
Keep your Litter-Robot working during power outages.
For those times when the electricity goes out, the Litter-Robot Open Air can be powered by a Backup Battery. When power to the unit is interrupted, the Litter-Robot automatically switches to Backup Battery power and a yellow LED illuminates the Power button to let you know the unit is in Backup Battery Mode. Once household power is restored, the Litter-Robot will switch back and begin recharging the battery automatically. The battery trickle charges and will be back to full power in a couple days.
The sealed 12V DC, 1.3 Amp Hour Ni-Cad Backup Battery can provide up to 48 hours of operation depending on usage. The estimated operation time is based on 10 cycles per day which is typical of two average-sized cats, but results will vary. To conserve energy, the Night Light function is disabled during Backup Battery Mode.
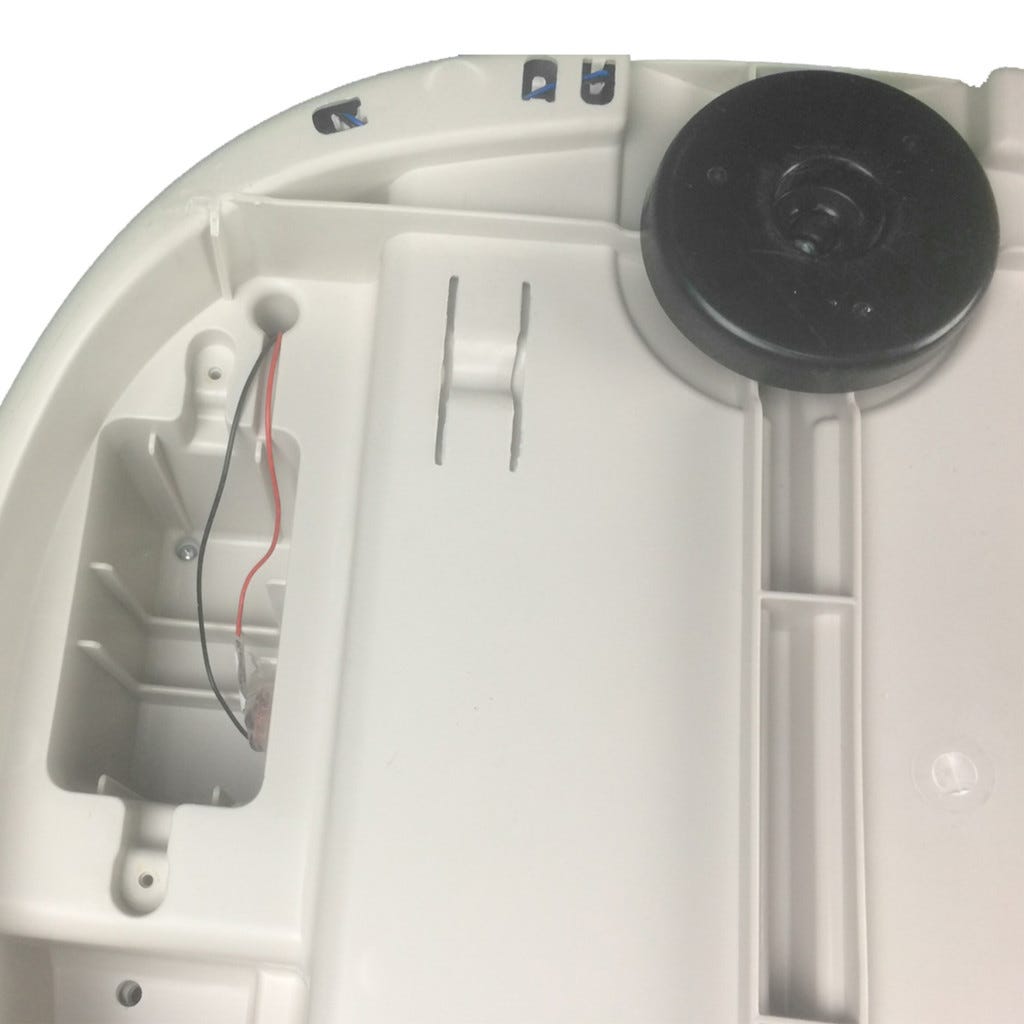
Each Backup Battery Kit includes the battery, retainer, and screws, and the battery pocket and connectors are located in the bottom of the Base.
How to Install the Litter-Robot Backup Battery
- Press the Power button to turn the unit off, then unplug the unit.
- Remove the Bonnet and Globe.
- Locate the serial number:
- For units purchased before October 5, 2017: The serial number is located on the inside back wall of the Base. You will need to remove the Waste Drawer to see the sticker.
- For units purchased after October 5, 2017: The serial number is located on the exterior backside of the Base to the right of the power jack.
- Gently turn the Base over to access the battery pocket.
![Battery Pocket]()
- Connect the battery leads according to your unit's serial number:
- Serial numbers 934 and above: Connect the RED lead to the RED terminal. Connect the BLACK lead to the BLACK terminal.
- Serial numbers 0-933: Connect the RED lead to the BLACK terminal. Connect the BLACK lead to the RED terminal.
![Backup Battery]() Connect leads to terminals according to your unit's serial number.
Connect leads to terminals according to your unit's serial number.
- Insert the battery into the pocket, so the connected side goes into the Base first.
- Align the Retainer across the bottom of the battery and attach it using the screws provided.
![Backup Battery in Base]()
- Turn the Base right side up and reassemble the Waste Drawer, Globe, and Bonnet. Plug the unit in and turn it on.
- Once the initial Clean cycle is done, the Globe will be at the Home position with the blue Ready light illuminated on the Control Panel. Test the Backup Battery installation by unplugging the unit from the wall (without powering it off) to simulate a power outage. You should see the Power button on the Control Panel become backlit. If you do not see this, carefully review your installation.
 Connect leads to terminals according to your unit's serial number.
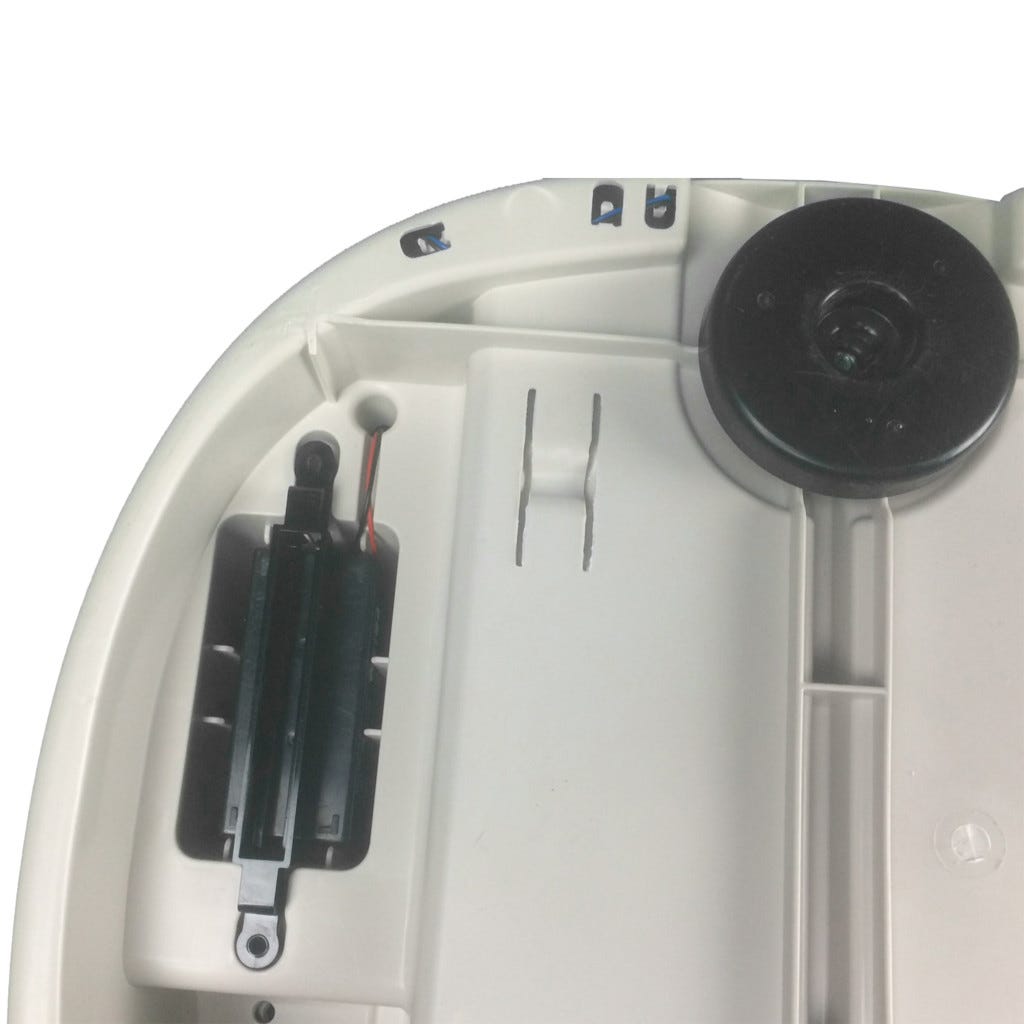
Save yourself the hassle! Keep your Litter-Robot Open Air working during power outages with the Backup Battery Kit.