The store will not work correctly in the case when cookies are disabled.

Litter-Robot 5 & Pro: Seal strips installation guide
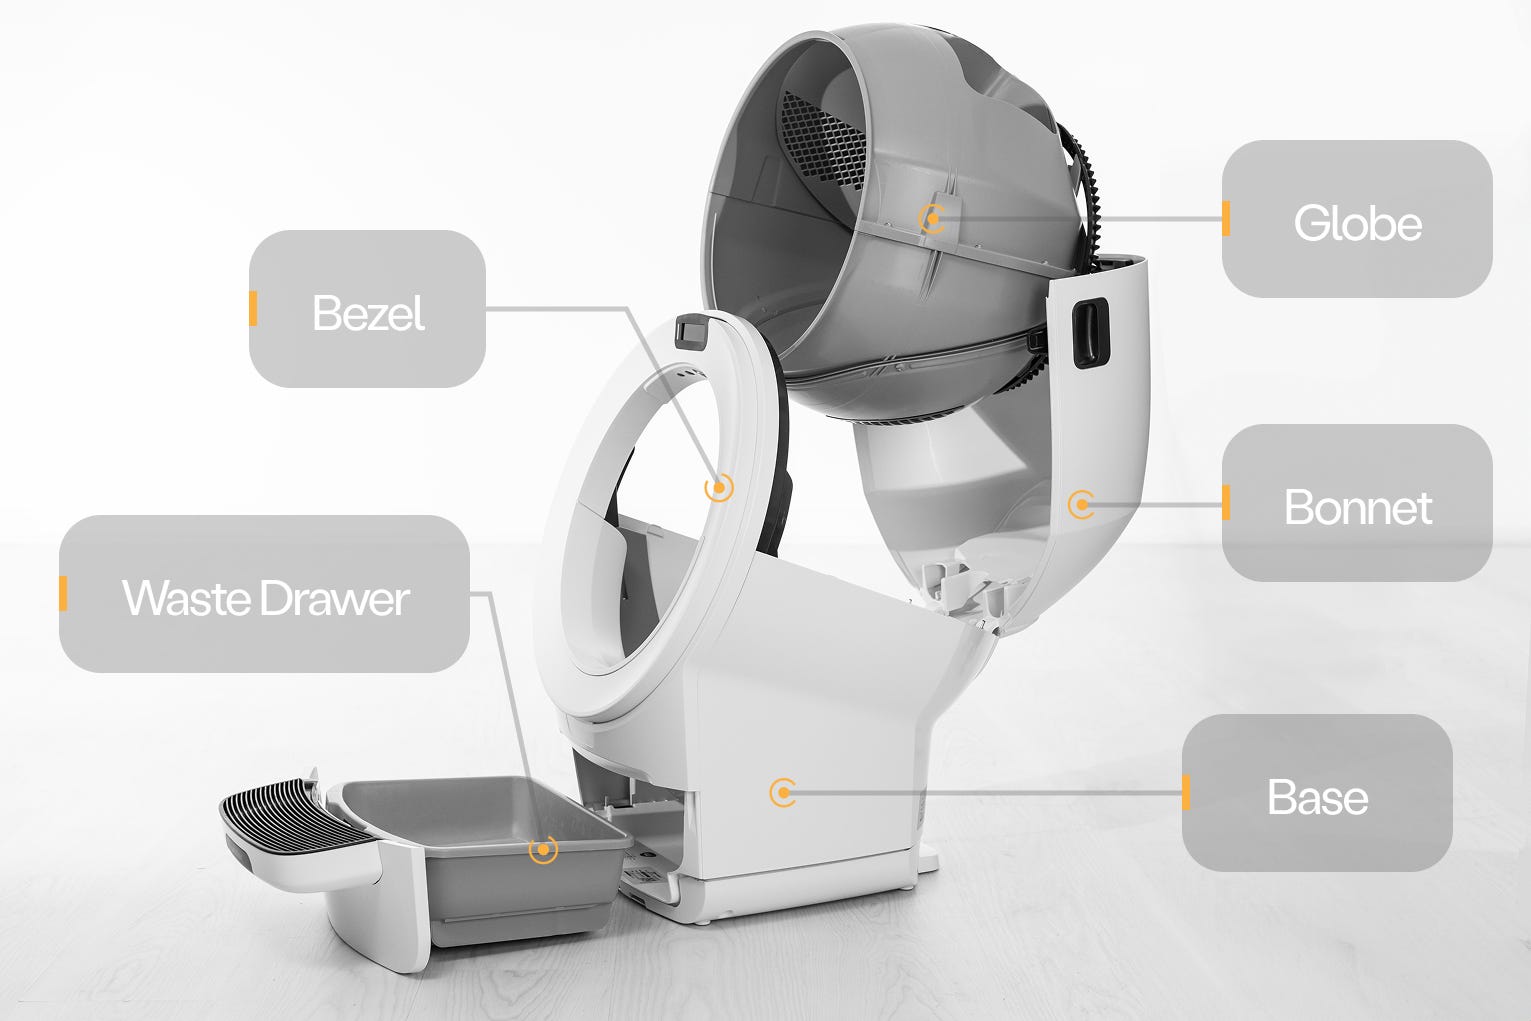
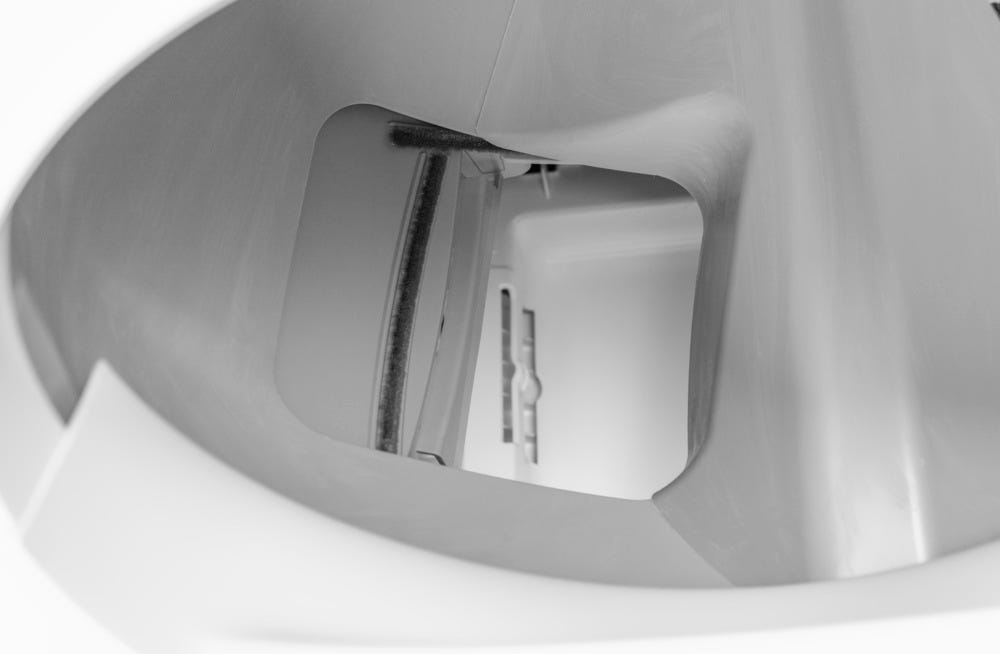
Litter-Robot 5 is equipped with brush-type seal strips that sit along the lower globe, bezel, and waste port. This pack contains all varieties of seal strips found on Litter-Robot 5.
Learn how to install Litter-Robot 5 Seal Strips in various locations on the unit. Seal Strips can help reduce odors, as well as reduce litter and waste leaking between parts.
Quick links
Installing Litter-Robot 5 Bezel Seal Strips
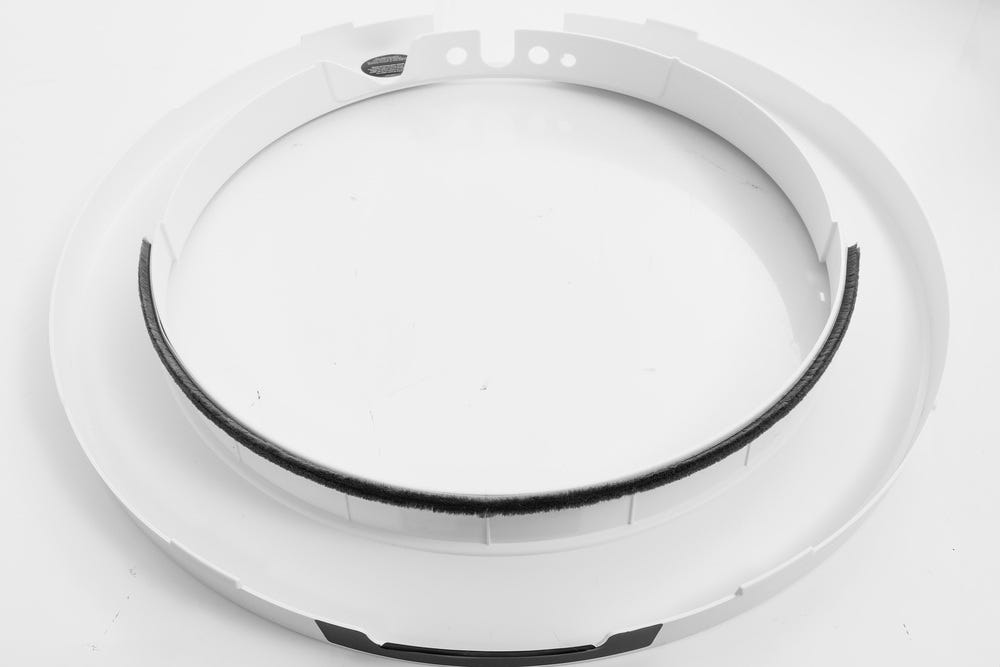
Add seal strips to the underside of the bezel to help reduce litter and waste leaking between the globe and bezel.
Tools needed:
- (2) Bezel seal strips: 11.5-inches (29.2 cm)
- Putty knife or flathead screwdriver (optional)
- Duct tape
- Rubbing alcohol
- Remove any accessories (if installed).
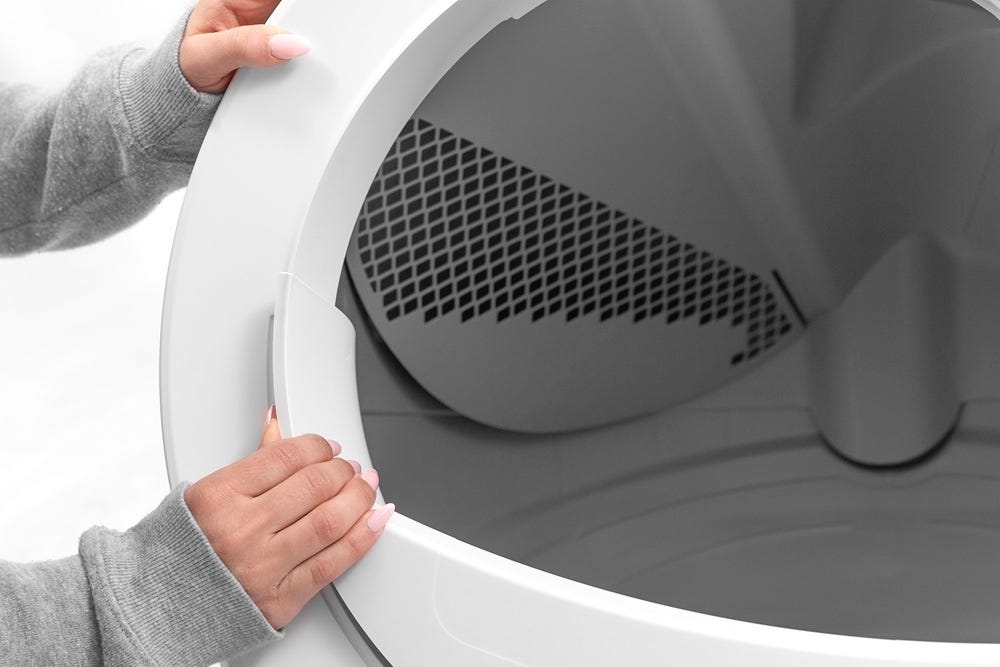
- Remove the bezel:
- Grip the bezel at the 11 o'clock and 1 o'clock positions, then squeeze and pull it away from the unit to remove it. If needed, repeat this step near the bottom of the bezel until it comes off completely.
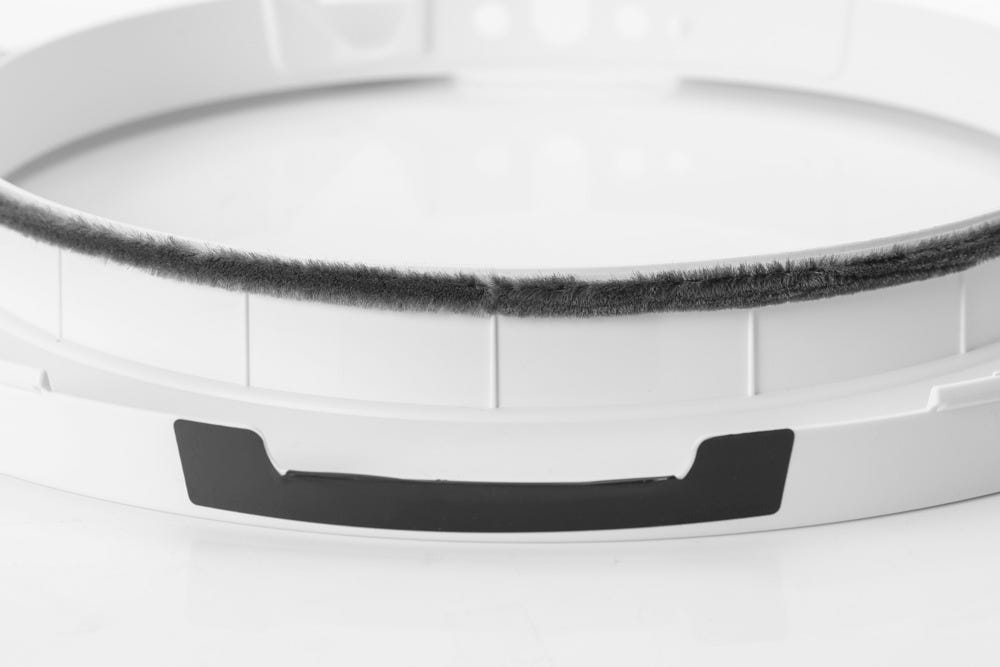
- Locate the area where the seal strips will be installed on the underside of the bezel along the back edge.
- If seal strips have already been installed here, you’ll need to remove the old strip and any residue to install the new seal strip. To do this, use a putty knife, flathead screwdriver, or your fingernail to lift the corner of the strips and peel them off.
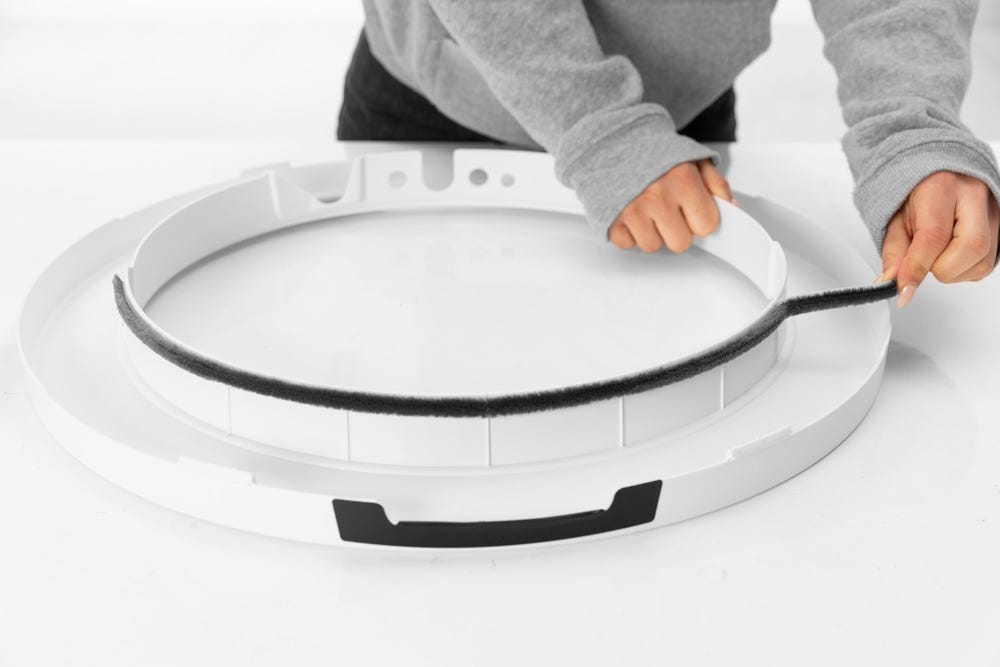
- You can also use ⅜-inch (9.5 mm) strips of sturdy duct tape. Apply tape to residue, rub to adhere firmly, and pull off. Repeat as necessary. Clean any residue left behind with rubbing alcohol.
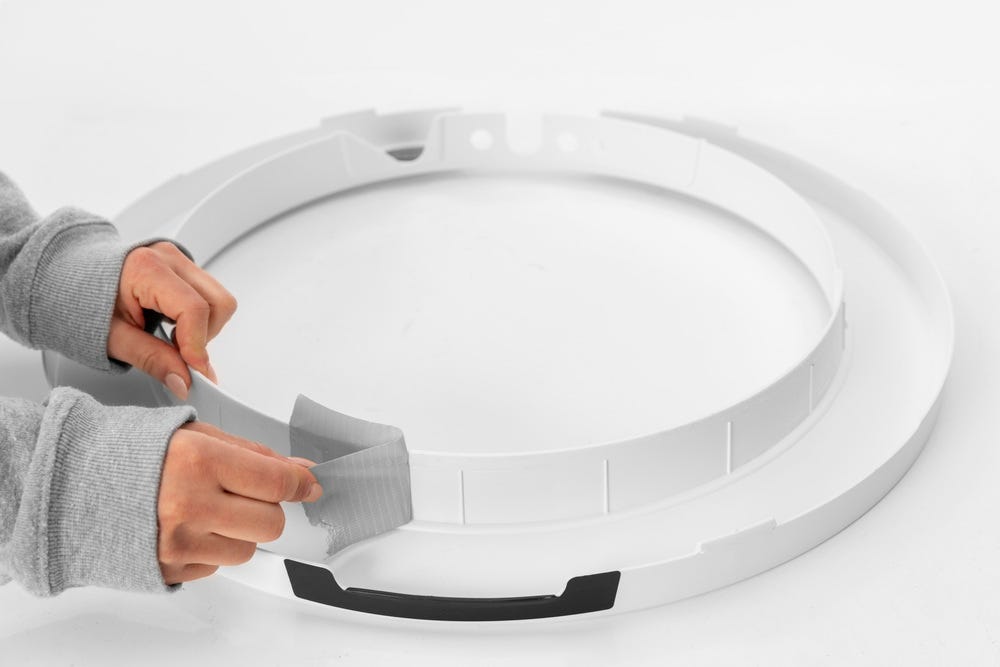
- Peel the backing off the first seal strip. Align one end of the strip with the center rib and edge of the bezel, then press it into place.
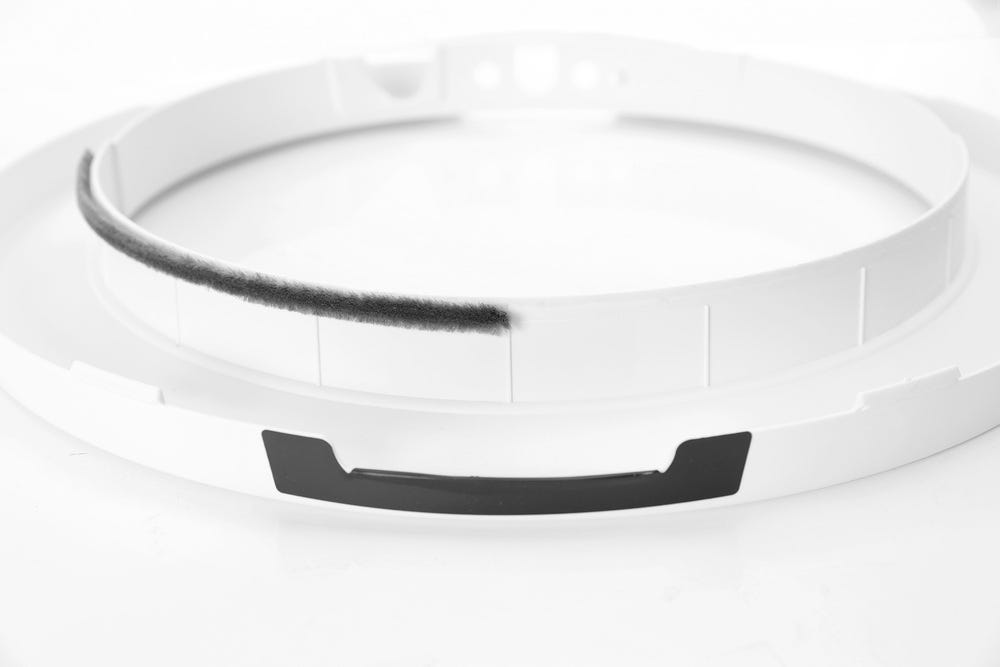
- Adhere the remaining portion of the seal strip by keeping the seal between the edge and the small ribs.
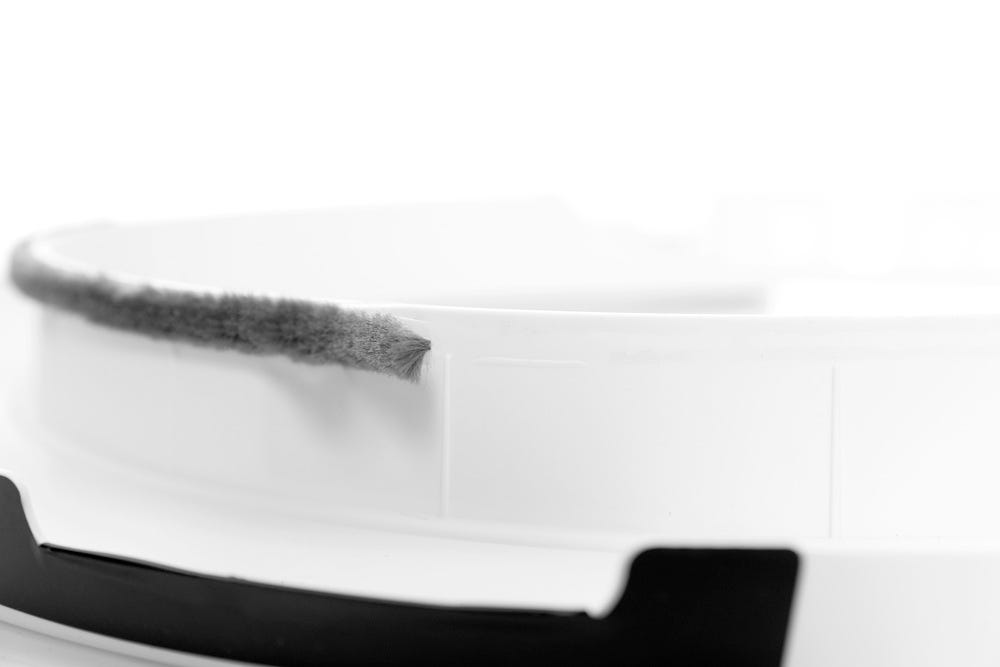
- Repeat the process for the second seal strip:
- Remove the adhesive backing and place one end of the strip next to the previous one and follow along the edge to adhere the remaining portion of the seal strip.
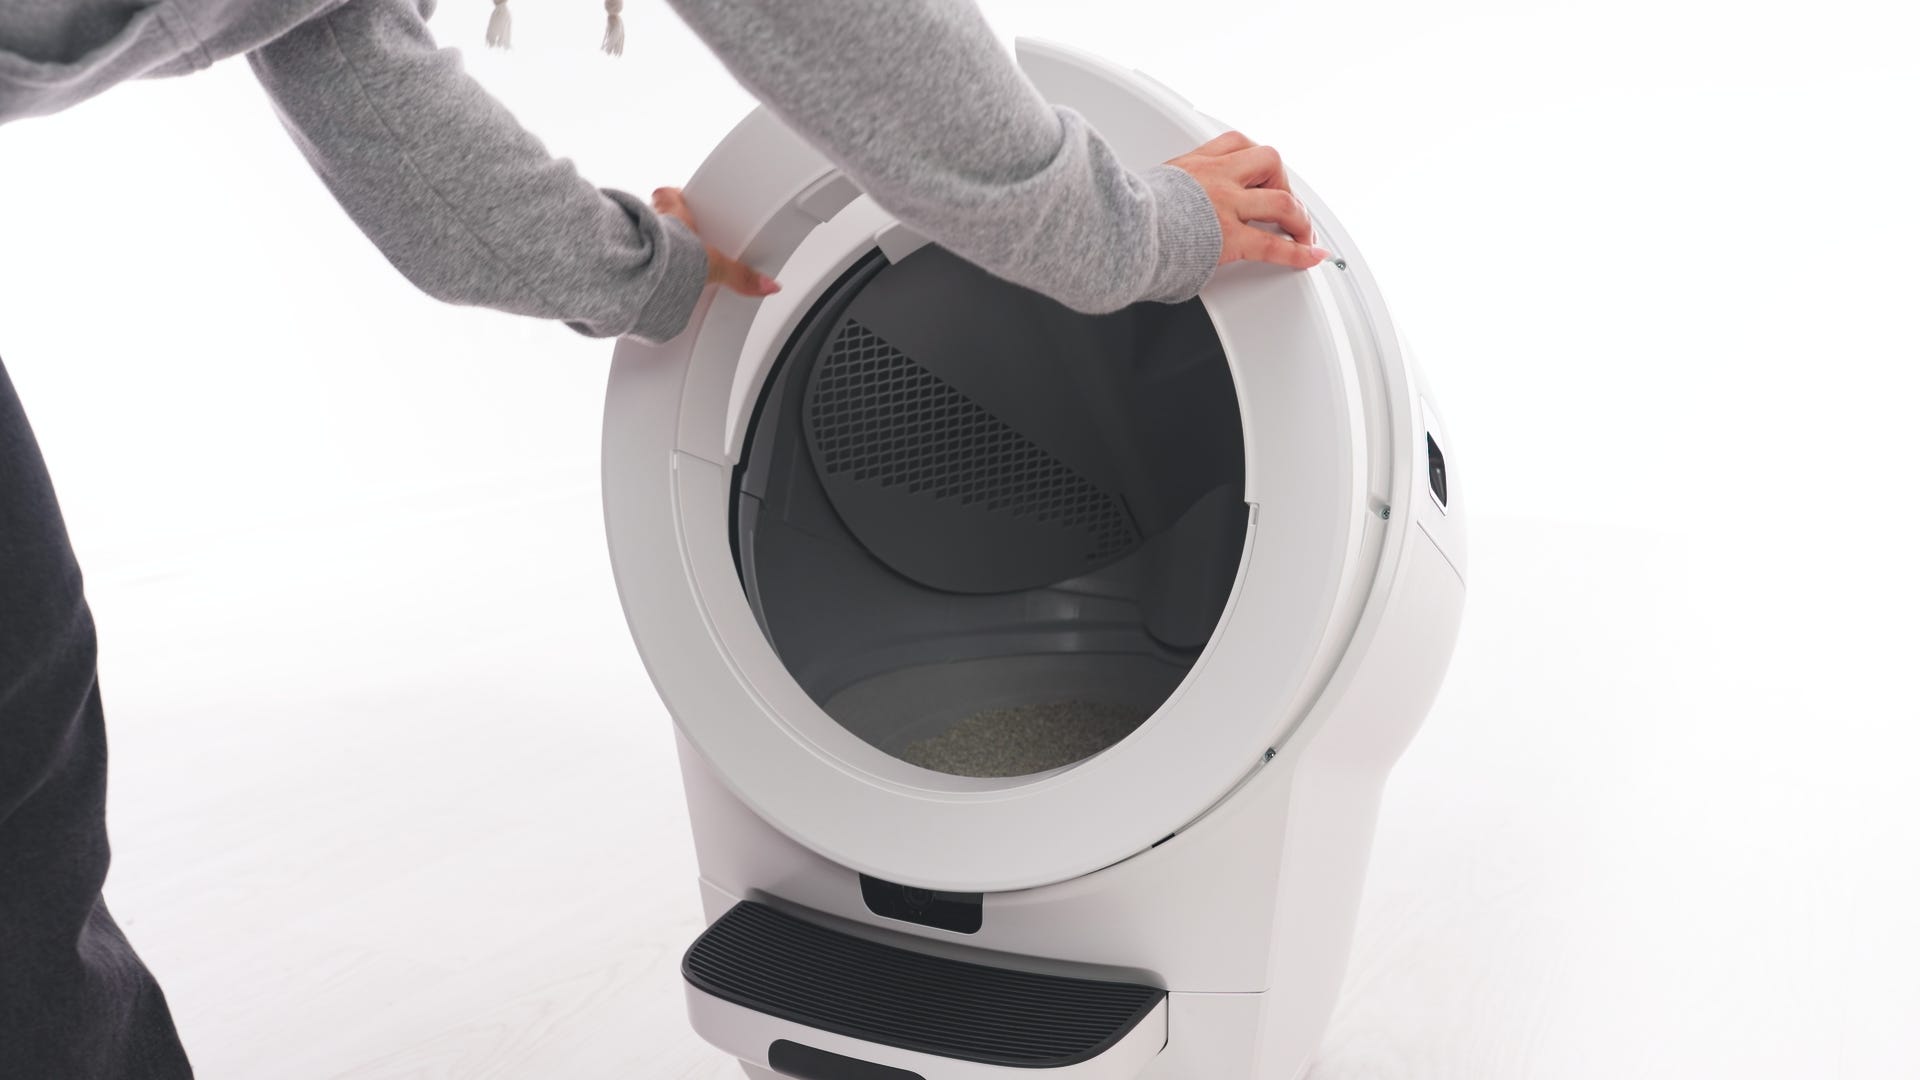
- Replace the bezel:
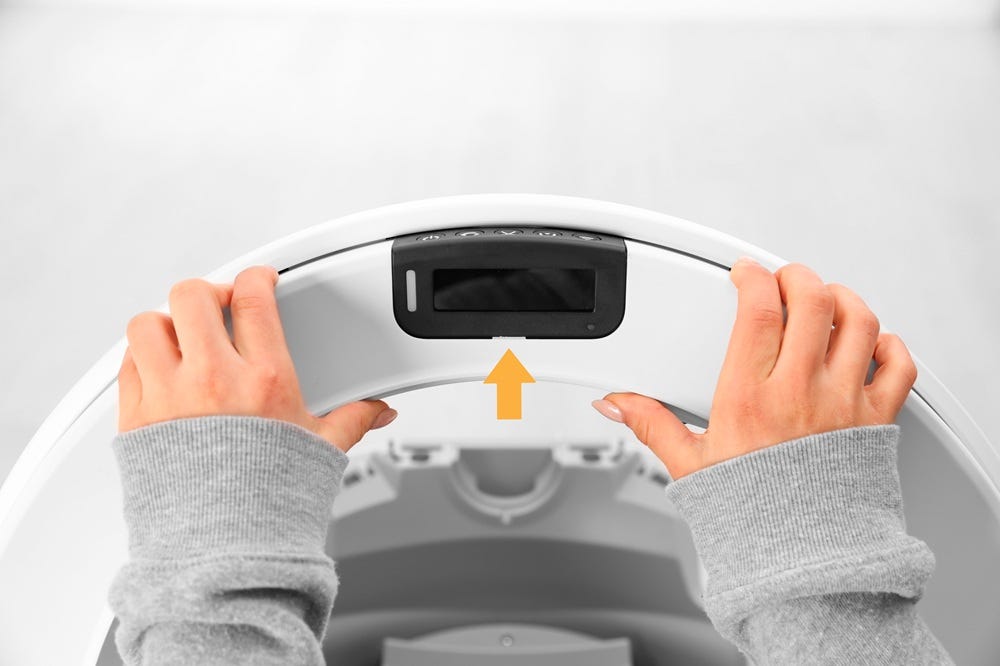
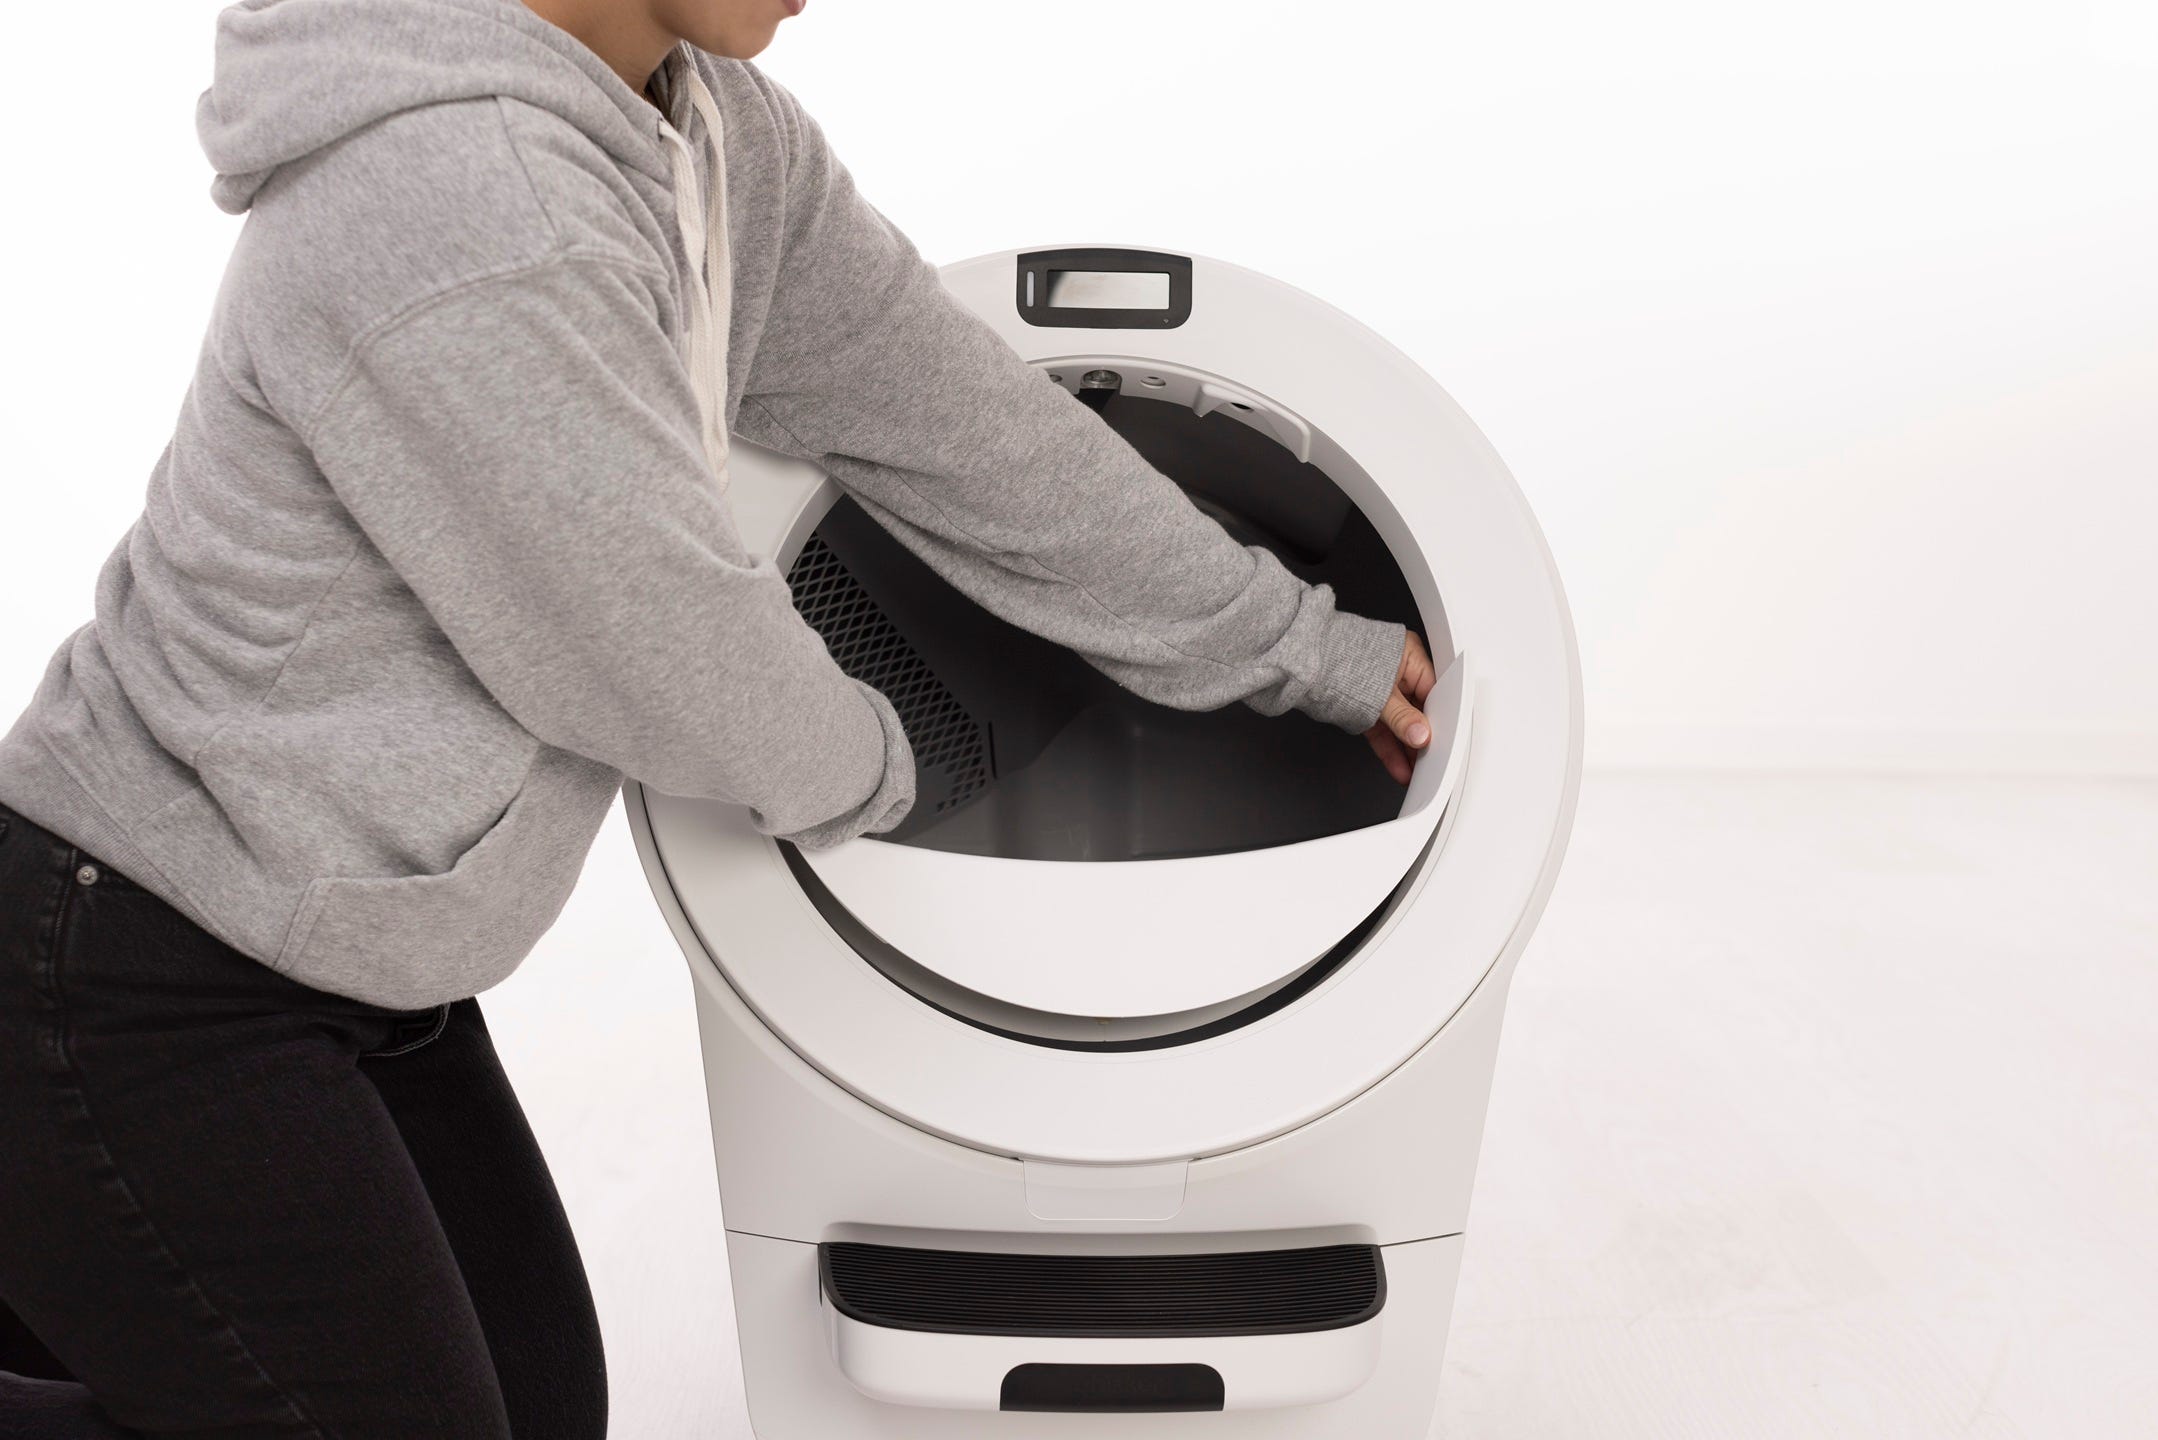
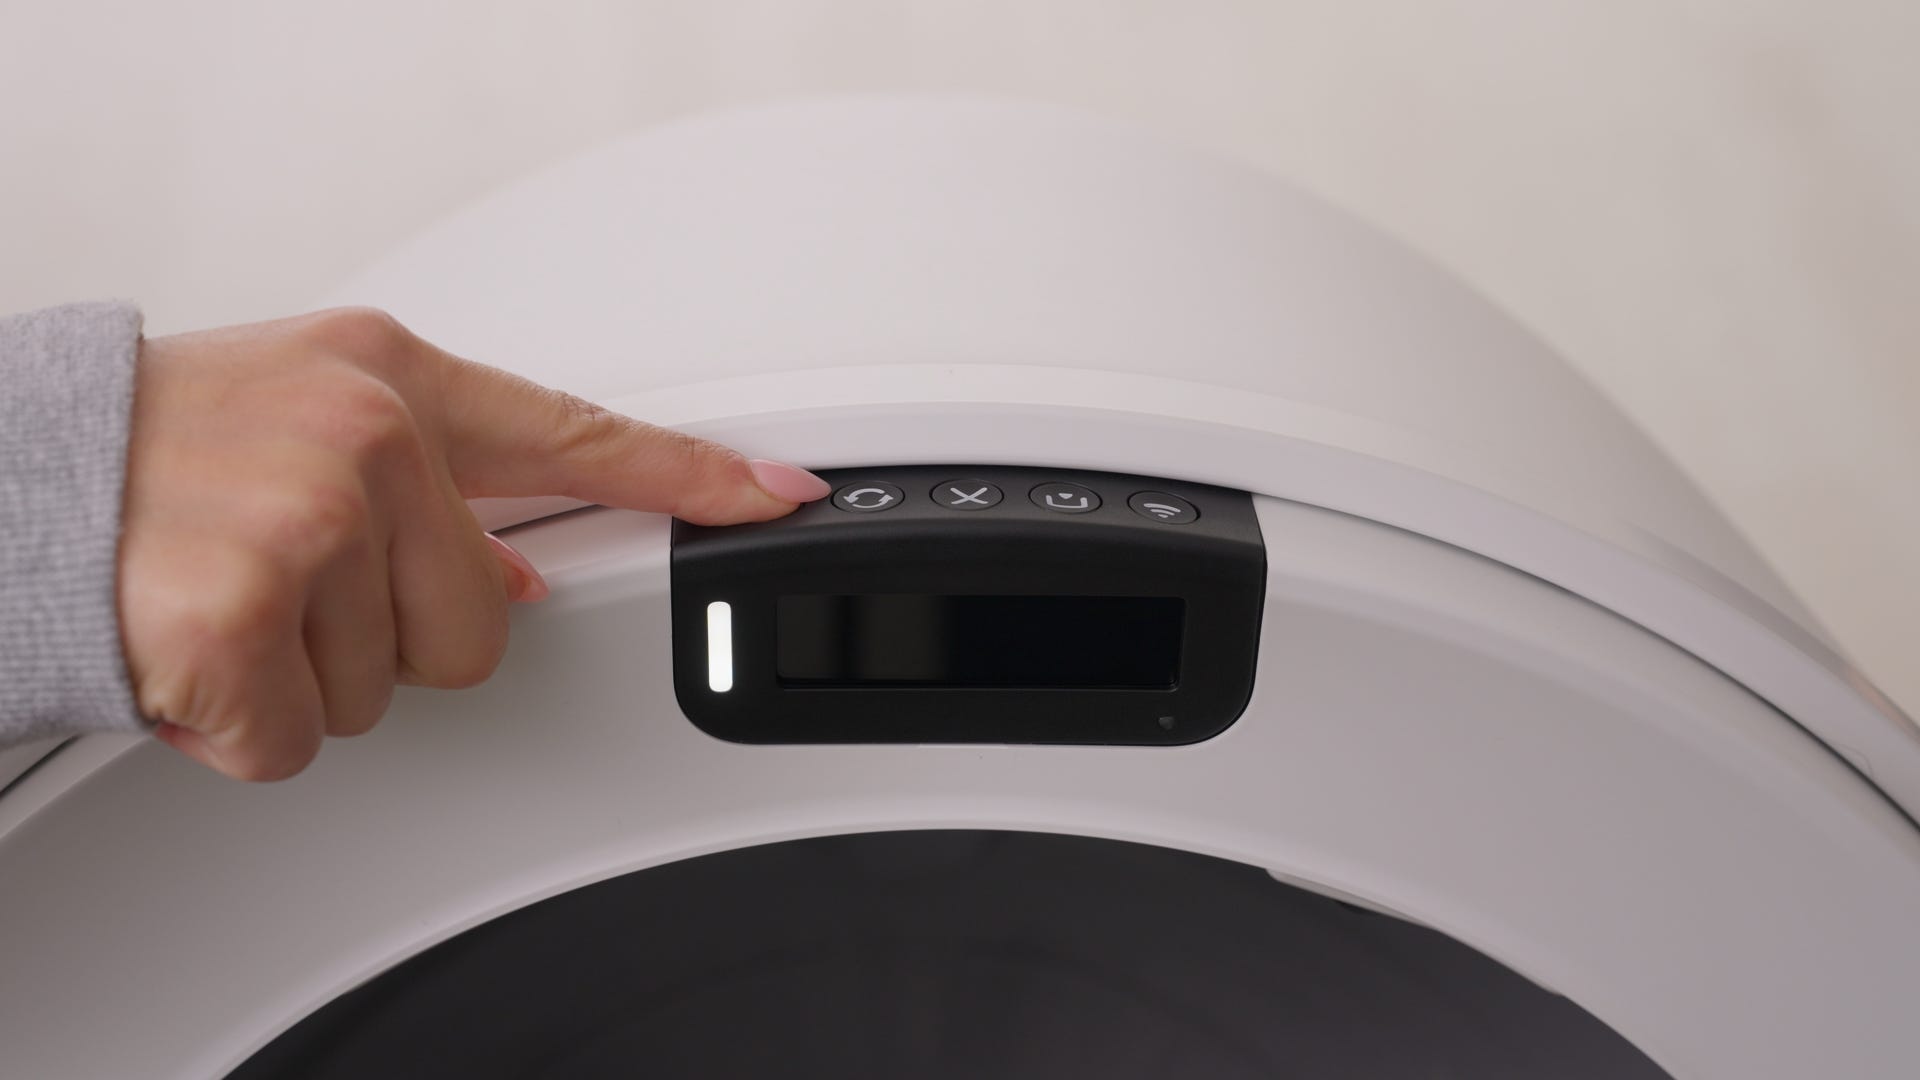
- Align the bezel so the cutout fits around the control panel display. Place one hand on each side of the bezel near the hooks, as shown.
- Press the outer edge of the bezel inward, working your way down each side until the bezel snaps completely into place.
- Make sure the small snap (GREEN arrow) is under the LCD screen.
- Make sure the bezel is installed correctly. All four snaps should be engaged (see below).
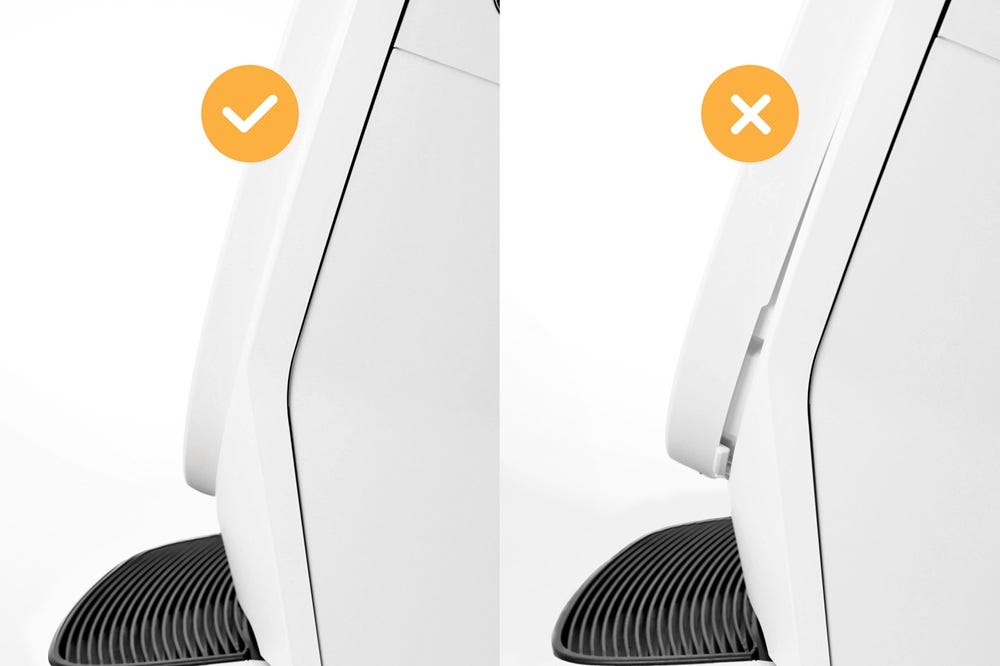
- Note that the seal strips may be slightly visible behind the lower edge of the bezel.
Installing Litter-Robot 5 Lower Waste Port Seal Strips
Add seal strips to the lower waste port to help reduce odors.
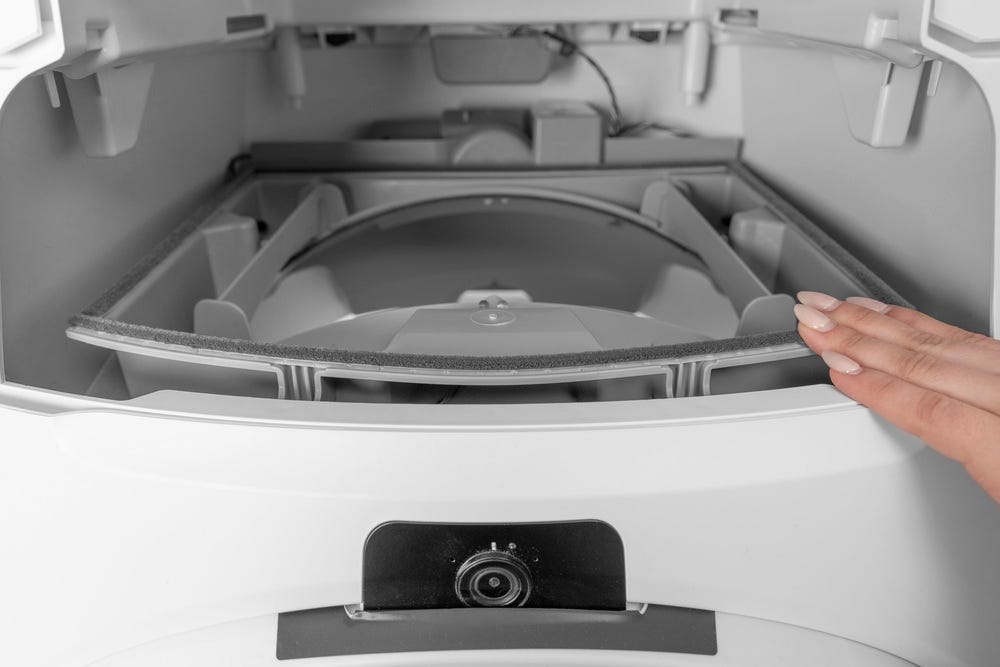
Tools needed:
(2) side seal strips: 10.25-inches (26 cm)
(1) forward seal strip 14.4-inches (36.6 cm)
(1) rear seal strip: 13.5-inches (34.3 cm)
Table or box at least 13.5-inches (34.3 cm) H
Putty knife or flathead screwdriver (optional)
Duct tape
Rubbing alcohol
- Make sure the unit is in the Home/Ready position.
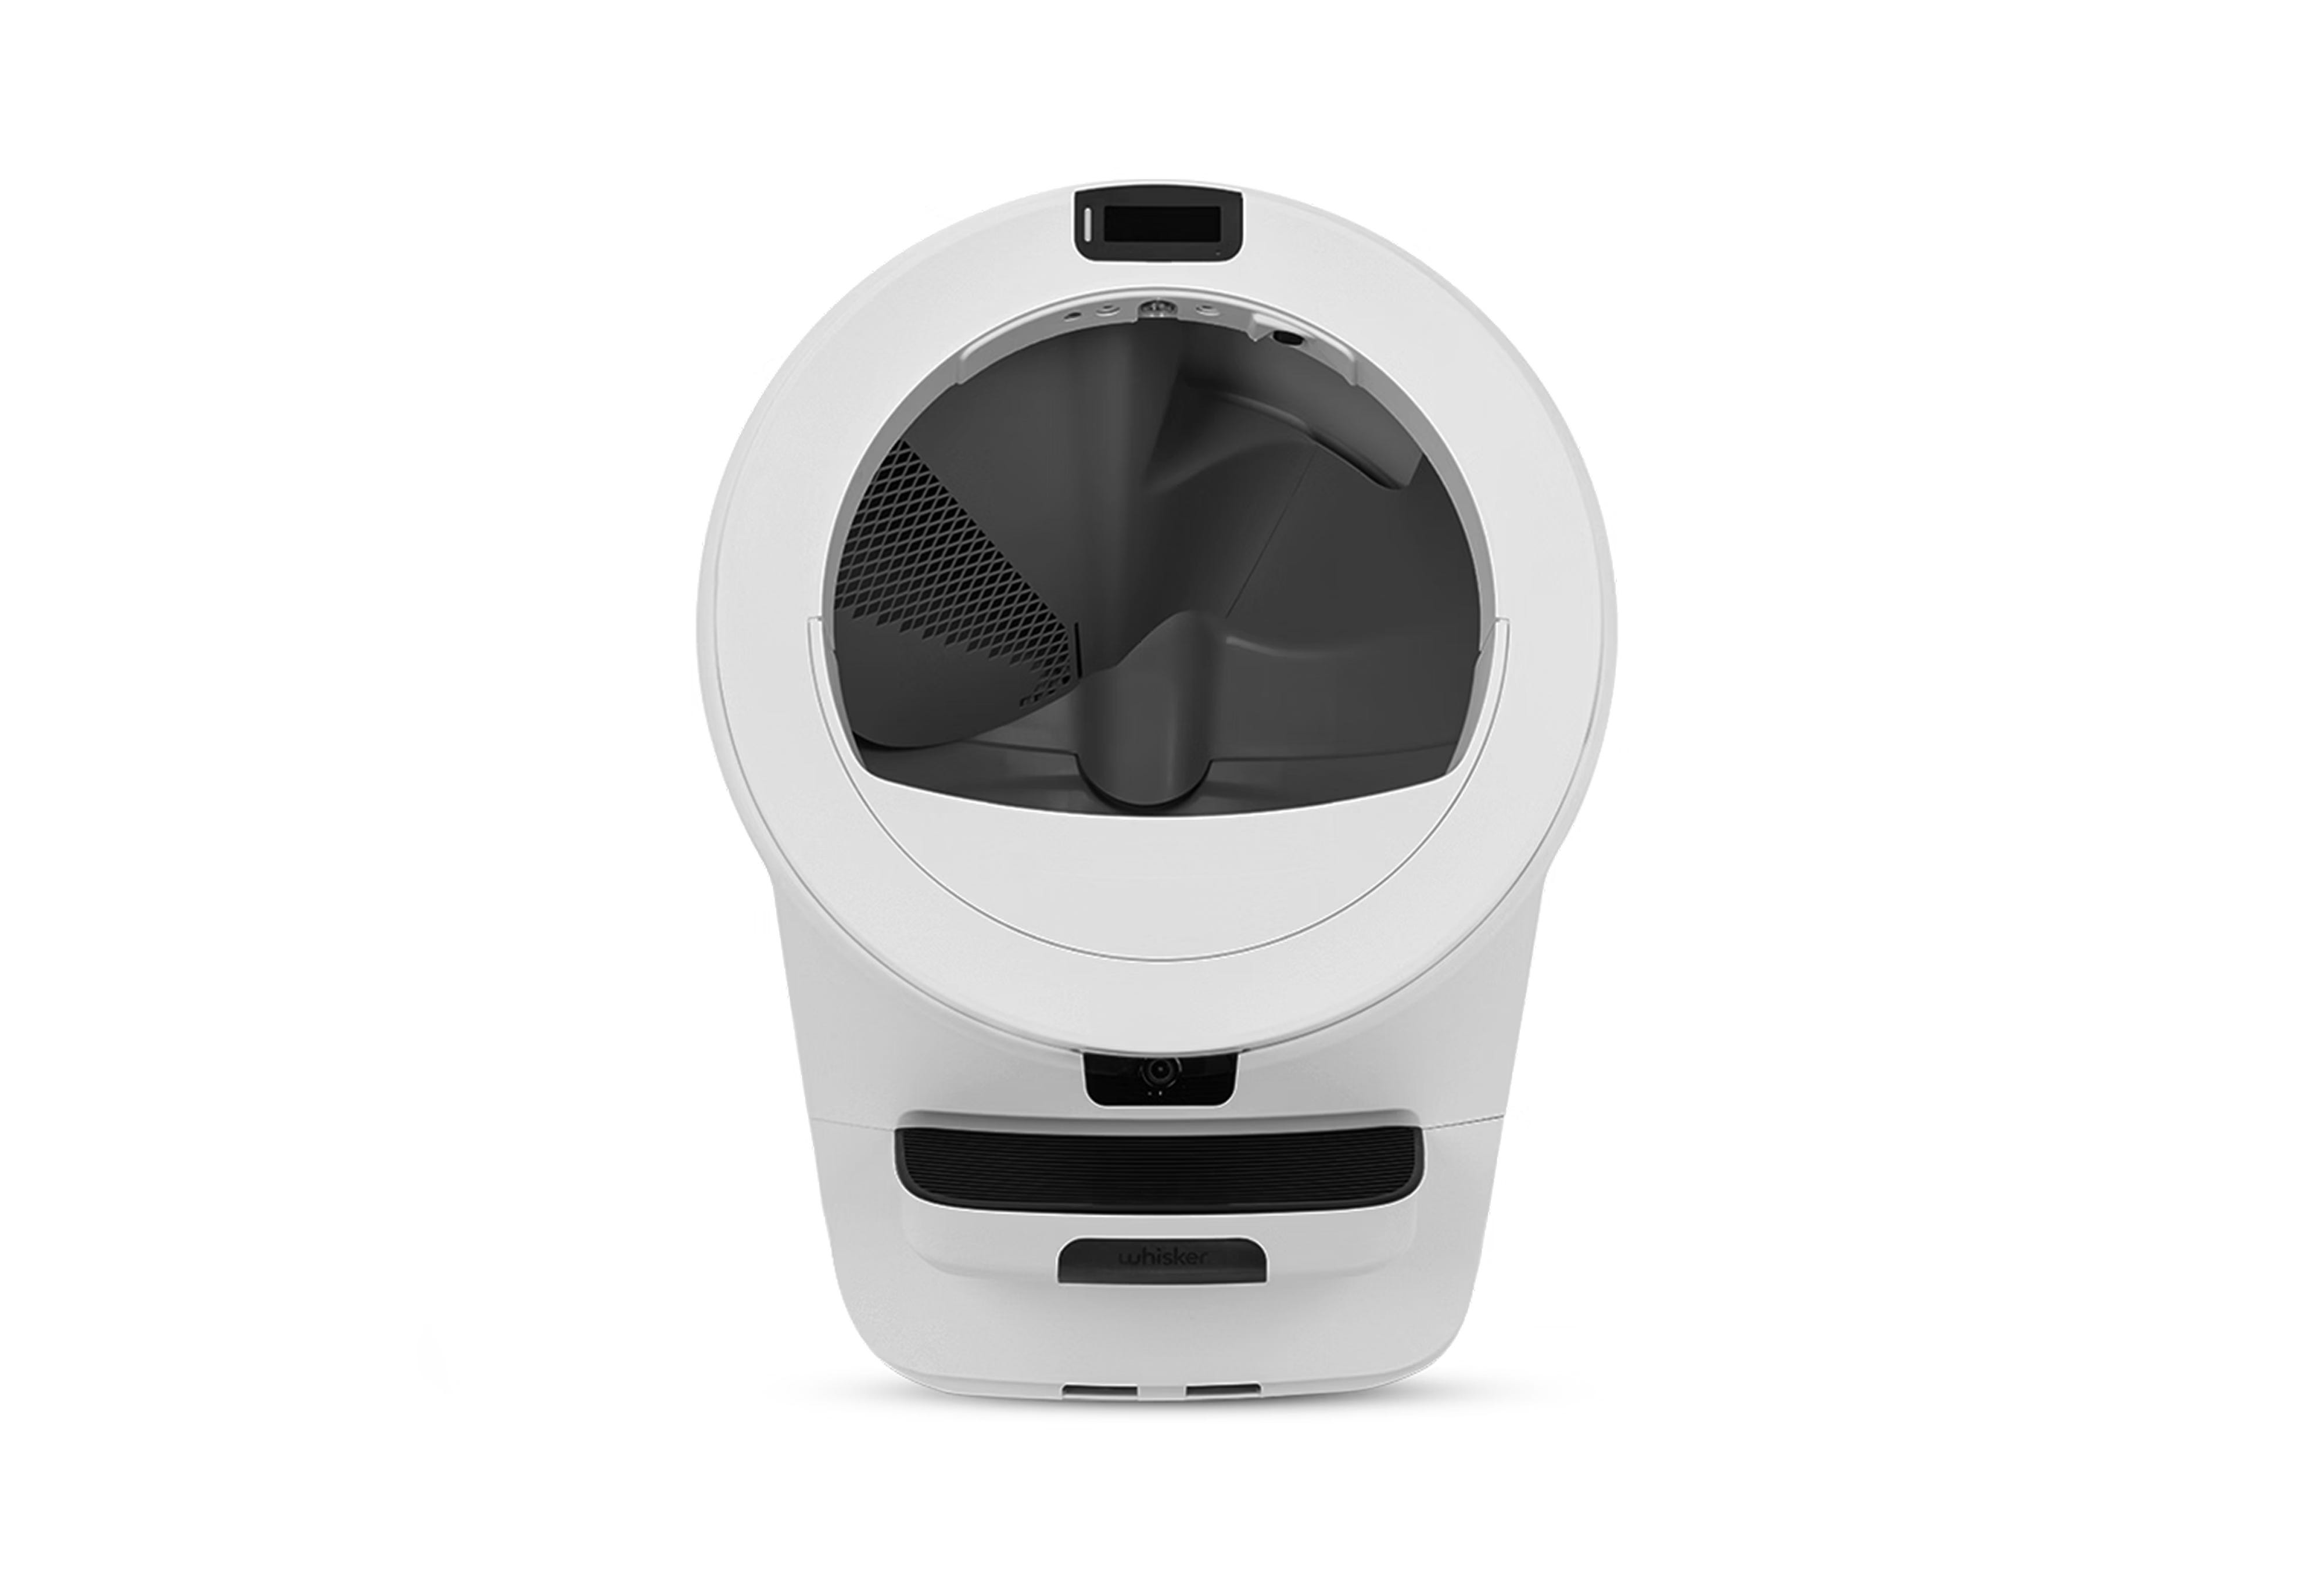
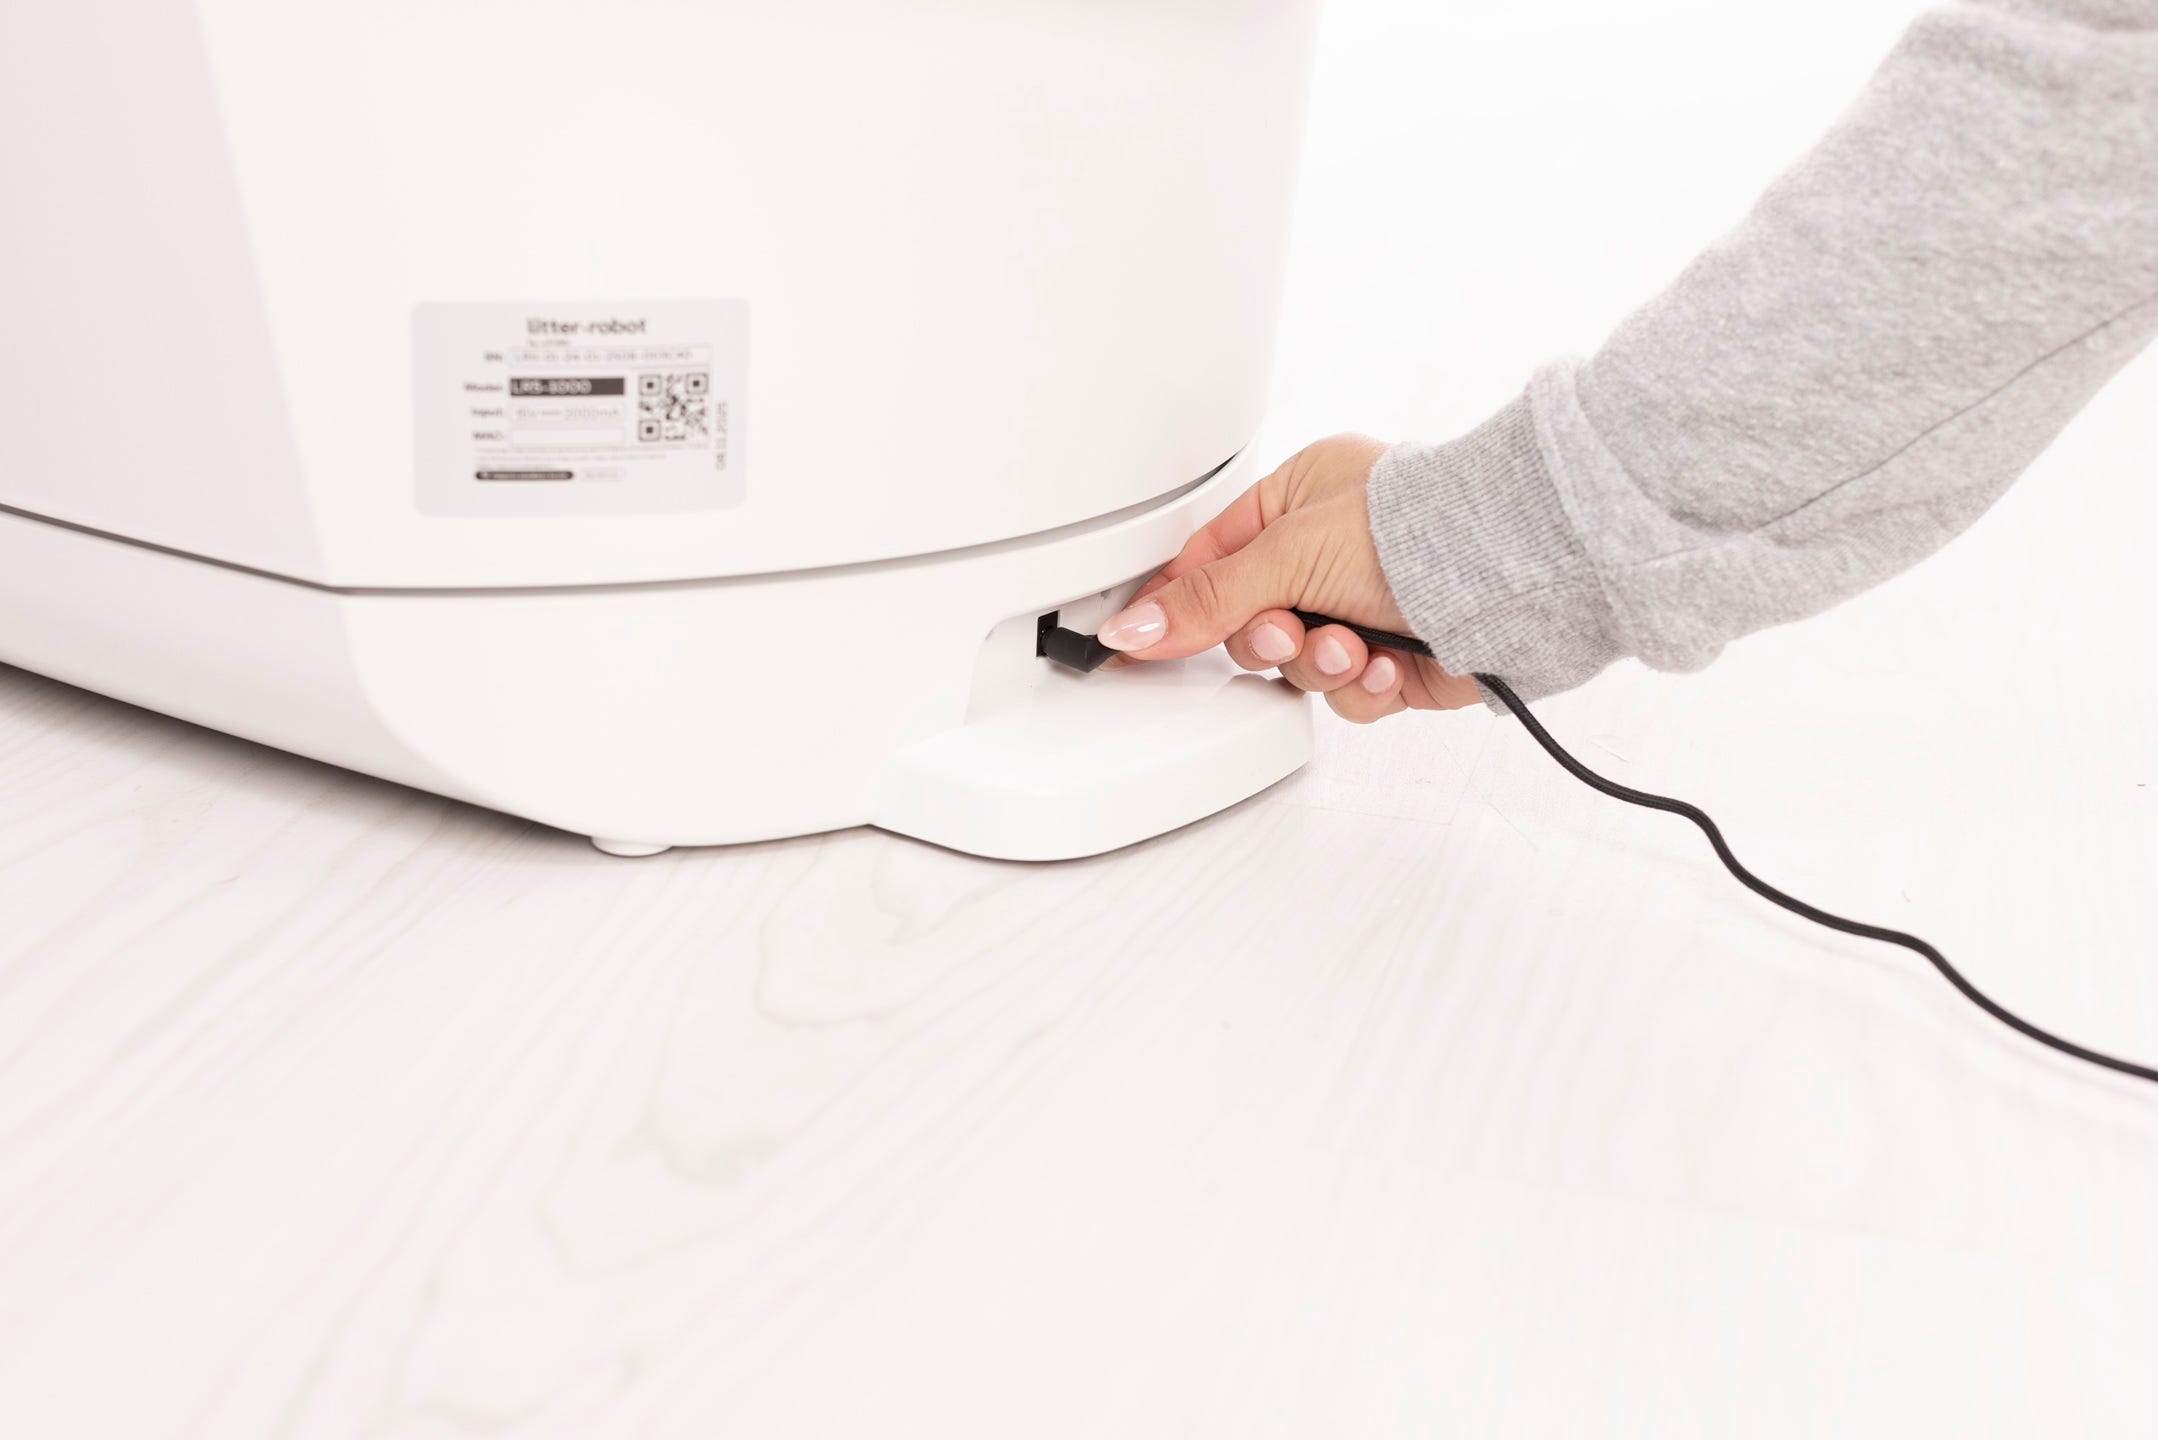
- Press the Power button to turn the unit off, then unplug the unit.
- If you have the fence or other accessories installed, remove them from the bezel.
- Remove the bonnet:
Press and hold the latches on both sides of the bonnet, then lift and rotate the bonnet to its open position.
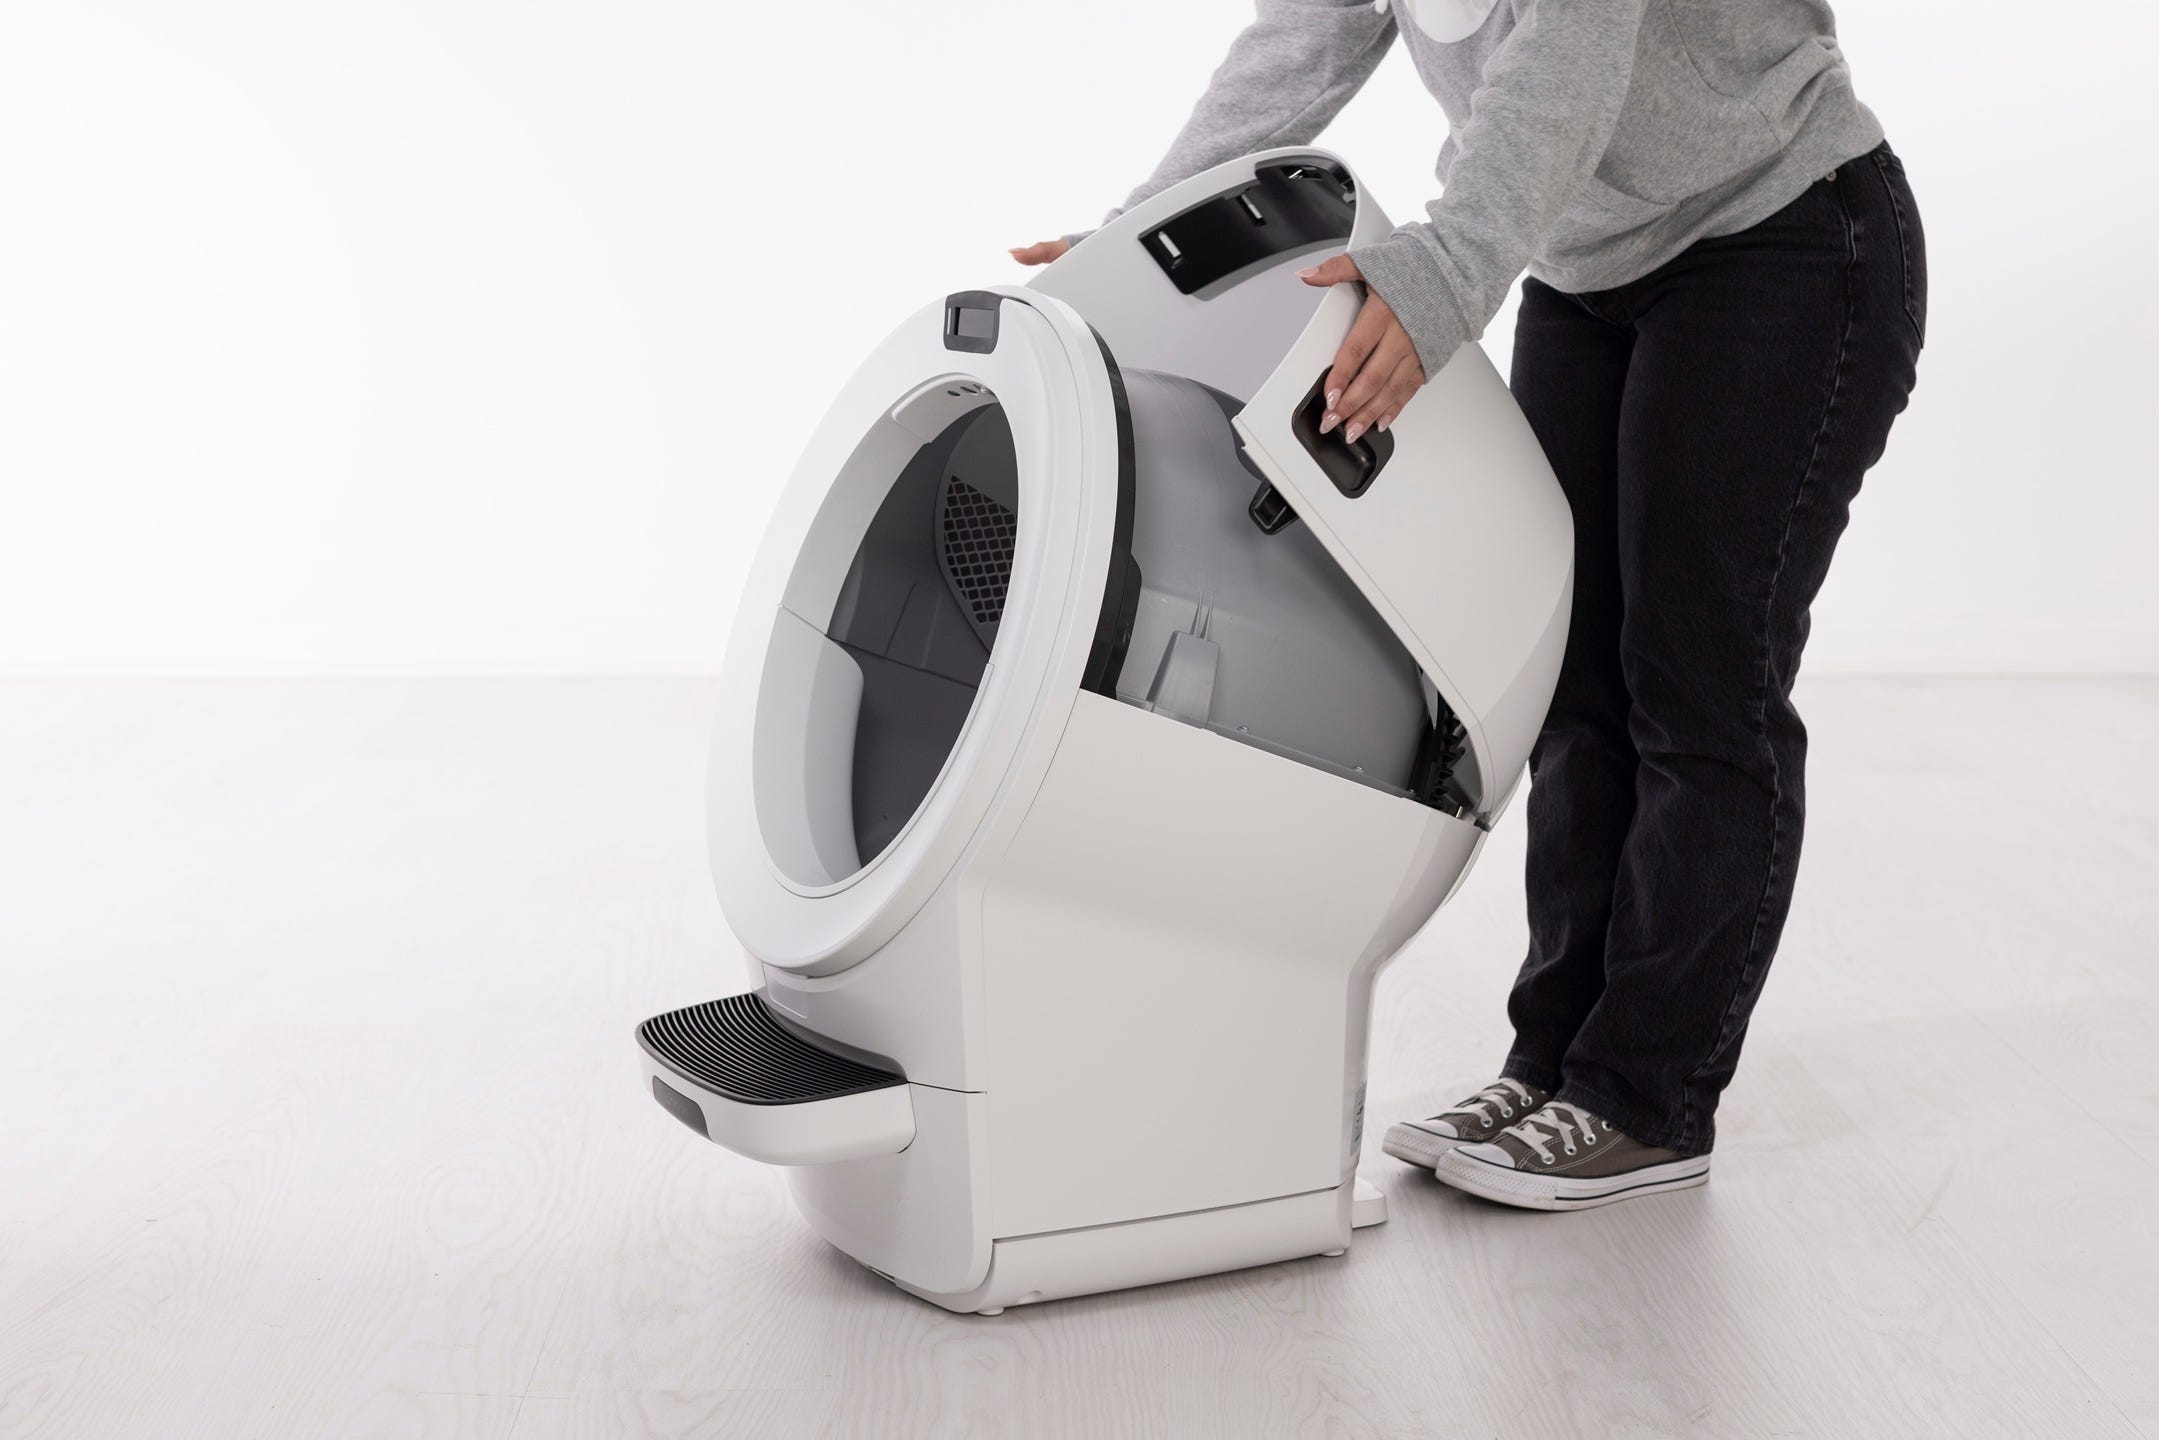
- While pulling up on the bonnet, slowly rotate it forward until it disengages from the unit frame behind the robot. Set the bonnet aside.
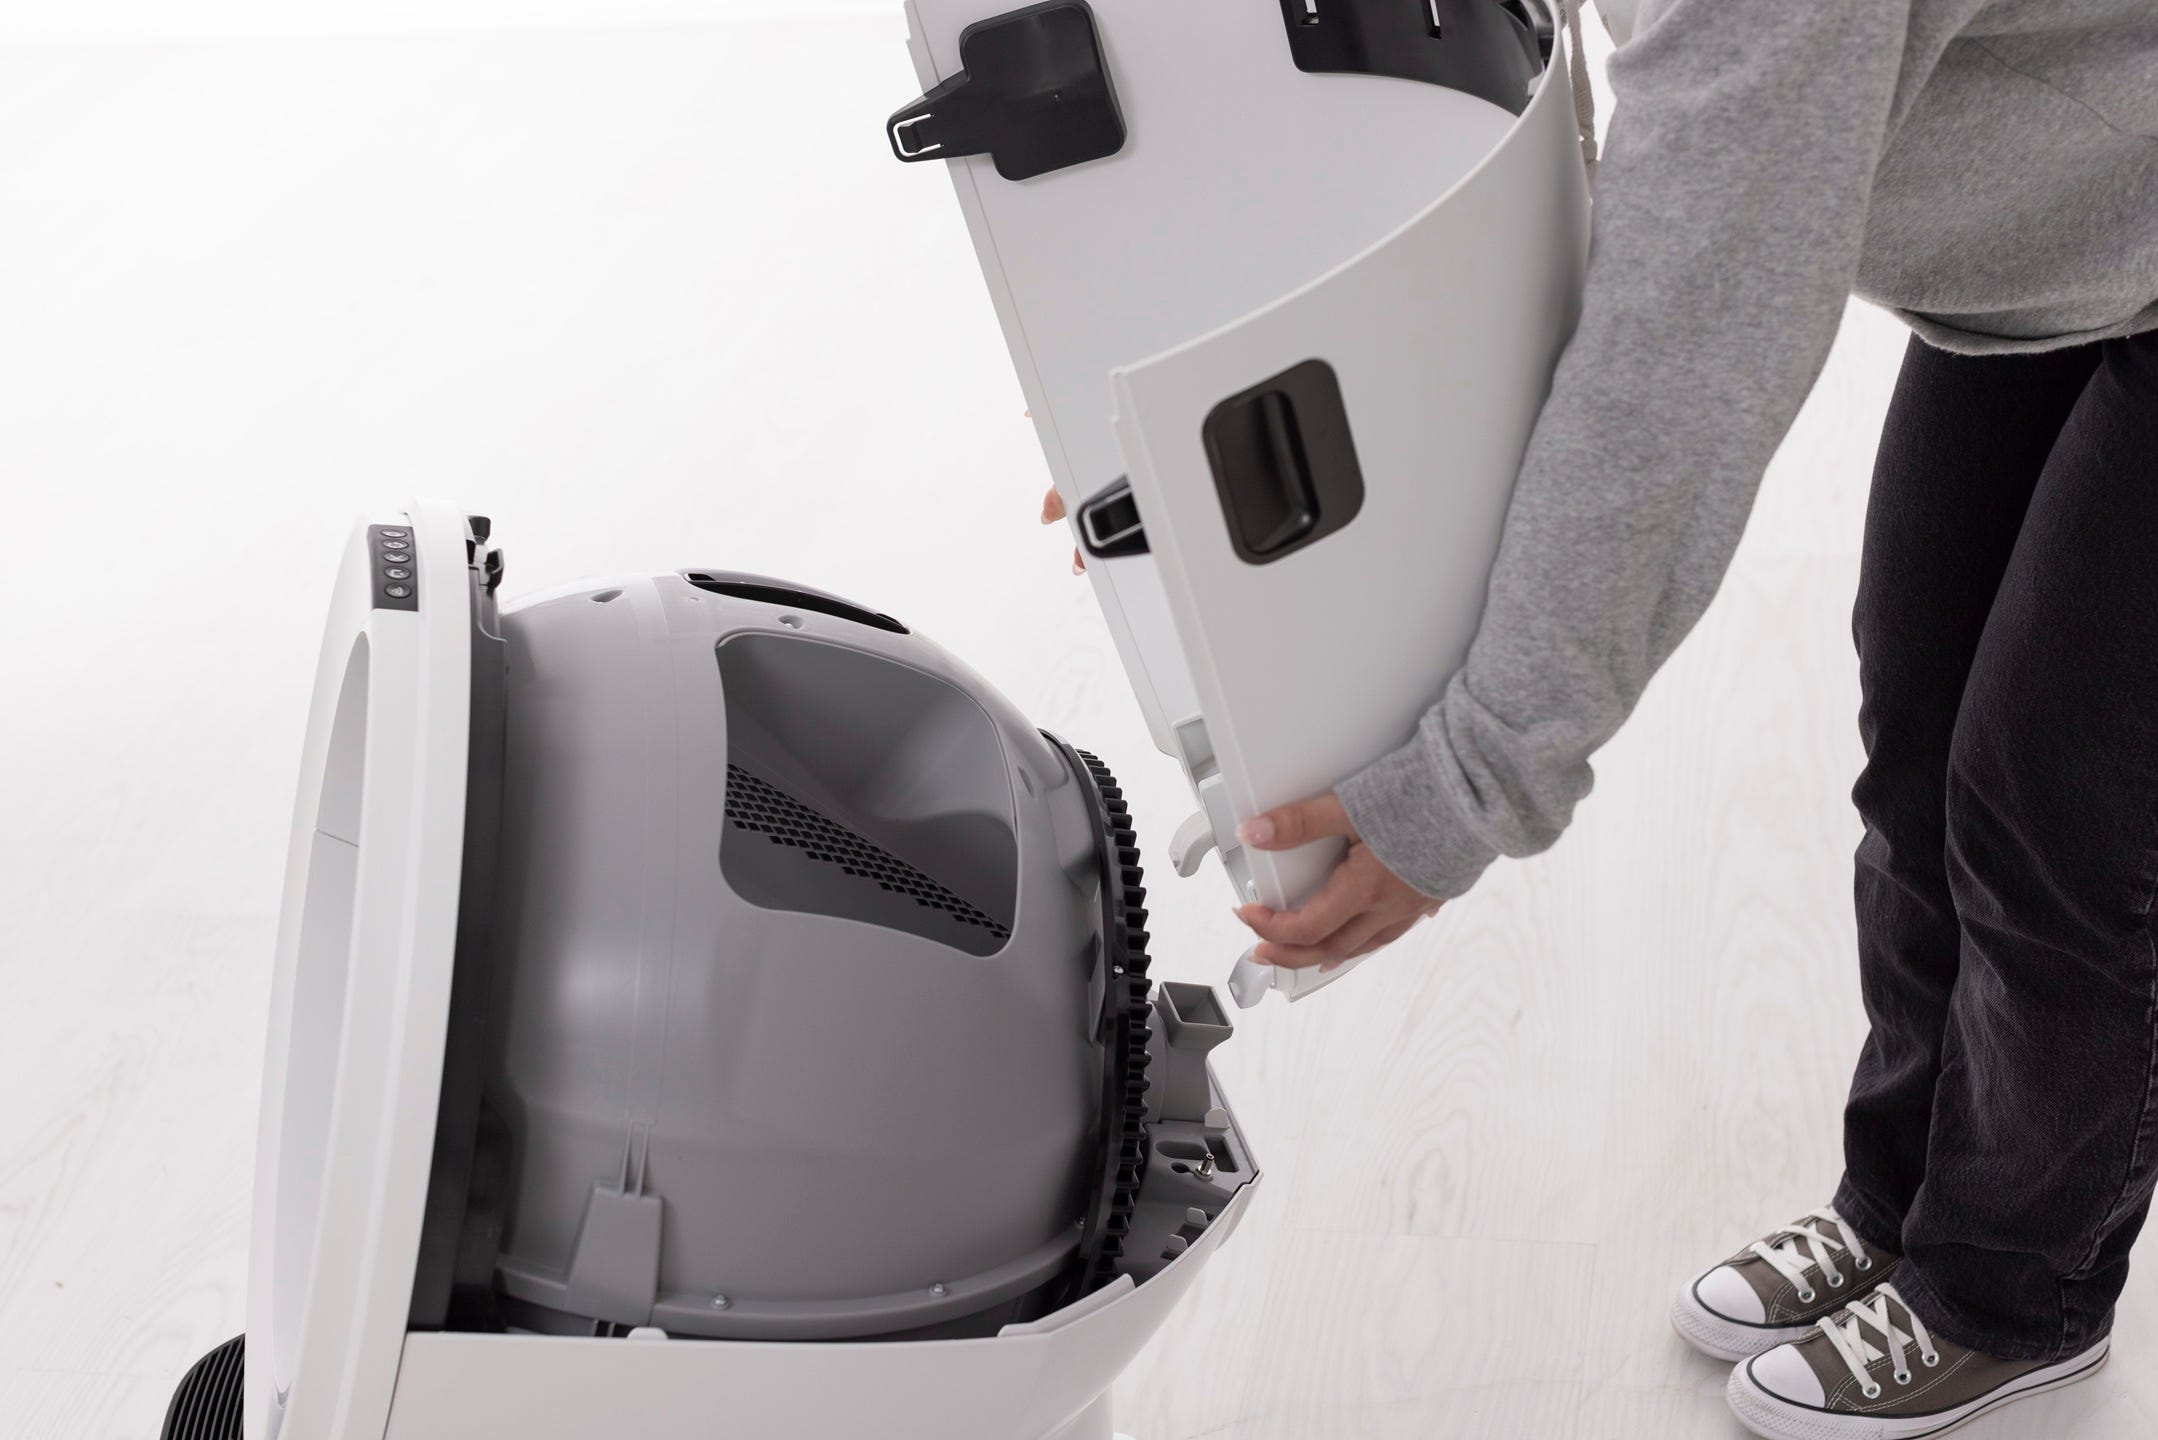
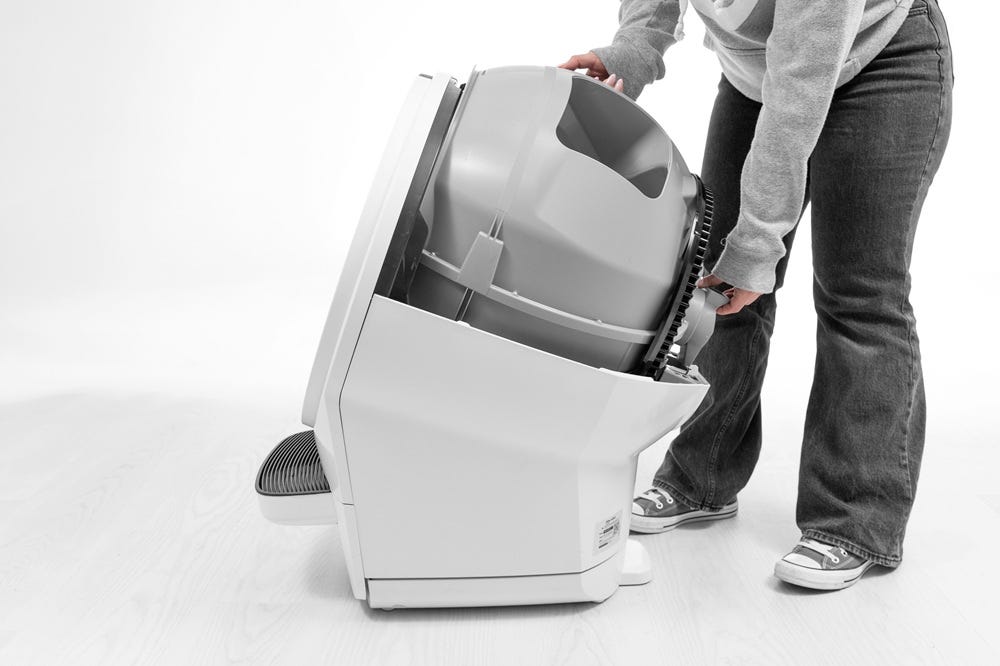
- Remove the globe and key:
Grab the black handle located on top of the globe, lift the globe off the base, and set it on the floor. Be mindful of the key, which may have fallen out of the rear of the globe.
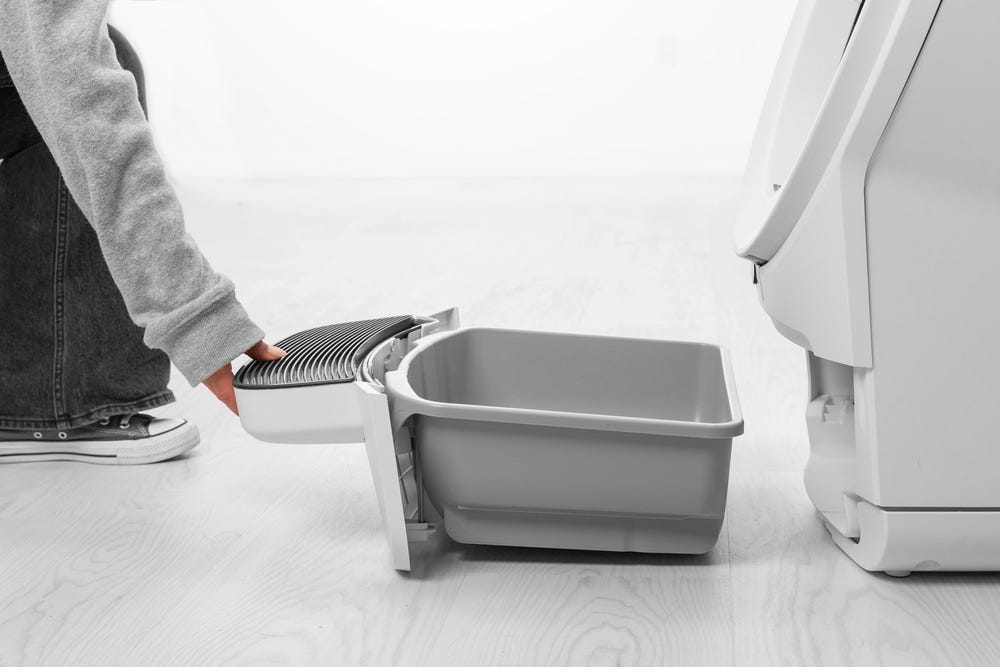
- Remove the waste drawer from the base and set aside.
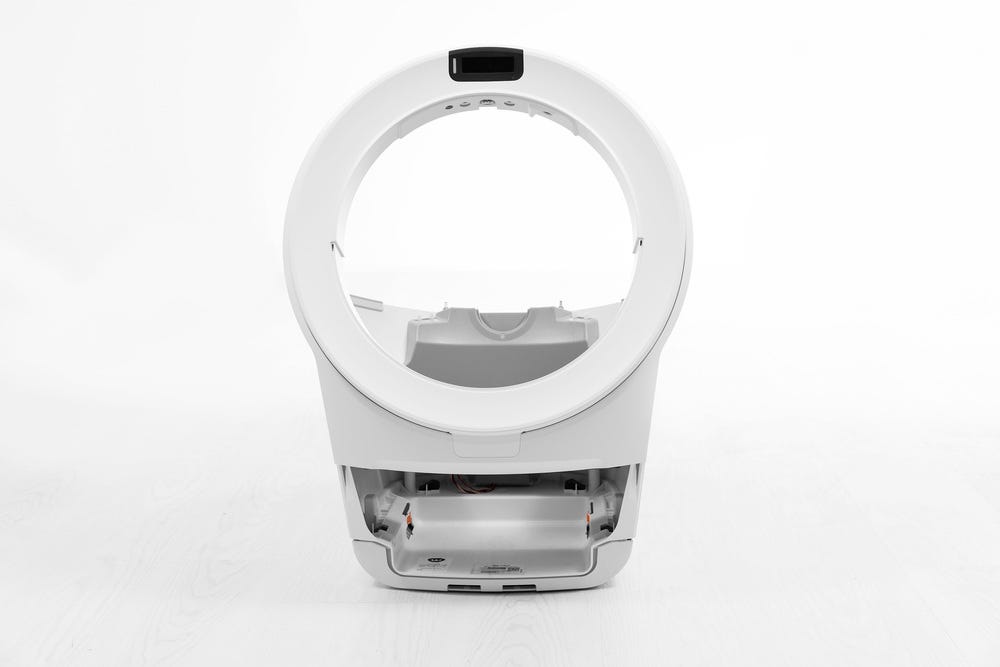
- Using a table or a box at least 13.5-inches (34.3 cm) high, turn the base assembly upside down and set it on top of the table or box so that the bezel hangs over the edge.
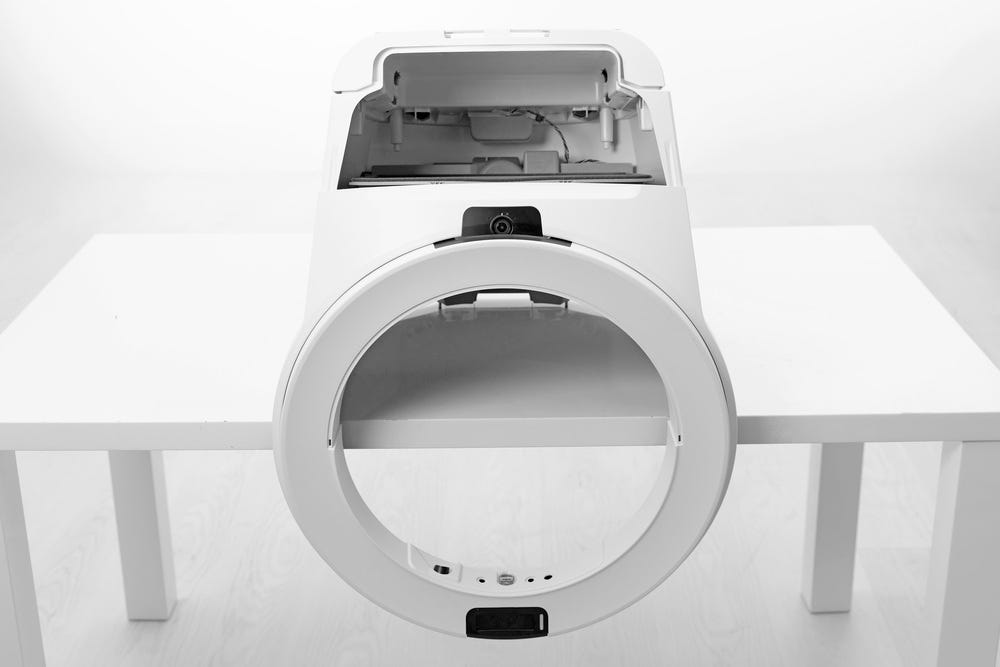
- Locate the old lower waste port seal strips. Use a putty knife, flathead screwdriver, or your fingernail to lift the corner of a strip and peel off all four (4) strips.
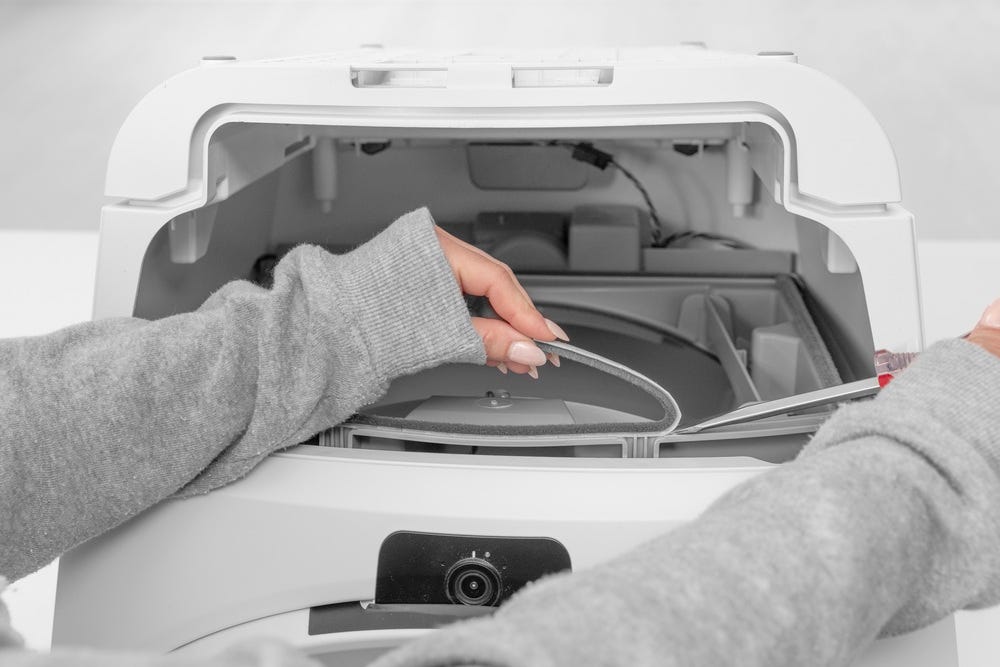
- To ensure that the new seal strips adhere to the base, remove any litter and old strip residue. This can be done with ⅜-inch (9.5 mm) strips of sturdy duct tape. Apply tape to residue, rub to adhere firmly, and pull off. Repeat around the port. Clean any residue left behind with rubbing alcohol.
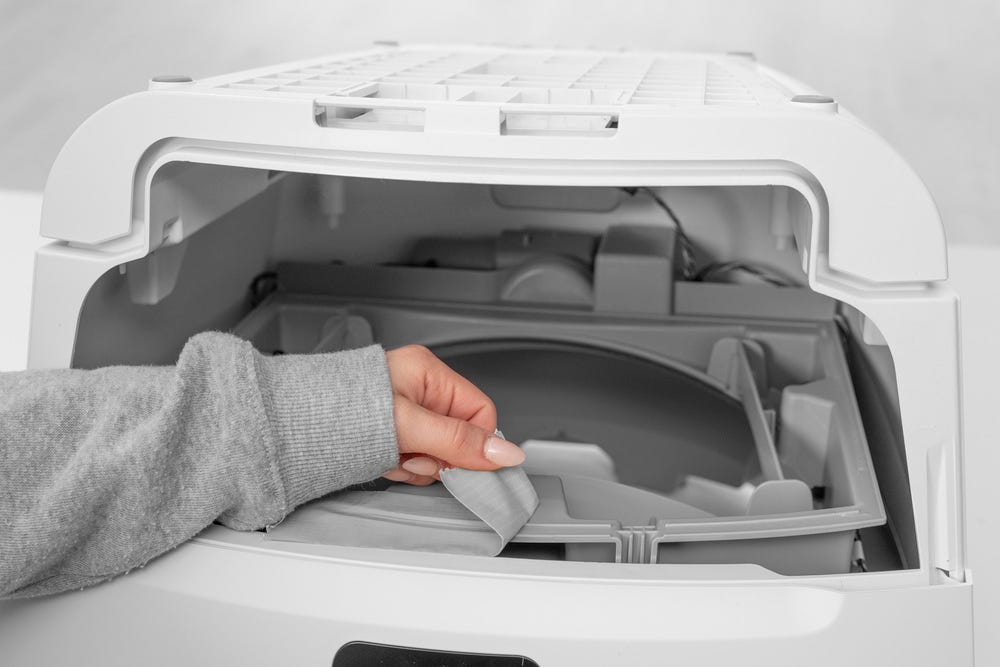
- Replace the (2) side seal strips first (these are 10.25-inches (26 cm) long):
- Peel off the adhesive backing on the first seal strip.
- Start at the back and place the strip forward along the guideline. Run your finger along the strip a few times with firm pressure to ensure adhesion.
- Repeat with the other side seal strip.
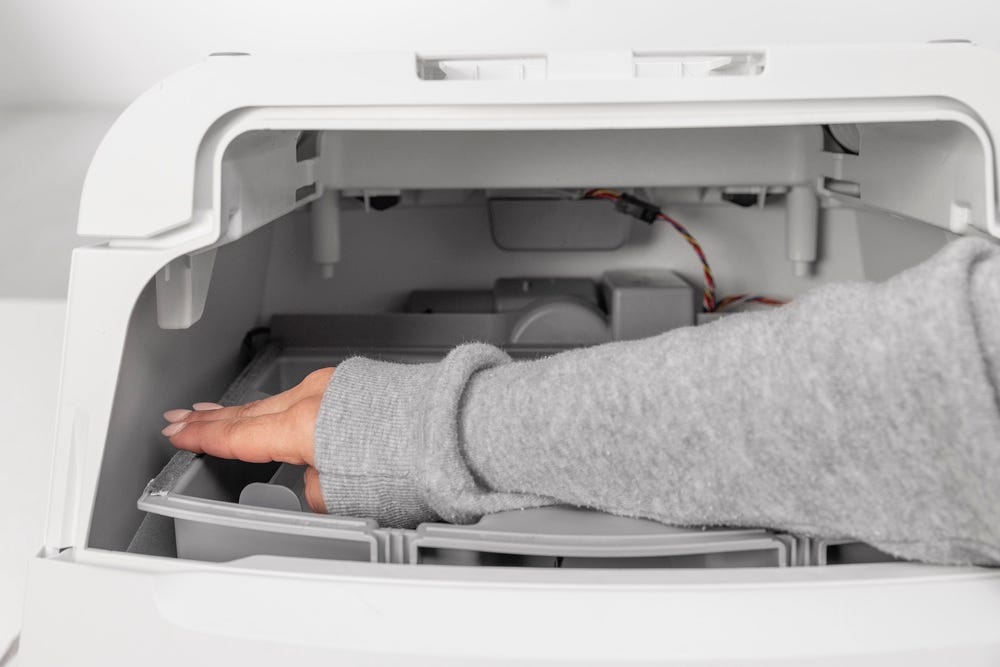
- Proceed to the rear seal strip, which is 13.5-inches (34.3 cm). Place the rear seal strip in front of the strip guideline. Run your finger along the strip a few times with firm pressure to ensure adhesion.
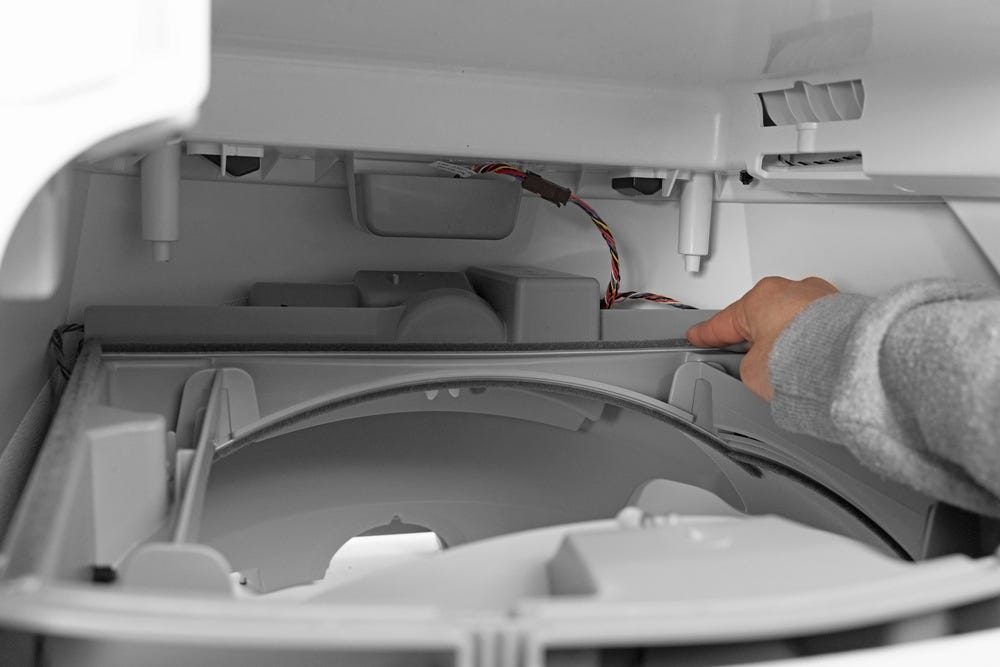
- Proceed to the forward seal strip, which is 14.4-inches (36.6 cm) long with small notches along one side. Place the forward seal strip between the seal strip guidelines with the notches facing outwards. Run your finger along the strip a few times with firm pressure to ensure adhesion.
- Place the base assembly upright on the floor.
- Reattach the globe and key:
- Ensure the key is inserted into the back of the globe. Lift the globe by the handle with one hand, and use your other hand to hold the key in place as you lower the globe into the base.
- Ensure the back of the globe is sitting flush in the rear bearing pocket. The large black gear on the rear of the globe will line up with the small white gear in the base.
- Replace the bonnet:
- Insert the two rear tabs on the bonnet into the rectangular pockets behind the globe. You may need to rotate the bonnet slightly in either direction until it drops into place.
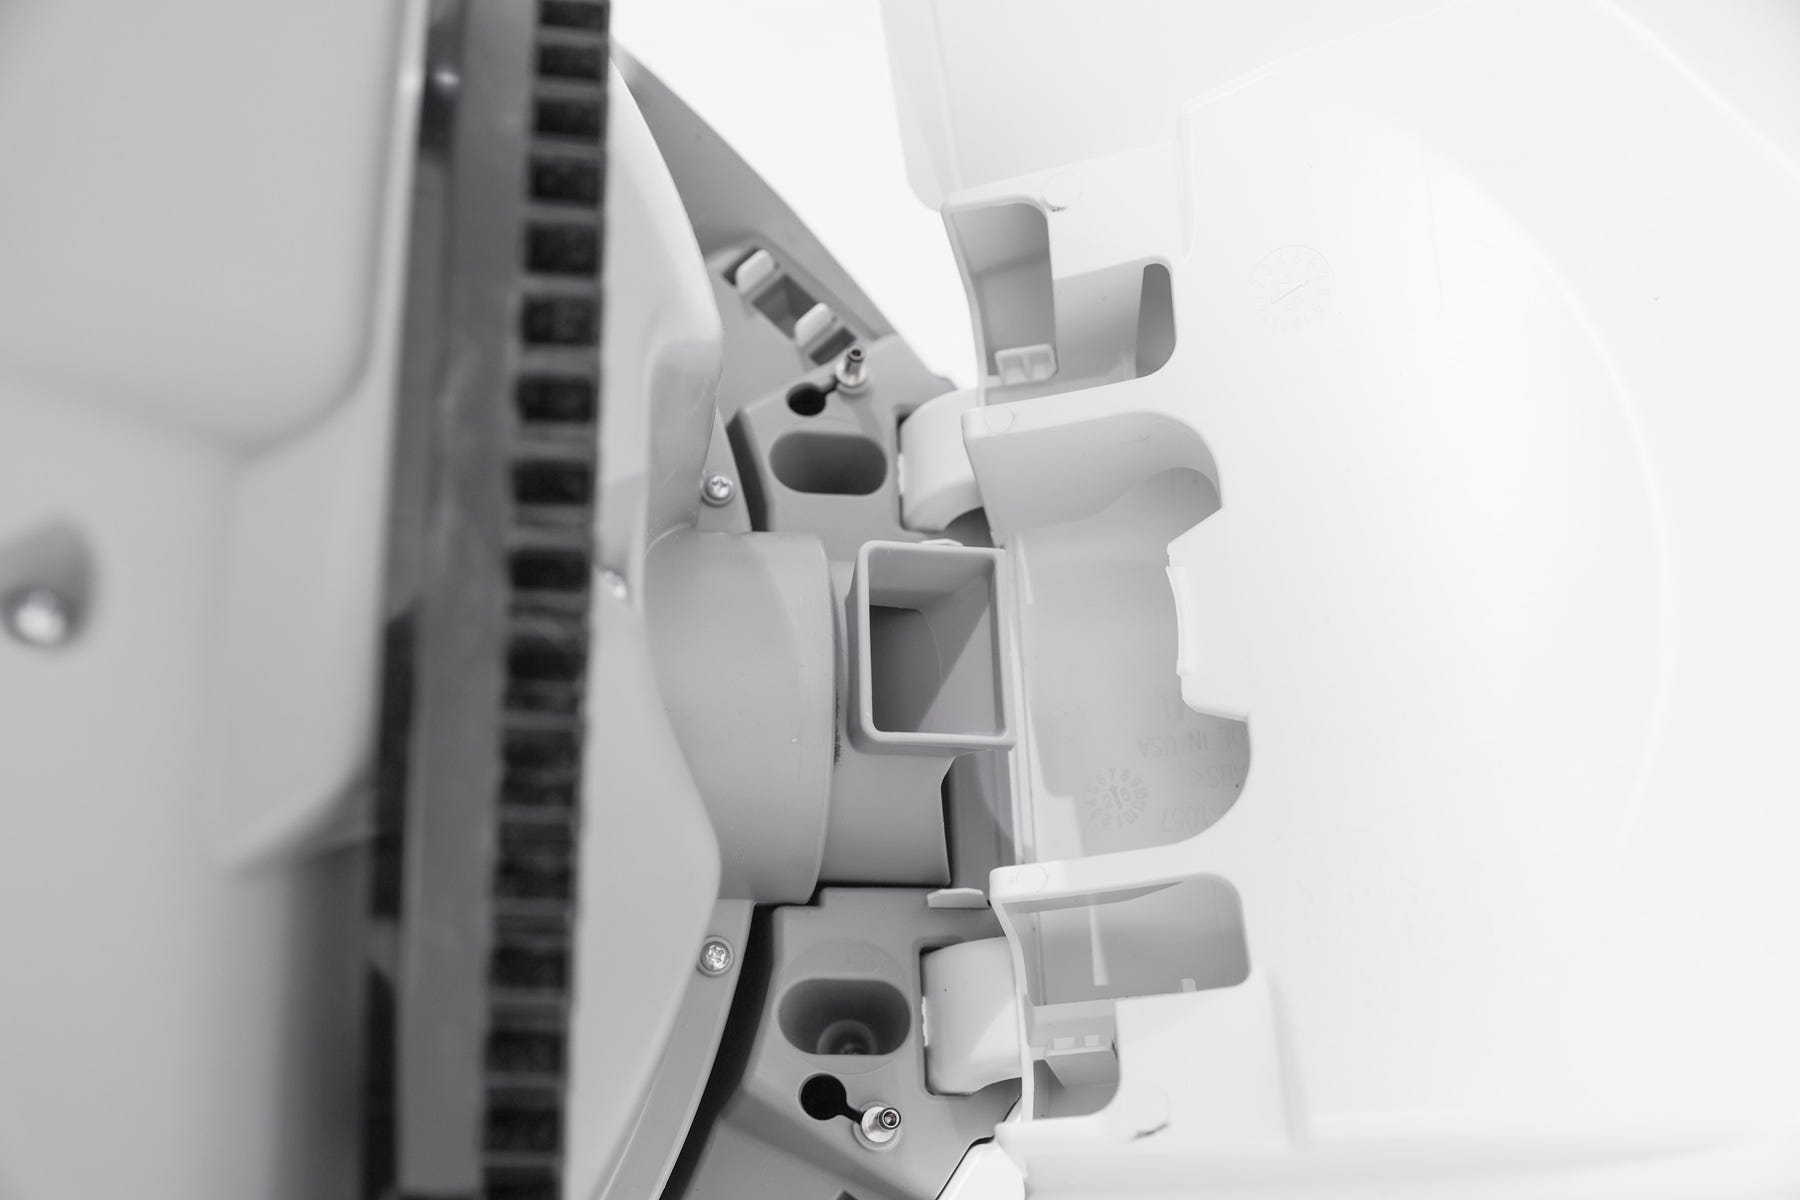
Rotate the bonnet down over the globe, then push down on the bonnet from the top to make sure it is latched and secure.
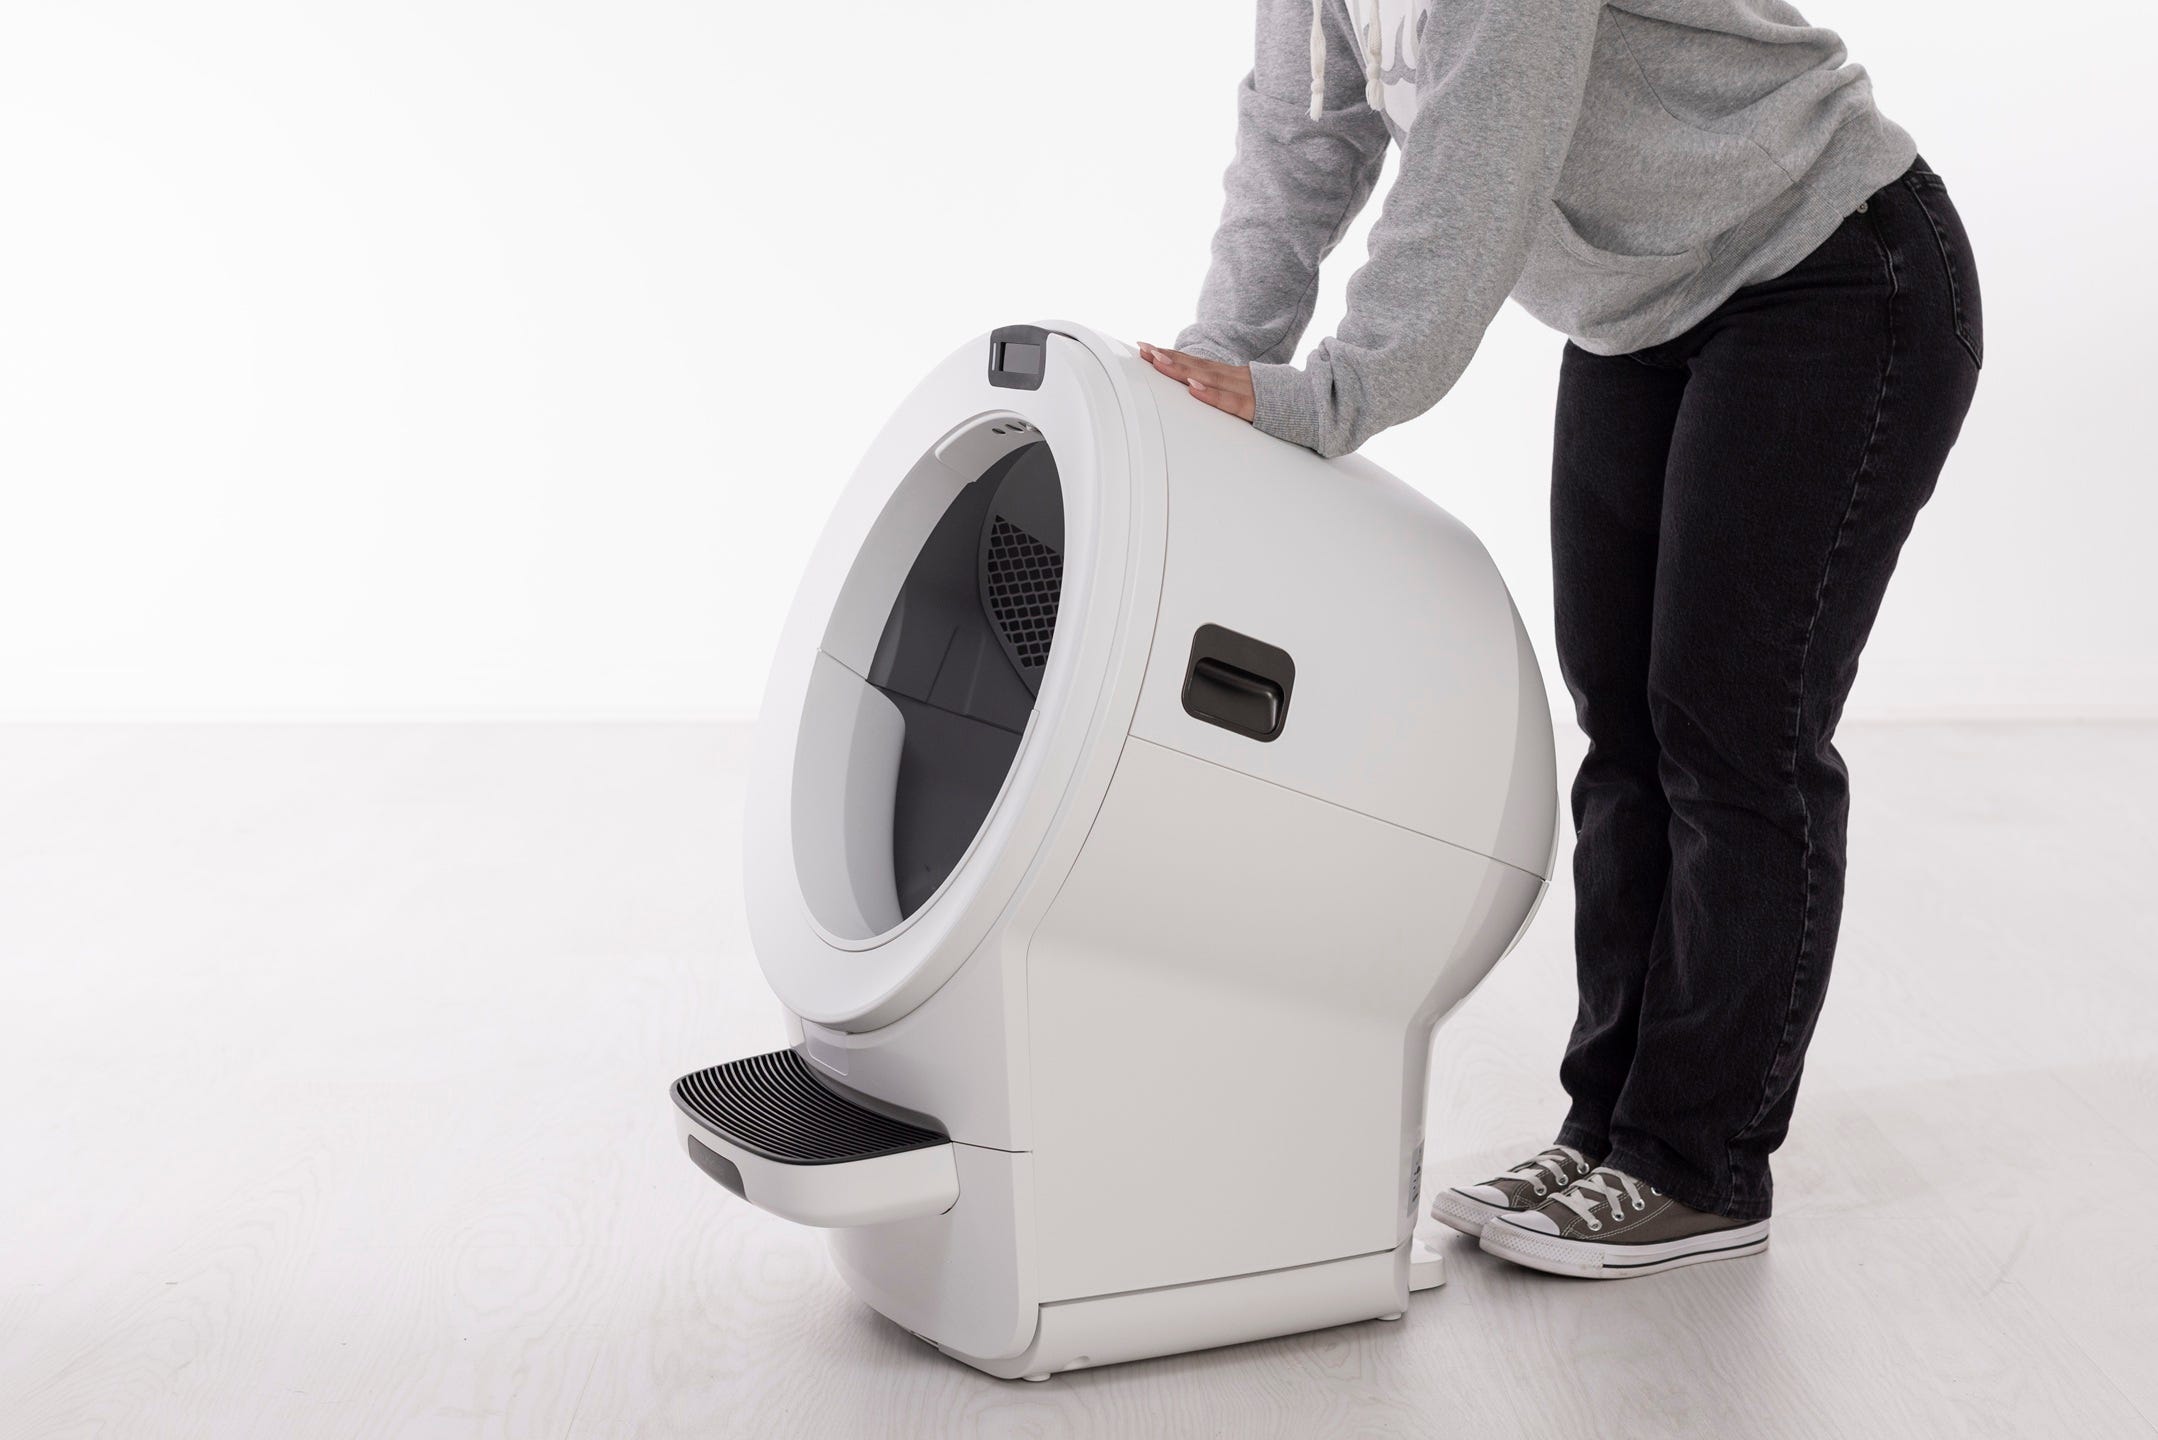
- Slide the waste drawer back into the base.
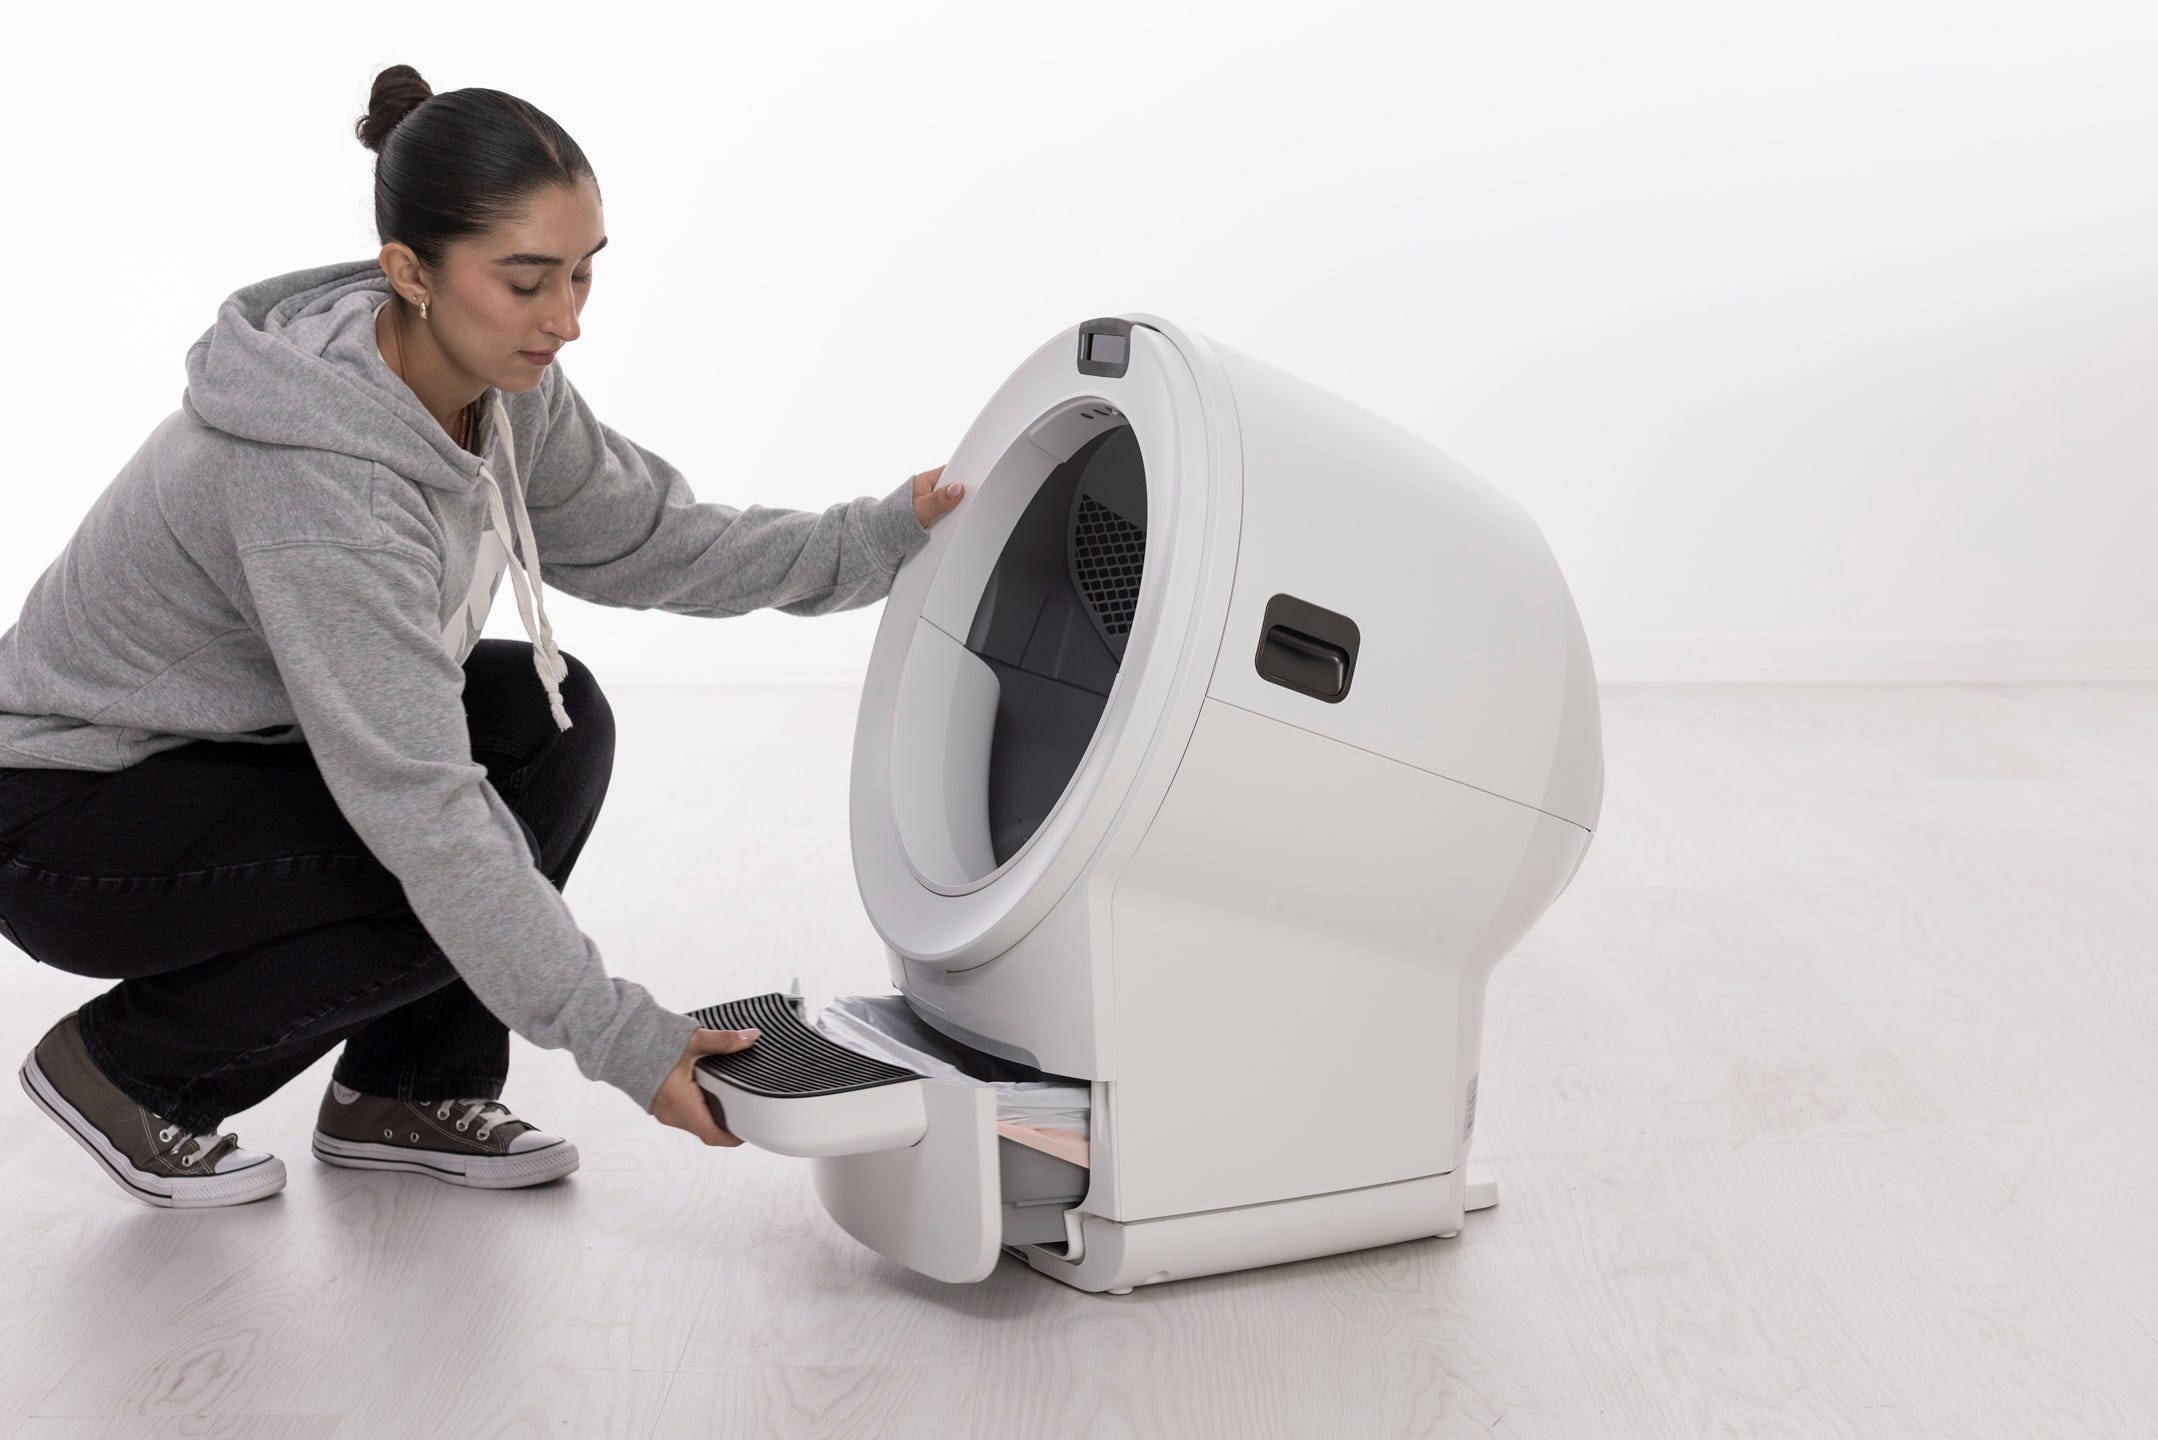
- If desired, re-install the fence or any other accessories by snapping them onto the bezel at the globe entrance.
- Plug the unit in and power it on.
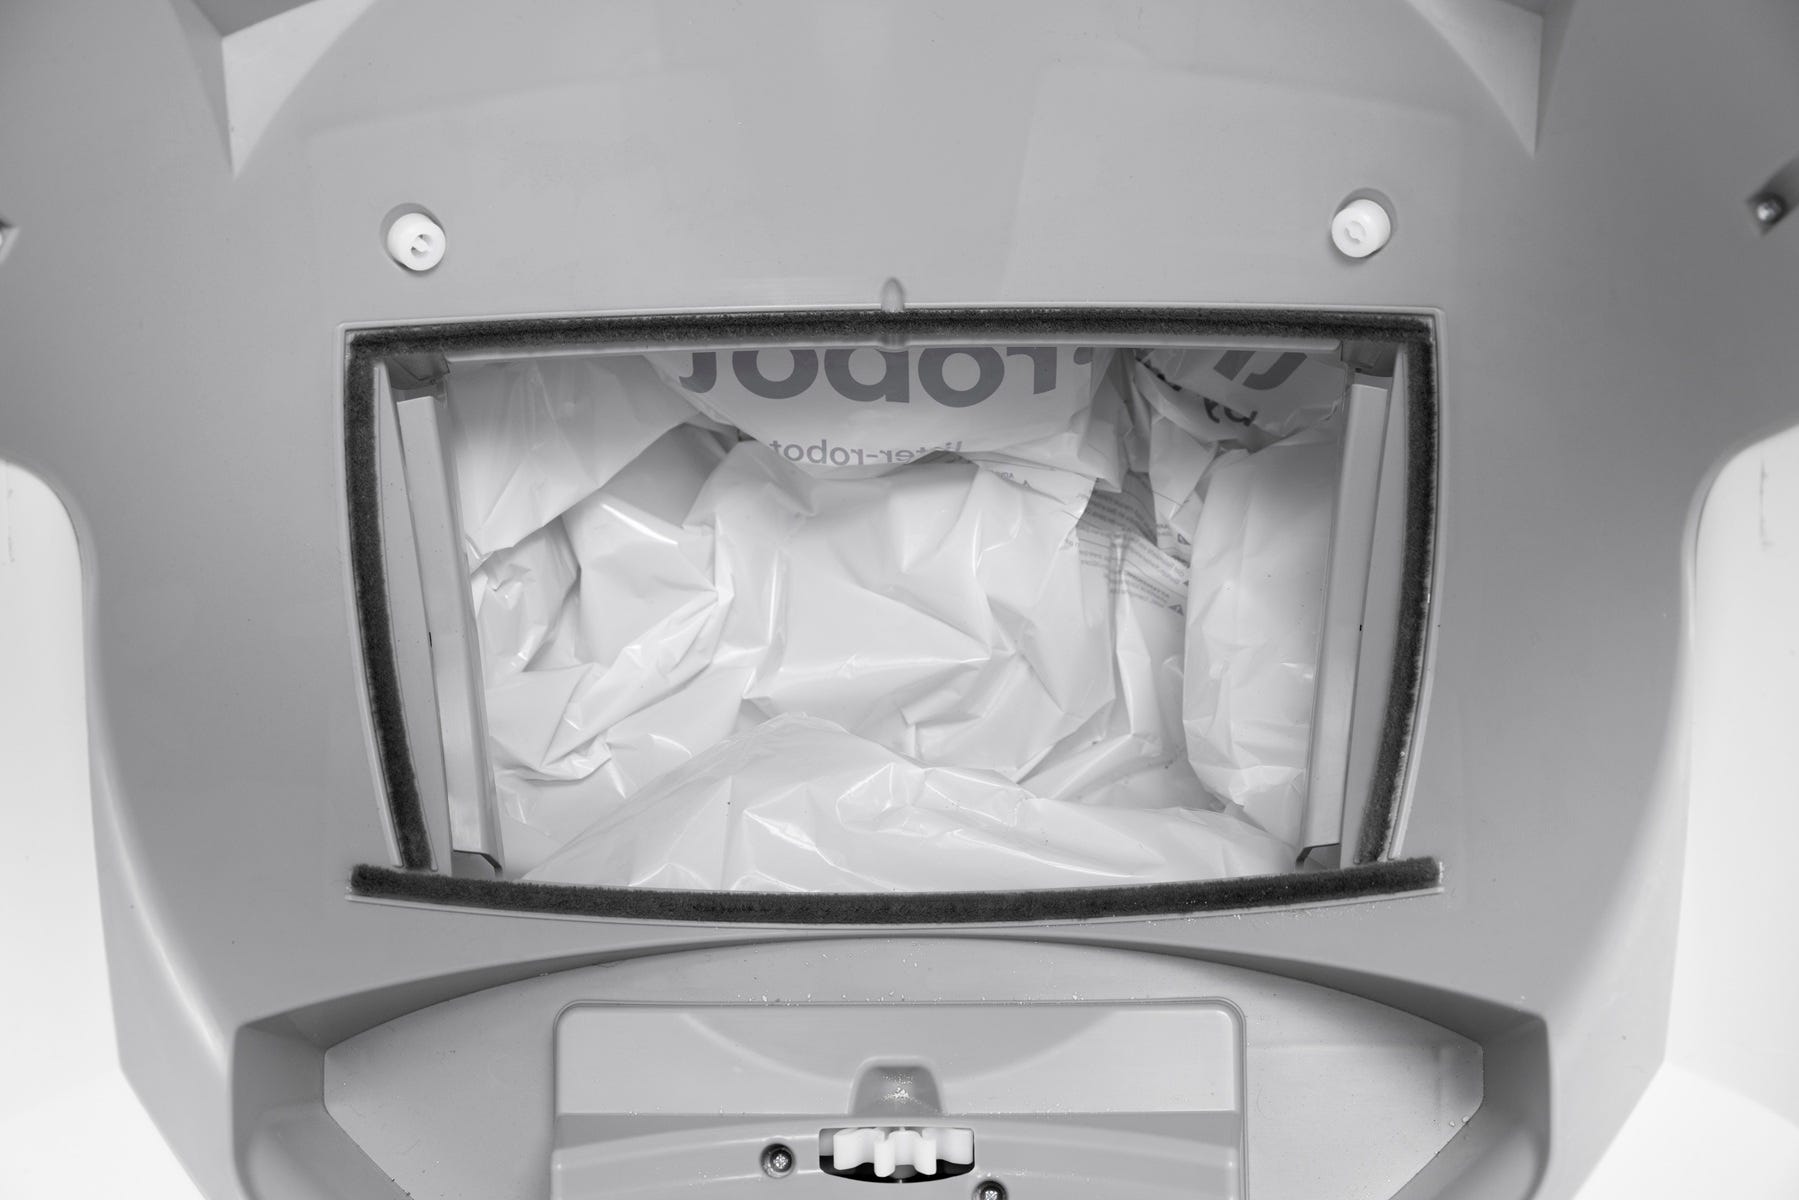
Installing Litter-Robot 5 Upper Waste Port Seal Strips
Add seal strips to the upper waste port to help reduce odors.
Tools needed:
- (1) forward seal strip: 13.5-inches (34.3 cm)
- (2) side seal strips: 6-inches (15.25 cm)
- (1) rear seal strip: 12-inches (30.5 cm)
- Putty knife or flathead screwdriver (optional)
- Duct tape
- Rubbing alcohol
- Make sure the unit is in the Home/Ready position.
- Press the Power button to turn the unit off, then unplug the unit.
- If you have a fence or other accessories installed, remove them from the bezel.
- Remove the bonnet:
Press and hold the latches on both sides of the bonnet, then lift and rotate the bonnet to its open position.
- While pulling up on the bonnet, slowly rotate it forward until it disengages from the unit frame behind the robot. Set the bonnet aside.
- Remove the globe and key:
Grab the black handle located on top of the globe, lift the globe off the base, and set it on the floor. Be mindful of the key, which may have fallen out of the rear of the globe.
- Locate the old upper waste port seal strips in the base. Use a putty knife, flathead screwdriver, or your fingernail to lift the corner of a strip and peel off all four (4) strips.
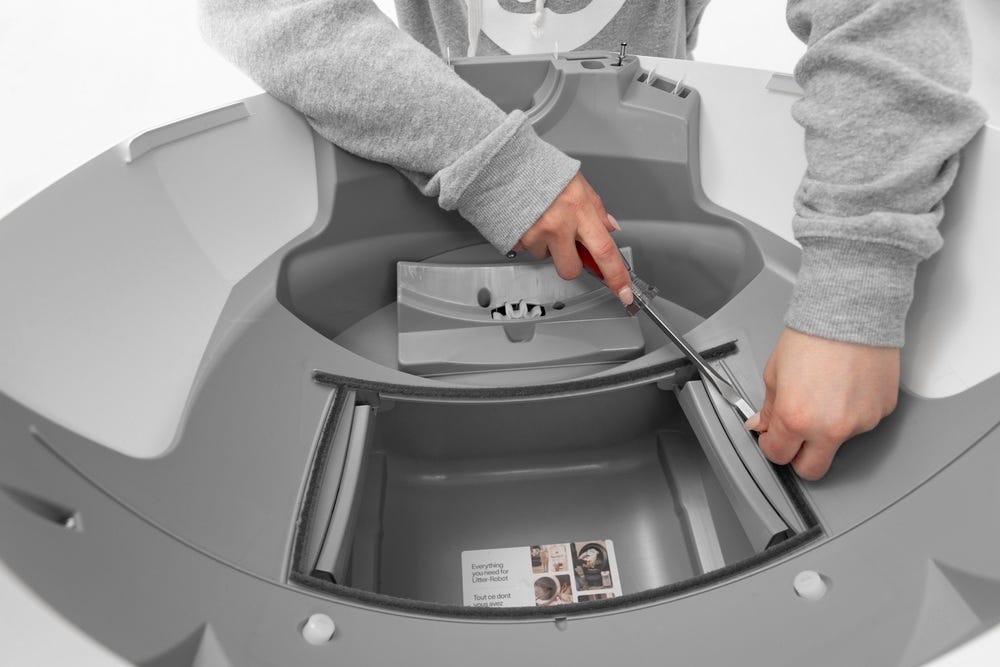
- To ensure that the new seal strips adhere to the base, remove any litter and old strip residue. This can be done with ⅜-inch (9.5 mm) strips of sturdy duct tape. Apply tape to residue, rub to adhere firmly, and pull off. Repeat around the port. Clean any residue left behind with rubbing alcohol.
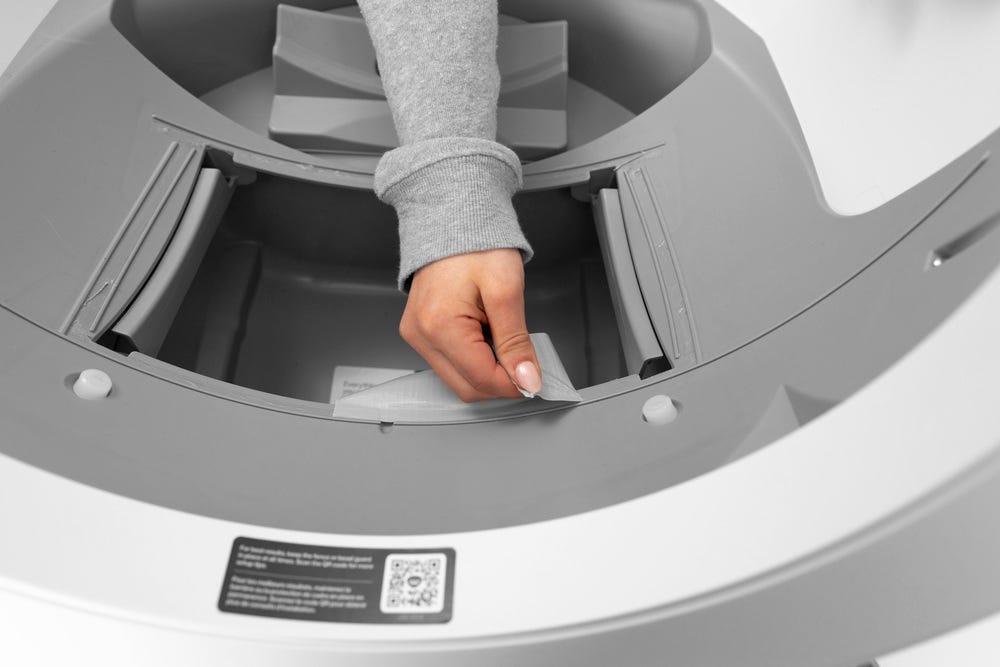
- Replace the forward seal strip first, which is 13.5-inches (34.3 cm) long. Peel off the adhesive backing on the strip and place it along the inside of the strip guideline. Run your finger along the strip with firm pressure a few times to ensure adhesion.
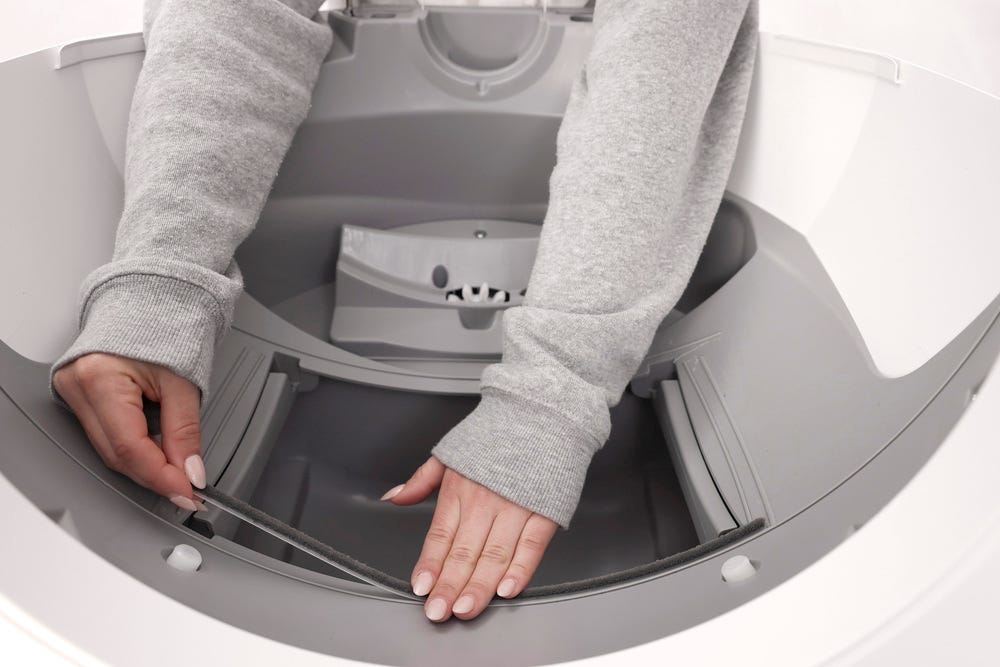
- Next, replace the (2) side seal strips, which are 6-inches (15.25 cm) long. Place immediately adjacent to the forward seal strip, and along the inside of the strip guideline. Apply firm pressure along the strip to ensure adhesion.
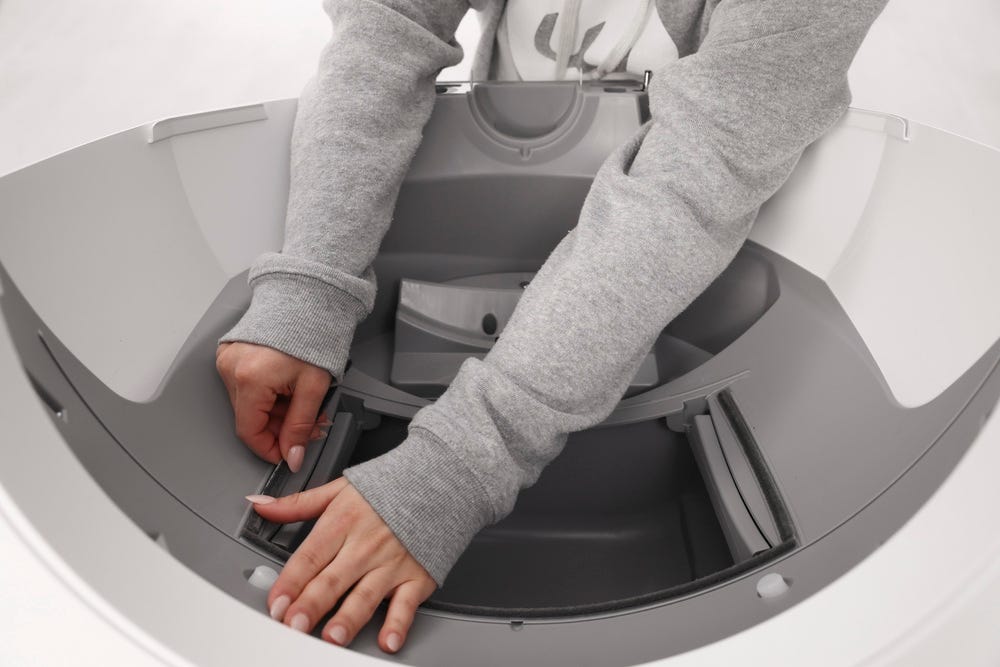
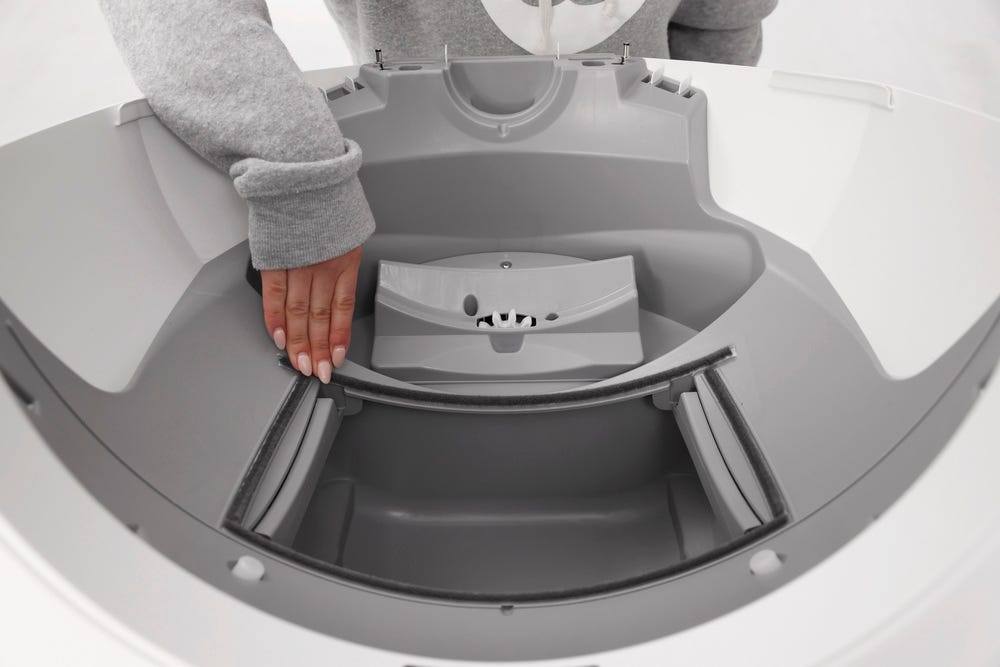
- Finally, replace the rear seal strip, which is 12-inches (30.5 cm) long. Apply firm pressure along the strip to ensure adhesion.
Reattach the globe and key:
Ensure the key is inserted into the back of the globe. Lift the globe by the handle with one hand, and use your other hand to hold the key in place as you lower the globe into the base.
Ensure the back of the globe is sitting flush in the rear bearing pocket. The large black gear on the rear of the globe will line up with the small white gear in the base.
Replace the bonnet:
Insert the two rear tabs on the bonnet into the rectangular pockets behind the globe. You may need to rotate the bonnet slightly in either direction until it drops into place.
- Rotate the bonnet downward over the globe and push down on the bonnet from the top to make sure it is latched and secure.
- If desired, re-install the fence or any other accessories by snapping them onto the bezel at the globe entrance.
- Plug the unit in and power it on.
- Observe two clean cycles to ensure the new seal strips don’t get pulled up. Watch as the dump port rotates over the waste port area—if the seals are not adhered well enough, they could get pulled up by the rotating globe and cause an Overloaded or Globe position error.
Didn't find what you're looking for?
Live support available Mon-Fri: 9AM-9PM EST and Sat-Sun: 9AM-5PM EST, or submit a ticket anytime.