The store will not work correctly in the case when cookies are disabled.


Litter-Robot 4: Motor installation guide
Learn how to remove and install the Litter-Robot 4 Motor.
You will need:
- Phillips-head screwdriver
- Make sure the unit is in the Home/Ready position.
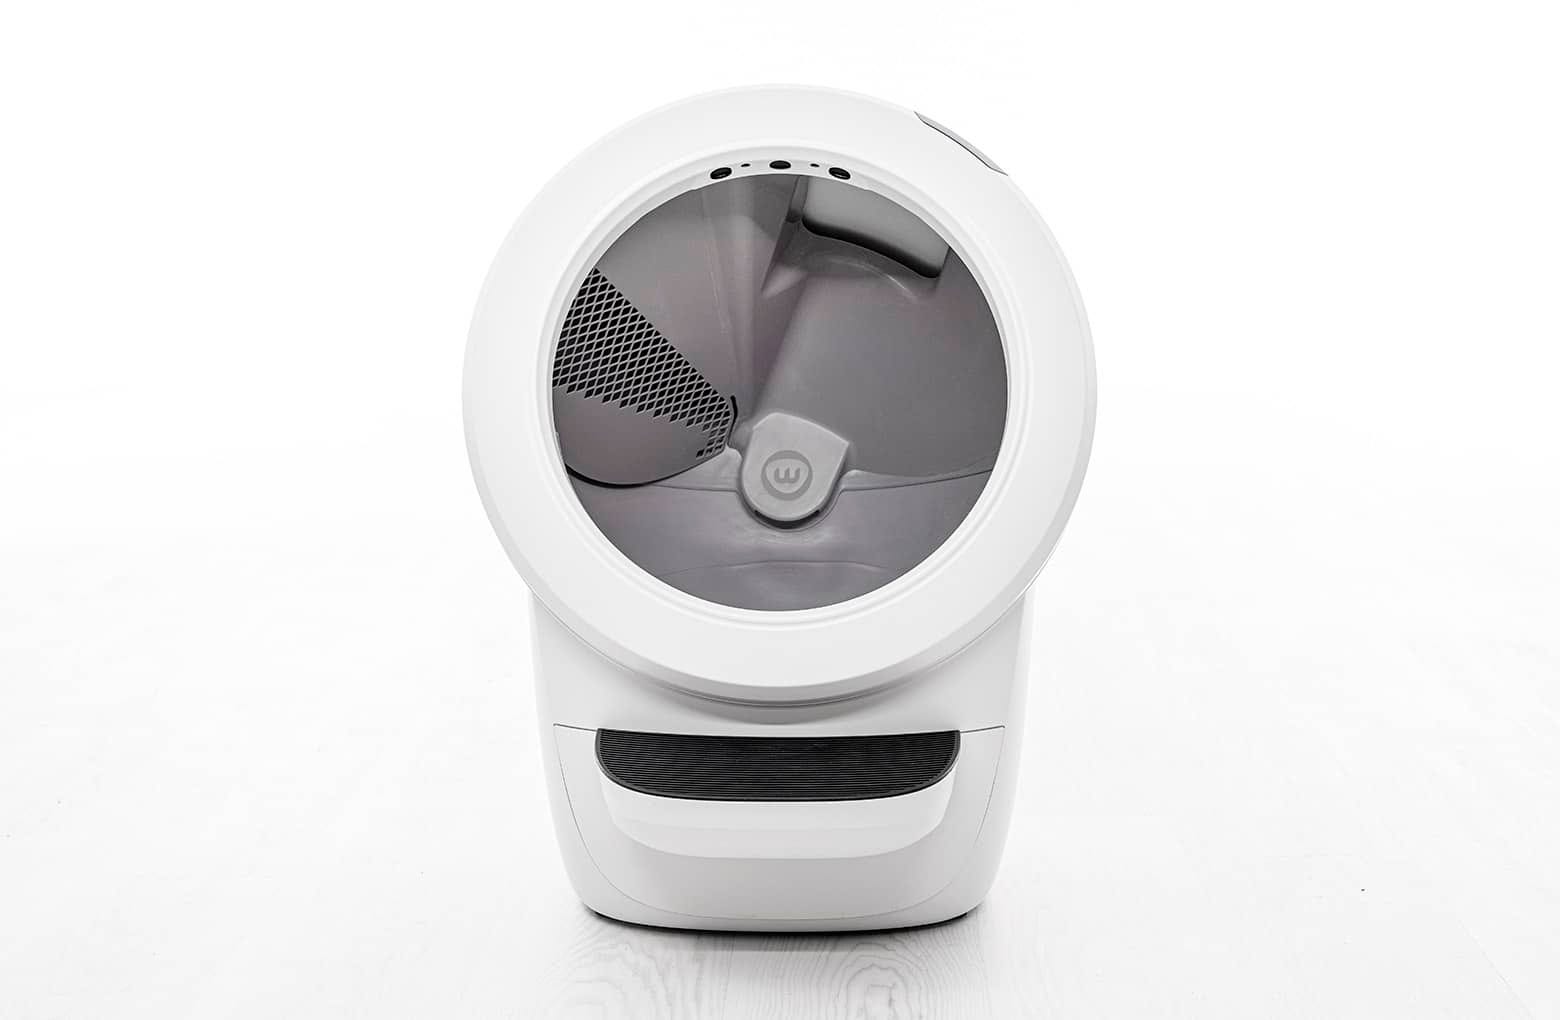
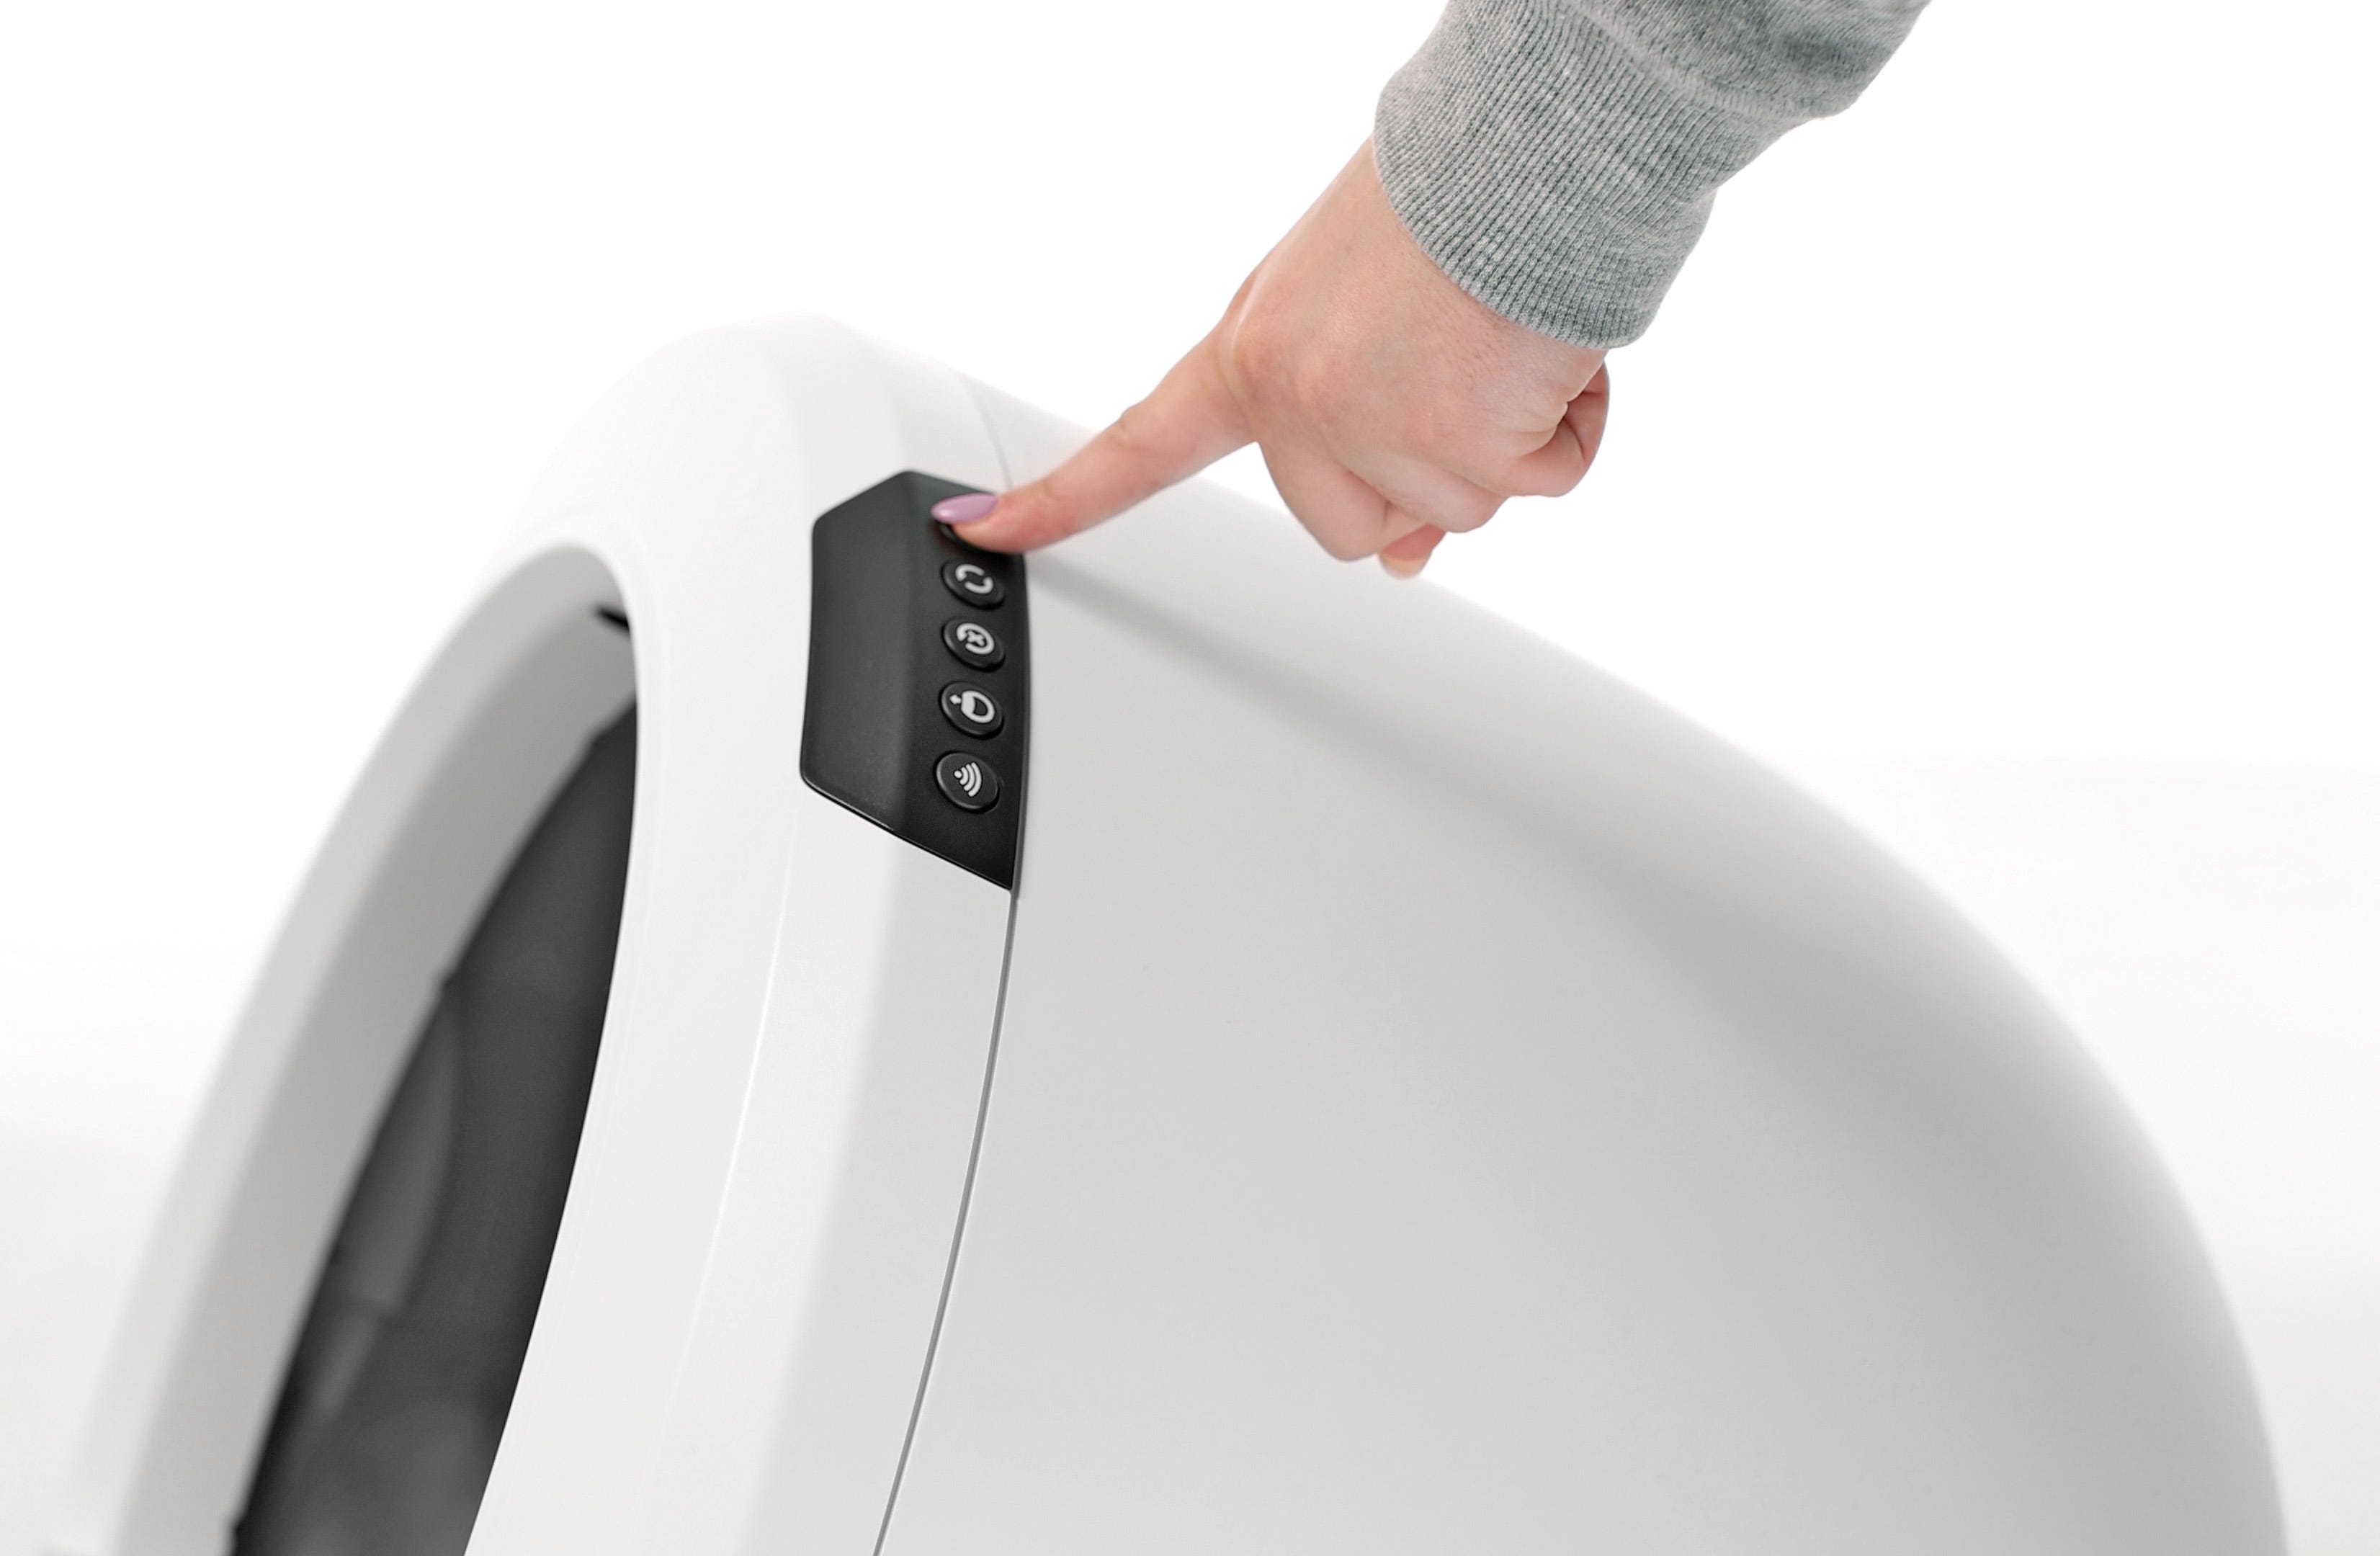
- Press the Power button to turn the unit off, then unplug the unit.
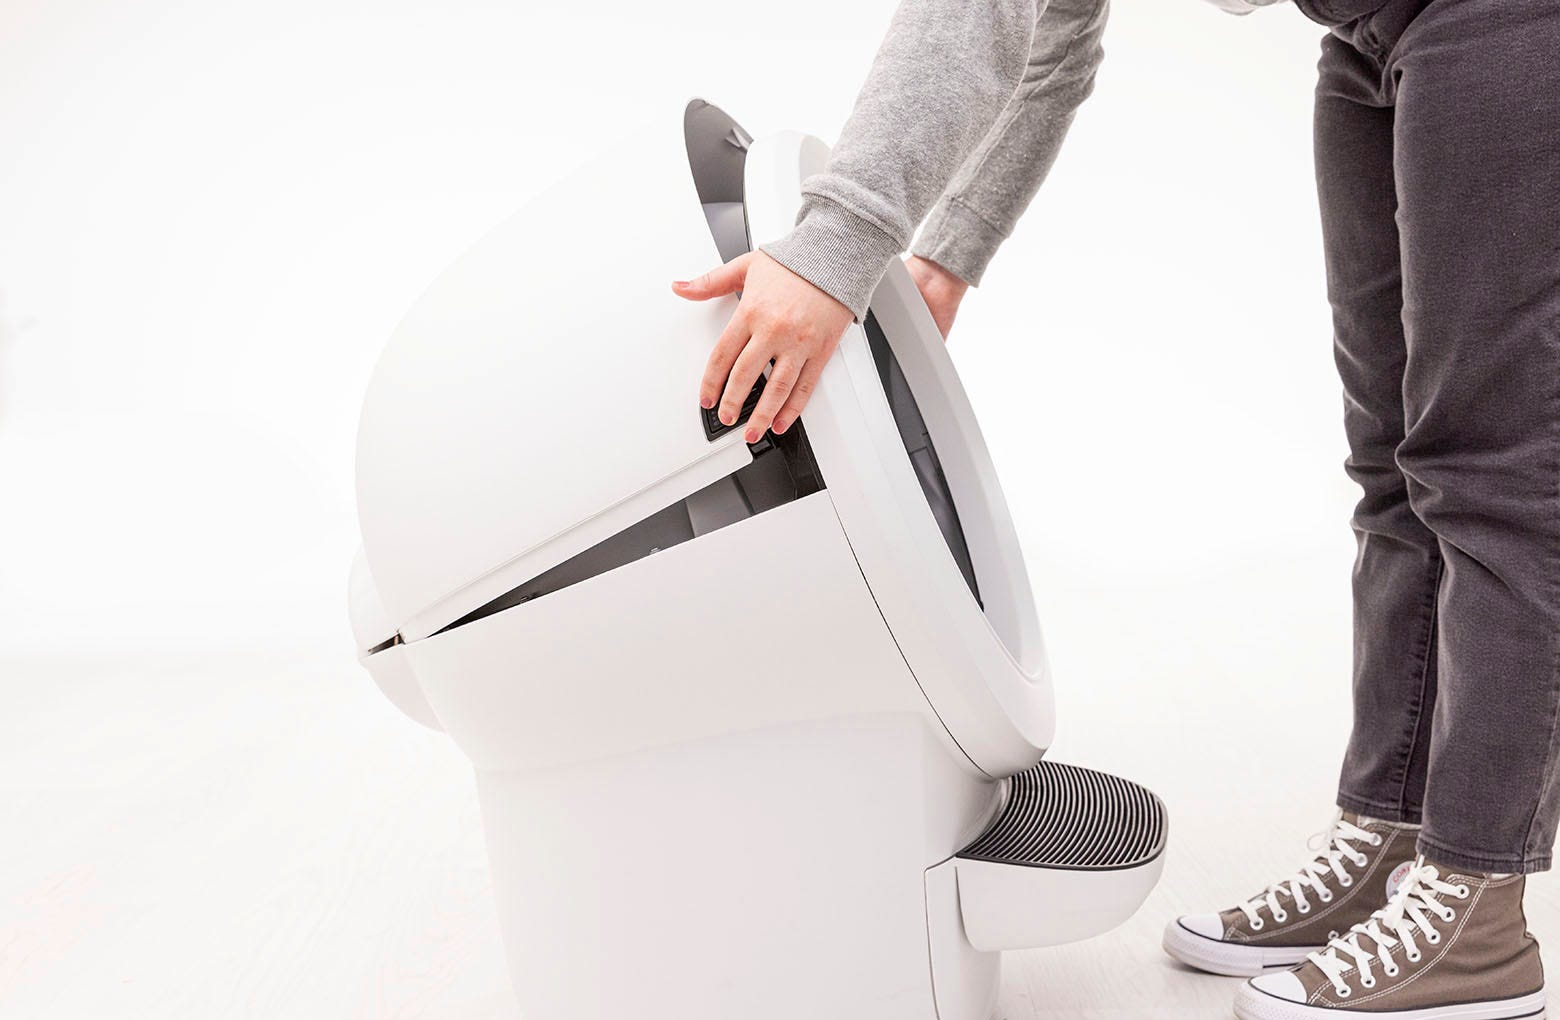
- Remove the bonnet:
- Press and hold the latches on both sides of the bonnet, then lift and rotate the bonnet to its open position.
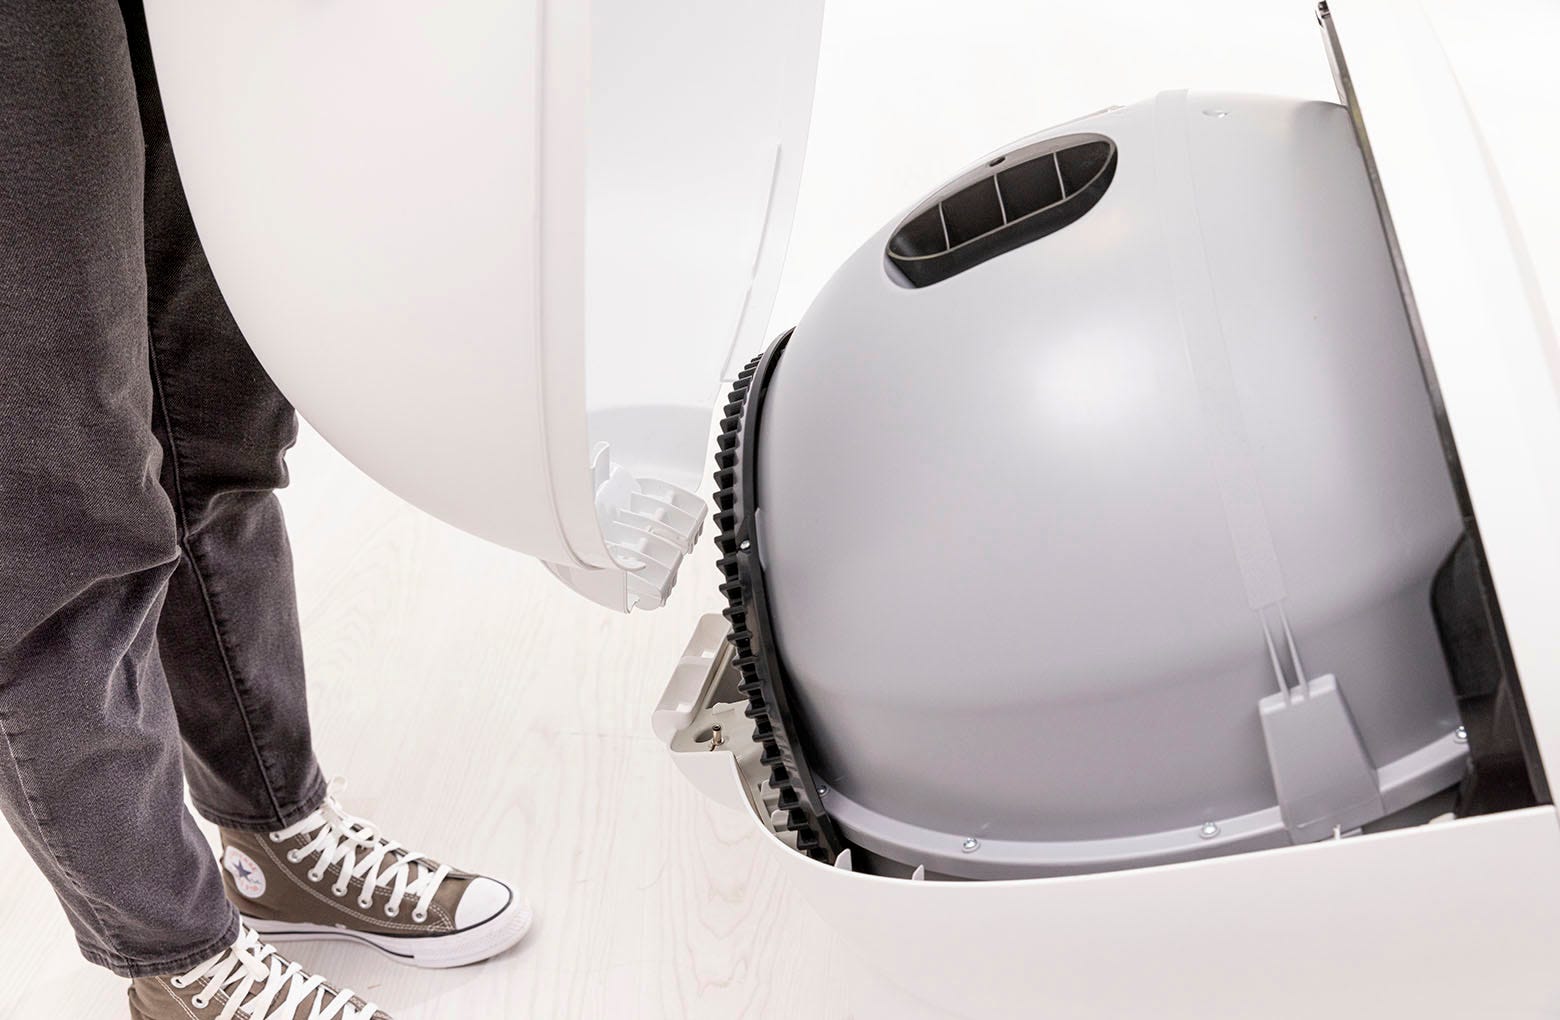
- Lift the bonnet up and out of the hinge to remove.
- Press and hold the latches on both sides of the bonnet, then lift and rotate the bonnet to its open position.
- Remove the globe: Grab the black handle located on top of the globe, lift the globe up and out of the base, and set it aside.
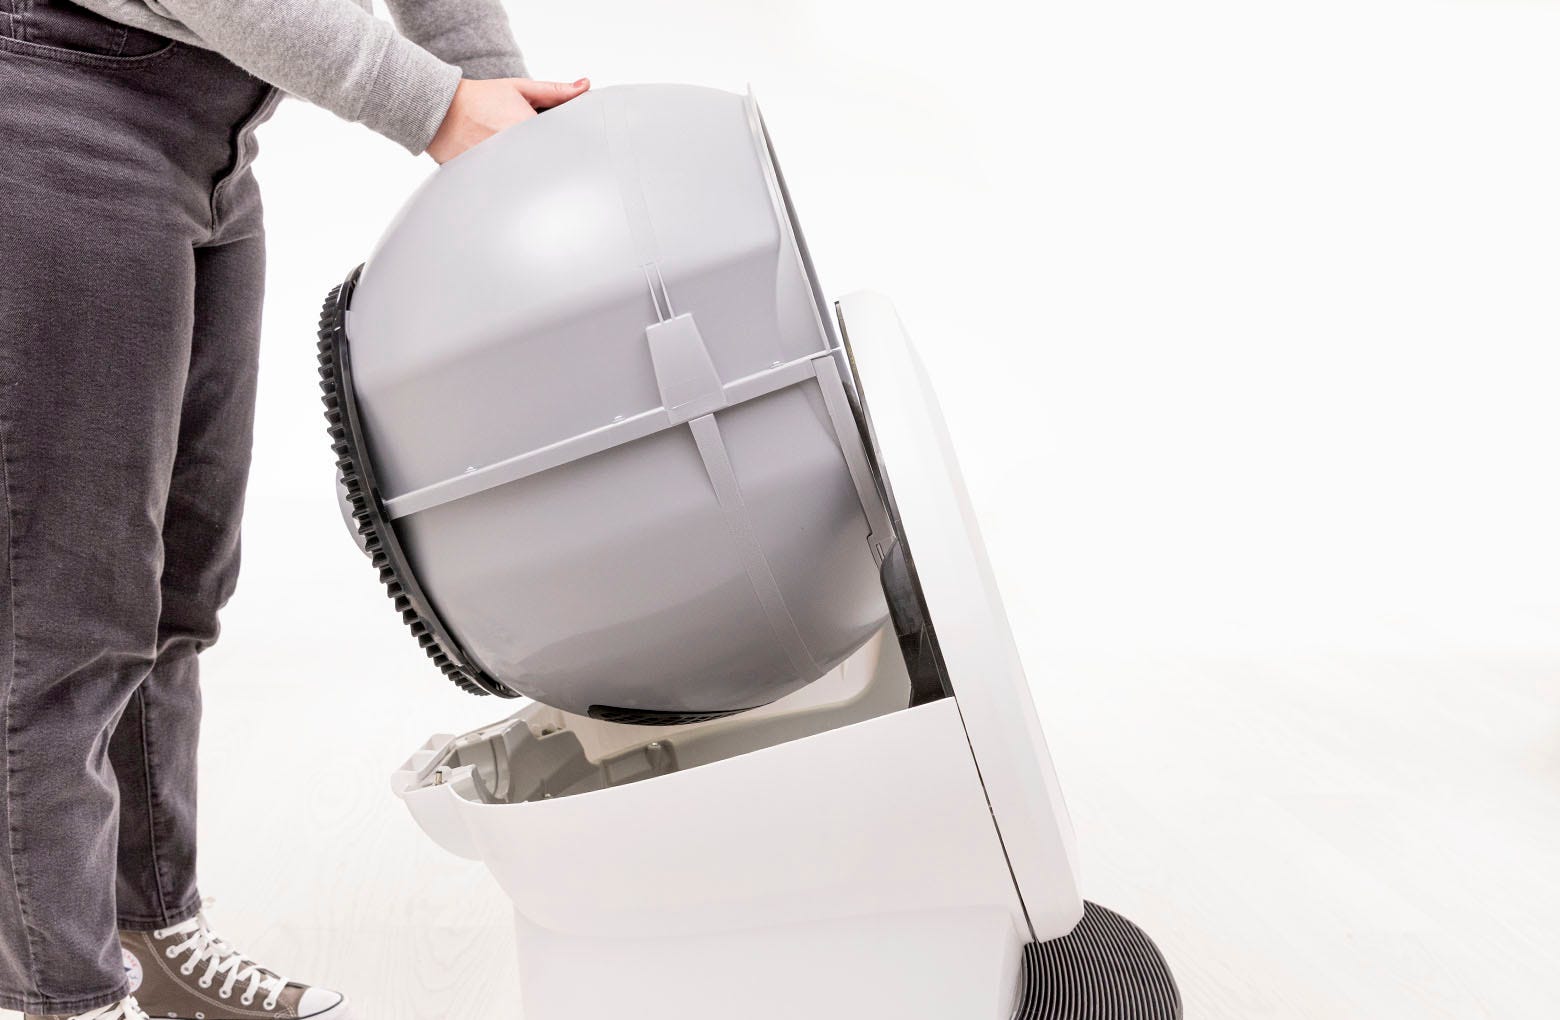
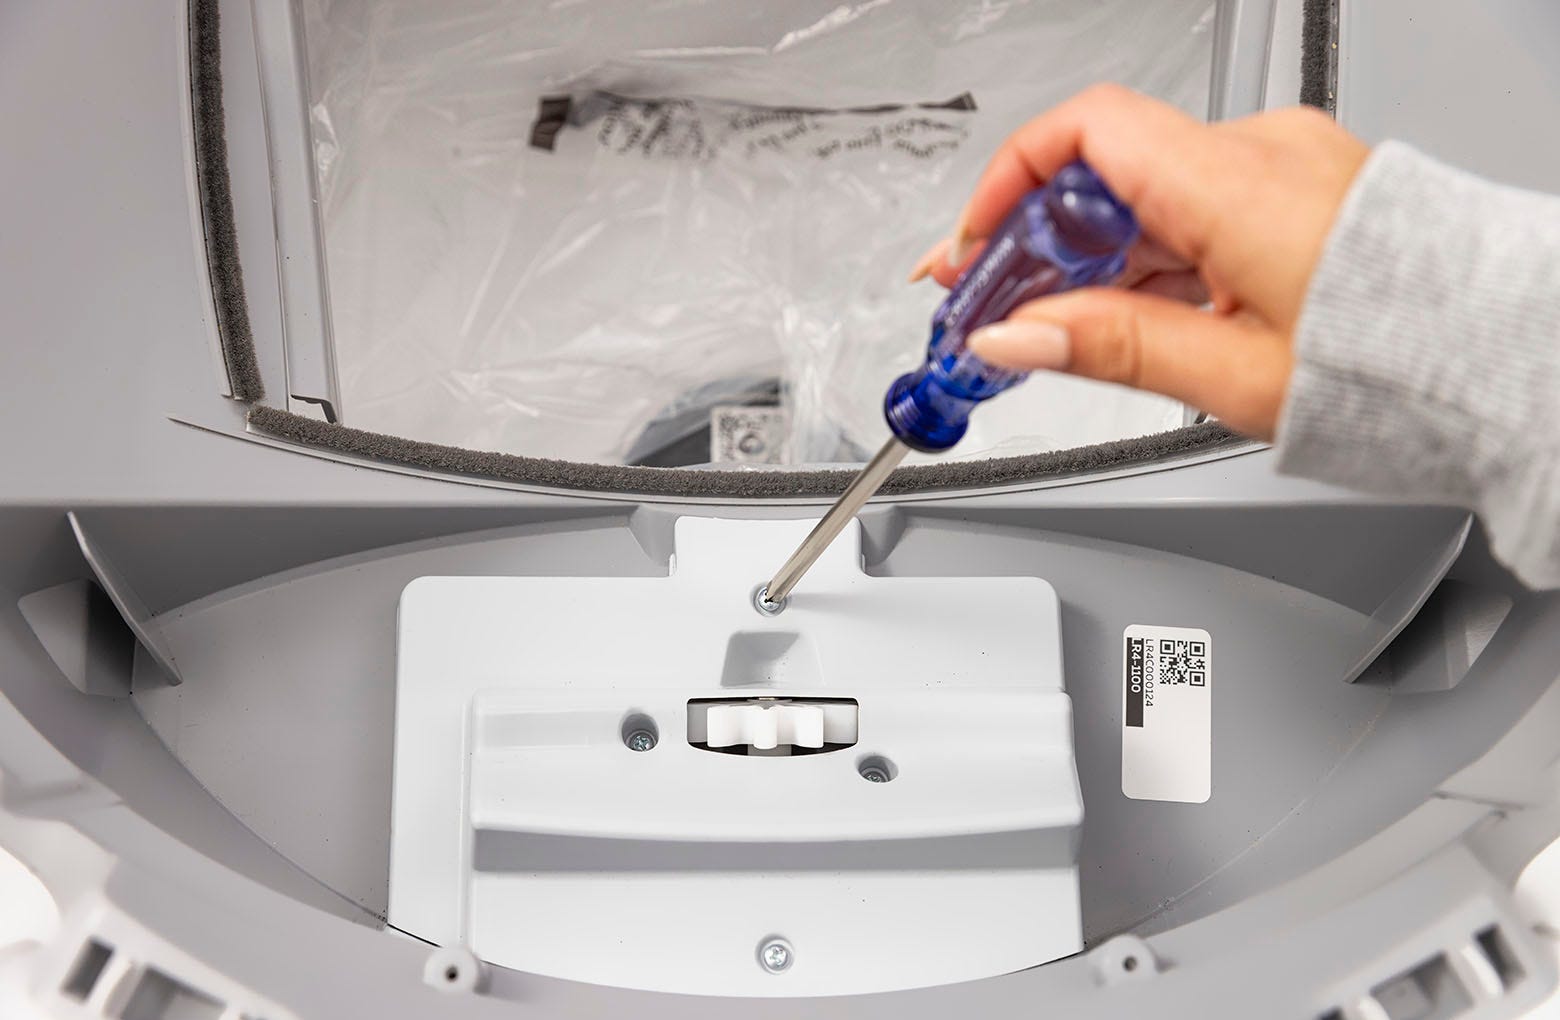
- Locate the motor cover in the base. Using a Phillips-head screwdriver, remove the four (4) screws from the motor cover.
- Remove the motor cover.
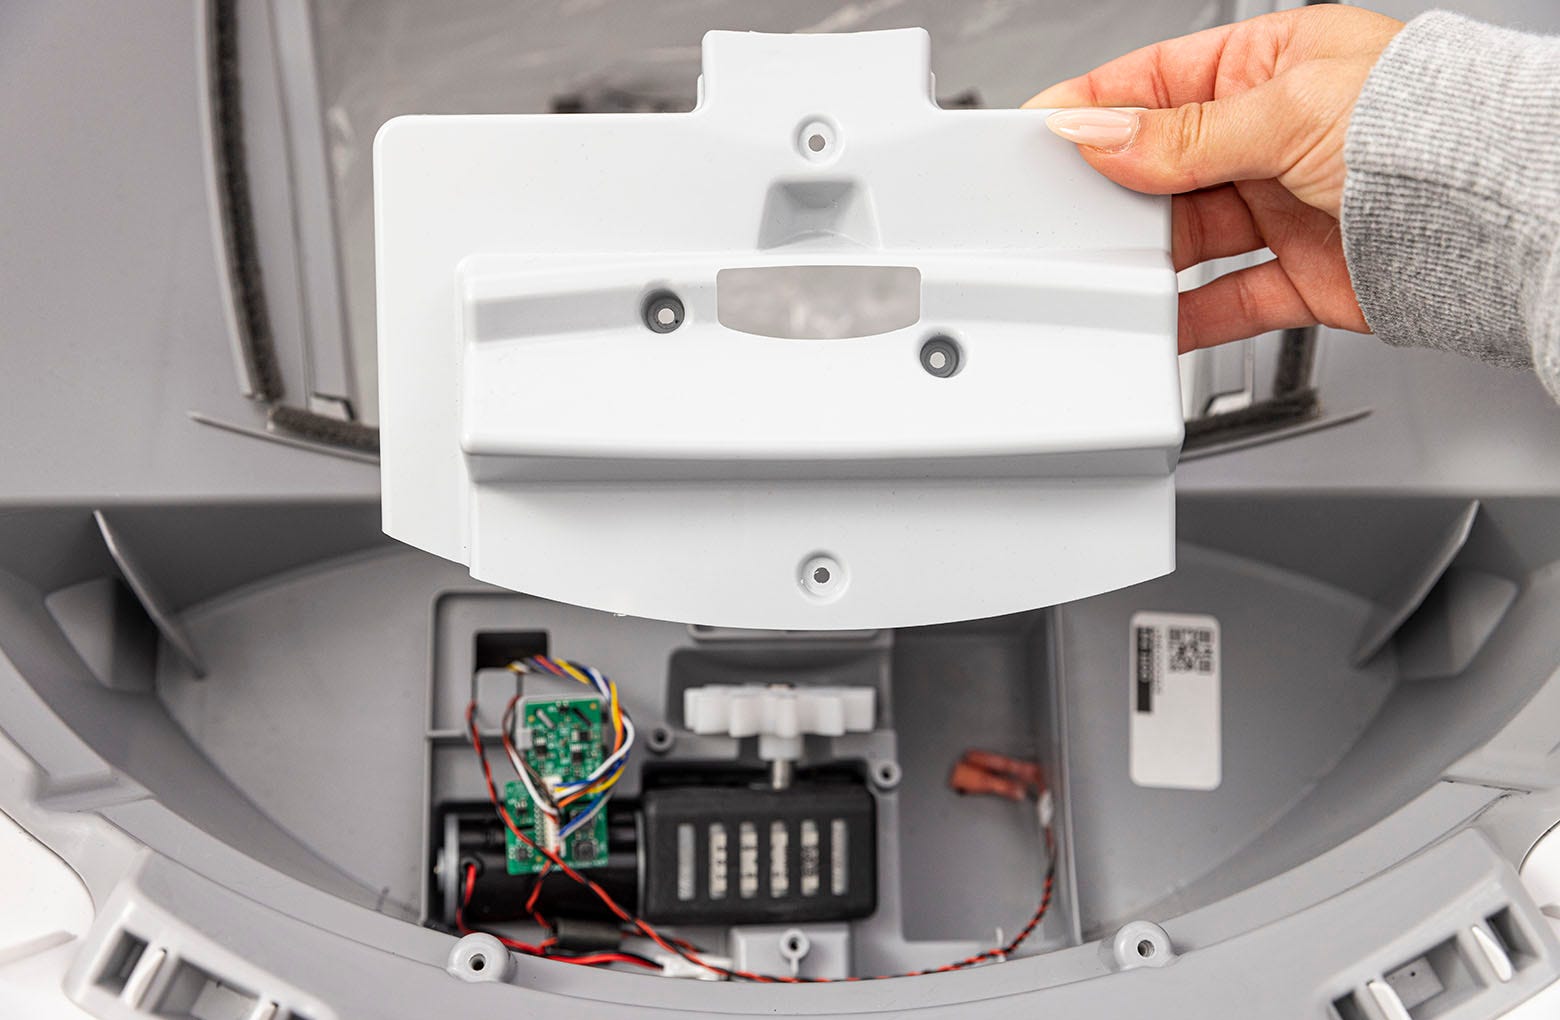
- Remove the rubber upper motor isolator and set it aside.
Note: The loose red and black twisted wires with red connector tips shown below are for the backup battery and do not affect motor operation.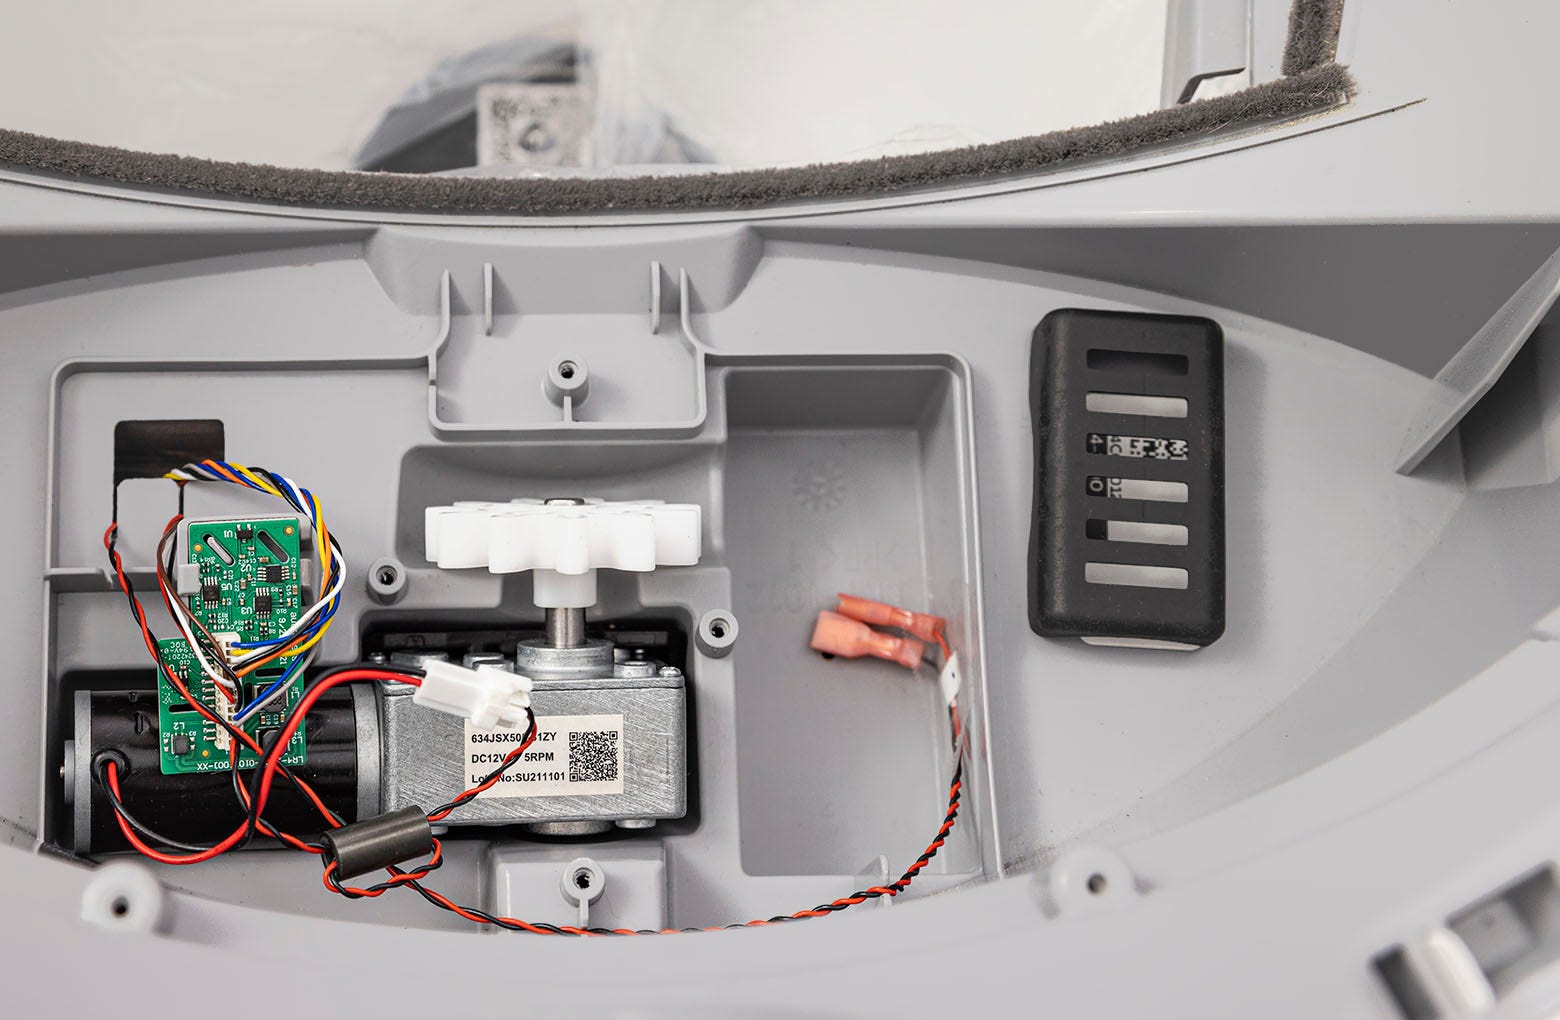
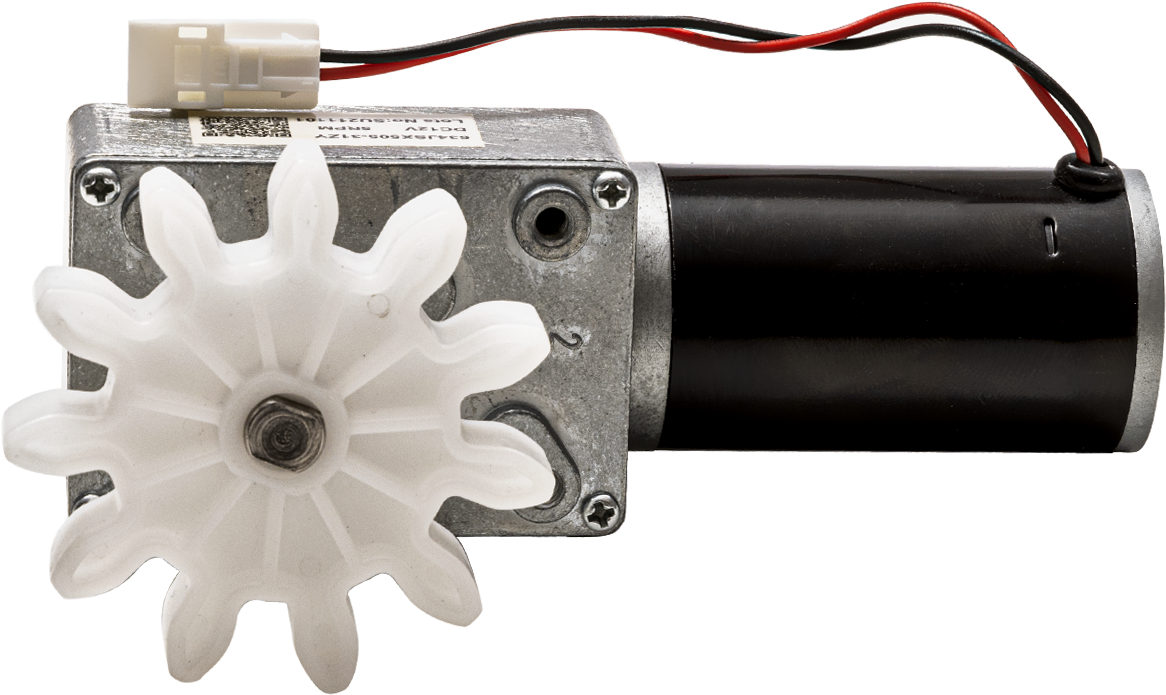
- Locate the motor wire connector and disconnect it from the wire harness.
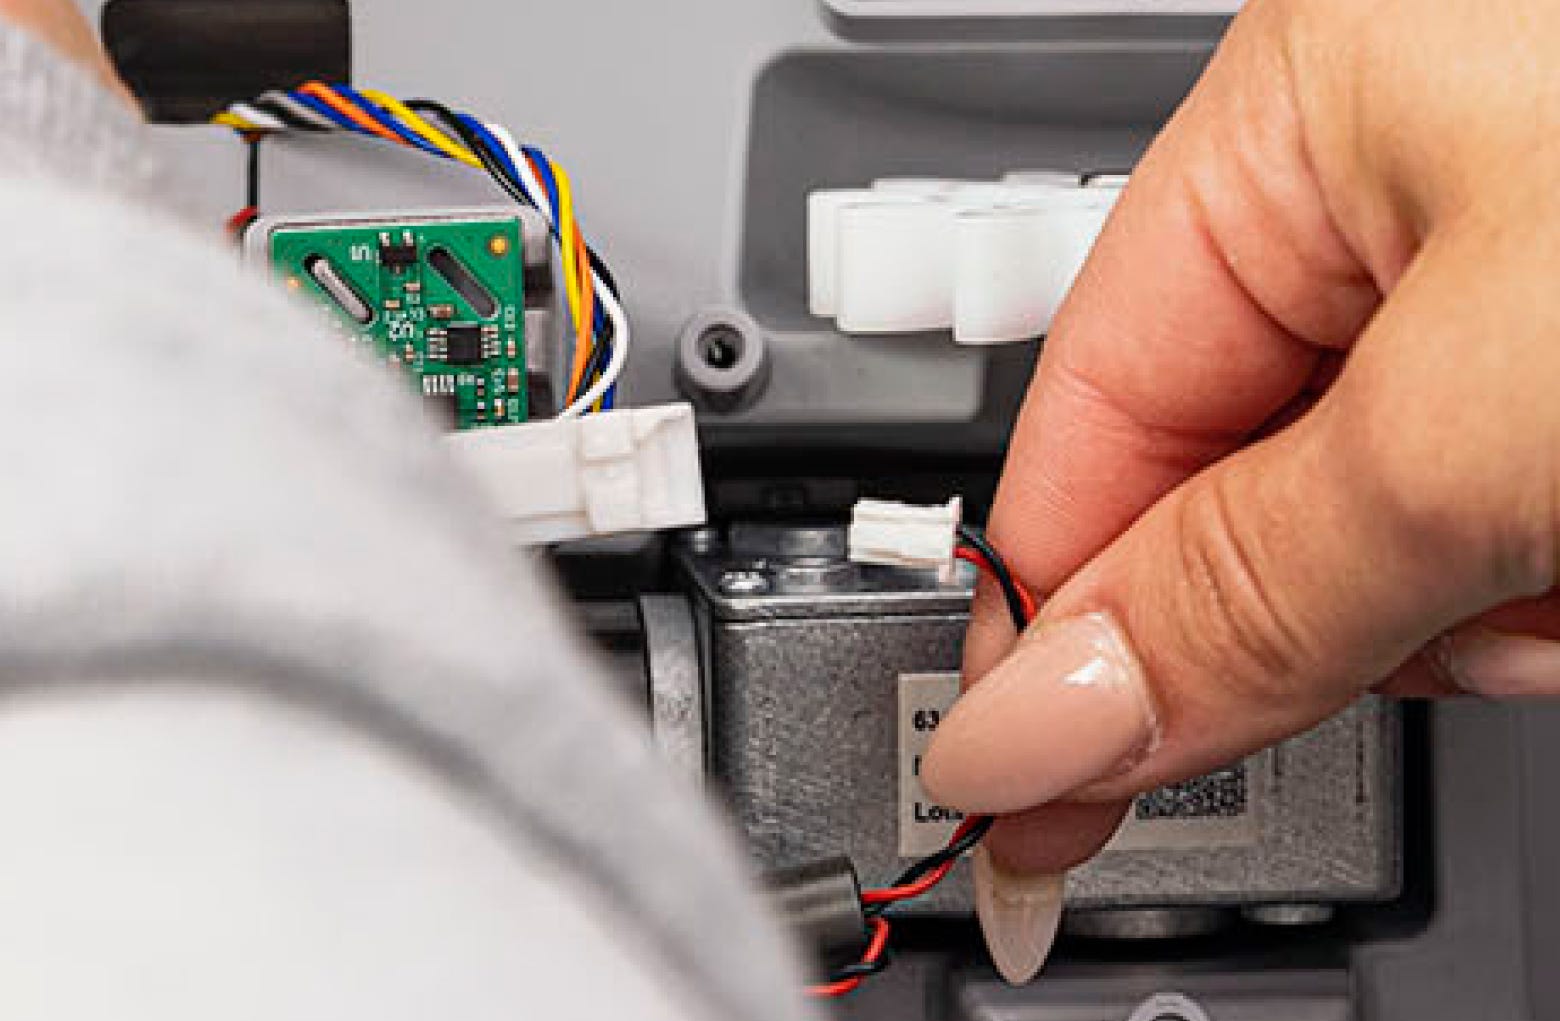
- Gently lift the motor out of the unit, being careful not to disturb the small green circuit board.
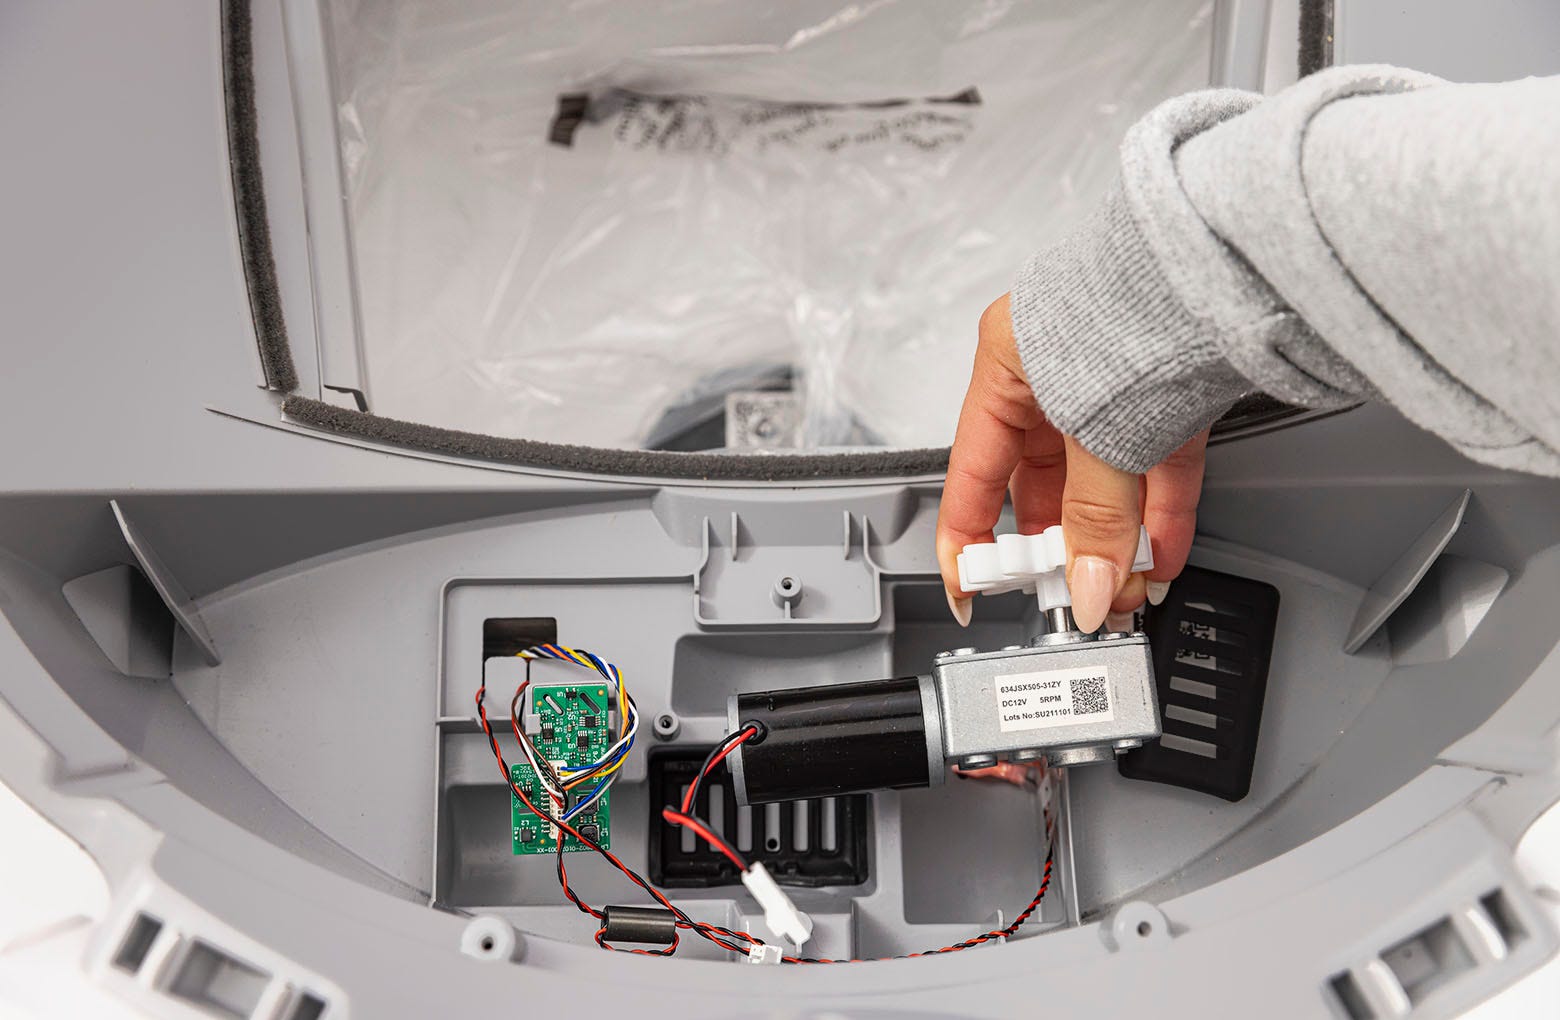
- Install the new motor: Gently lower the motor into position, checking to make sure the motor is seated inside the rubber bottom motor isolator.
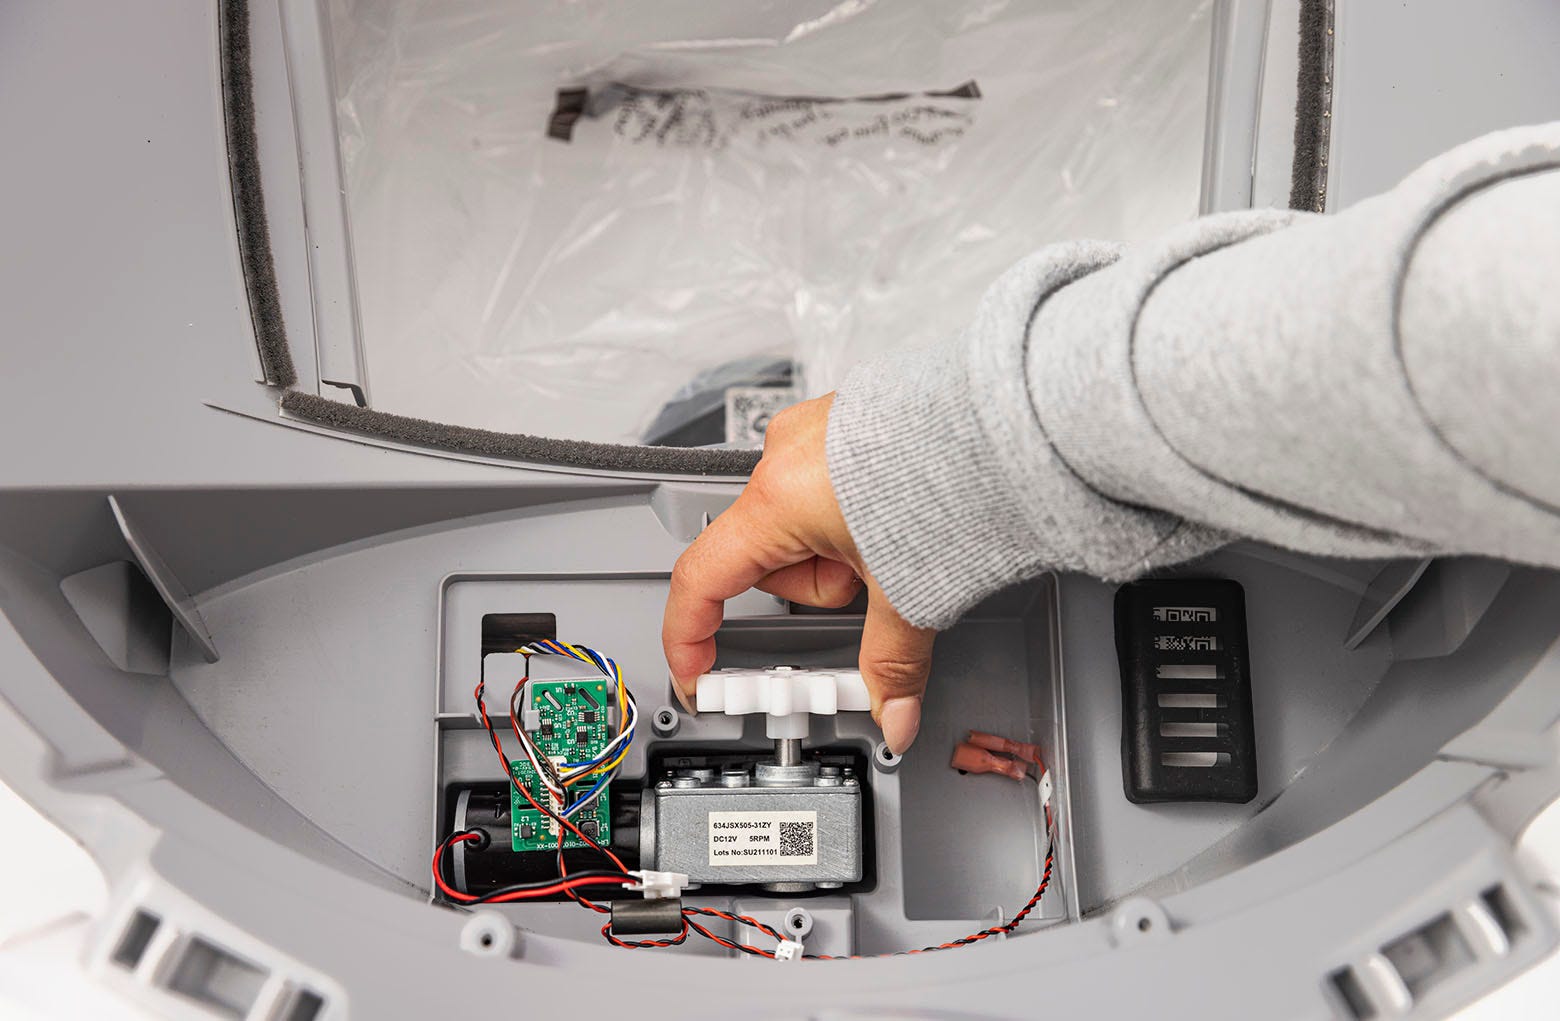
- Place the rubber upper motor isolator on top of the motor.
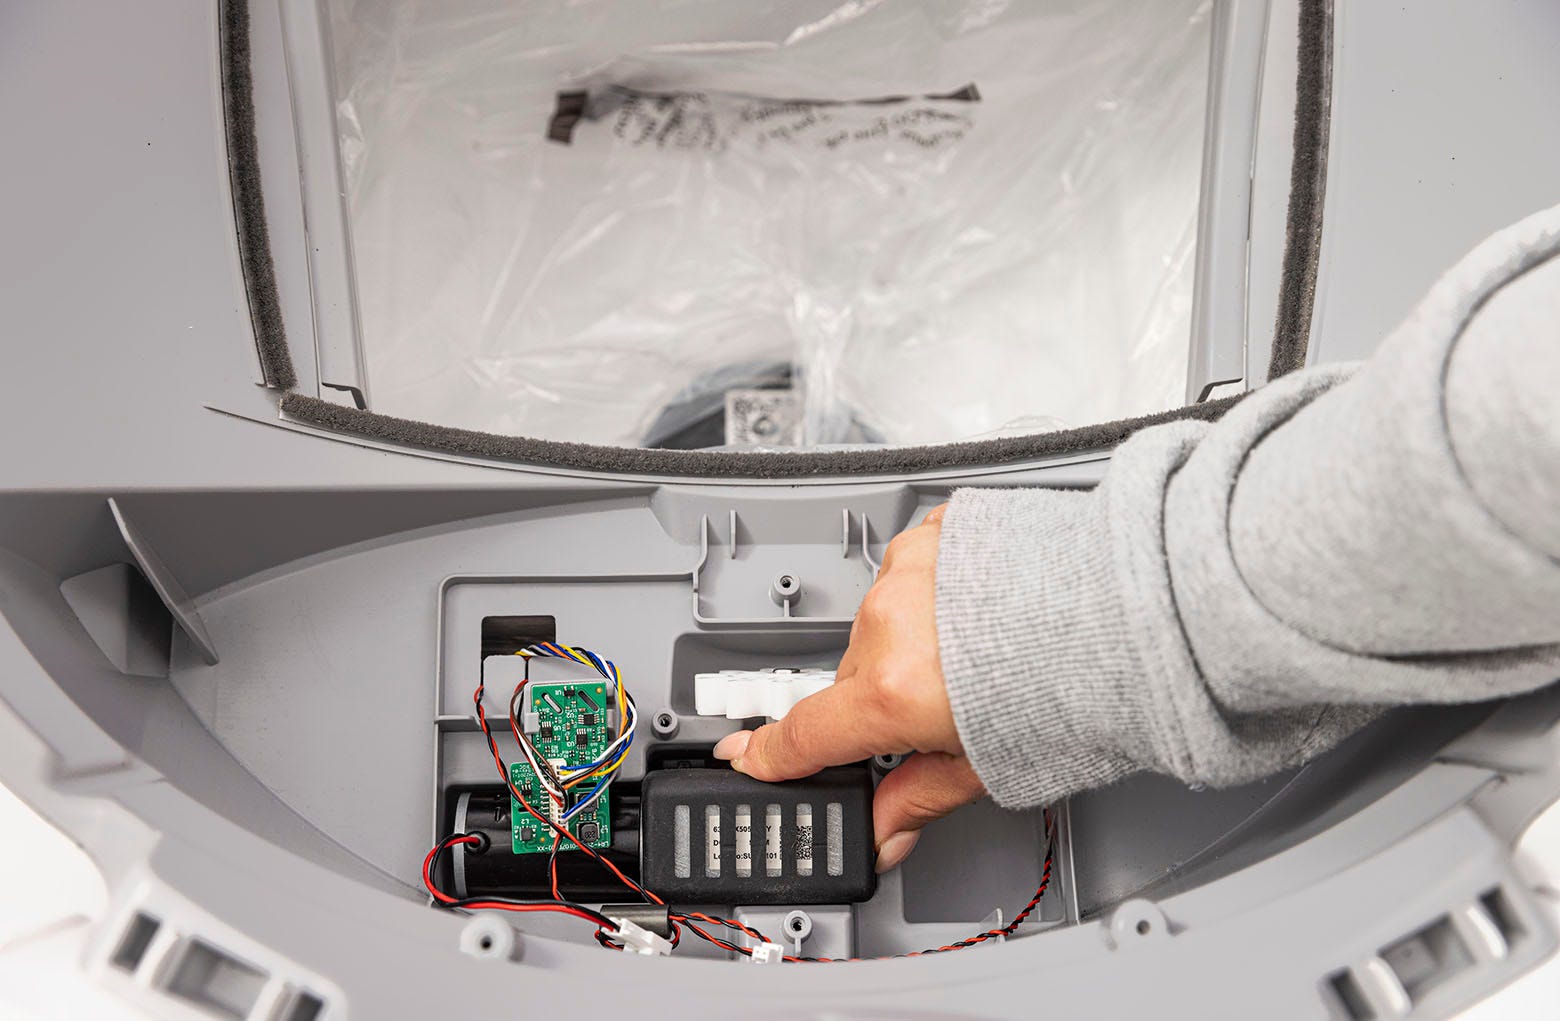
- Connect the motor wire connector to the wire harness.
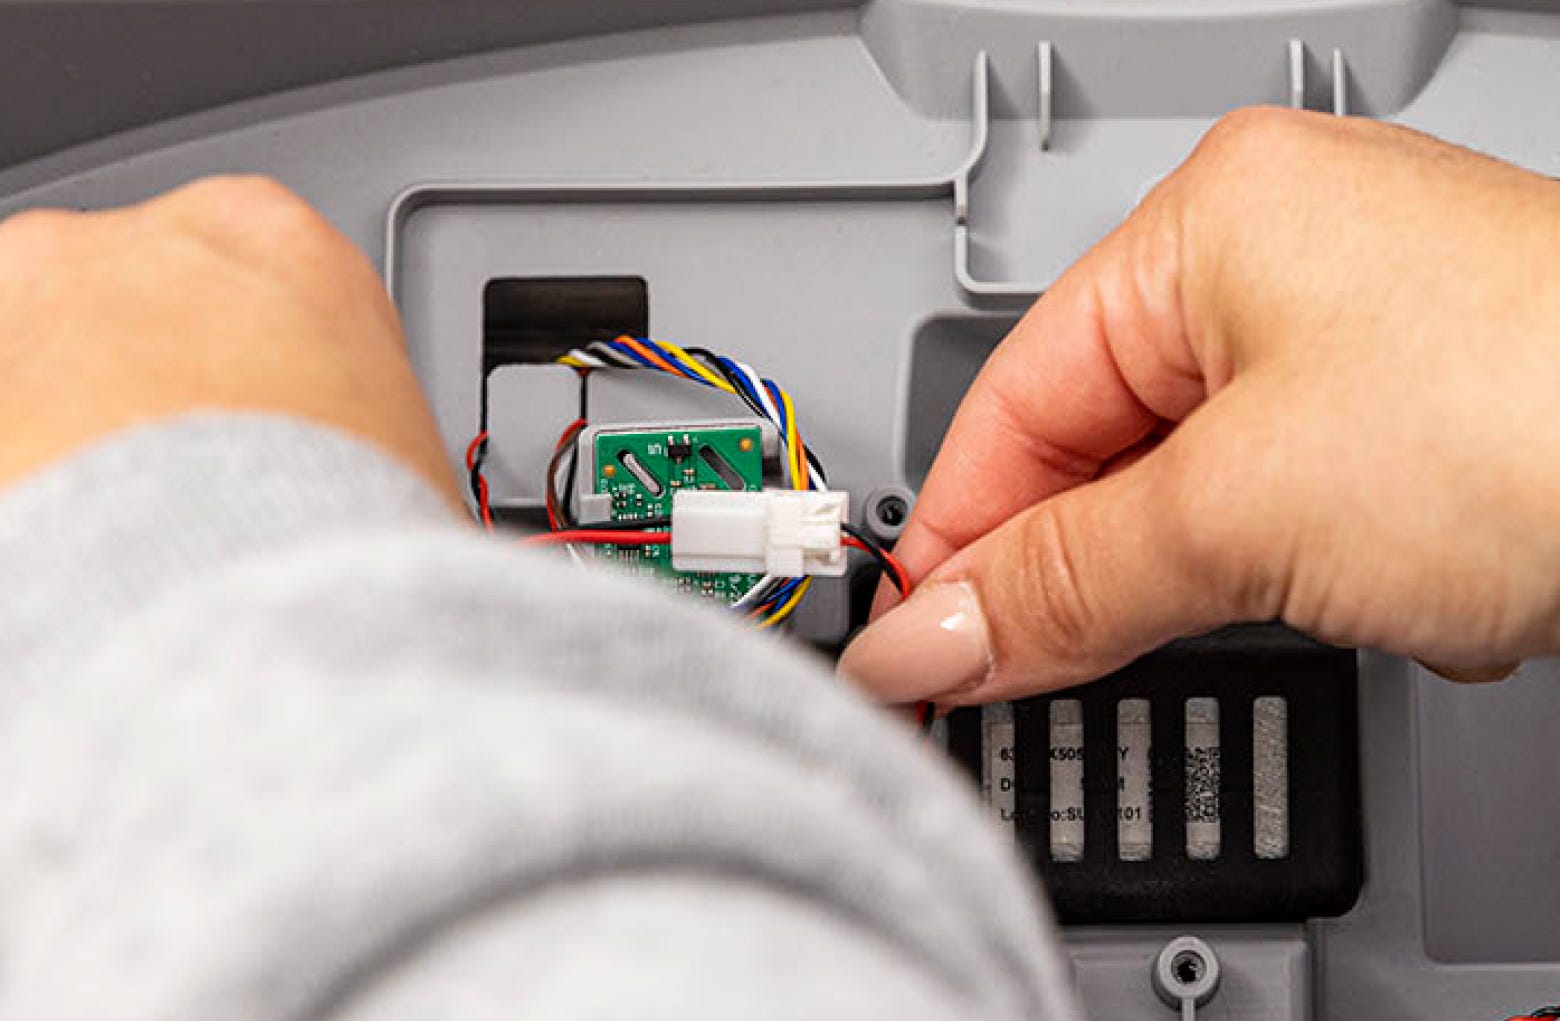
- Ensure the motor wire connector is out of the way and not preventing the cover from resting completely.
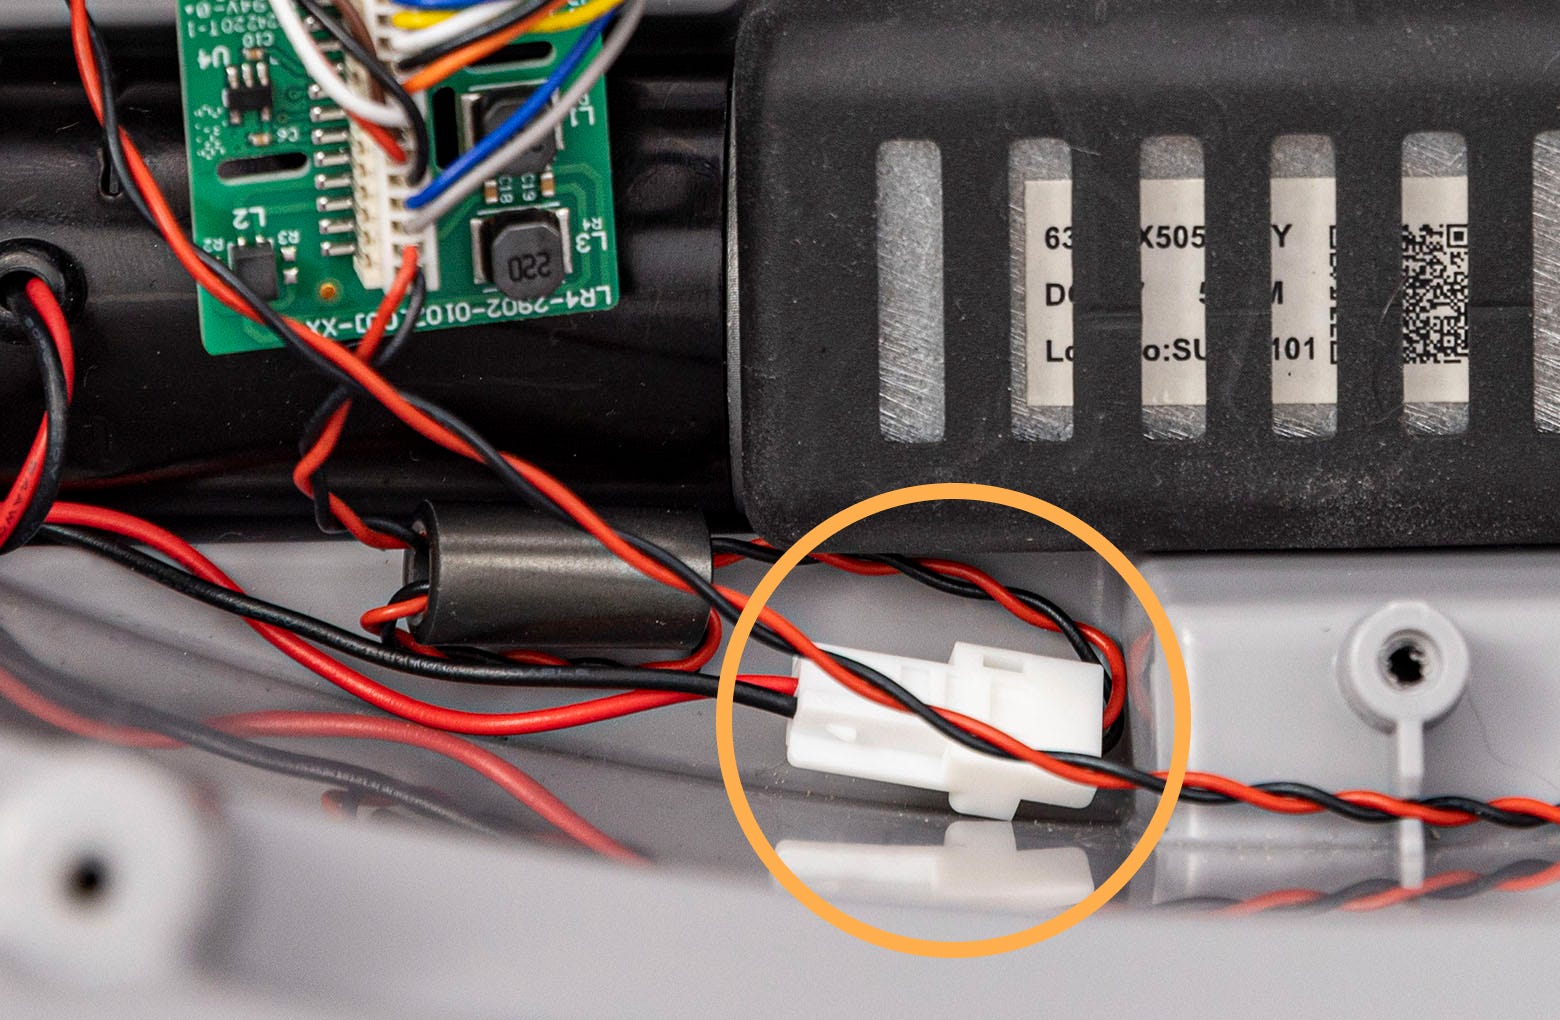
Note: Be mindful of where the wires are when replacing the motor cover; if the wires are over a screw boss, they could accidentally be cut.
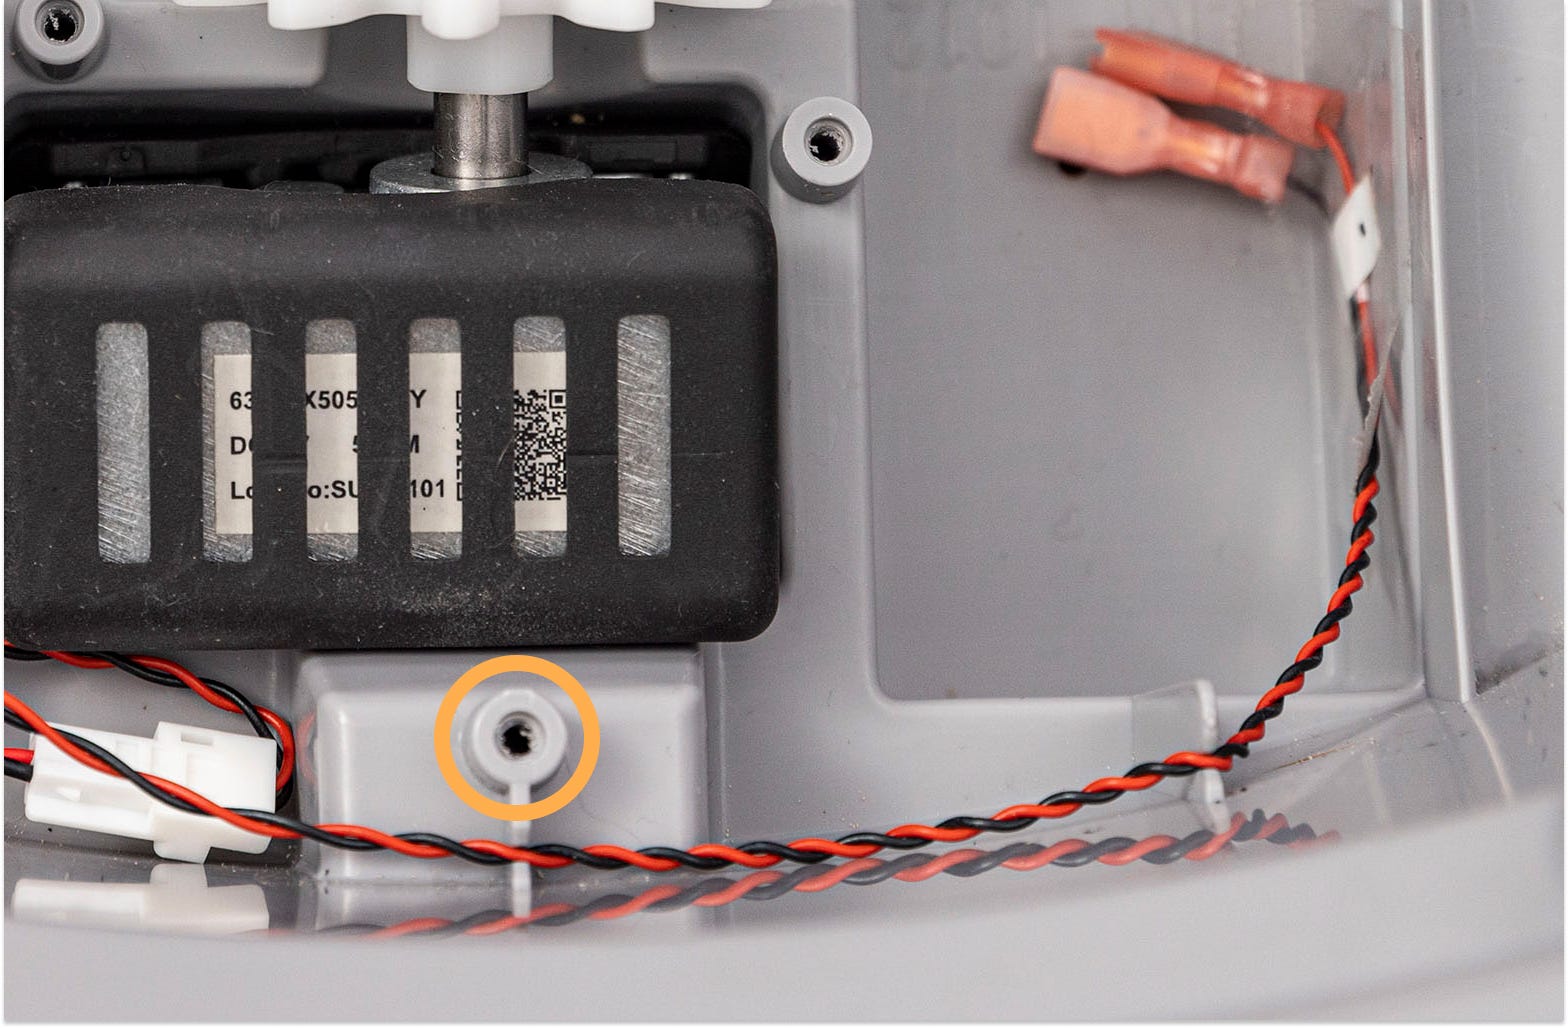
- Reinstall the motor cover using the four (4) Phillips screws – do not overtighten.

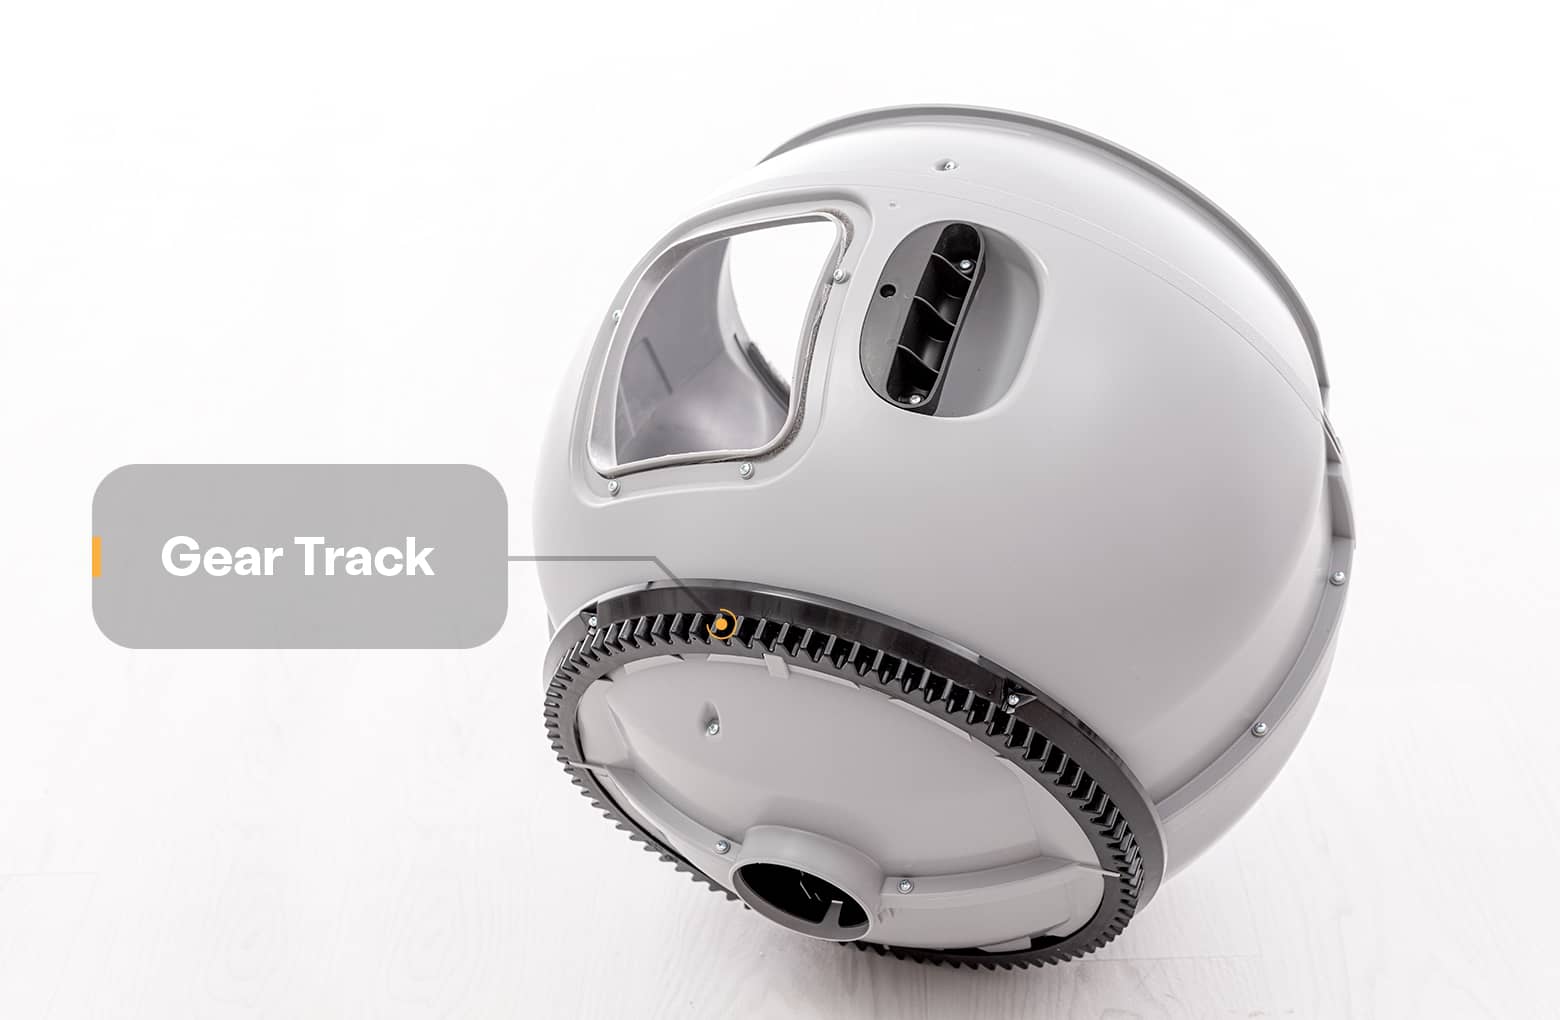
- Replace the globe: Hold the globe by the handle and slide it back into the base. Ensure the back of the globe is sitting flush in the rear bearing pocket. The large black gear on the rear of the globe will line up with the small white gear in the base.
- Replace the bonnet:
- Place the bonnet into the hinge behind the robot as shown.
- Rotate the bonnet downward over the globe and push down on the bonnet from the top to make sure it is latched and secure.
- Place the bonnet into the hinge behind the robot as shown.
- Plug the unit back in and power it on.
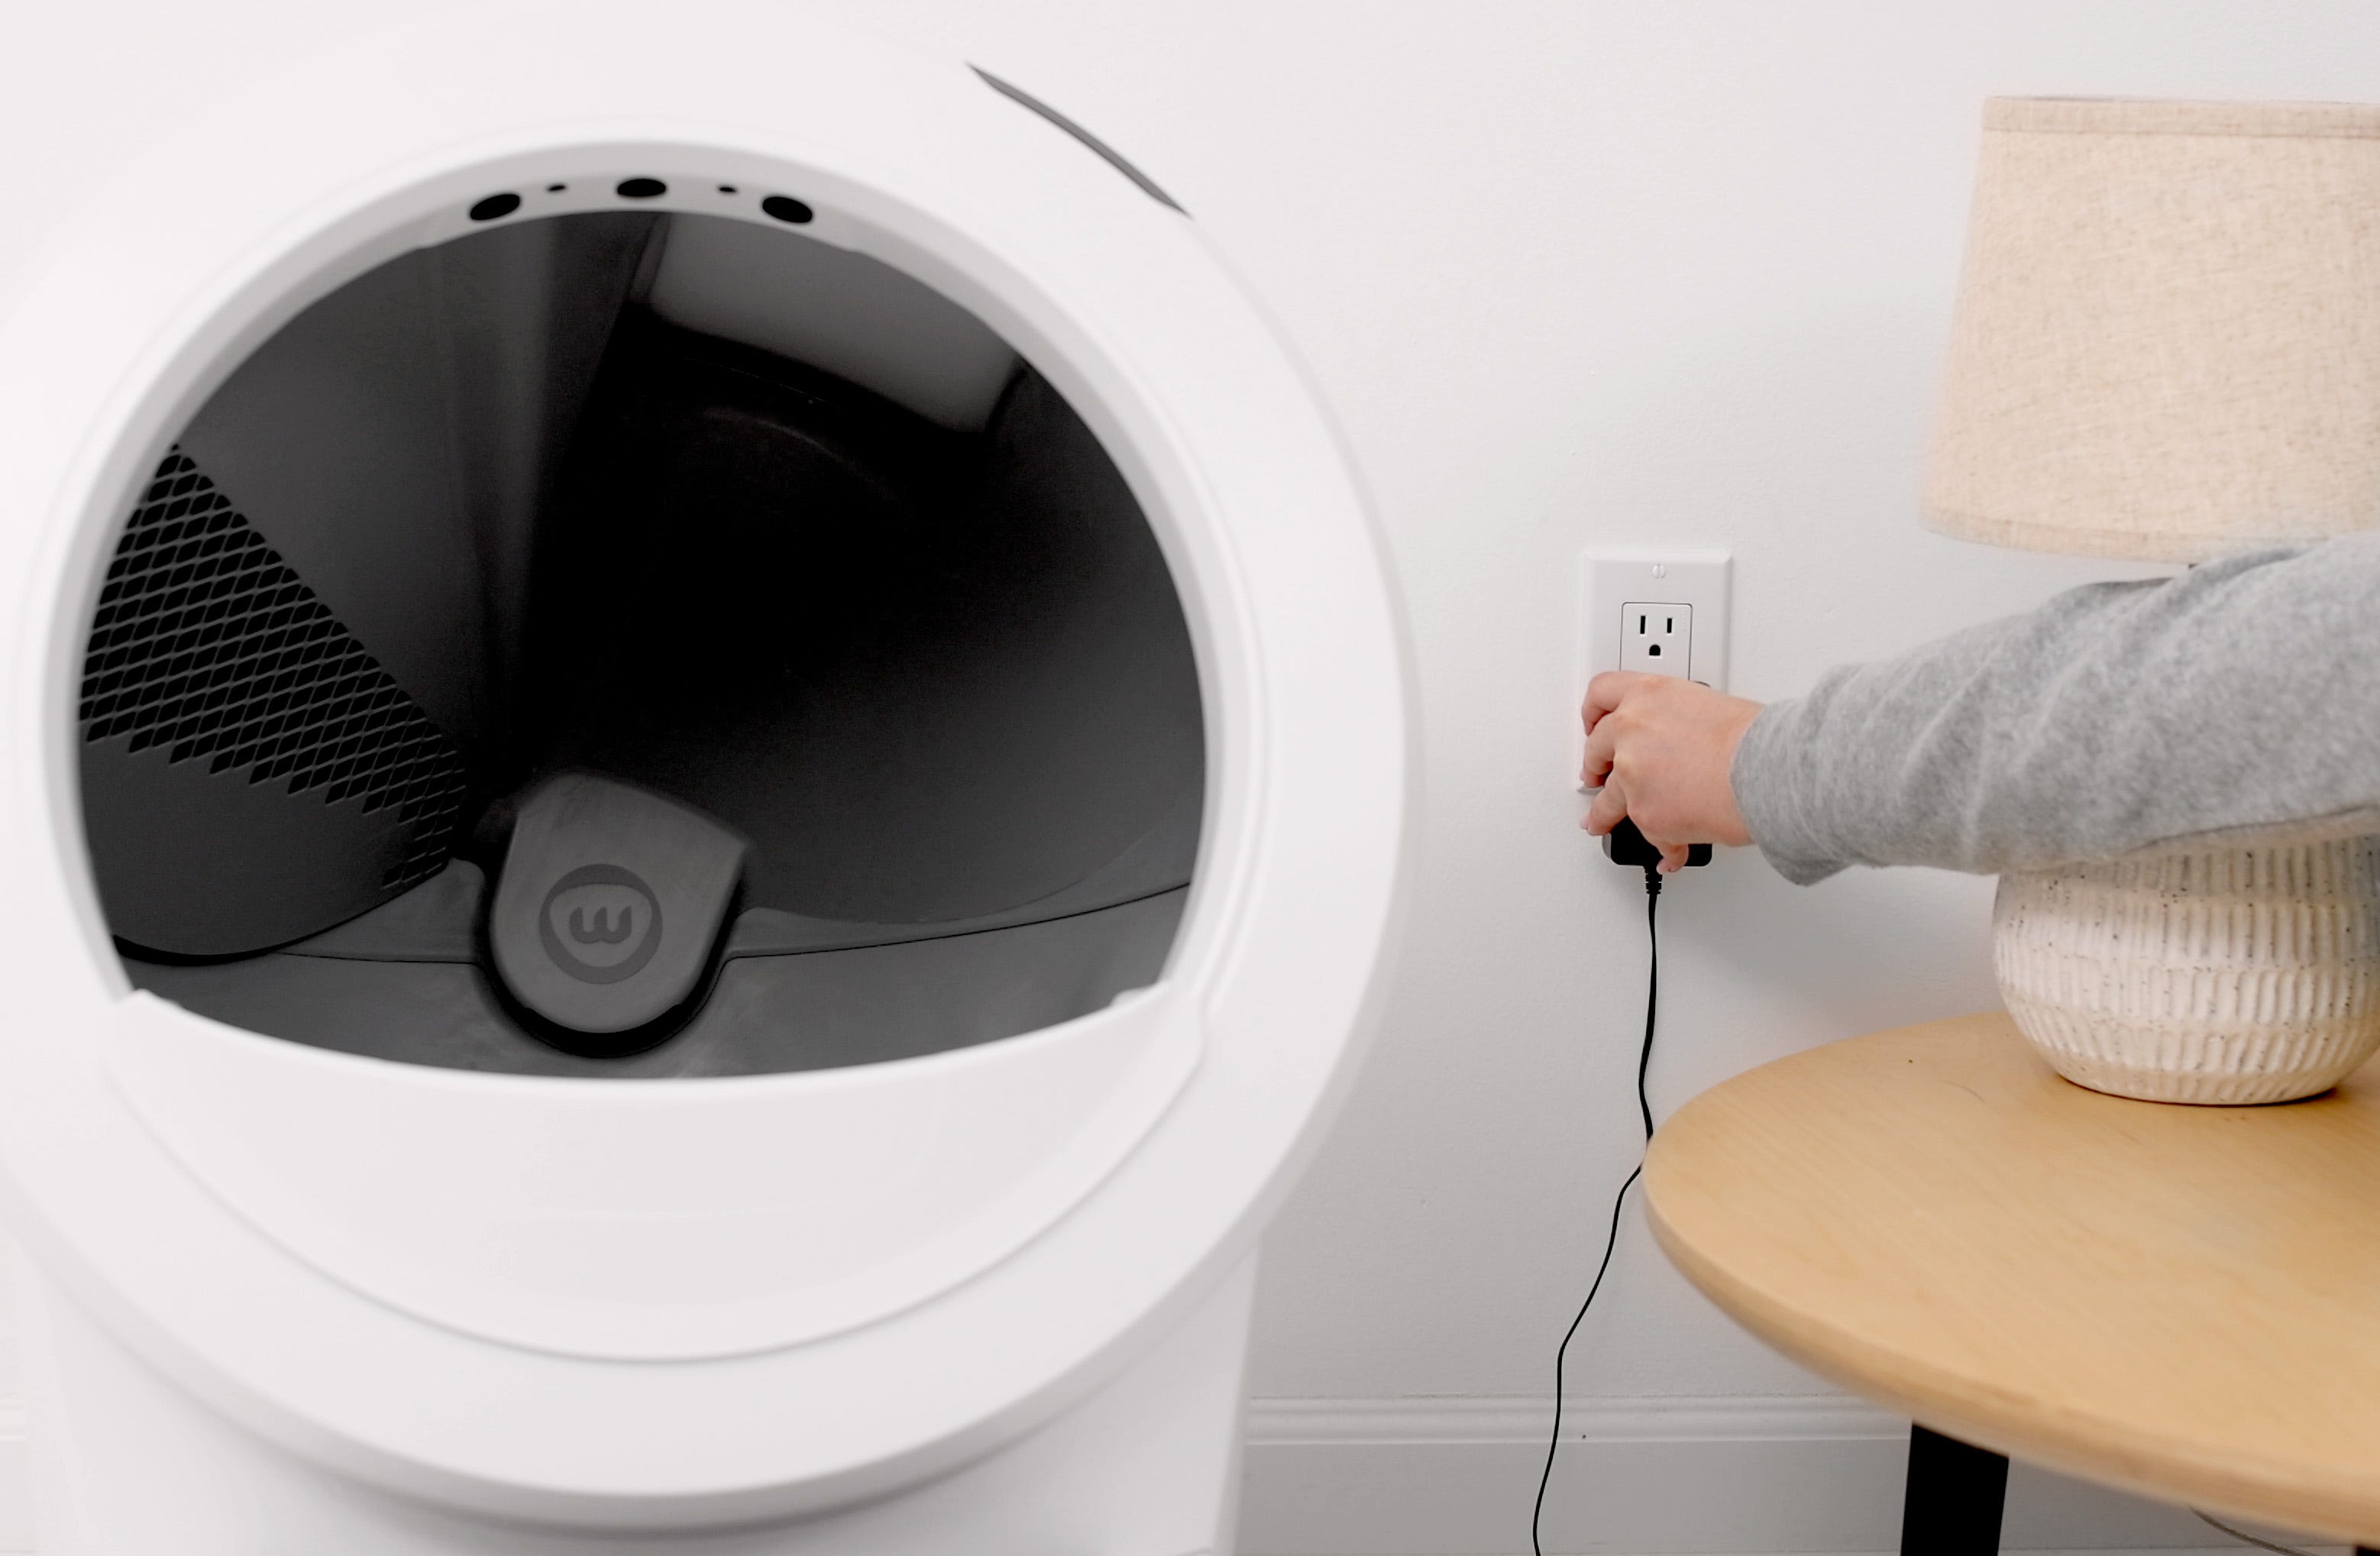
- Now, let's run a test cycle:
- Short press the Reset button,
- Then short press the Cycle button to run a clean cycle.
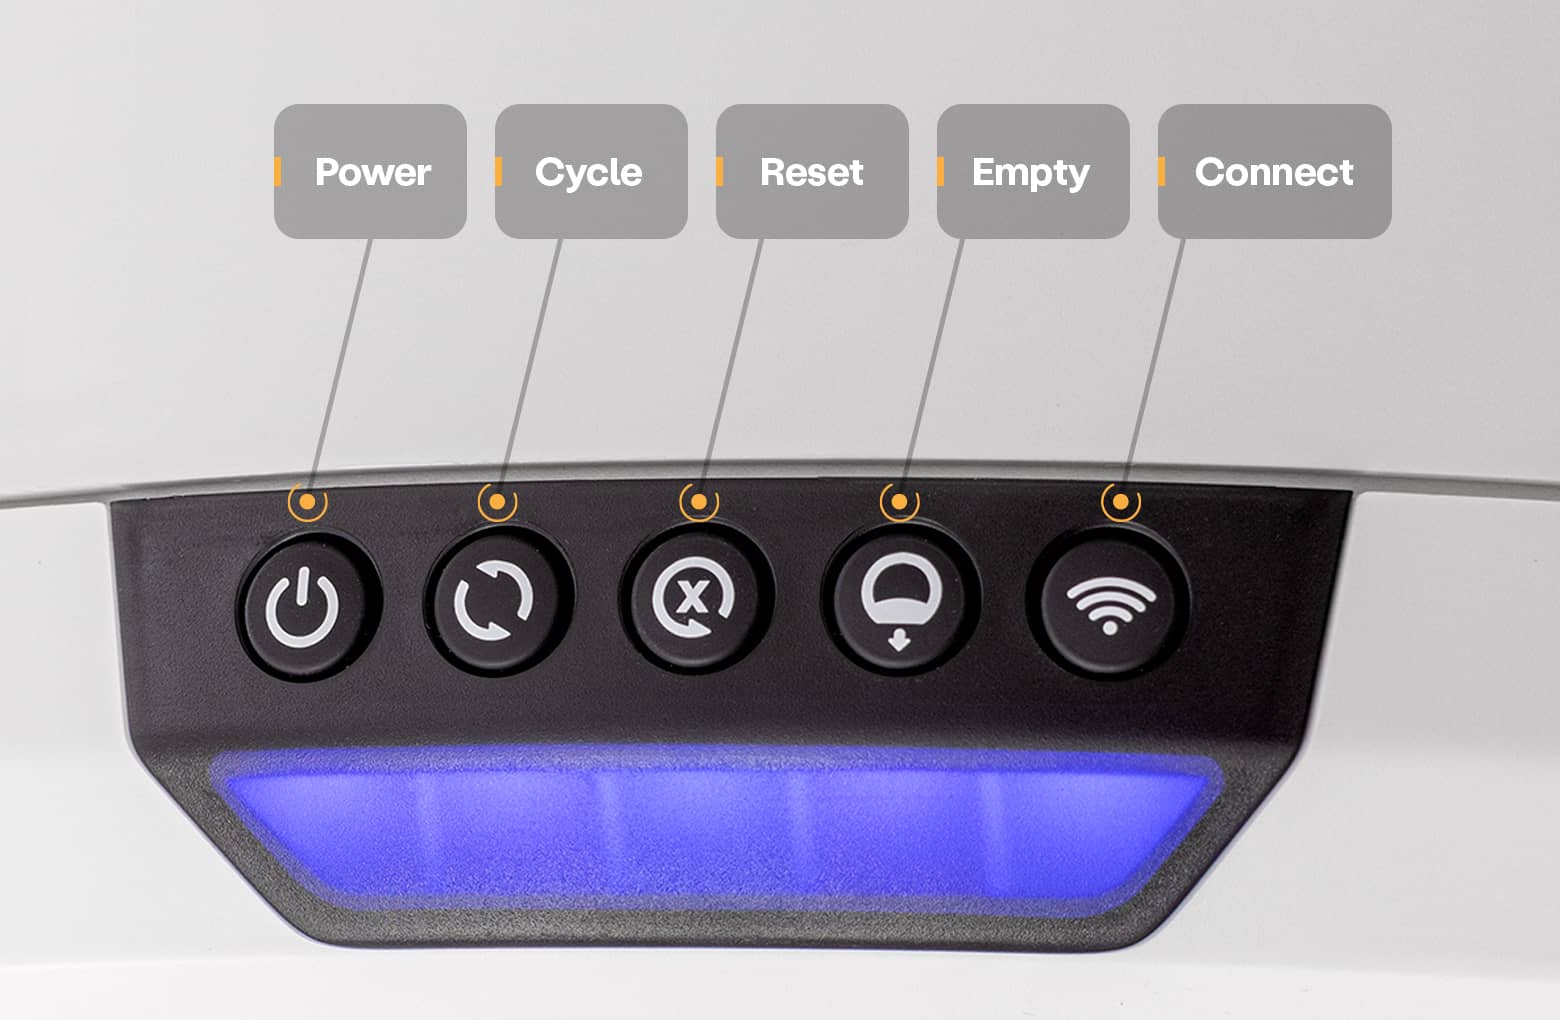
After the test cycle, Litter-Robot should be in the Home position displaying a blue light bar.
Questions? Visit whiskersupport.com
Didn't find what you're looking for?
Live support available Mon-Fri: 2PM-2AM GMT and Sat-Sun: 2PM-10PM GMT, or submit a ticket anytime.