The store will not work correctly in the case when cookies are disabled.

Litter-Robot 4: Globe installation guide
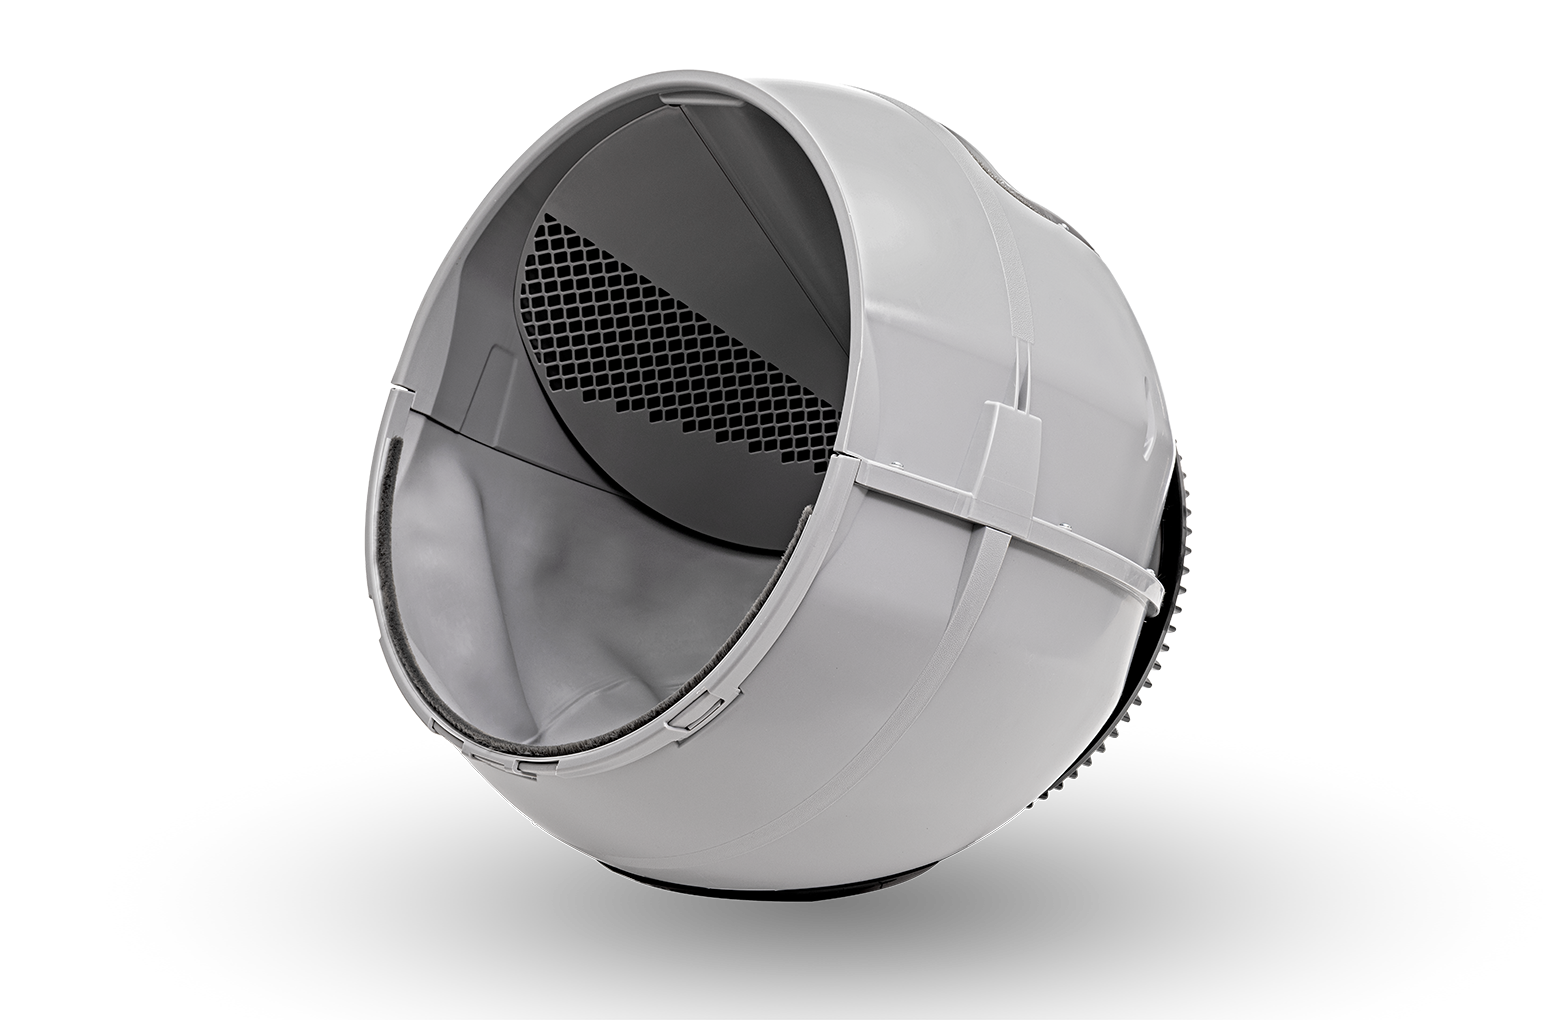
Replacing the Litter-Robot 4 Globe is easy. Follow these steps to remove the old globe and quickly install a new one.
- Make sure the unit is in the Home/Ready position. Press the Power button to turn the unit off, then unplug the unit.

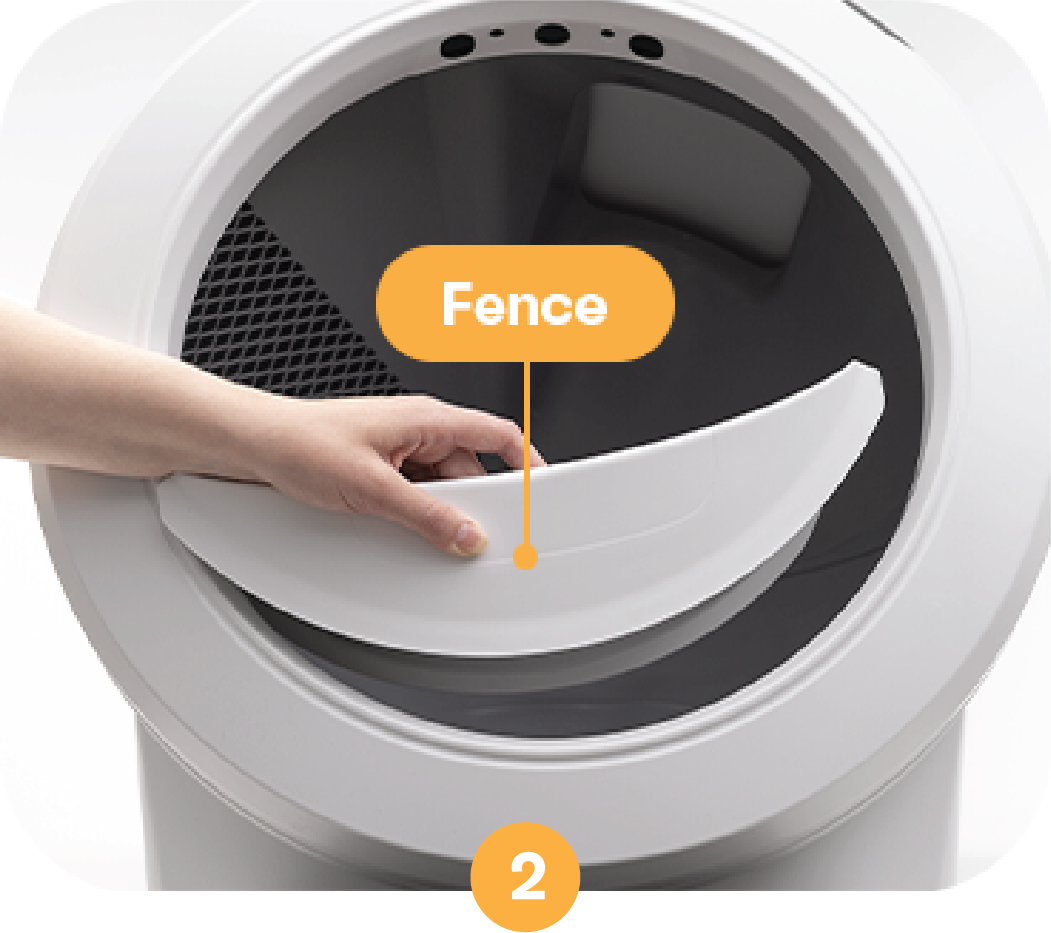
- Remove the fence from the bezel at the globe entrance (if installed).
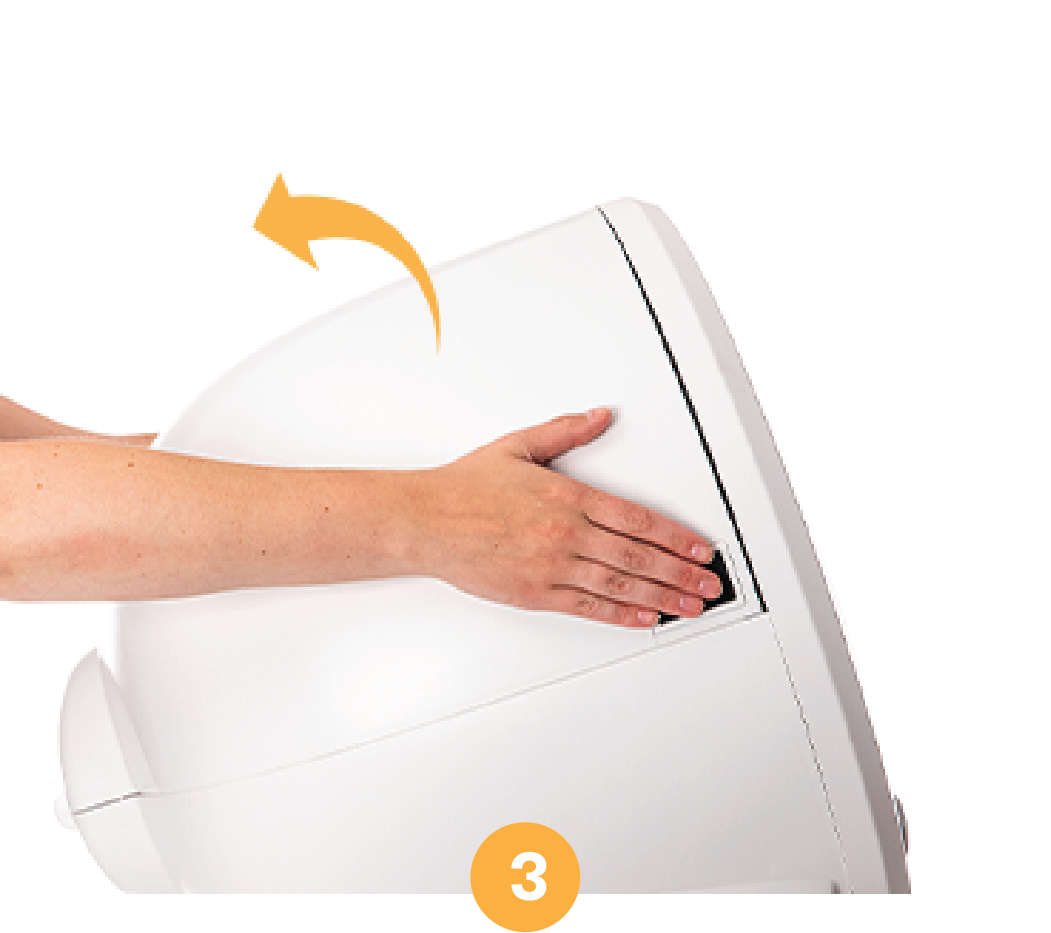
- Open the bonnet: Press and hold the latches on both sides of the bonnet, then lift and rotate the bonnet to its open position.
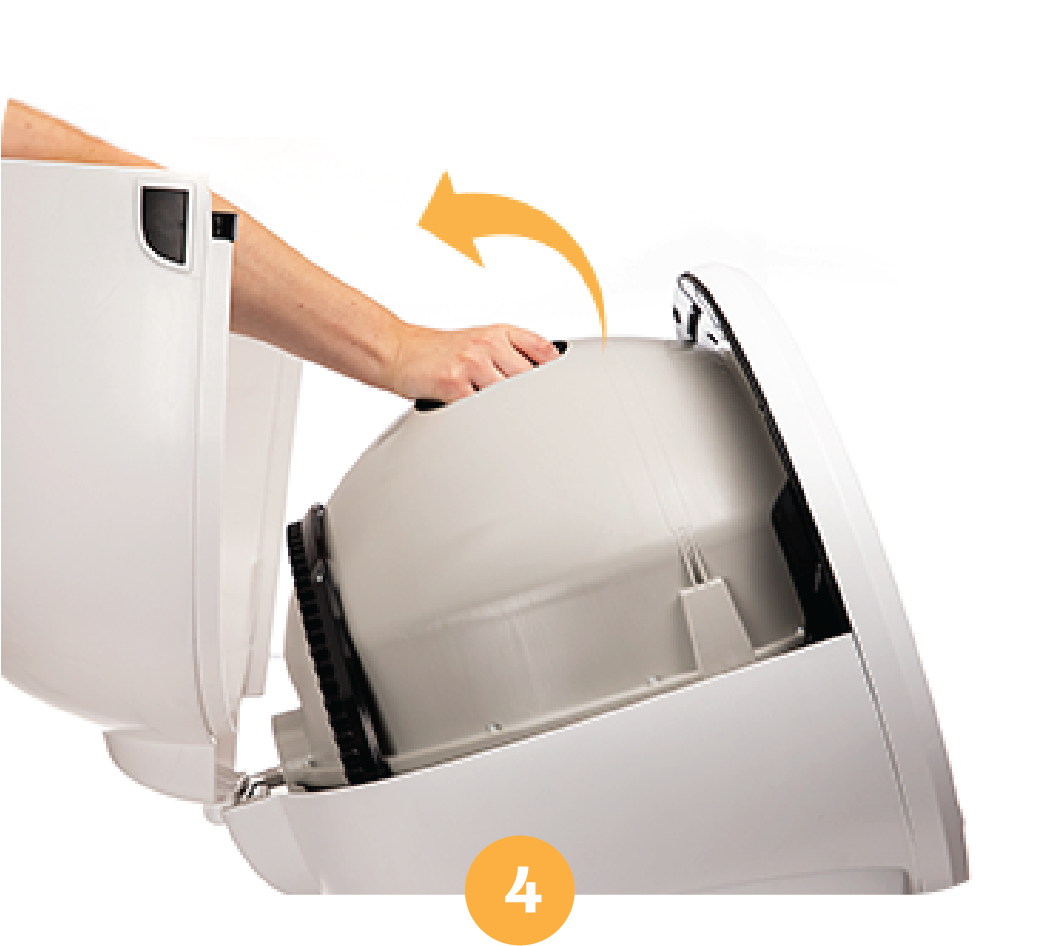
- Remove the old globe: Grab the black handle located on top of the globe, lift the globe off the base, and set aside.
- Install the new globe: Hold the globe by the black handle and set it onto the base. When replacing the globe, try to place the two liner “fingers” in the center of the bezel (as seen from above) in order to be close to the Home/Ready position.
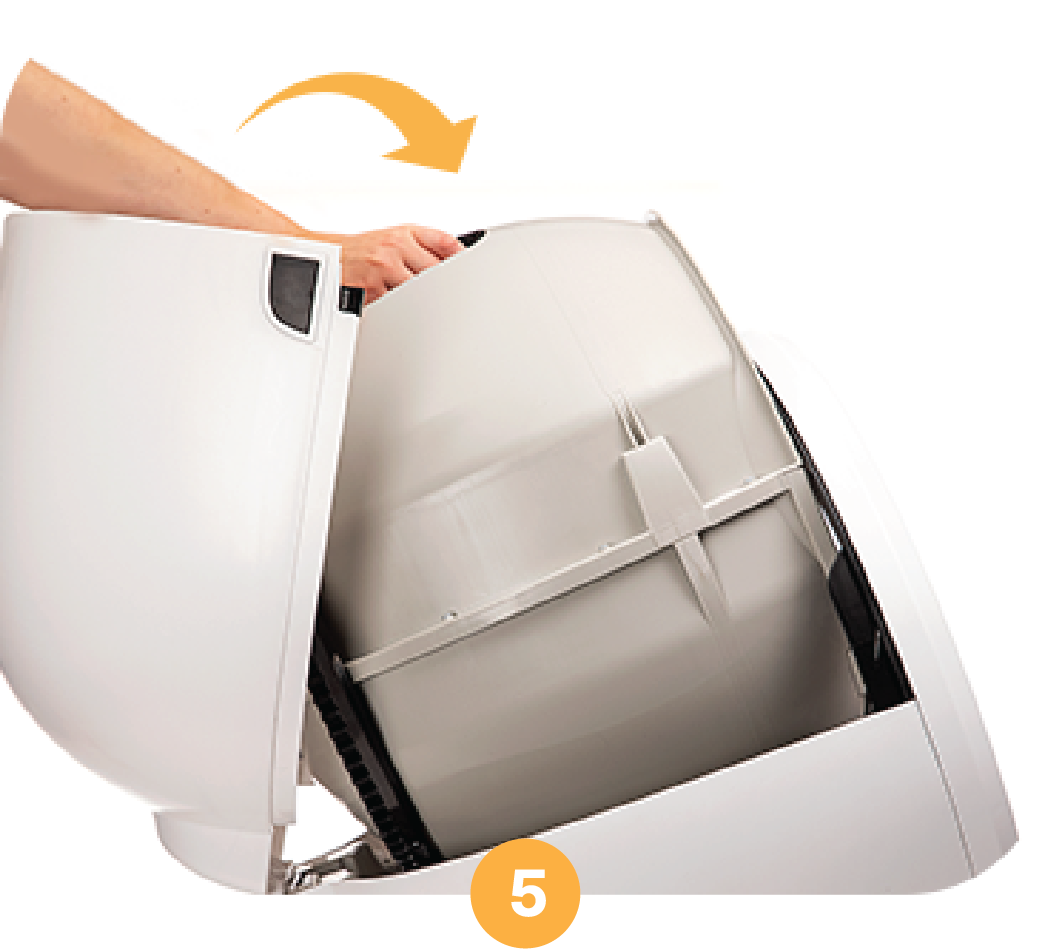
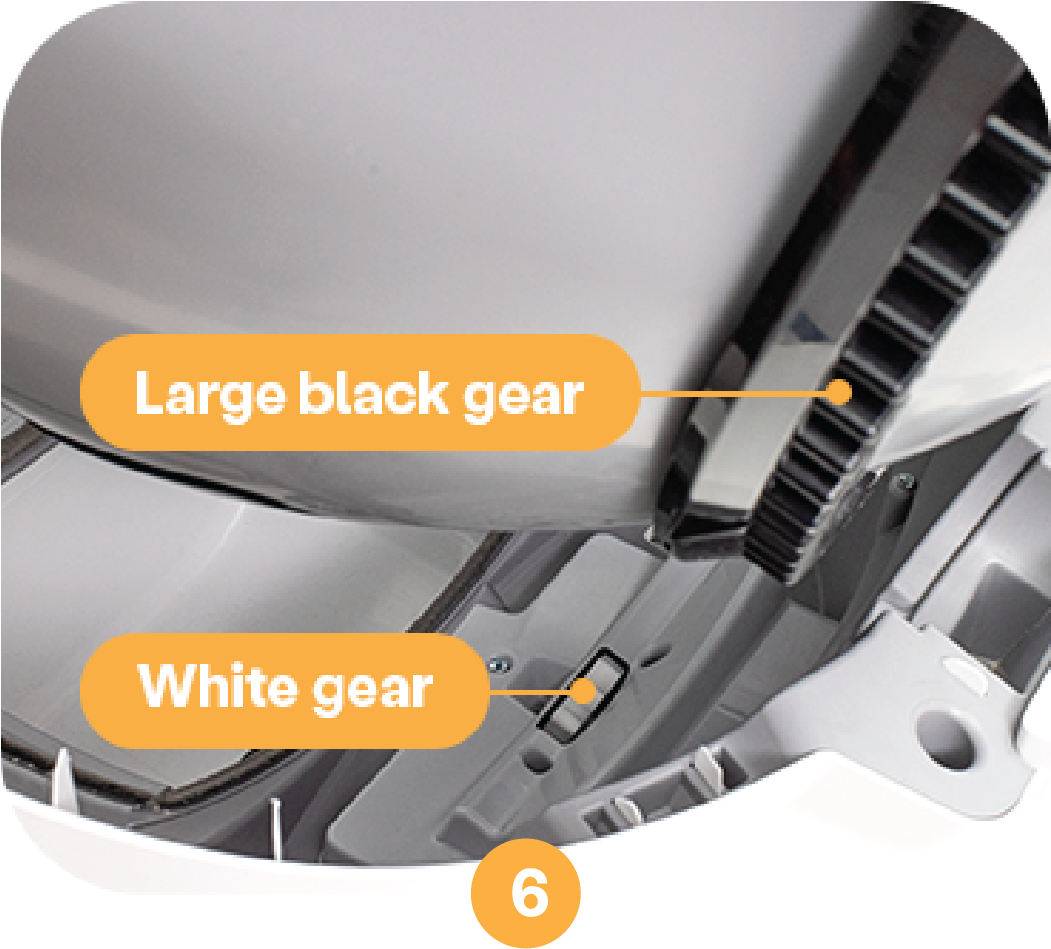
- Ensure the back of the globe is sitting flush in the rear bearing pocket: The large black gear on the rear of the globe will line up with the small white gear in the base.
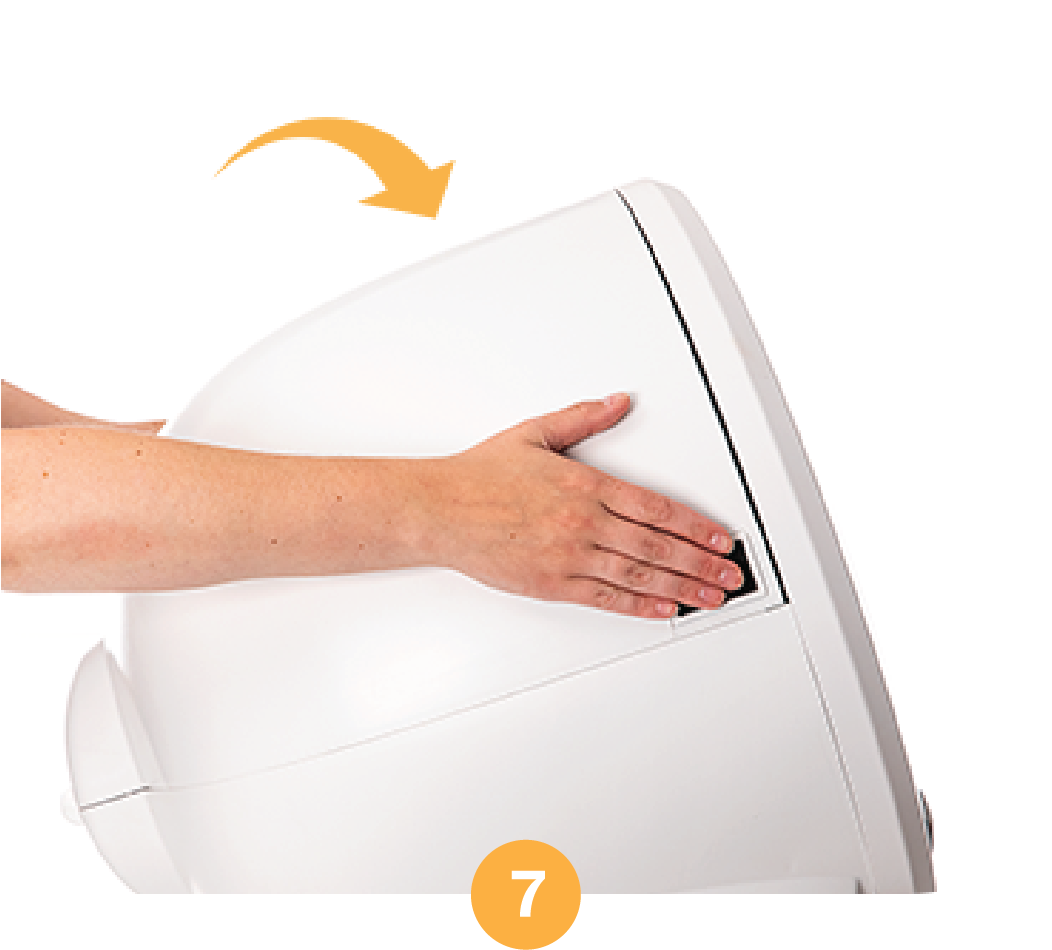
- Close the bonnet: Rotate the bonnet downward over the globe and push down on the bonnet from the top to make sure it is latched and secure. (Note: If you removed the bonnet completely, be sure to latch the center tab on the bonnet into the catch clip on the unit frame behind the bezel before closing the bonnet.)
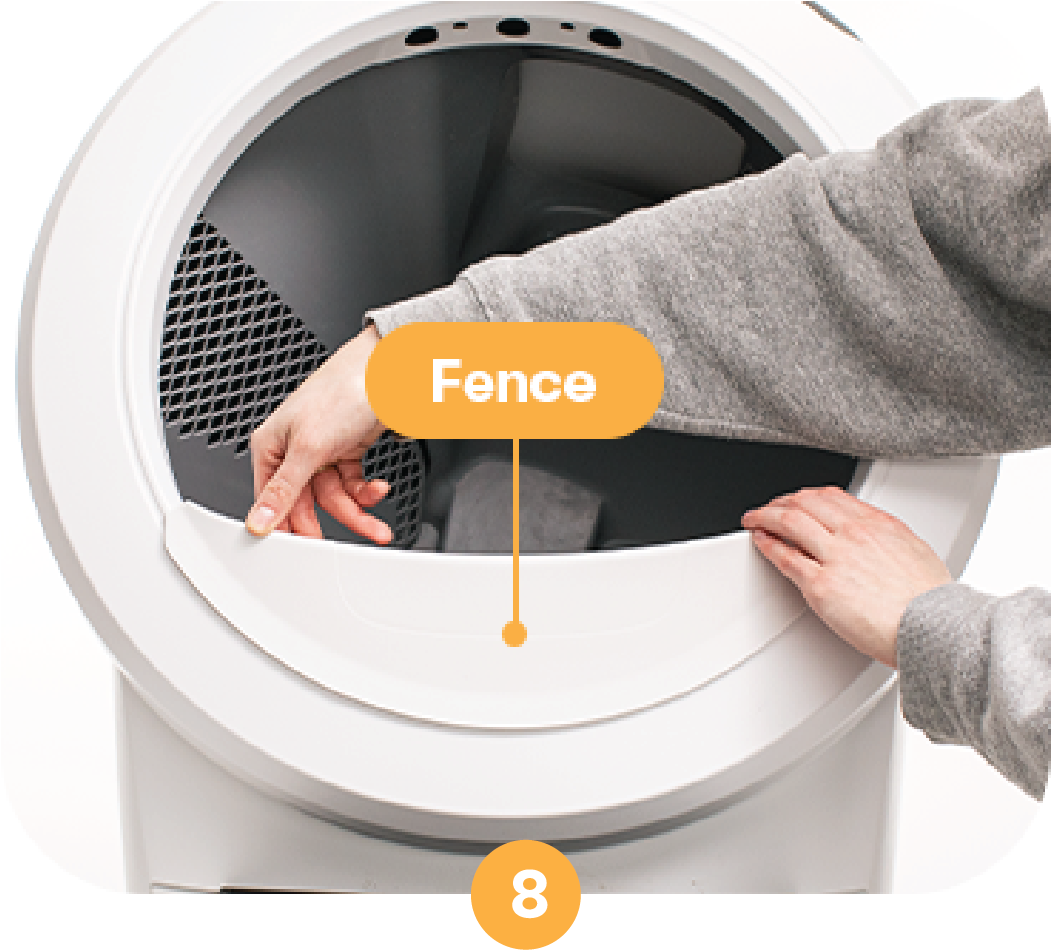
- Re-install the fence by snapping it onto the bezel at the globe entrance.
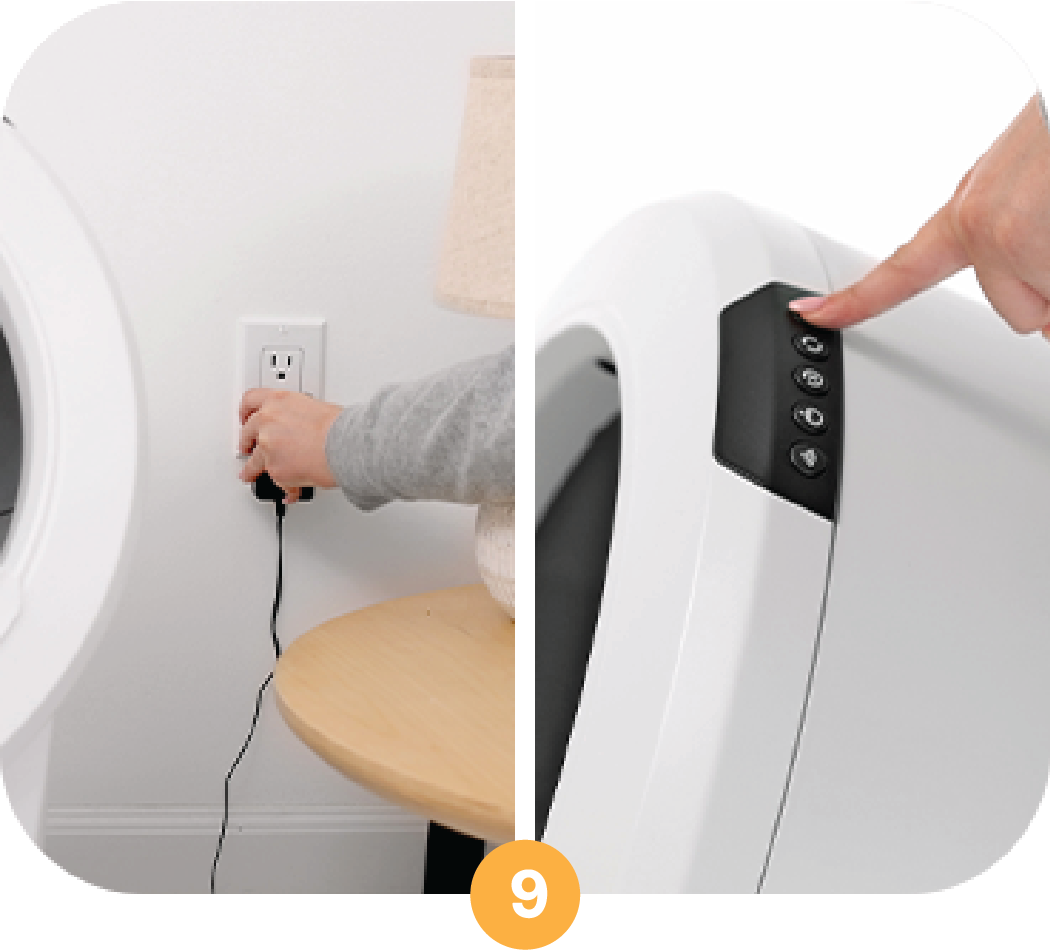
- Plug the unit in and power it on.
Didn't find what you're looking for?
Live support available Mon-Fri: 9AM-9PM EST and Sat-Sun: 9AM-5PM EST, or submit a ticket anytime.