The store will not work correctly in the case when cookies are disabled.
Litter-Robot 4: Laser sensor cleaning instructions
Litter-Robot 4 is equipped with OmniSense™ detection that utilizes laser and weight sensor technology to provide real-time litter and waste drawer levels. OmniSense™ also supports the SafeCat system, which continuously analyzes four safety zones to ensure your cat is always safe.
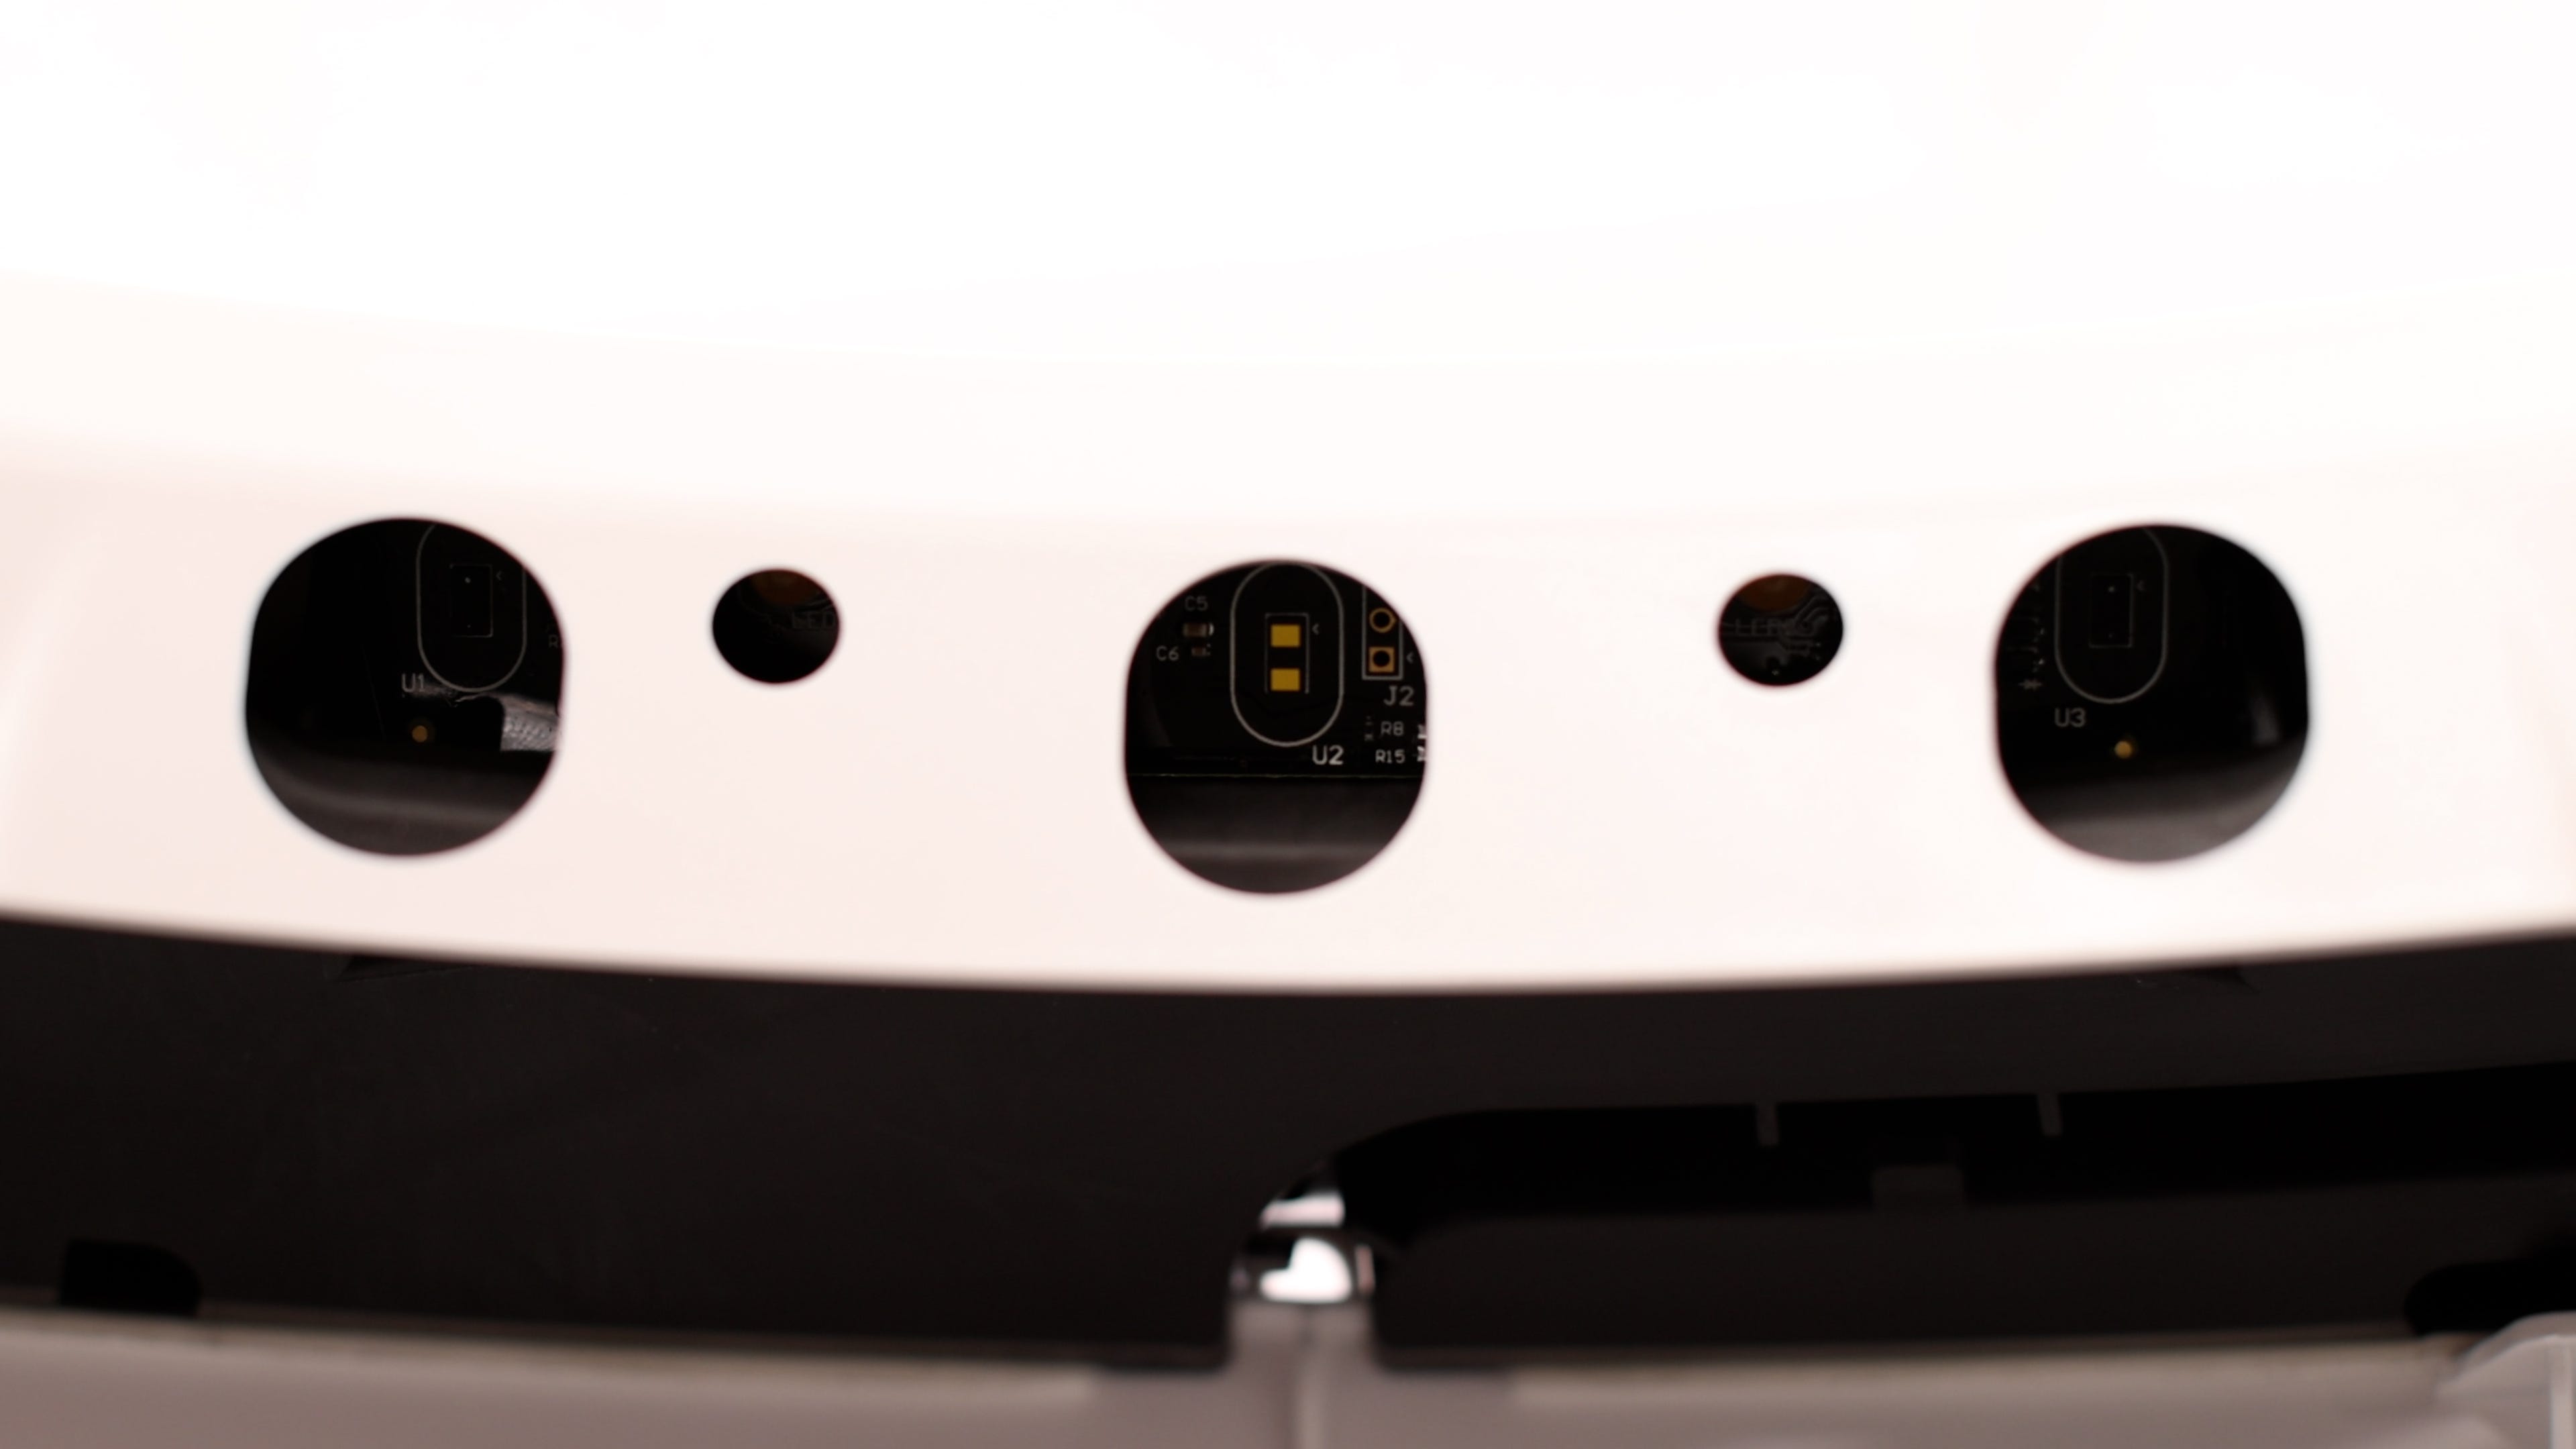
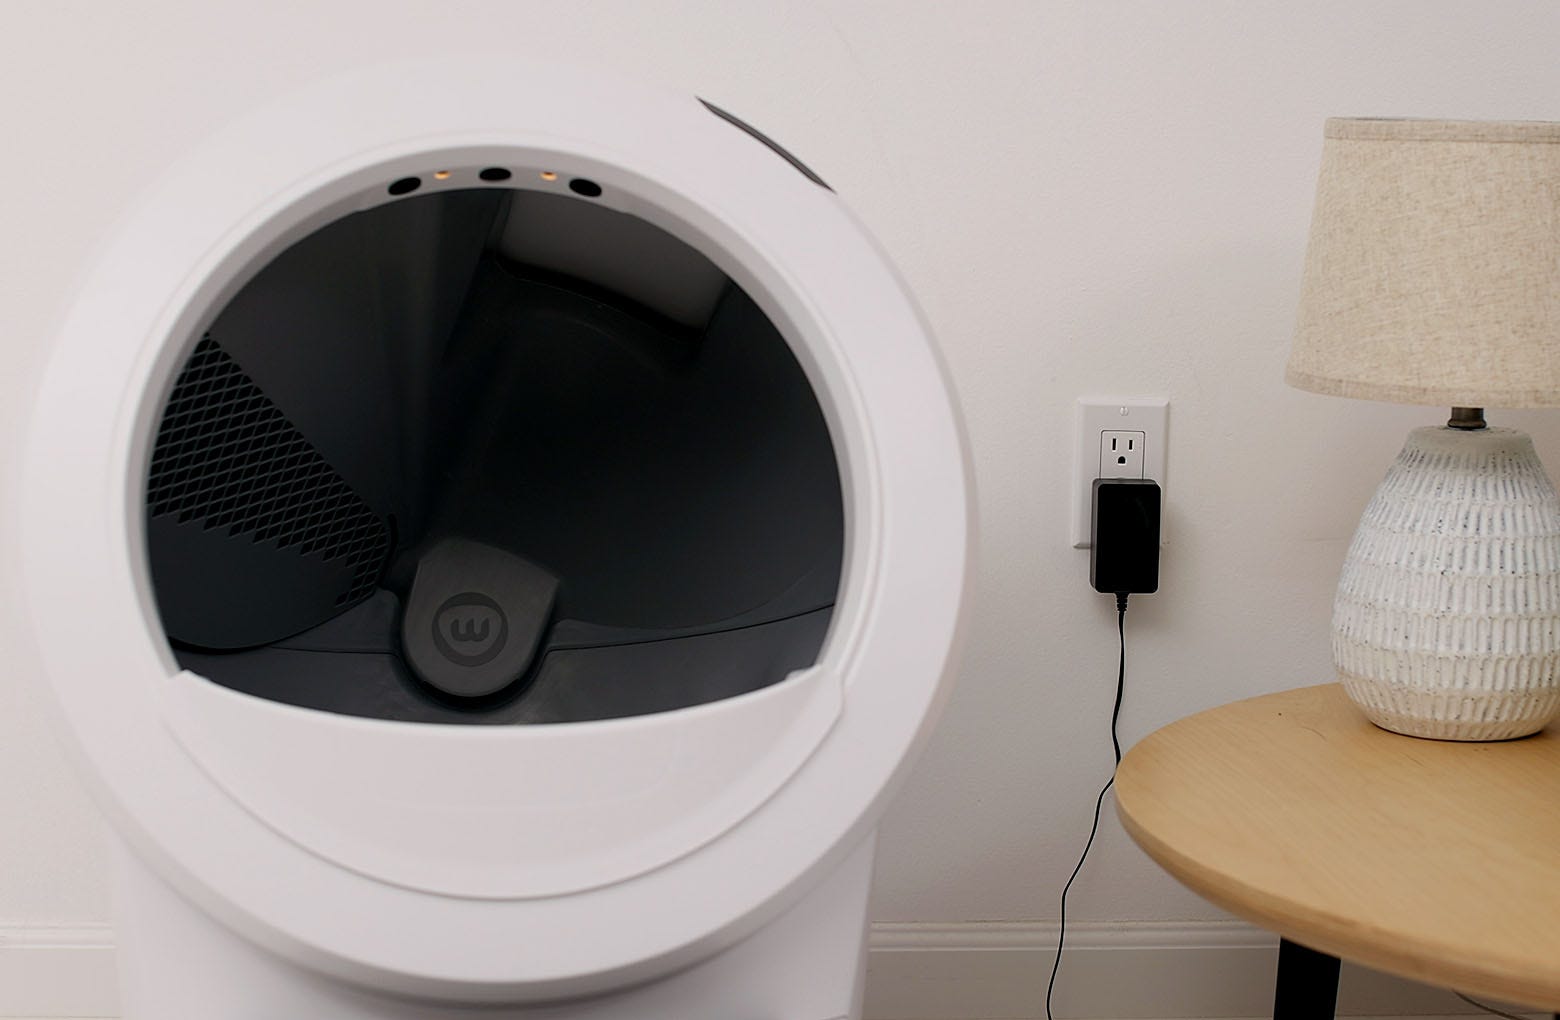
There are three sensors located in the top of the bezel, as well as a cat sensor weight scale located in the base of the unit. These sensors detect when a cat has entered or exited the unit.
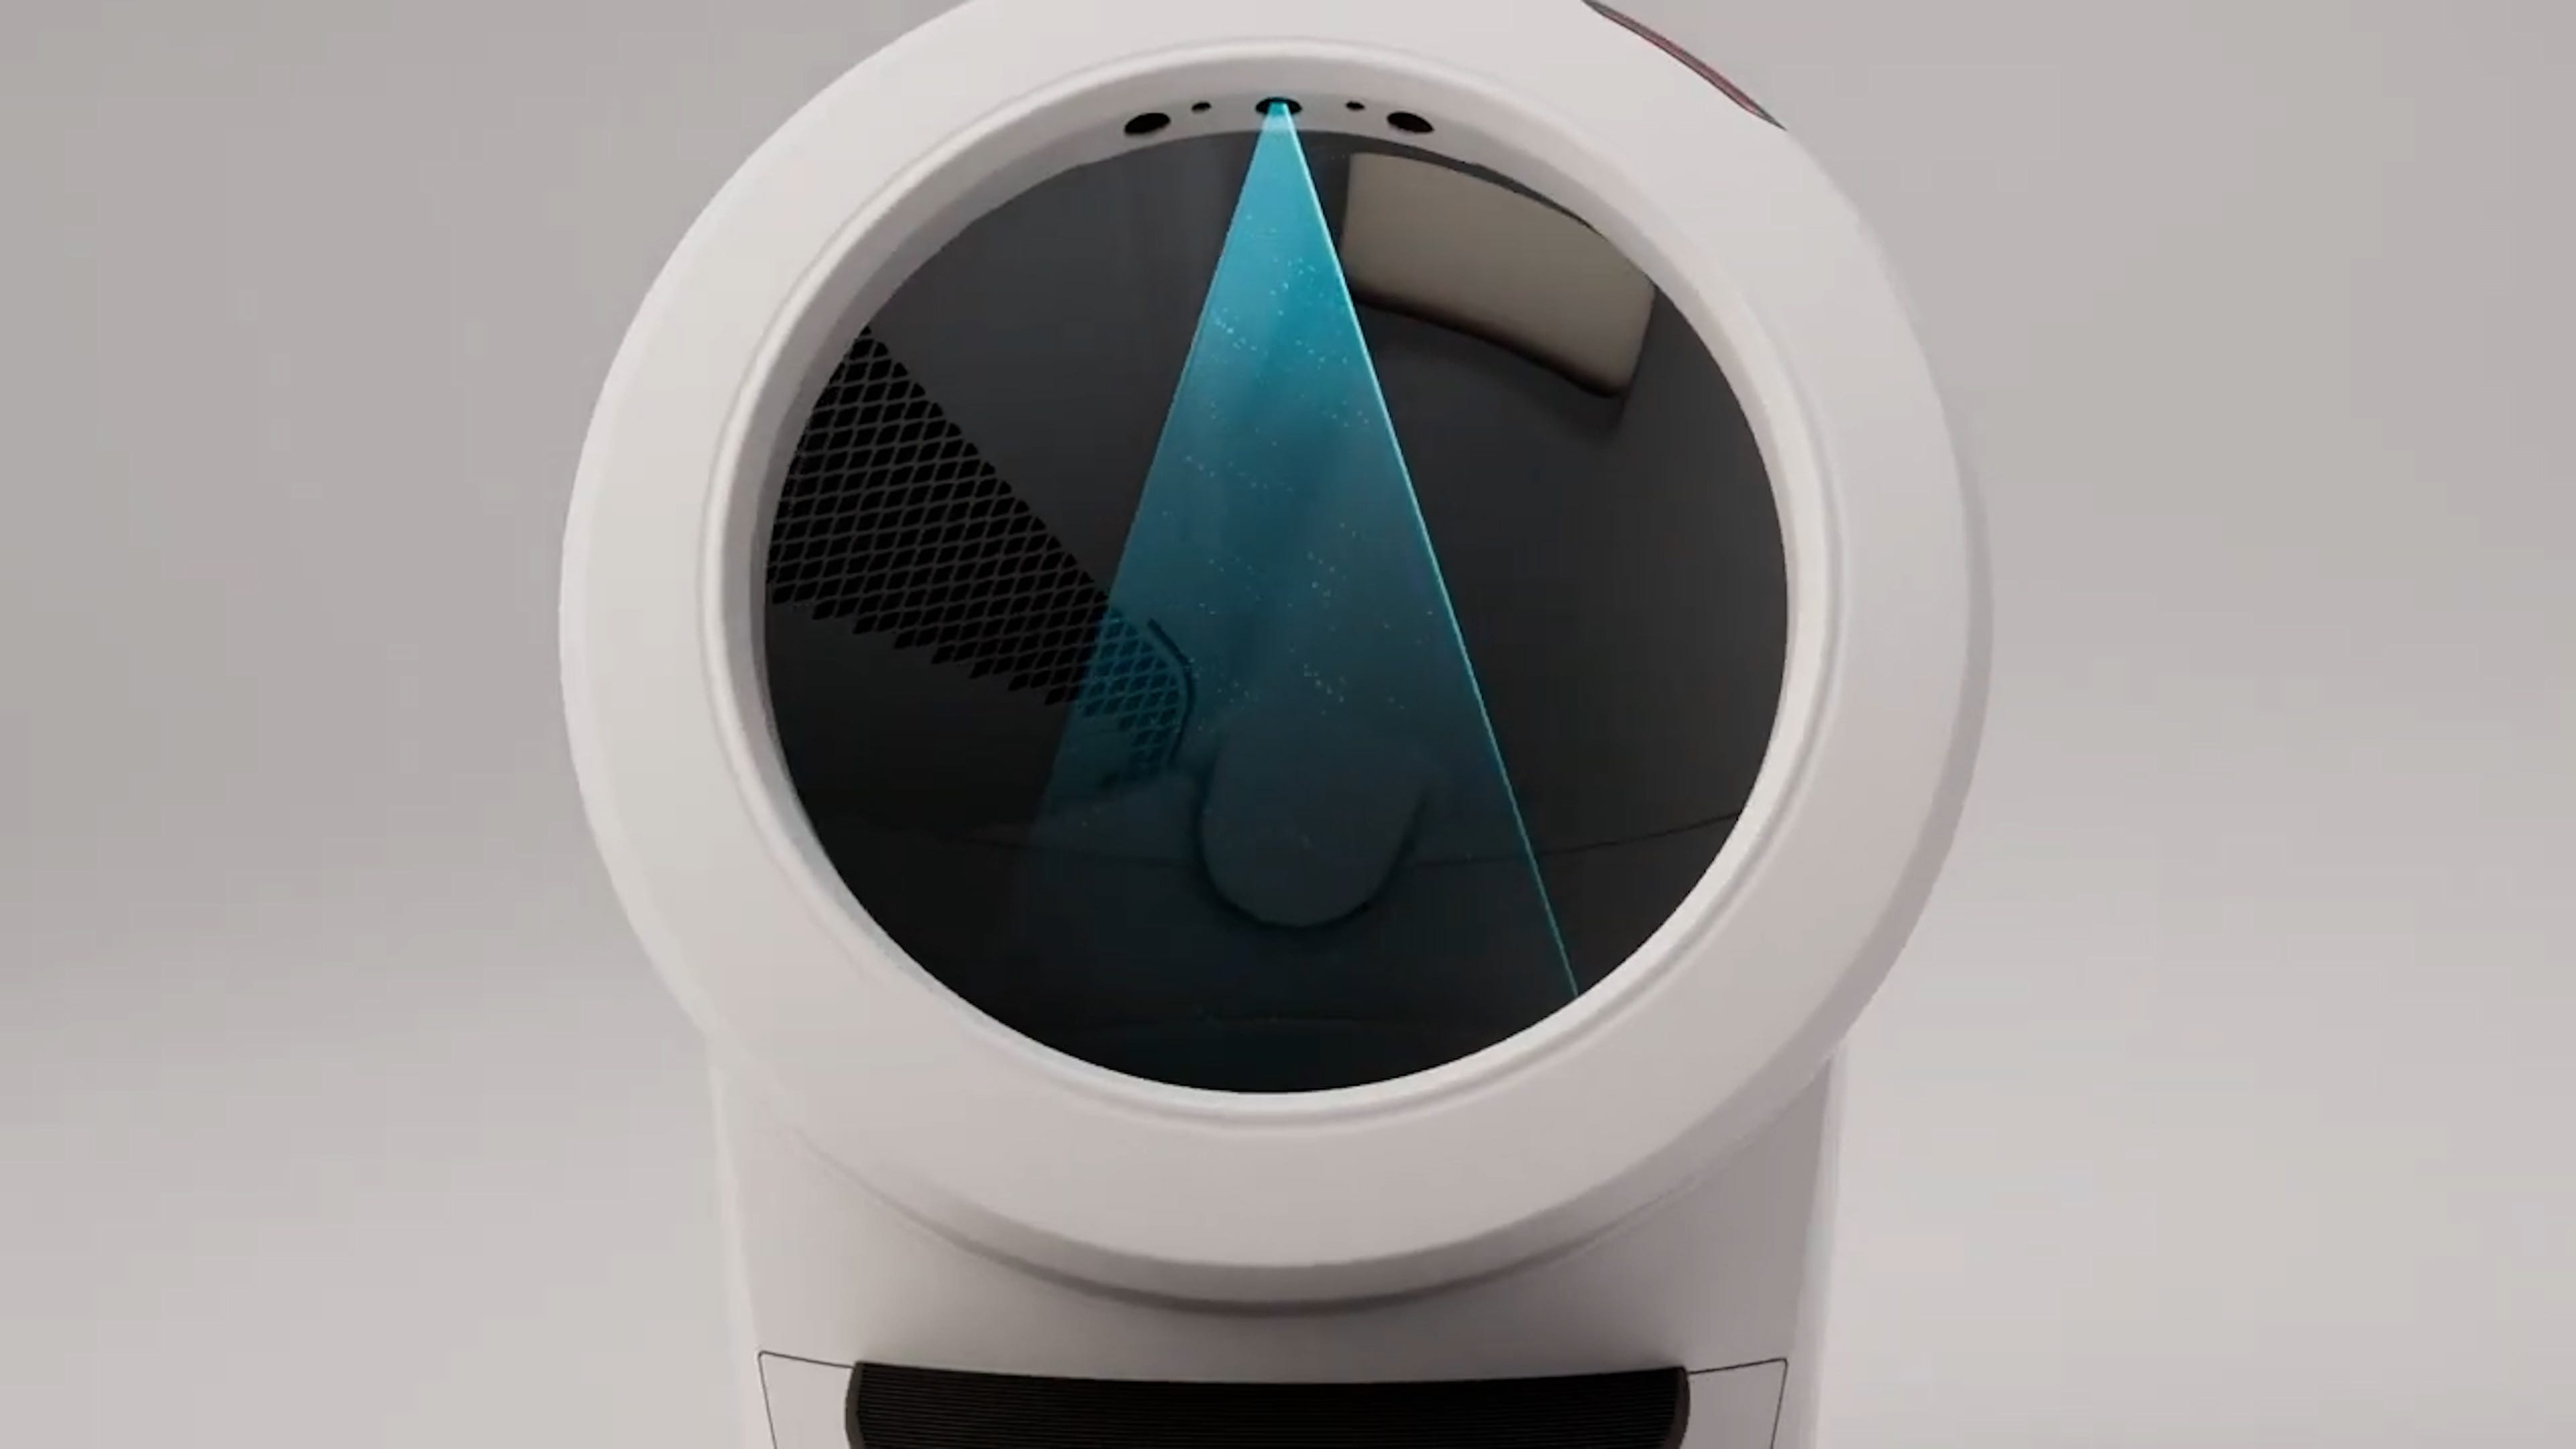
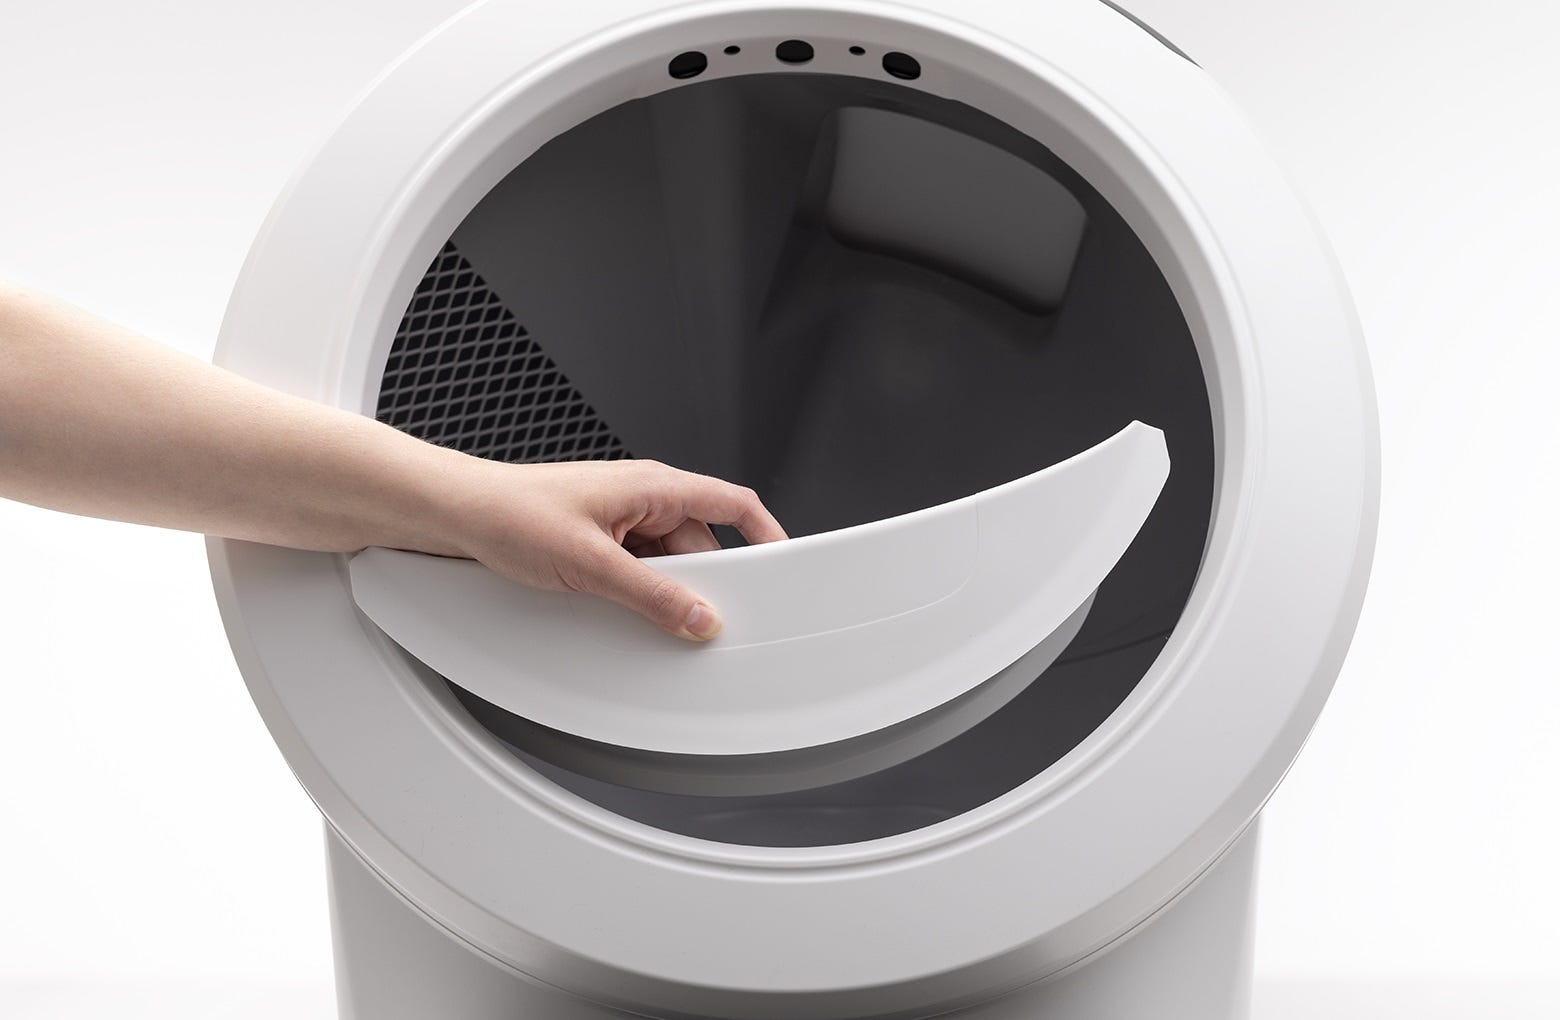
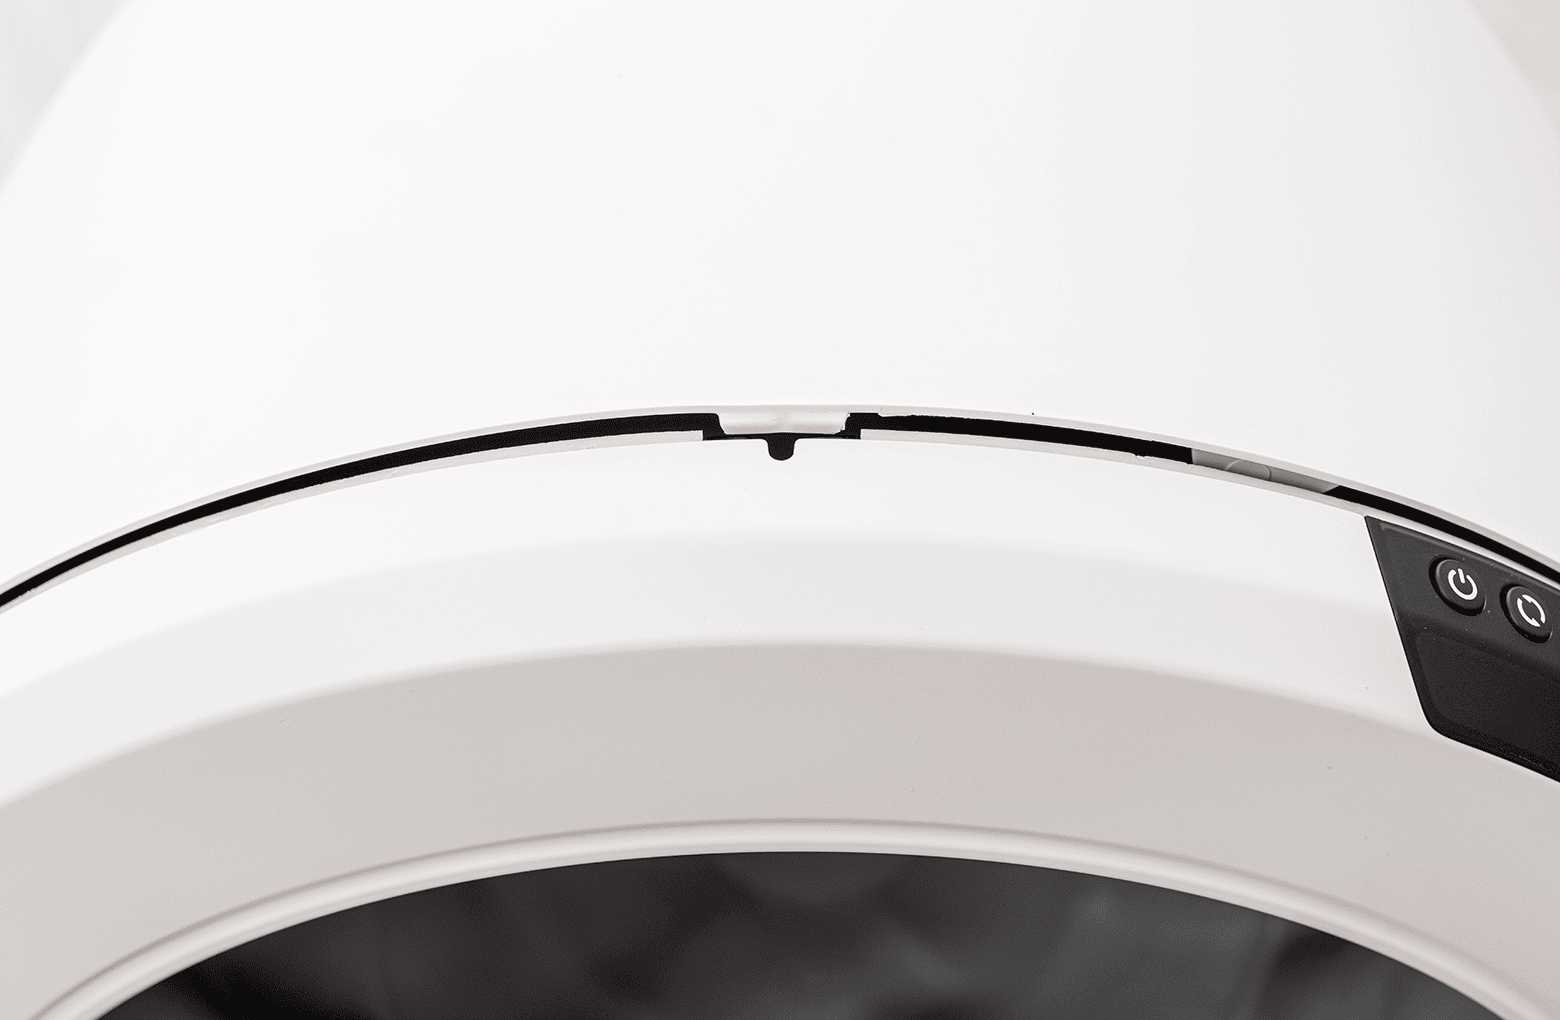
Let’s take a closer look at the three sensors, called curtain sensors, located in the bezel.
Debris, such as dust or cat fur, can interfere with the operation of these sensors. This can cause the unit to inaccurately measure the waste drawer level and litter level, as well as falsely detecting a cat.
- Wipe the bezel area where the sensors are located with a dry clean cloth to remove debris such as hair or dust.
- Vacuum the inside perimeter of the bezel with a brush attachment, passing over the holes at the top of the bezel where the curtain sensors are located.
- Compressed air may also be used to gently clear any debris or fur lodged in the sensor openings.
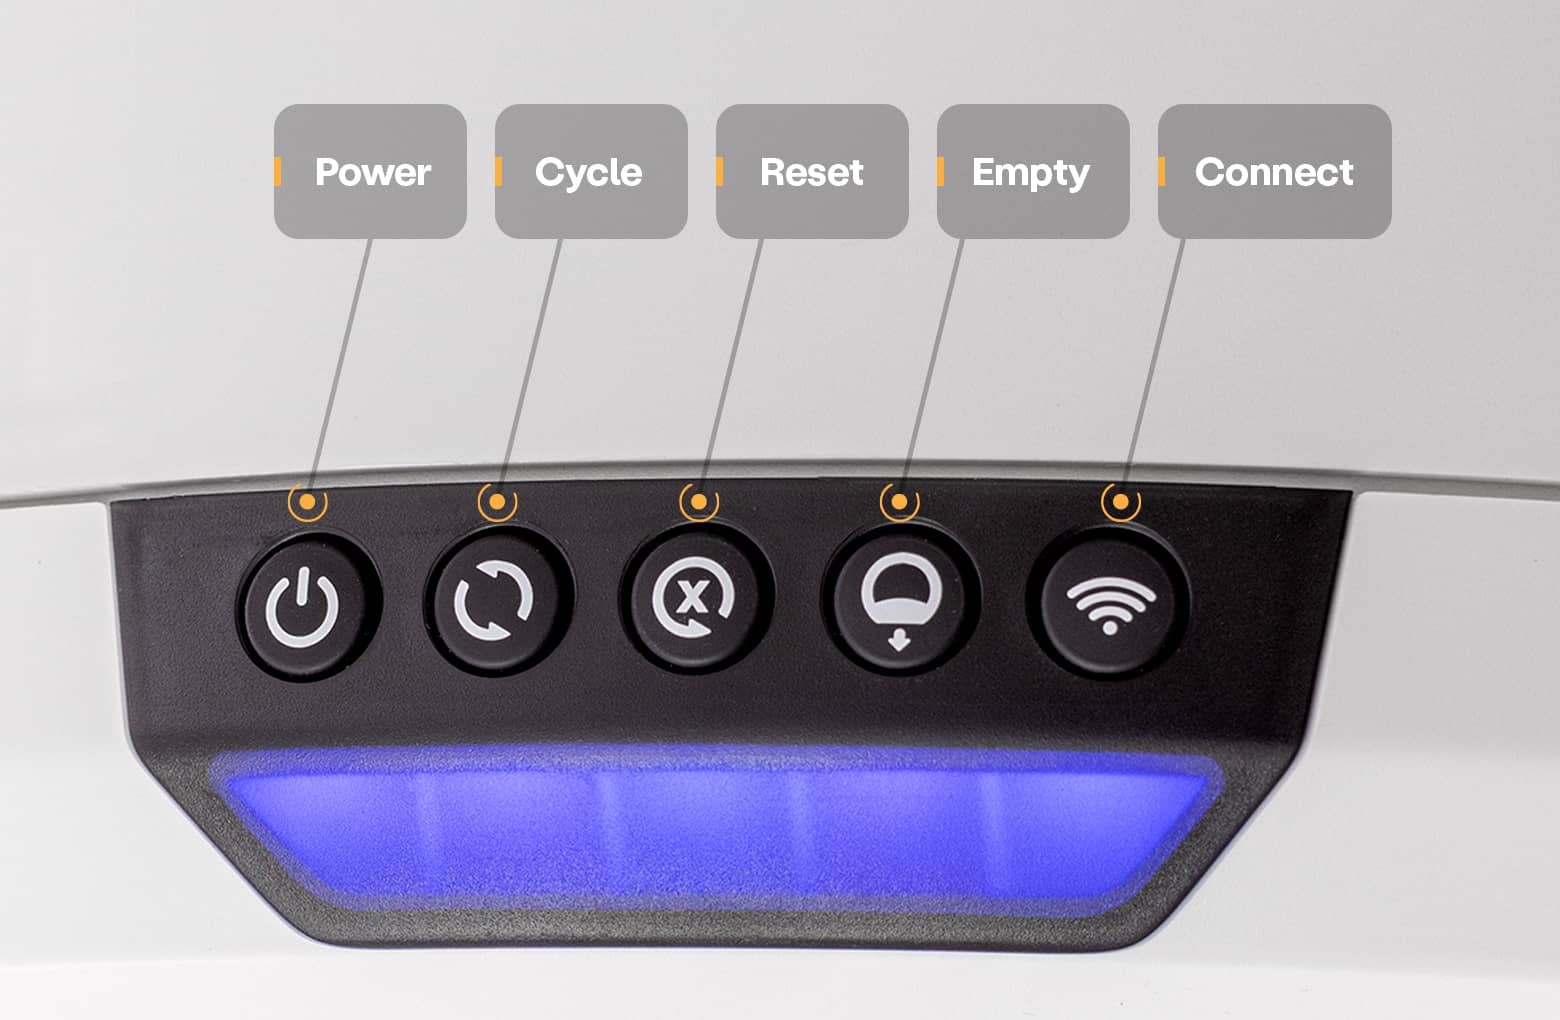
- Now, let's run a test cycle. Short press the Reset button, then short press the Cycle button to run a Clean cycle.
After Litter-Robot cycles, it should return to the Home position, displaying a solid blue light.
Successful: If your unit displays a solid blue light bar, you've been successful.
Unsuccessful: If your unit is not displaying a solid blue light bar, please follow these troubleshooting steps.
Issue not resolved?
Let’s check for any additional debris or foreign objects that may interfere with the sensors during the cycle.
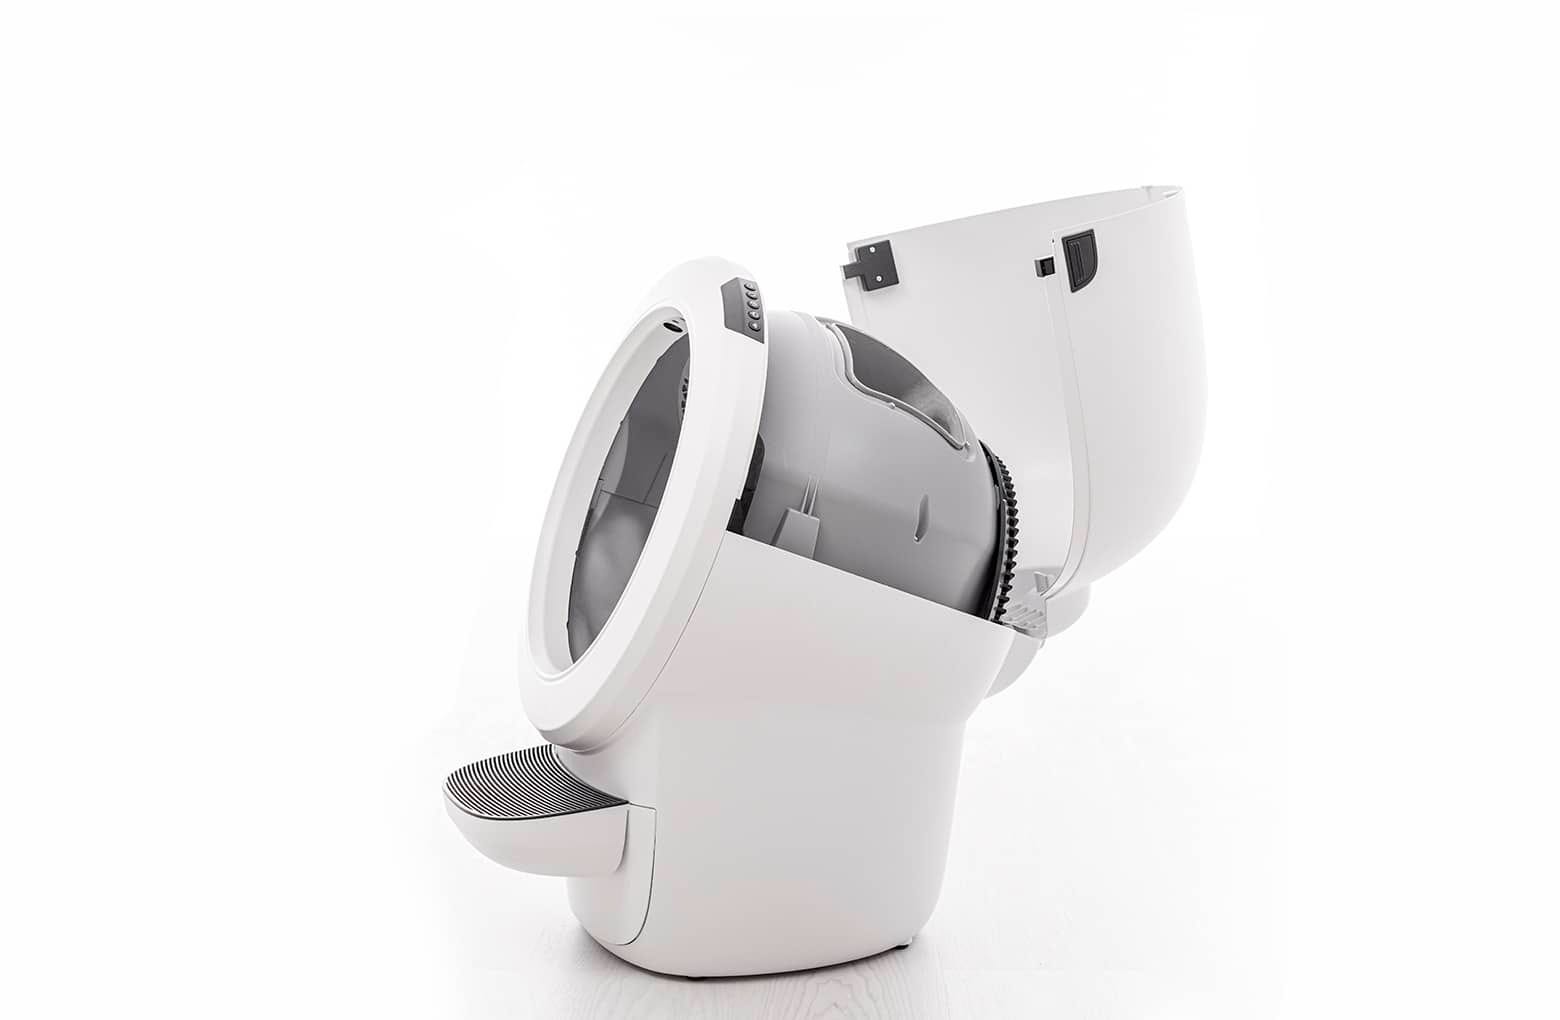
First, we will remove the bonnet and globe to look for any issues.

Removing the bonnet
- To open the bonnet, press and hold the latches on both sides of the bonnet, then lift and rotate the bonnet to its open position.
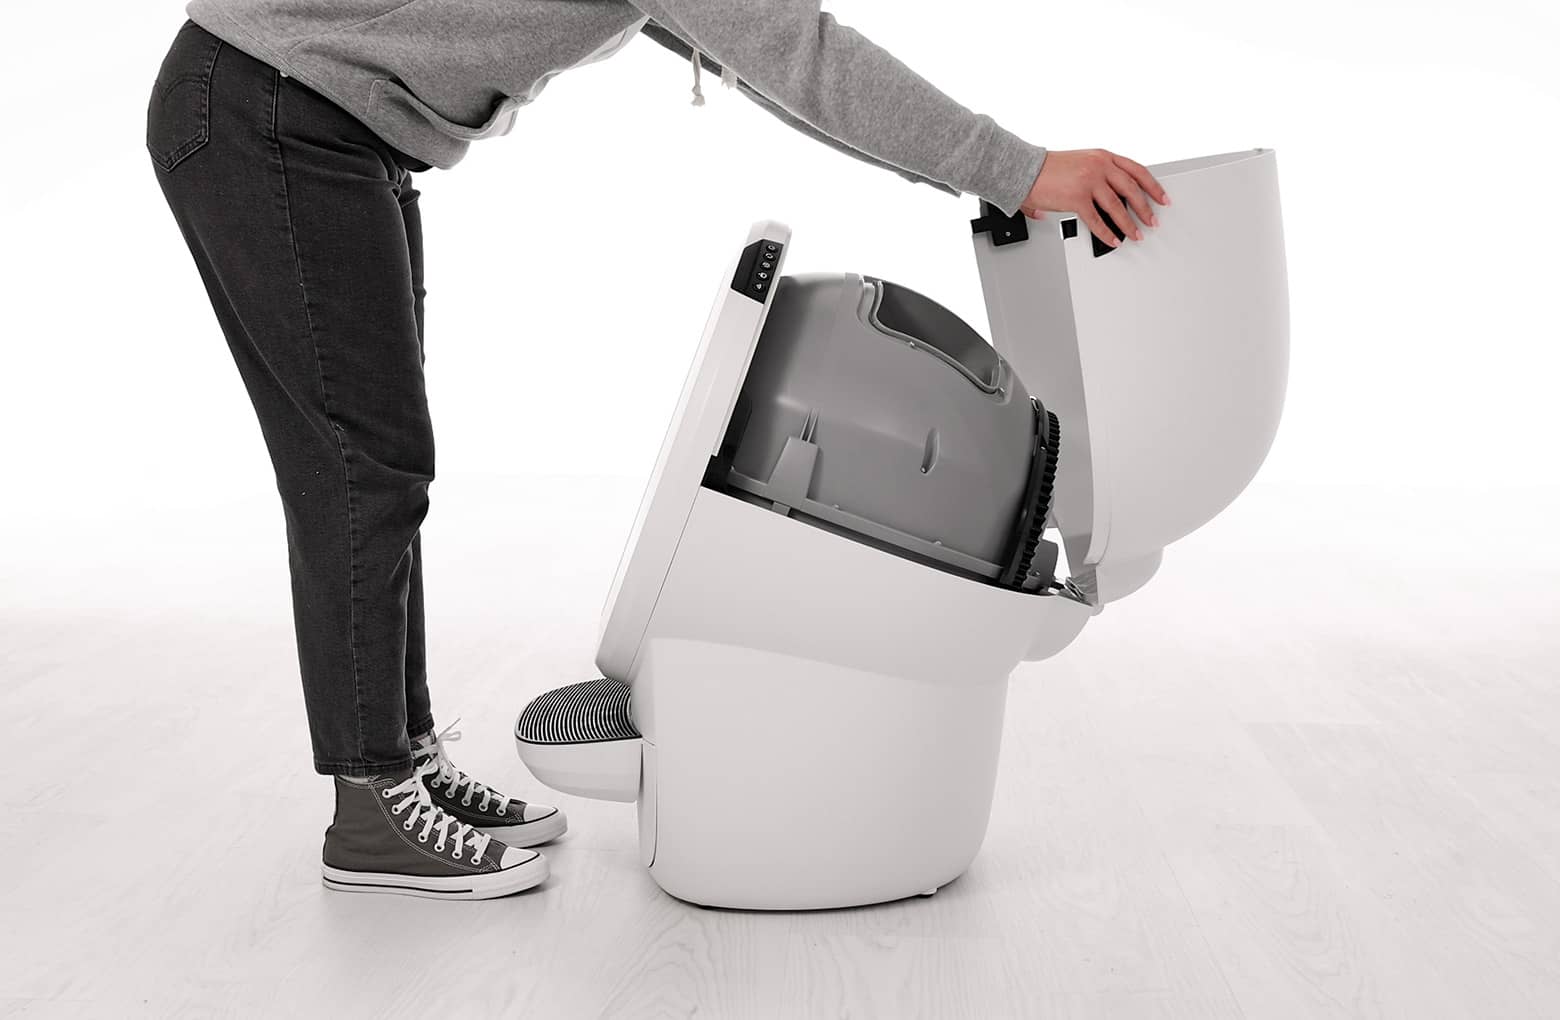
- Set the bonnet aside.
- If you have a fence installed, remove this from the bezel.
Note: You typically need to remove the bonnet completely only during deep cleaning or bonnet replacement.
Removing the globe
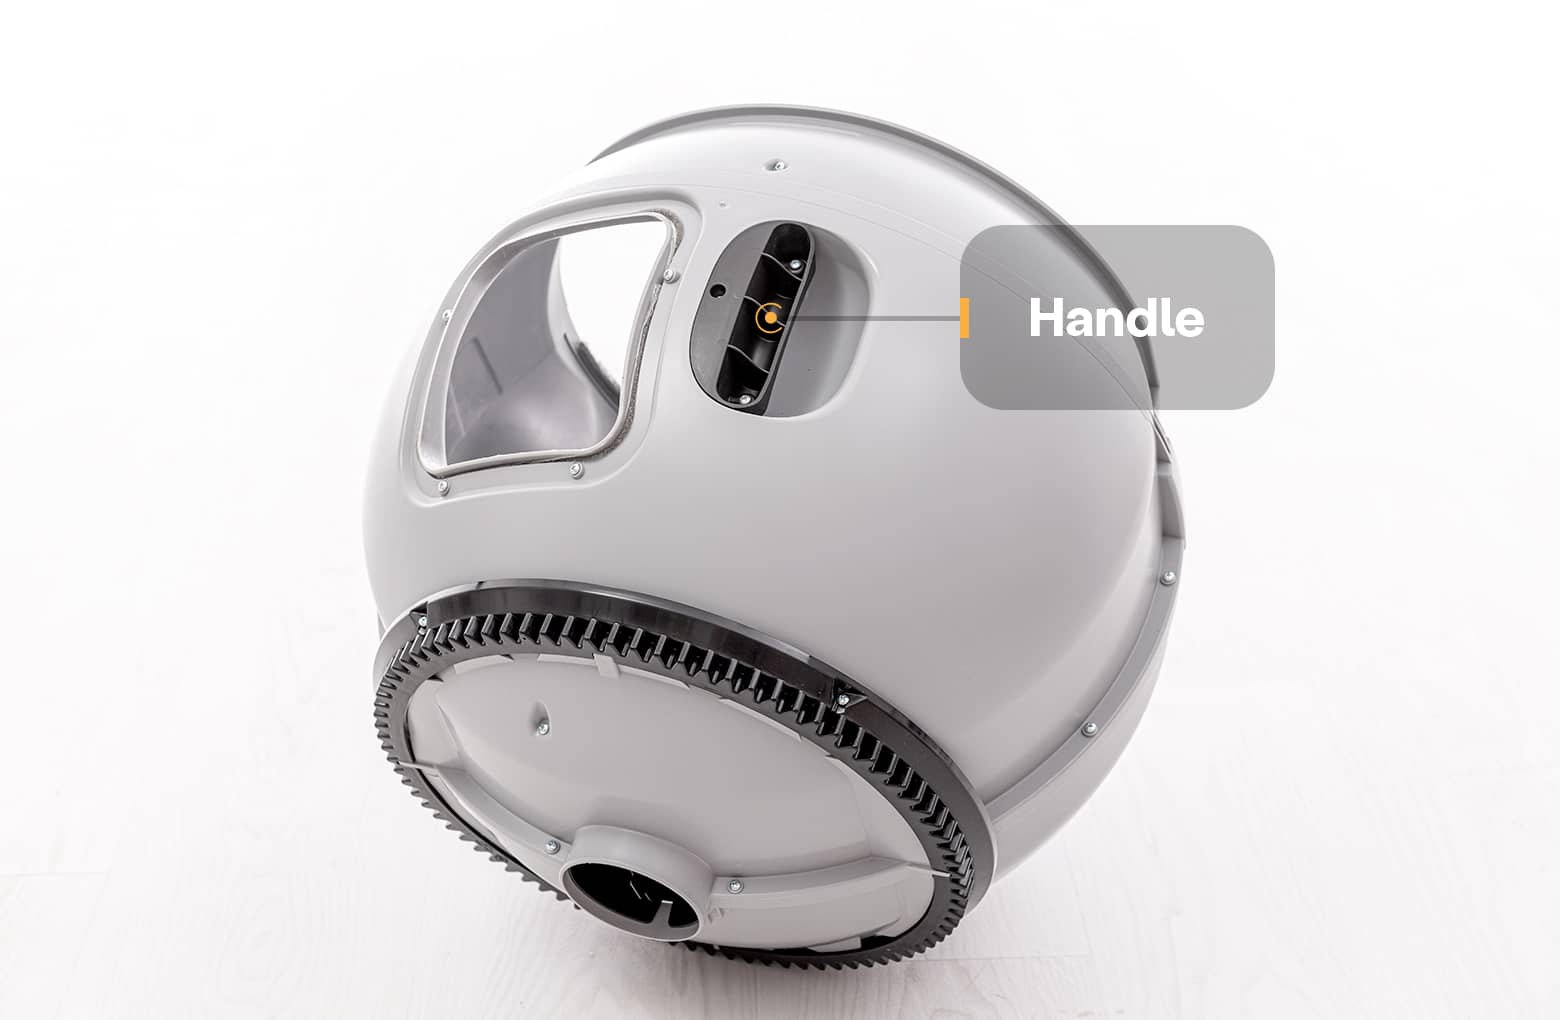
- To remove the globe, grab the black handle located on top of the globe, lift the globe out of the base, and set it aside.

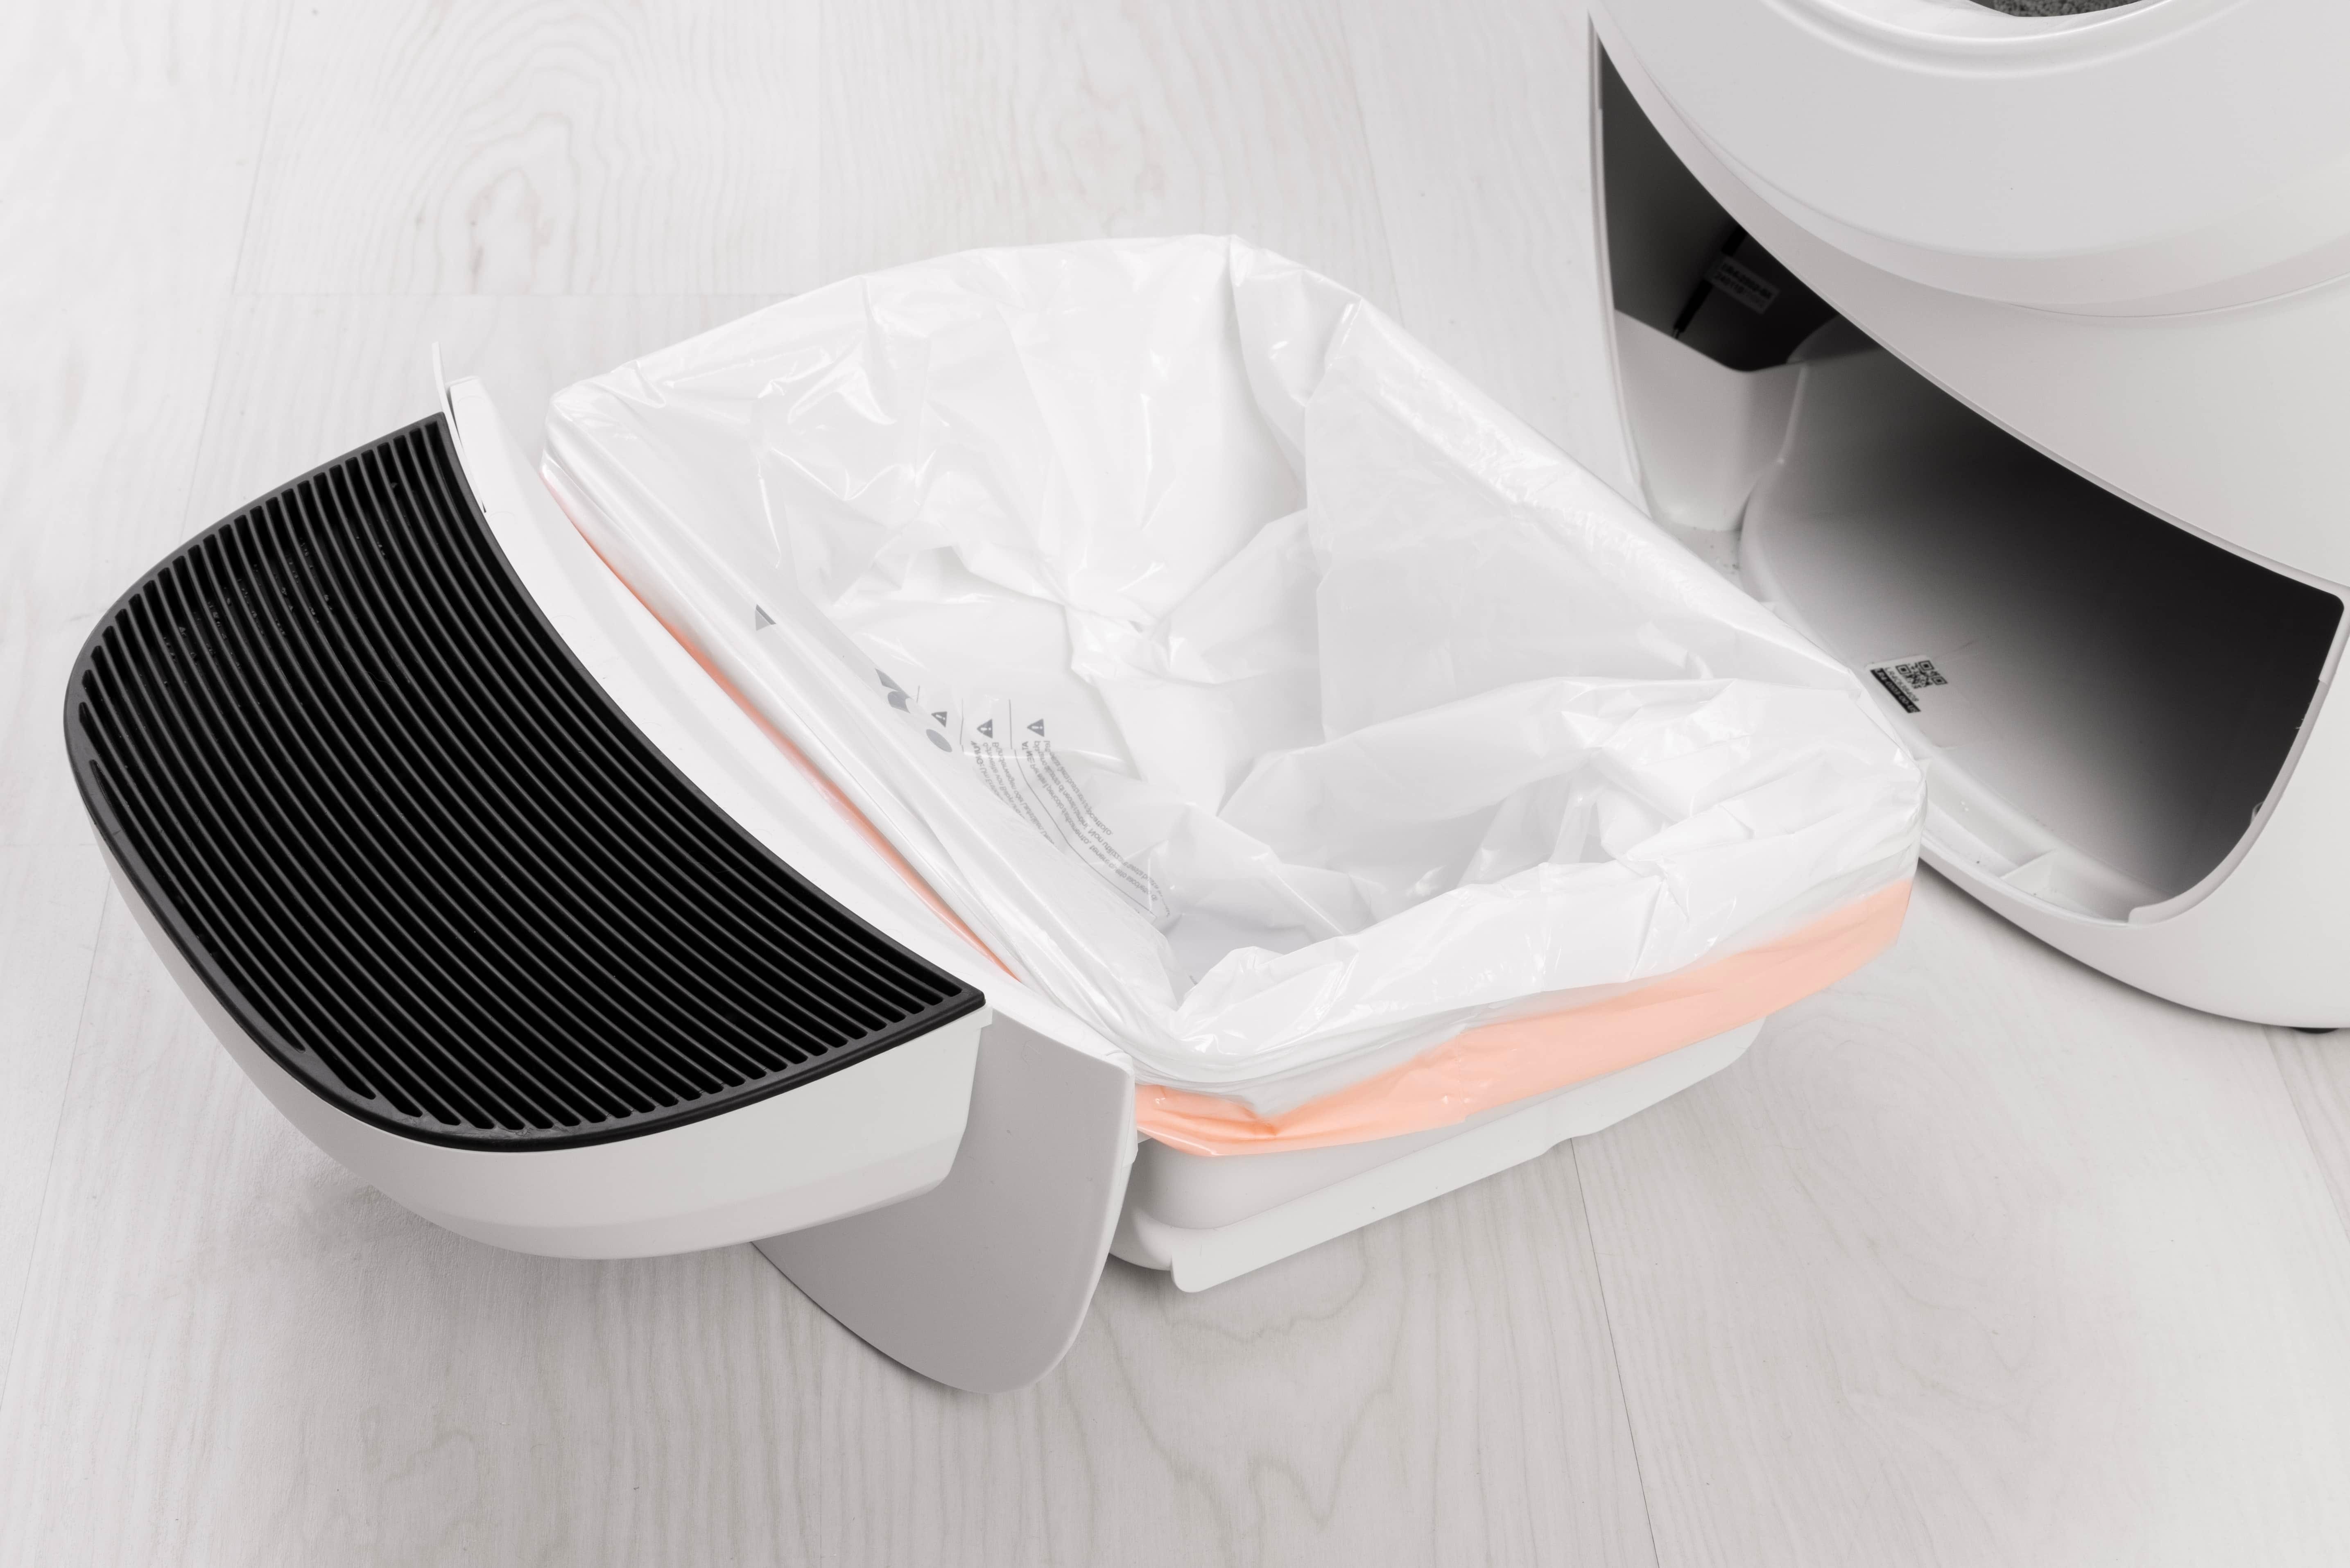
- Remove the waste drawer and empty it or set it aside.
If you had to replace the base, this is when you’d remove the new base from the box and place it in the desired location near a power outlet.
A firm, level surface is required for accurate detection of cats and weight readings.
Inspect the seal strips
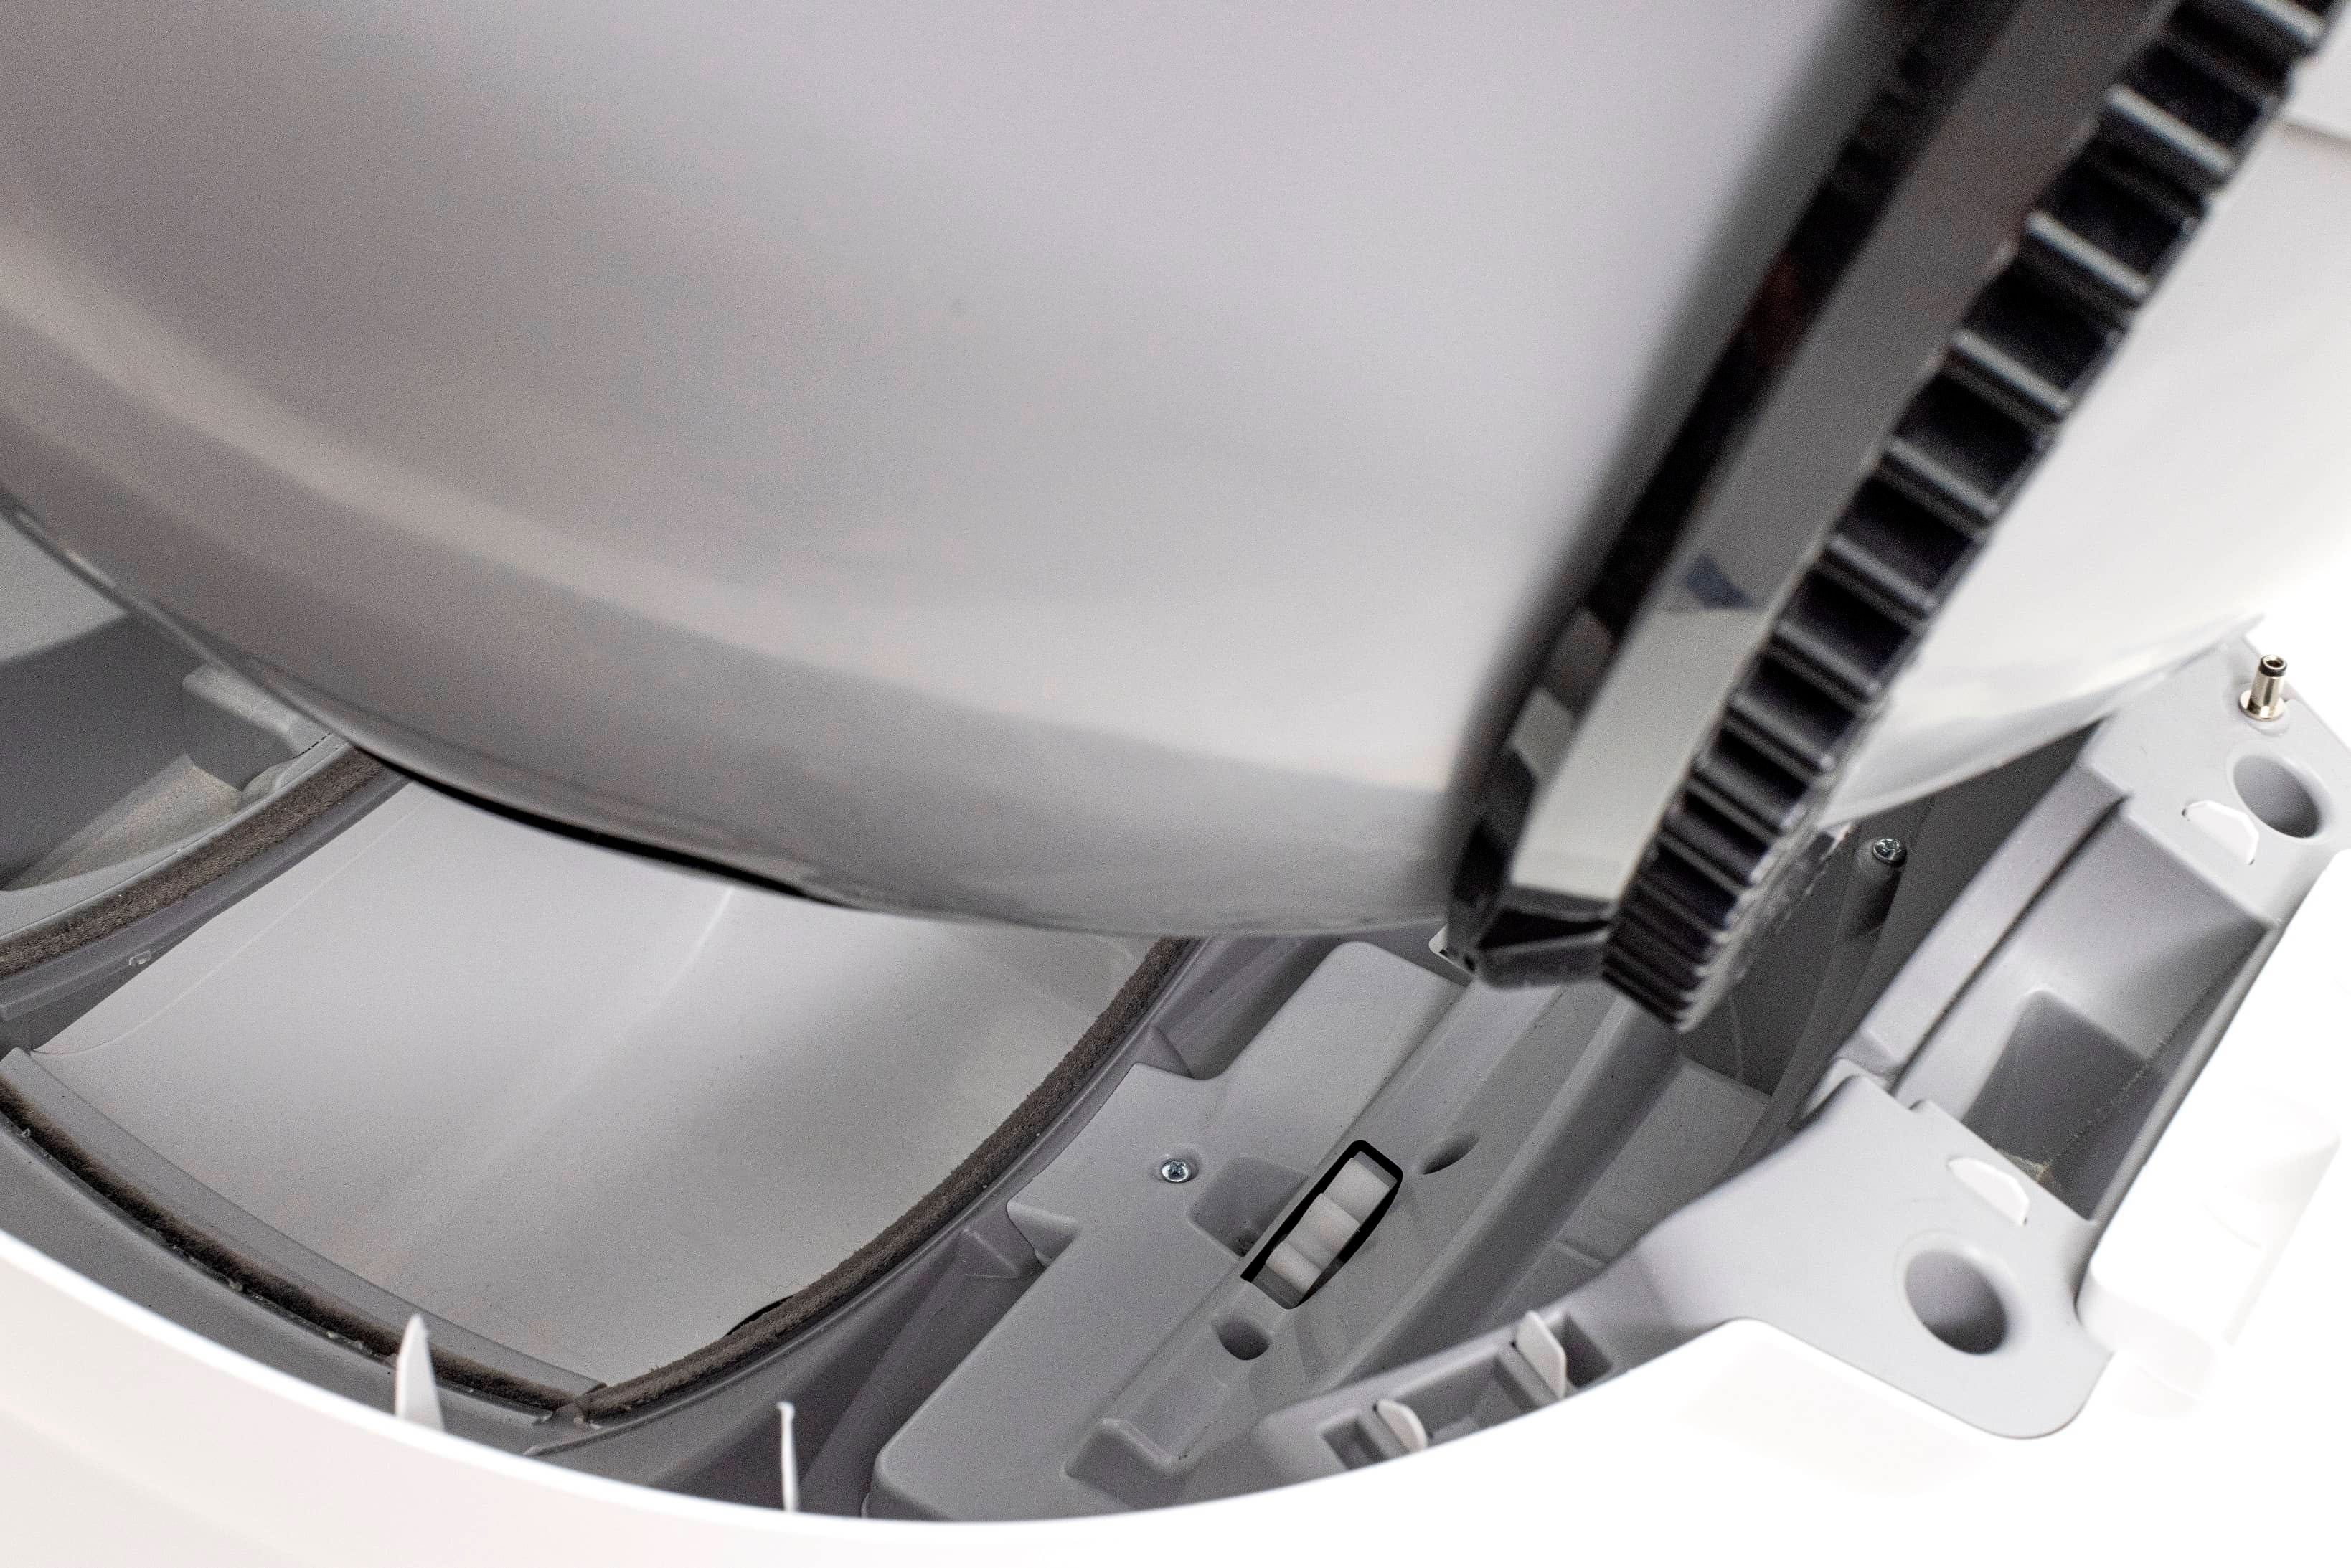
Cat fur can get stuck in the seal strip located at the lower front of the globe. When the globe rotates, fur can interfere with the curtain sensors.
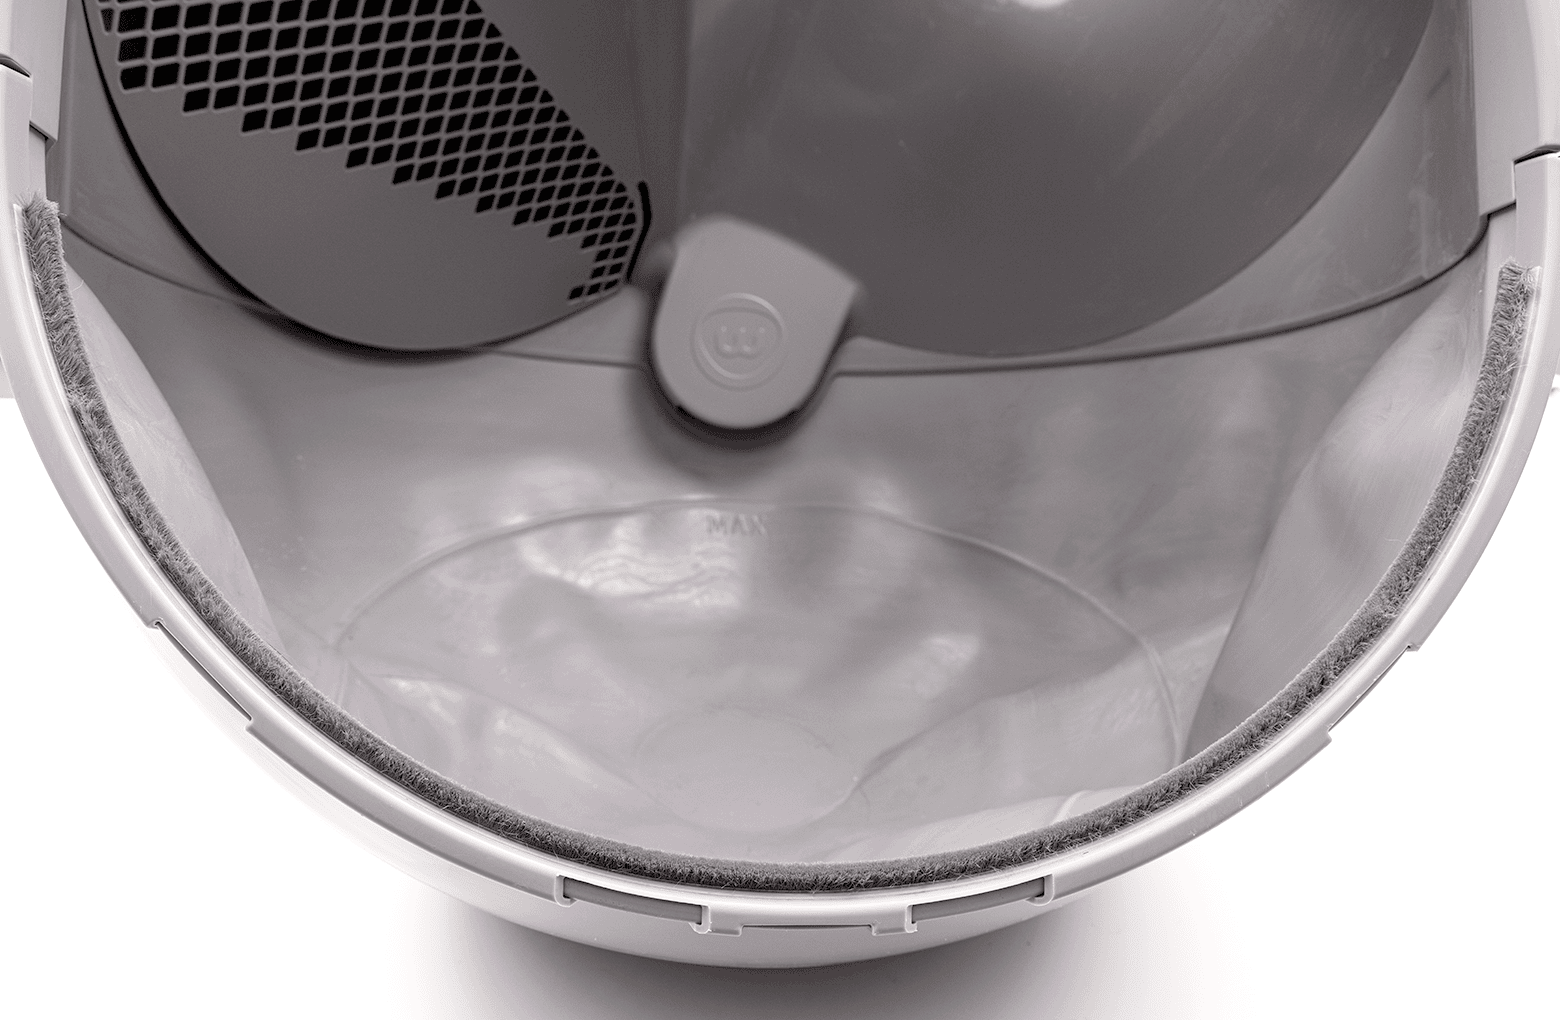
Ensure the seal strips on the inside of the globe are not peeling up or have any debris stuck to them. You may purchase replacement seal strips at Litter-Robot.com.
Cleaning the sensors
With the globe, bonnet, and drawer removed, lean the unit backward so that you can look into the holes on the bezel to see each sensor.
Using a clean, dry cotton swab, carefully clean the surface of each sensor to remove any dust. You may also use compressed air to gently clear any debris or fur lodged in the sensor openings.
It is important to note that it will be very difficult to see any dust, specifically on the sensors. Lightly cleaning the surface will help remove any debris that might be interfering with them.
Now that we’ve checked for any obstructions let’s re-install the waste drawer, globe, and bonnet and check for proper operation of the unit.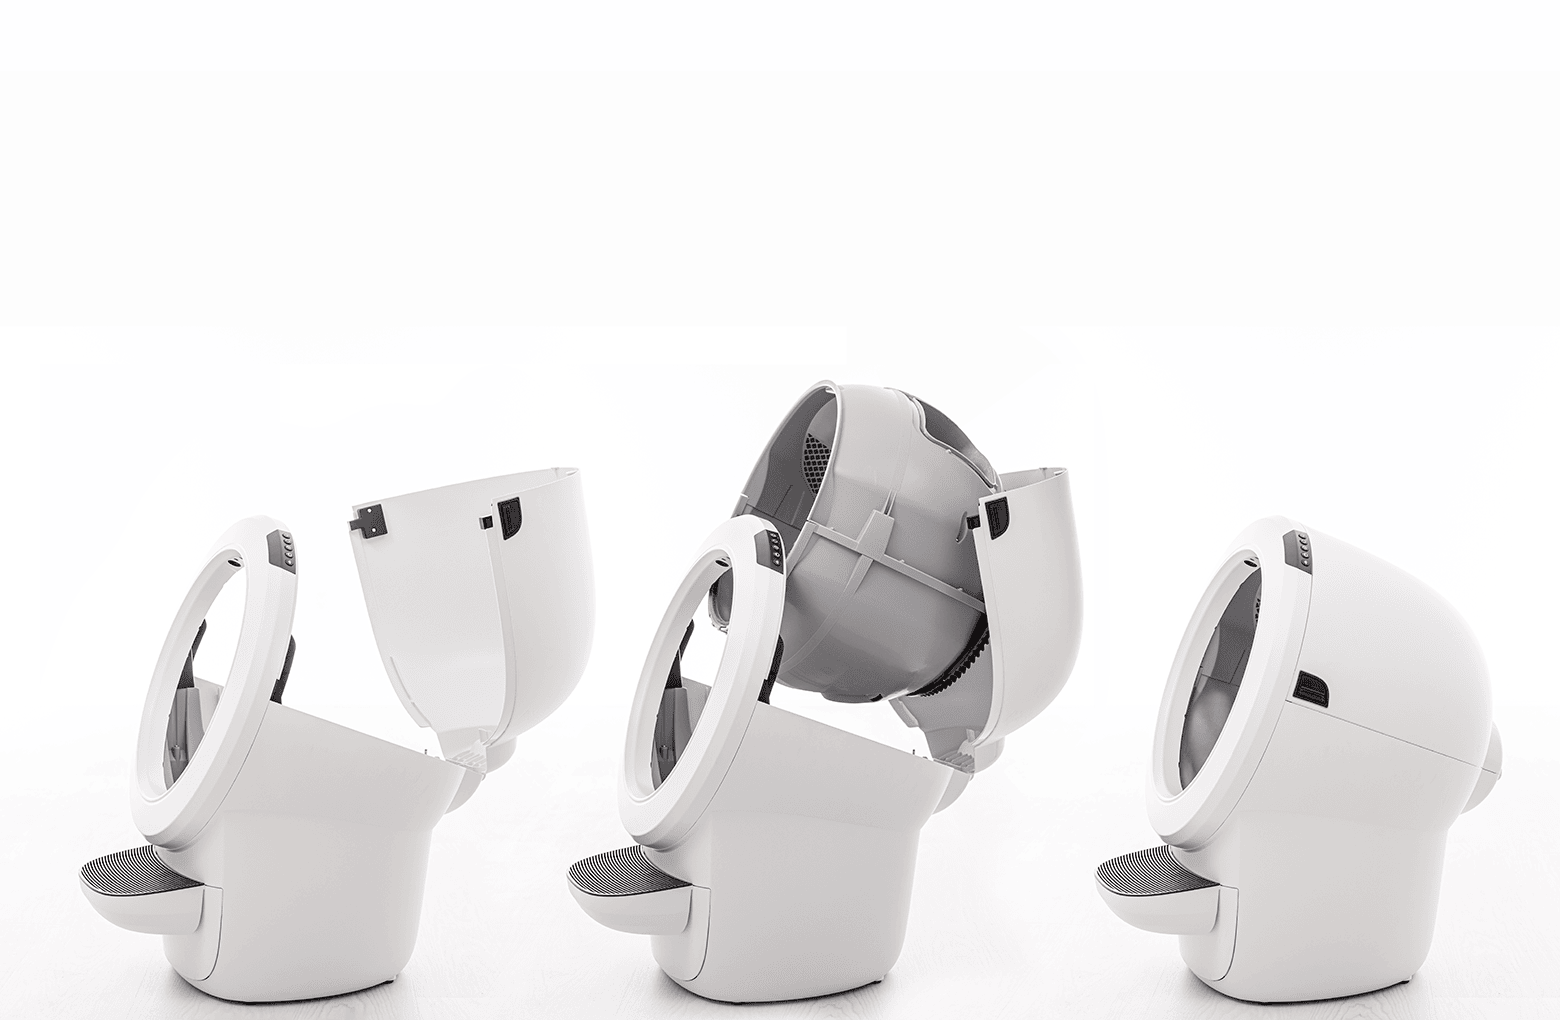
Installing the globe
- To install the globe, hold the globe by the black handle and set it into the base.
- When installing the globe, keep the globe handle and waste port oriented toward the top to ensure the globe is close to the Home position.
- The large black gear on the rear of the globe should easily engage with the smaller white drive gear in the base.
Installing the bonnet
- If the bonnet was completely removed, rotate the bonnet upward and align the hinge feature of the bonnet at the back of the base.
- To close the bonnet, rotate the bonnet downward over the globe, applying slight inward pressure at the latches to align the bonnet within the base. You should hear the latches snap into place.
- Check to make sure the center tab at the top of the bonnet is secured in its pocket by pushing down on the bonnet at the tab location.
Final steps
- Reinstall the fence by snapping it onto the bezel at the globe entrance.
- Plug the unit in and power it on.
- Litter-Robot will display a solid blue light indicating it is ready for use.
Successful: After your Litter-Robot cycles, it should return to the Home position, displaying a blue light bar.
Issue not resolved?
To repair your Litter-Robot, you will need a laser board or a base.
What do I do?
My unit is covered by WhiskerCare™
If your Litter-Robot is covered by WhiskerCare™ warranty, you have access to replacement parts, at no cost, to get your Litter-Robot up and running quickly.
- Simply log in to your account at litter-robot.com.
- Click on ‘My Robots’ to access the parts available for your robot.
- Select the Litter-Robot 4 Laser Board, and we’ll ship you the part at no cost.
- Follow these simple installation instructions.
The warranty on my unit has expired
If your unit is no longer under warranty, we can help you with the necessary parts and instructions to properly fix your unit at home.Parts Needed (choose one):
Need technical support?
Our Troubleshooting Wizard will solve most issues and is the fastest way to get help.
Didn't find what you're looking for?
Live support available Mon-Fri: 9AM-9PM EST and Sat-Sun: 9AM-5PM EST, or submit a ticket anytime.