The store will not work correctly in the case when cookies are disabled.

Litter-Robot 3: Circuit board installation guide
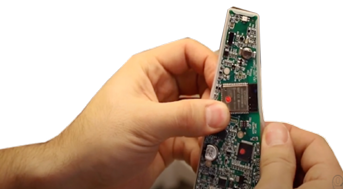
Litter-Robot 3 is equipped with a main circuit board that controls the robot's functionality. Litter-Robot 3 Connect unit's main circuit board also controls the connectivity of the robot. Within this circuit board are the main processor, WiFi connectivity chip (for connect units), ambient light sensor, as well as main harness connectors for power and other peripheral sensors or systems.
If your serial number begins with LR3CI you will need a connect main circuit board.
If your serial number begins with LR3C (not LR3CI) you will need a connect upgrade kit.
If your serial number begins with LR3 (not LR3C or LR3CI) you will need a main circuit board, unless you'd like to upgrade to a connect unit then you will need a connect upgrade kit.
Tools Needed
- Needlenose Pliers
- Phillips-head screwdriver
Disassemble Litter-Robot
- Press the Power button to turn the unit off.
- Unplug the power plug from the wall.
- Press the bonnet tabs on either side of the unit to release the bonnet.
- Rotate the bonnet backward and lift the bonnet up to remove it from the unit.
- Remove the globe and set it aside.
- Remove the waste drawer and set it aside.
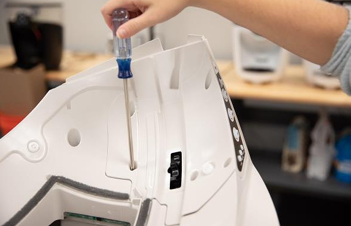
-
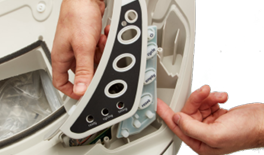
Unscrew the 5 screws to remove the control panel cover; take care not to lose any of the screws.
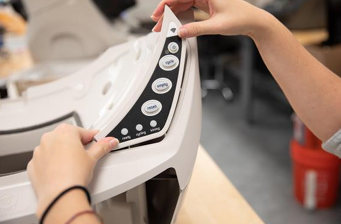
-
Separate the control panel cover from the control panel by pushing the buttons through and lifting up. If necessary, use needle-nose pliers to lift the cover out of place.
Note: The circuit board and keypad may be held in place by a piece of tape (assembly aid). If present, simply remove it; it is not required for reassembly.
Remove old circuit board
-
Turn the keypad and circuit board over and unplug the three connectors from the circuit board: 4-pin (DFI drawer full indicator), 6-pin (motor and power), and 8-pin (hall effect sensor).
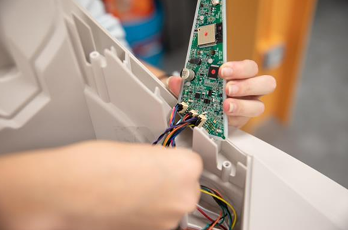
- Before removing the rubber keypad, note how it is secured on the circuit board by the lip around the perimeter as well as the three round anchors through the board.
- Remove the rubber keypad from the original circuit board, setting the circuit board aside.
Install new circuit board
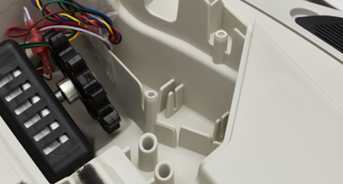
-
Ensure that the motor sits flush in the motor cavity and that no wires are in the way of the motor’s gear.
-
Install the rubber keypad over the new circuit board, ensuring that it is securely fitted along all of the edges.
-
Reattach the three wire connectors to the circuit board: 4-pin (DFI drawer full indicator), 6-pin (motor and power), and 8-pin (hall effect sensor). Each connector is keyed with a top and a bottom so that it will only fit in one way. If you feel any resistance, flip the connector over and try to attach it again.
Earlier models were manufactured with four ports and a secondary board housed the WiFi chip. When installing the replacement, the secondary board and its wiring may be discarded.
-
Reassemble the control panel cover onto the circuit board and keypad by pushing the keypad buttons back through the cover. Make sure to keep the rubber keypad wrapped around the edges of the circuit board.
Reassemble Litter-Robot
- Look through the opening where the black gear protrudes and make sure no wires are visible. If wires are visible, remove the control panel cover, tuck them into the wire channel, and secure them with the piece of tape. Once in position, the edges of the control panel cover should rest flush with the base.
- Attach the control panel cover by tightening the 5 screws. Do not over-tighten.
- Reinstall the waste drawer.
- Replace the globe, making sure it is on straight and in its tracks. At the back of the globe, turn the black key into the key pocket.
- Replace the bonnet by inserting the bonnet tabs into the rear bonnet slots then press the latches while rotating it forward, until the latches click into place.
- Plug Litter-Robot into the wall.
- Press the Power button to turn the unit on.
- Once the initial clean cycle is complete, the unit should return home displaying a blue 'ready light' status.
If you're getting three flashing lights, it is most likely due to the position sensor being out of place. Follow the steps in our Litter-Robot 3: All three lights flashing (Globe position fault) guide to inspect the position sensor.
If your Litter-Robot 3 Connect was onboarded before installation, the app will work with the same serial number, but you will need to delete your original robot from the app and re-onboard it. If necessary, follow the Getting Started Guide to onboard your Litter-Robot and connect to the app.
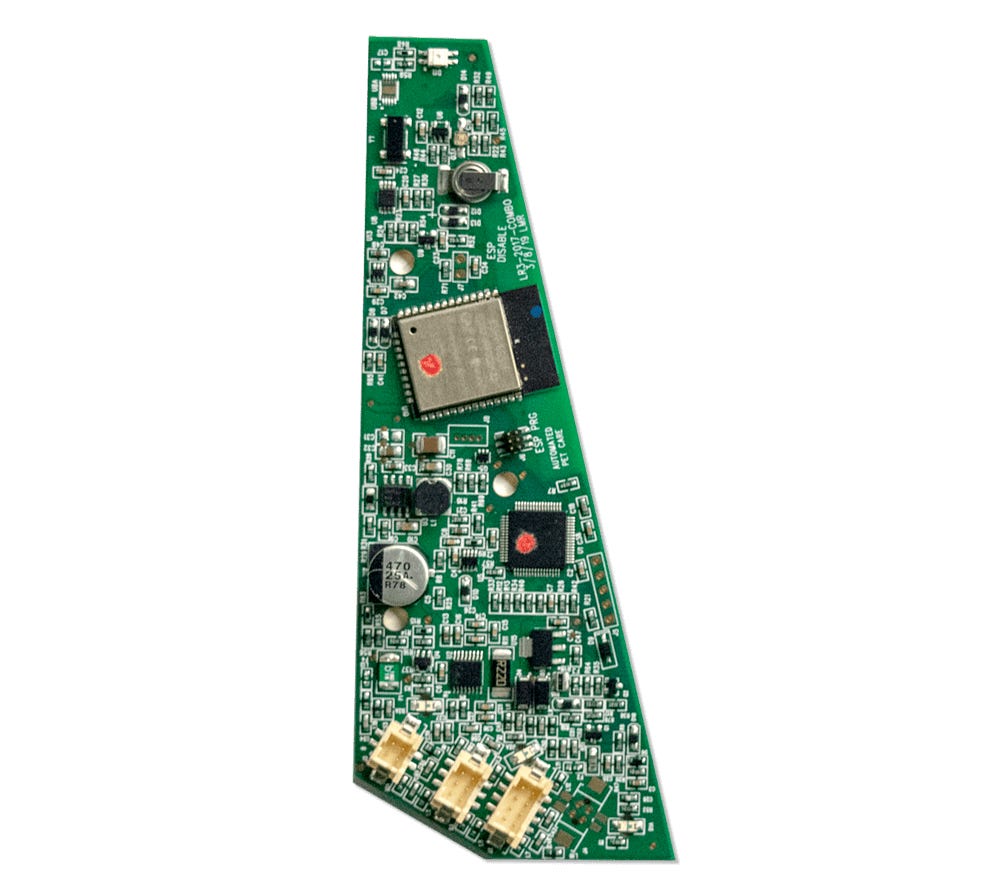 Litter-Robot 3 Connect Main Circuit Board
 Litter-Robot 3 (non-Connect) Main Circuit Board
Didn't find what you're looking for?
Live support available Mon-Fri: 9AM-9PM EST and Sat-Sun: 9AM-5PM EST, or submit a ticket anytime.