The store will not work correctly in the case when cookies are disabled.
Litter-Robot 4: Assembly and disassembly
Litter-Robot is built in a modular way to make troubleshooting and maintenance simple. We’ll show you how to disassemble your unit to access certain areas for ongoing maintenance.
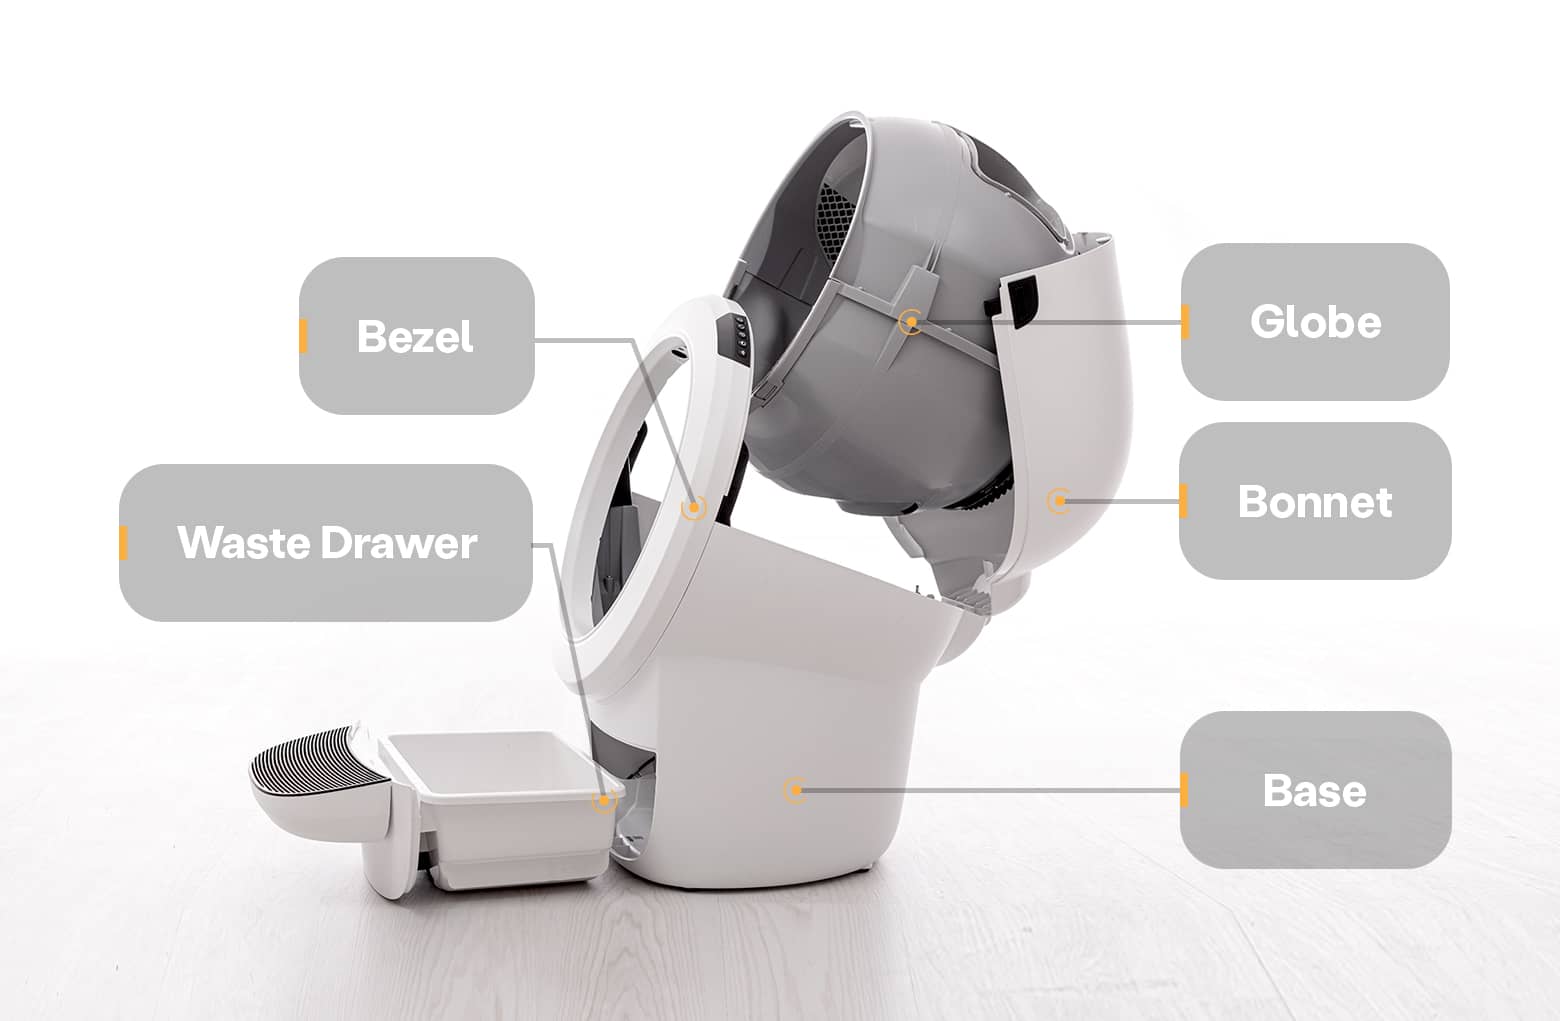
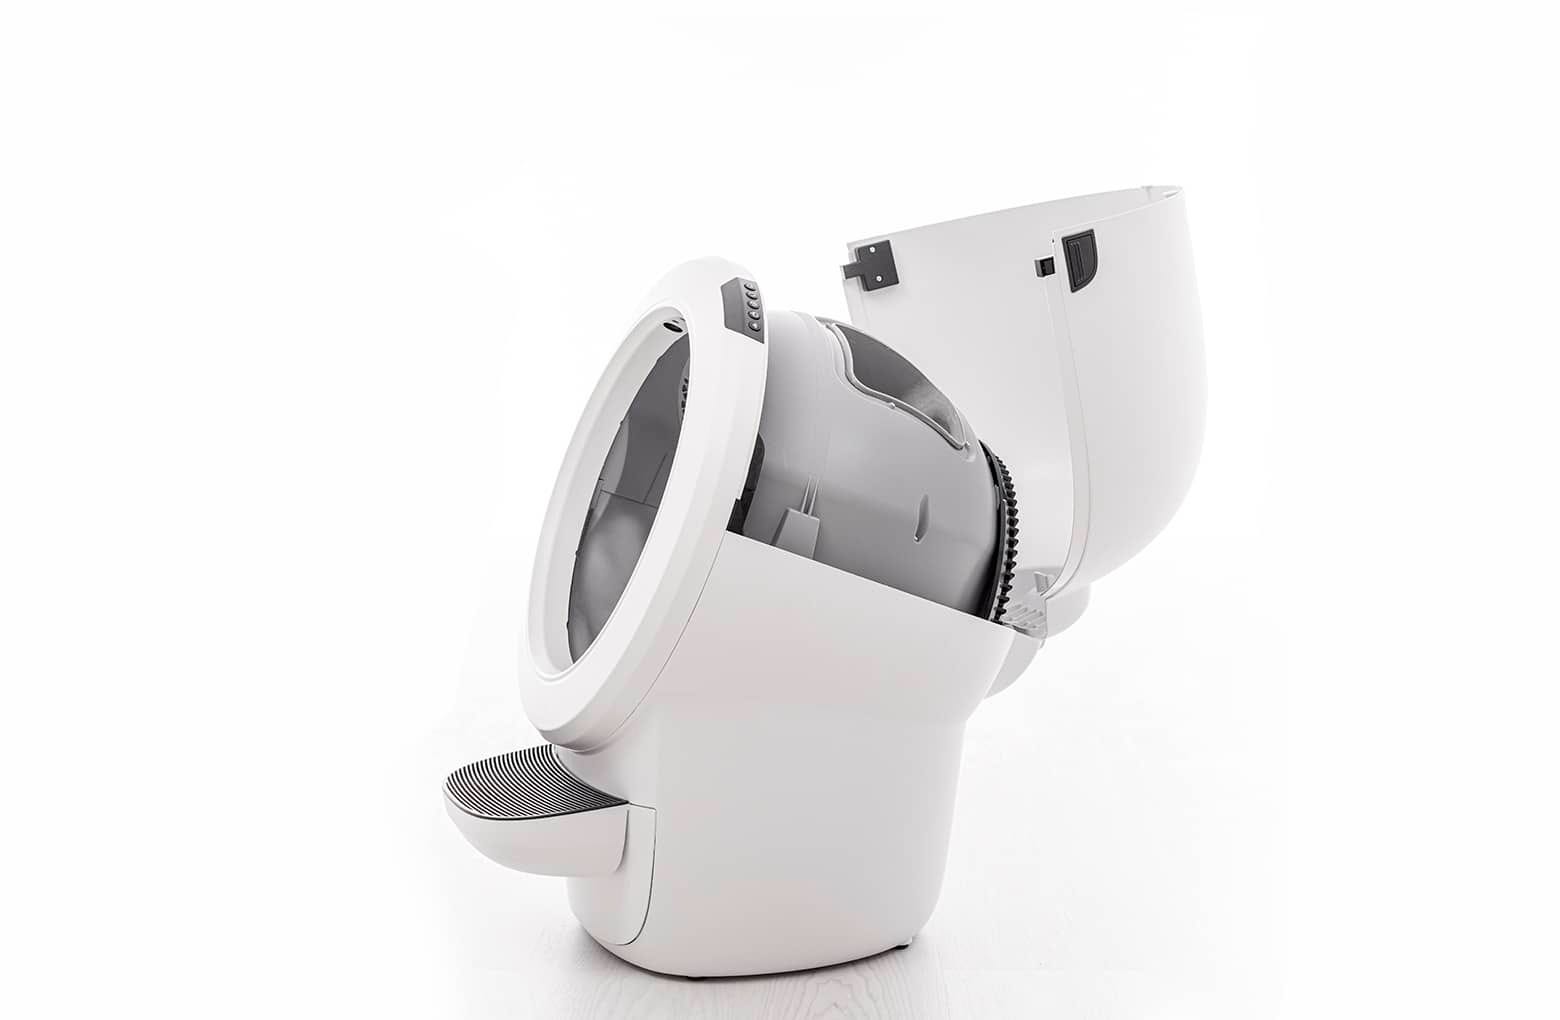
Litter-Robot 4 has five main components: the base, the bezel, the globe, the waste drawer, and the bonnet.
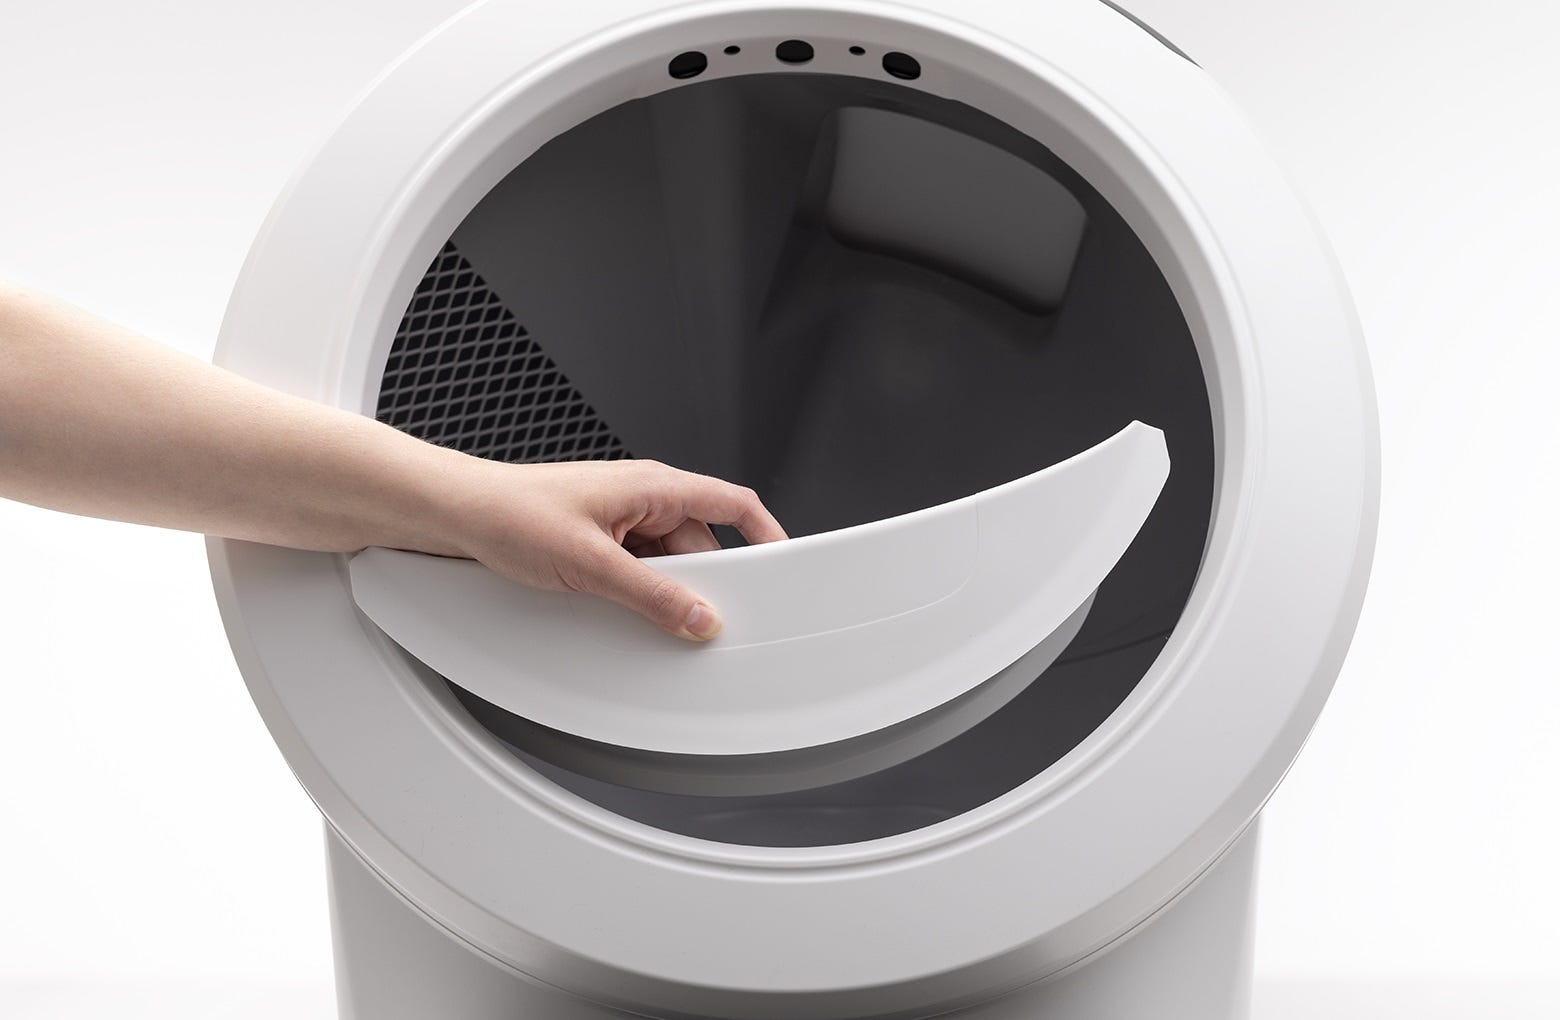
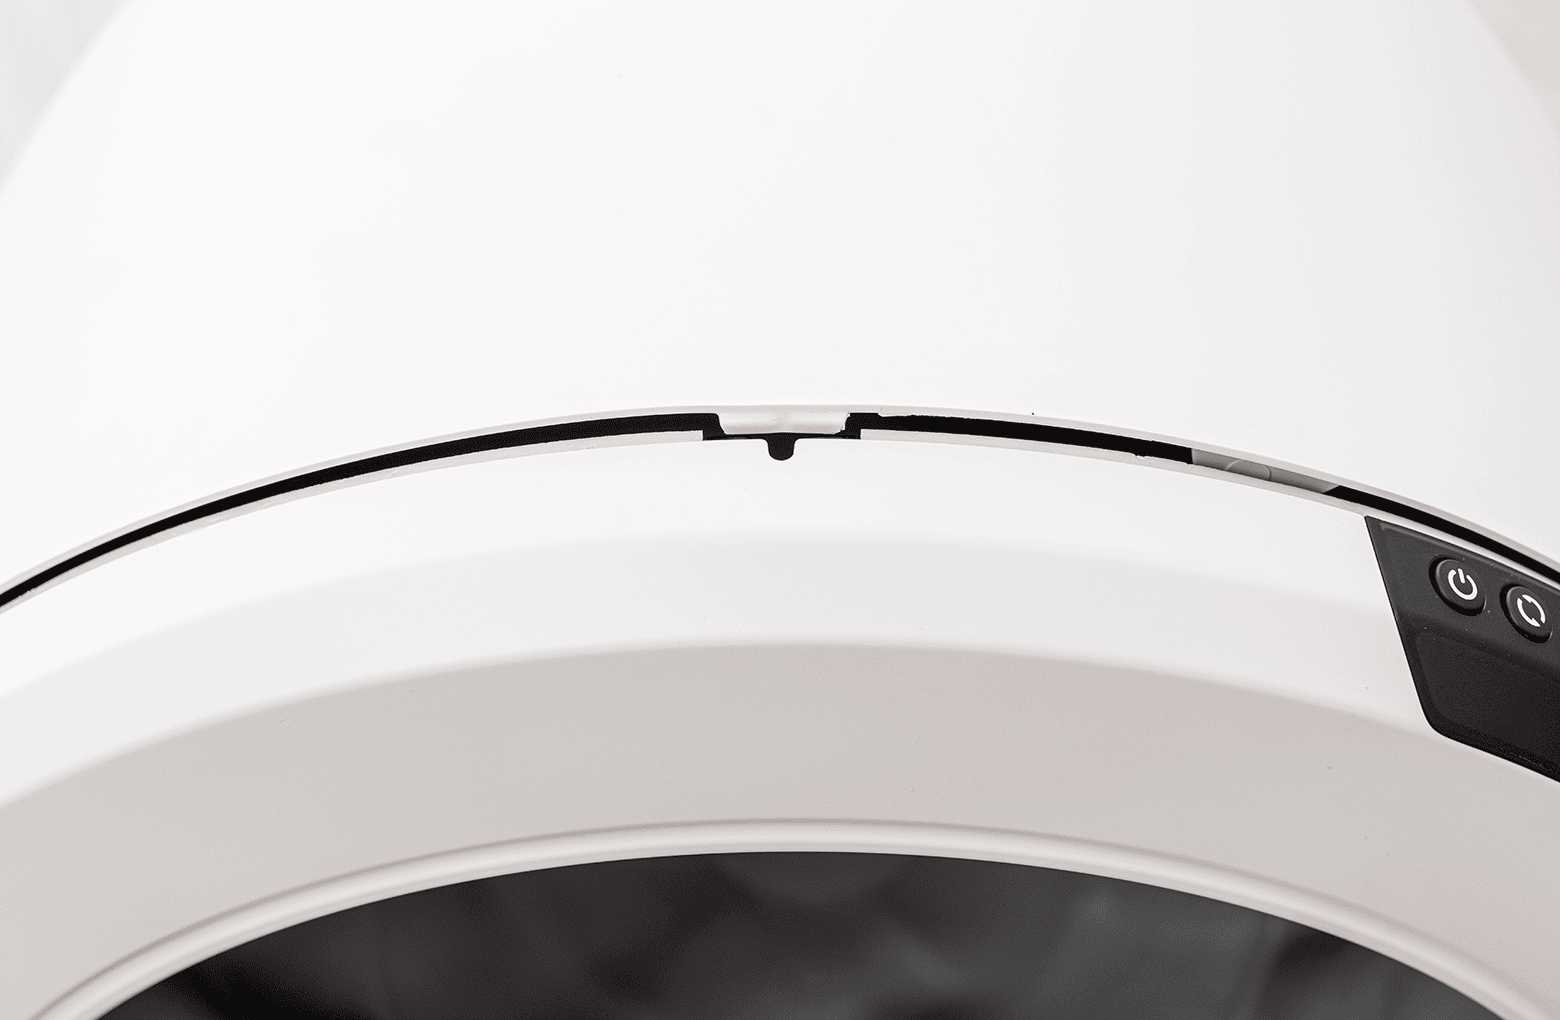
You’ll find the control panel on the top right of the bezel.
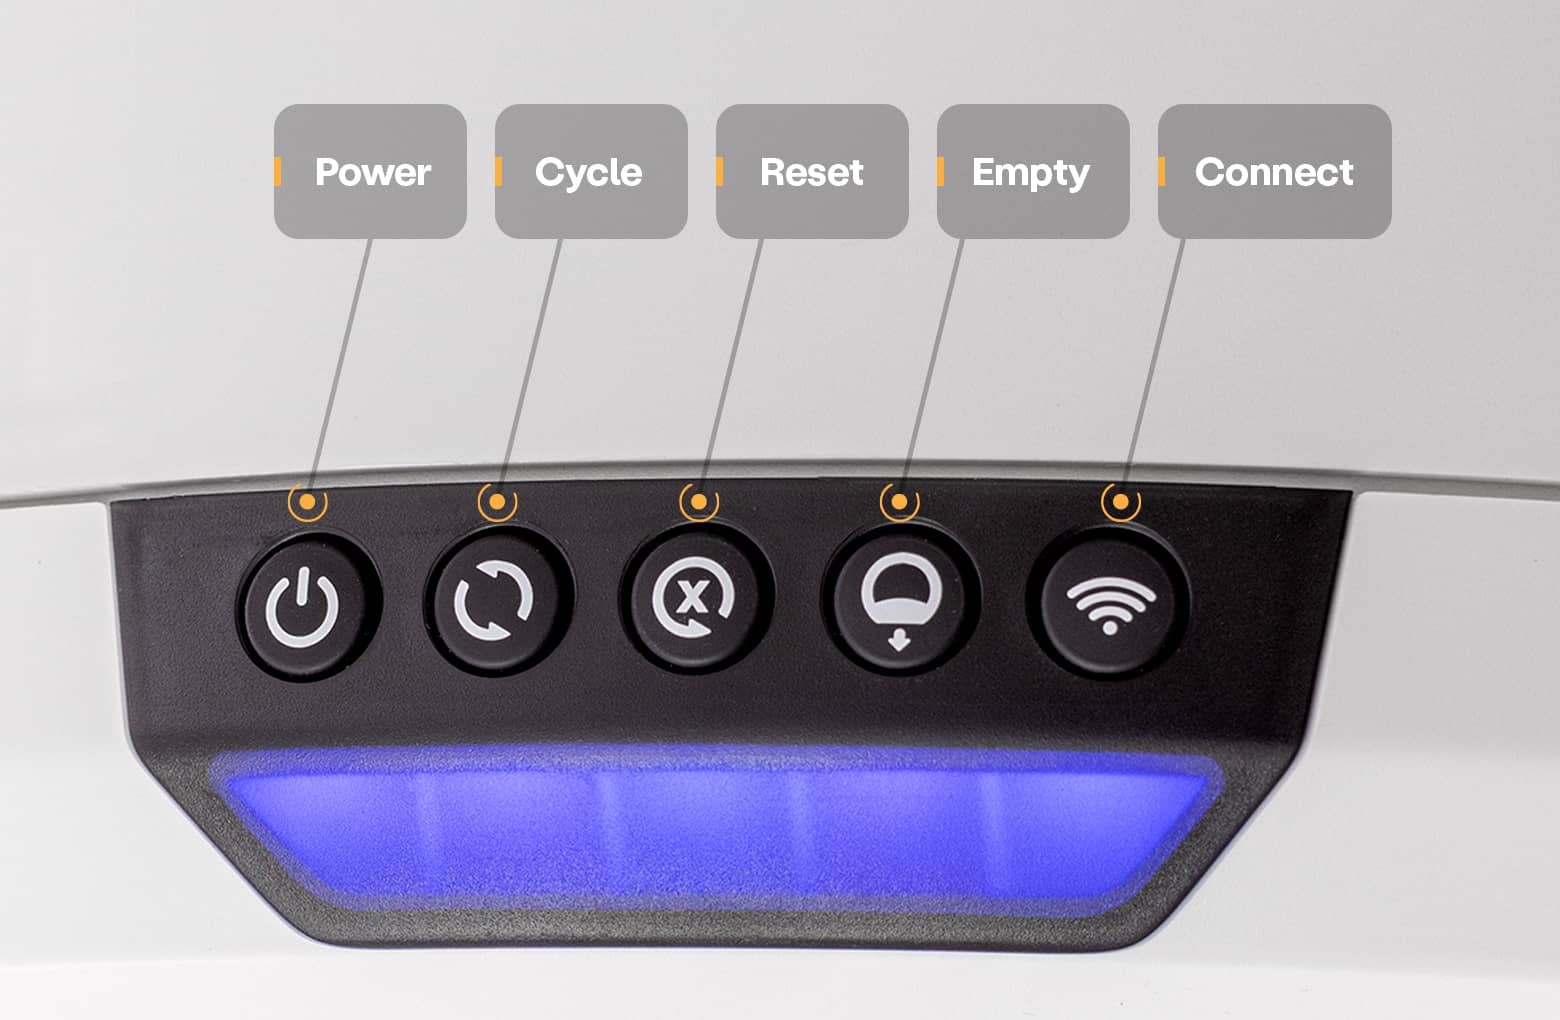
There are two types of button presses: a quick press and a long press. A long press means pressing the button for more than 3 seconds. Typically if a 'long press' is needed, it will be identified.
These two types of presses will activate different features of your Litter-Robot. Keep this in mind when activating functions or troubleshooting.
Many of these functions are also available through the app.
Quick navigation
Disassembly
Preparation
- Make sure the unit is in the Home position.

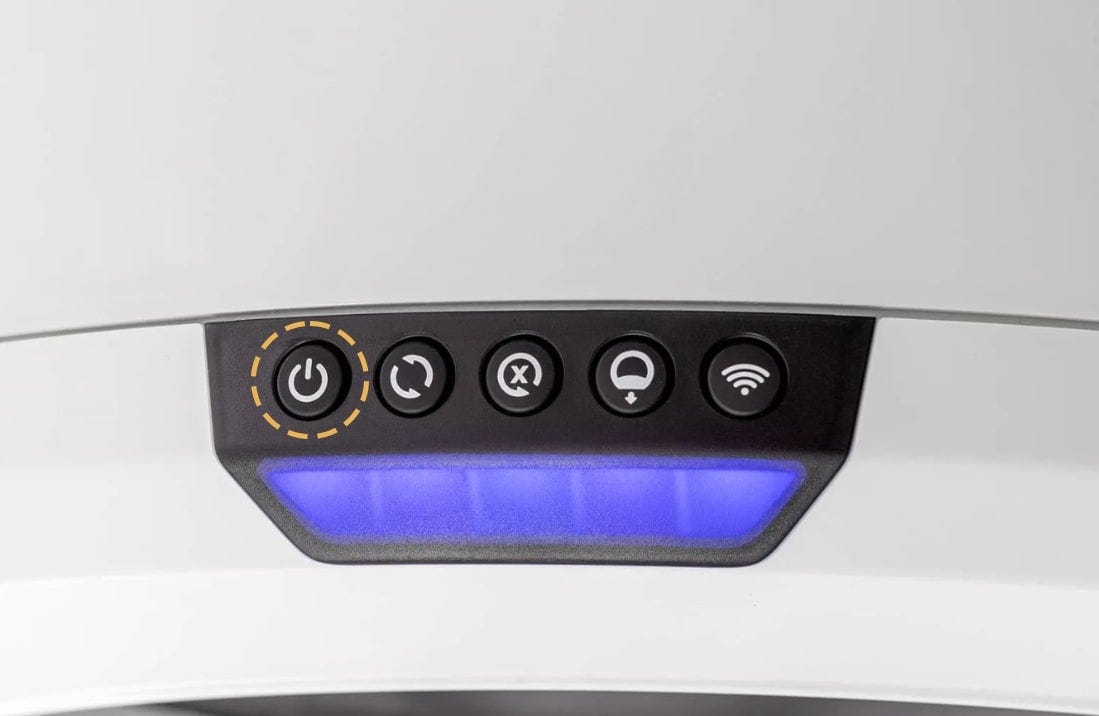
- Press the Power button to turn the unit off, then unplug the unit from the wall.
Removing the bonnet
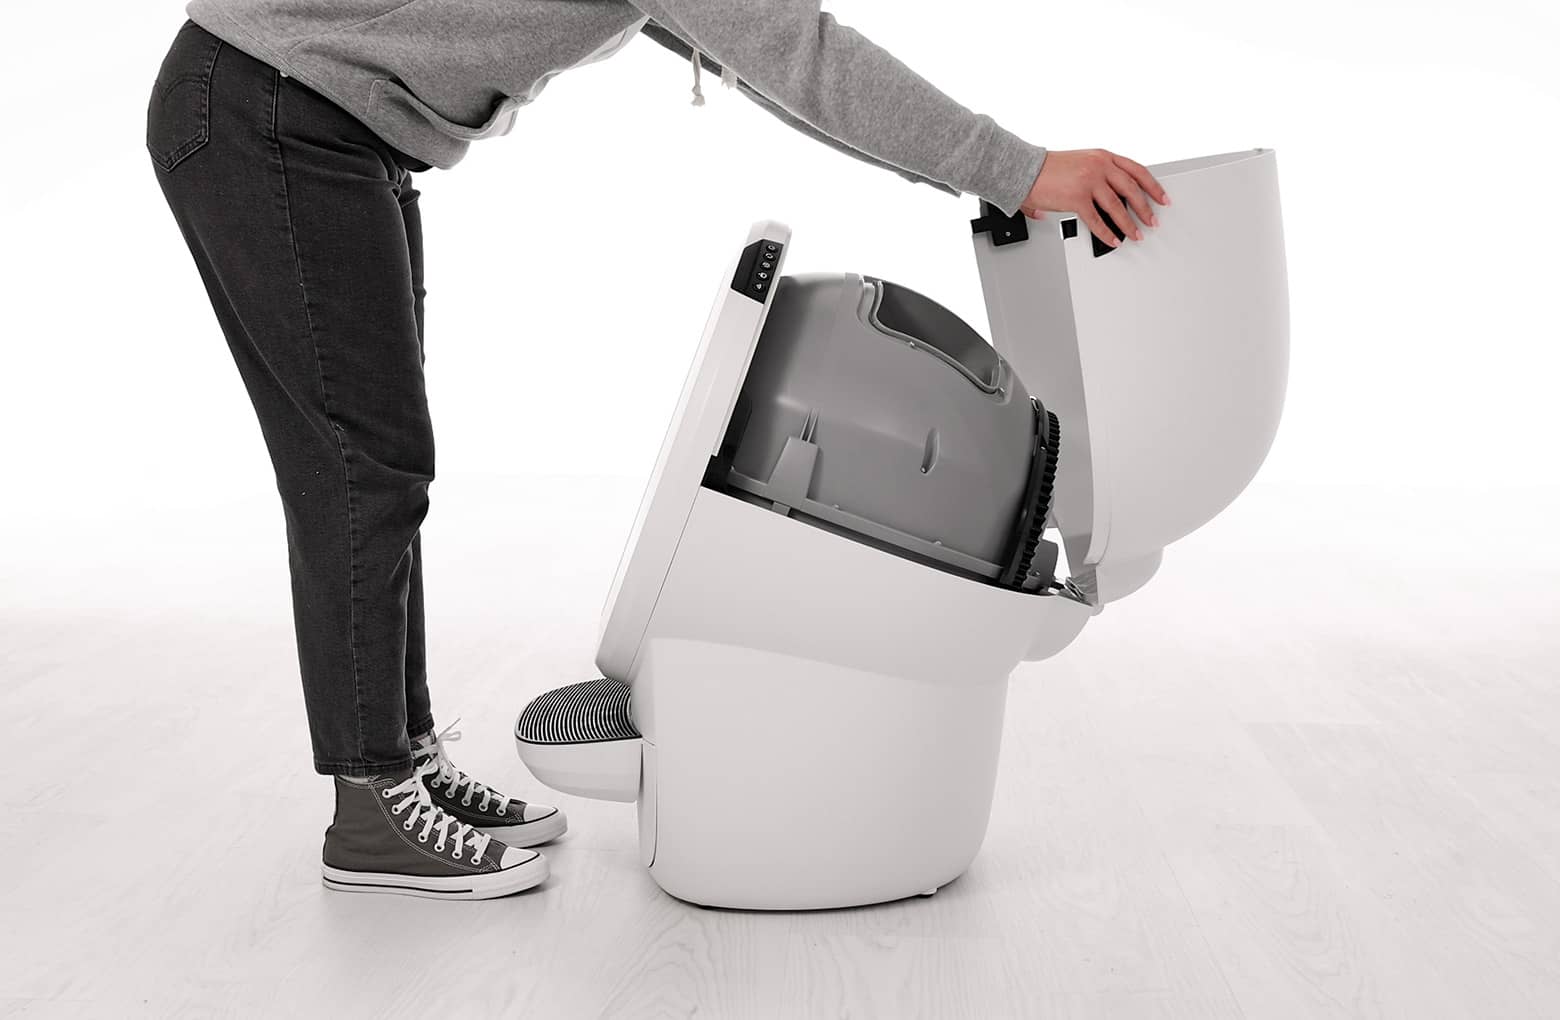
- To open the bonnet, press and hold the latches on both sides of the bonnet, then lift and rotate the bonnet to its open position.
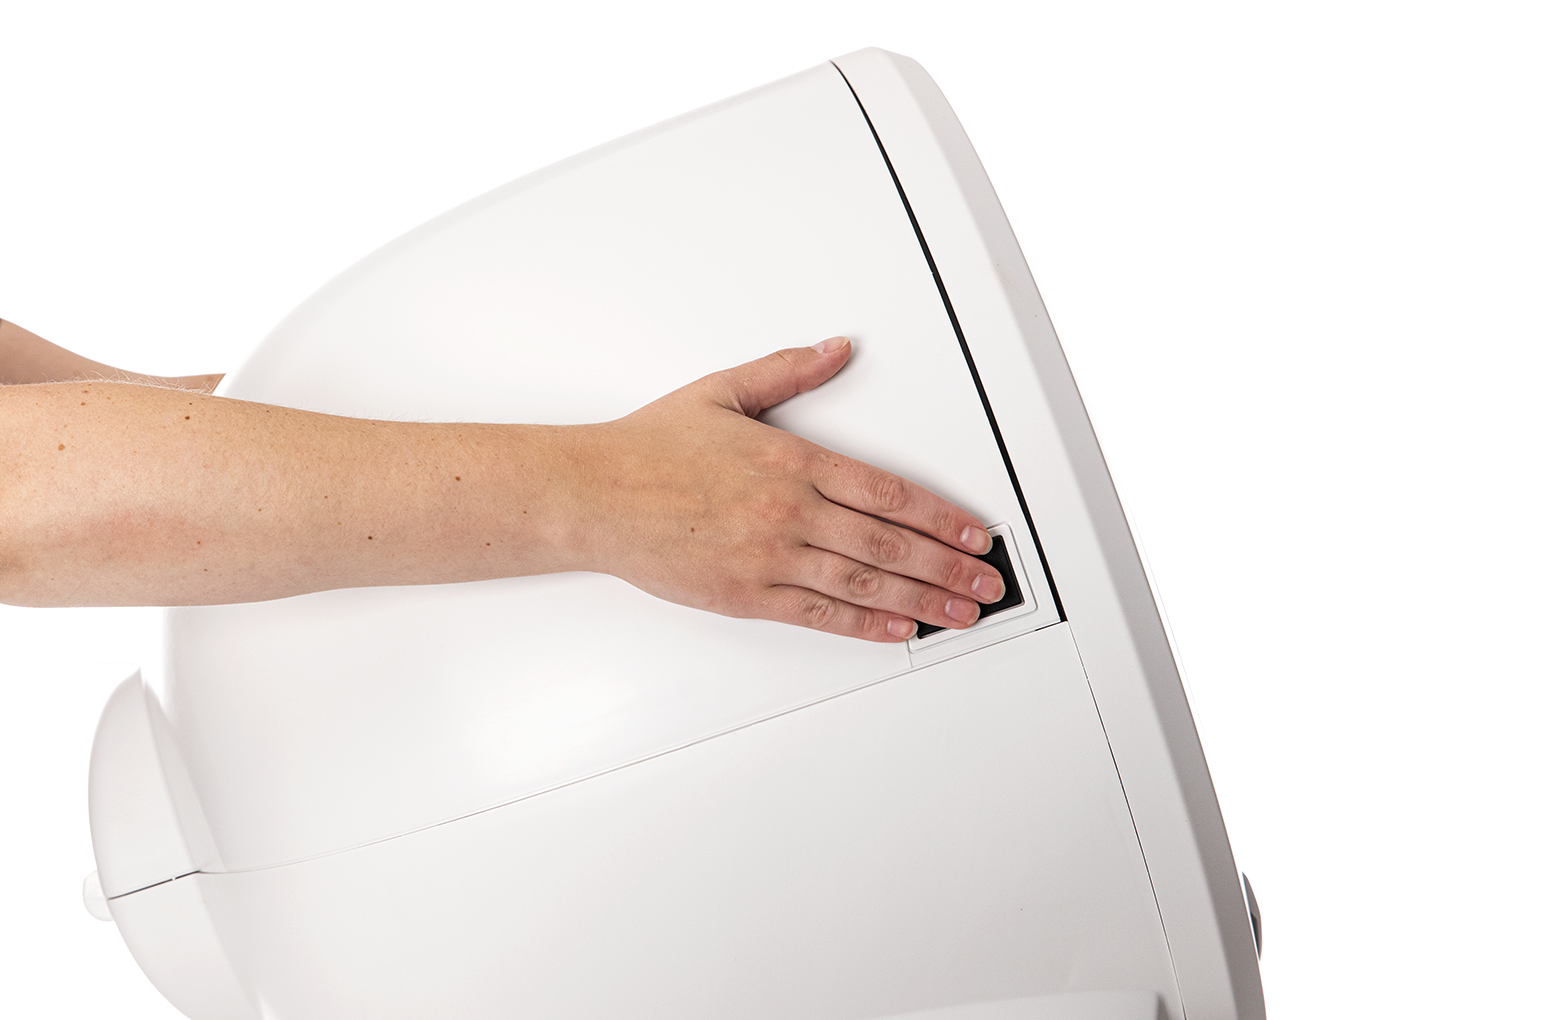
- Set the bonnet aside.
- If you have a fence installed, remove this from the bezel.
Note: Typically need to remove the bonnet completely only during deep cleaning or bonnet replacement.
Removing the globe
- To remove the globe, grab the black handle located on top of the globe, lift the globe out of the base, and set it aside.

A firm, level surface is required for accurate detection of cats and weight readings.
- If you had to replace the base, this is when you’d remove the new base from the box and place it in the desired location near a power outlet.
- The new base, which has a new serial number, will need to be onboarded to the Whisker app.
- Open the Whisker app and follow the onboarding instructions. Once complete, your newly onboarded Litter-Robot 4 will appear as a new robot in the Whisker app.
- Delete your old robot: In the Whisker app, select your old Litter-Robot 4 unit from the dashboard, tap on the Settings gear in the top right corner, tap Delete Robot, then tap Yes.
Assembly
Installing the globe
- To install the globe, hold the globe by the black handle and set it into the base.
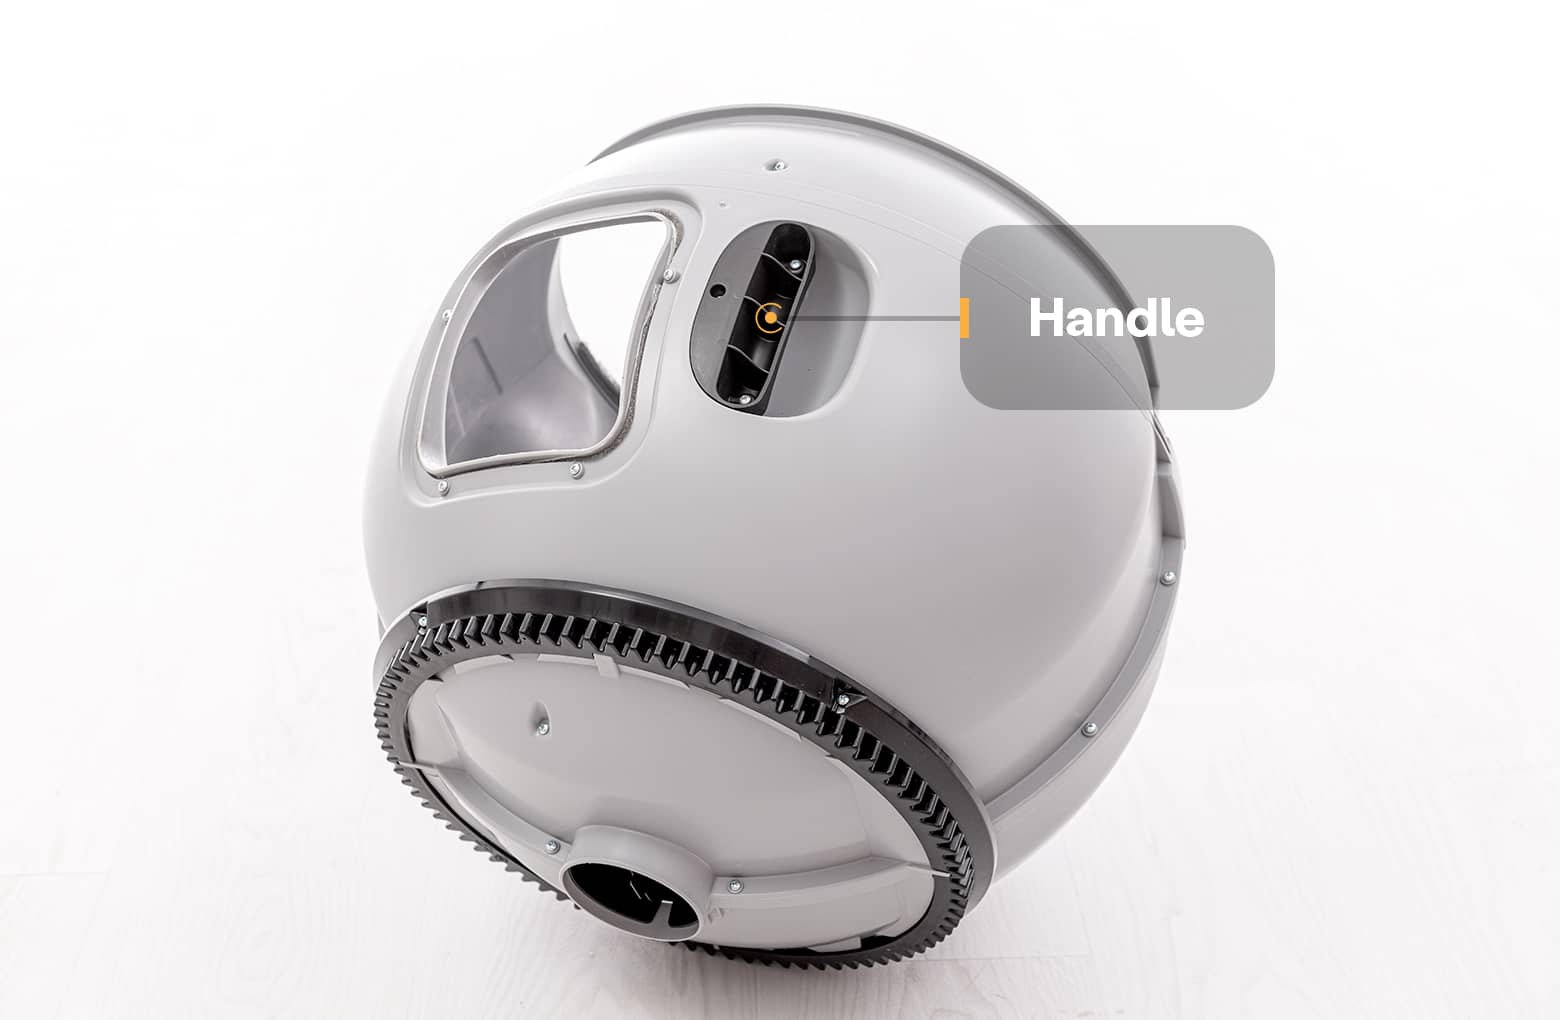
- When installing the globe, keep the globe handle and waste port oriented toward the top to ensure the globe is close to the Home position.
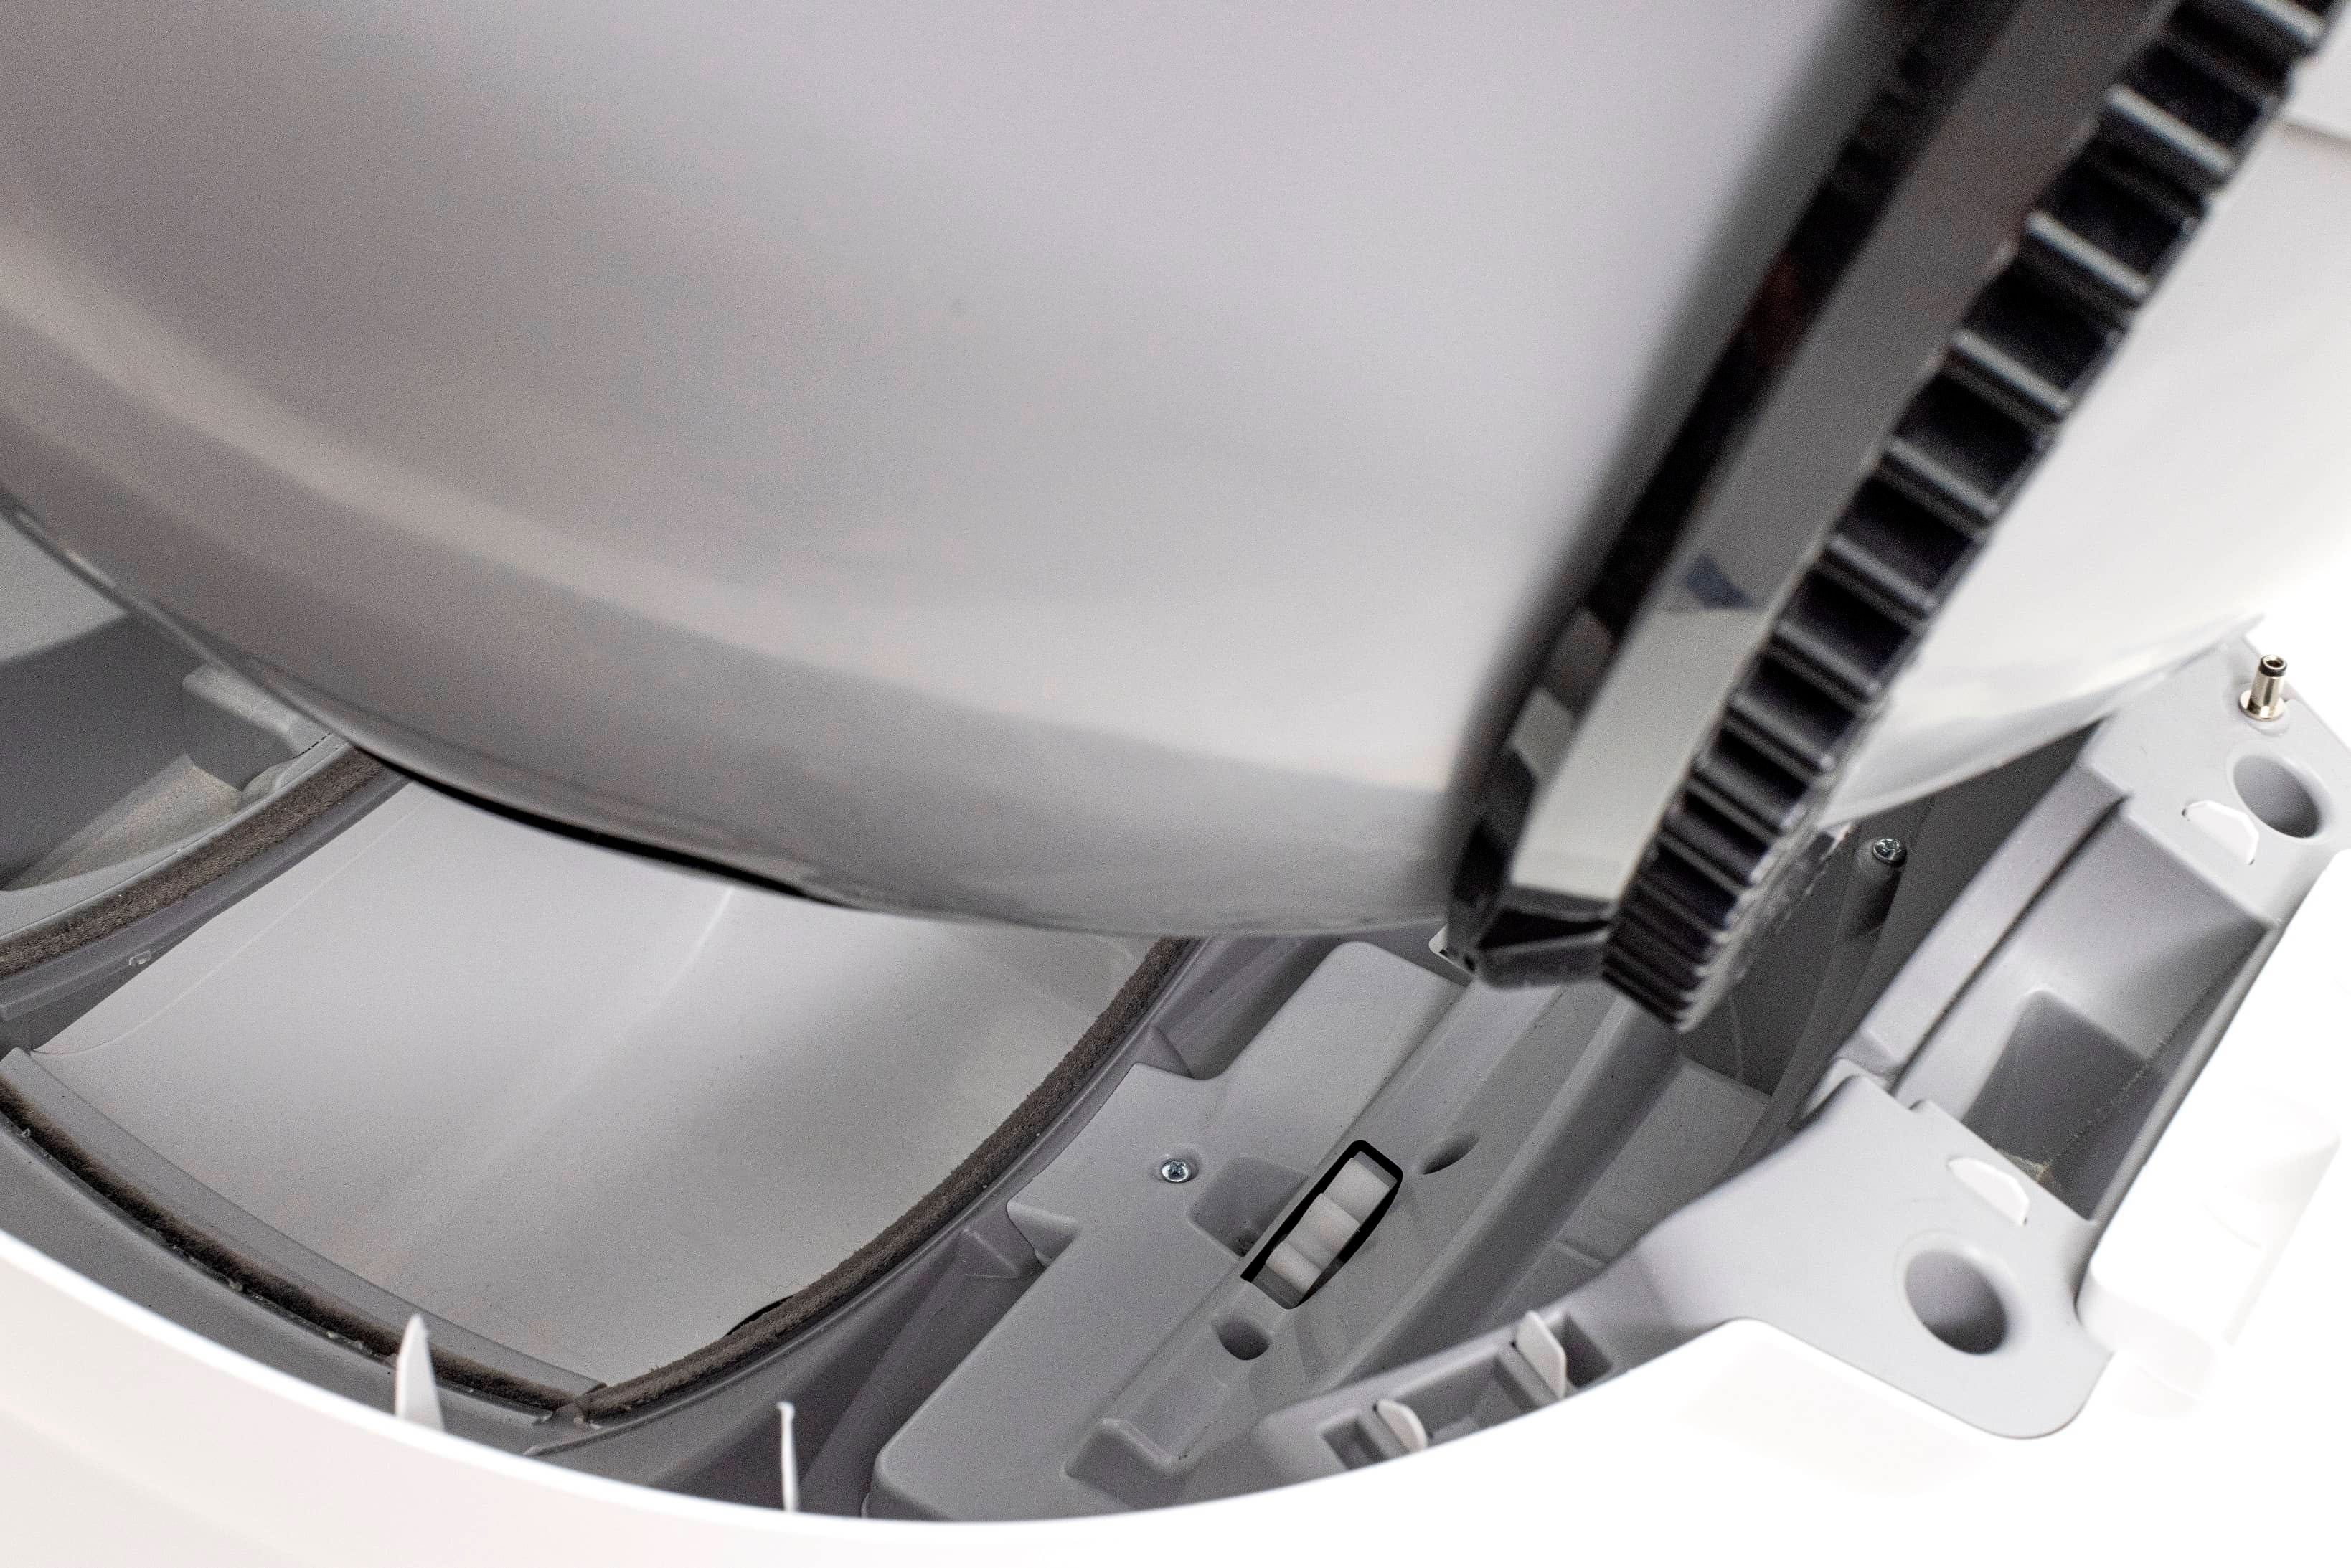
- The large black gear on the rear of the globe should easily engage with the smaller white drive gear in the base.
Installing the bonnet
- If the bonnet was completely removed, rotate the bonnet upward and align the hinge feature of the bonnet at the back of the base.
- To close the bonnet, rotate the bonnet downward over the globe, applying slight inward pressure at the latches to align the bonnet within the base. You should hear the latches snap into place.
- Check to make sure the center tab at the top of the bonnet is secured in its pocket by pushing down on the bonnet at the tab location.
Final steps
- Reinstall the fence by snapping it onto the bezel at the globe entrance.
- Plug the unit in and power it on.
Waste drawer
Litter-Robot 4 ships with 5-pack of custom-fit waste drawer liners. These liners are made specifically for any Litter-Robot model, but a white 8-13 gallon (30-49L) trash bag will also work.
White bags work best.
Please note that waste level readings may be inaccurate when using a dark bag, especially when the drawer is empty. As clumps start to collect in the drawer, the readings will become more accurate. For the most precise waste level readings and a seamless experience, including drawstrings for easy disposal, we highly recommend using Litter-Robot Waste Drawer Liners.
Installing the waste drawer liner
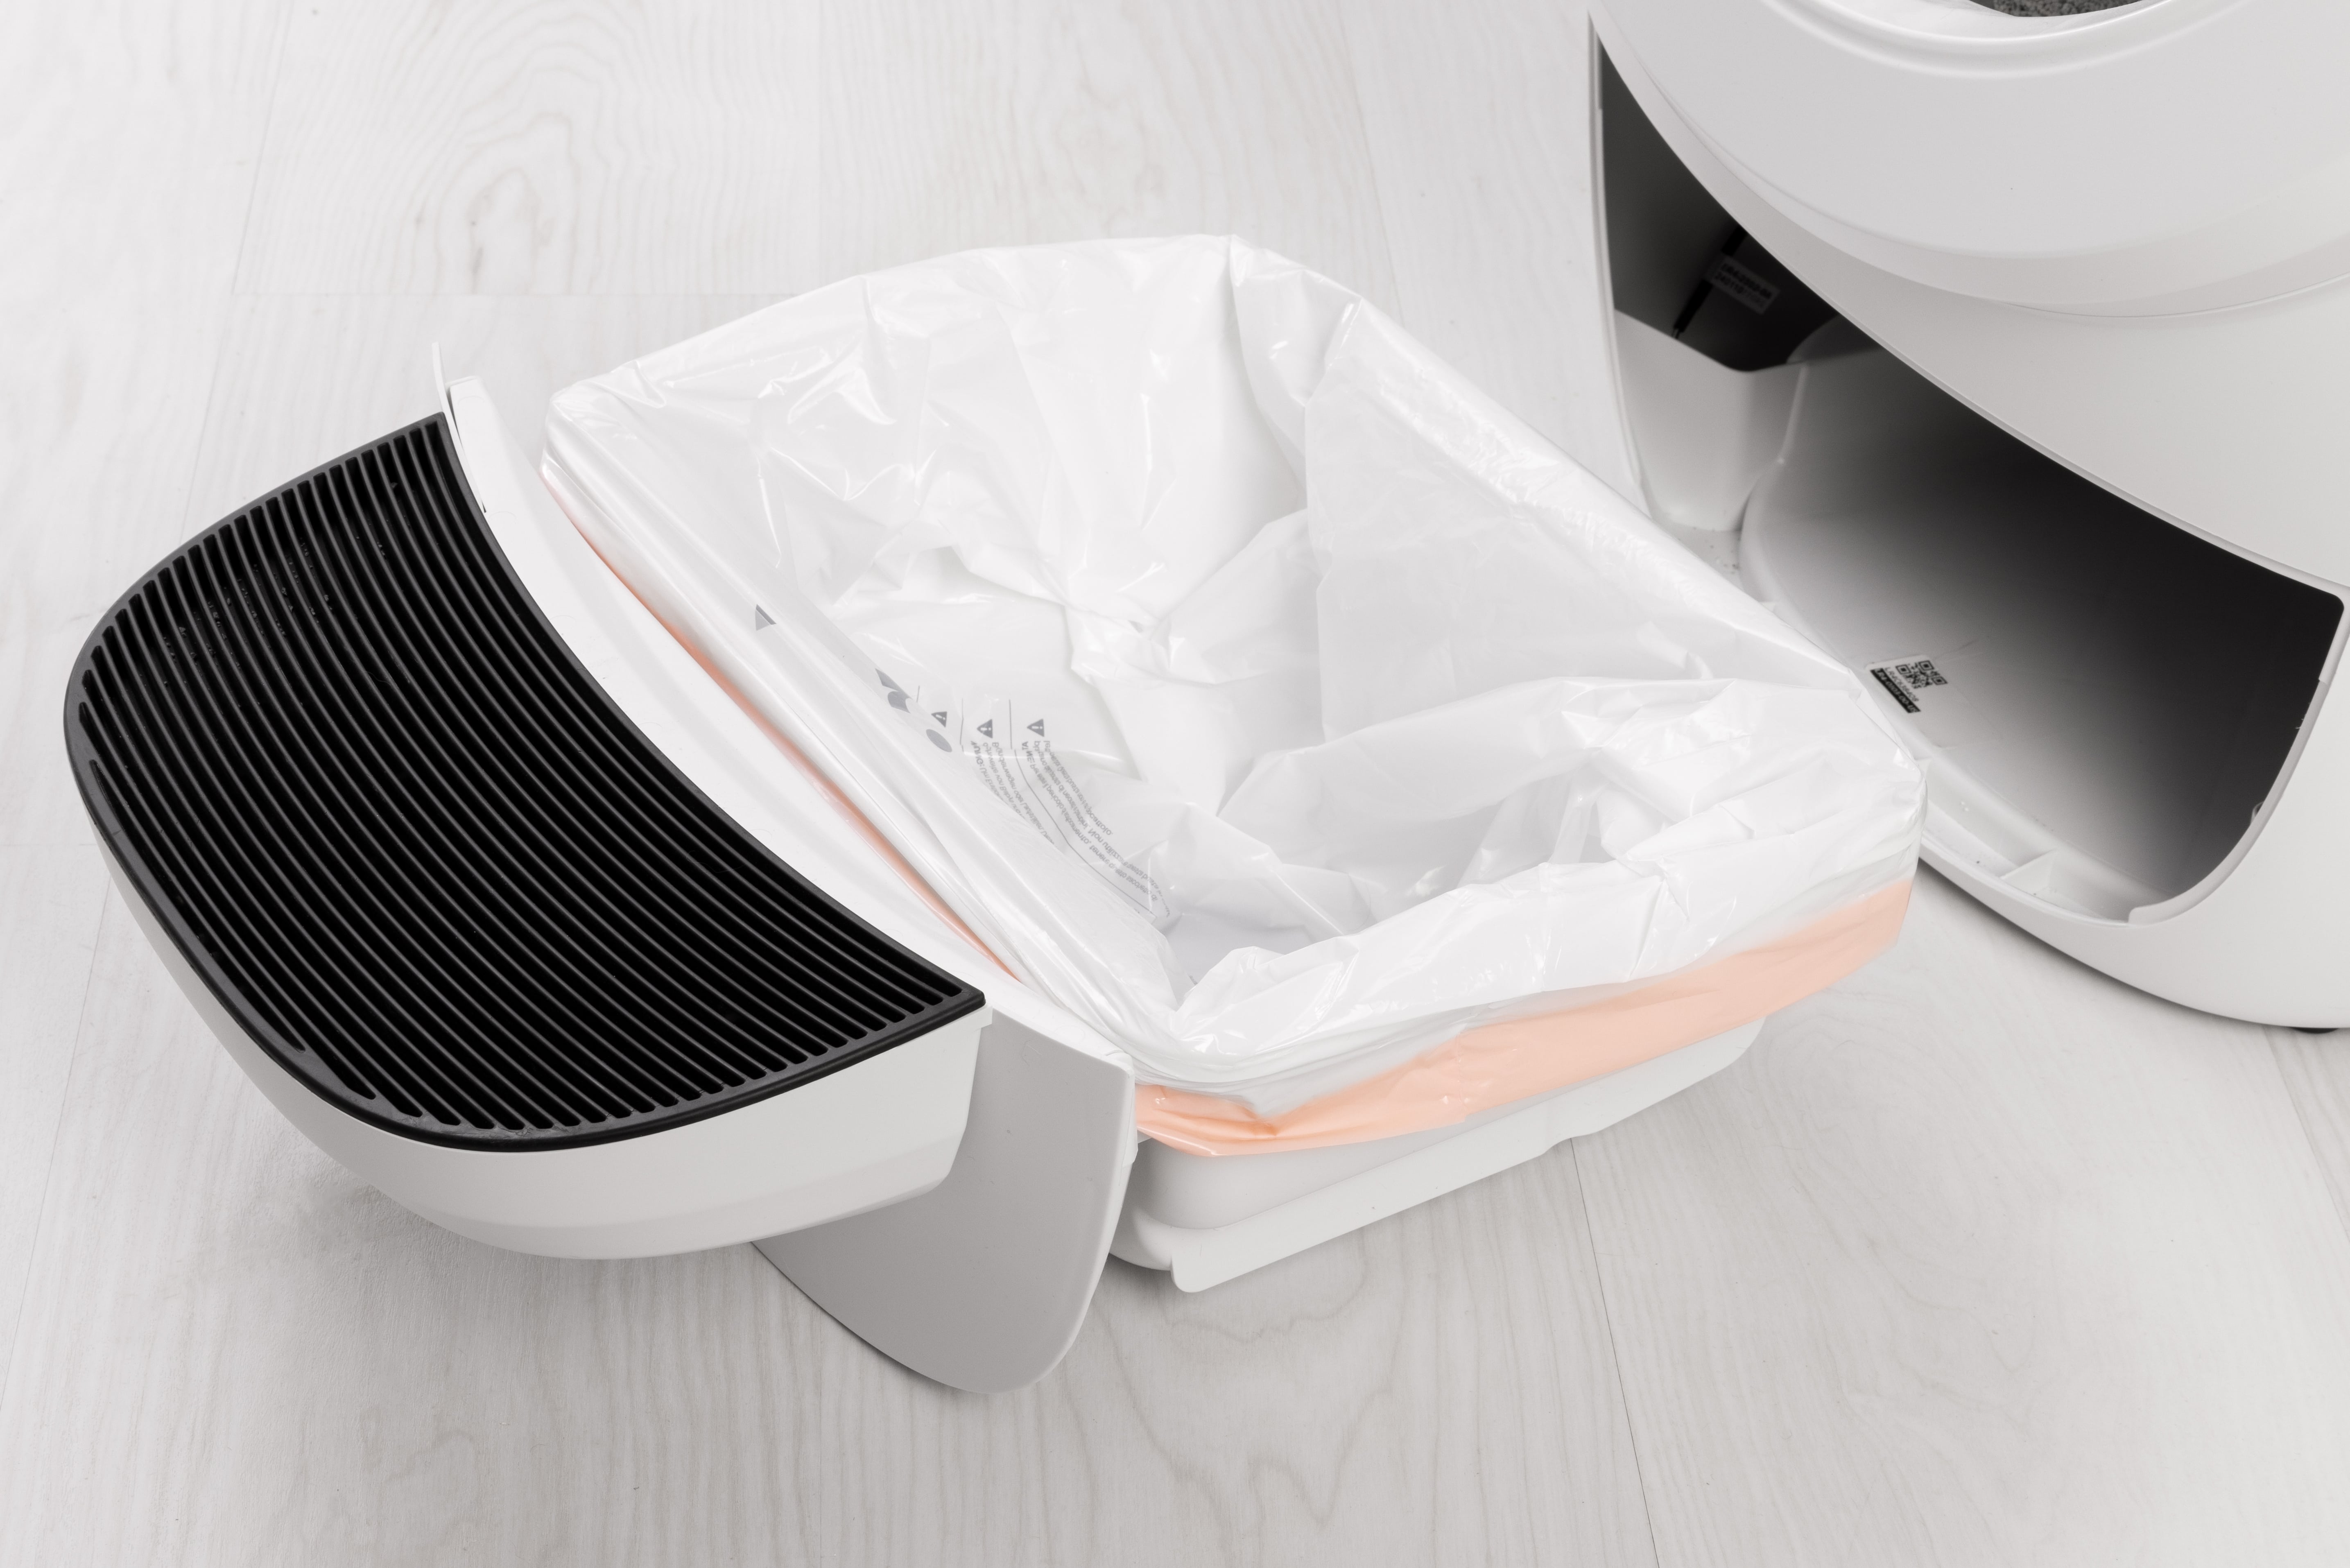
- To install a new waste drawer liner, you’ll need to remove the drawer from Litter-Robot. Simply grab the step and slide the drawer out until it’s clear of the unit.

- Now take your new waste drawer liner and open it all the way.
- Wrap the edges of the waste drawer liner or bag over the rim of the waste drawer.
Litter-Robot 4 is equipped with OmniSense™ detection that utilizes laser and weight sensor technology to provide real-time litter and waste drawer levels.
Stretched bags or bags not pressed flat will cause the OmniSense™ detection to inaccurately measure the waste drawer level.
Ensure the bag is pushed flat against the side walls and bottom of the drawer.
- Finally, push the drawer back into the unit
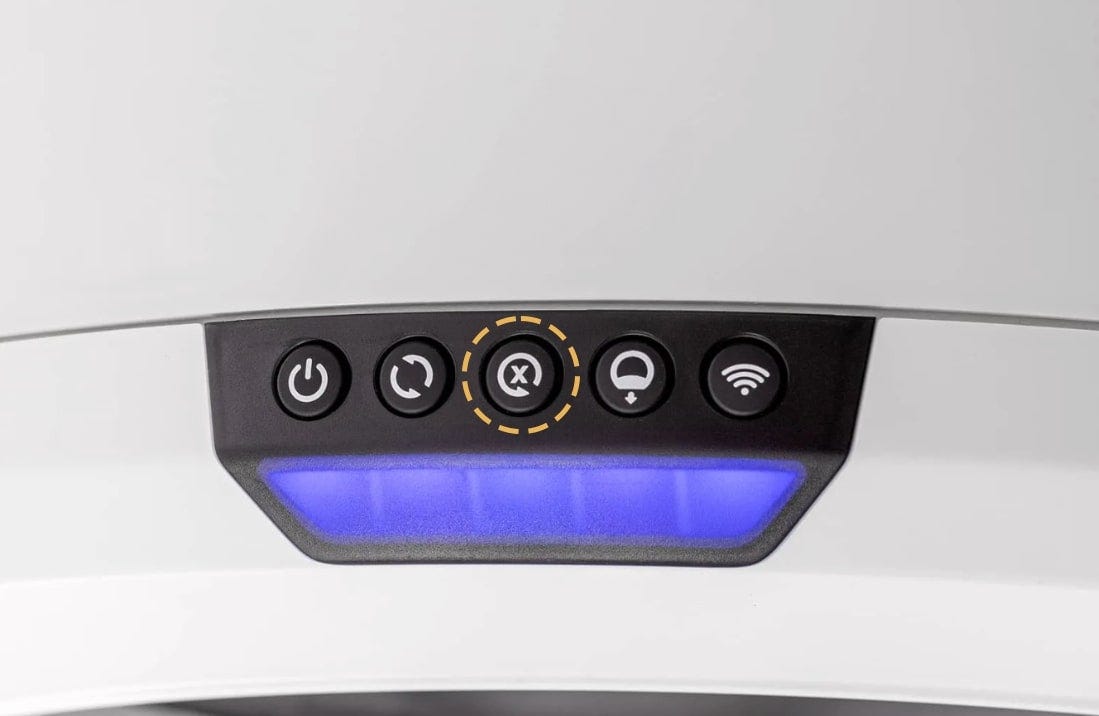
- Press the Reset button to zero the weight sensors.
Carbon filter
Litter-Robot 4 is equipped with a carbon filter that is installed on the outside of the globe. When the globe is in the Home position, the filter sits directly over the waste drawer to absorb odors.

OdorTrap® Packs may be also be used instead of the carbon filter. Neither the carbon filter nor OdorTrap® are required for operation.

Replacing the carbon filter or OdorTrap® pack
Installing the OdorTrap® holder
Questions? Visit whiskersupport.com
Didn't find what you're looking for?
Live support available Mon-Fri: 9AM-9PM EST and Sat-Sun: 9AM-5PM EST, or submit a ticket anytime.