The store will not work correctly in the case when cookies are disabled.
Litter-Robot 4: Deep cleaning guide
Keep your self-cleaning litter box working for longer by following these Litter-Robot cleaning instructions.
We recommend doing a basic globe cleaning every 1-3 months and a deep cleaning at least every 3 months, depending on how many kitties you have.
Here's how to take apart Litter-Robot 4 for cleaning.
More frequent deep cleanings may be necessary depending on use.
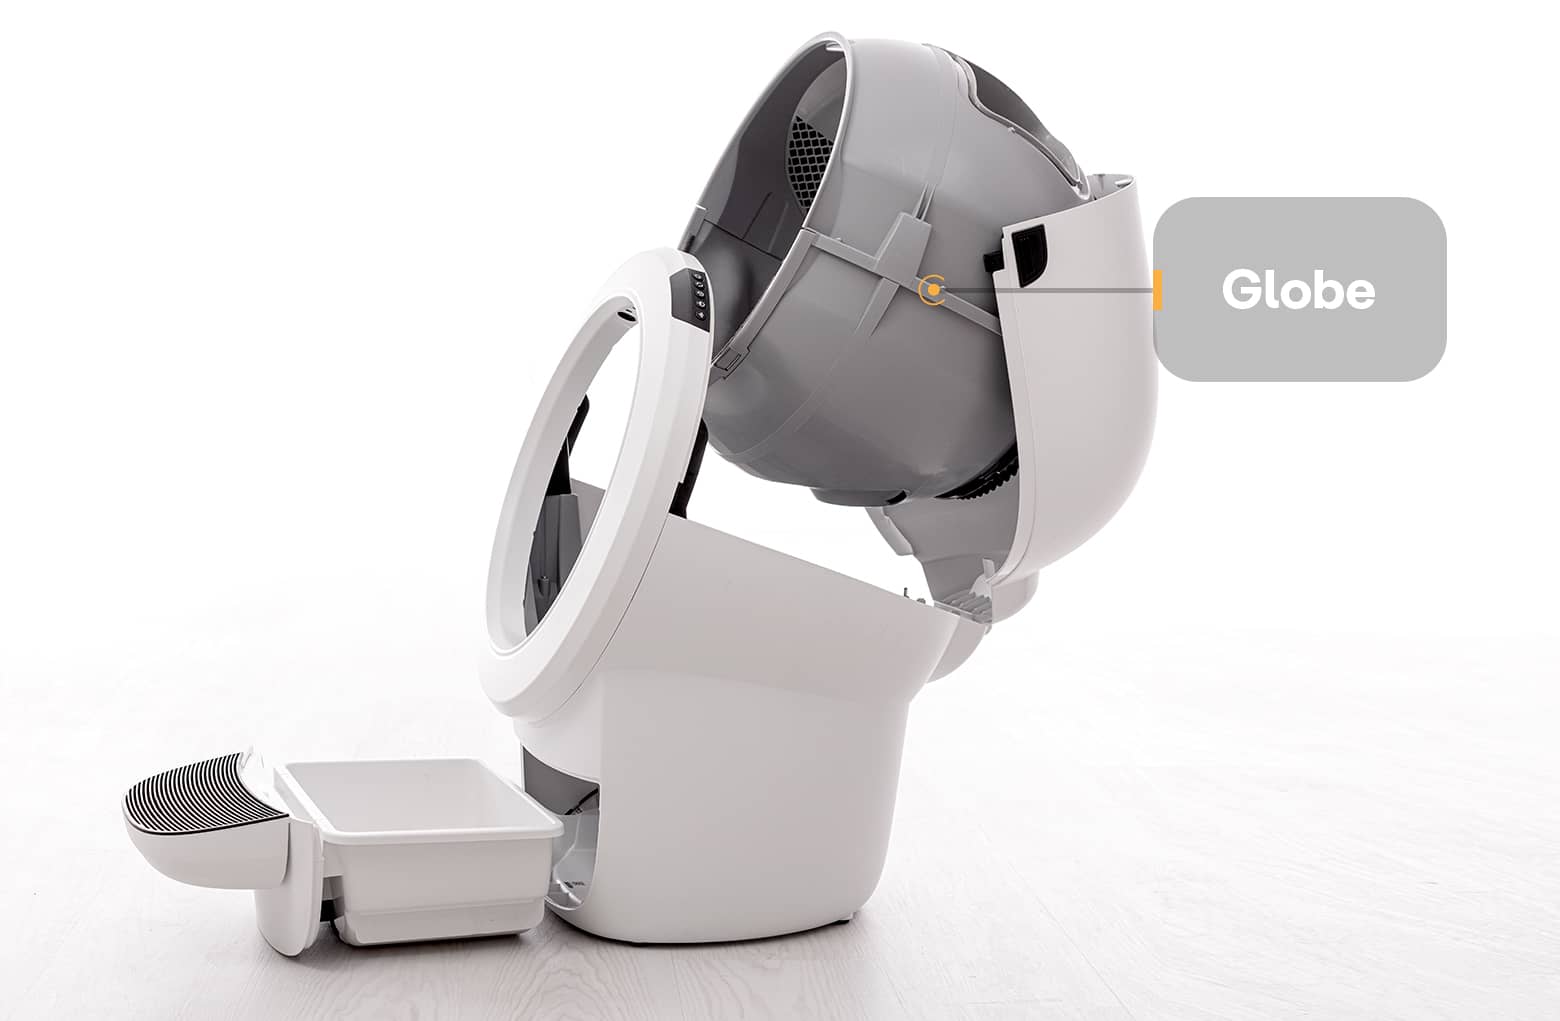
Cleaning the globe
- Press the Empty button to cycle the globe clockwise. This will allow the litter to fall through the waste port and into the waste drawer for easy disposal.
- Sweep any leftover litter toward the waste port.
-
Press either Cycle or Reset to
return the globe to the Home position. Ensure that all litter has been
removed from the globe—wet litter turns into messy clay!
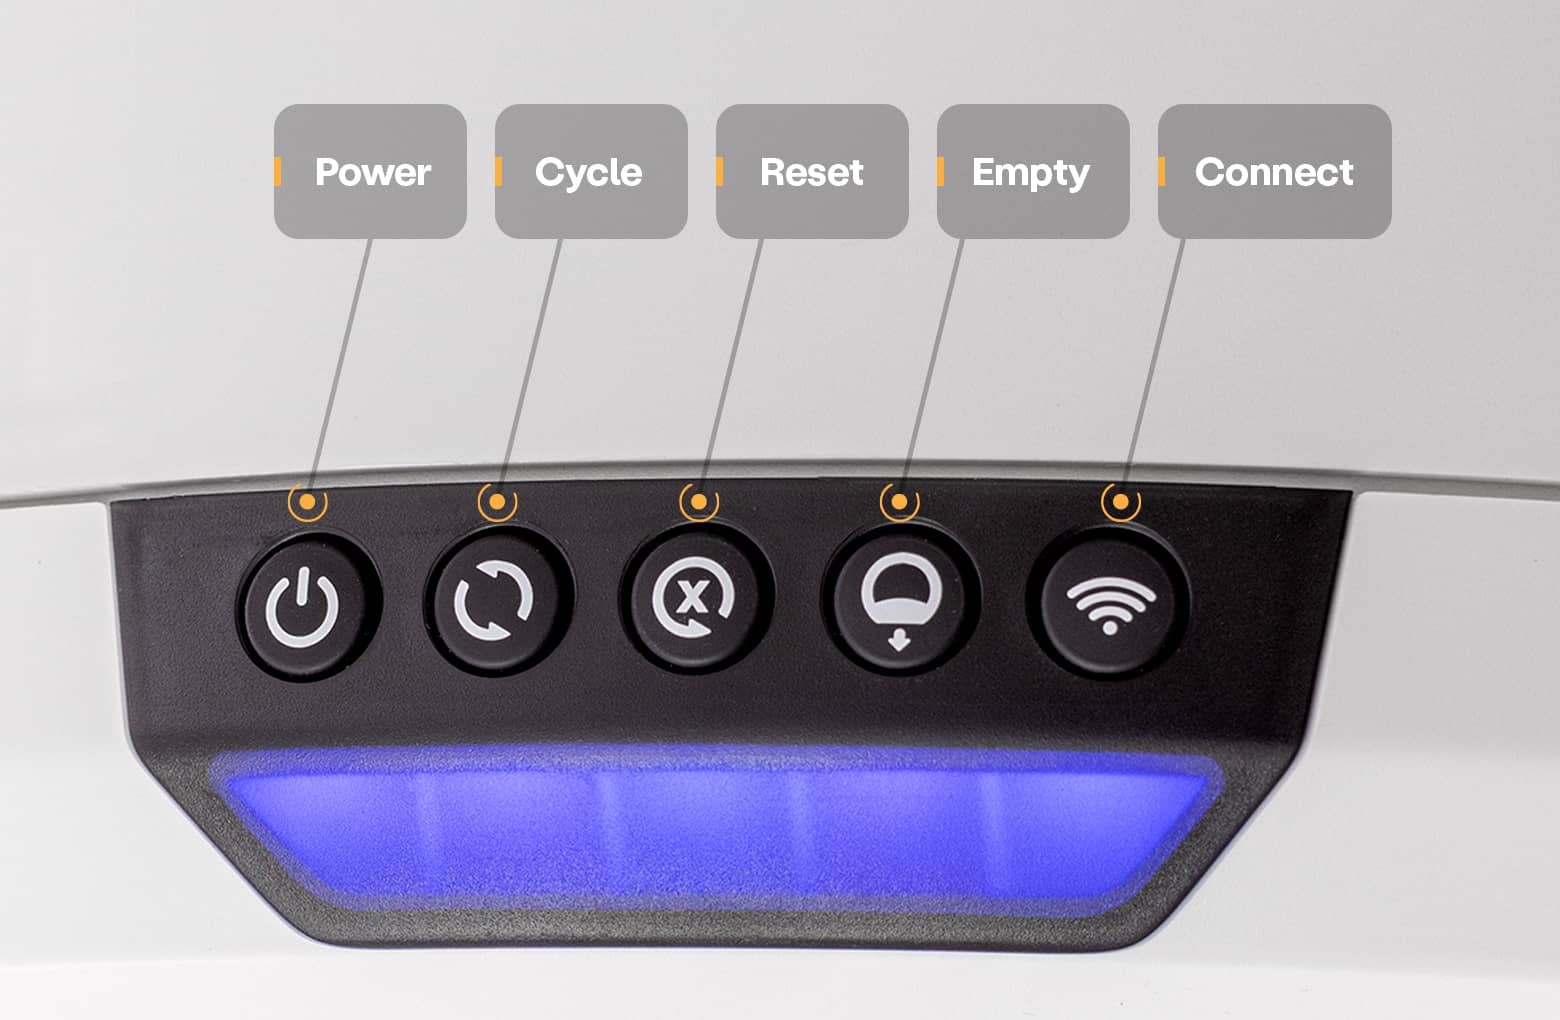
If your unit is stuck during a cycle, short press the Reset button to continue and complete the cycle. If your unit is still stuck and it is in an error state, long press the Reset button for 3 seconds to zero the weight scale.
- Turn Litter-Robot off and unplug the unit.
- If you have any accessories installed such as the fence, shield, or LitterHopper, remove them.
-
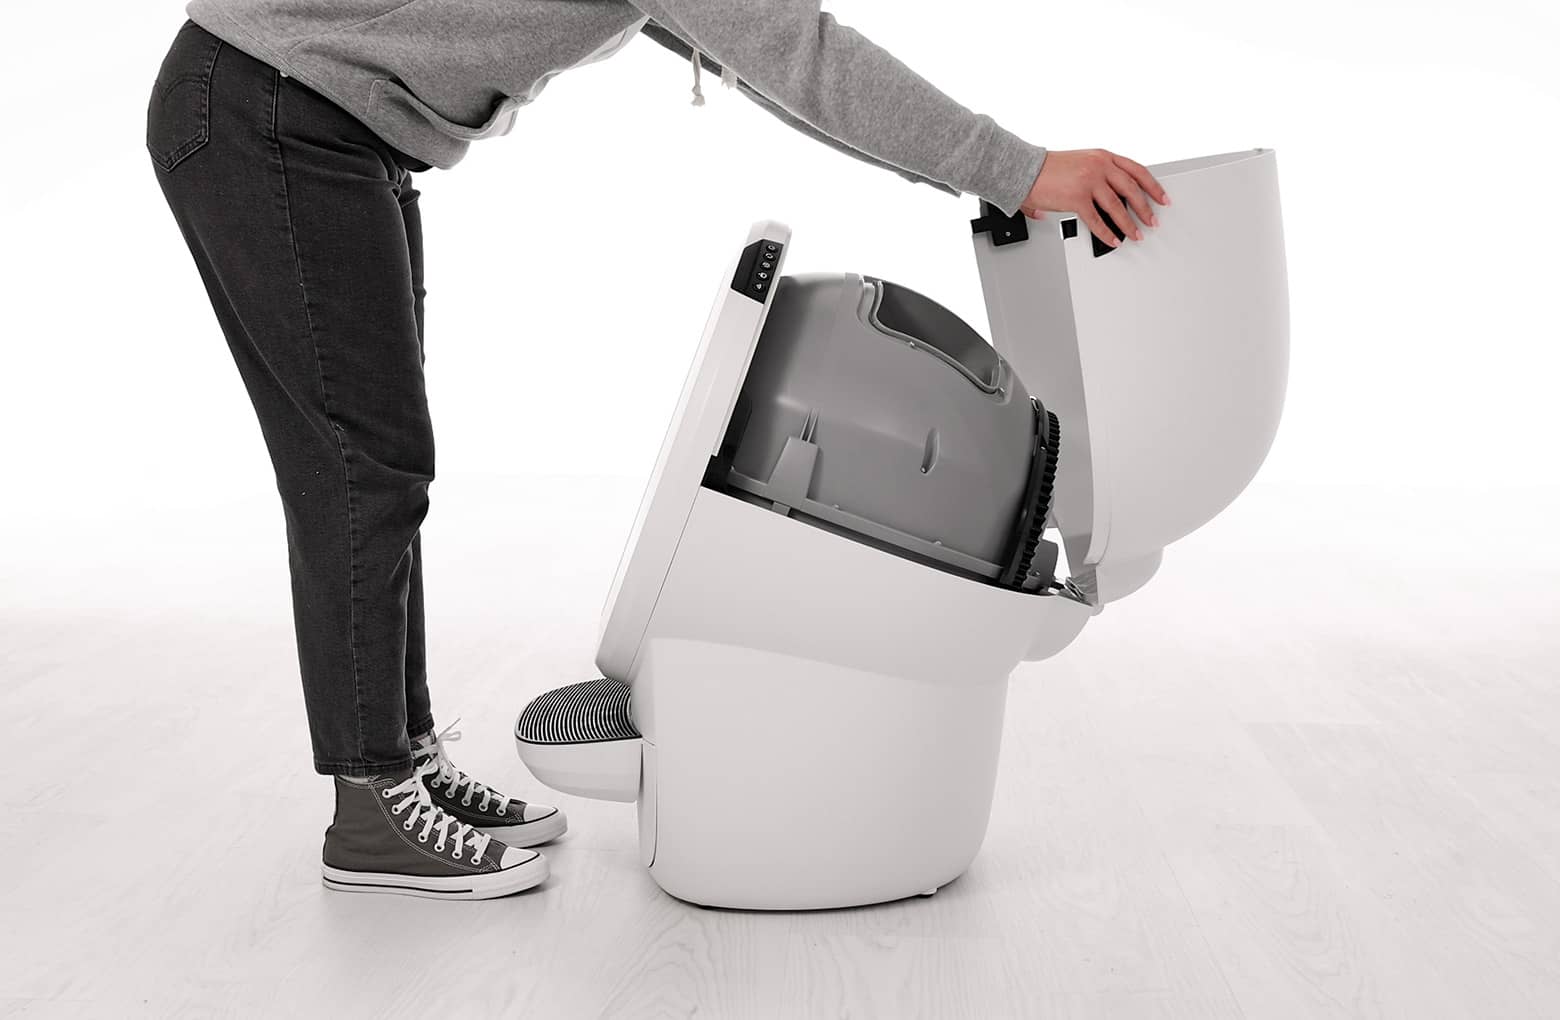
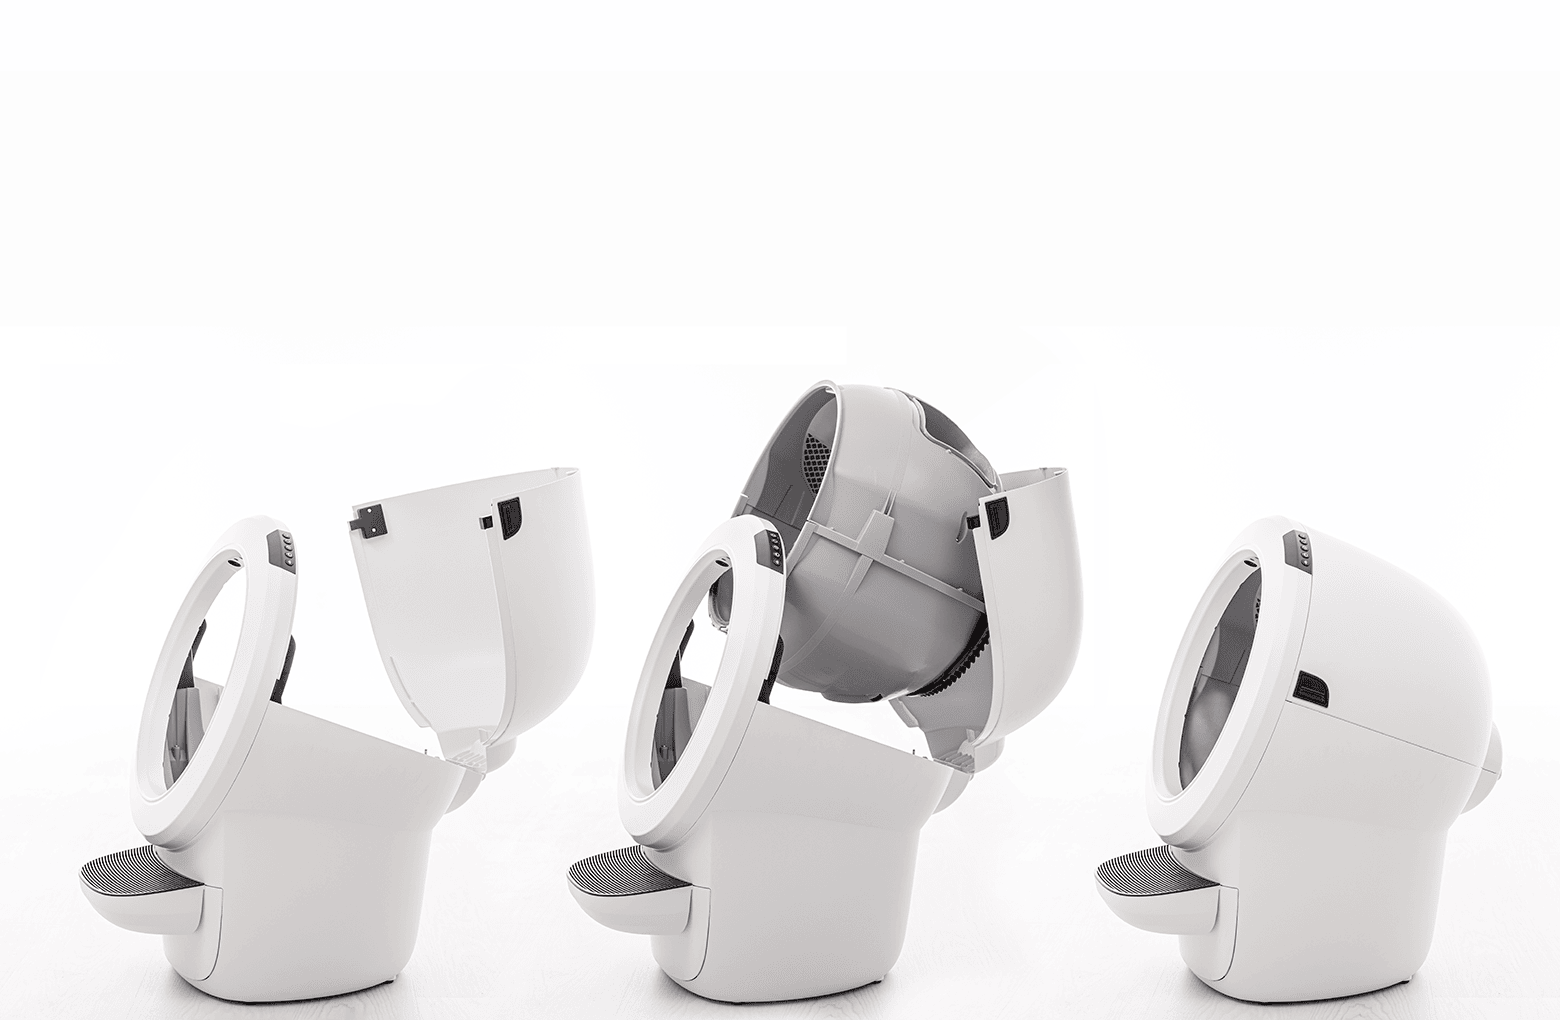
Open the bonnet: Press and hold the buttons on both sides of the bonnet,
then lift and rotate the bonnet to its open position.
-
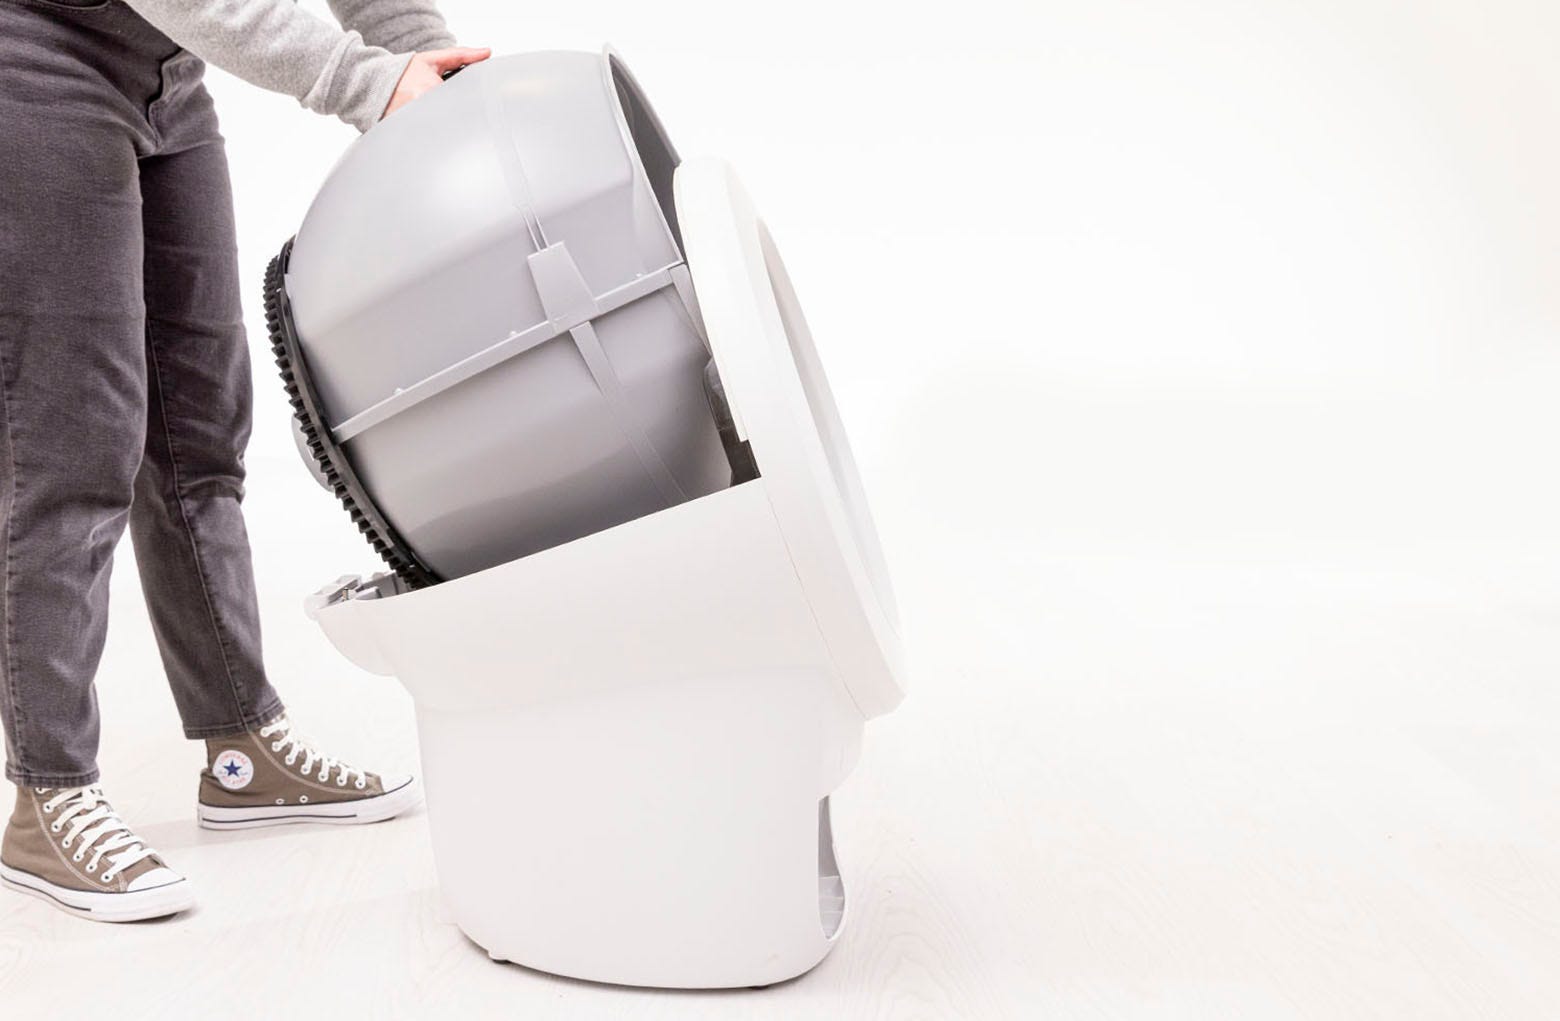
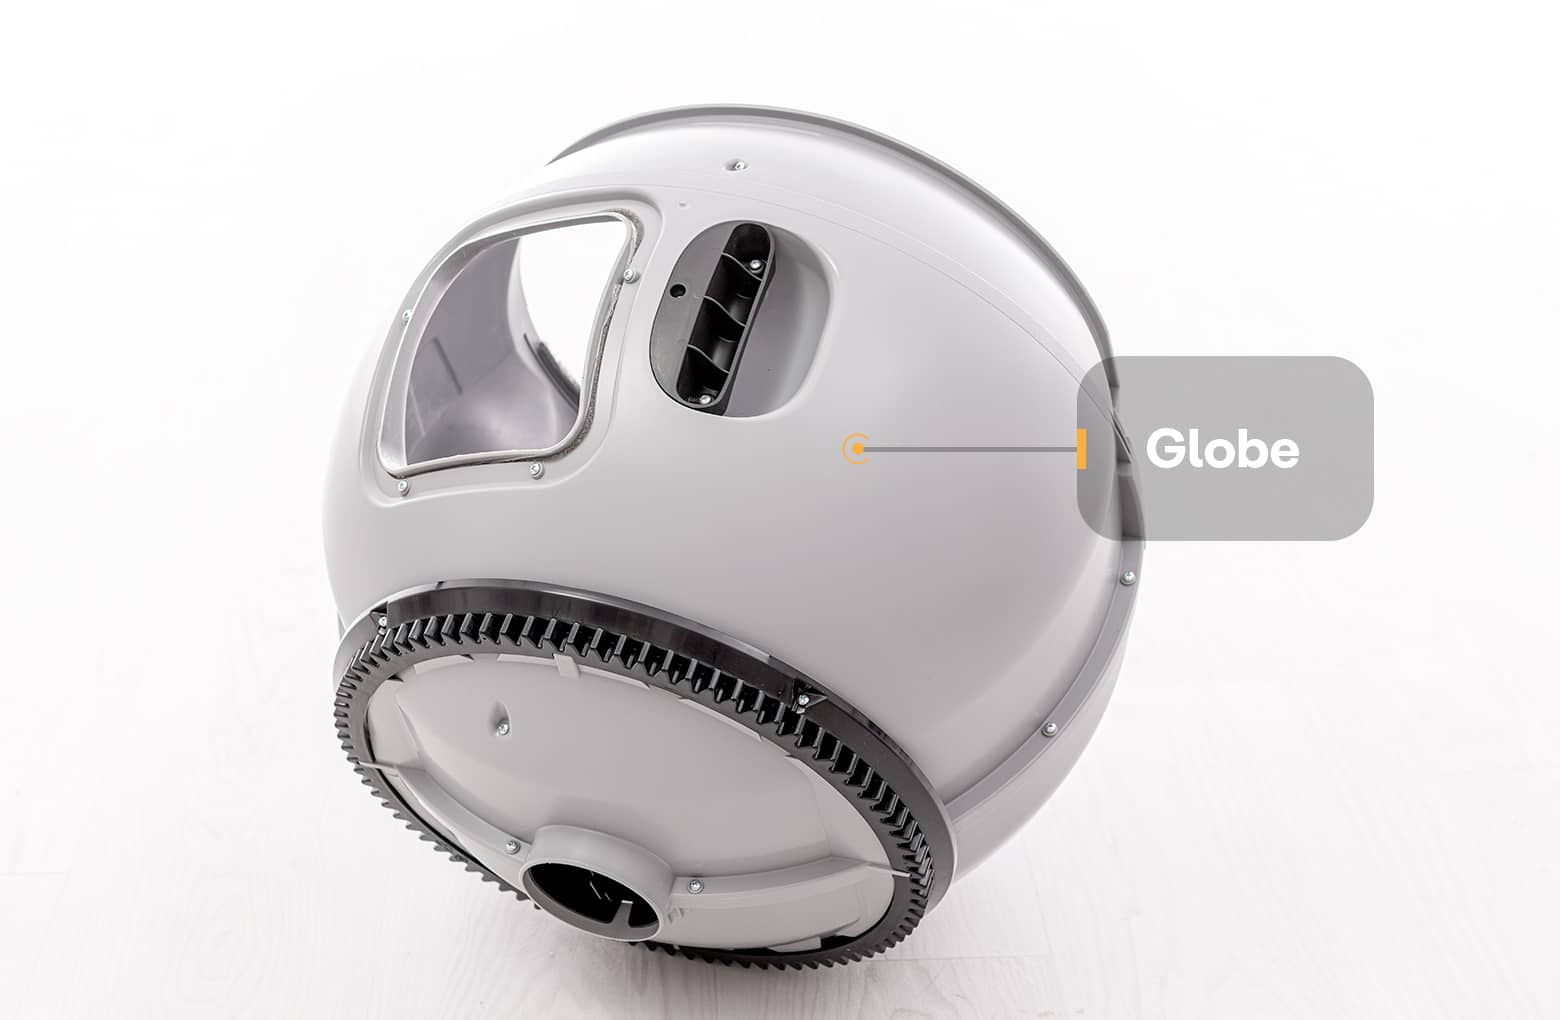
Remove the globe: Using the handle, lift the globe off the base.
-
Remove the carbon filter from under the globe. Push the top edge of the
filter downward to free it from hooks and remove it from the slot.

-
Clean the globe with Litter-Robot
Cleaner Spray
or
Cleaner Wipes, or with water and a mild soap. There are no electronic components in the
globe that can be damaged by soap and water. If the globe has become
extremely dirty, it can be soaked and cleaned with a water hose.
Do not use bleach or cleaning products that contain bleach inside the globe as this may cause irritating fumes.
-
Let the globe dry completely before reassembling it to the base and closing
the bonnet.
For a quick touch-up, you can use Litter-Robot cleaner wipes or a disposable towelette to wipe the inside and upper half of the globe (without removing the litter). You can also manually rotate the globe to a position where the litter is behind the screen, providing access to the flexible globe liner surface for spot cleaning. Litter-Robot can then be used almost immediately since drying is nearly instantaneous.
Litter-Robot Cleaner Spray and Cleaner Wipes can be ordered at litter-robot.com.
Optional: Cleaning the septum
The Litter-Robot 4 Septum holds the sifted litter during a clean cycle. Learn how to remove and install the septum here.
You will need:
- Phillips-head screwdriver
-
Standing behind the unit, look down at the top of the globe. Remove the
seven (7) screws holding the septum in place using a Phillips-head
screwdriver:
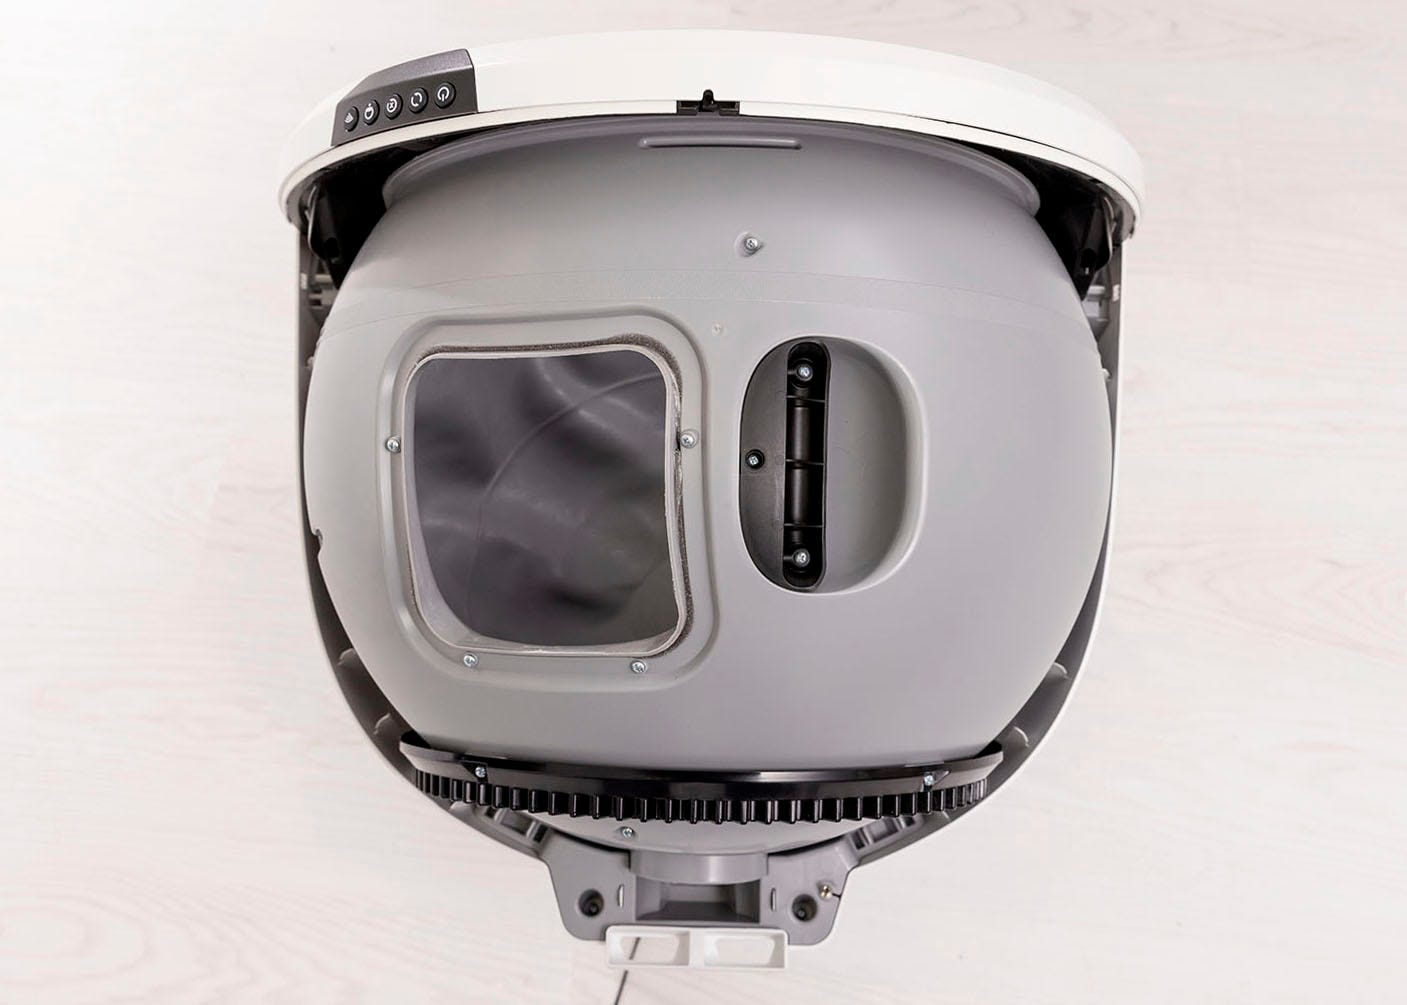
- One (1) screw in front of the handle, near the front of the globe
- Four (4) screws around the waste port
- One (1) screw to the far left of the waste port
- One (1) screw below the black gear track on the rear of the globe
-
Remove the septum from the globe: The septum is pliable and can easily be
bent for removal.

- To re-install the septum, hold it in place just above the black gear track and replace the seven (7) screws.
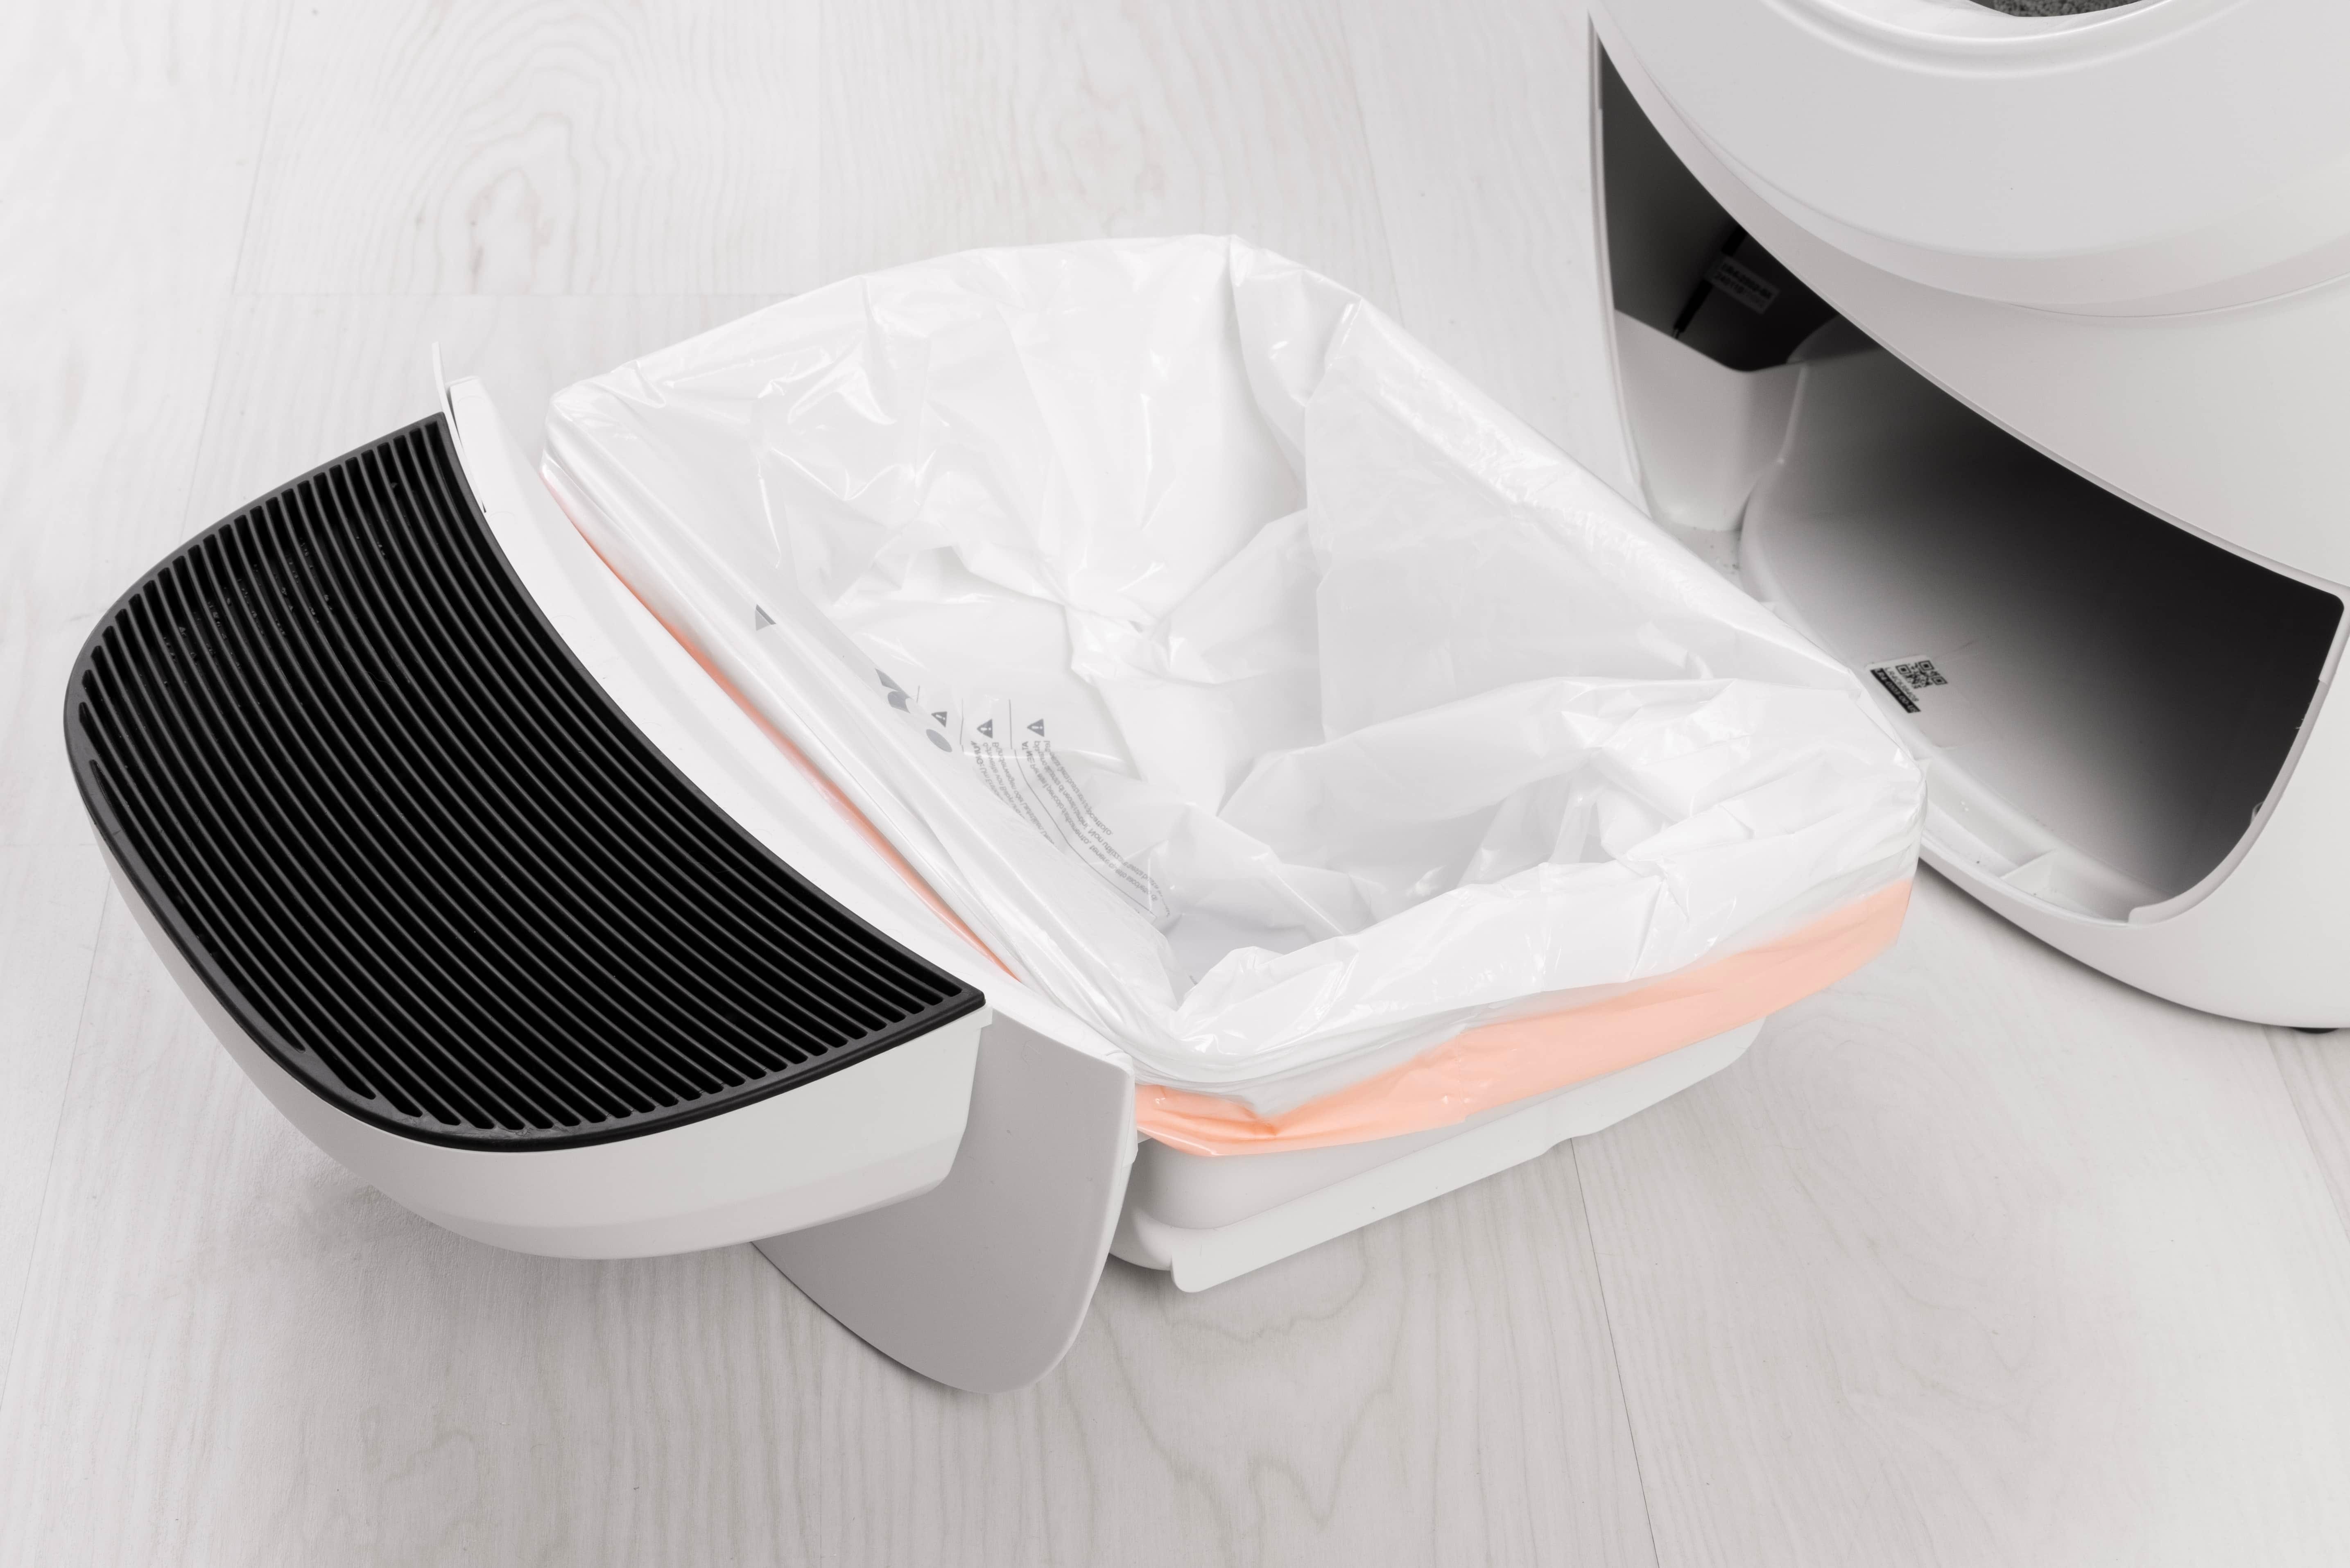
Cleaning the waste drawer
-
Pull the waste drawer out.
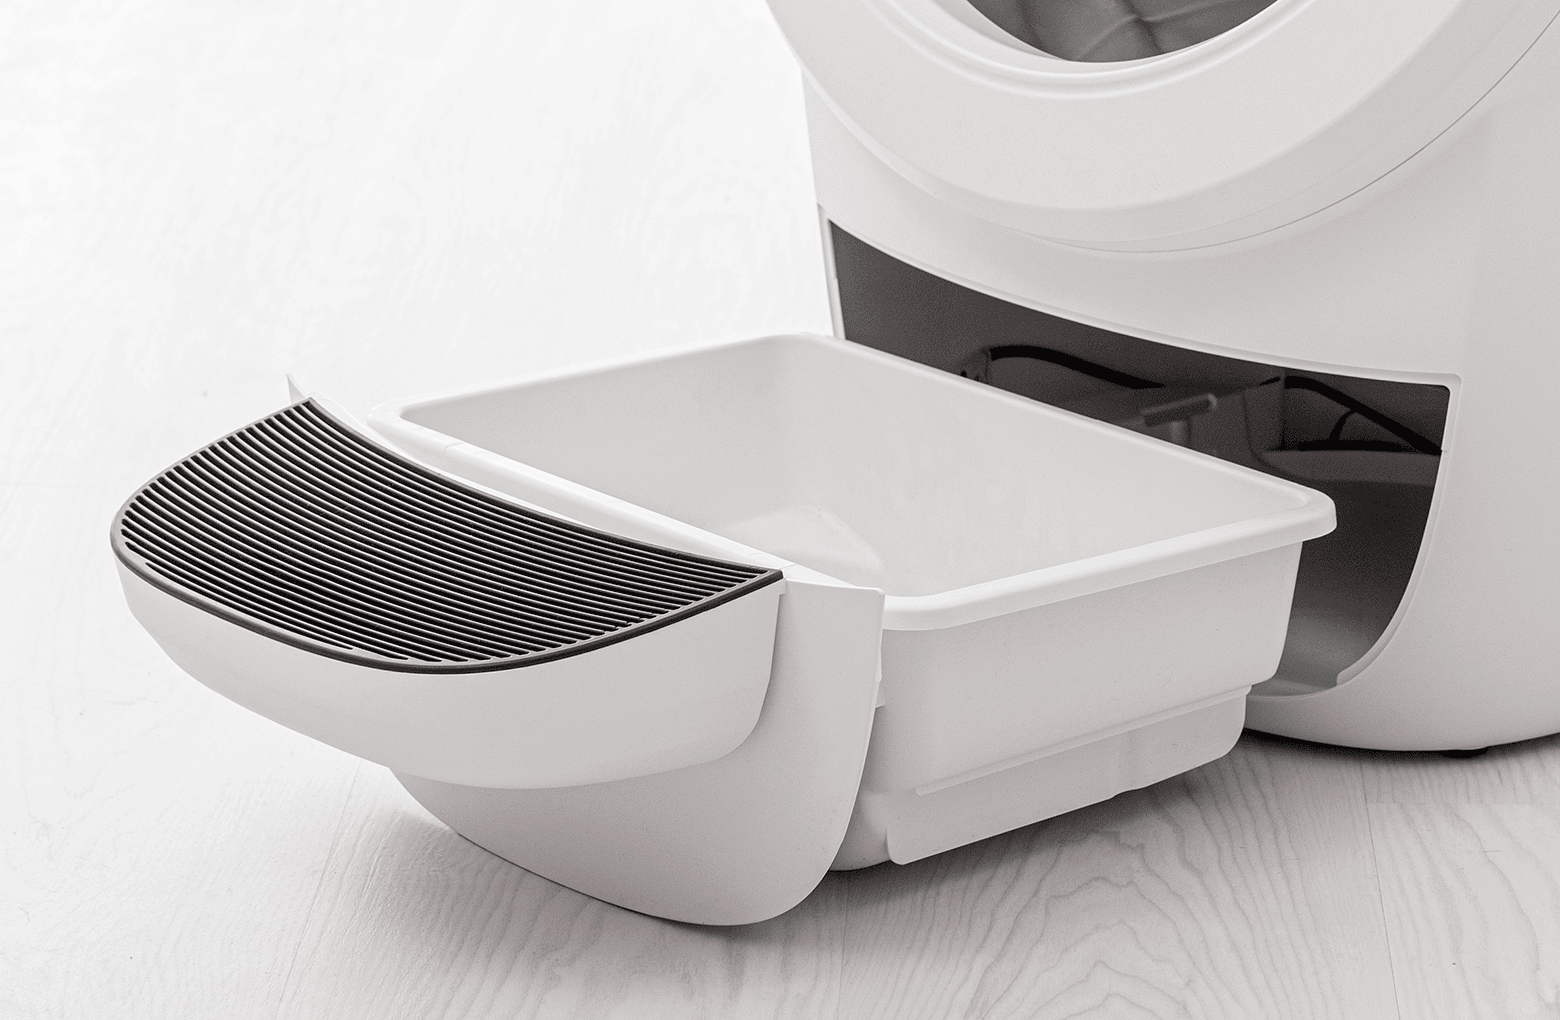
- Clean the drawer with Litter-Robot Cleaner Spray, Cleaner Wipes, or soap and water.
- Open a new liner or waste drawer bag.
-
Wrap the edges of the waste drawer liner or bag over the waste drawer flange
(rim).
Stretched bags or bags not pressed flat will cause the DFI (drawer full indicator) to inaccurately measure the waste drawer level.
-
Push the rest of the bag to the bottom of the waste drawer, then slide the
waste drawer closed.
White bags work best.
Please note that waste level readings may be inaccurate when using a dark bag, especially when the drawer is empty. As clumps start to collect in the drawer, the readings will become more accurate. For the most precise waste level readings and a seamless experience, including drawstrings for easy disposal, we highly recommend using Litter-Robot Waste Drawer Liners.
Cleaning the base
-
Never submerge, spray, or soak the base or control panel. The base and
control panel contains sensors and electronics.
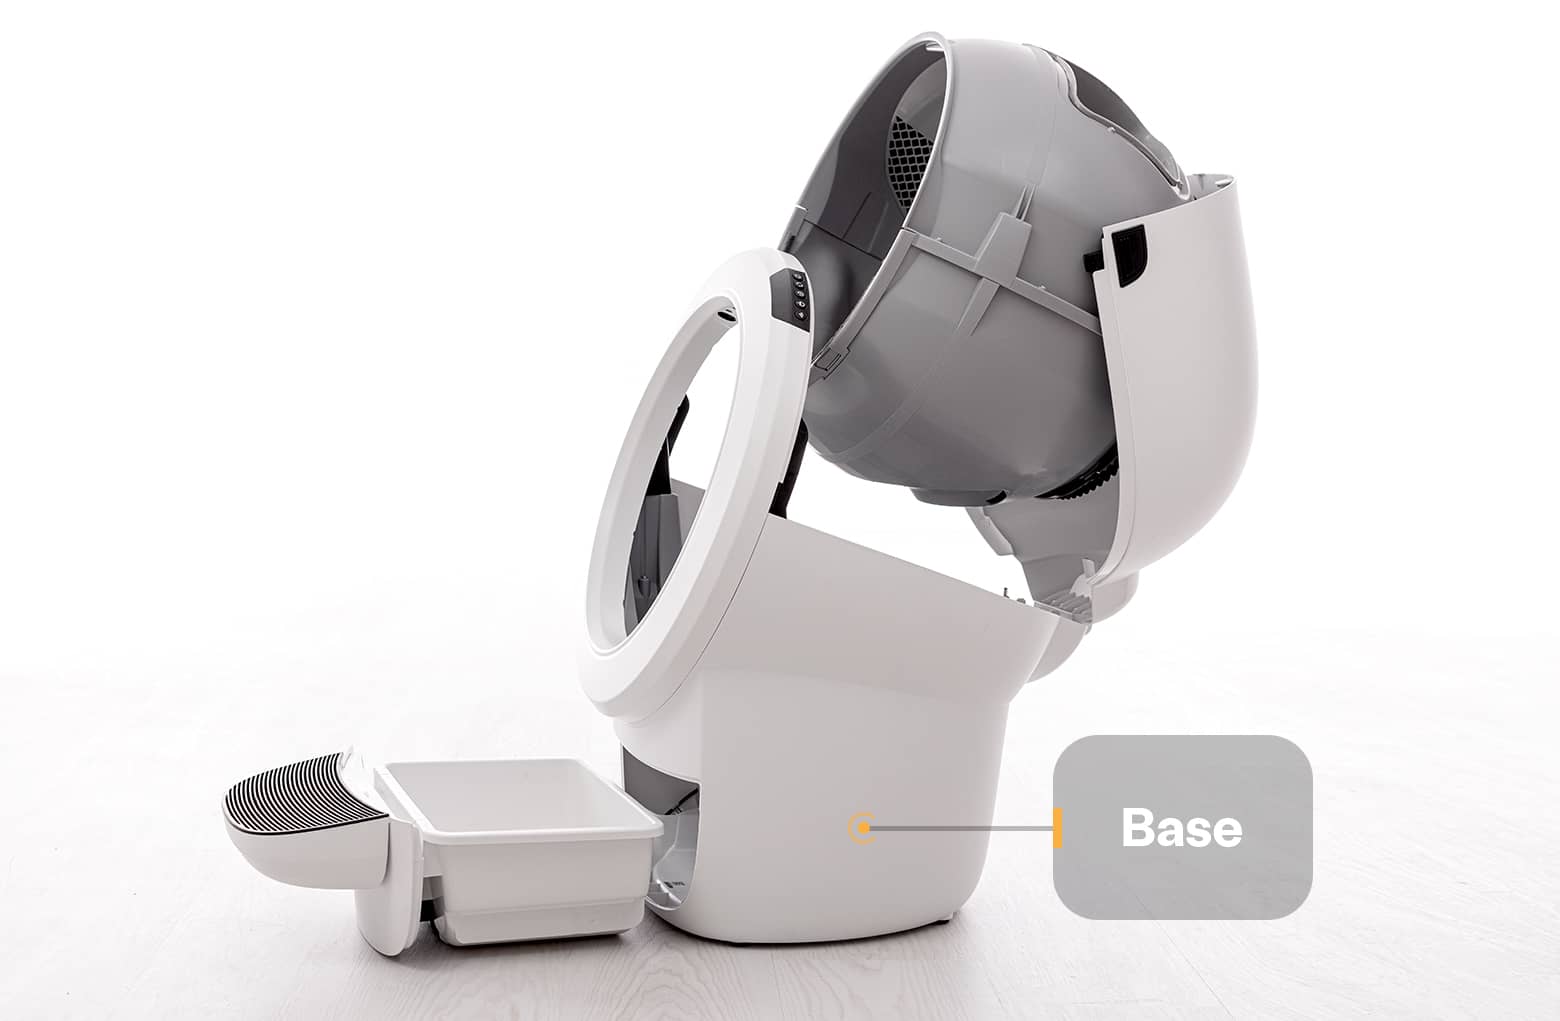
- Wipe the surfaces of the base with a cloth dampened with a disinfectant. If using a spray, spray away from the base directly onto a cloth or paper towel so disinfectant does not get on the electronics.
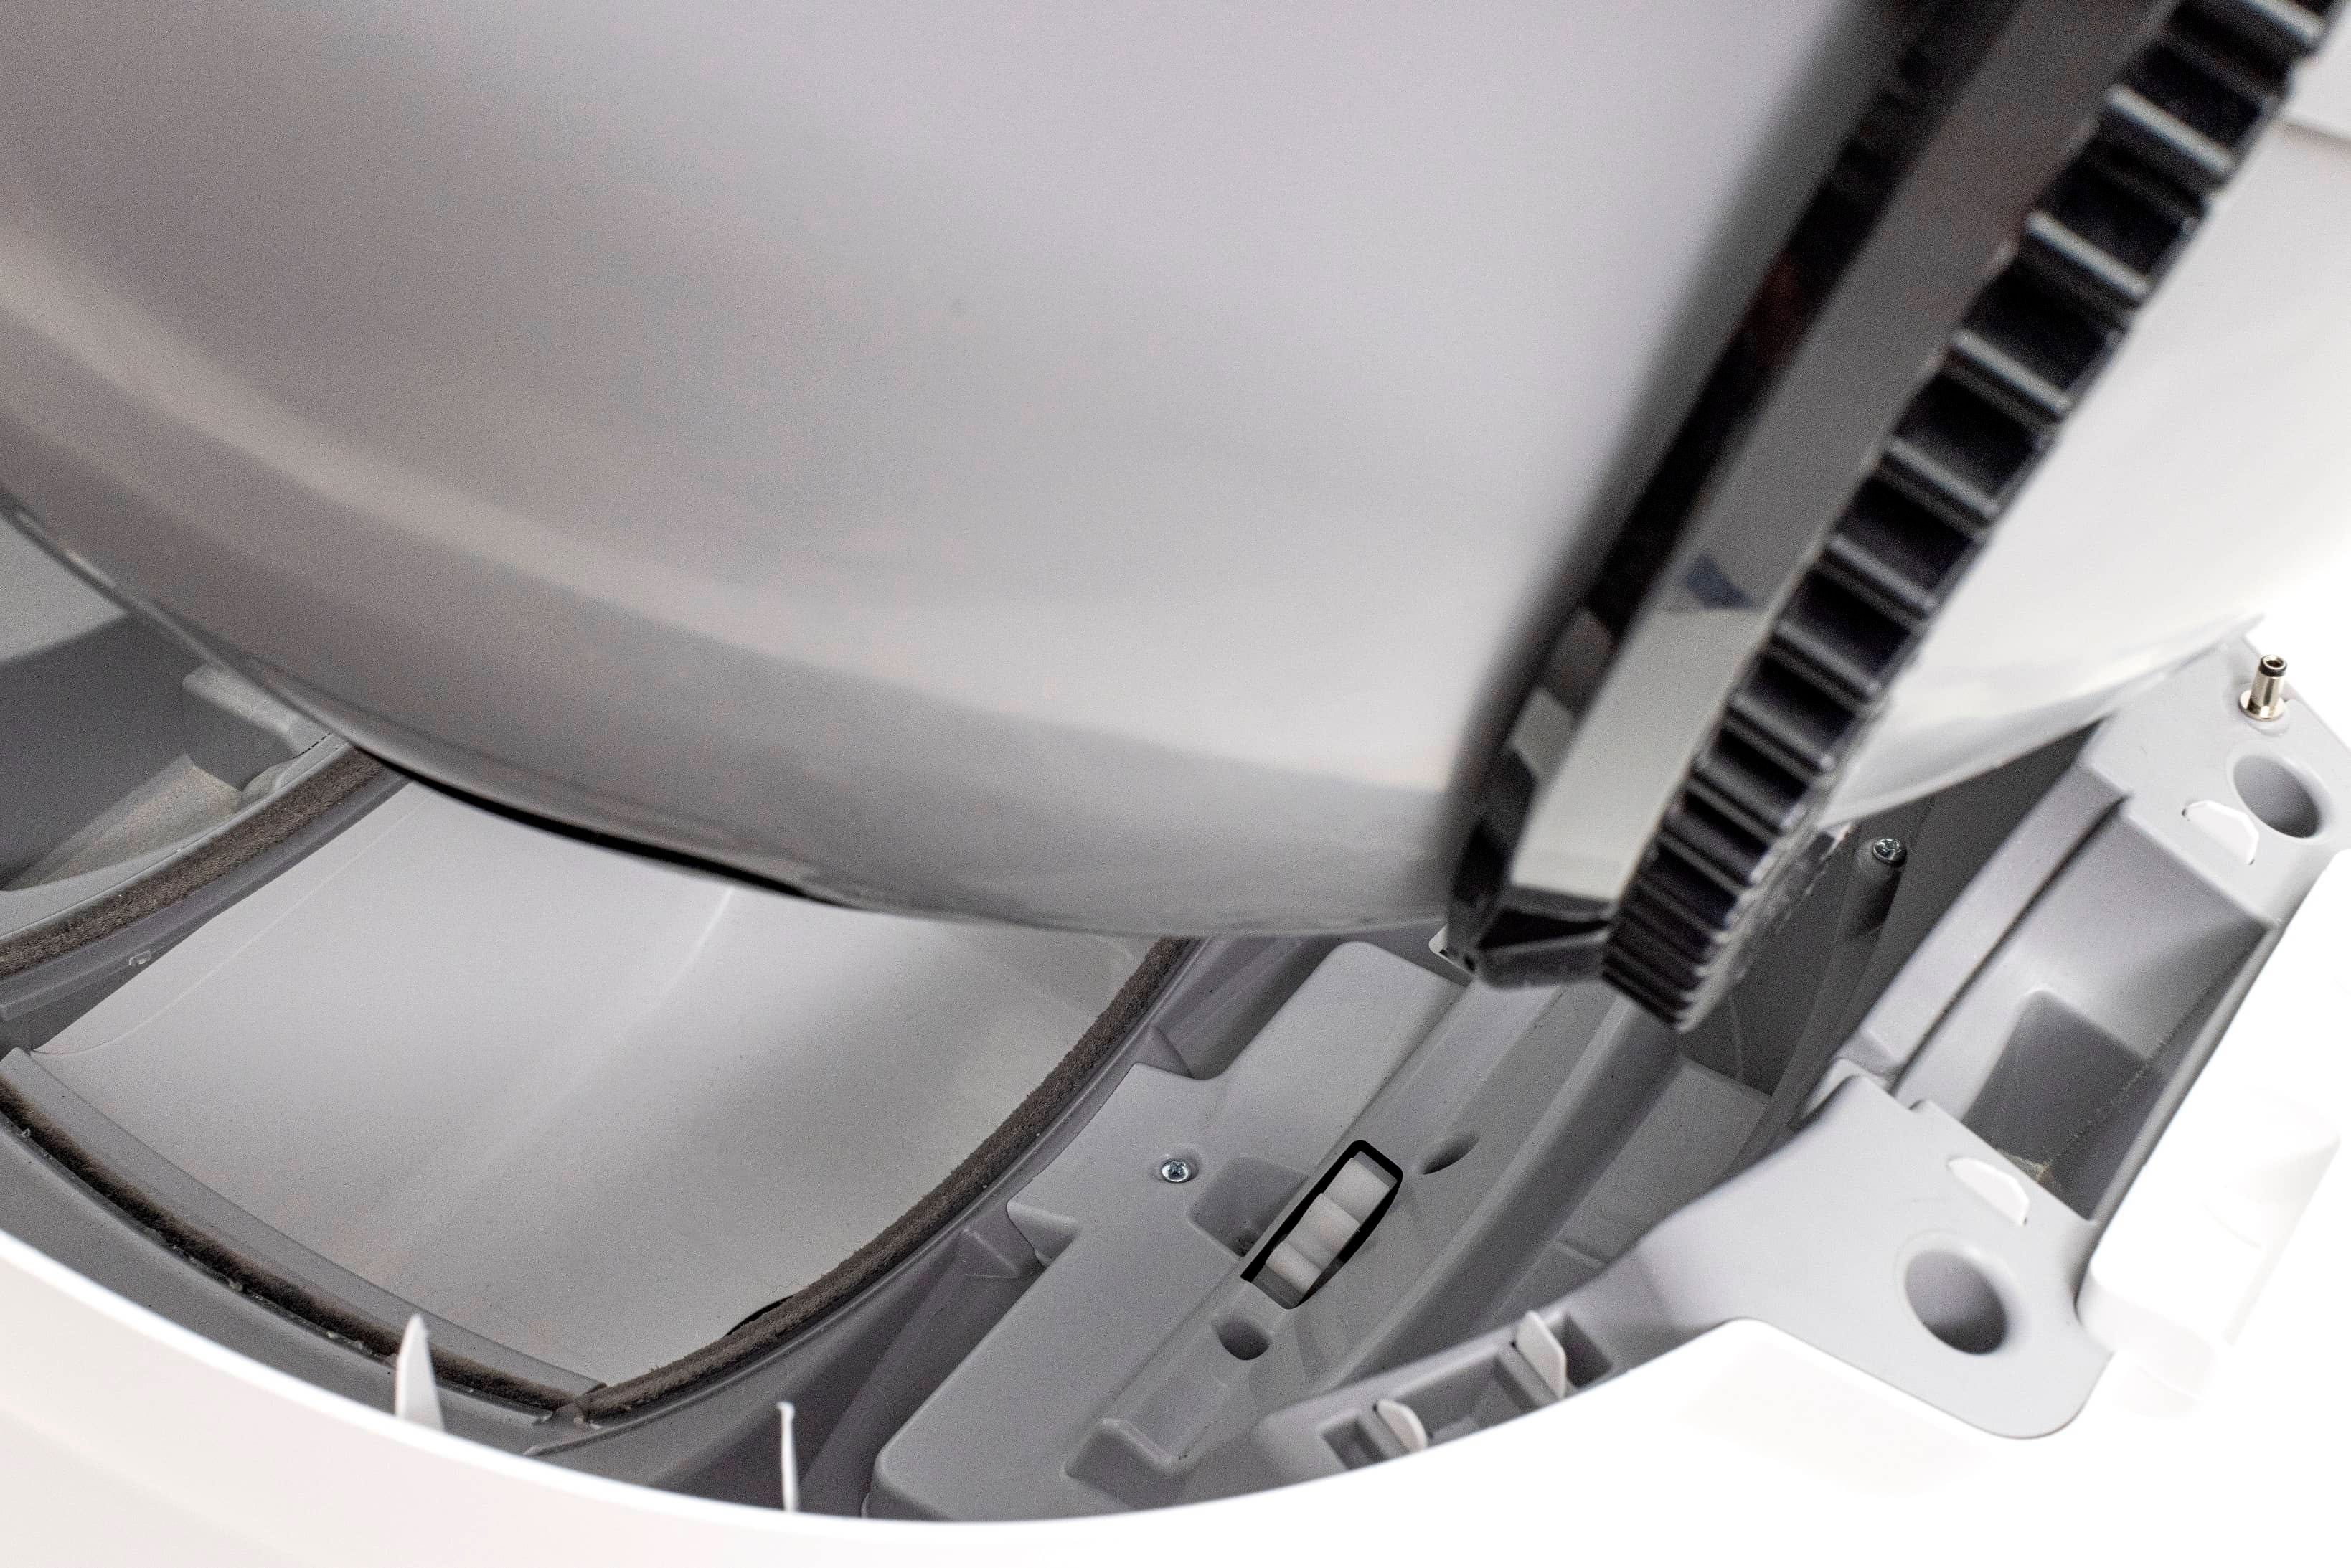
Reinstalling the globe and bonnet
-
Place the globe on the base in the approximate Home position. Holding the
globe by the handle and sliding it back into the base will align it
approximately in the Home position.

-
Ensure the back of the globe is sitting flush in the rear bearing pocket and
the gear track is engaged to the motor pinion.
-
Rotate the bonnet downward with light pressure on the sides such that the
bonnet hugs the globe. This will help to ensure proper alignment of the
bonnet latches to the base.
-
Push down on the bonnet from the top and make sure the bonnet has latched
into place and the bonnet is secure.
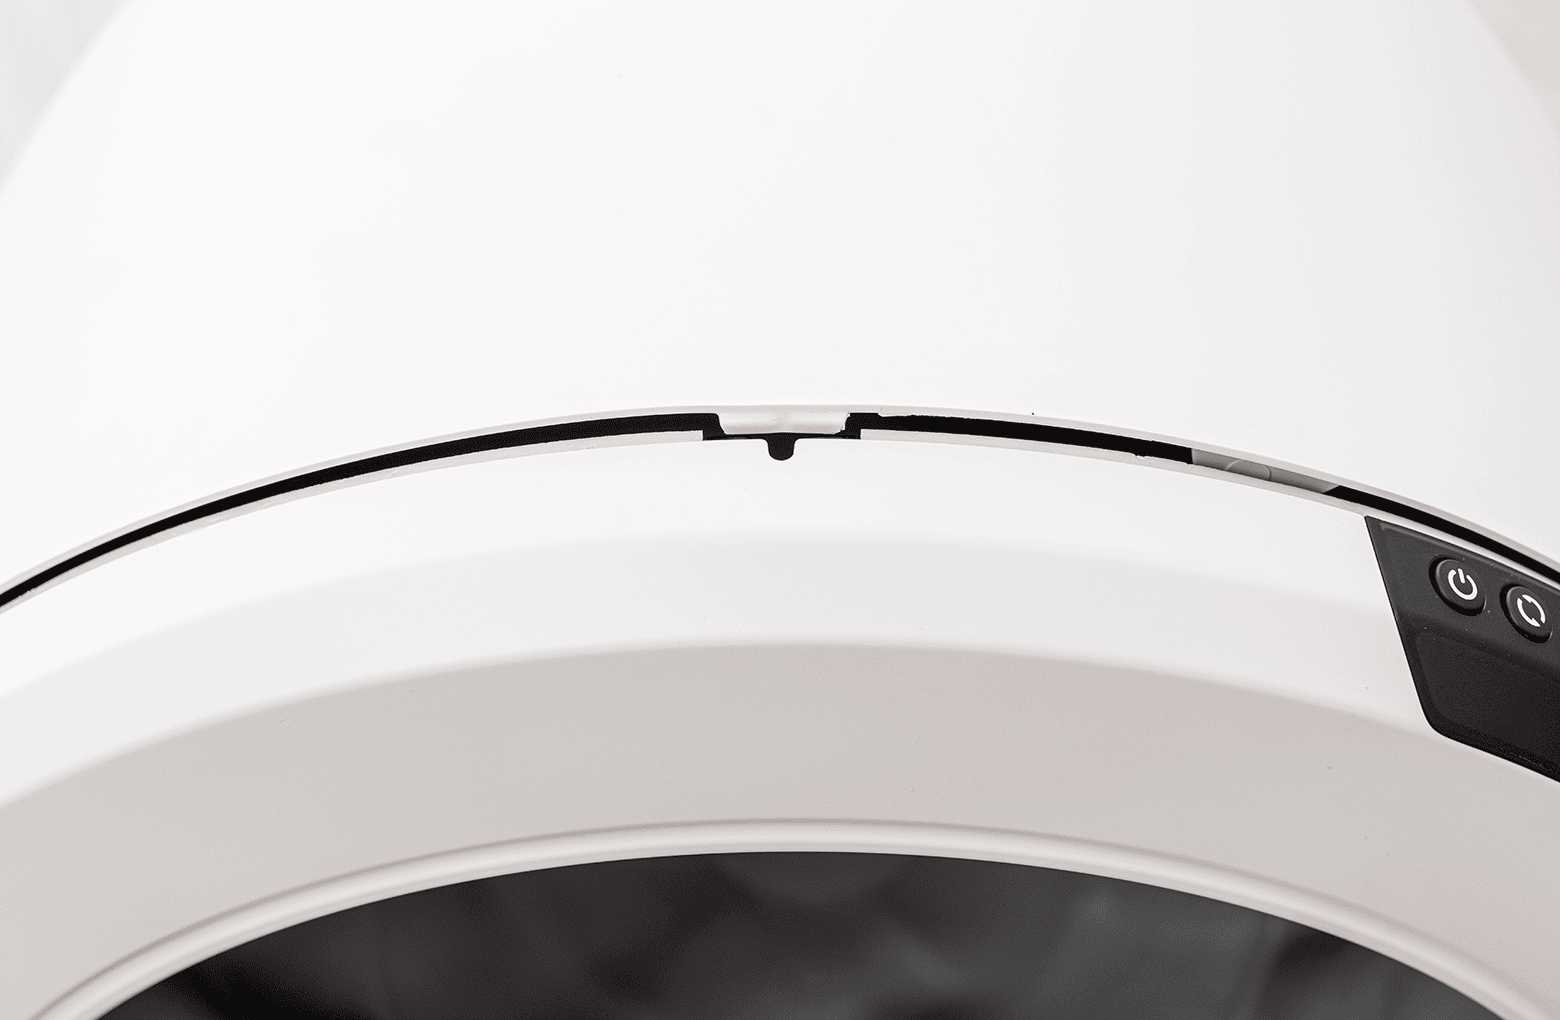
The unit will not run without the bonnet installed.
-
Reinstall any accessories, then plug the unit in and power it on.
- Litter-Robot will display a solid blue light indicating it is ready for use.
Need technical support?
Our Troubleshooting Wizard will solve most issues and is the fastest way to get help.
Didn't find what you're looking for?
Live support available Mon-Fri: 9AM-9PM EST and Sat-Sun: 9AM-5PM EST, or submit a ticket anytime.