The store will not work correctly in the case when cookies are disabled.

Litter-Robot 4: Septum installation guide
The Litter-Robot 4 Septum holds the sifted litter during a clean cycle. Learn how to remove and install the septum here.
You will need:
- Phillips-head screwdriver
Make sure the unit is in the Home/Ready position. Press the Power button to turn the unit off, then unplug the unit.

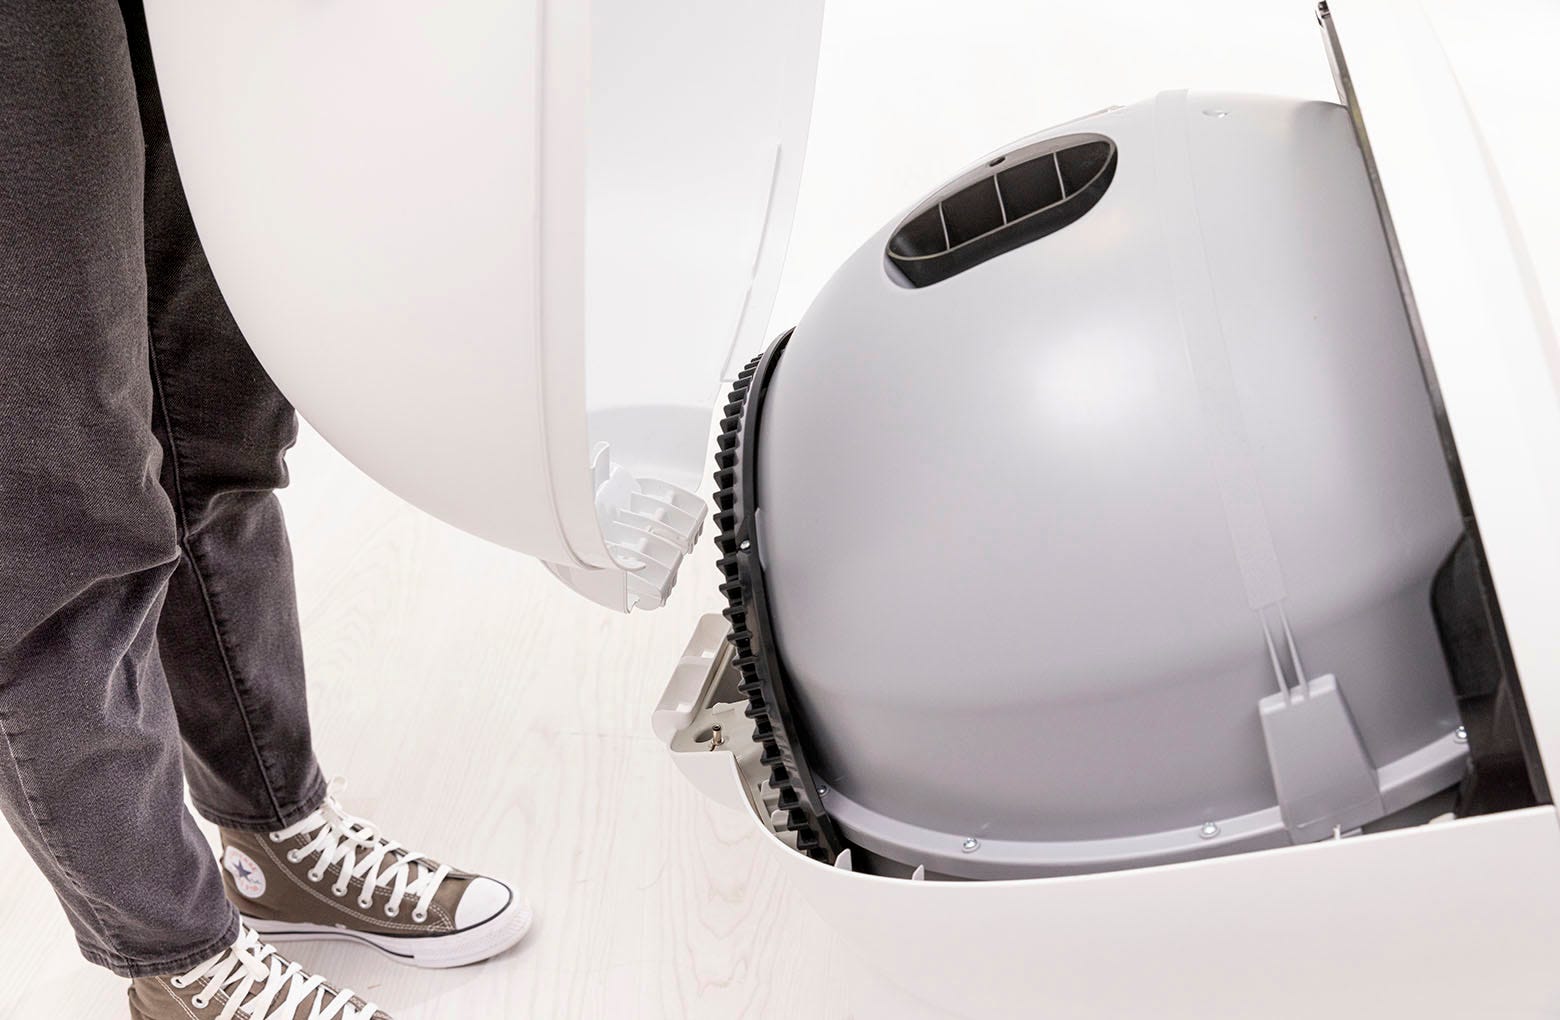
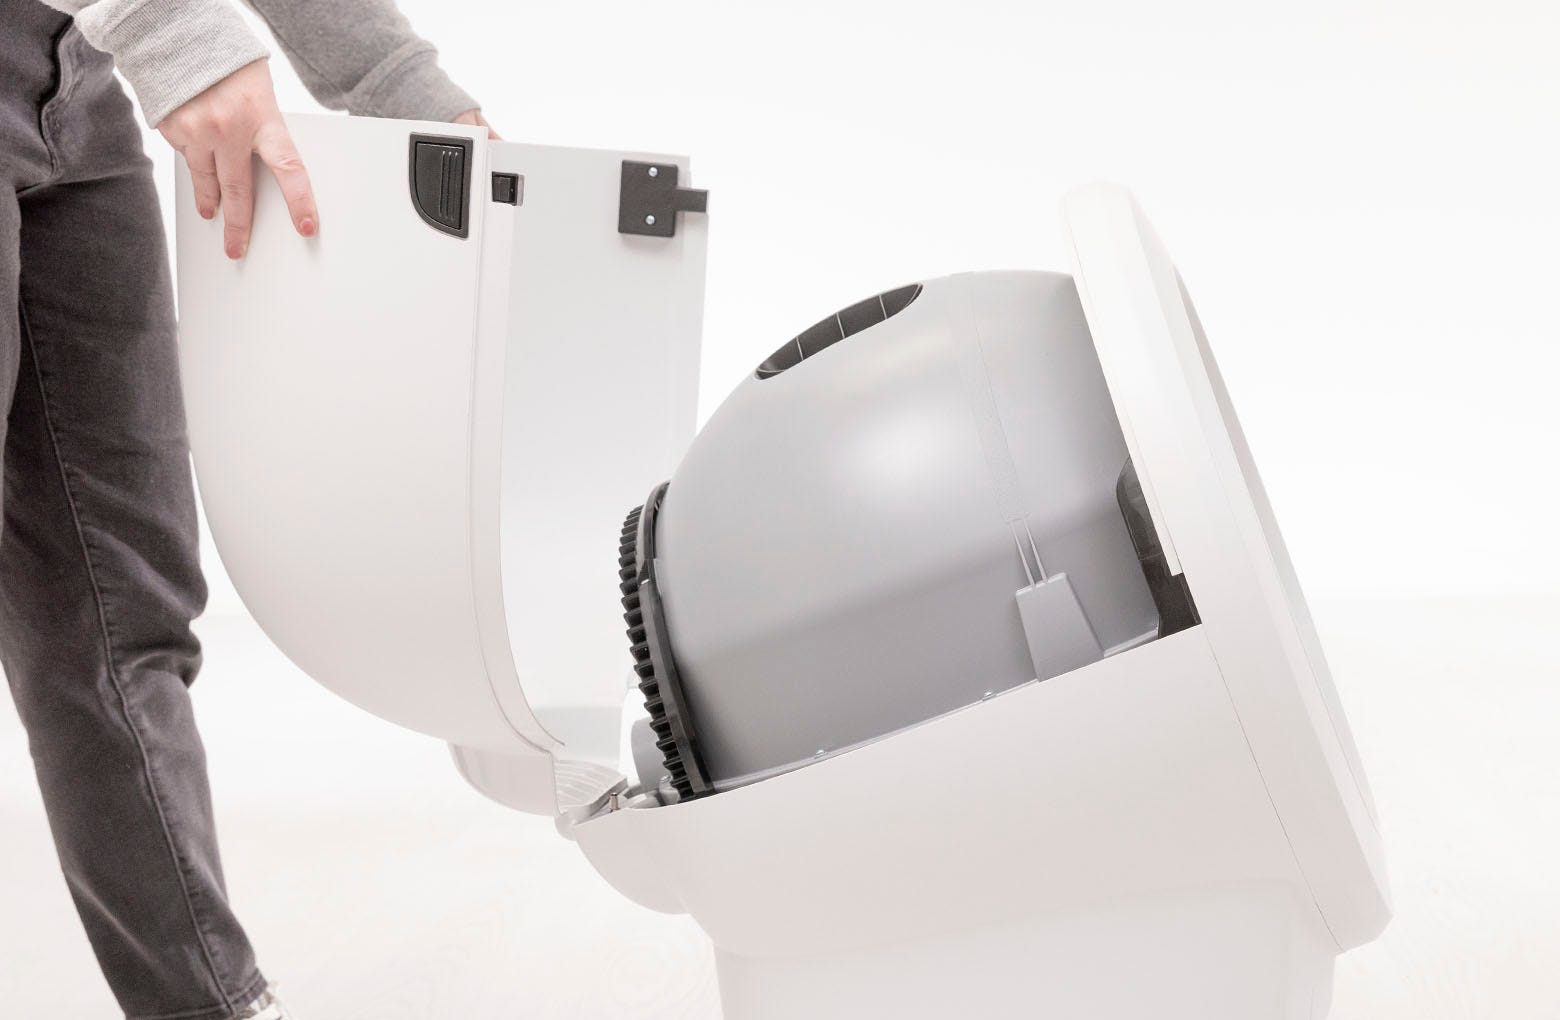
Remove the bonnet:
- Press and hold the latches on both sides of the bonnet, then lift and rotate the bonnet to its open position.

- Unlatch the bonnet, remove it, and set aside.
- Press and hold the latches on both sides of the bonnet, then lift and rotate the bonnet to its open position.
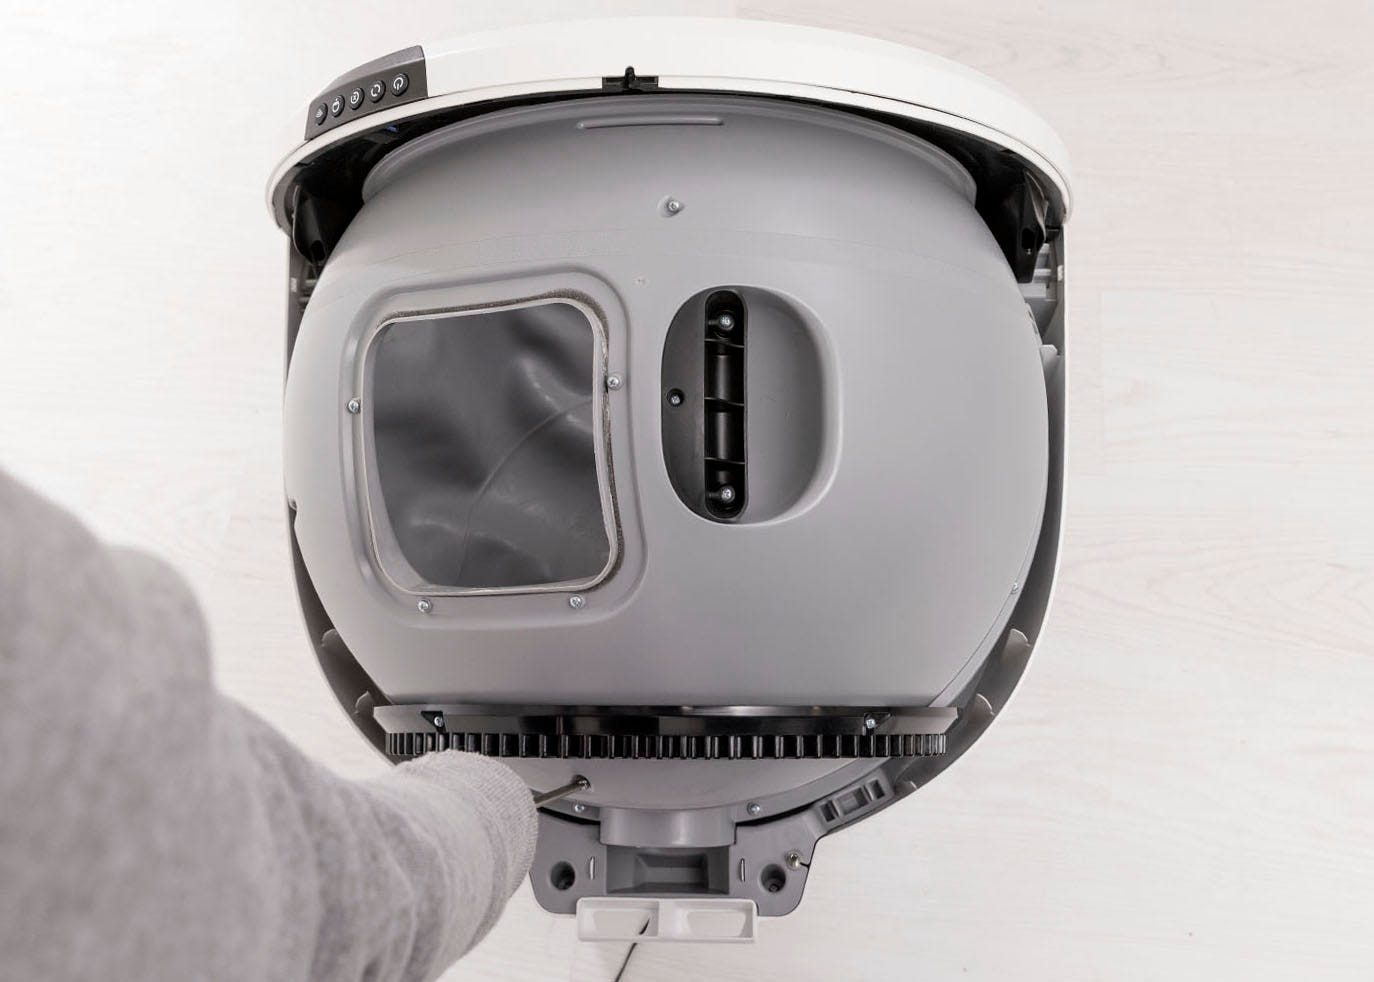
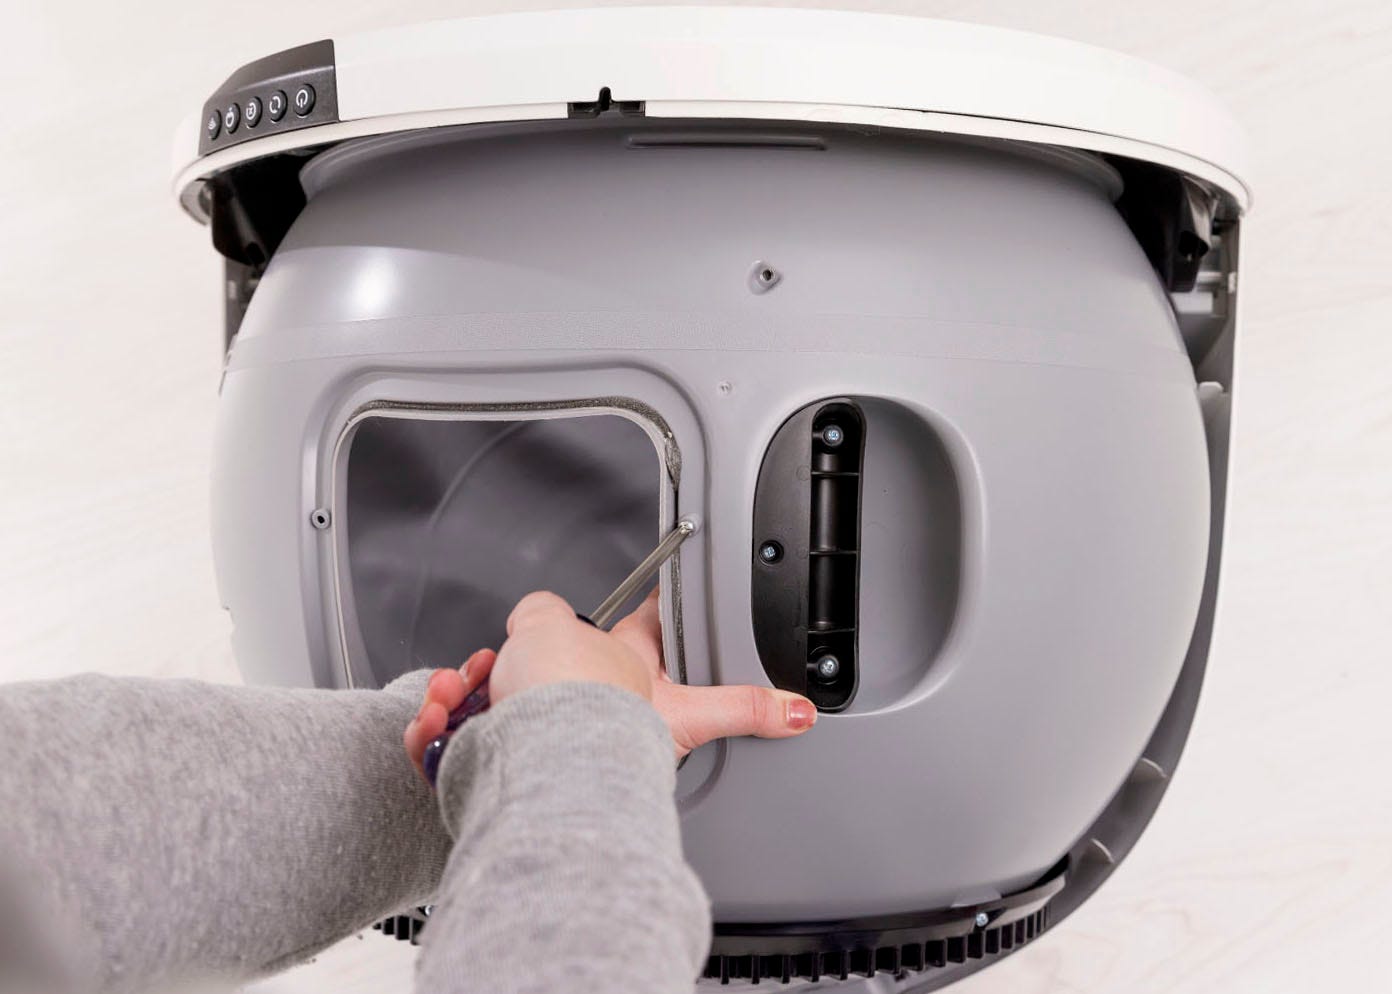
Standing behind the unit, look down at the top of the globe. Remove the seven (7) screws holding the septum in place using a Phillips-head screwdriver:
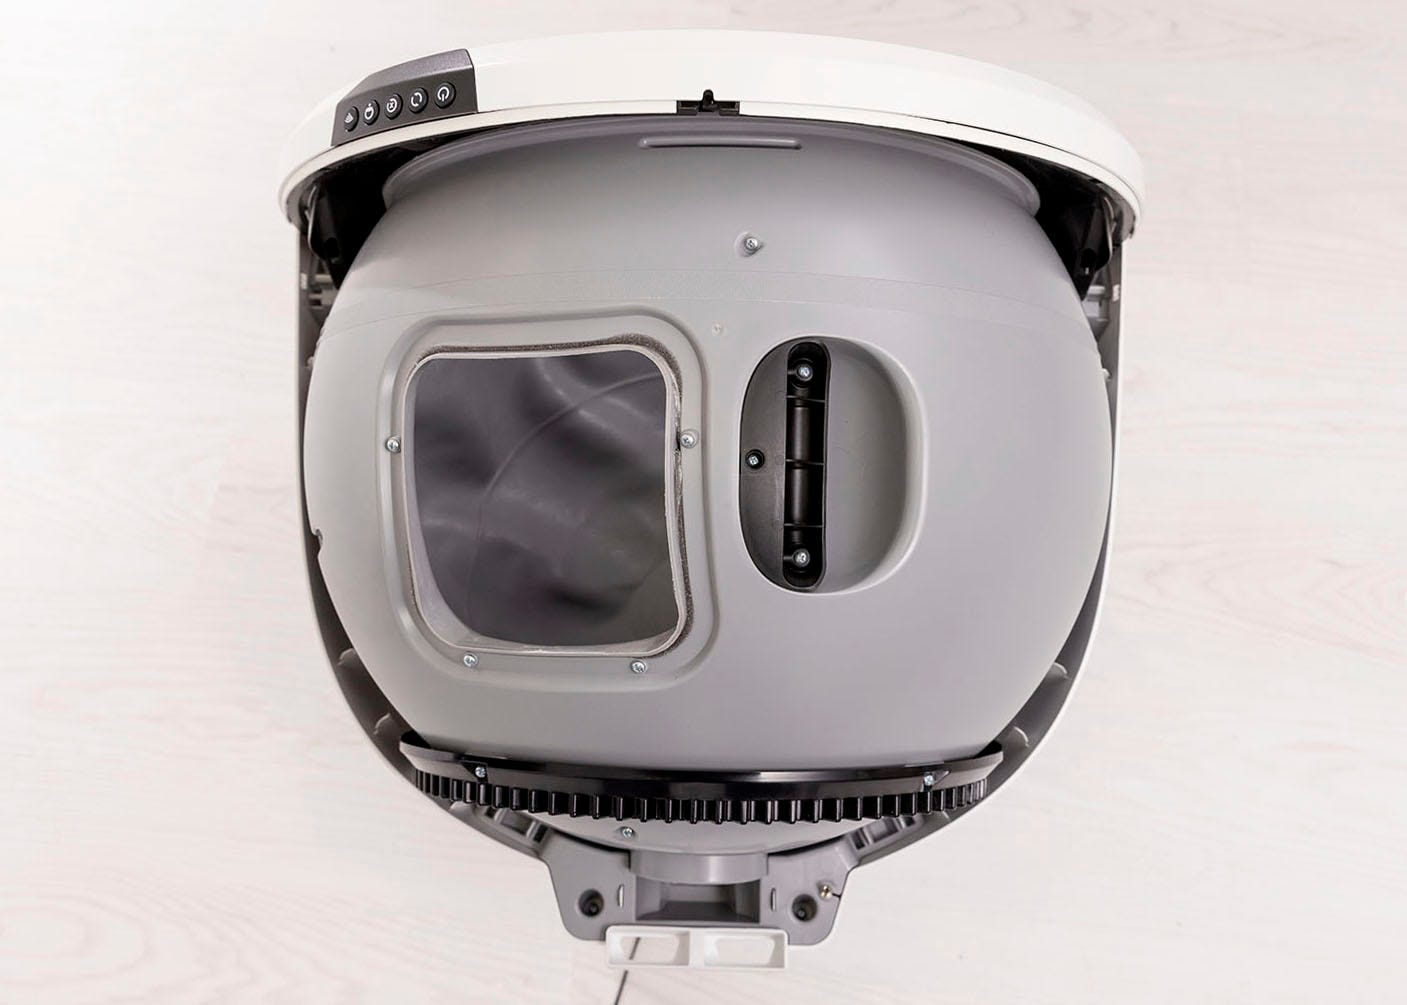
- One (1) screw in front of the handle, near the front of the globe
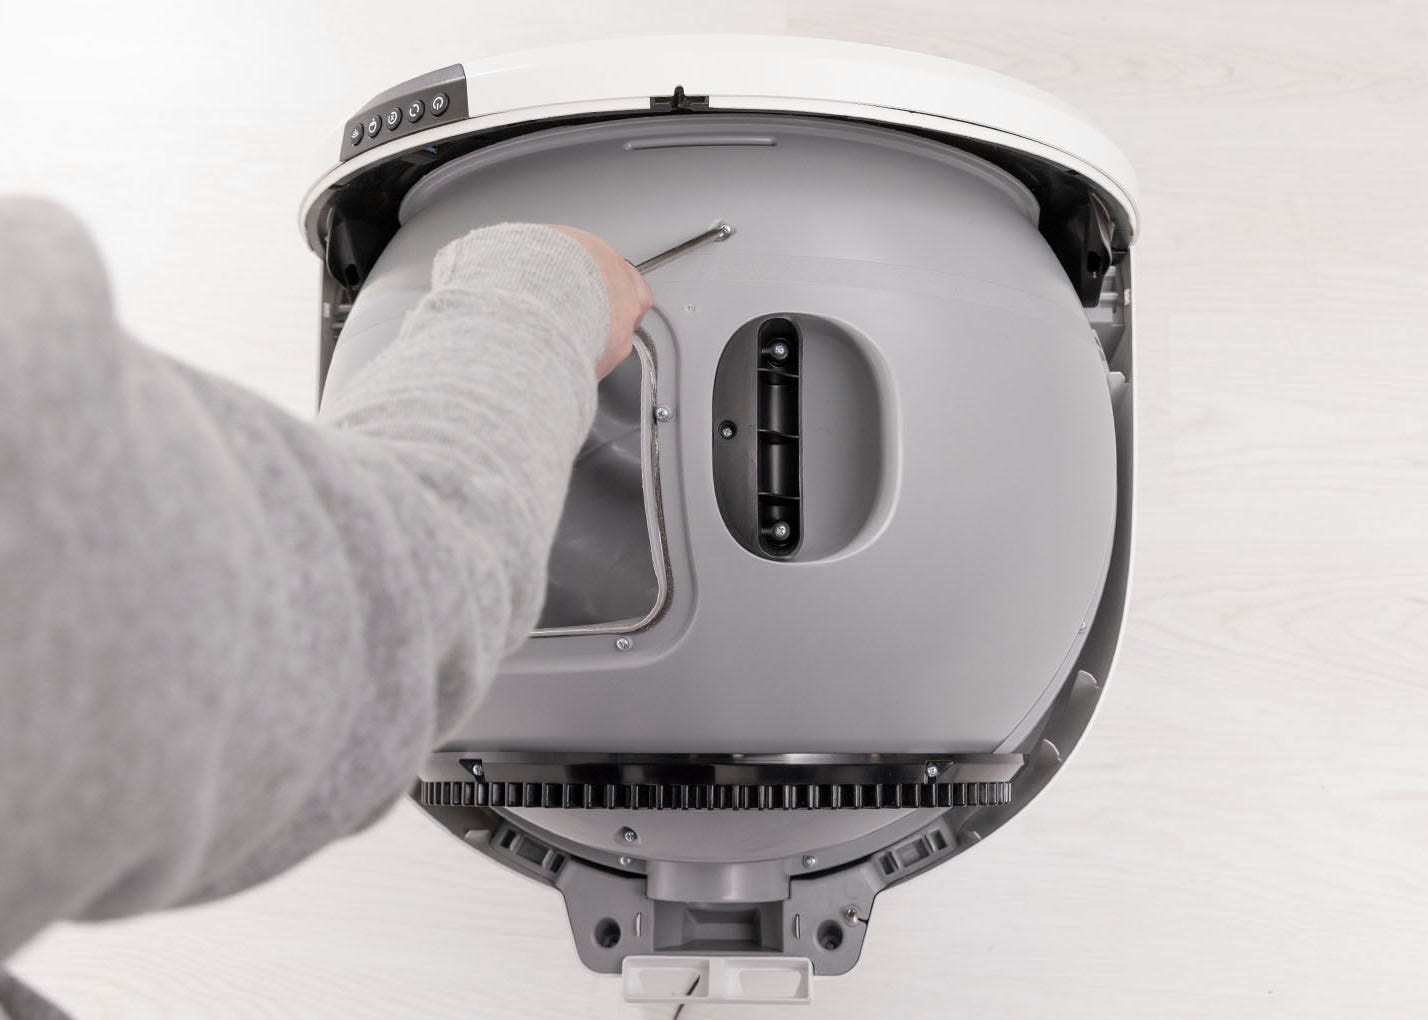
- Four (4) screws around the waste port

- One (1) screw to the far left of the waste port
- One (1) screw below the black gear track on the rear of the globe.
- One (1) screw in front of the handle, near the front of the globe
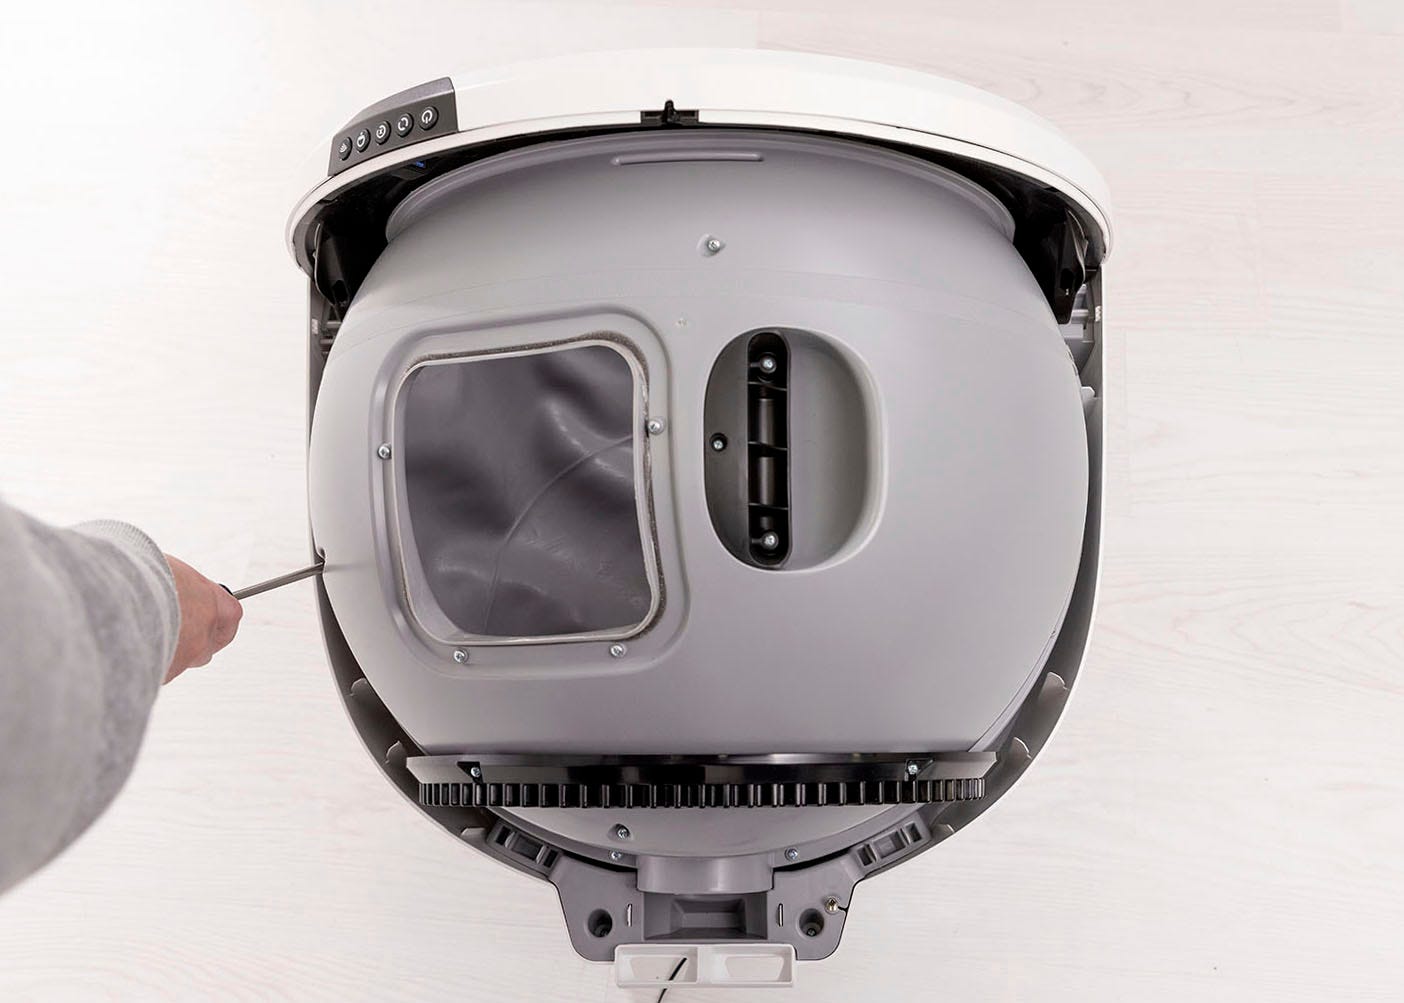
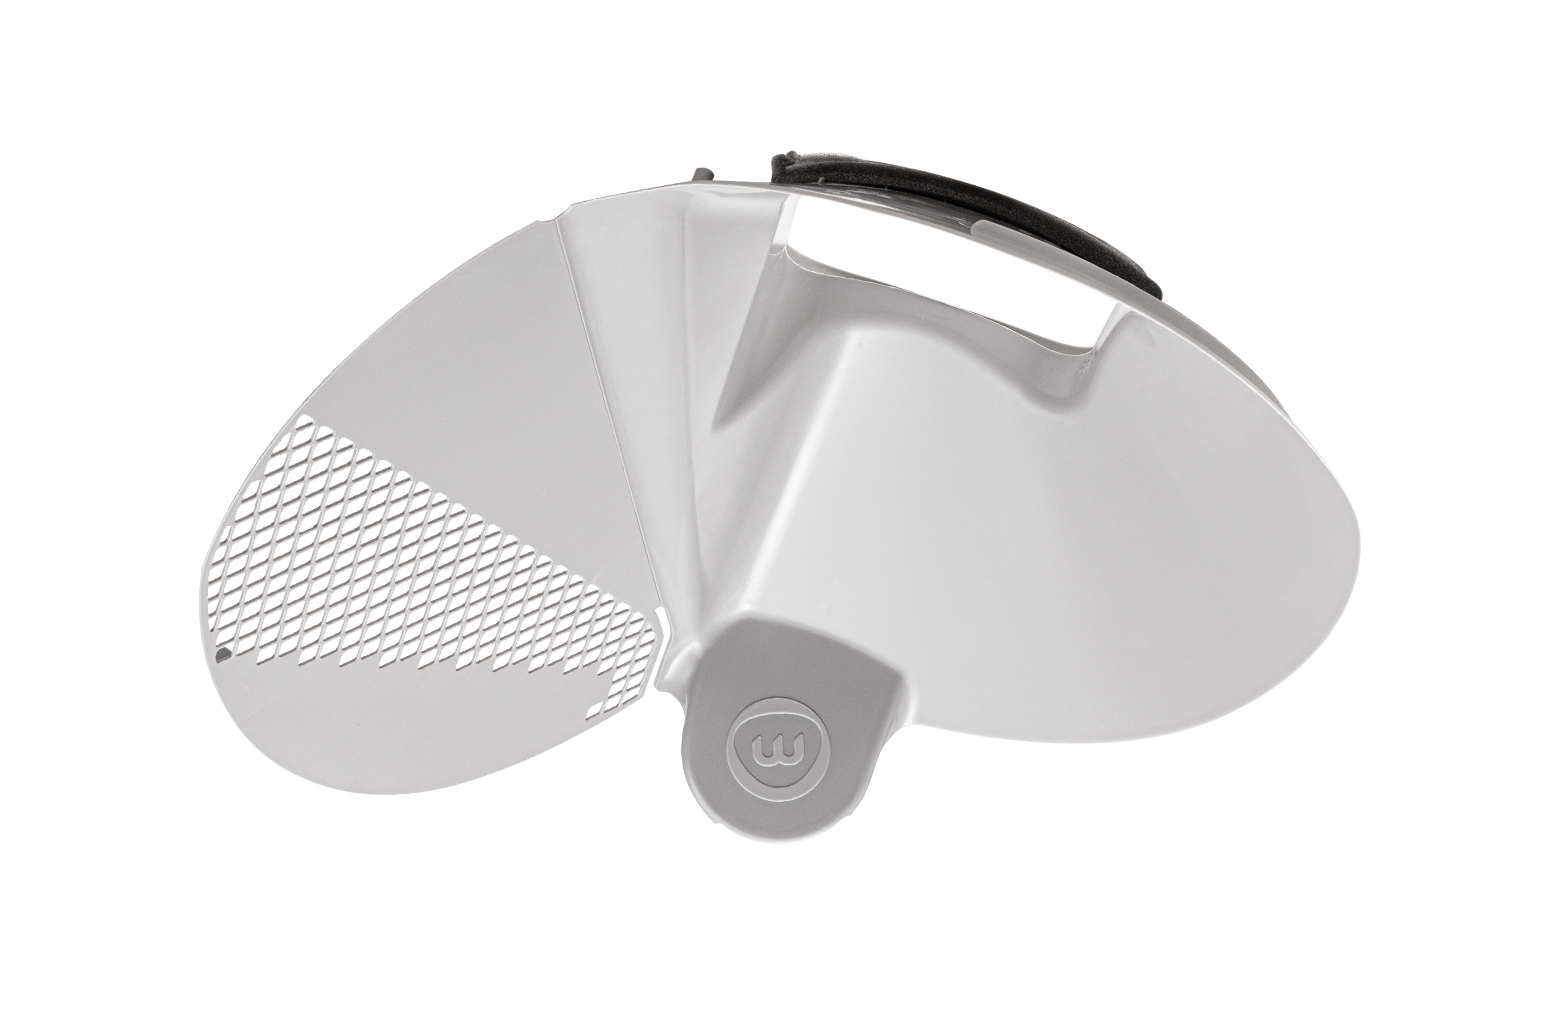
Remove the septum from the globe: The septum is pliable and can easily be bent for removal. Set the old septum aside.

Install the new septum: Hold the septum in place just above the black gear track and replace the seven (7) screws.
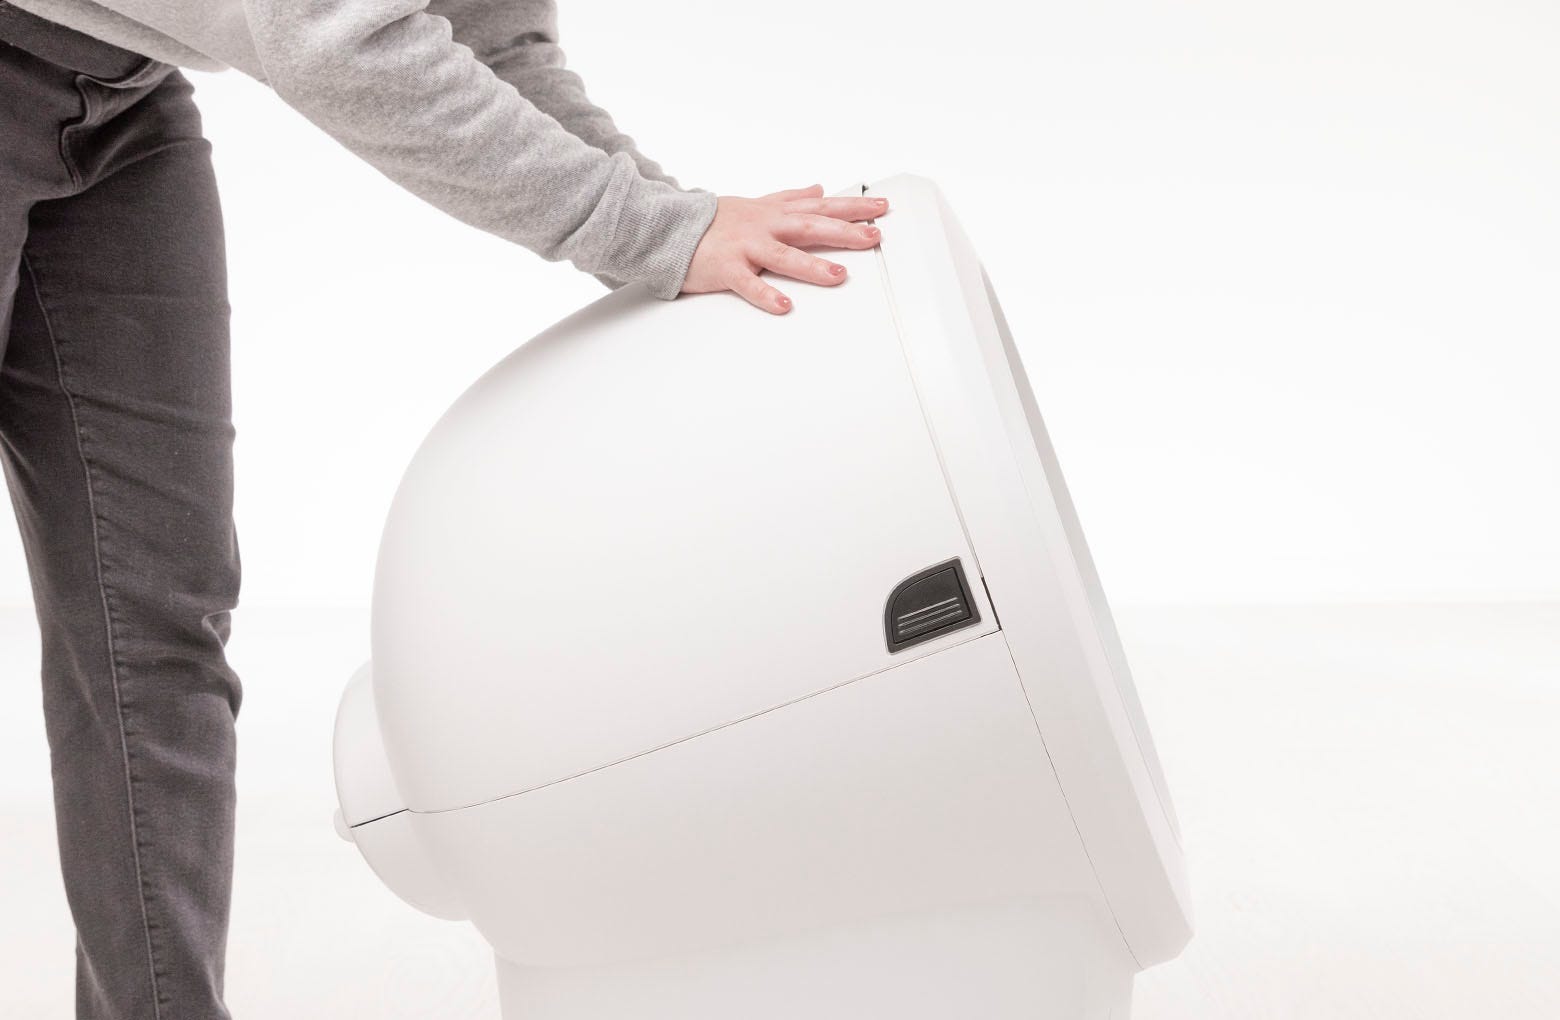
Replace the bonnet:
- Place the bonnet into the hinge behind the robot as shown.
- Rotate the bonnet downward over the globe and push down on the bonnet from the top to make sure it is latched and secure.
- Place the bonnet into the hinge behind the robot as shown.
Plug the unit in and power it on.
Didn't find what you're looking for?
Live support available Mon-Fri: 9AM-9PM EST and Sat-Sun: 9AM-5PM EST, or submit a ticket anytime.