The store will not work correctly in the case when cookies are disabled.
Litter-Robot 5 & Pro: LitterHopper® installation guide
The LitterHopper is designed to automatically maintain the optimal litter bed level within the globe of your Litter-Robot 5. The 'default' optimal litter bed level is at the MAX fill line inside the globe. Litter-Robot 5 uses sensors to measure the height of the litter bed level at the end of each clean cycle. If the sensors determine that the litter bed level is below the optimal level, then the LitterHopper will dispense litter into the globe during the NEXT clean cycle. When dispensing, the globe will momentarily pause rotation.
Key points to remember:
Start with a full bed of litter that is at the MAX fill line in the globe.
We recommend using clay-clumping litter in Litter-Robot 5. Translucent or white-colored litter (most often seen in crystal litter) may impact the litter level and Drawer Full Indicator (DFI) accuracy.
Litter will be auto-dispensed ONLY when needed and ONLY during a clean cycle.
- If the litter level is significantly low, it may take multiple cycles to return to the optimal level.
- Each dispense runs for a short duration (up to 20 seconds), rather than dispensing a large amount of litter at once.
Quick links
Before you begin
Tools Required: None
Parts Included:
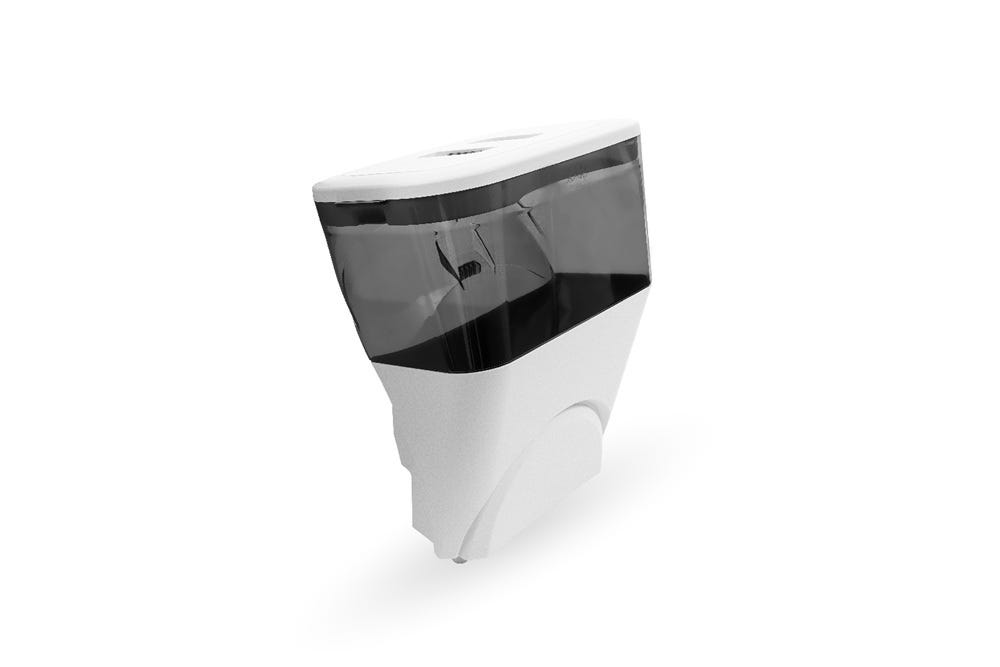
Litter-Robot 5 LitterHopper
Holds approximately 17 cups (~4 liters) of litter that is automatically dispensed as needed to maintain the optimal litter level in the Litter-Robot 5.
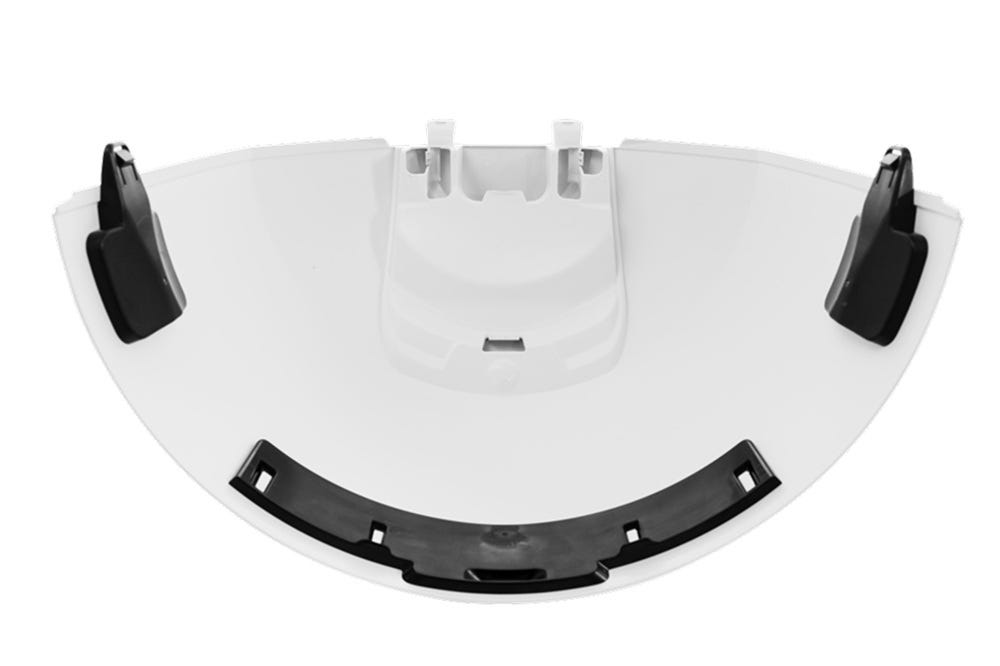
Litter-Robot 5 LitterHopper features
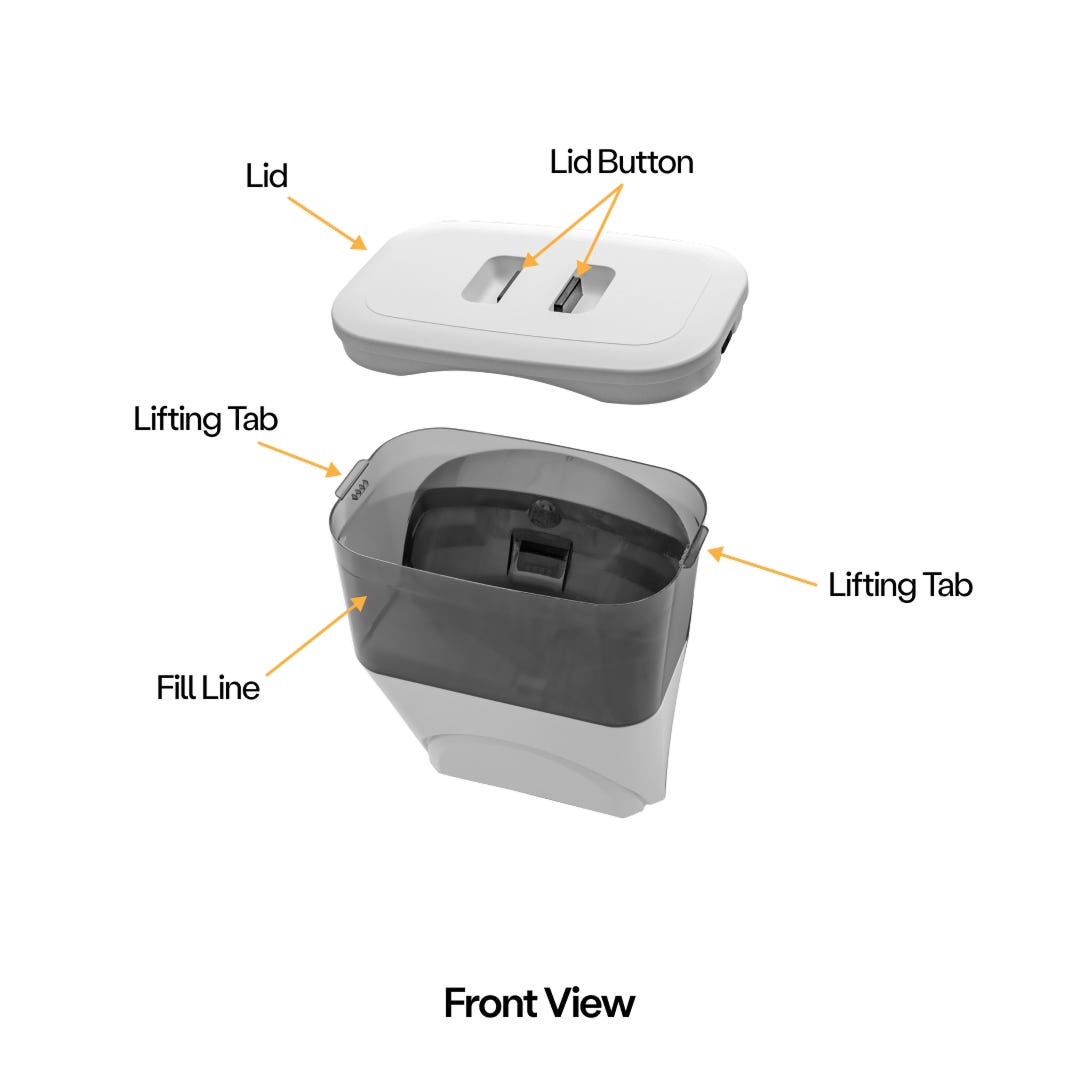
- Lid buttons: Squeeze together to release and remove the lid from the LitterHopper.
- Lifting tabs: Used to lift the LitterHopper during installation and removal from Litter-Robot 5.
- MAX fill line: Maximum fill level of litter in the LitterHopper.
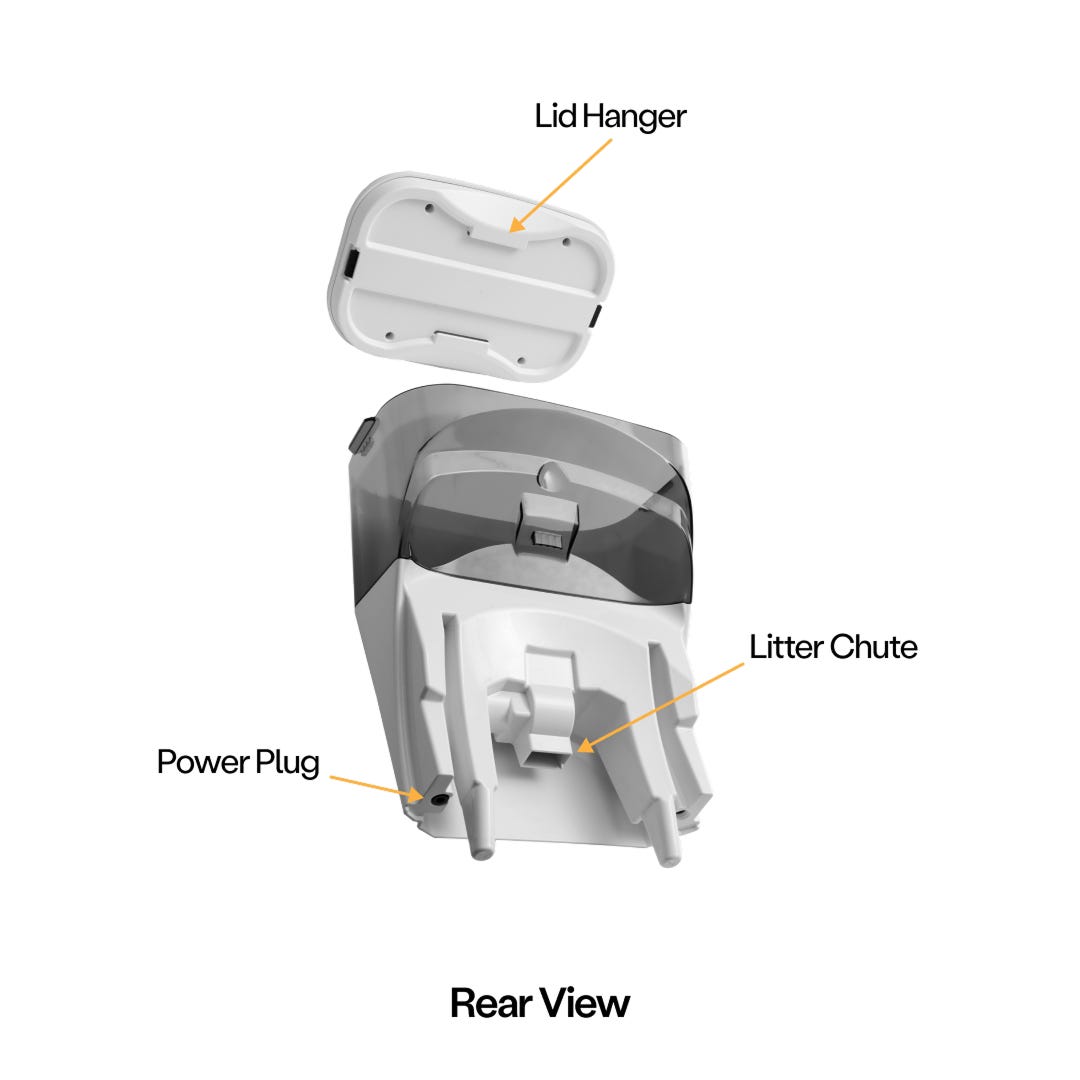
- Lid hangers: Hook features for hanging the lid on the edge of the hopper when refilling with litter.
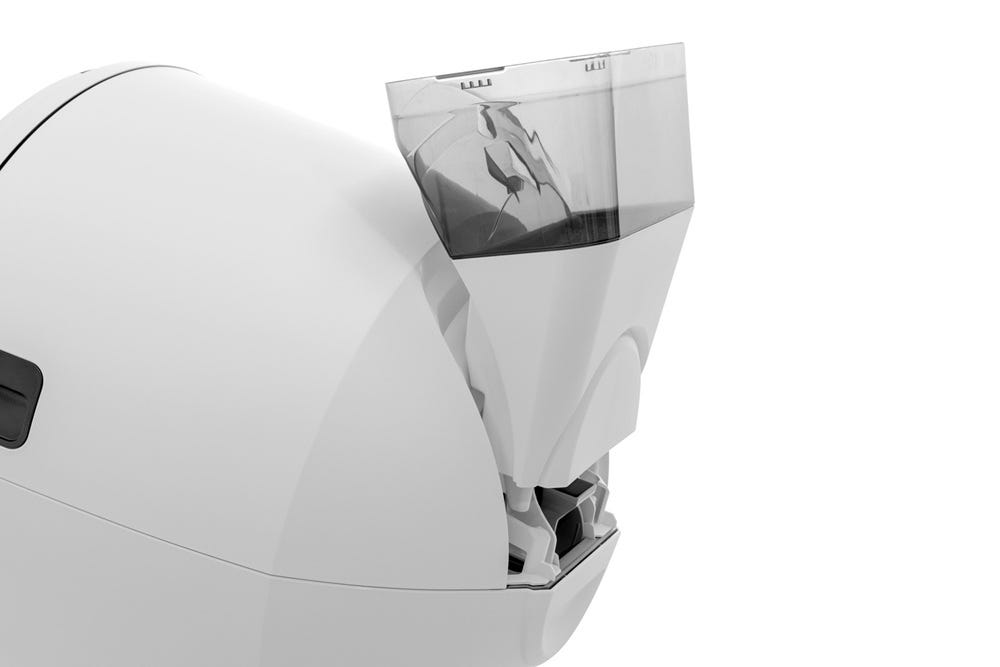
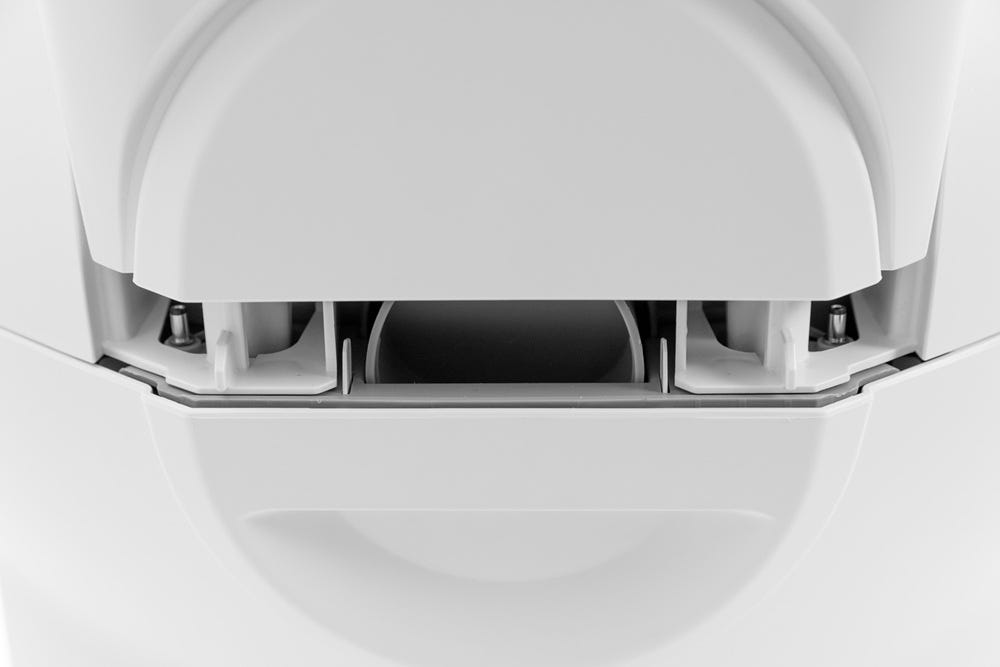
- Litter chute: Opening where litter enters Litter-Robot 5.
- Mounting Tab: The mounting tab slides into a slot on the back of the Litter-Robot 5 during assembly.
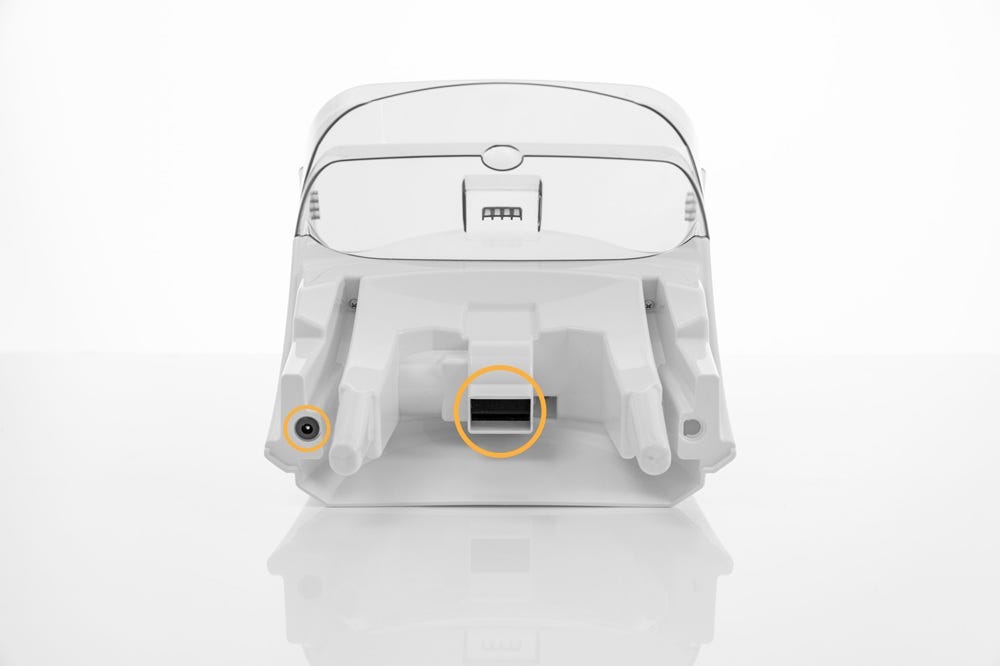
- Power plug: Connection where the LitterHopper receives electrical power from Litter-Robot 5.
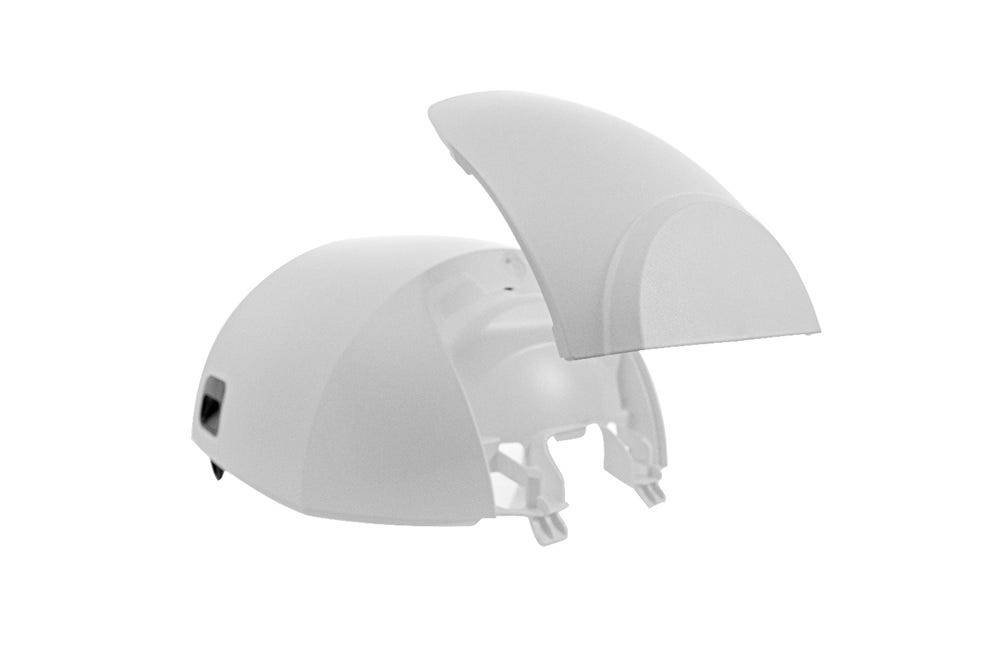
- Plate: The plate is located in the center of the bonnet, this attachment is removable so that the LitterHopper can be installed.
Check your firmware version
- Press and hold the
 Cancel and
  Connect buttons together for 3 seconds.
 - Confirm that the “Robot” firmware listed on the screen is “5.09.06” or later
You may also check the firmware version directly in the Whisker app:
- Open the Whisker app on your mobile device. See how to onboard your unit if you have not done so already:
- Check your Litter-Robot 5 settings to verify you are updated to the latest firmware version. (Note: Screens may vary as the app gets updated.)
If your firmware is not on the most current version, contact Whisker Customer Experience for assistance.
Prepare your Litter-Robot 5 - Disassembly Instructions
Make sure the unit is in the Home/Ready position.
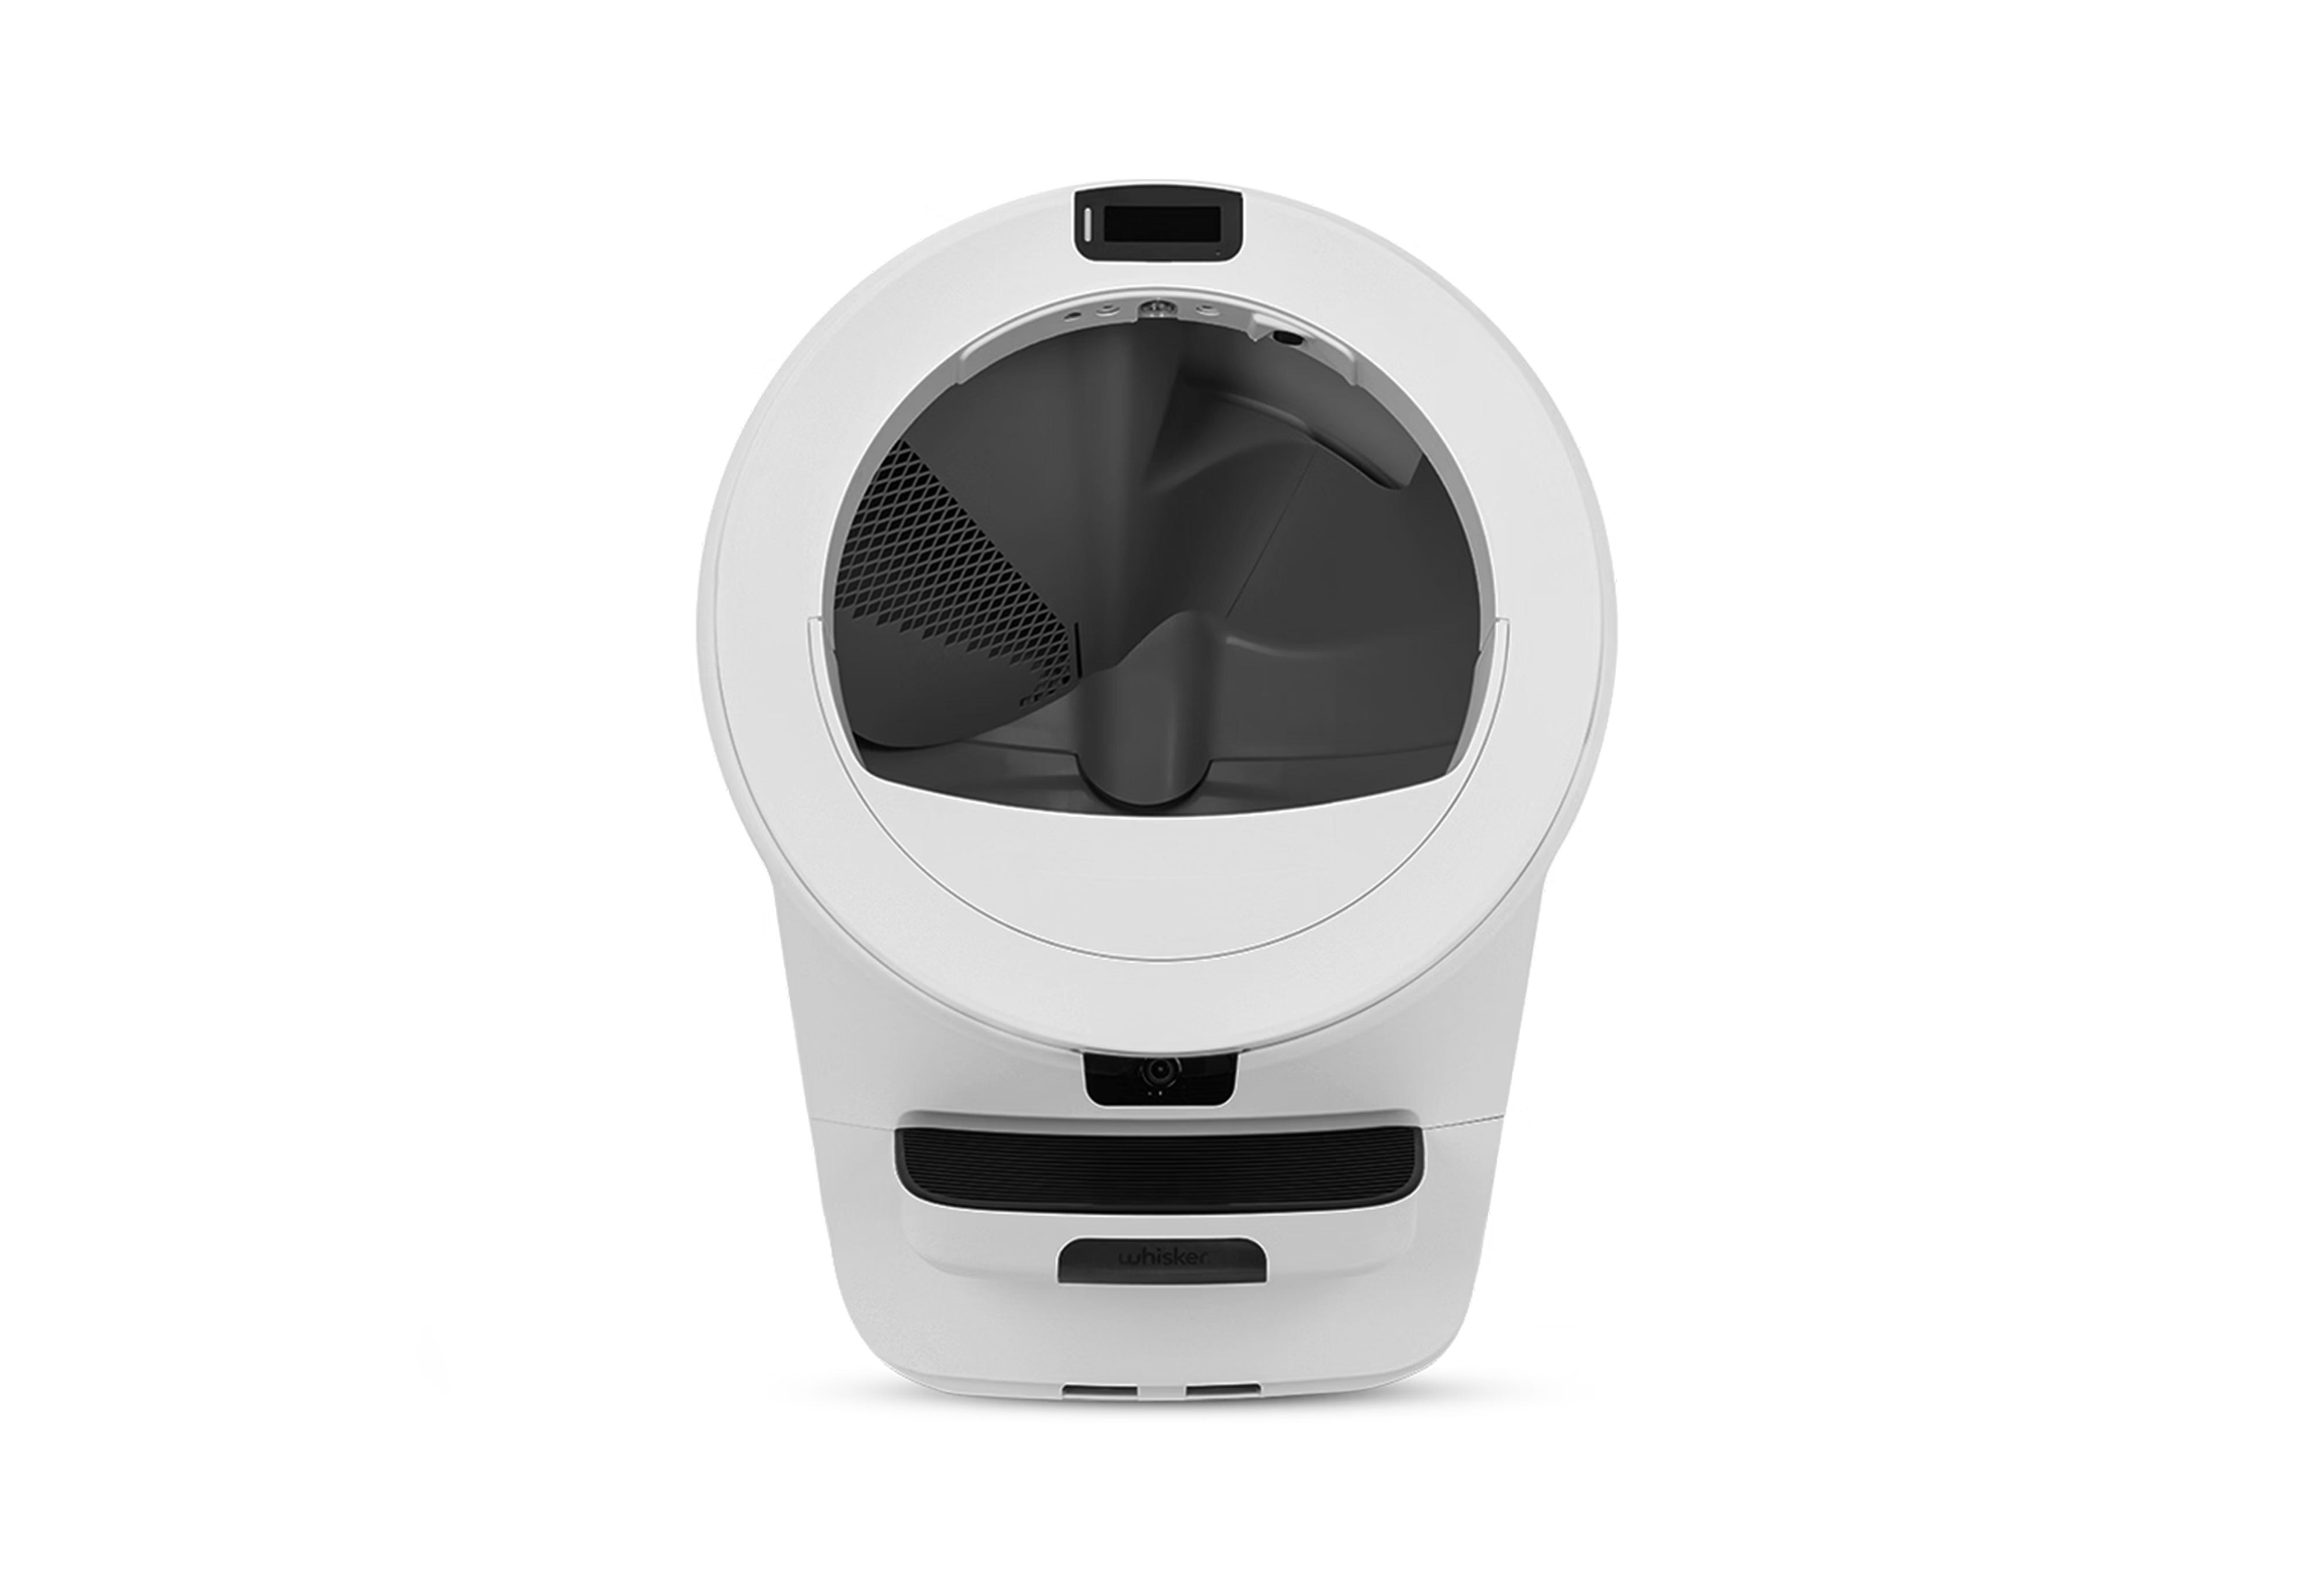
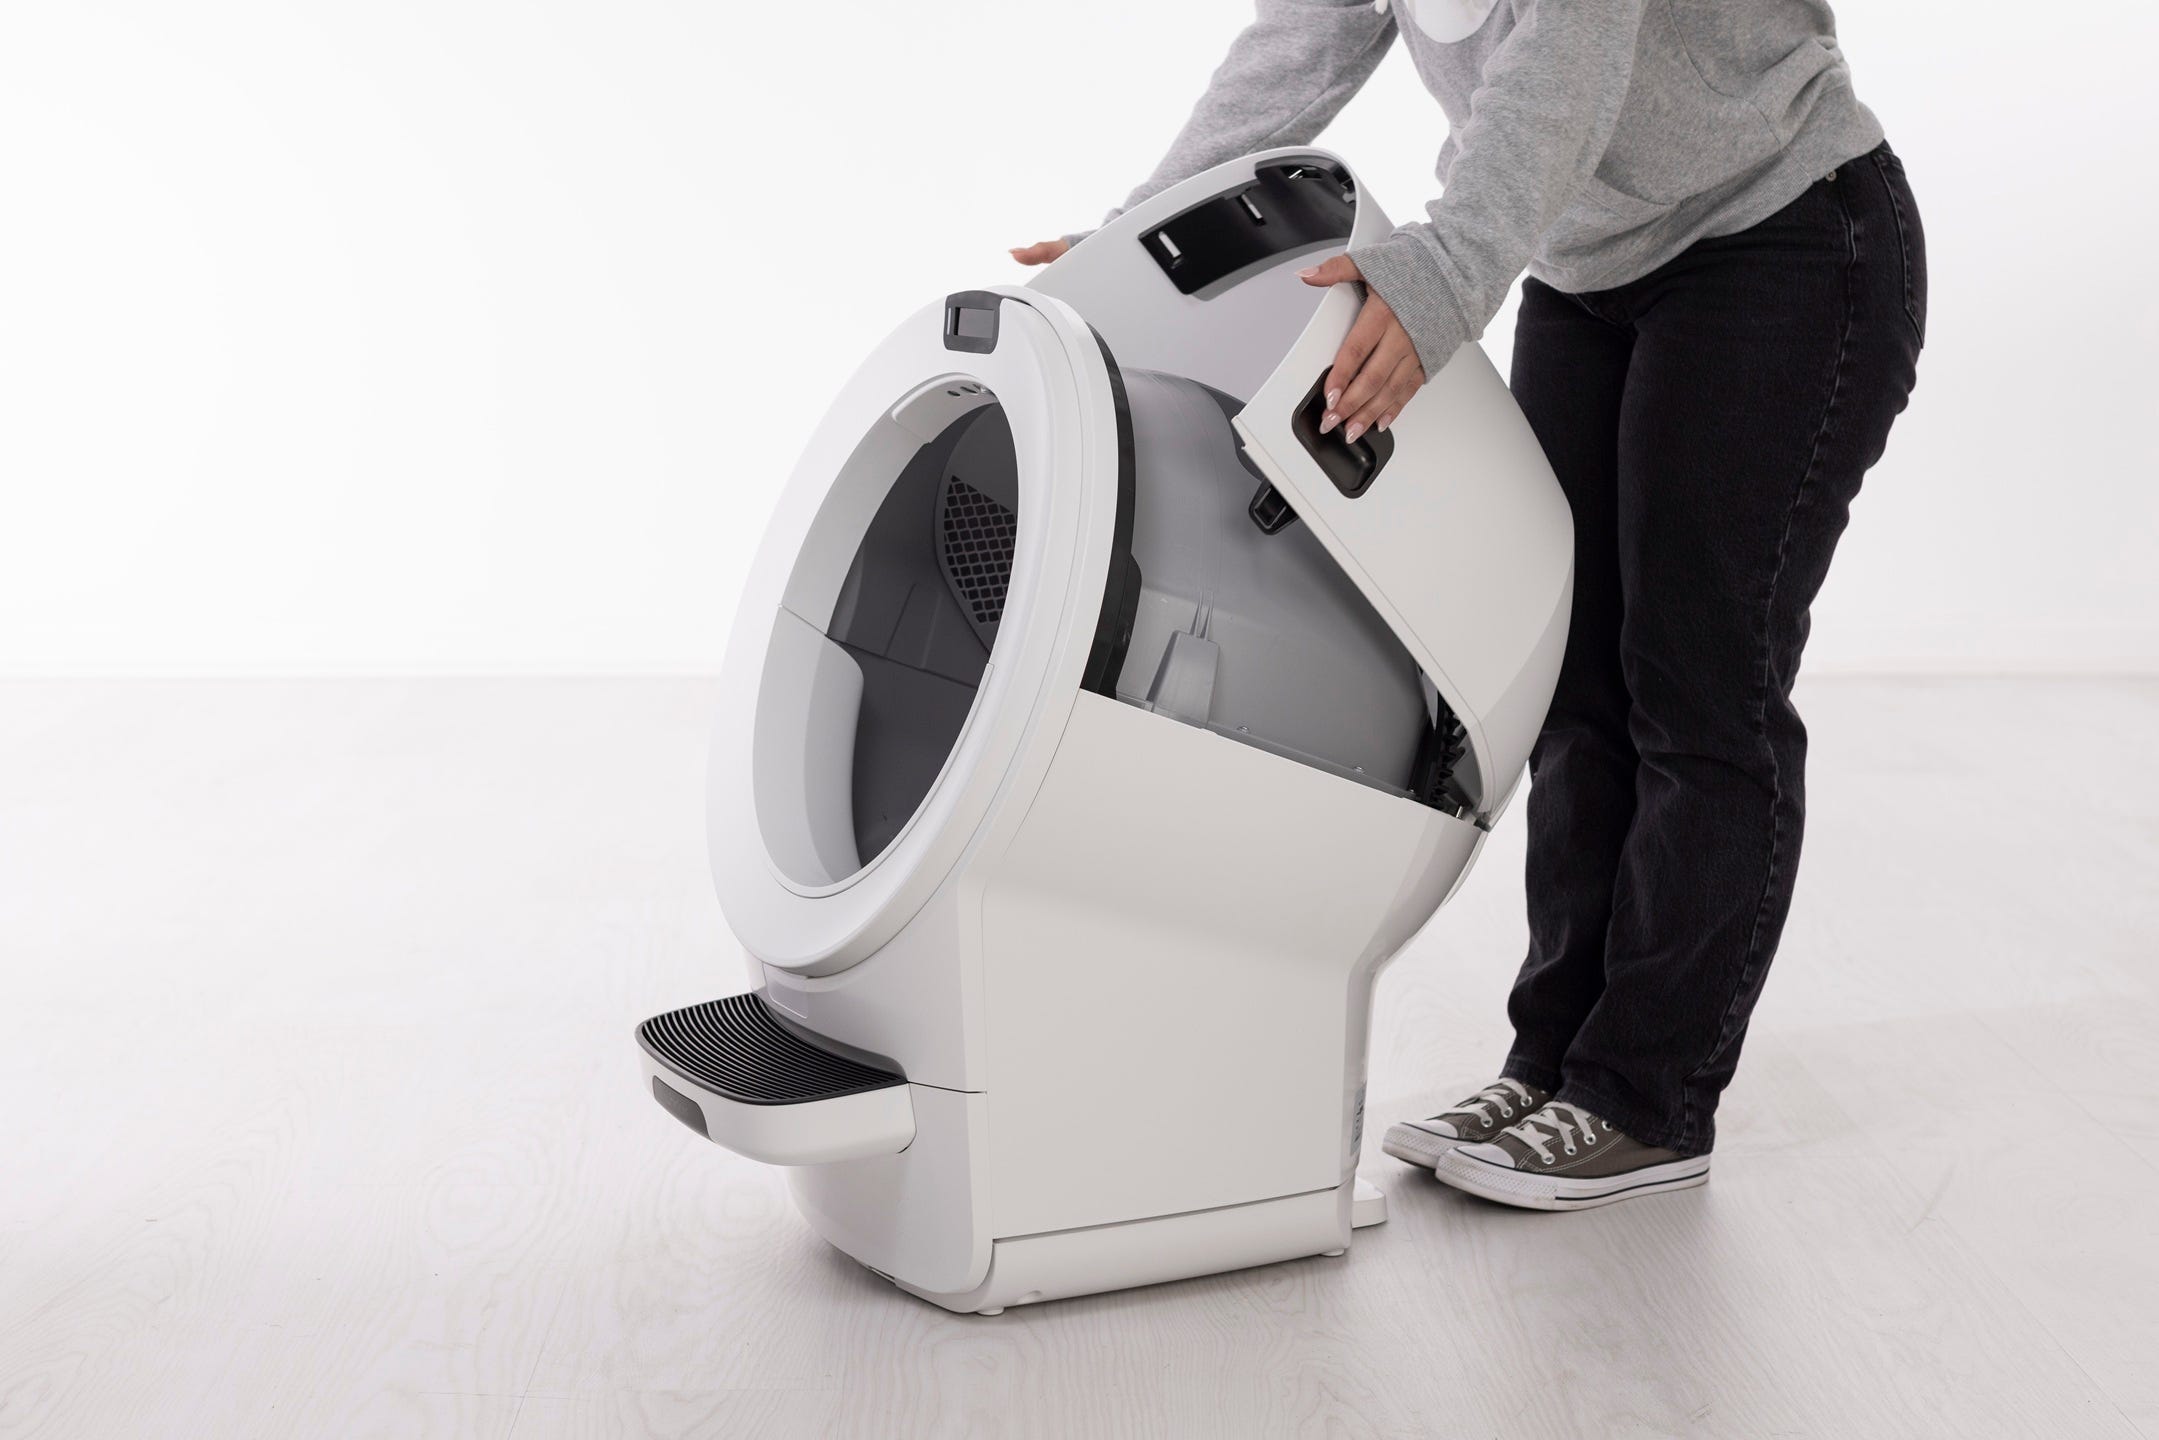
Remove the bonnet:
Press and hold the latches on both sides and rotate it to about 45° before pulling up and away. It cannot be removed in its fully open position. Set the bonnet aside.
- If Litter-Robot has already been in use by your kitty, ensure the base is clean and free of debris.
Lift the globe by the handle while holding the globe key in place to keep it from falling into the waste drawer.

- Vacuum any litter or buildup from the circular pockets on the base. Debris in these areas can prevent the posts from seating properly and may interfere with the connection.
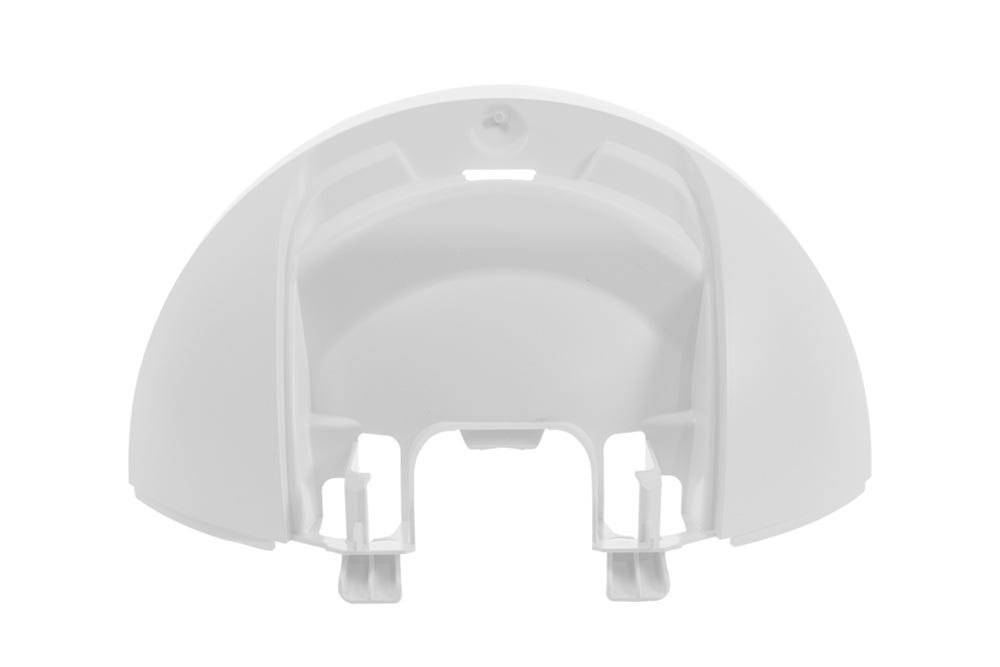
- Place the bonnet upside down on a flat surface and locate the clips on either side of the plate in the center.
- Press both clips outward to release the plate, then pull the plate up and away from the bonnet.
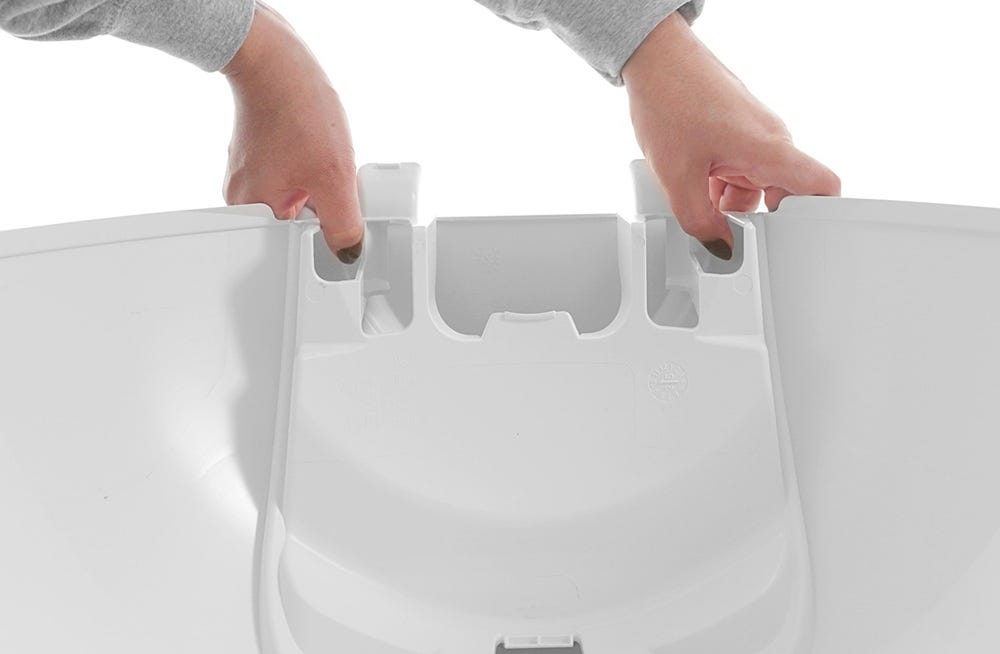
Note: We recommend keeping the plate attachment until you are satisfied with your new LitterHopper.
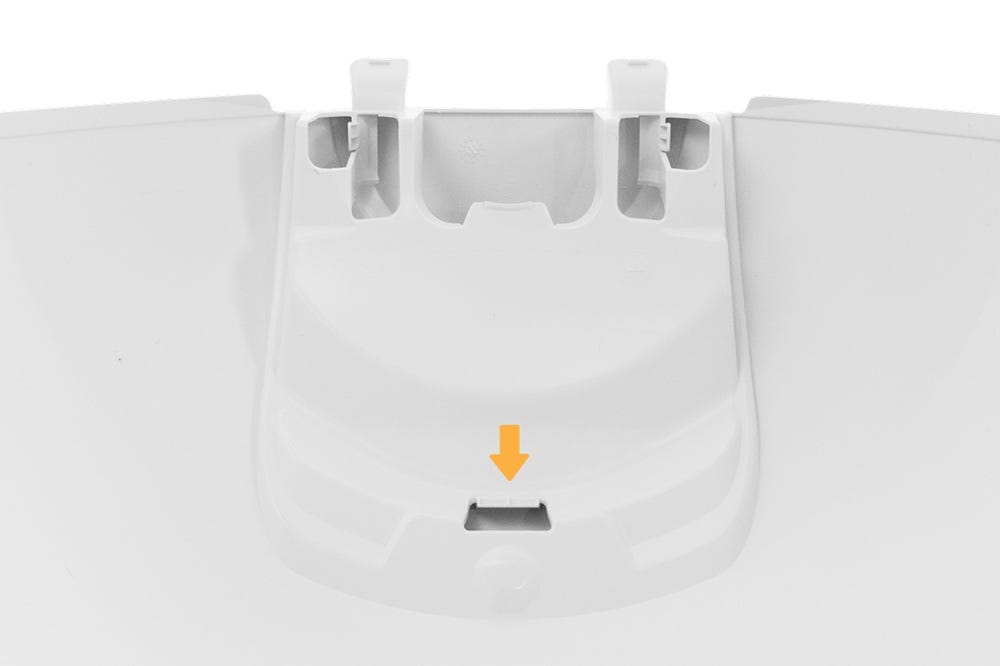
- If the plate attachment does not automatically release, unhook the center tab from the slot.
- Reattach the bonnet: rotate the bonnet upward at a 45° angle and align the hinge feature of the bonnet at the back of the base.
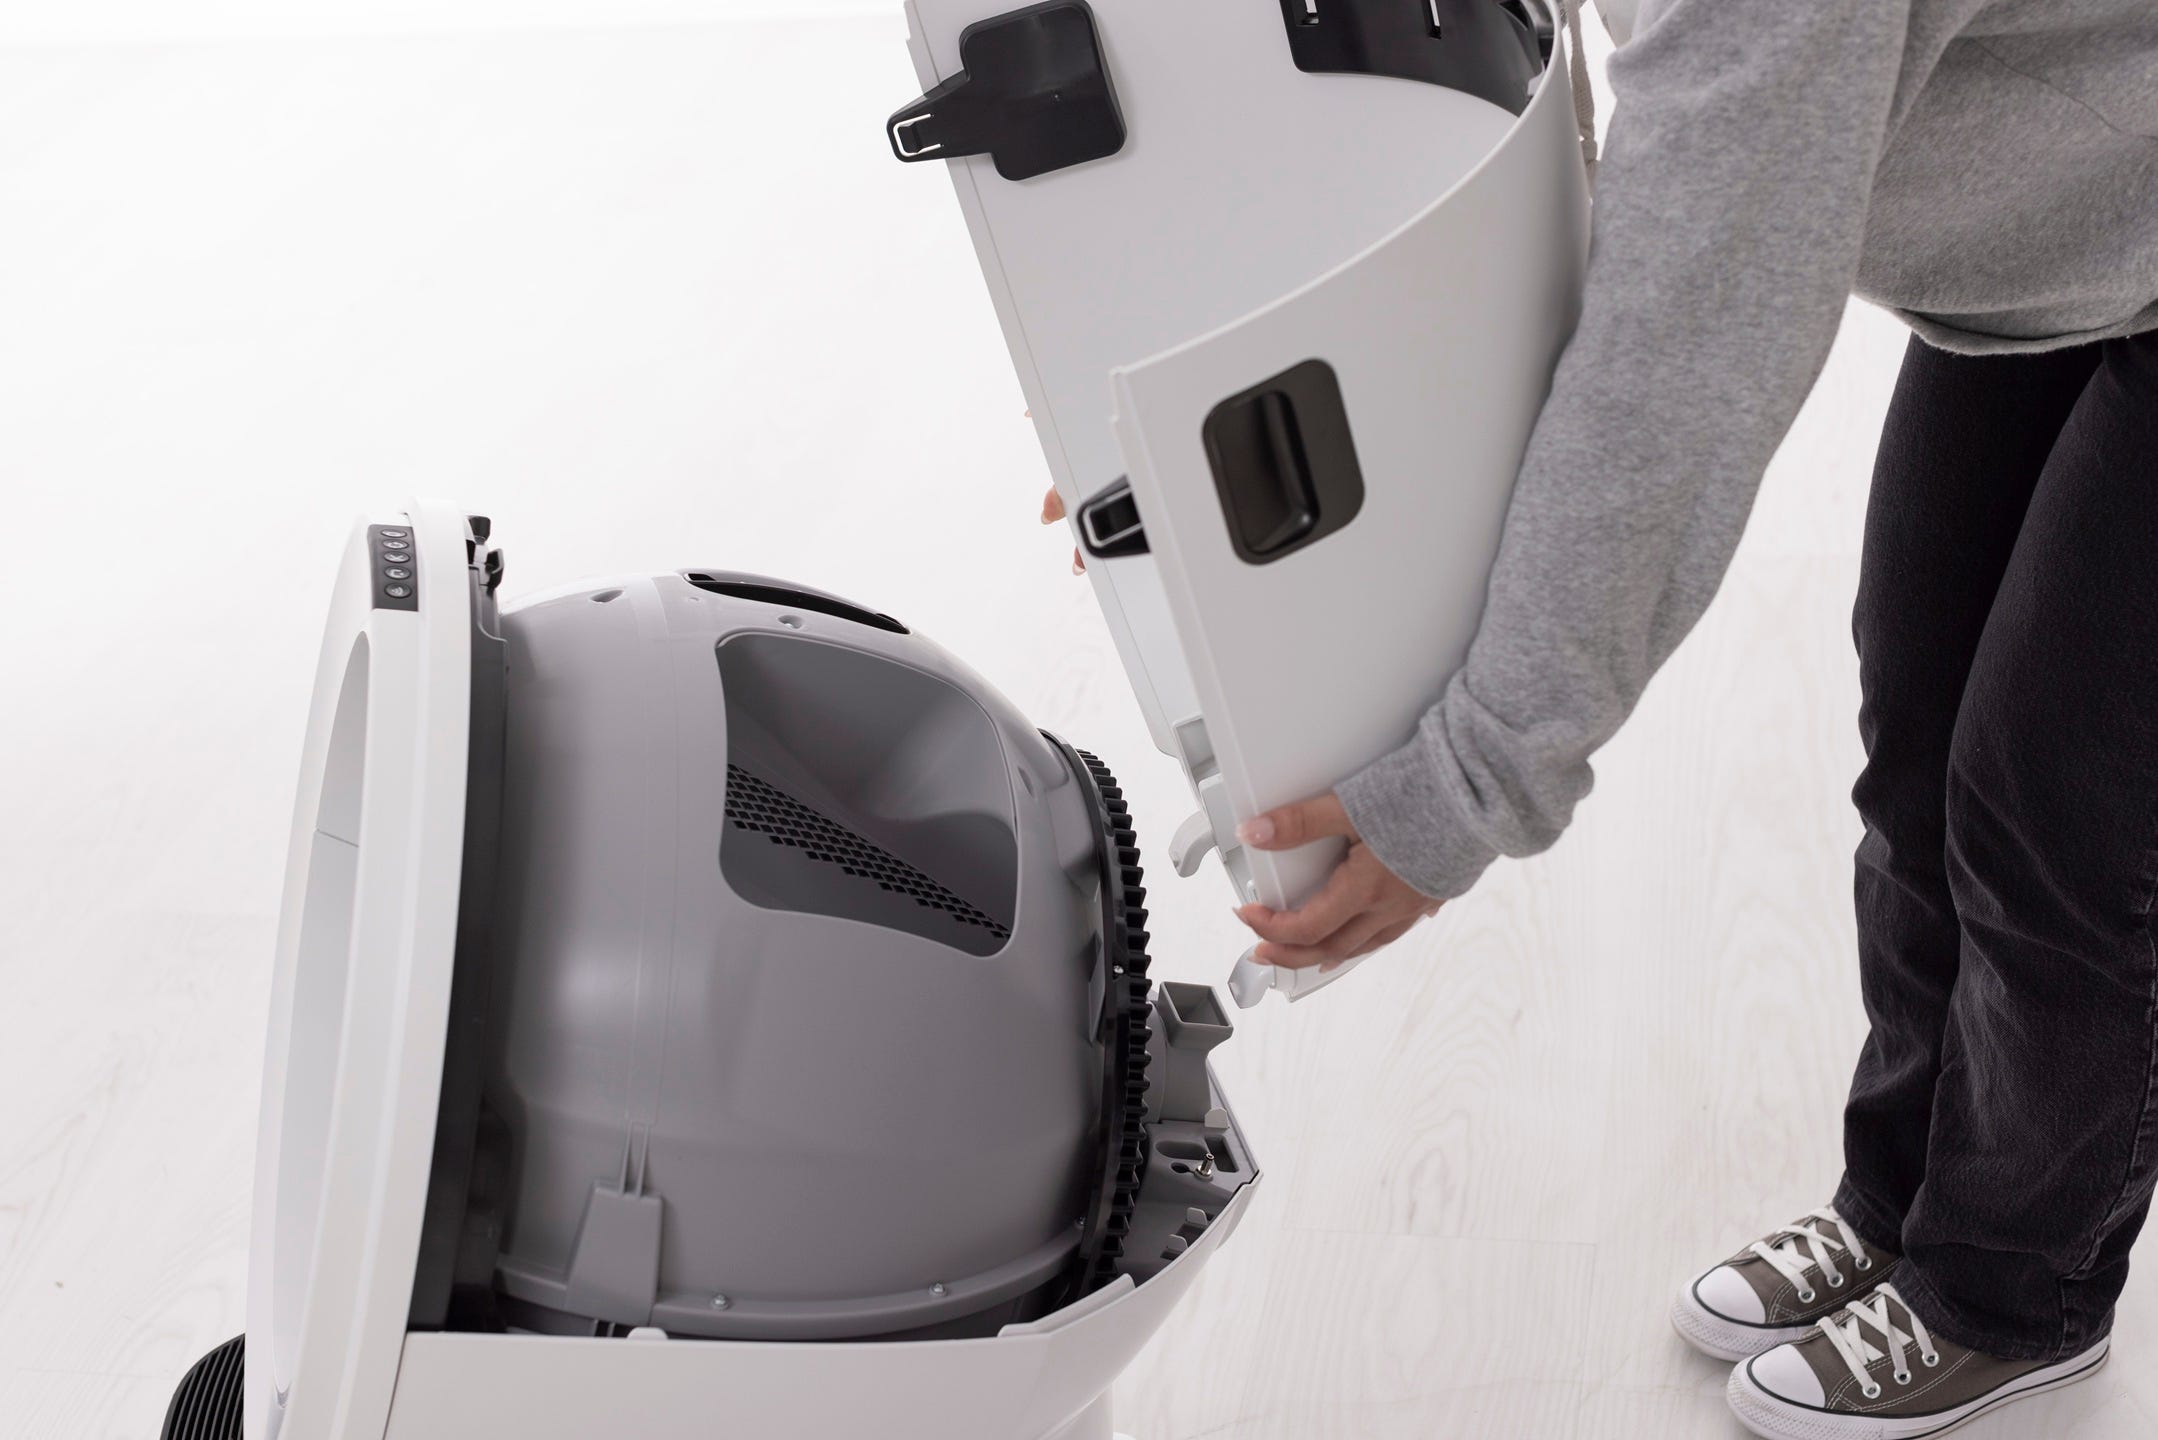
- To close the bonnet, rotate the bonnet downward over the globe. The bonnet should automatically latch into place.
Installing the LitterHopper
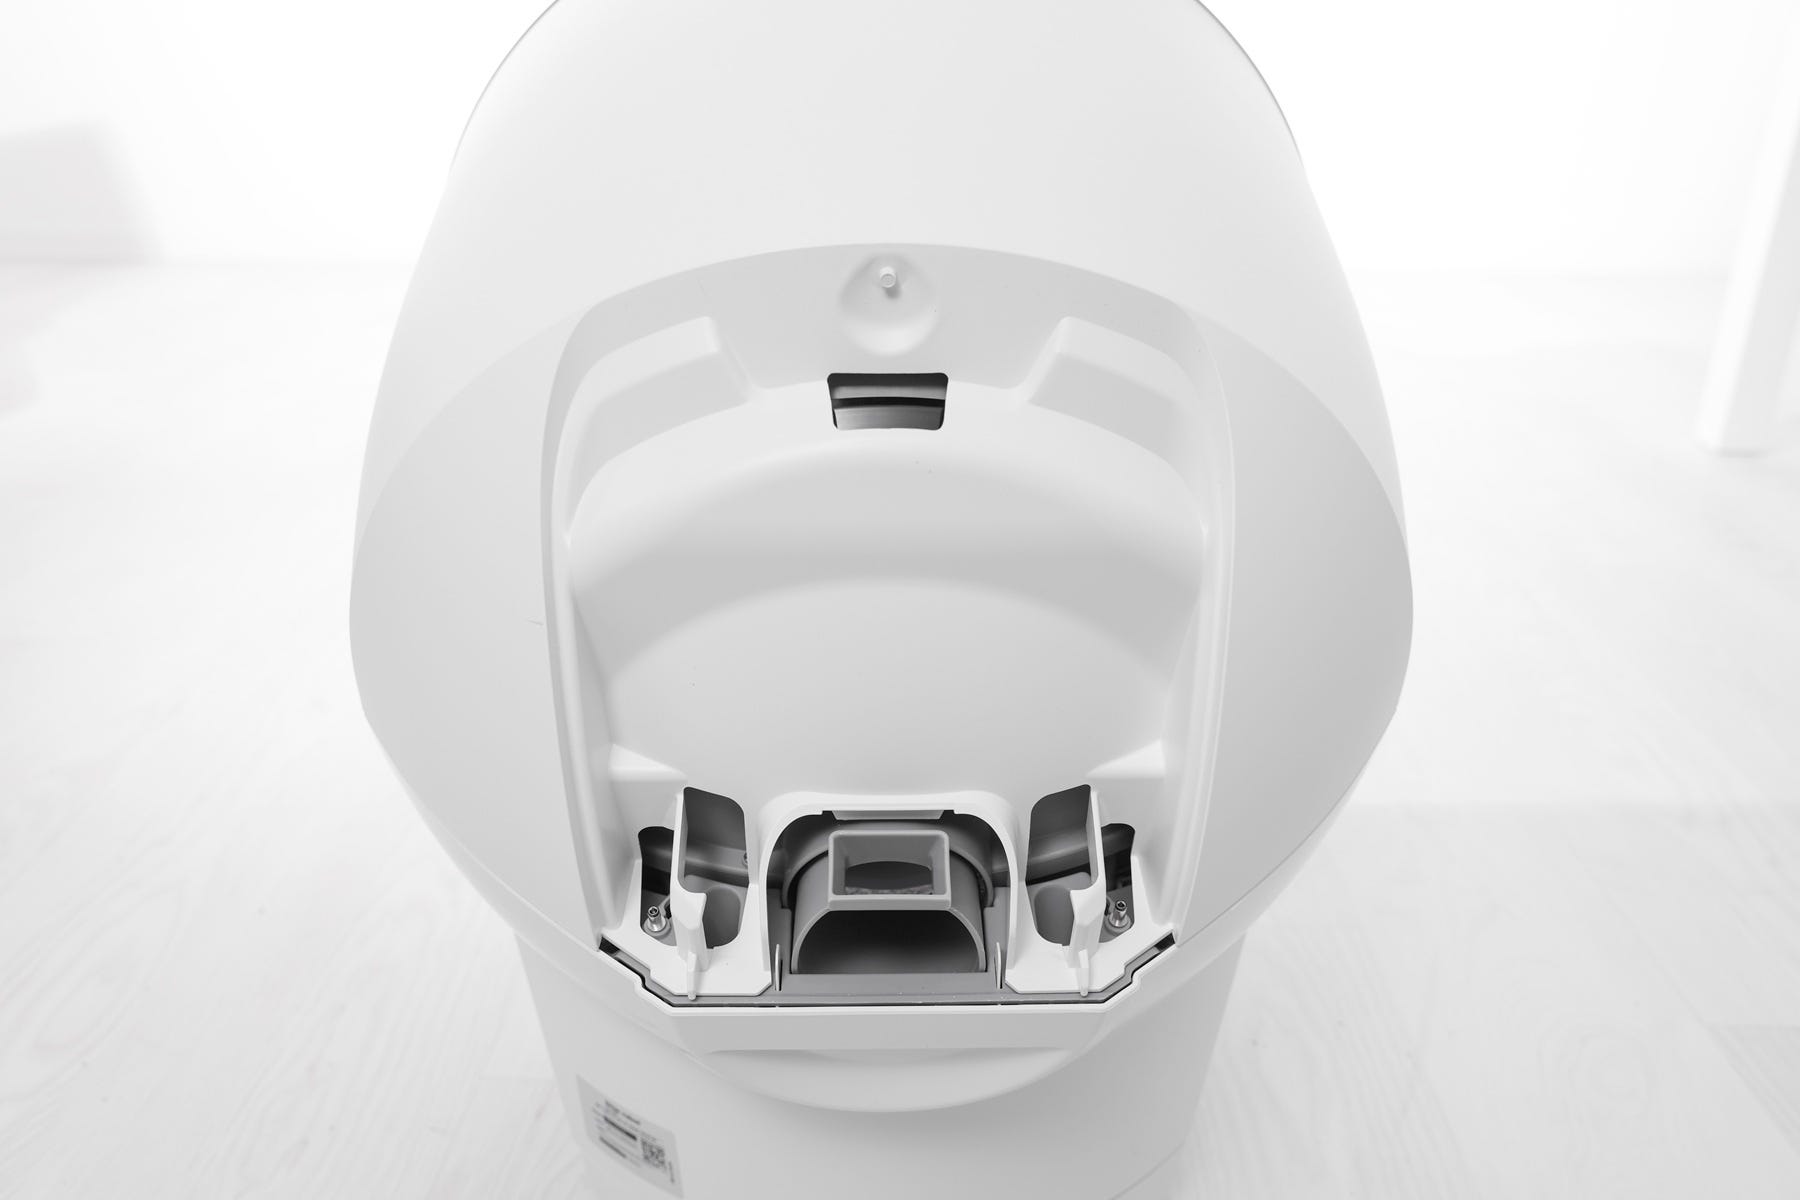
Litter-Robot 5 has two circular pockets on each side of the hinge at the back of the base and a slot at the back of the bonnet for the LitterHopper mounting tab.
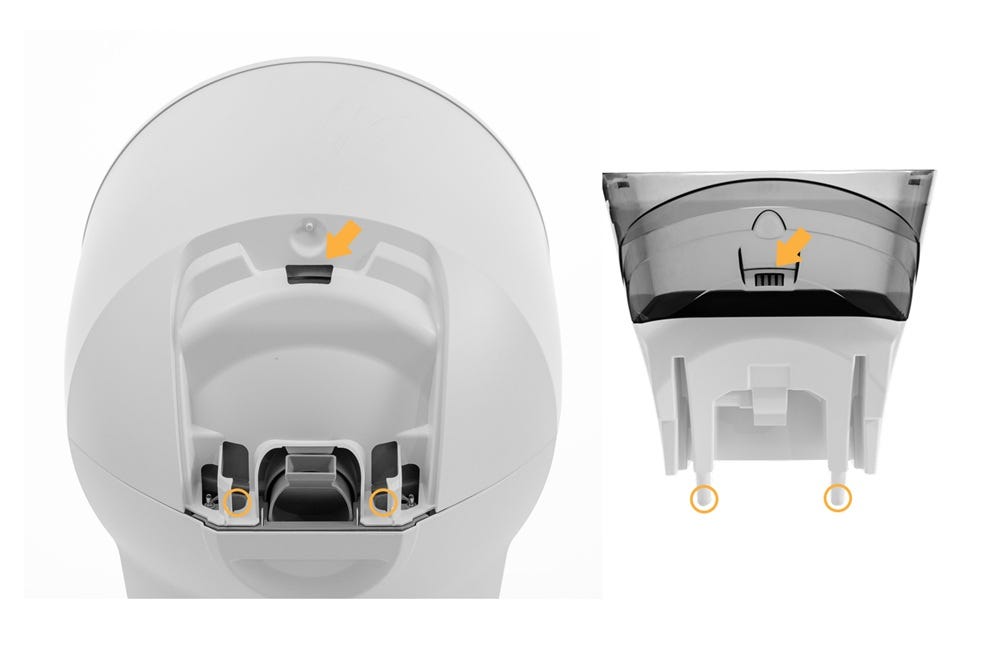
- Make sure the metal prong on the LitterHopper is visible, clean, and not damaged.
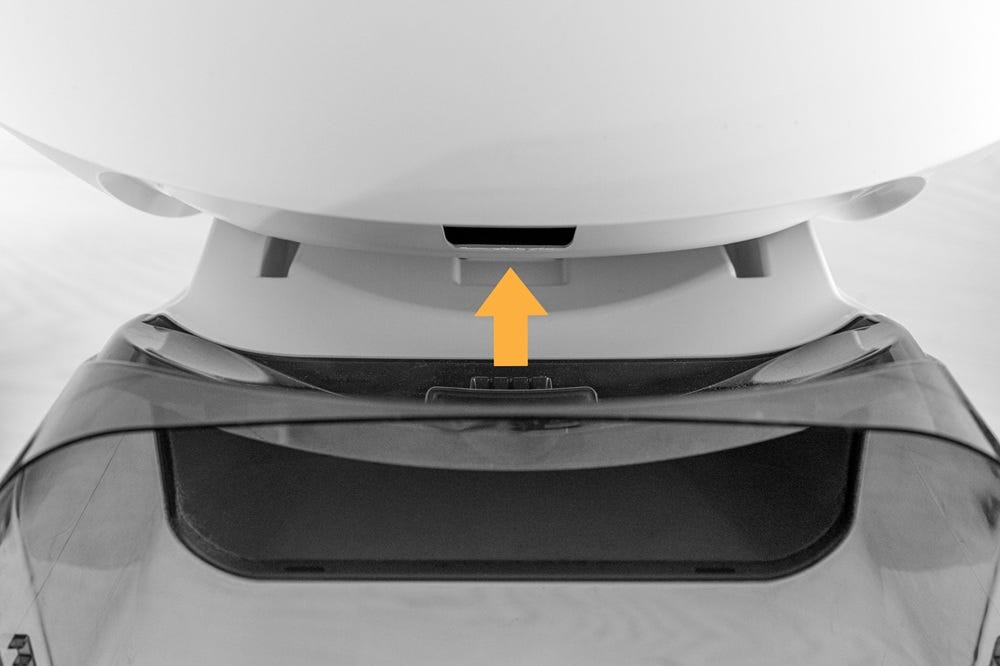
- Locate the two circular pockets in the base that correspond with the posts on the bottom of the LitterHopper.
- Align the posts on the LitterHopper with the circular pockets and lower it into place.
- Ensure that the mounting tab at the back of the LitterHopper is fully seated in the slot on the bonnet.
Note: If the mounting tab is not fully engaged, there may be a visible gap between the LitterHopper and bonnet, and the LitterHopper may feel loose or not firmly attached.
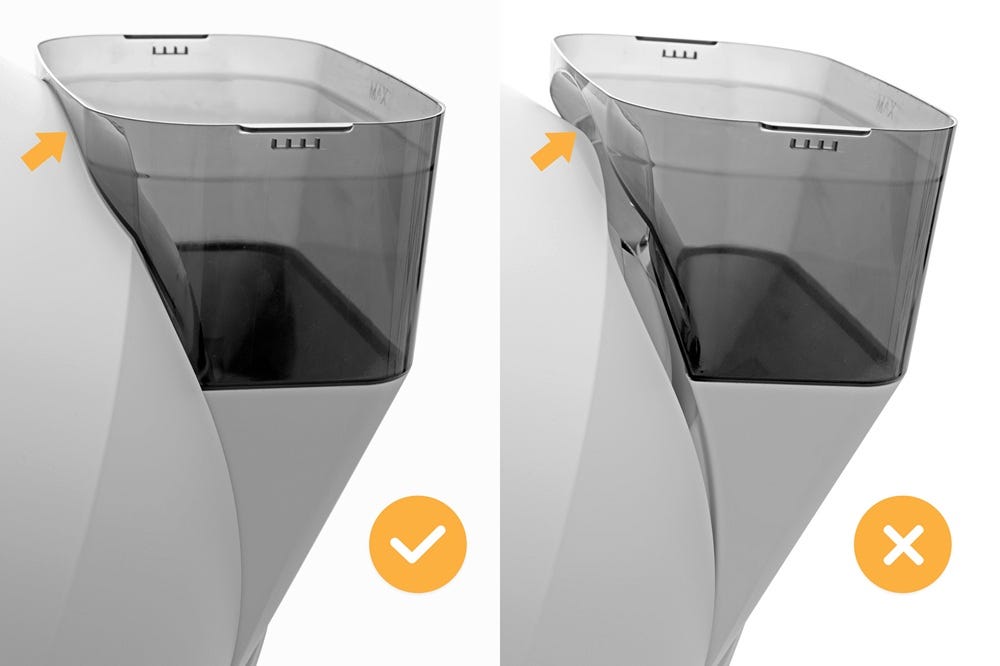
- When fully installed, there should be no gaps around the top, bottom, or sides of the LitterHopper and bonnet. The LCD Screen will temporarily display a “LitterHopper detected” message.
In the Whisker app, you will also see confirmation that the LitterHopper is connected:
A push notification indicating the LitterHopper is enabled
“Hopper detected” and “Hopper enabled” in the History page under Device Activity
A LitterHopper card on the Status page
Note:
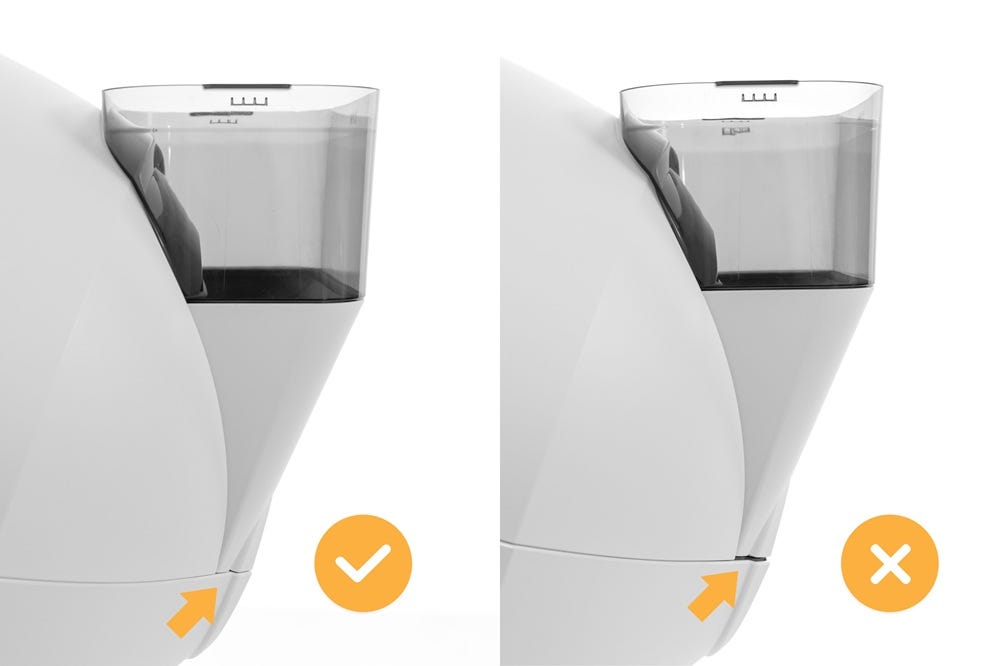
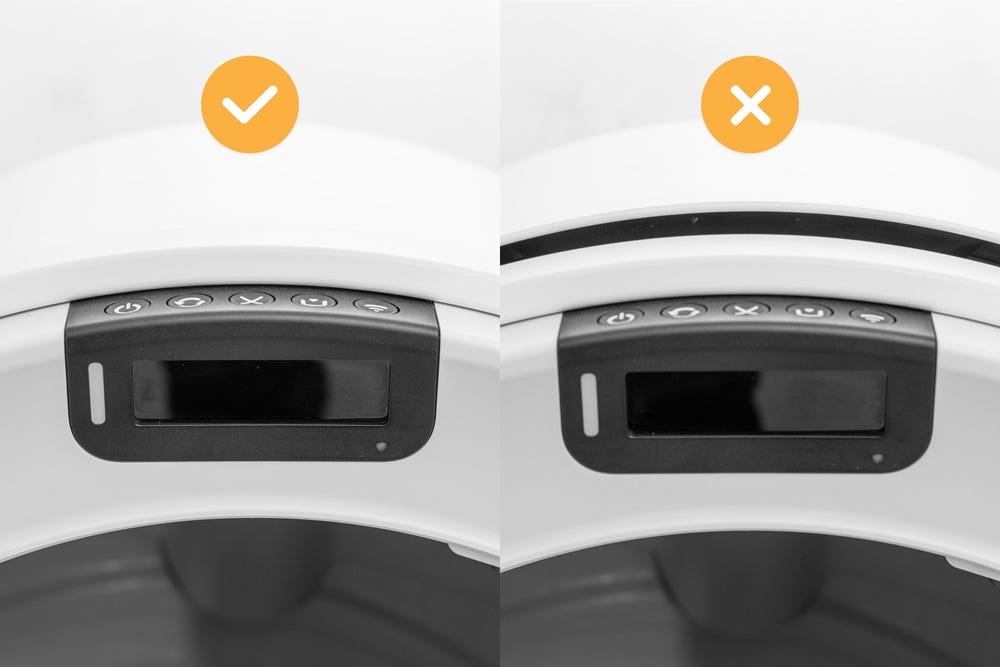
The bonnet should fit securely to the base with only a minimal gap. During LitterHopper installation, the bonnet may temporarily become unlatched or the gap may widen.
If this occurs, press down on the bonnet until it relatches securely.
- Press the Cancel button to zero the weight scale.
Successful: Litter-Robot temporarily displays a “LitterHopper detected” message on the LCD screen and a notification is sent in the Whisker app.
Unsuccessful: Litter-Robot does not detect the LitterHopper check to ensure it’s properly seated and repeat the installation.
Final steps
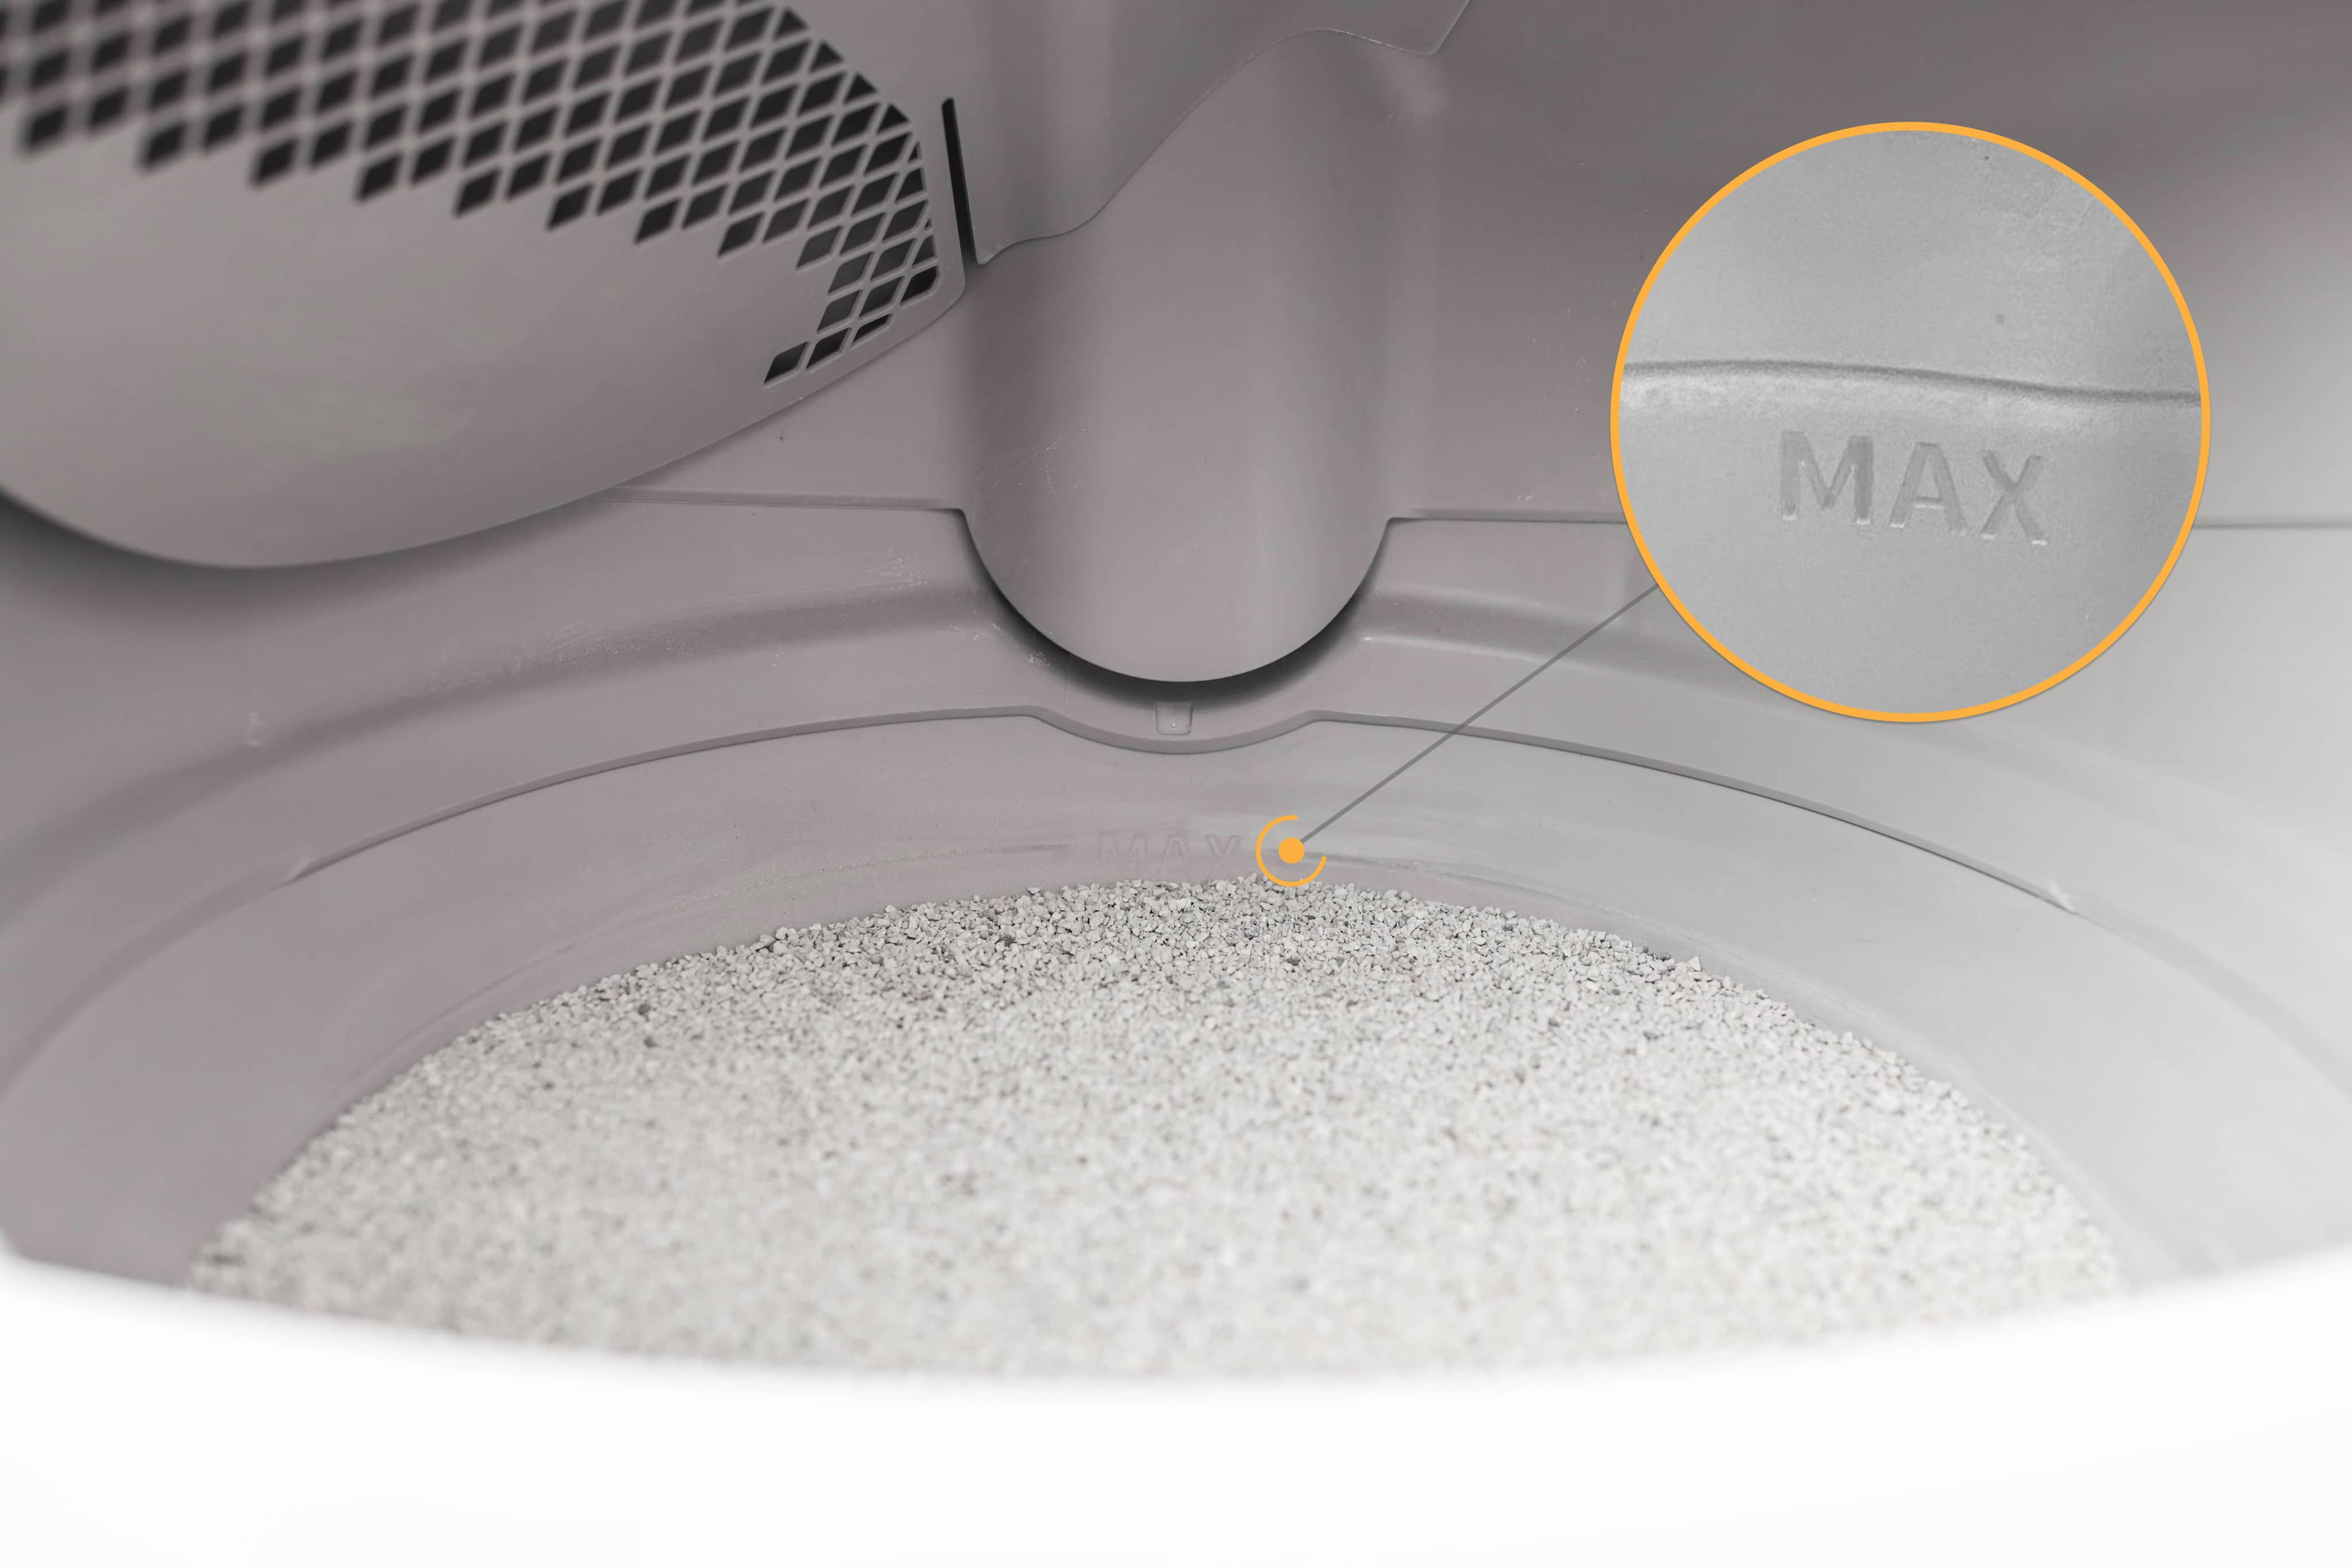
Ensure the litter level inside the globe is at the MAX fill line. Add some litter if needed. The LitterHopper is designed to maintain the litter at the optimal level.
Ensure that the litter is leveled across the globe.
Remove the lid from the LitterHopper and fill the LitterHopper with litter up to the MAX fill line. Install the lid and make sure it is securely attached to the LitterHopper.

Note:
As it dispenses litter, the litter level in the LitterHopper may become uneven. Litter may appear higher along the sides while the center is lower.If the litter level appears uneven, gently level the litter or add more litter until it reaches just below the MAX fill line.

Any time you add litter to the globe or the LitterHopper, you will need to press the
Cancel button to zero the weight sensors. Once your LitterHopper has been detected, it is automatically enabled and ready to use.
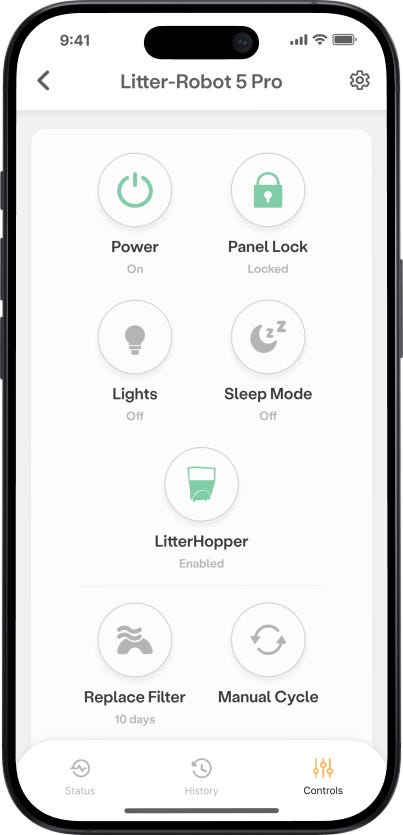
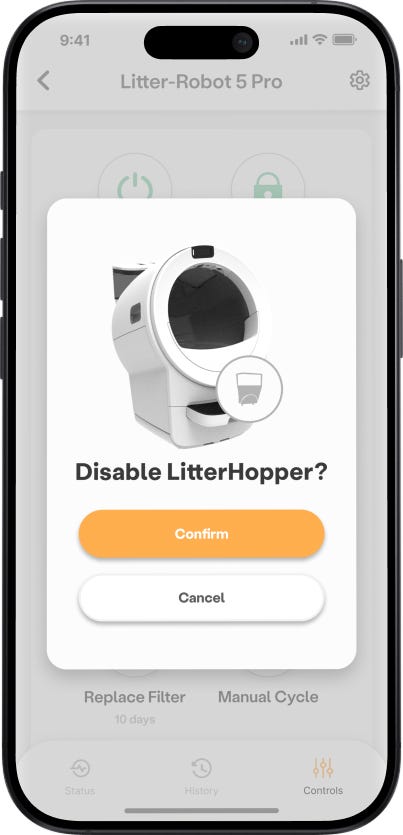
Enabling & disabling the LitterHopper
The LitterHopper is automatically enabled once installed, but you can easily enable or disable the LitterHopper from the control panel or by using the Whisker app.
To enable/disable directly on the control panel:
- Press and hold the
 Cycle
Cycle  Empty buttons for 3 seconds. Once the LitterHopper is successfully enabled/disabled, a confirmation message will appear on the LCD screen.
 To enable/disable from the Whisker app:
- Select your Litter-Robot 5→ tap Controls → tap LitterHopper → confirm disable/enable
What should I do with the plate attachment after installing the LitterHopper?
Feel free to recycle or throw away the plate attachment from the bonnet (Be sure to follow local regulations). Or you can store it in the box your LitterHopper arrived in for safekeeping.
Enjoy LitterHopper!
Need more help?
If additional support is needed, please contact Whisker Customer Experience.
Didn't find what you're looking for?
Live support available Mon-Fri: 9AM-9PM EST and Sat-Sun: 9AM-5PM EST, or submit a ticket anytime.