The store will not work correctly in the case when cookies are disabled.
Litter-Robot 5: Waste drawer assembly and disassembly guide
The Litter-Robot 5 Waste Drawer is designed for easy removal, cleaning, and reassembly. Follow the steps below to properly assemble and disassemble the waste drawer.
Before you start
Parts required
- Waste drawer body
- Waste drawer front and step
- Waste drawer liner
Assembling the waste drawer
- Pull the waste drawer body out from the unit.
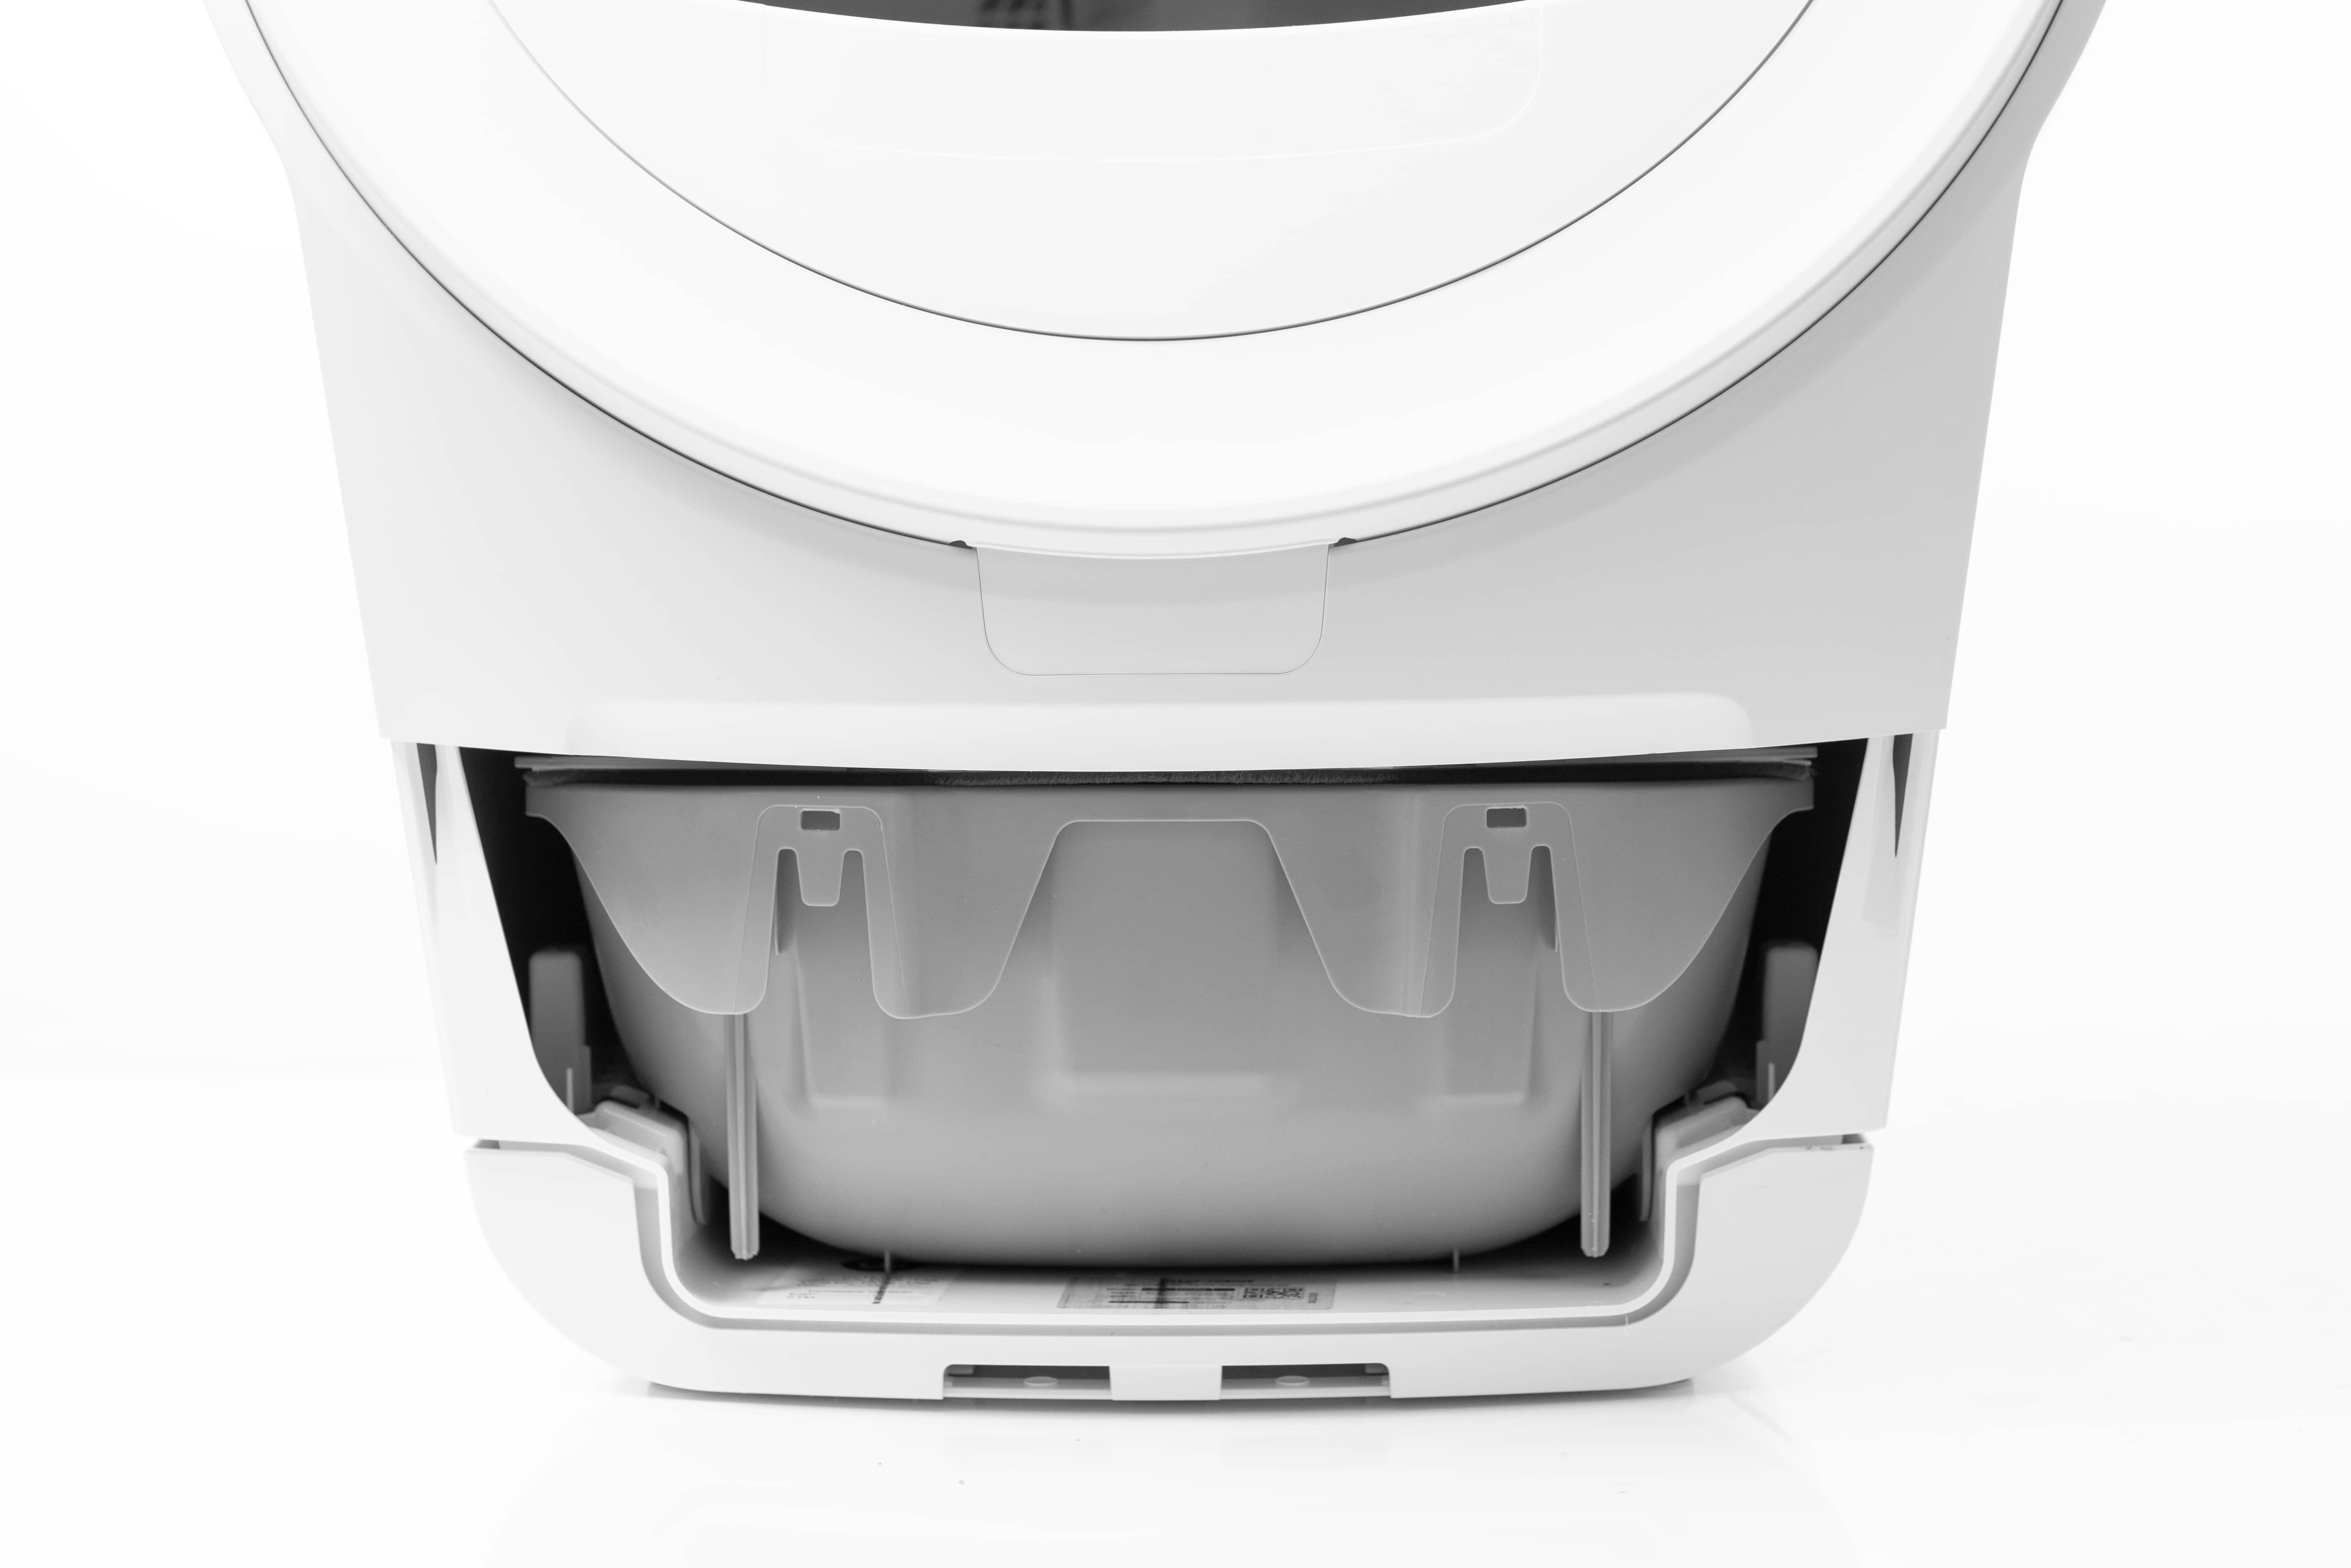
- The waste drawer has two alignment slots that correspond with the two alignment hooks on the step.
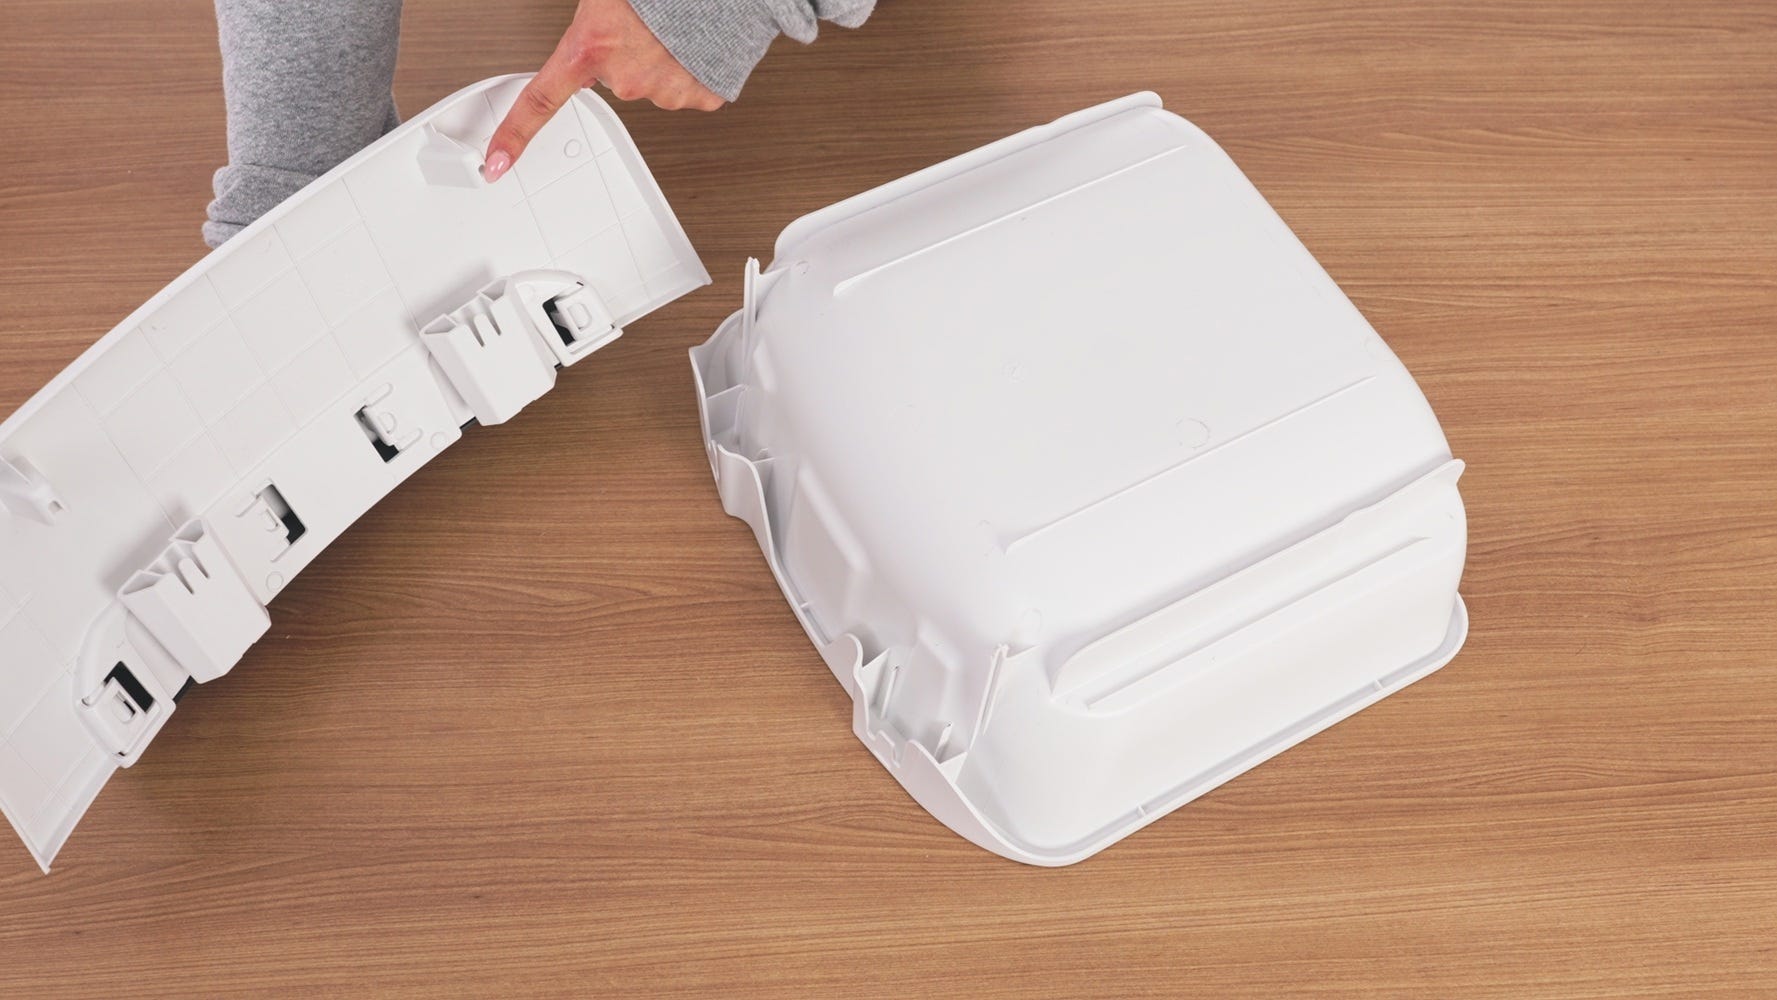
- Place the drawer body upside down on a flat surface, such as a table. Slide the step posts into the waste drawer pockets.
- Insert the pegs on the drawer body into the assembly pockets on the drawer front.
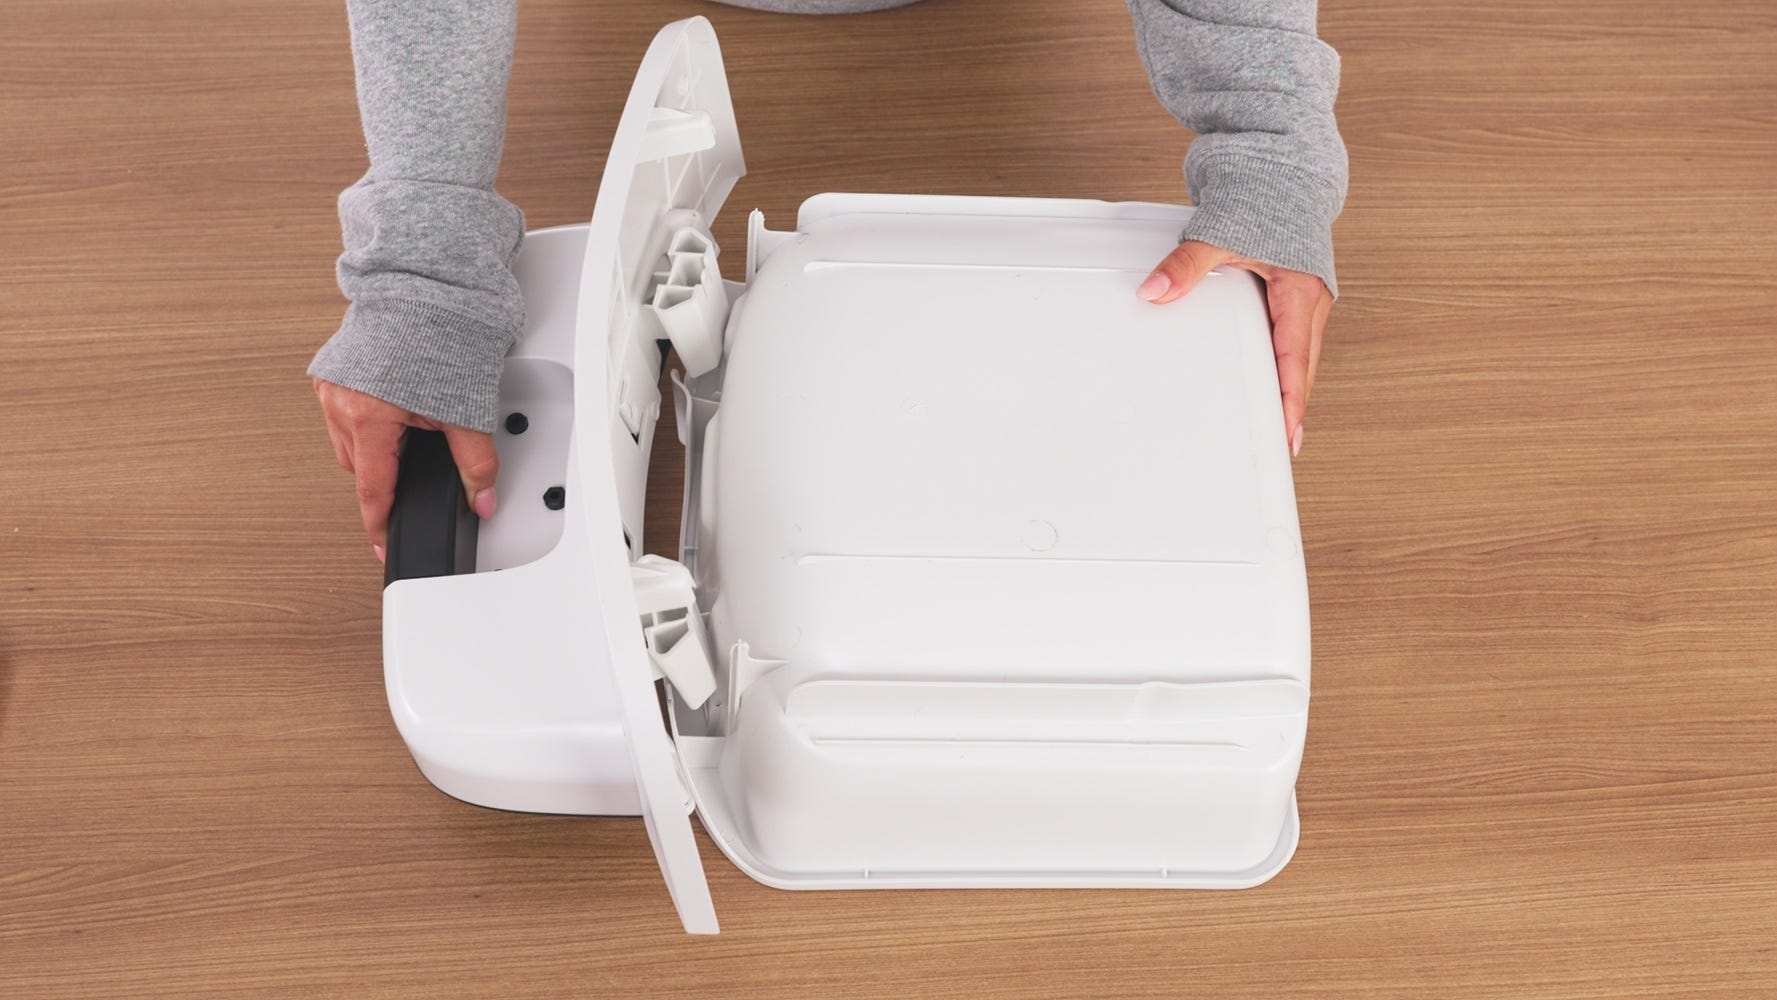
- While holding the pegs in place, flip the drawer so that it’s facing right side up. Push the drawer body down slightly until you hear or feel both pegs snap into place.
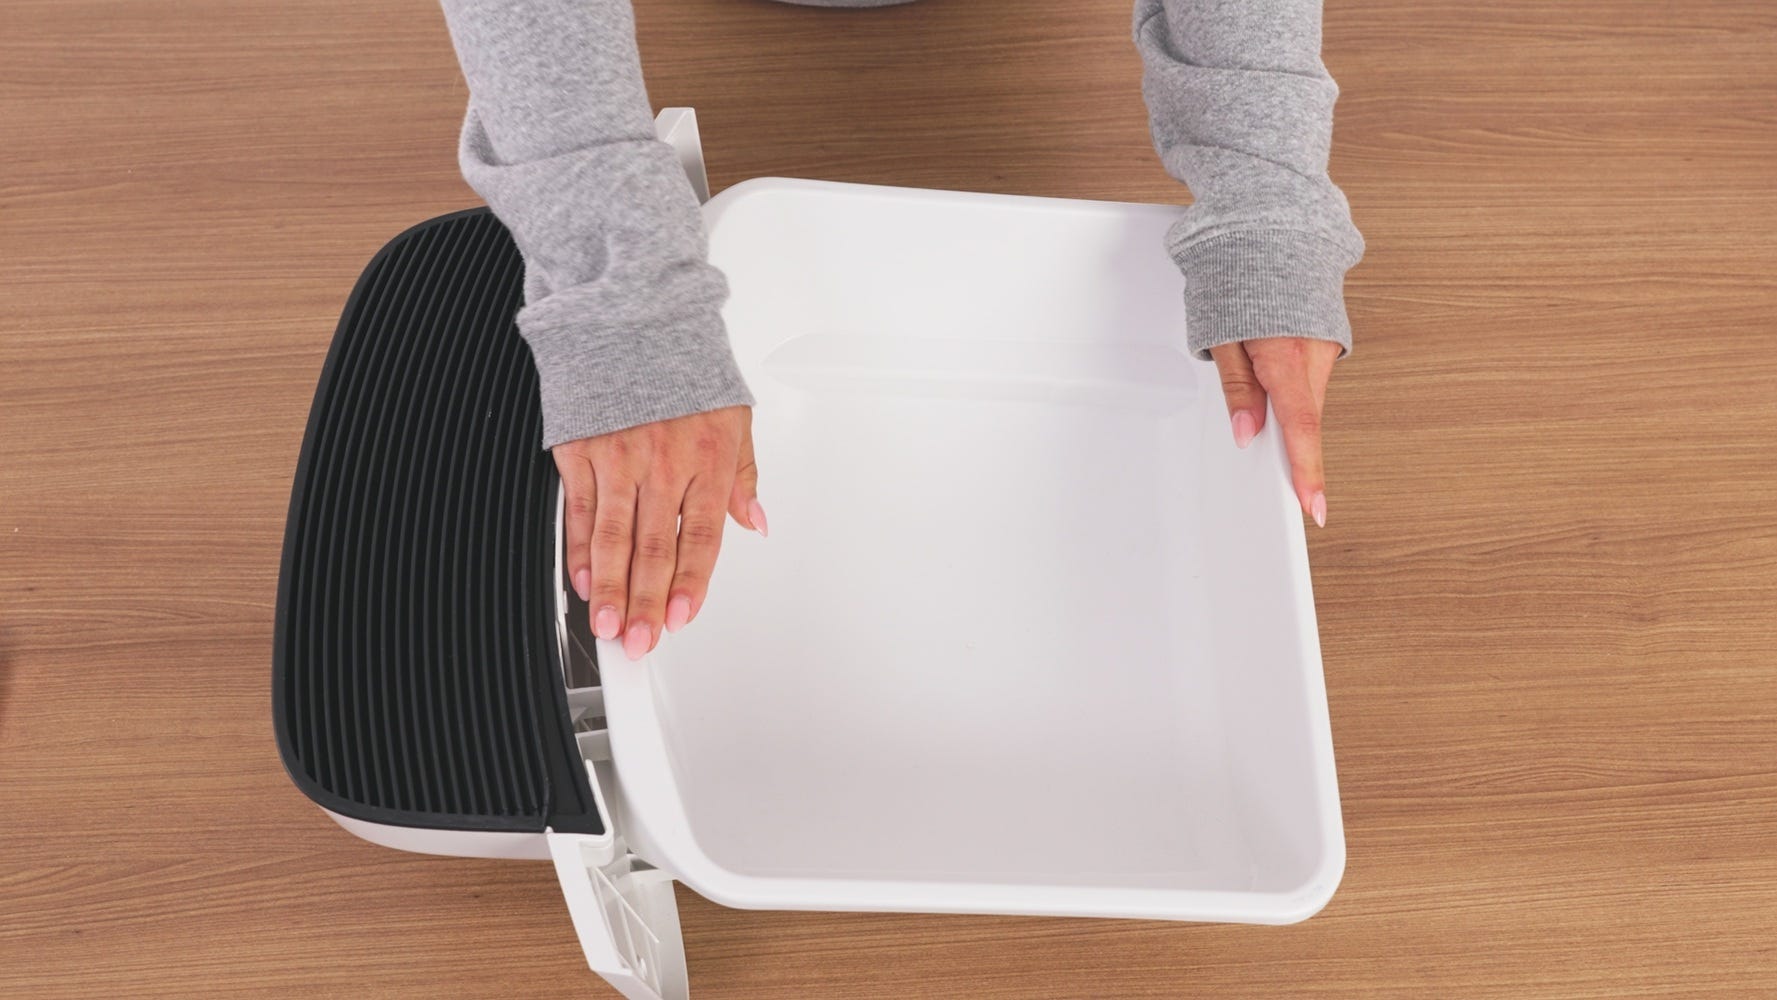
- Insert the drawer liner and smooth it flat against the sides and bottom to ensure the Drawer Full Indicator (DFI) functions correctly.
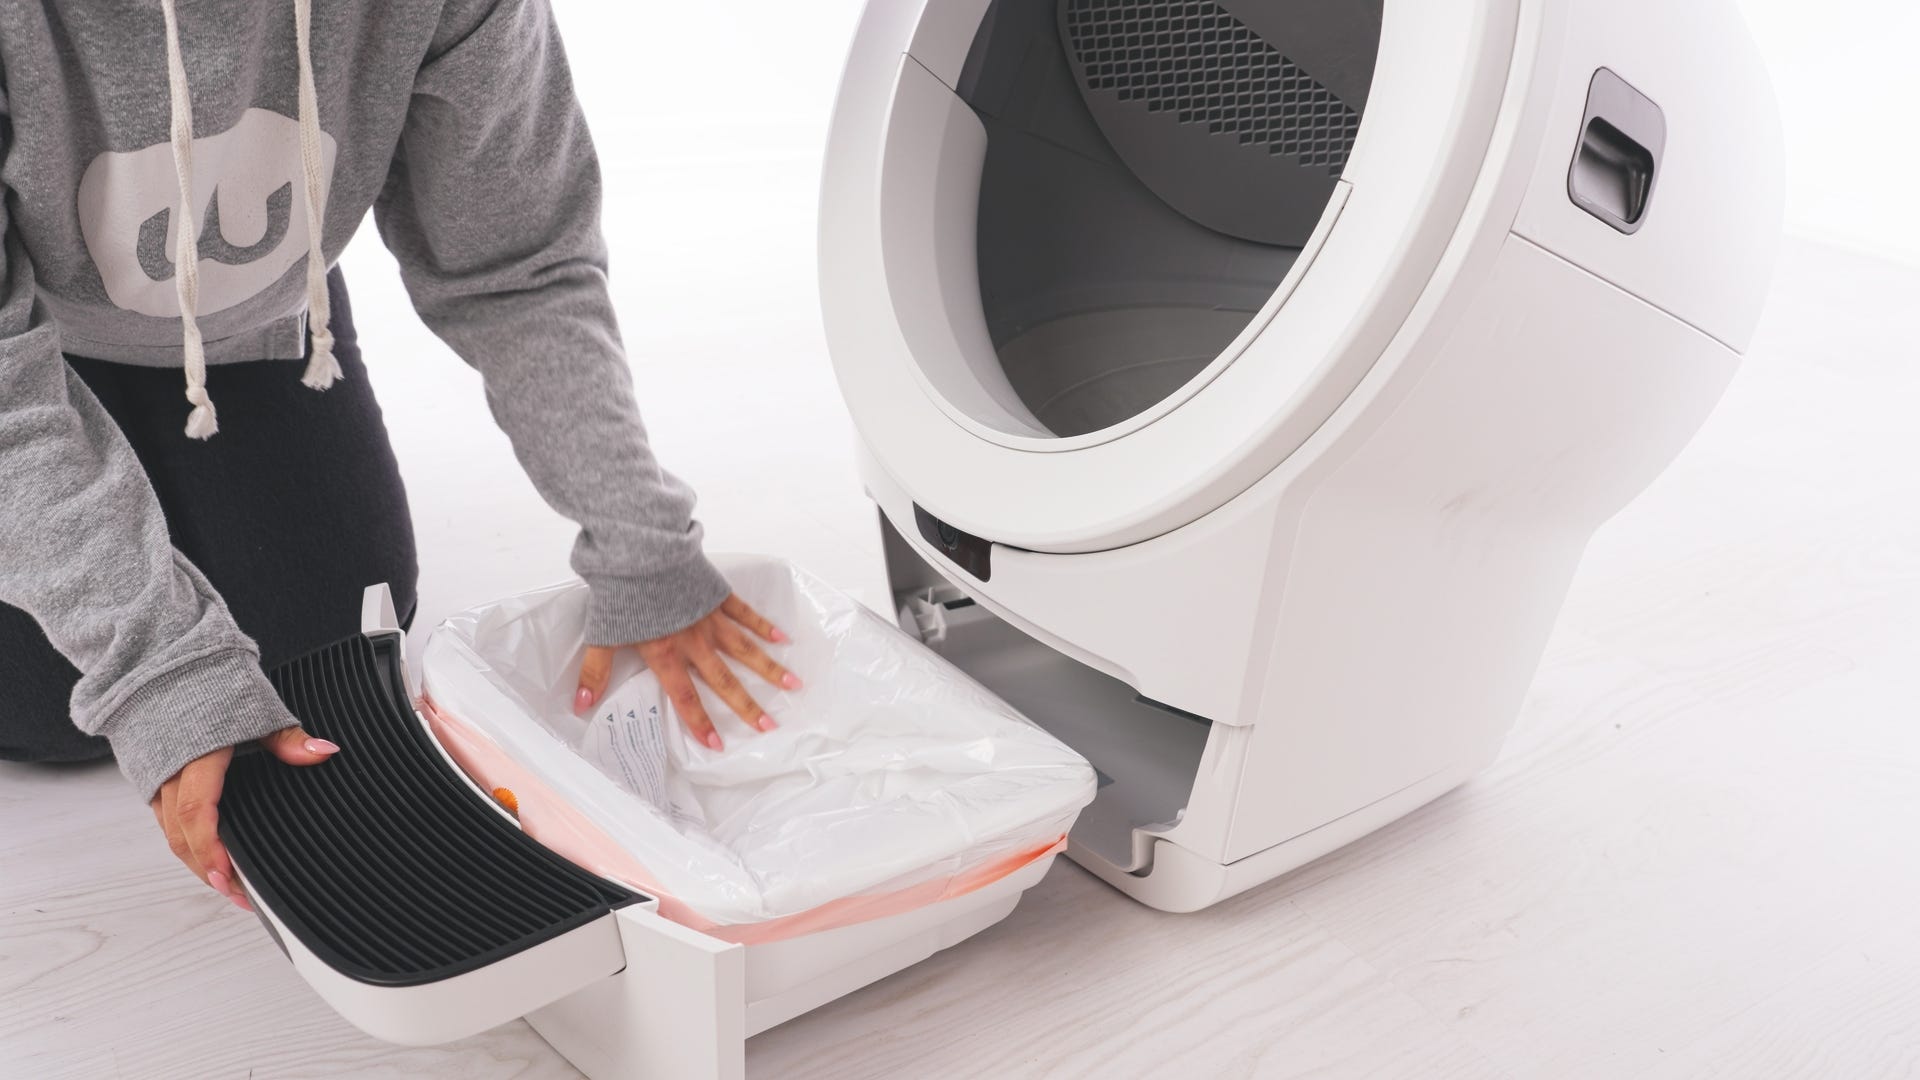
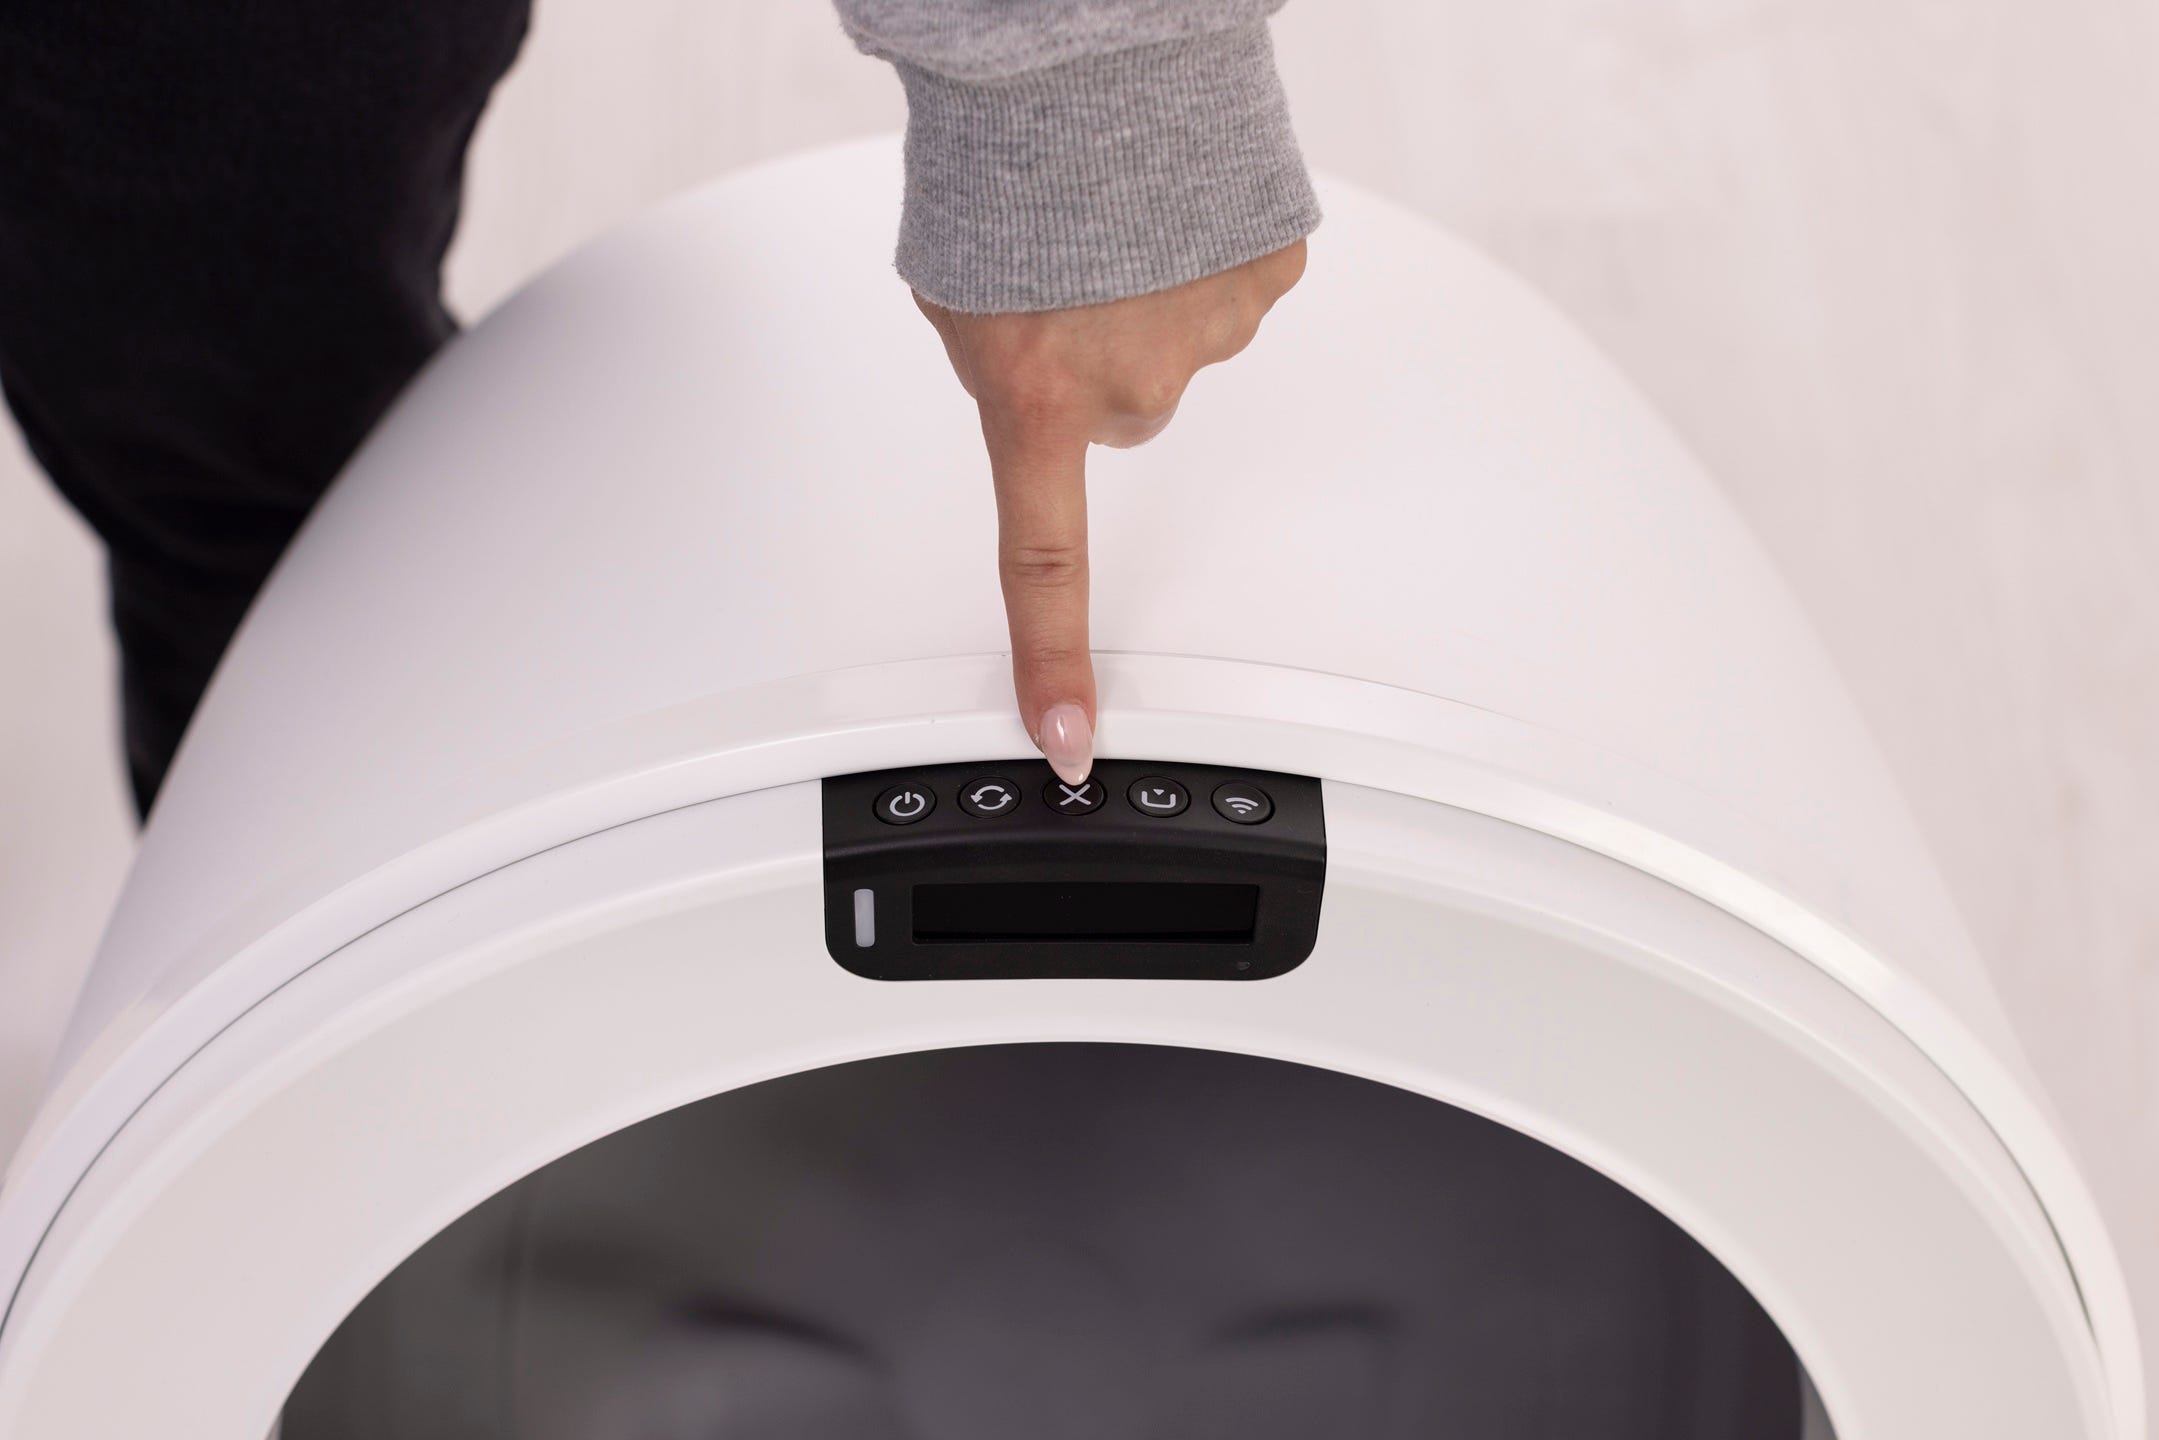
- Reinsert the drawer and short press the Cancel button.
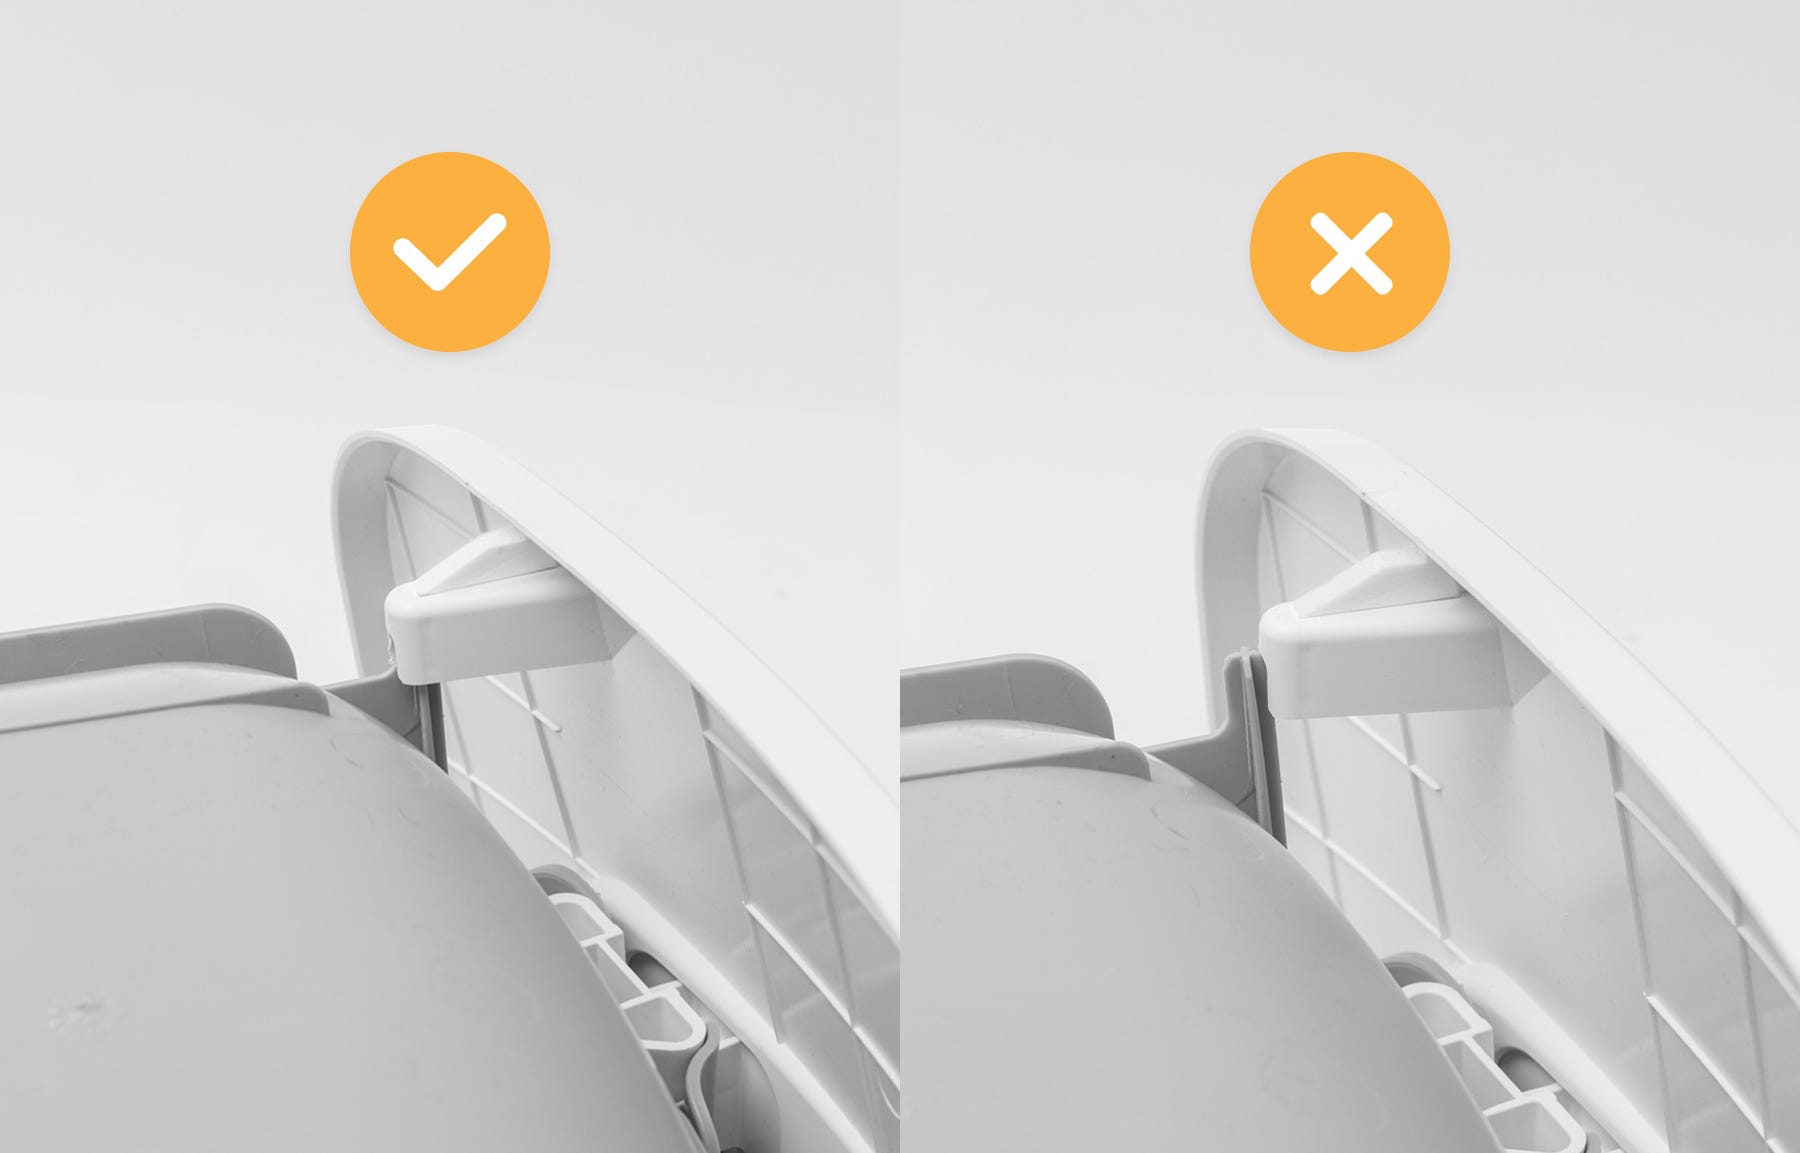
Successful assembly: The waste drawer should slide smoothly into the base with the step securely attached and the liner properly fitted.
Disassembling the waste drawer
To remove the step from the drawer body, press the two drawer “fingers” inward, one side at a time, to unlock the two hooks from the slots.
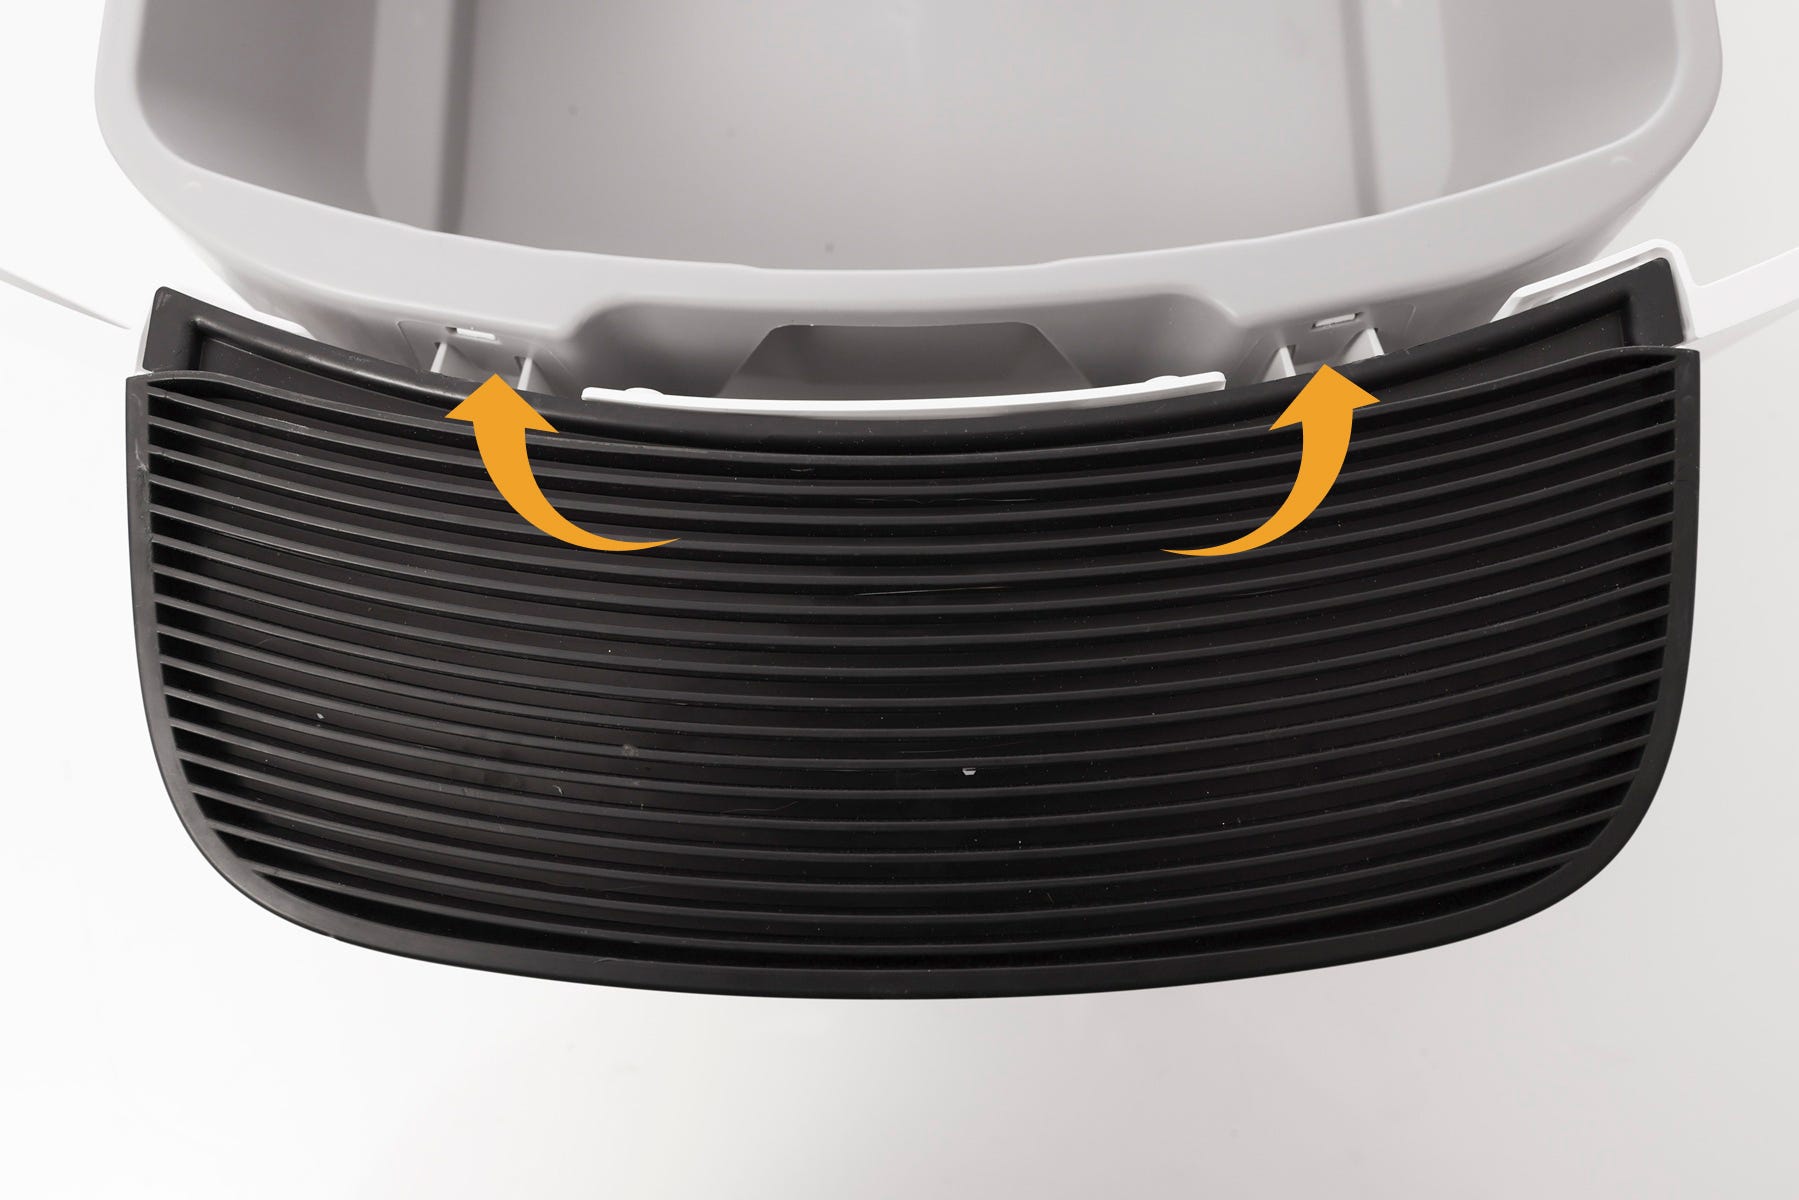
Note: You may need a flathead screwdriver to unlatch the hook from the slot.
Didn't find what you're looking for?
Live support available Mon-Fri: 9AM-9PM EST and Sat-Sun: 9AM-5PM EST, or submit a ticket anytime.