The store will not work correctly in the case when cookies are disabled.

Return packaging instructions
Learn how to package your Litter-Robot unit or base for return.
Quick links
Packaging Litter-Robot 5 / EVO
Use the original Litter-Robot 5 or Litter-Robot EVO box. Alternatively, purchase a 24” x 24” x 31” box from a shipping or home supply store.
Litter-Robot 5 & Pro full unit return
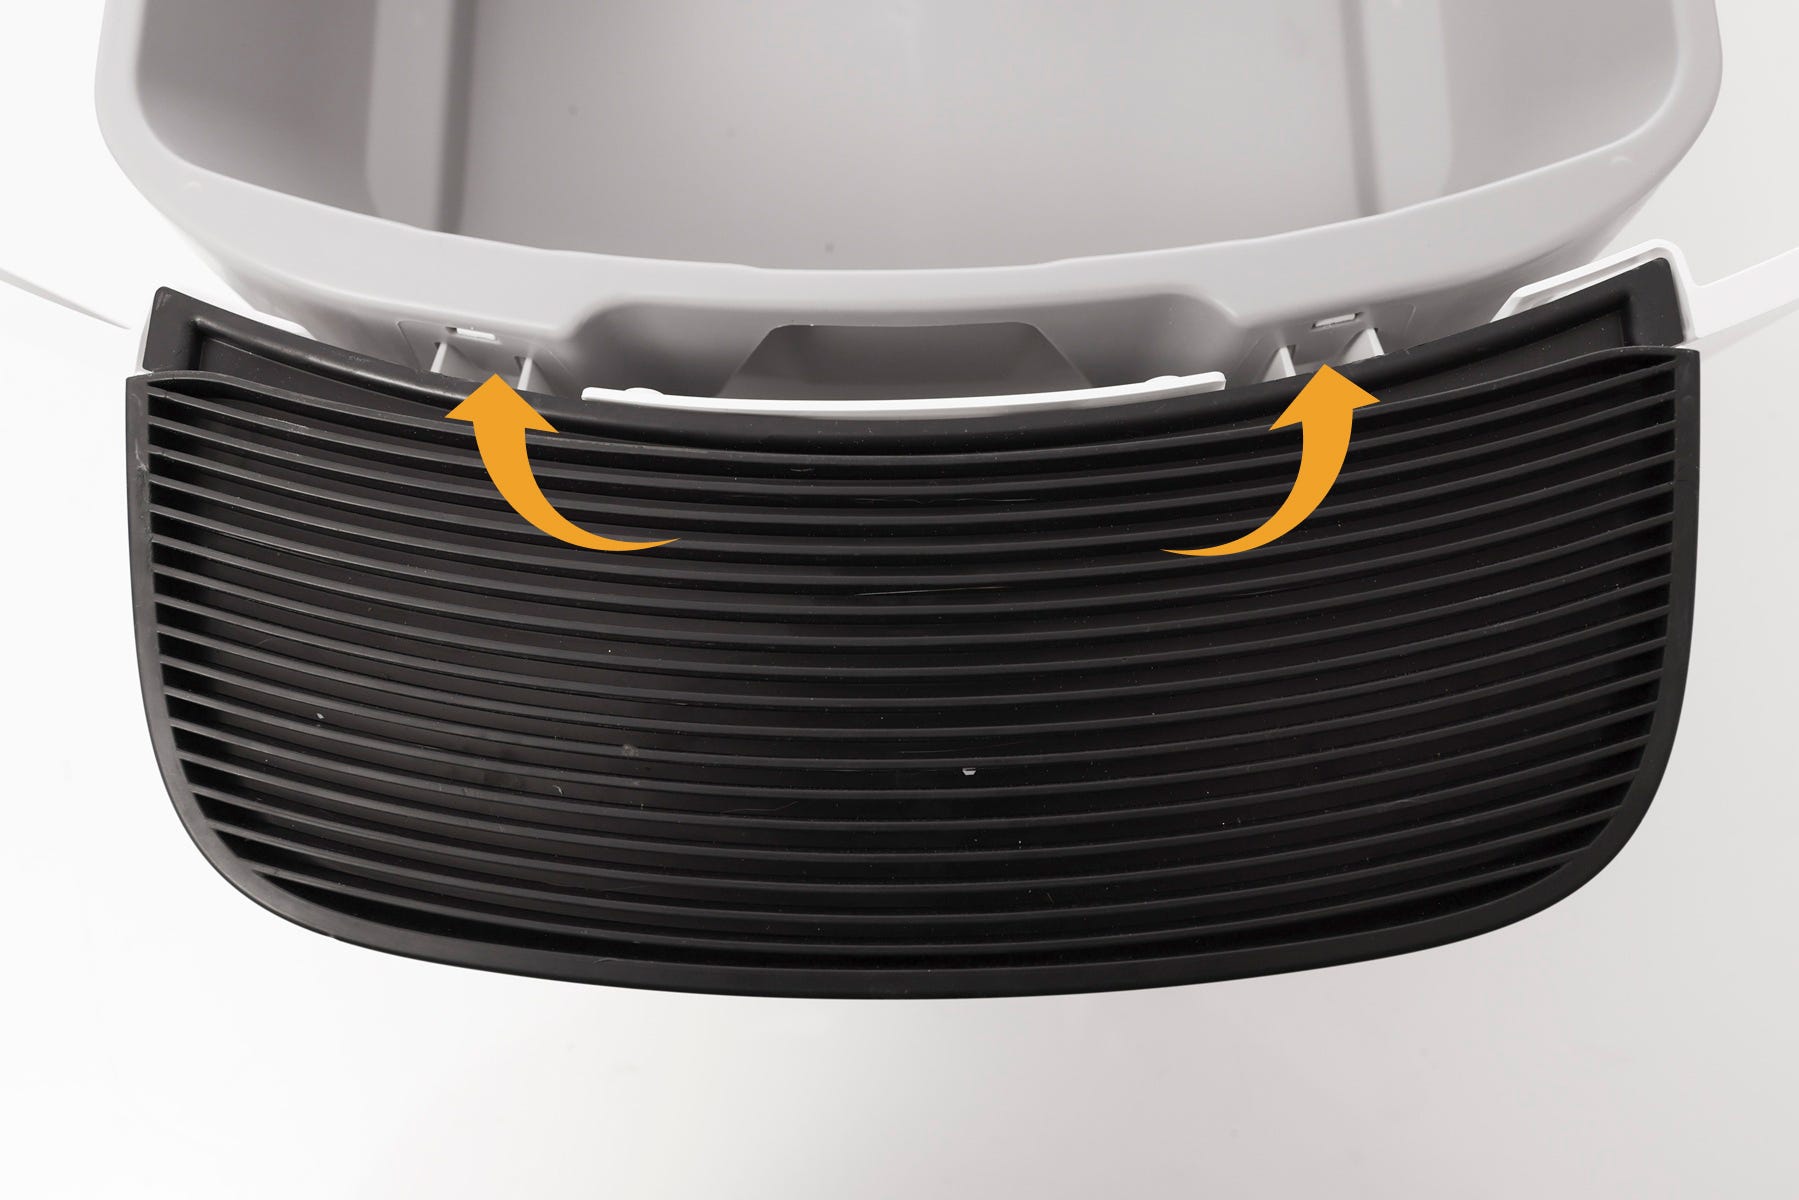
If you are returning your Litter-Robot, the waste drawer will need to be disassembled to package your return.
- To remove the step from the drawer body, press the two drawer tabs inward, one side at a time, to unlock the two hooks from the slots.
Note: You may need a flathead screwdriver to unlatch the hooks from the slots.
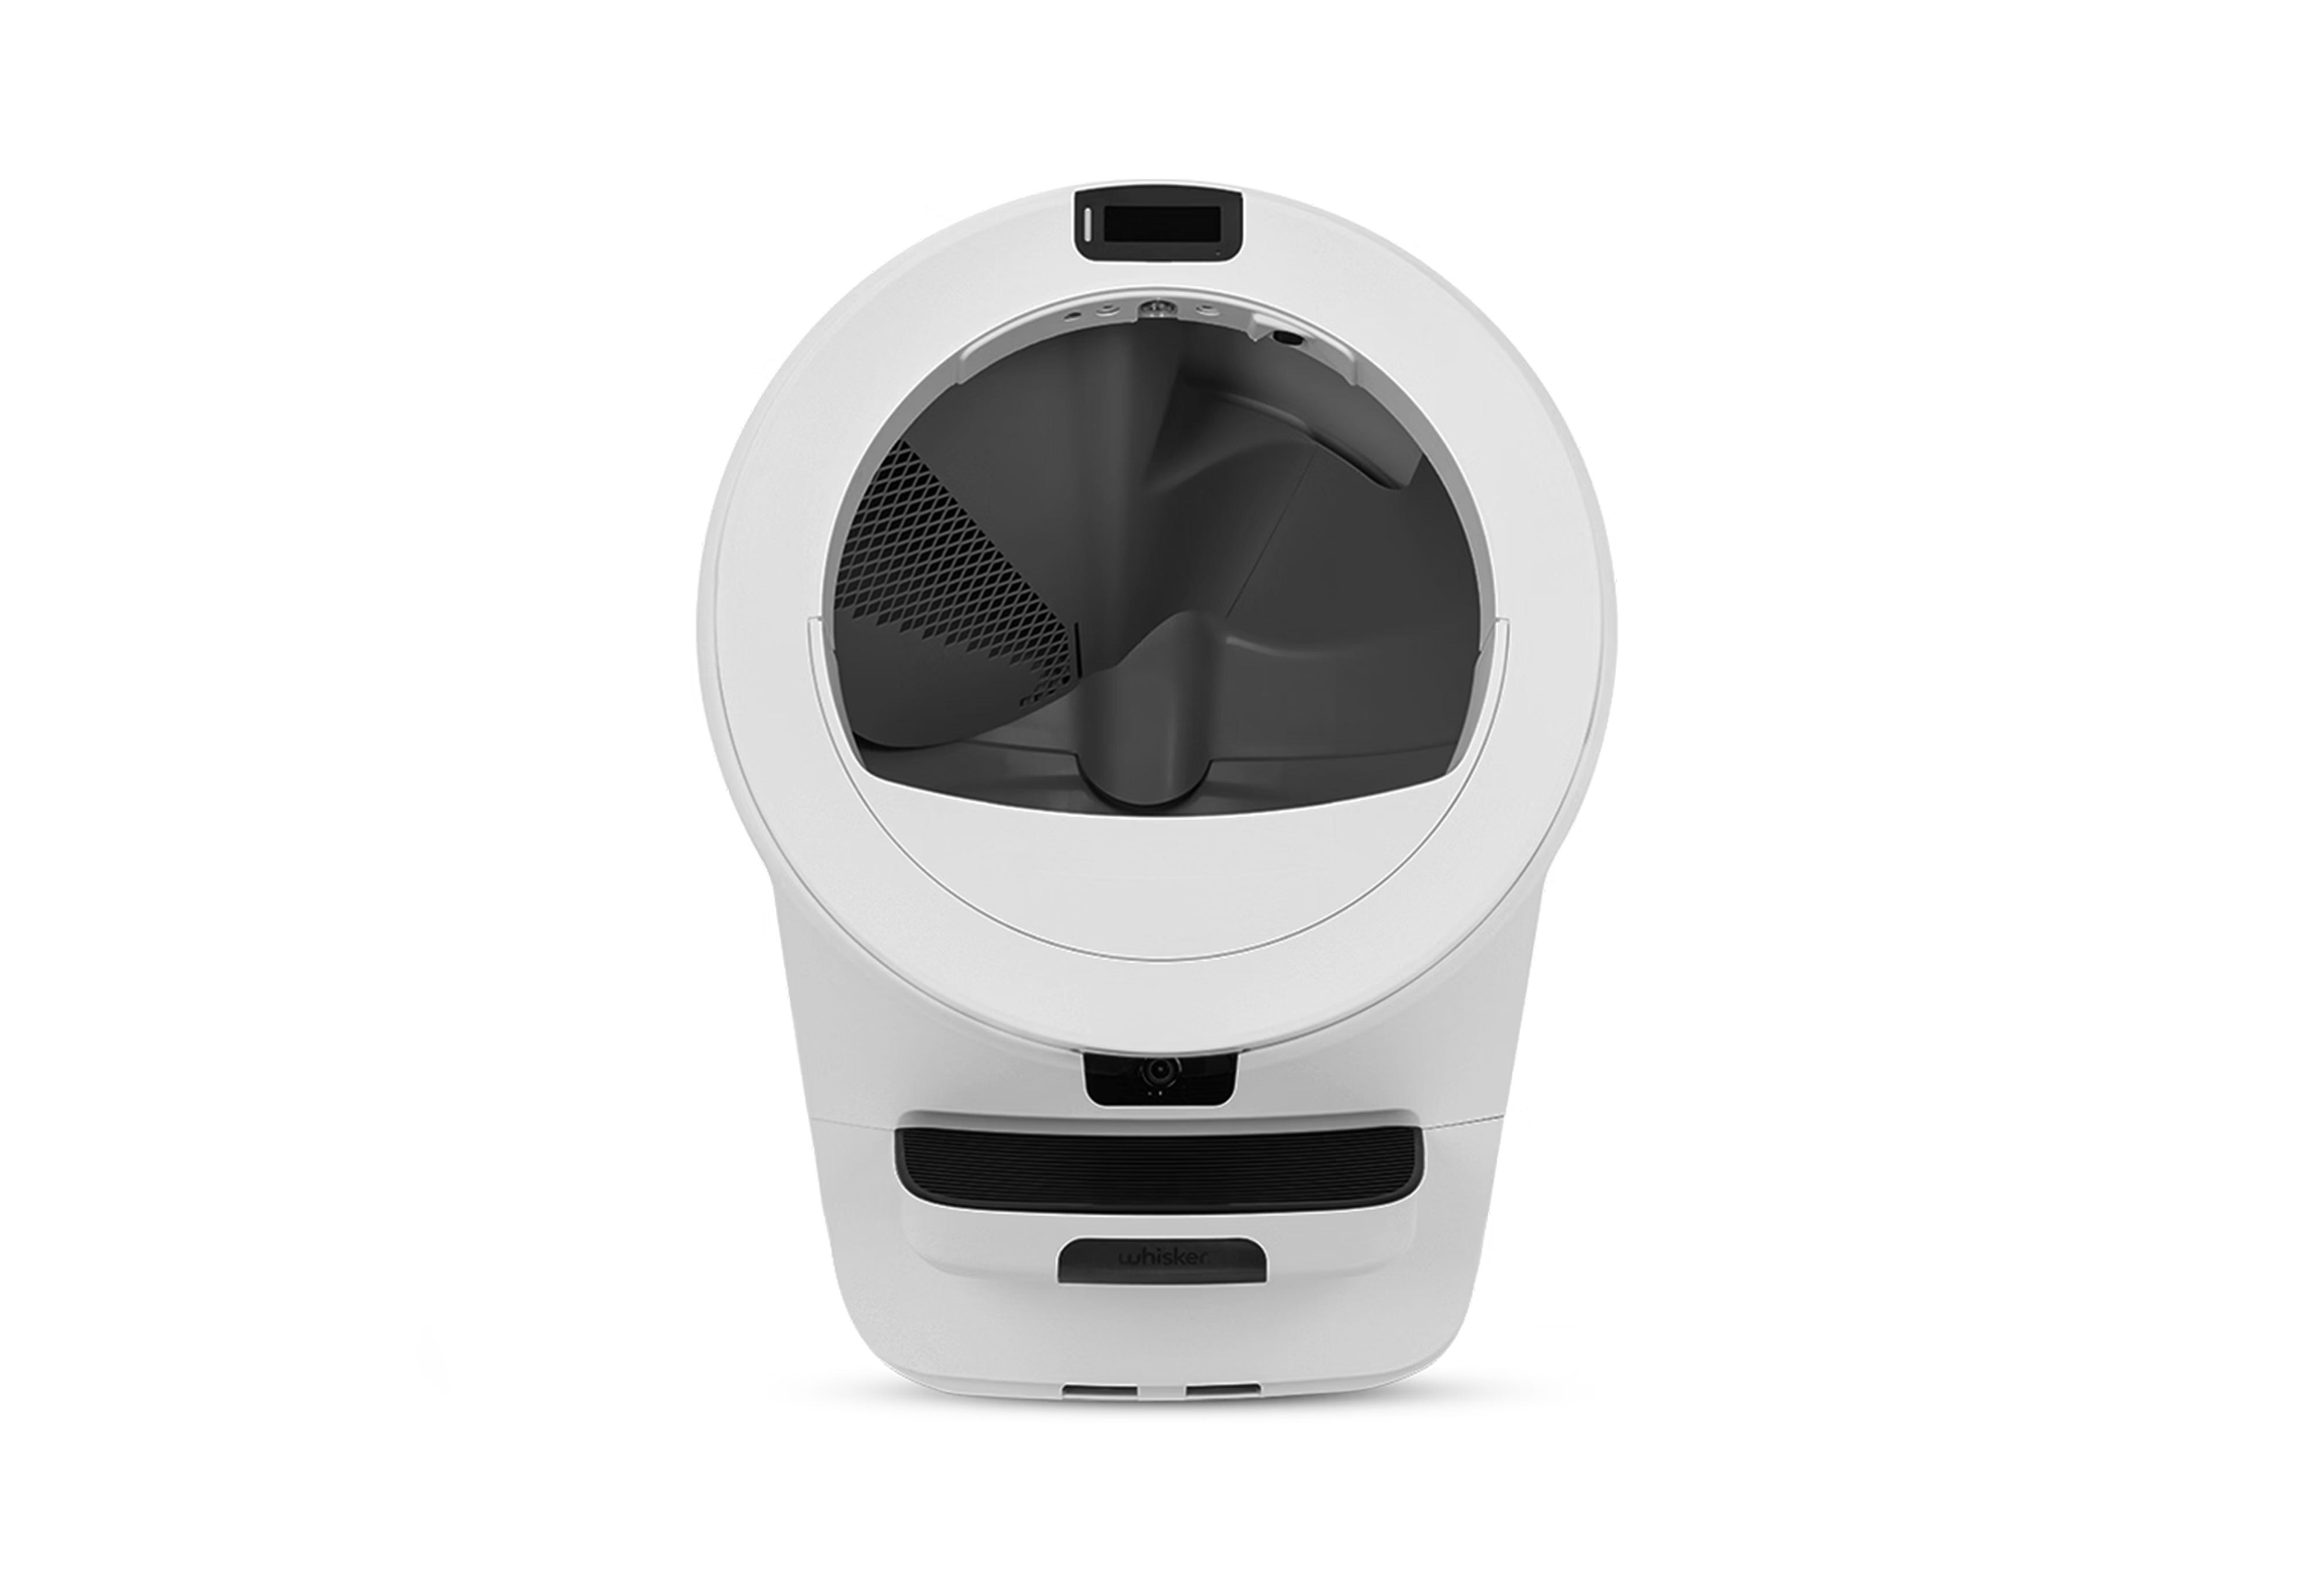
Litter-Robot 5 & Pro base return
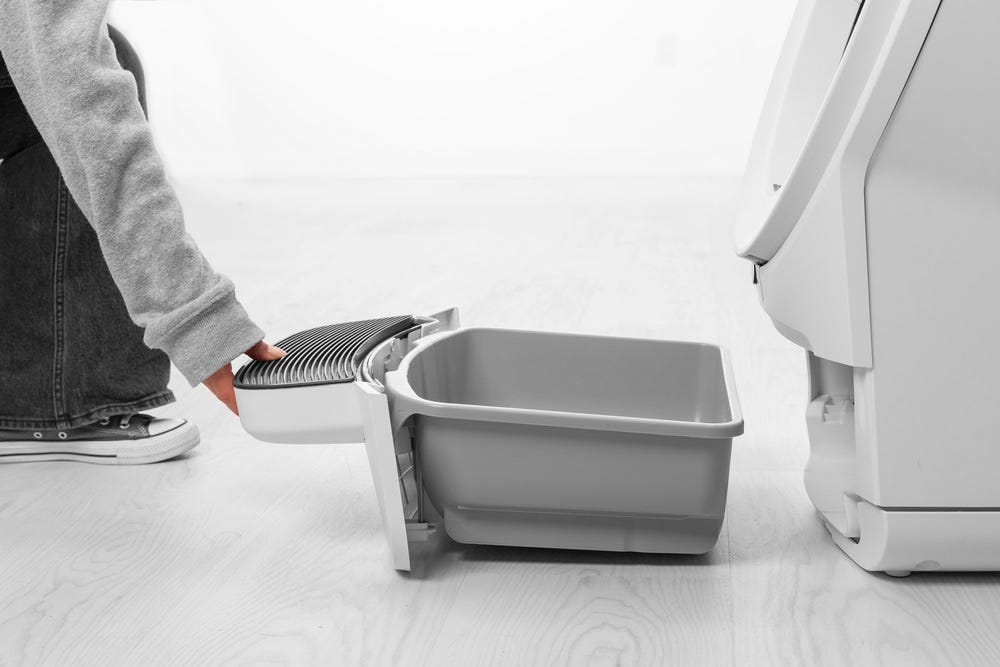
If you are returning the base of the robot for a replacement you will need to hold onto the components from your existing Litter-Robot to install on the new base. These parts will not be included with your replacement base.
Follow the steps below to prepare the base for shipment:
Remove the waste drawer from the unit to install on the new base.
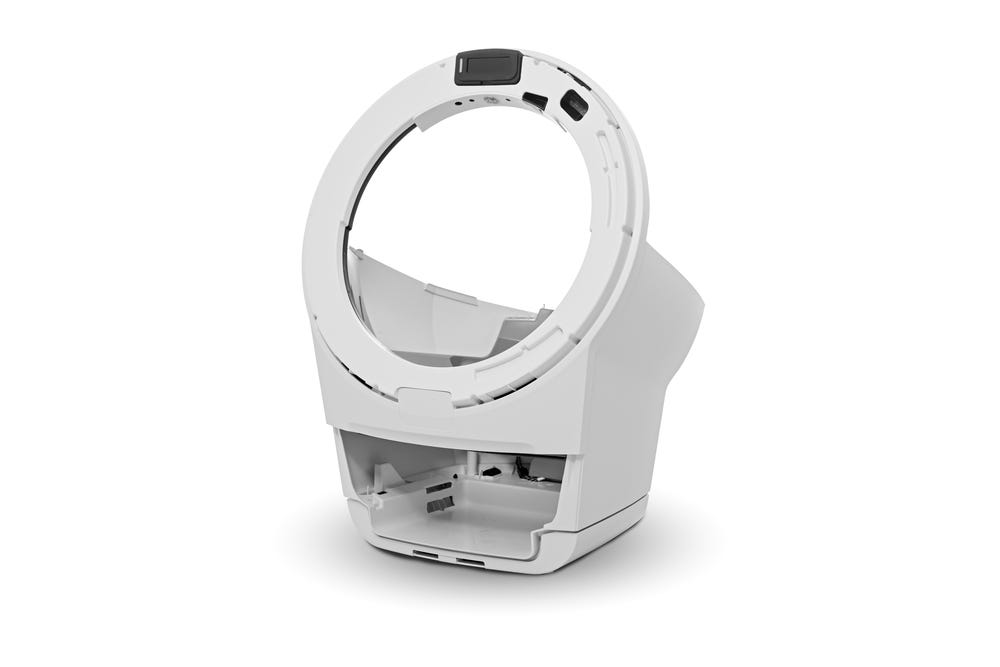
- Next, remove any accessories from the bezel.
- Remove the bezel by squeezing it at the 11 o'clock and 1 o'clock positions to disengage the top three snaps on the underside of the bezel.
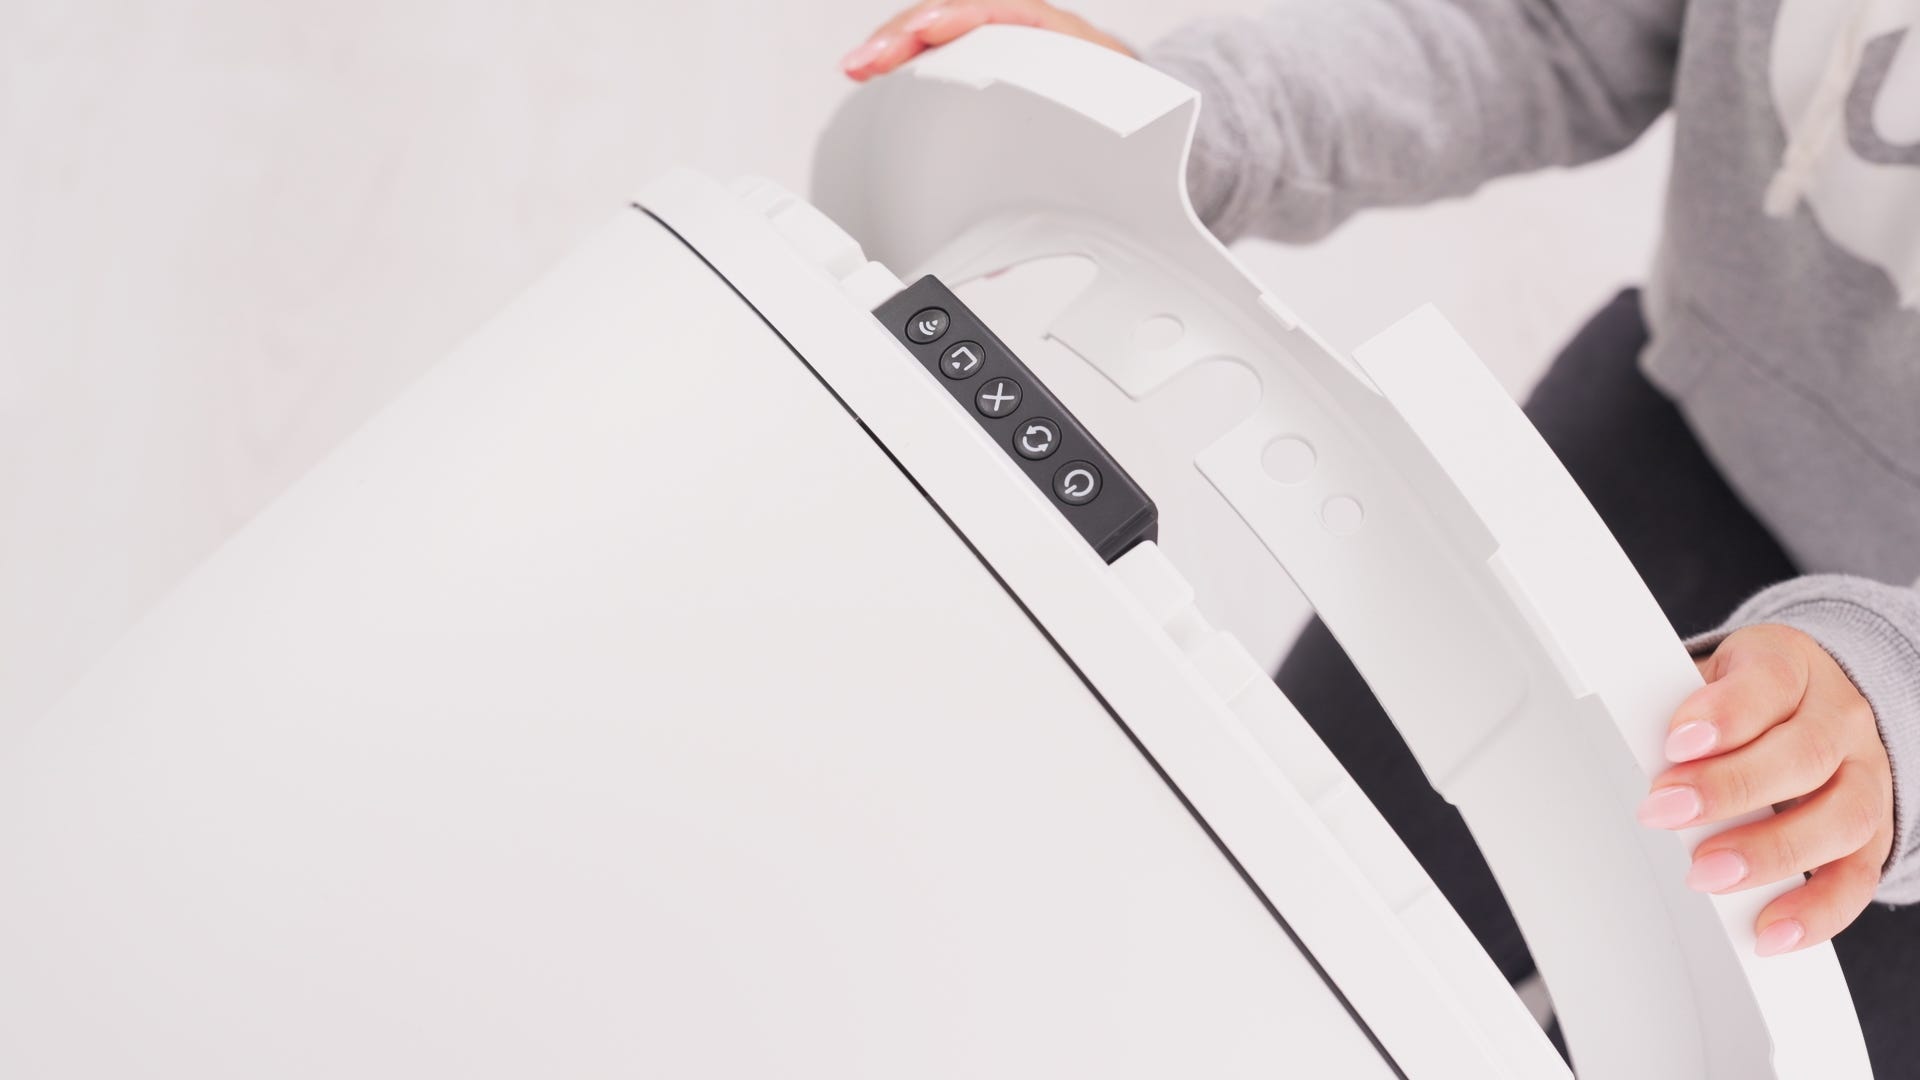
- Pull the top of the bezel towards you to release the top three snaps. Once the top of the bezel is disengaged from Litter-Robot 5, pull up on the bezel to release the bottom two snaps and fully remove the bezel.
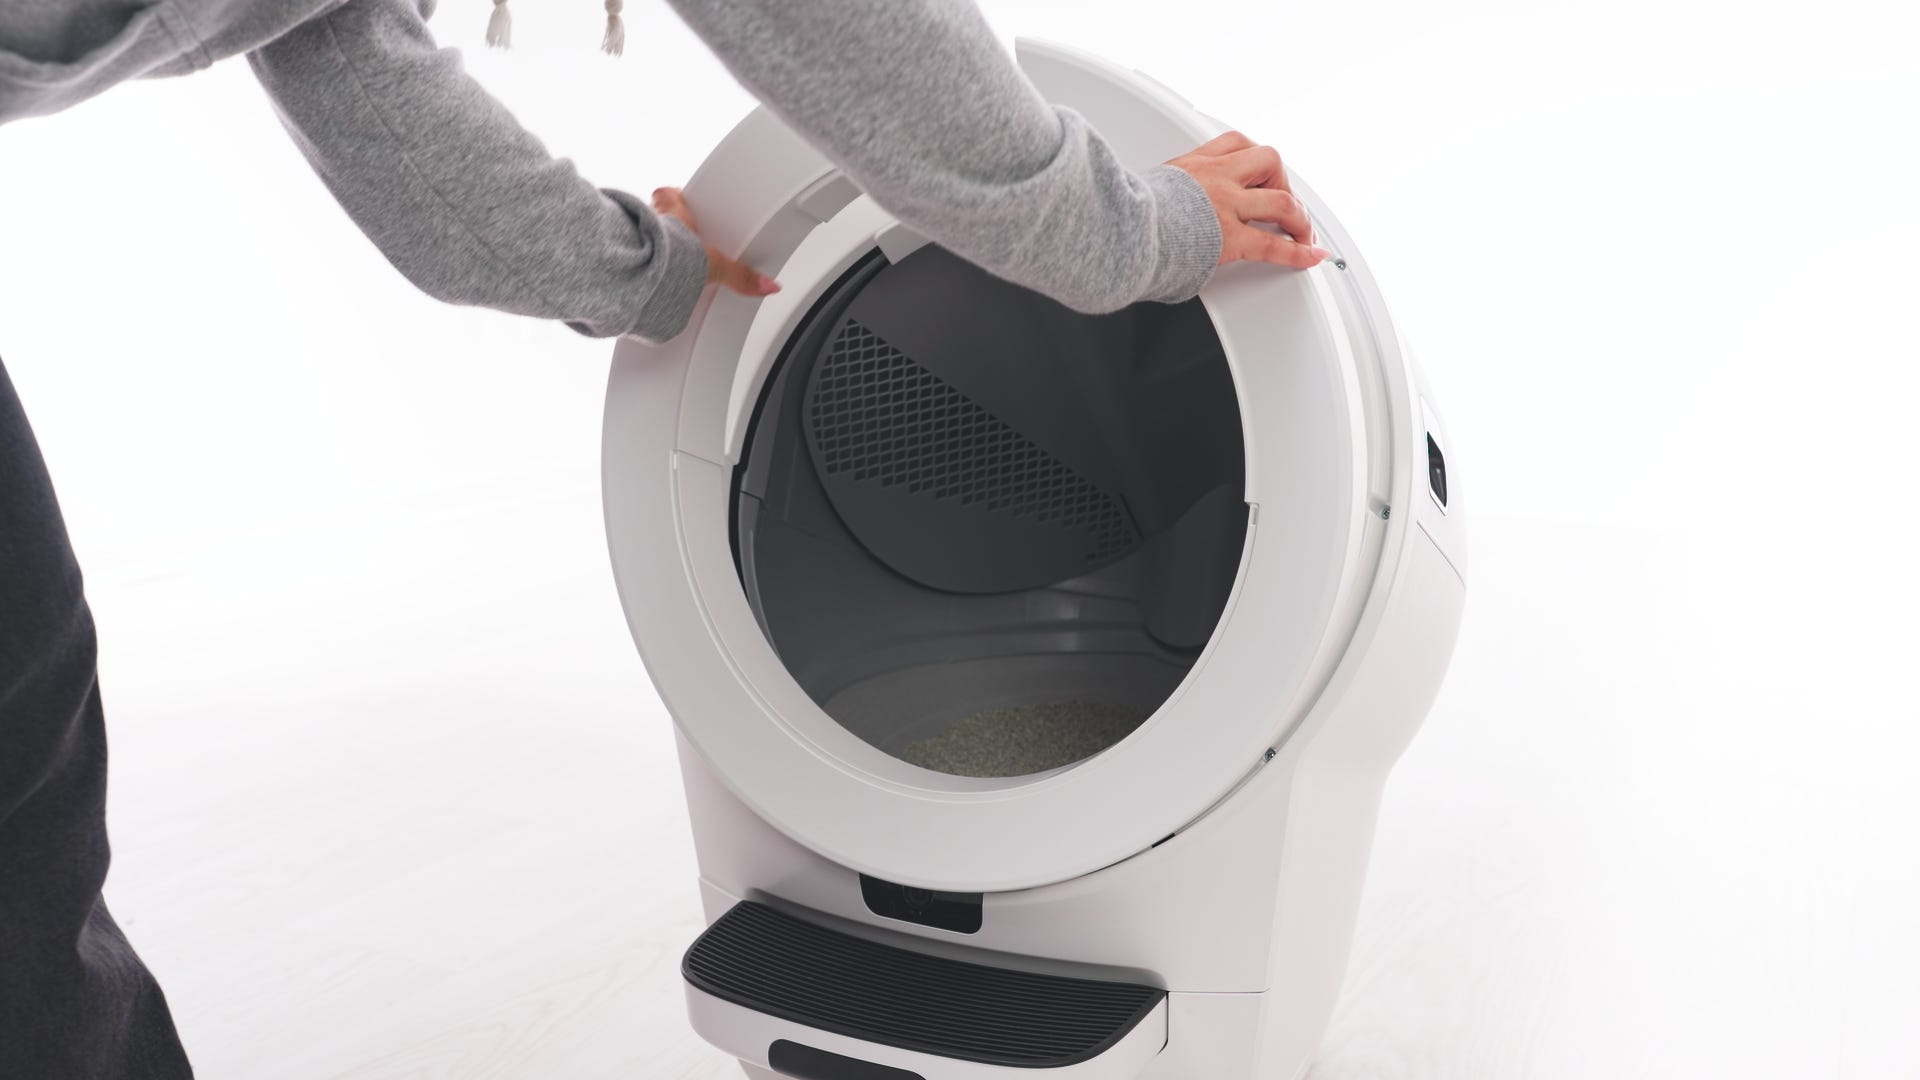
Remove the bonnet and globe from the base.
For full instructions, see: Litter-Robot 5 & Pro disassembly instructions.
Remove the power supply and set aside.
Litter-Robot EVO full unit return
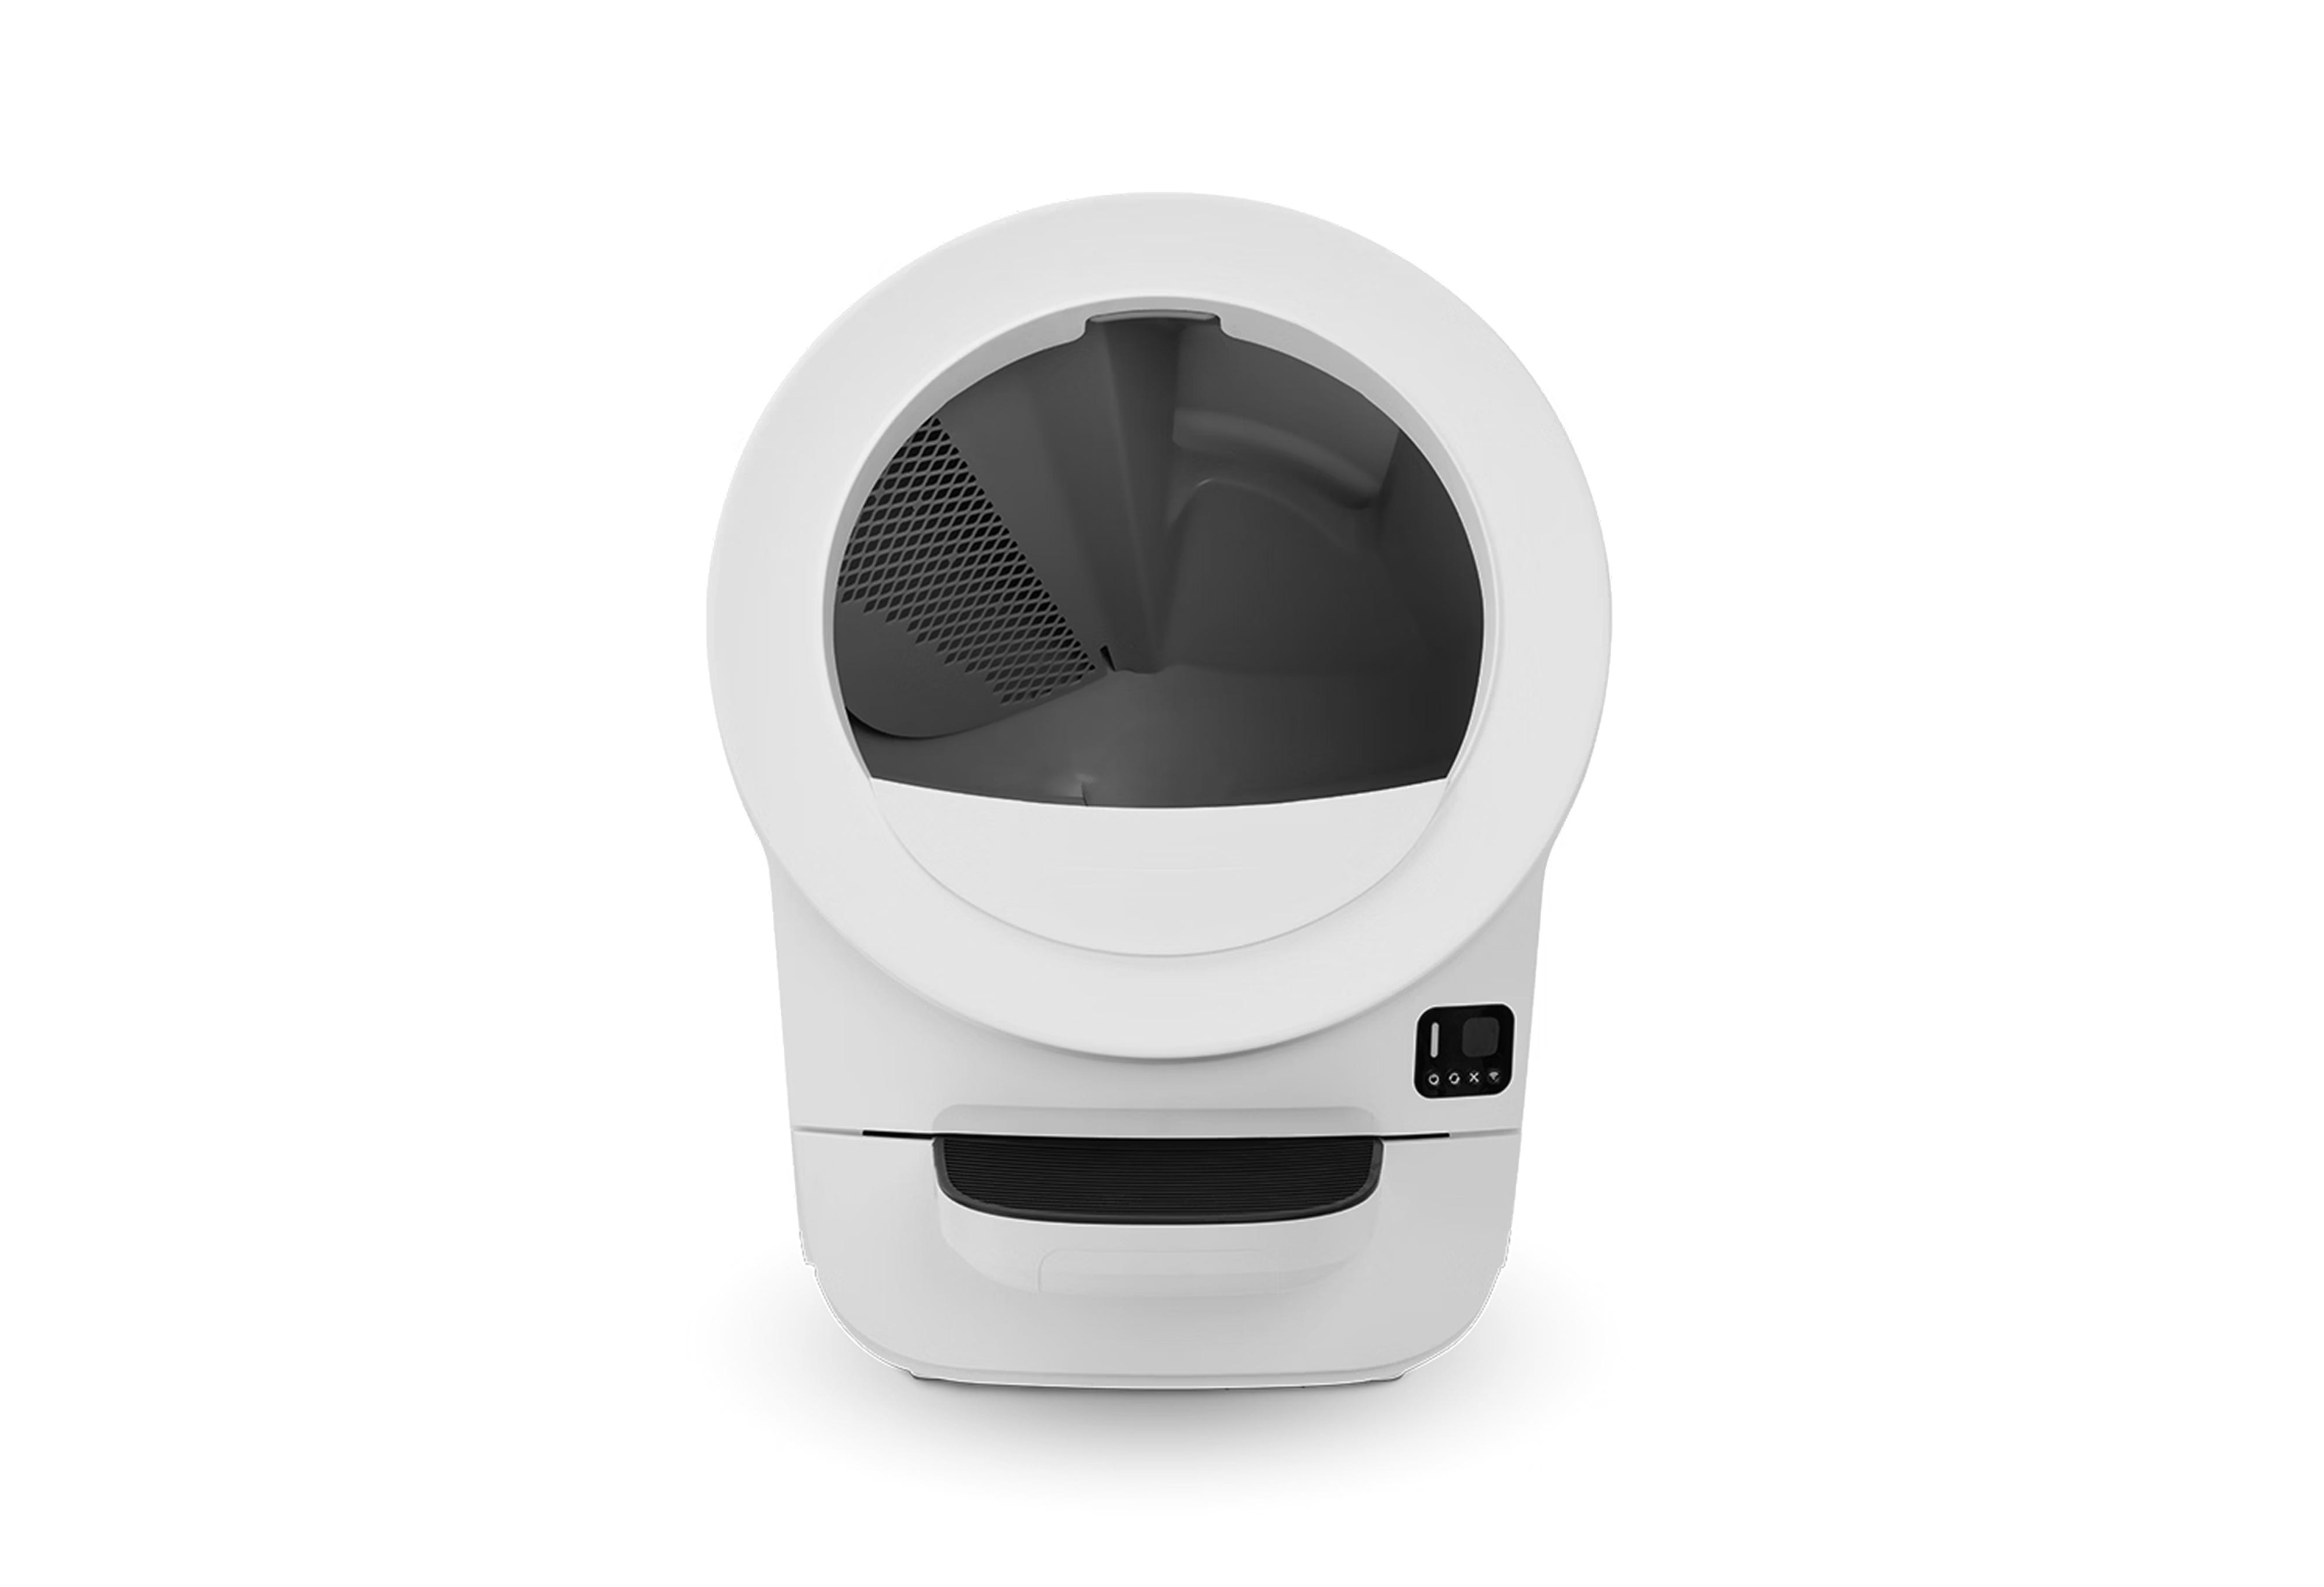
If you are returning your Litter-Robot EVO and the waste drawer didn’t arrive pre-assembled you must disassemble the drawer to package your return:
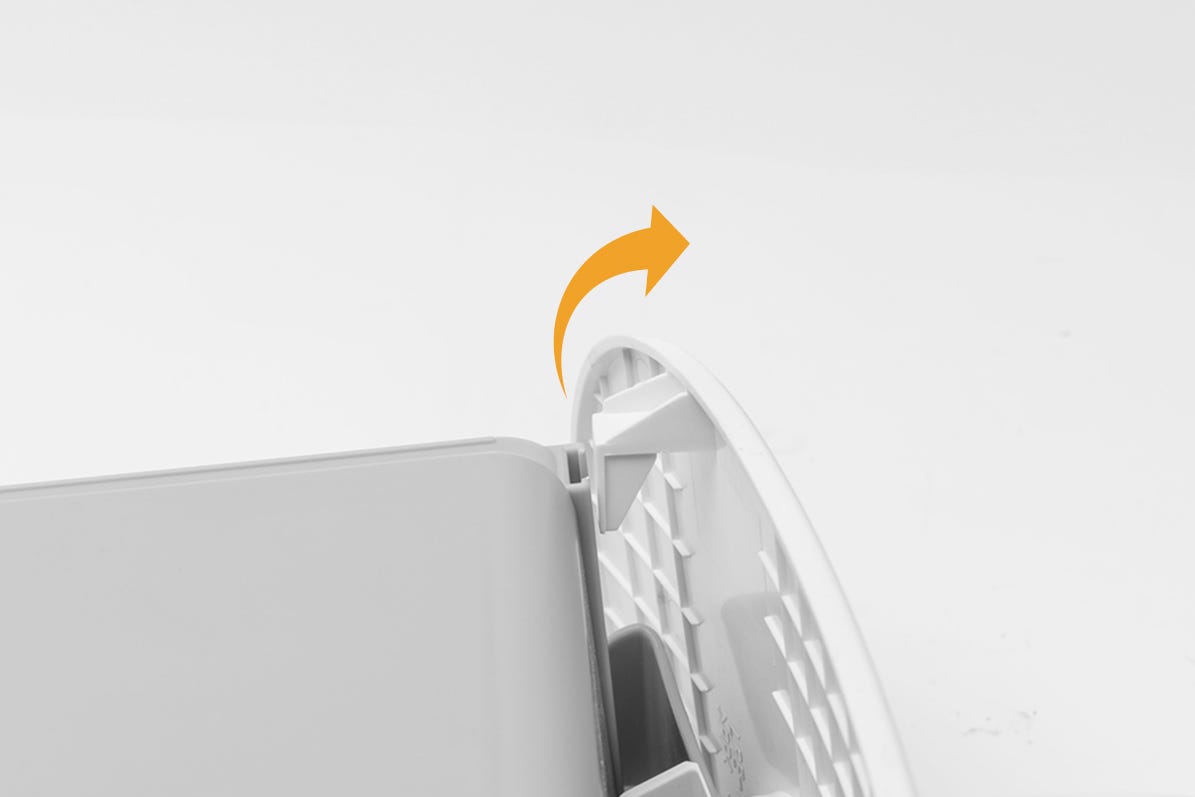
- To remove the step from the drawer body, flip the waste drawer upside down. Unhook the tabs from the drawer body by sliding the tabs up and outward to release the front panel. Pull up and away to separate the two pieces.
Litter-Robot EVO base return
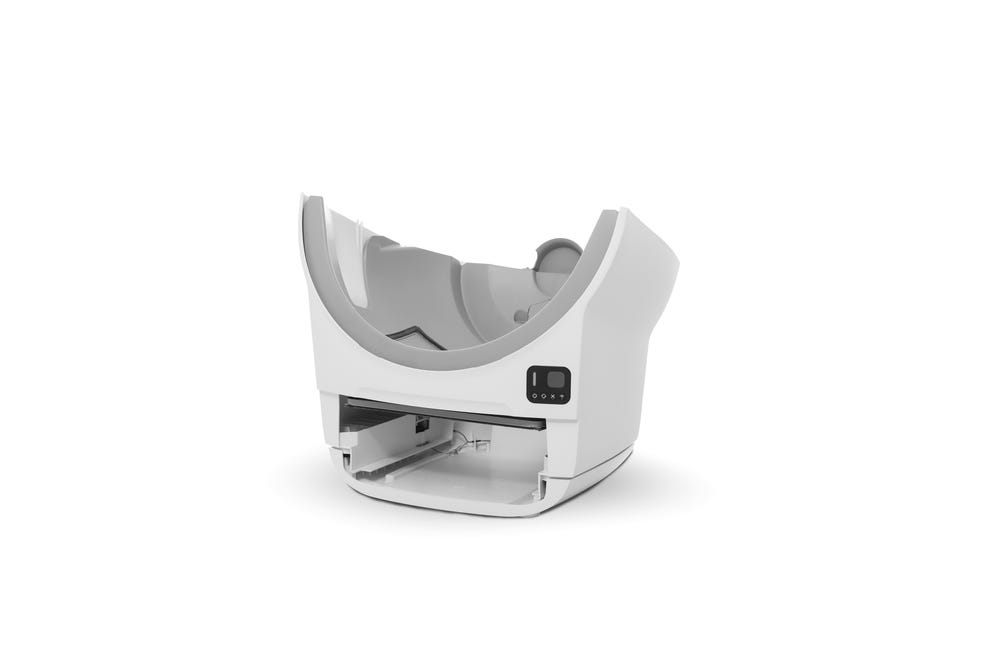
If you are returning the base of the robot for a replacement you will need to hold onto the components from your existing Litter-Robot to install on the new base. These parts will not be included with your replacement base.
Follow the steps below to prepare the base for shipment:
Remove the waste drawer from the unit to install on the new base.
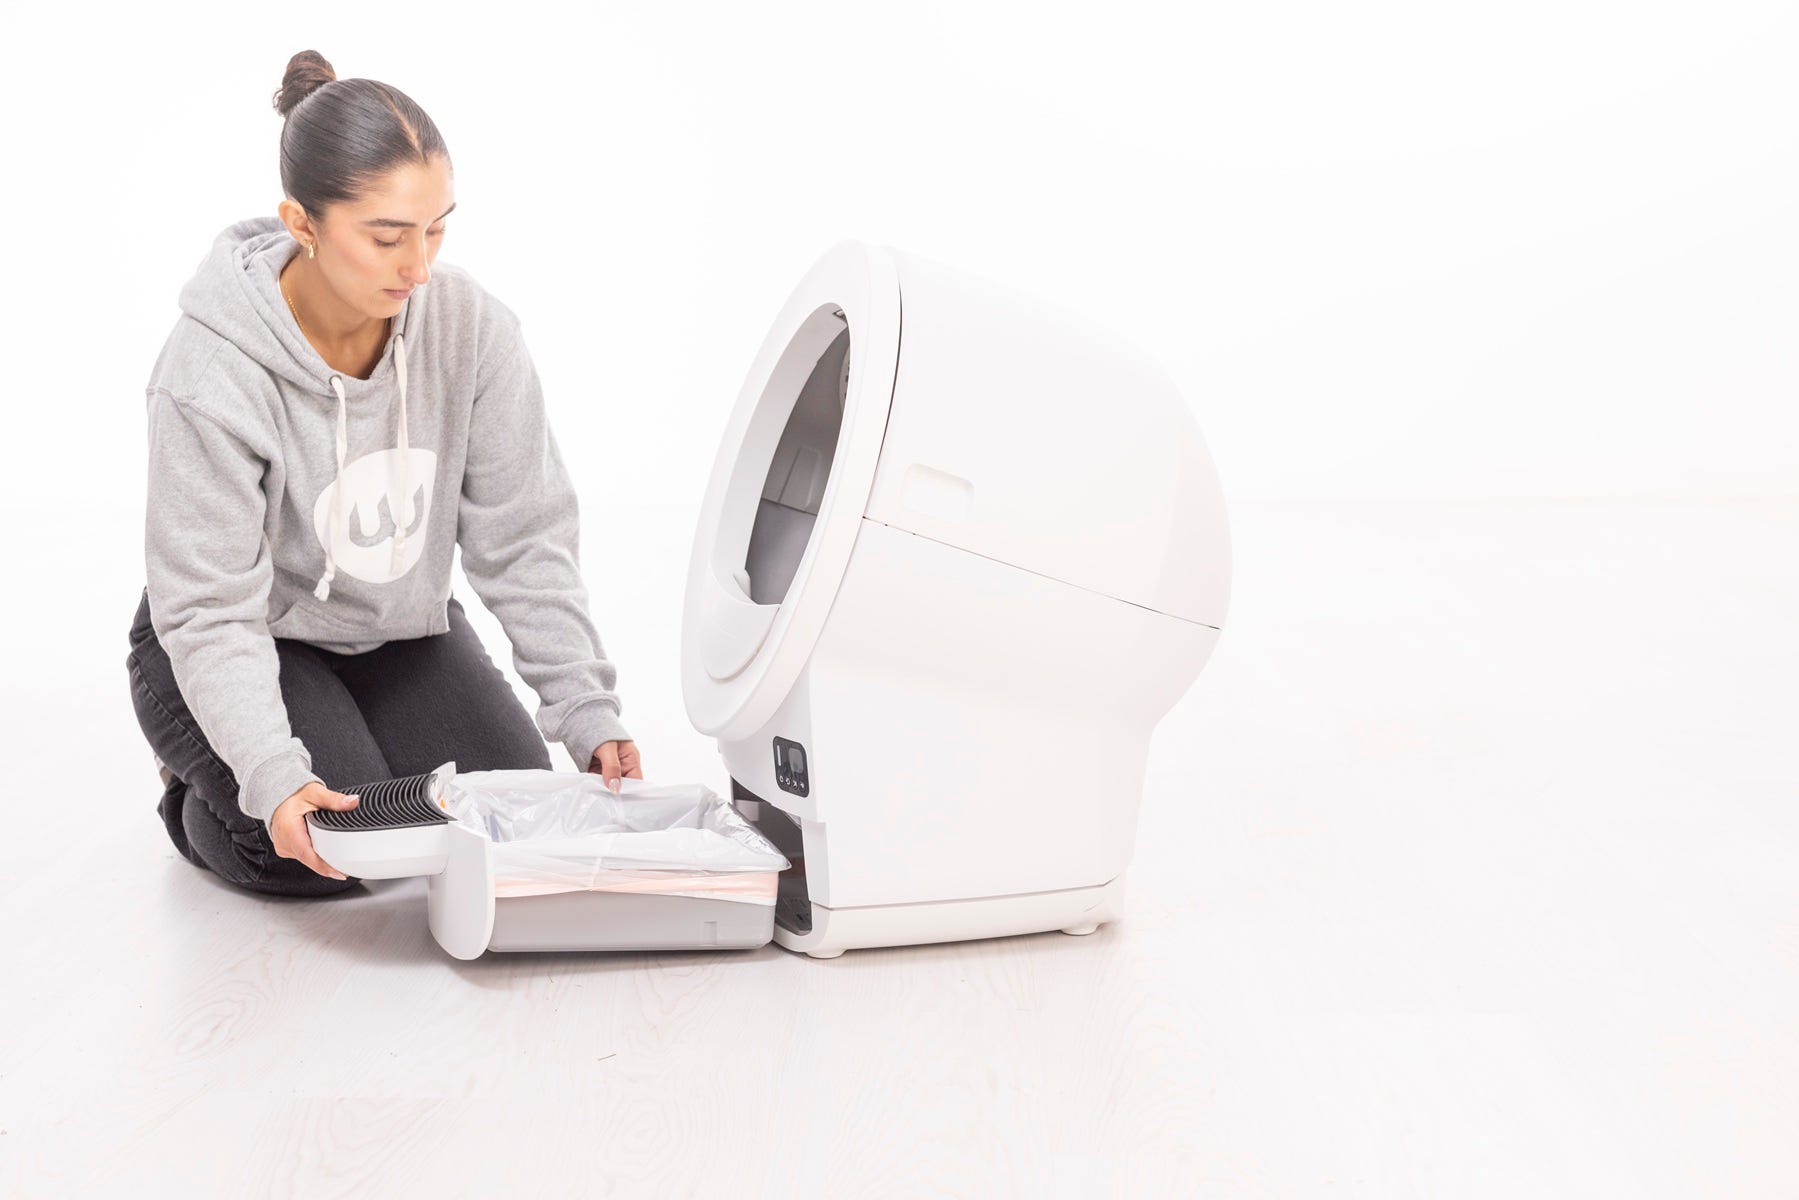
- Next, remove any accessories from the bezel to install on the replacement base.
- Remove the bonnet and globe from the base.
For full instructions, see: Litter-Robot EVO disassembly instructions
Remove the power supply and set aside.
Dismantling the box
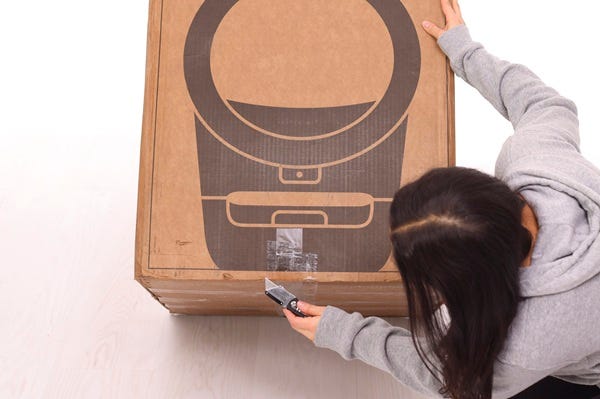
Cut the tape strips connecting the side panels of the bottom of the box and bottom tray (only on the two sides that do not have box connecting clips).
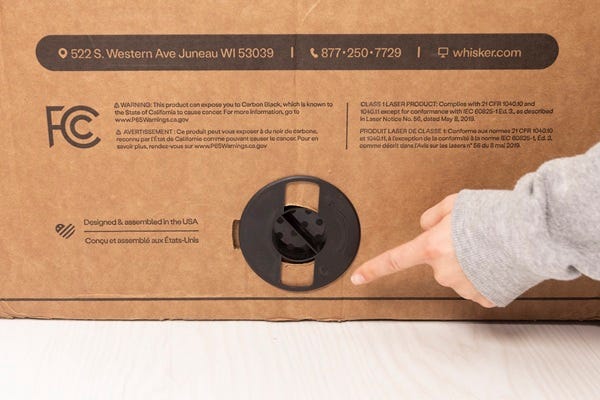
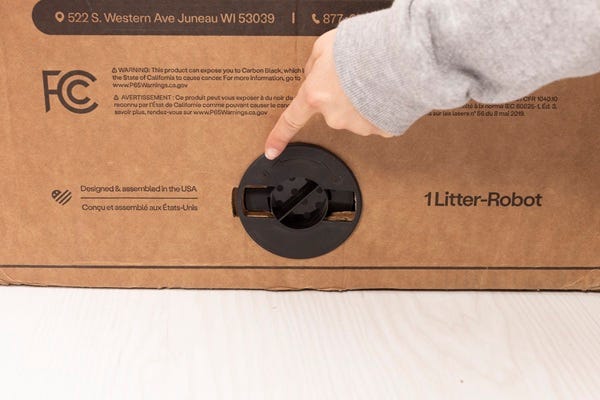
Rotate the box-connecting clips counter-clockwise to unlock them. Then pull the clips to remove them. Set the clips aside.
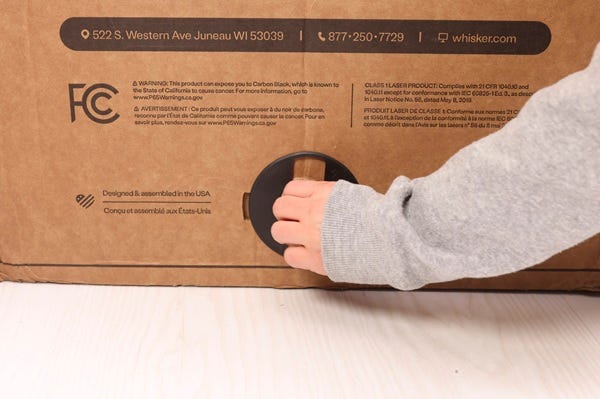
- Clip in locked position
- Clip in unlocked position
- Use the box handles to lift the box up and off the bottom tray.
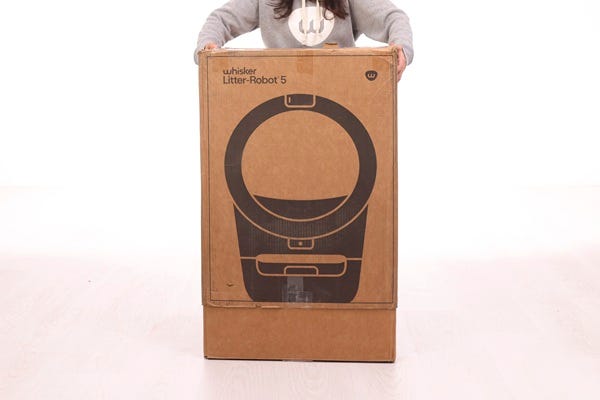
Note: If you are returning a Litter-Robot EVO in its original packaging, you may notice a small cardboard insert in the corner of the bottom tray. This insert is not needed for return and can be discarded.
Identifying the molded inserts
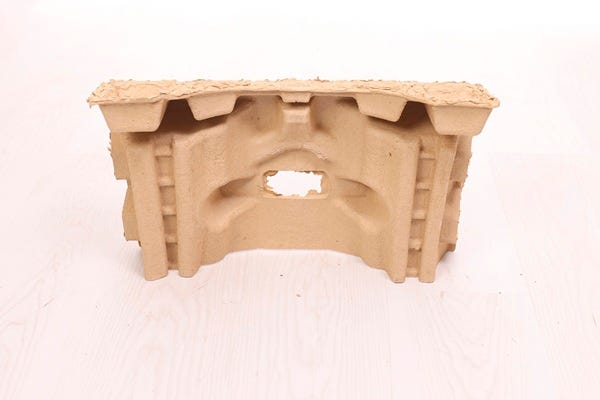
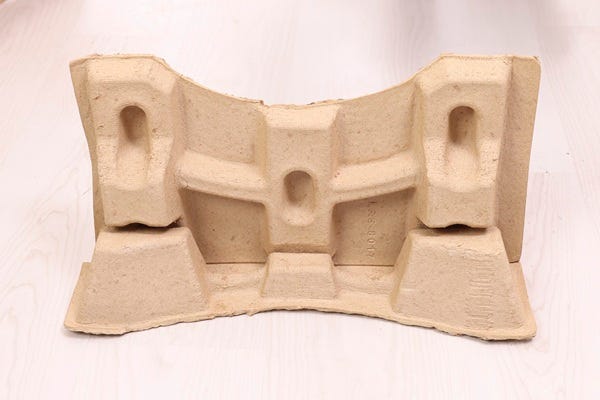
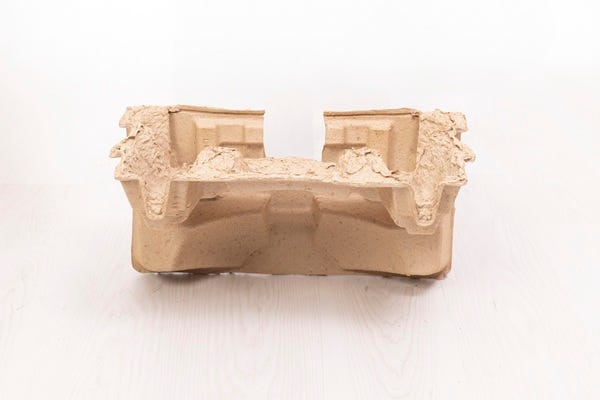
There are three molded inserts total:
- Bottom back molded insert
- Bottom front molded insert
- Top molded insert
Bottom back molded insert
Bottom front molded insert
Top molded insert
Packaging the unit
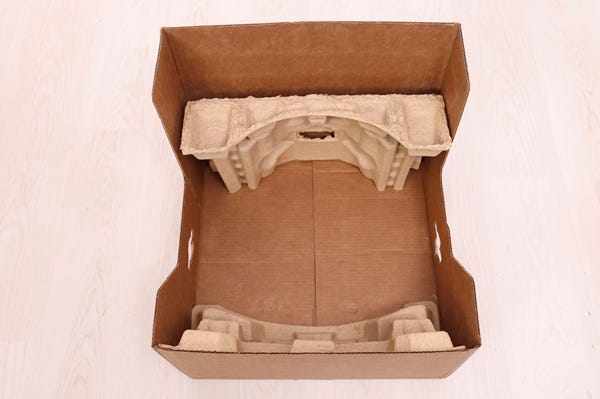
- Place the bottom back molded insert and bottom front molded insert in the bottom tray as shown.
- If applicable, place the flat cardboard insert along the edge of the bottom tray. (If you ordered a LitterTrap Mat with your original purchase, this is not applicable.)
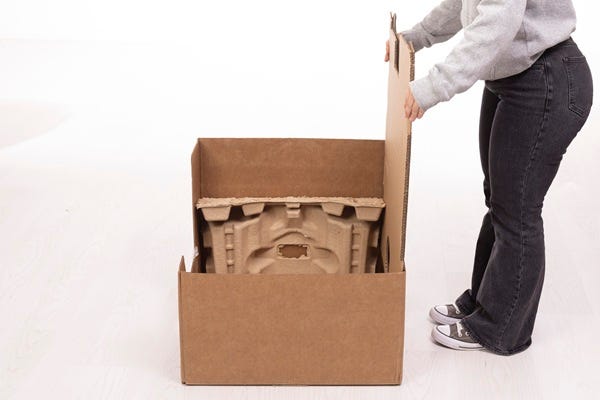
- Place Litter-Robot into the bottom tray.
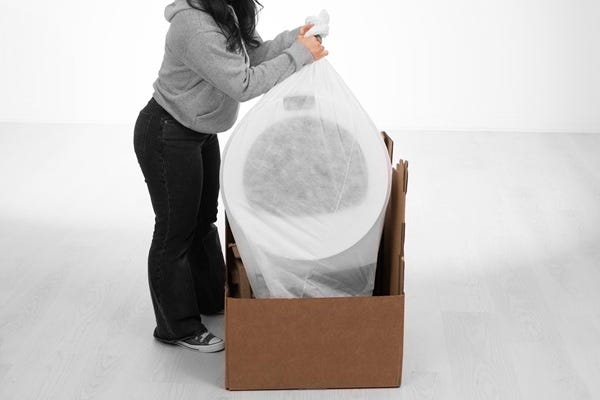
- Ensure the bottom of the bezel is resting on the molded inserts as shown.
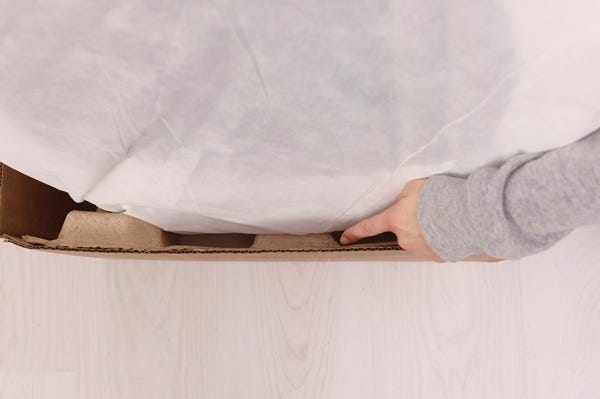
- Ensure the tape around the top flaps is cut, then slide the box over the bottom tray. Ensure the box is oriented so that the clip holes on the box and the bottom tray are aligned.
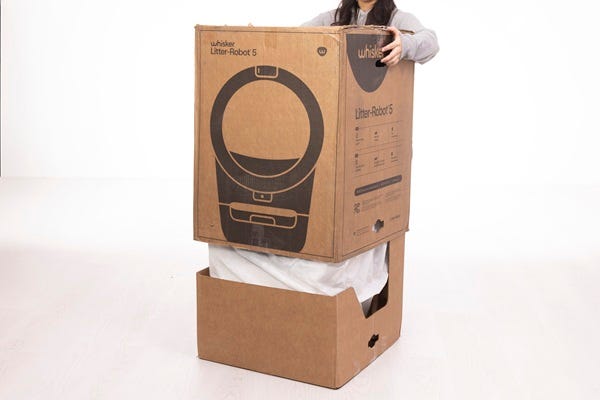
- Fold and place the top molded insert between the back wall of the box and the robot as shown.
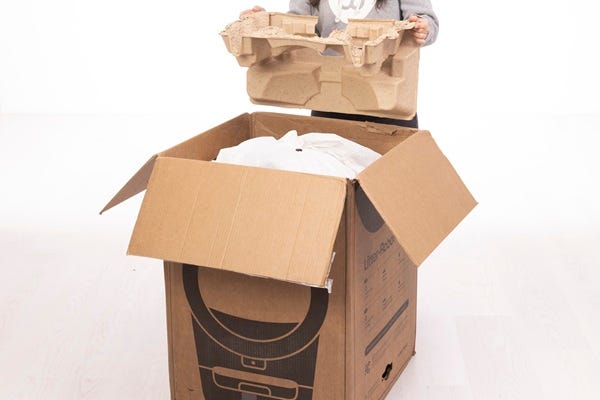
- Add the drawer step into the opening in the top molded insert.
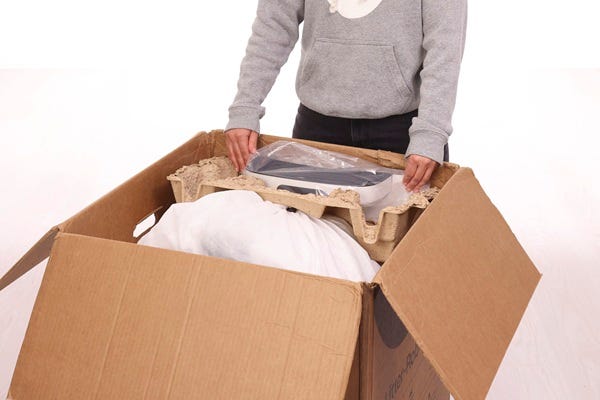
- Place the welcome tray on top of the package as shown. Place the power supply into the designated slot in the welcome tray.
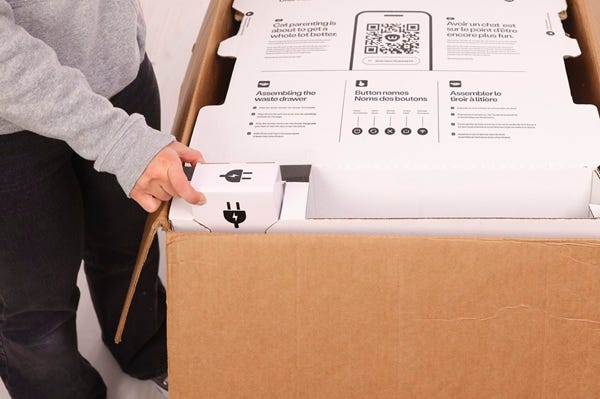
- Close the box flaps and tape the box shut.
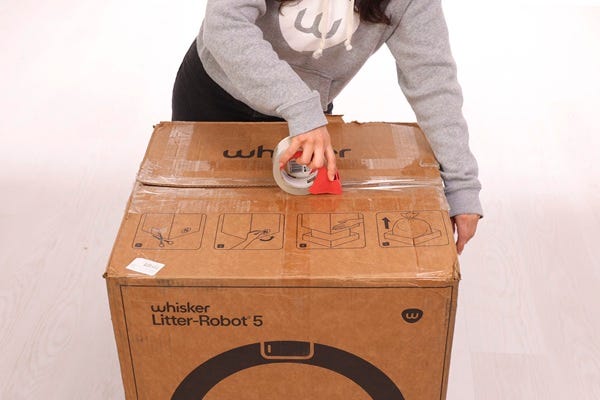
- Insert the box connecting clips into the clip holes and rotate the clips clockwise into the locked position.
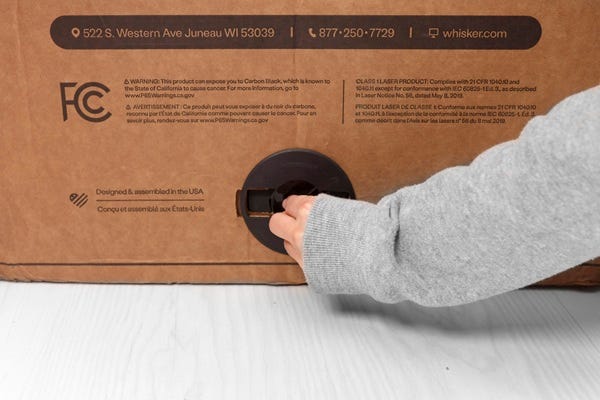
Packaging Litter-Robot 4
Use the original Litter-Robot 4 box. Alternatively, purchase a 24” x 24” x 31" box from a shipping or home supply store.
- Place the bottom insert in the box. Then place the foam collar on the Litter-Robot 4 unit as shown.
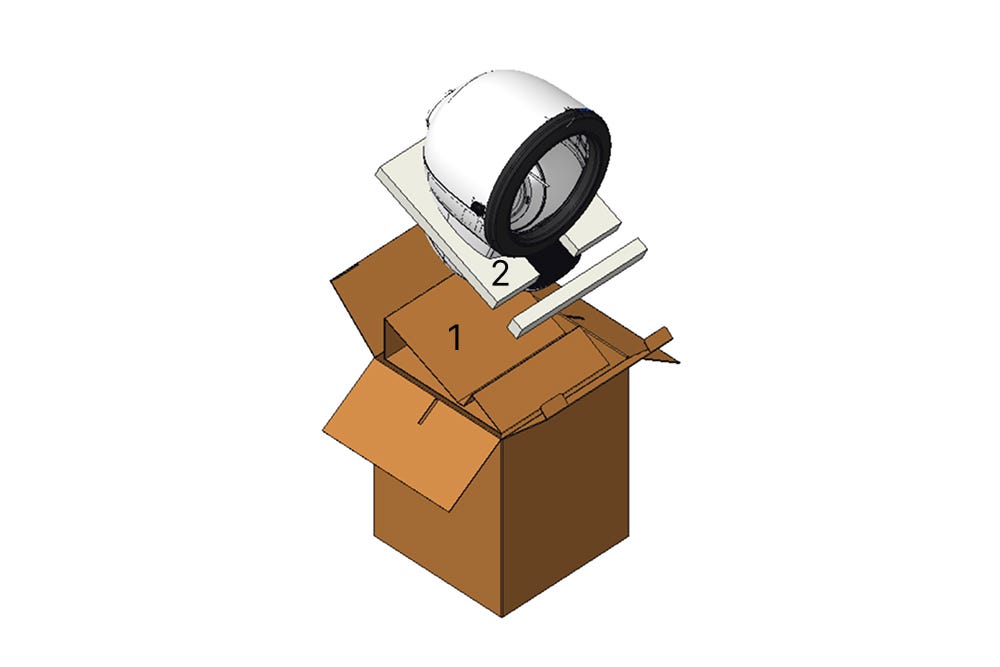
- Place the Litter-Robot 4 unit in the box.
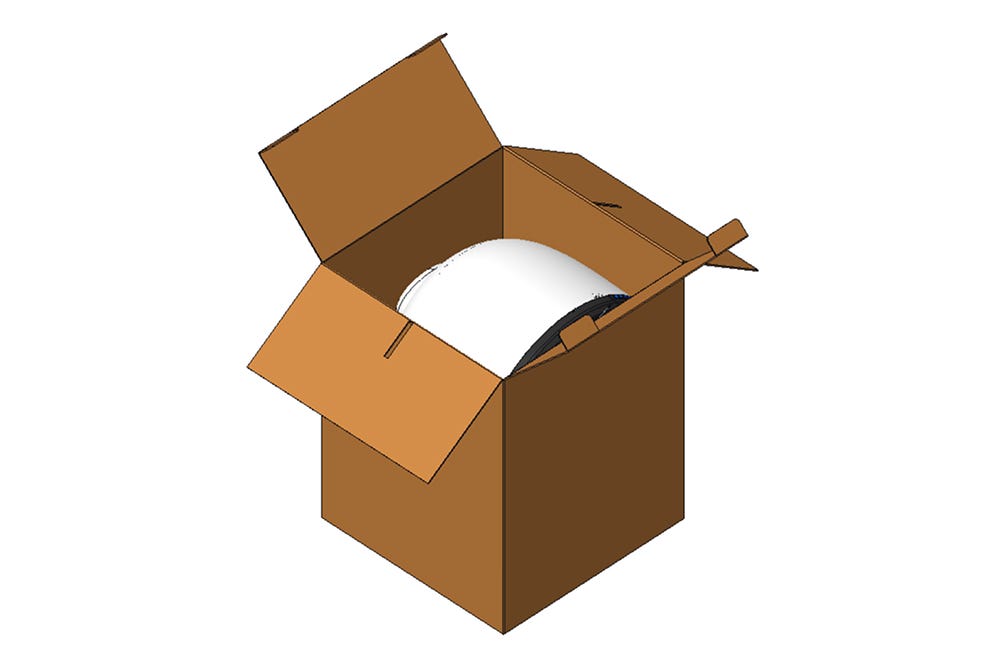
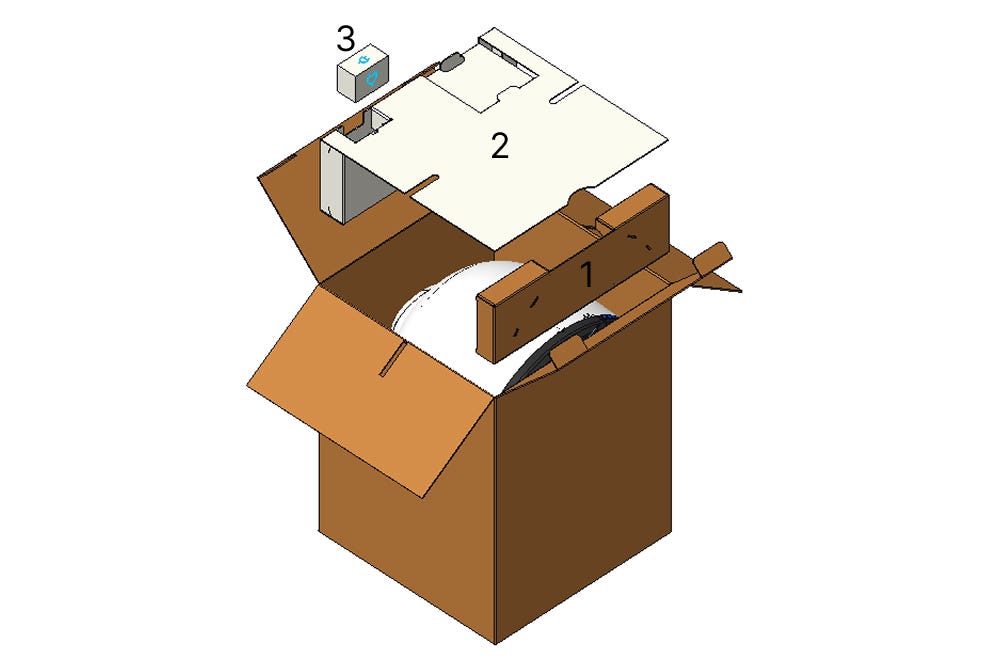
- Position the front insert (1) so that the front of the Litter-Robot 4 unit sits in the groove. Cover the back of the unit with the top insert (2). Place the power supply in the top pocket (3). Write your name and RMA number prominently on the outside of the box and on an interior box flap prior to sealing the box with tape.
Packaging Litter-Robot 3
Use the original Litter-Robot 3 box. Alternatively, purchase a 33" x 24" x 24" box from a shipping or home supply store.
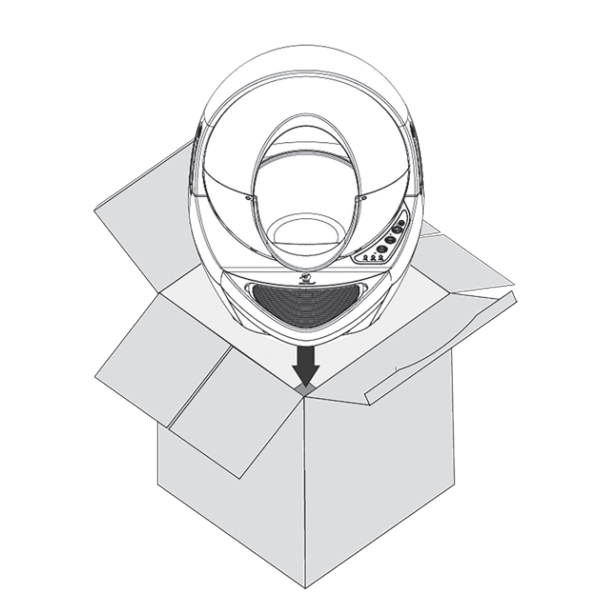
- Place Litter-Robot 3 into the box so it faces the corner and aligns with the cardboard insert on the bottom.
- Slide corner braces into place: rear corner brace with cutout (1), side corner braces (2), small front corner brace (3).
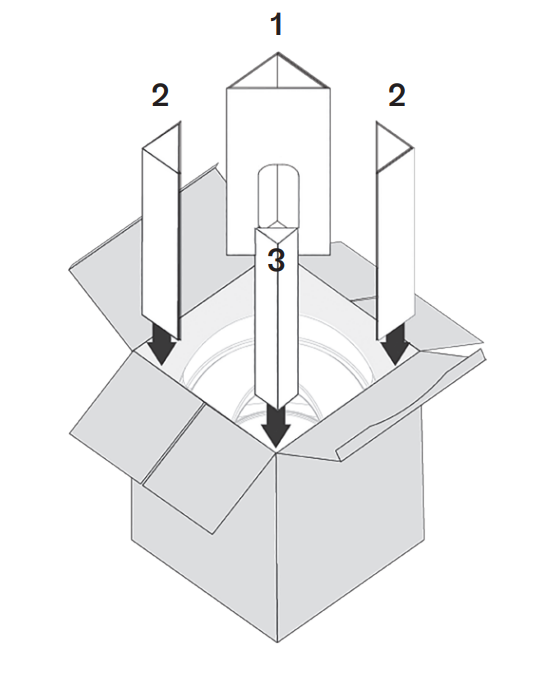
- Safely pack the power supply inside the rear corner brace (1).
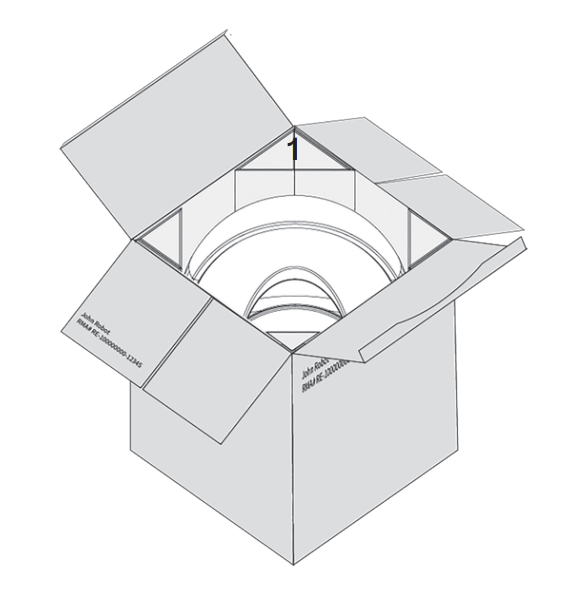
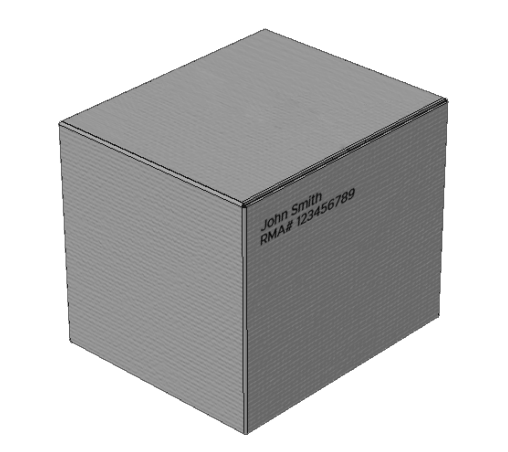
- Write your name and RMA number prominently on the outside of the box and on an interior box flap prior to sealing the box with tape.
Didn't find what you're looking for?
Live support available Mon-Fri: 9AM-9PM EST and Sat-Sun: 9AM-5PM EST, or submit a ticket anytime.