The store will not work correctly in the case when cookies are disabled.

Litter-Robot 3: Globe liner installation guide
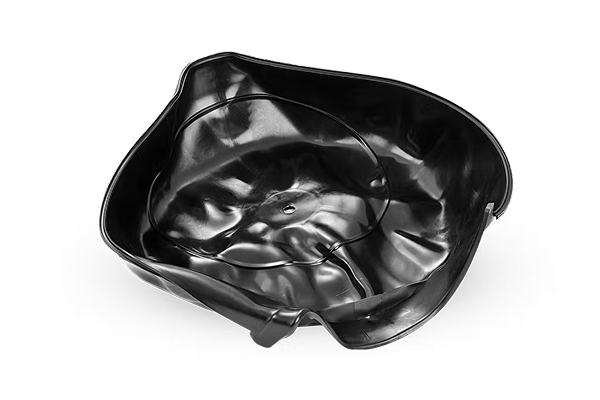
Litter-Robot 3 is equipped with a flexible black rubber globe liner. It
has a raised fill line to indicate how much litter to add to Litter-Robot.
During rotation, a weight behind the globe liner causes the liner to fall away
from the globe to ensure any stuck-on clumps are removed.
Tools needed:
- Phillips Screwdriver
- Flathead Screwdriver
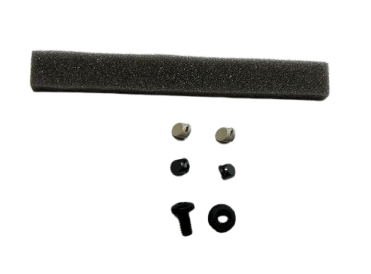
Globe liner kit parts included:
- (1) 6” foam strip
- (1) Screw
- (1) Nut
- (2) Beige screw covers
- (2) Gray screw covers
Preparation
- Empty all litter from the globe by pressing the Empty button on the Control Panel. Once complete, brush any remaining litter through the waste port, then press the Reset button to return the globe to the Home position.
- If you use the Whisker app, press Reset Gauge in the Controls section of the app when you empty the waste drawer to reset the waste drawer level in the app.
- Press the Power button to turn the unit off and unplug it from the wall.
- Remove the bonnet by pressing the tabs on either side, then lift while rotating it backward. There are two plastic tabs on the back of the bonnet that should slide up and out of the base. Set the bonnet aside.
- Remove the globe from the base and wipe the globe down with a paper towel and disinfectant. Make sure the waste port is clean.
Disassemble the globe
-
On either side of the globe opening, use the end of a paperclip or a
flathead screwdriver to remove the screw covers. You may reuse either the
original parts or the spares included in the Globe Liner Kit.
Tip: Place your thumb over the screw cover as you wedge it out of place to avoid flinging it.
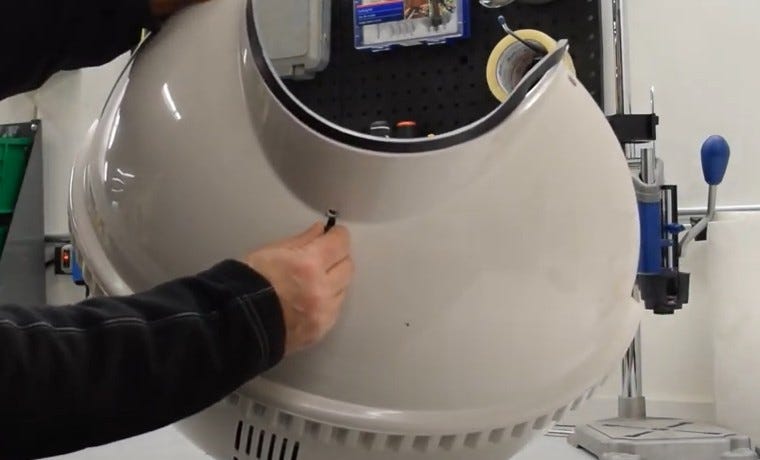
- Use a Phillips screwdriver to remove the 8 screws around the equator of the globe and carefully set the screws aside.
-
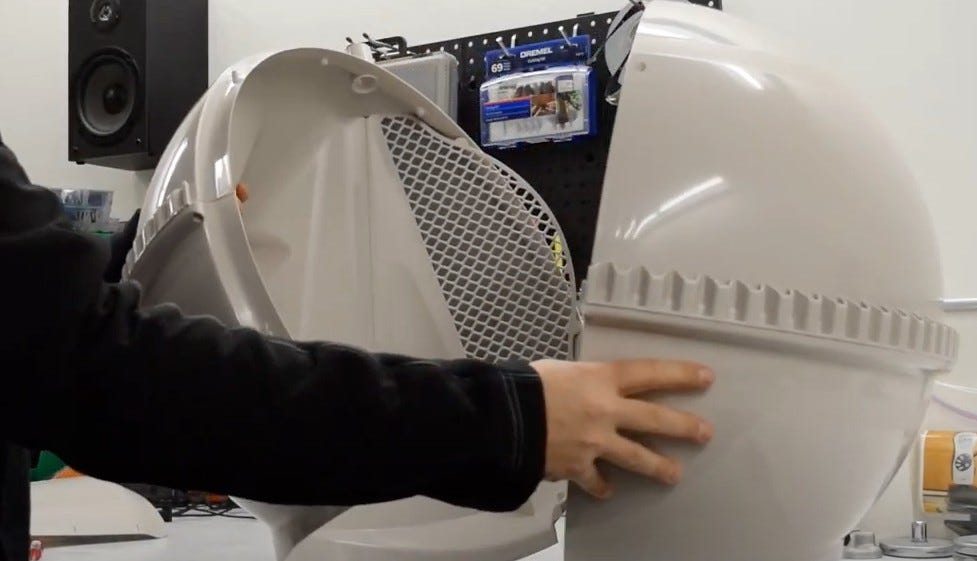
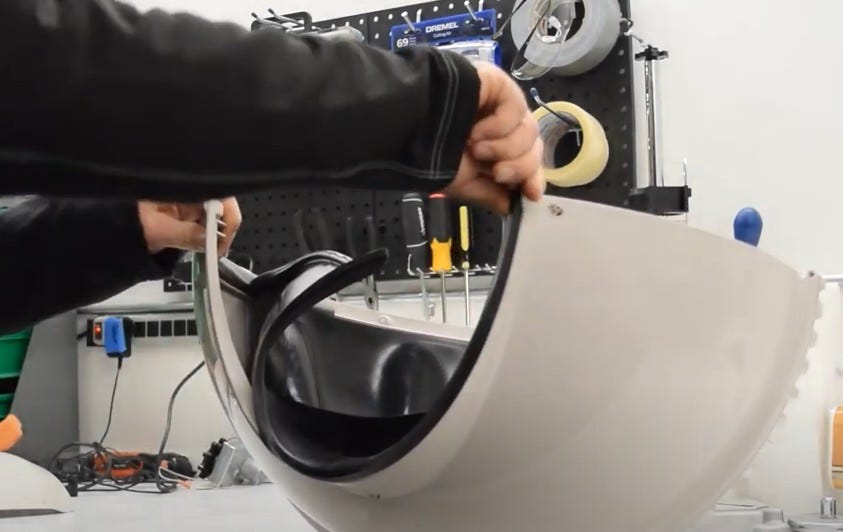
Set the globe on its back and split the halves; set the top half aside.
Remove the old liner
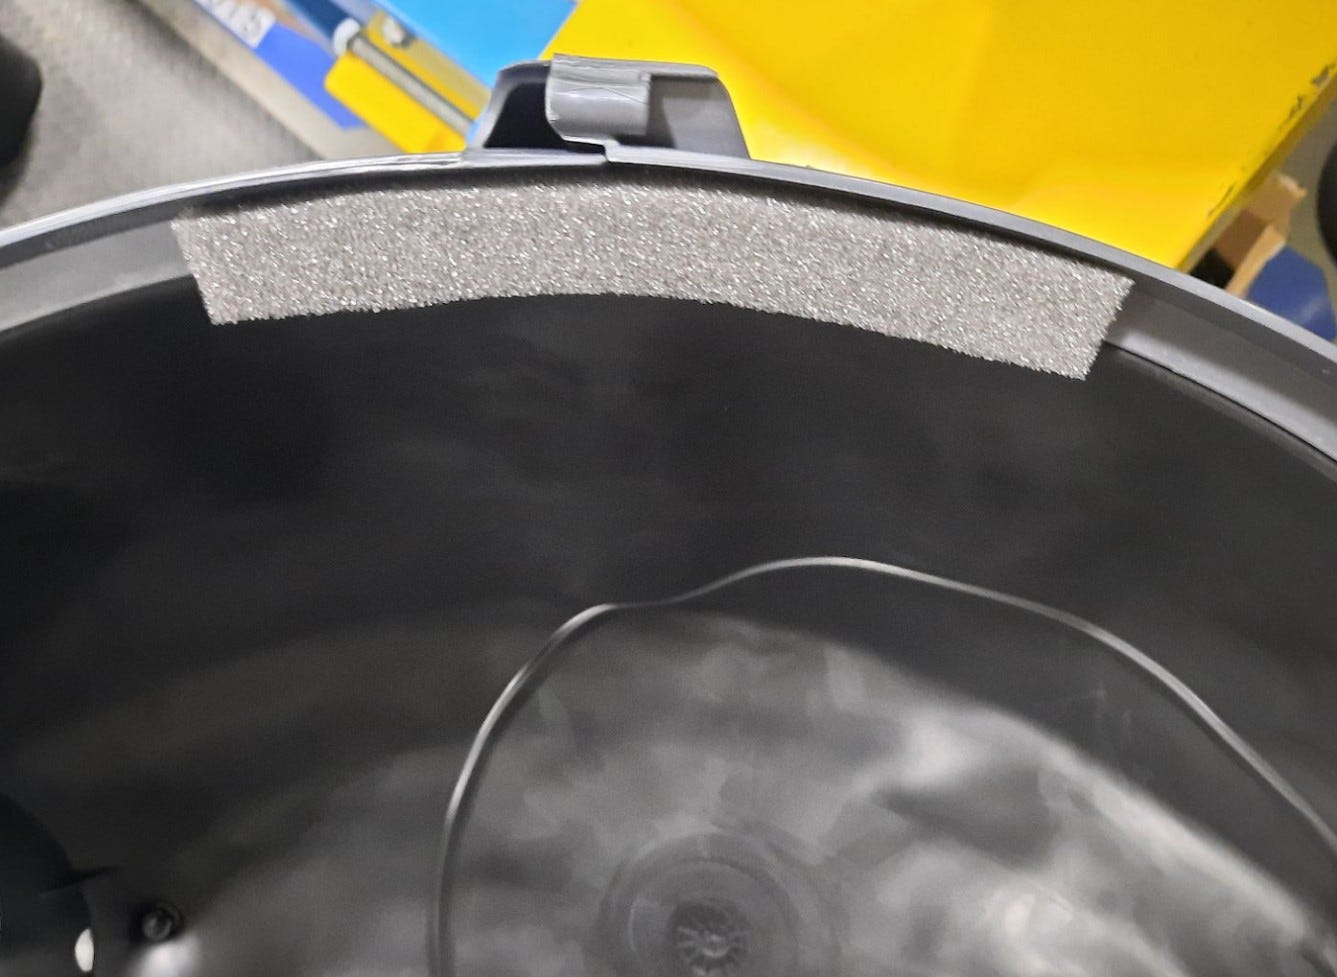
- Note the placement of the foam strips on the back-left side of the globe. You will have to place new ones in a similar fashion. Remove and discard.
-
Using a Phillips screwdriver, remove the screw near the opening and the nut
inside the globe.
-
Note the location of the screw and nut for reassembly. You may reuse
either the original parts or the spares included in the Globe Liner
Kit.
-
Note the location of the screw and nut for reassembly. You may reuse
either the original parts or the spares included in the Globe Liner
Kit.
-
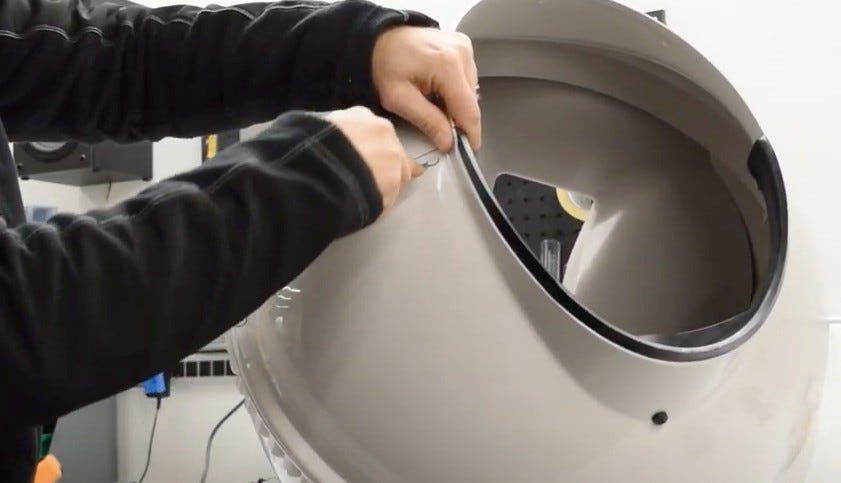
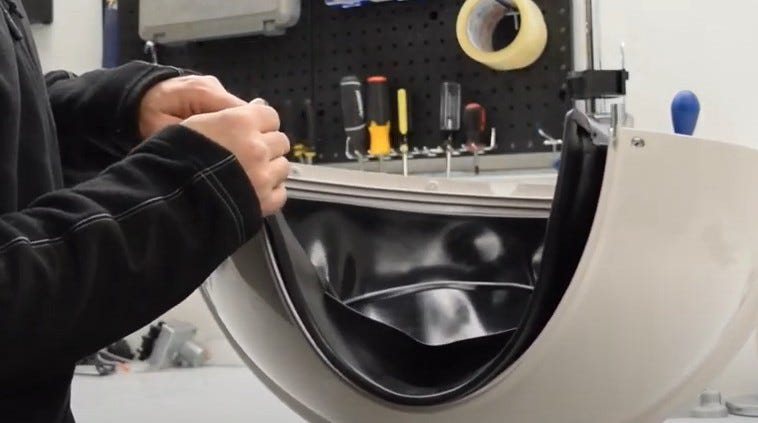
From the lip of the opening, peel back the globe liner, then unhook the
liner from the slots on the left and right sides of the entryway.
- Slide the rubber T-mount out of the T-Slot. Disregard this instruction if your globe liner does not have this.
- Peel the globe liner out of the channel inside the globe and discard it.
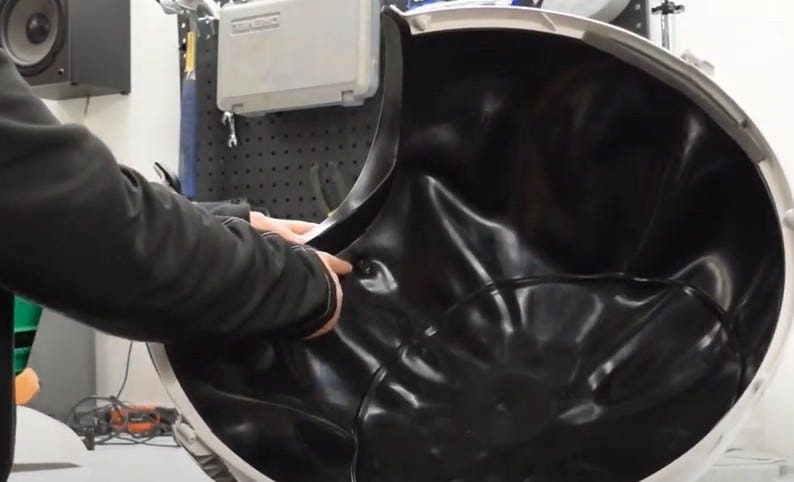
Install the new liner
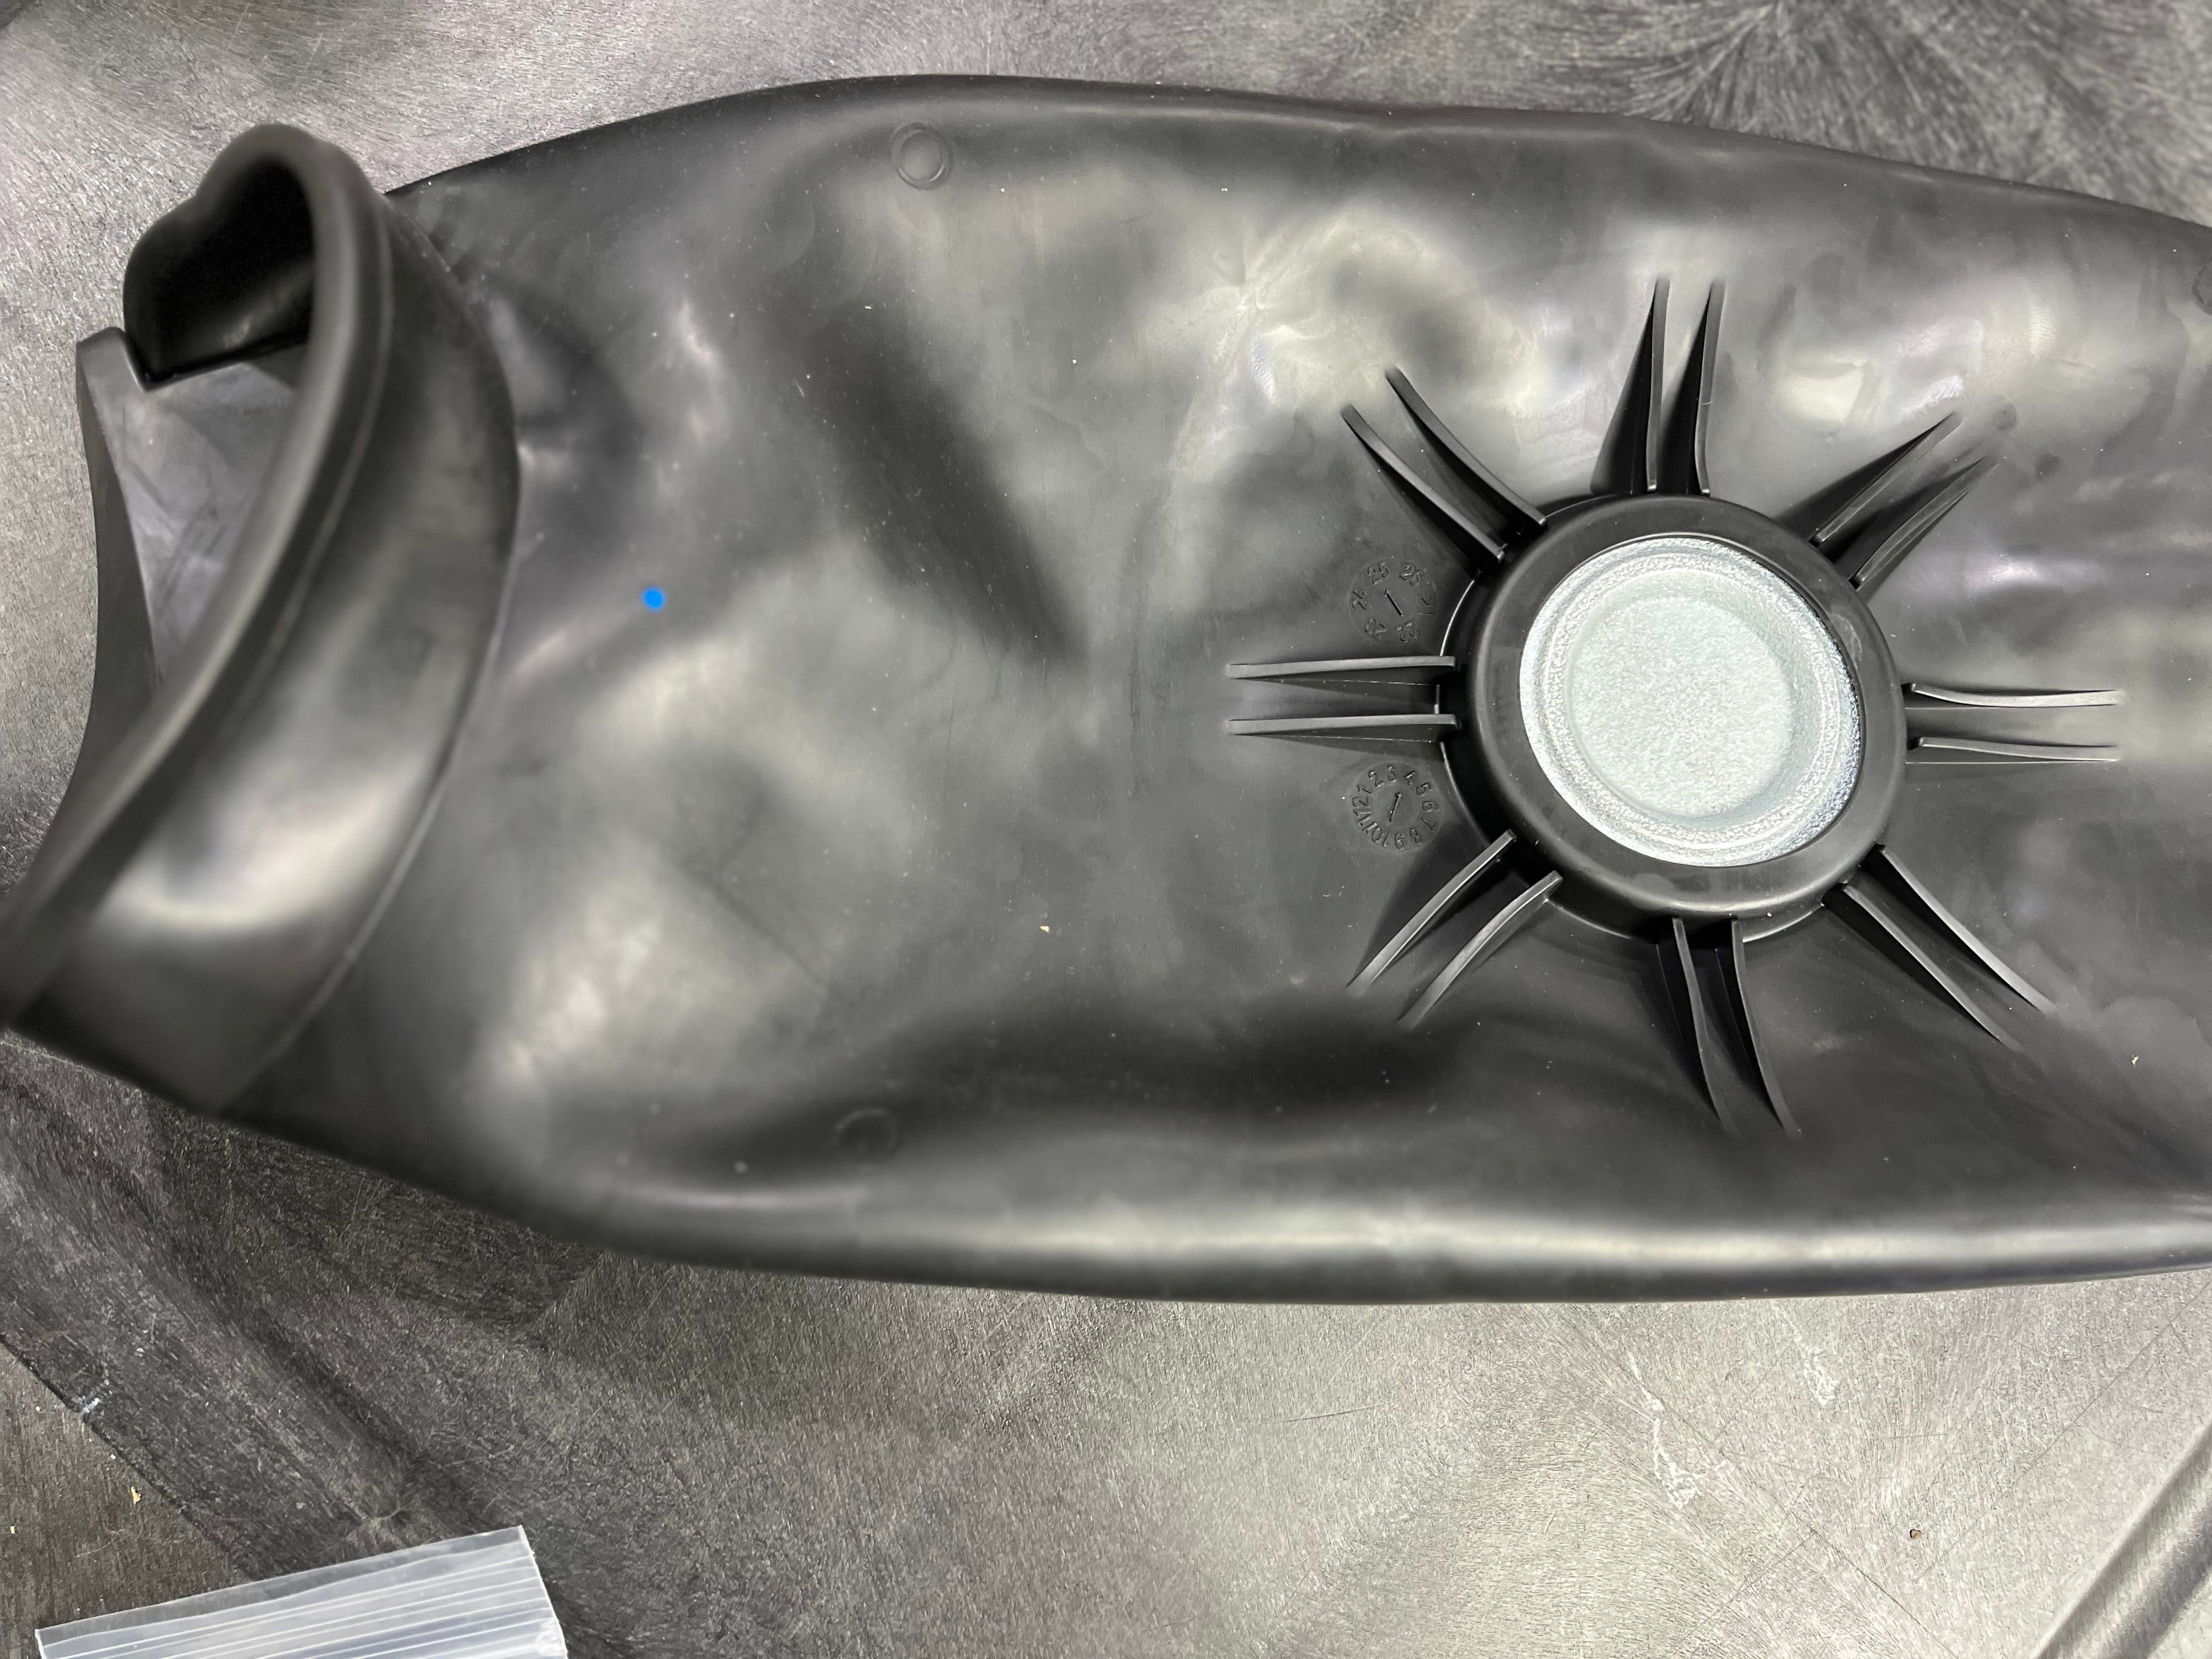
- Check that the weight on the underside of the globe liner is secured in its pocket.
-
Locate the paint pen mark on the underside of the globe liner to notate the
slit for the screw and nut.
- Place the globe liner centered in the globe and aligned to the entryway.
- Slide the t-mounts at both ends of the liner into the T-Slots at the entrance of the globe. Disregard this instruction if your globe liner does not have this.
-
Wrap the globe liner around the lip of the entryway.
-
Push the ridge in the globe liner into the channel on the globe.
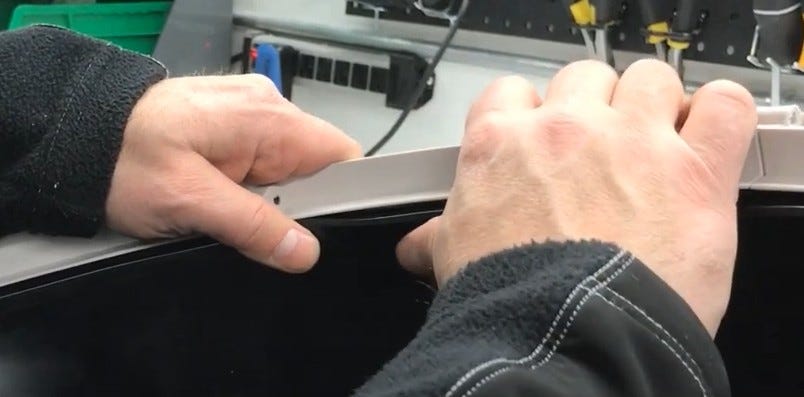
- Once the globe liner is in place, work any slack around the channel until there are no gaps and it rests evenly.
-
Replace the screw through the existing hole from the underside of the globe
and through the slit in the liner. Finish by fastening with the nut on the
liner side.
-
You may use the original screw and nut or the spares included in the
Globe Liner Kit.
-
You may use the original screw and nut or the spares included in the
Globe Liner Kit.
-
Adhere the new 6" foam strip to the center rear of the globe,
overlapping the plastic and the globe liner.
Reassemble
- Replace the top half of the globe. Make sure the globe liner stays secure in its channel and that the foam is completely hidden. Once in place, if you can see the foam strips, reposition the foam and/or upper globe until no foam is visible.
- Use a Phillips screwdriver to replace the 8 screws you removed previously.
-
Push the two screw covers into place.
- You may reuse either the original parts or the spares included in the Globe Liner Kit.
- Reassemble Litter-Robot, plug it in, and power on.
Didn't find what you're looking for?
Live support available Mon-Fri: 9AM-9PM EST and Sat-Sun: 9AM-5PM EST, or submit a ticket anytime.