The store will not work correctly in the case when cookies are disabled.
Litter-Robot 4: LitterHopper not dispensing or blue and purple alternating light bar
IMPORTANT
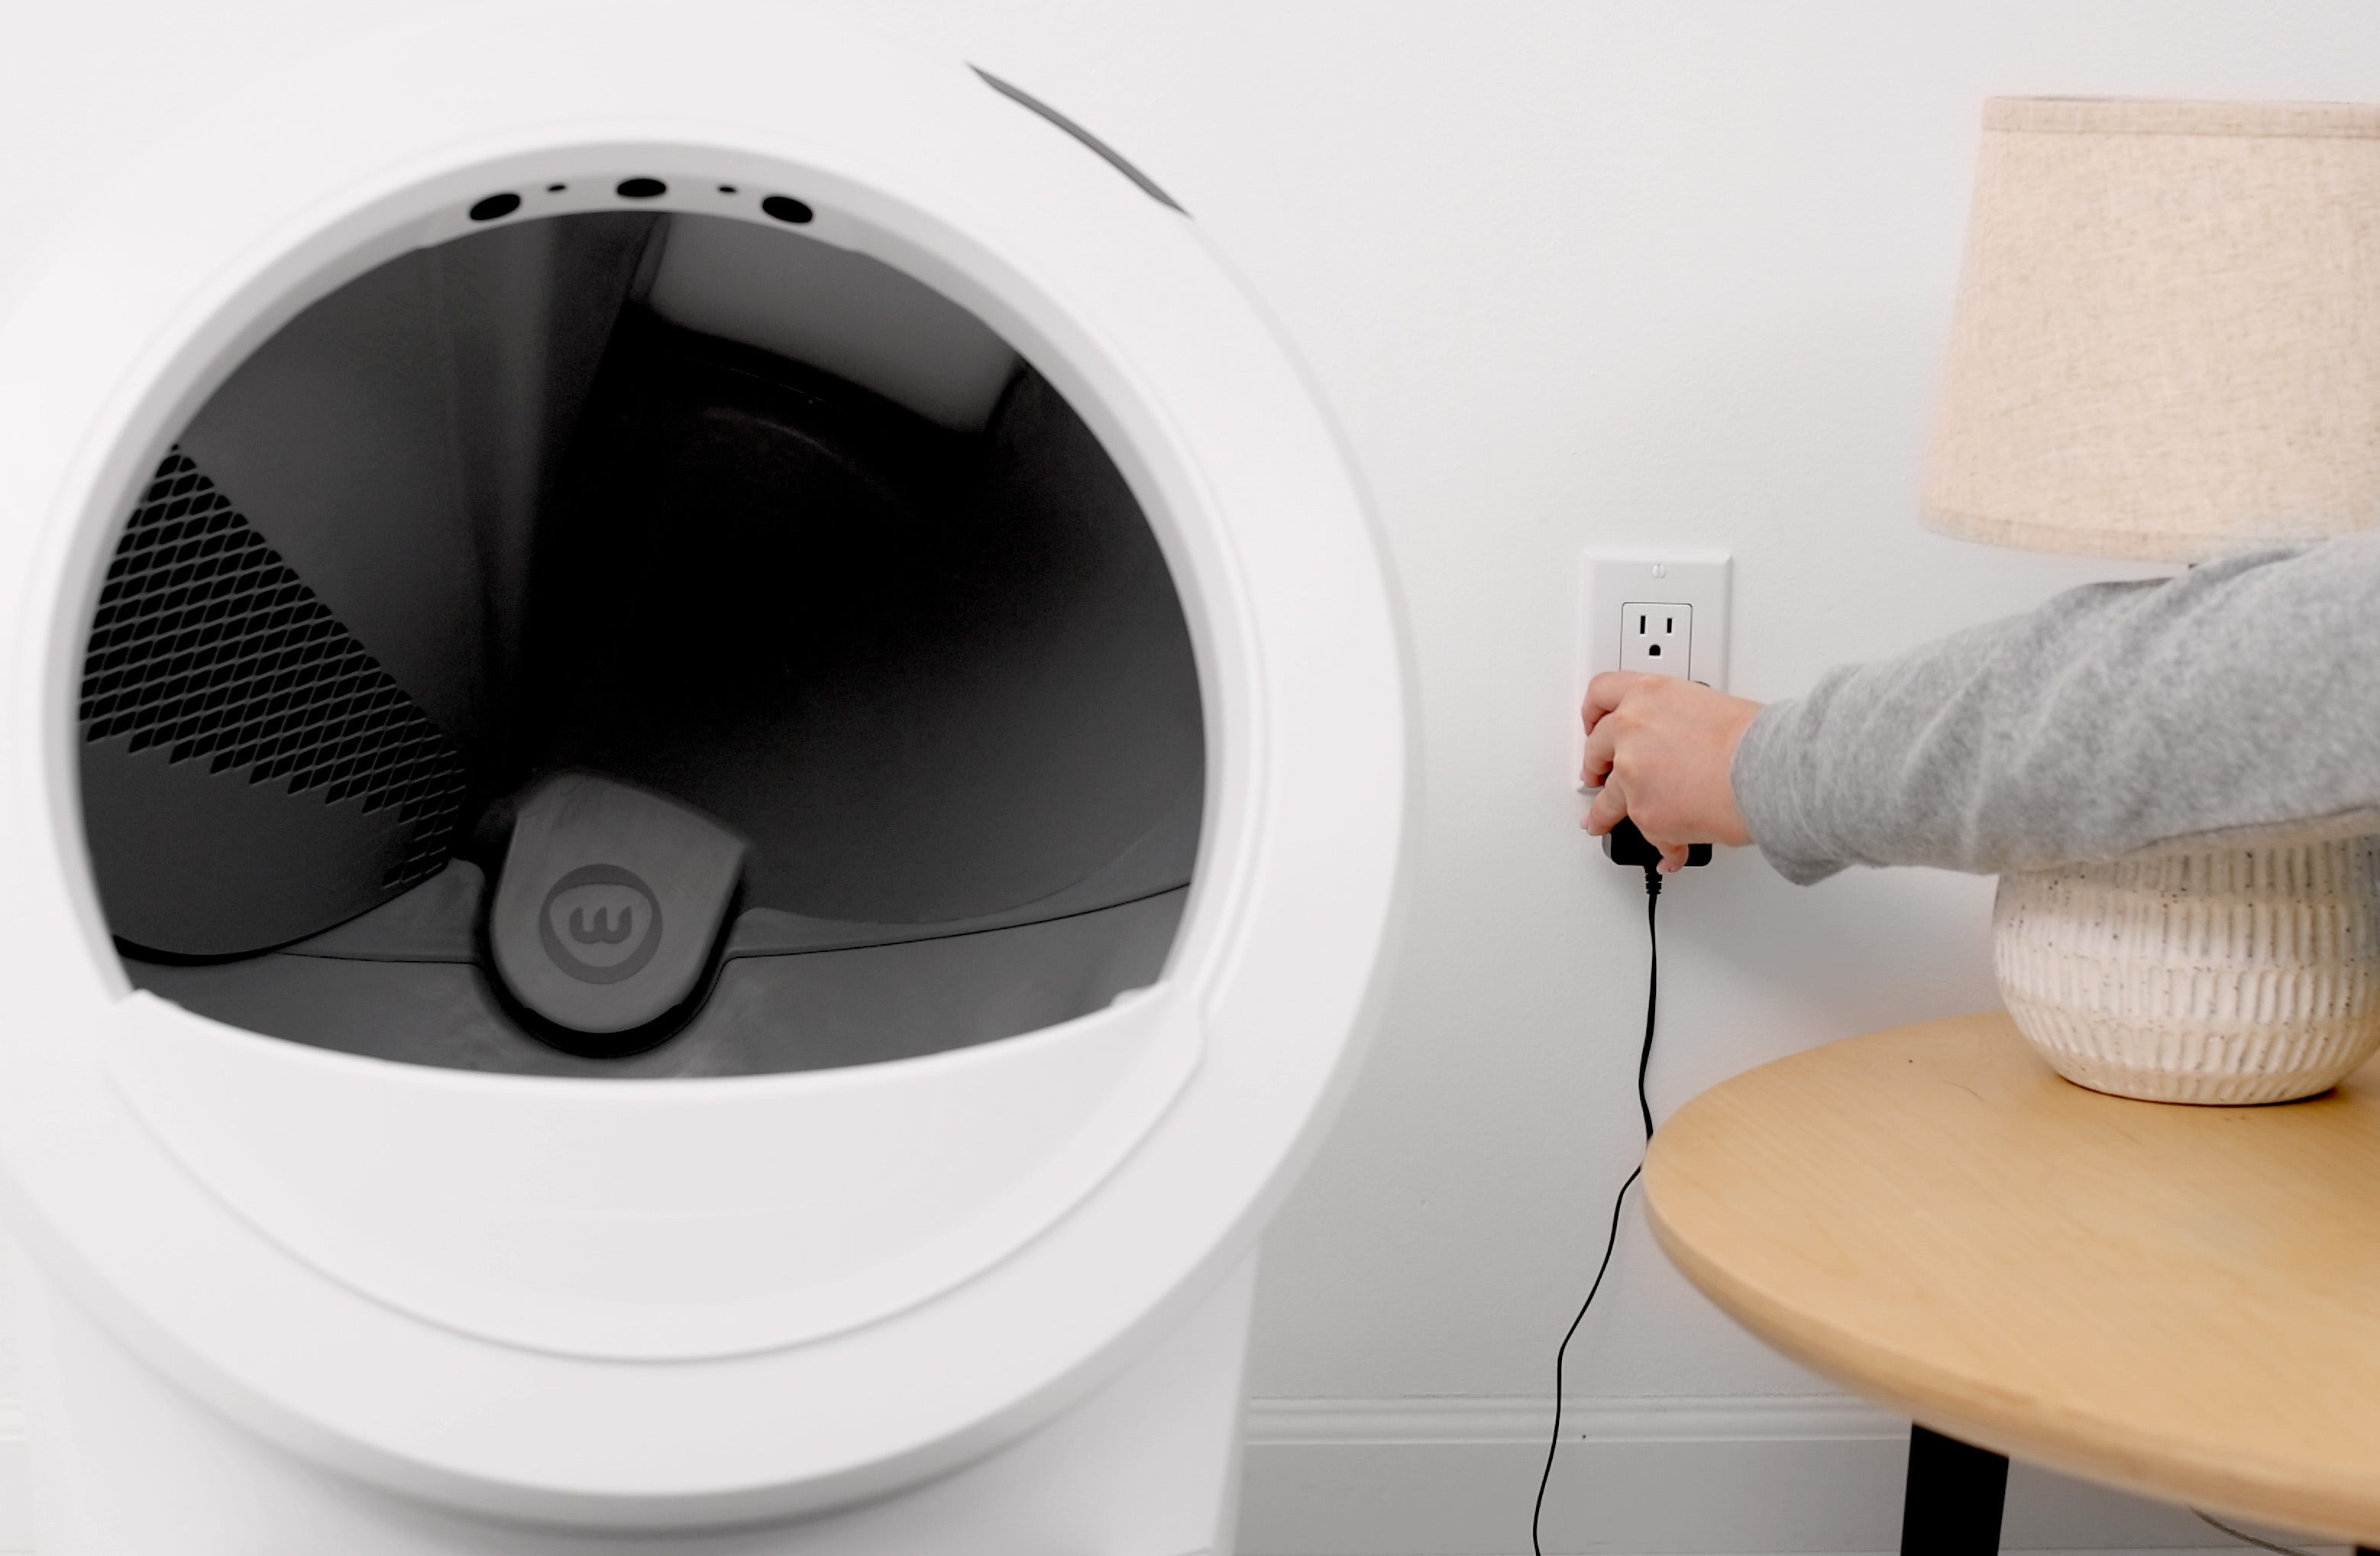
- Make sure your unit is plugged in.
- Make sure your unit is connected to WiFi and online.
- Make sure your firmware is up-to-date. If the app does not give you the option to update, then you have the latest version.
- Do not use a backup battery while using the LitterHopper; LitterHopper will not dispense litter if the backup battery is installed.
Introduction
The LitterHopper is designed to automatically maintain the optimal litter bed level within the globe of your Litter-Robot 4. The 'default' optimal litter bed level is just below the MAX fill line inside the globe. Litter-Robot 4 uses sensors to measure the height of the litter bed level at the end of each clean cycle. If the sensors determine that the litter bed level is below the optimal level, then the LitterHopper will dispense litter into the globe during the NEXT clean cycle. When dispensing, the globe may momentarily pause rotation.
It will not dispense when:
- The litter in the globe is at the optimal litter level.
- The app shows a motor error status.
- The unit displays an alternating blue and purple light.
Troubleshooting overview
- Disable LitterHopper
- Check LitterHopper installation
- Check LitterHopper motor
- Check globe key and base pockets
- If you purchased the Litter-Robot 4 LitterHopper® Bundle or Litter-Robot 4 Ultimate LitterHopper® Bundle, your key is preinstalled
- Reinstall LitterHopper
- Ensure optimal litter level
- Clean curtain sensors
- Calibrate optimal litter level
- Enable LitterHopper and run 1 to 3 consecutive test cycles
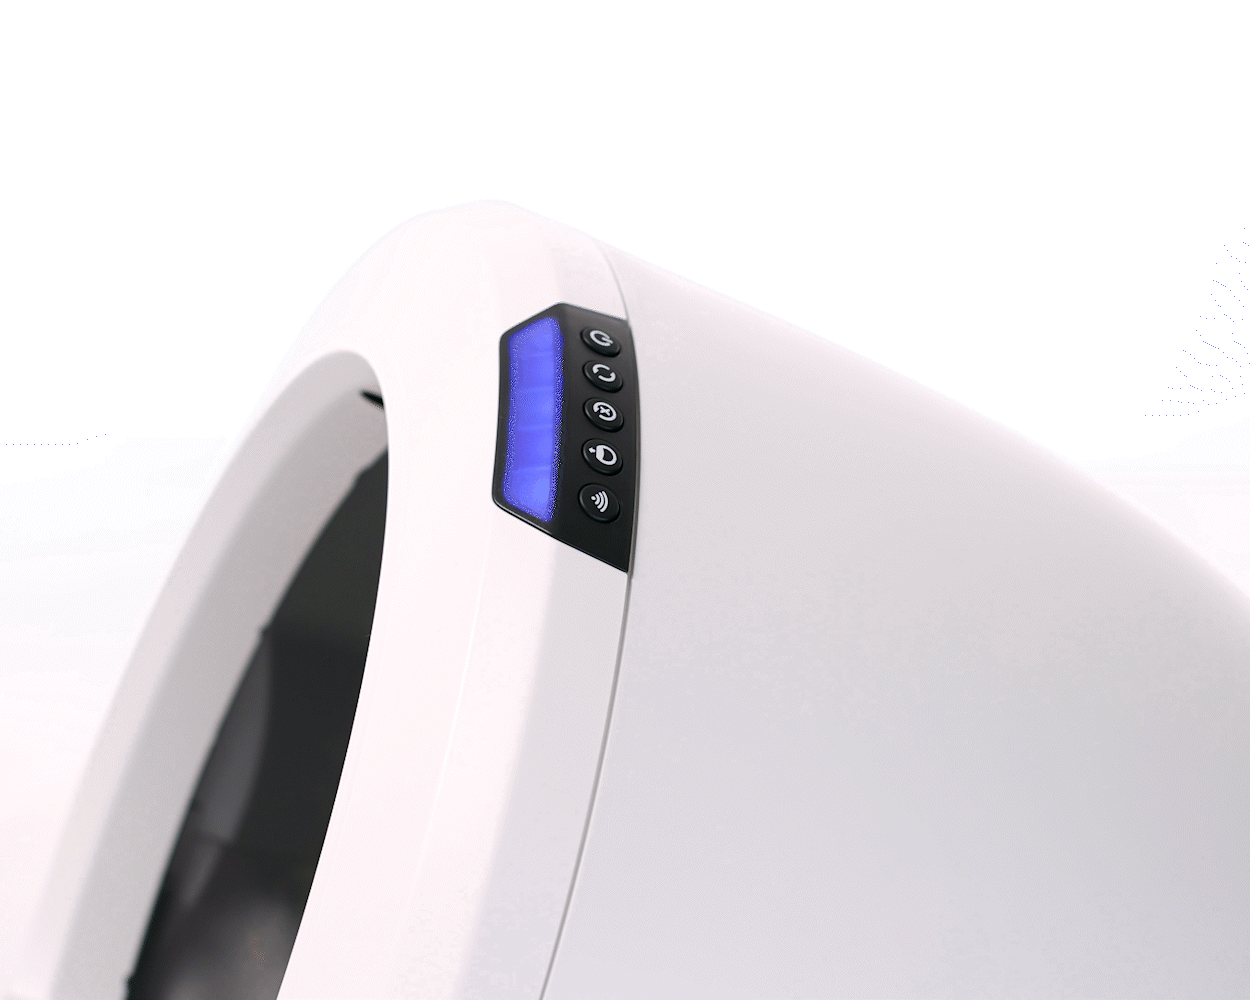
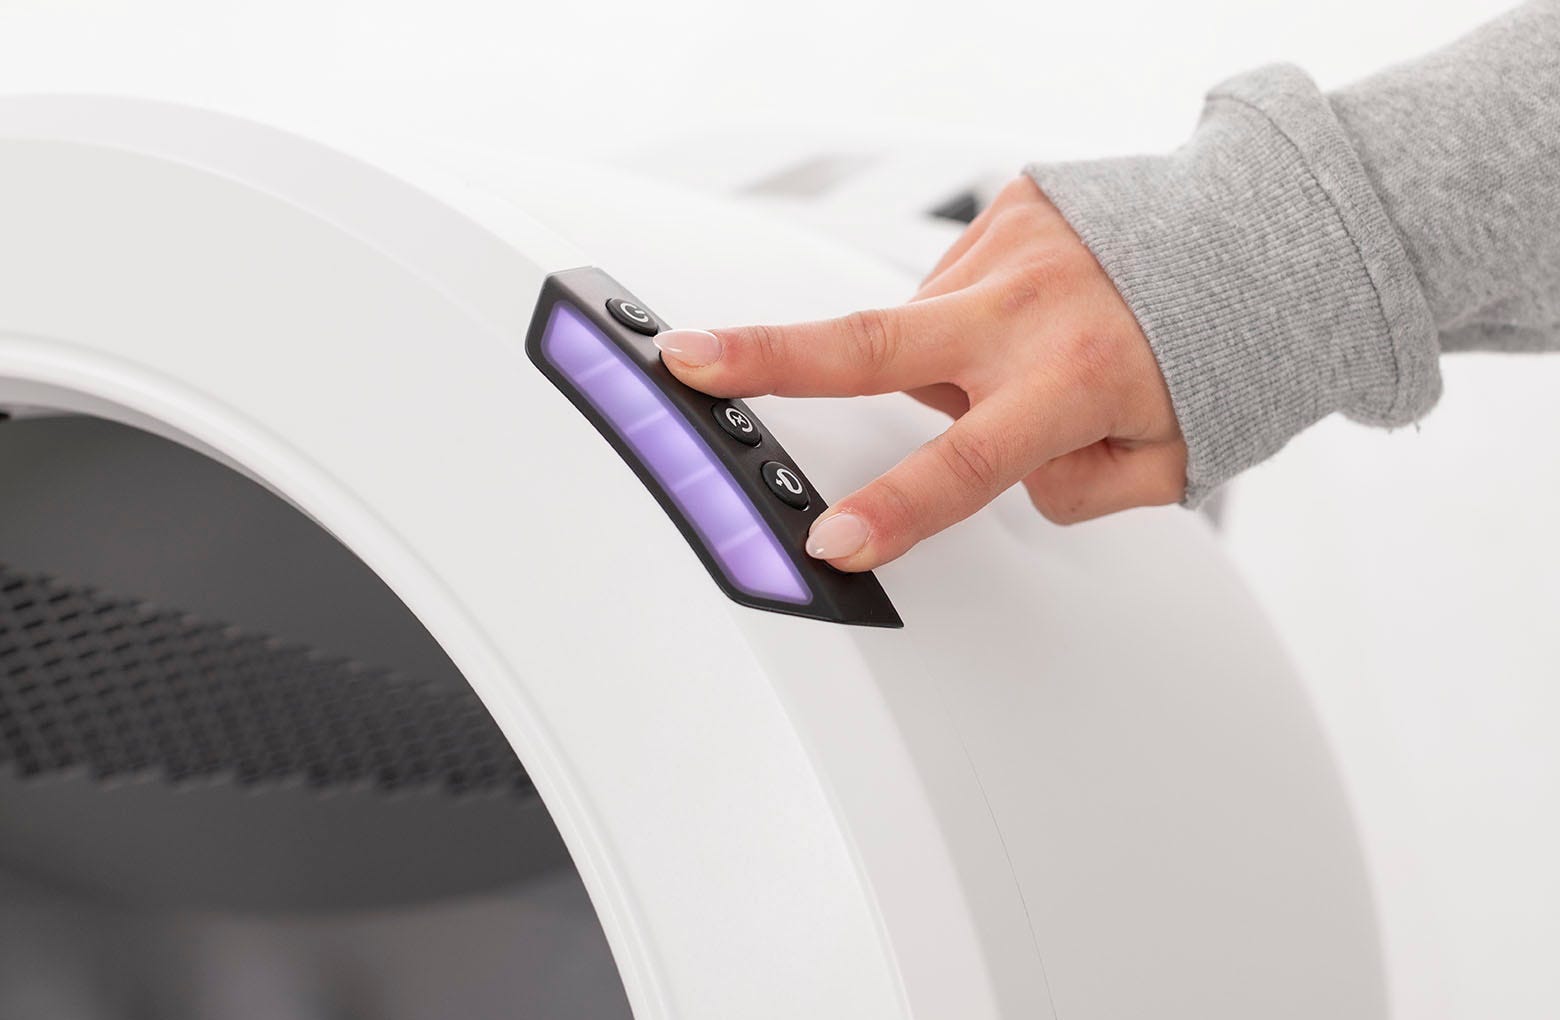
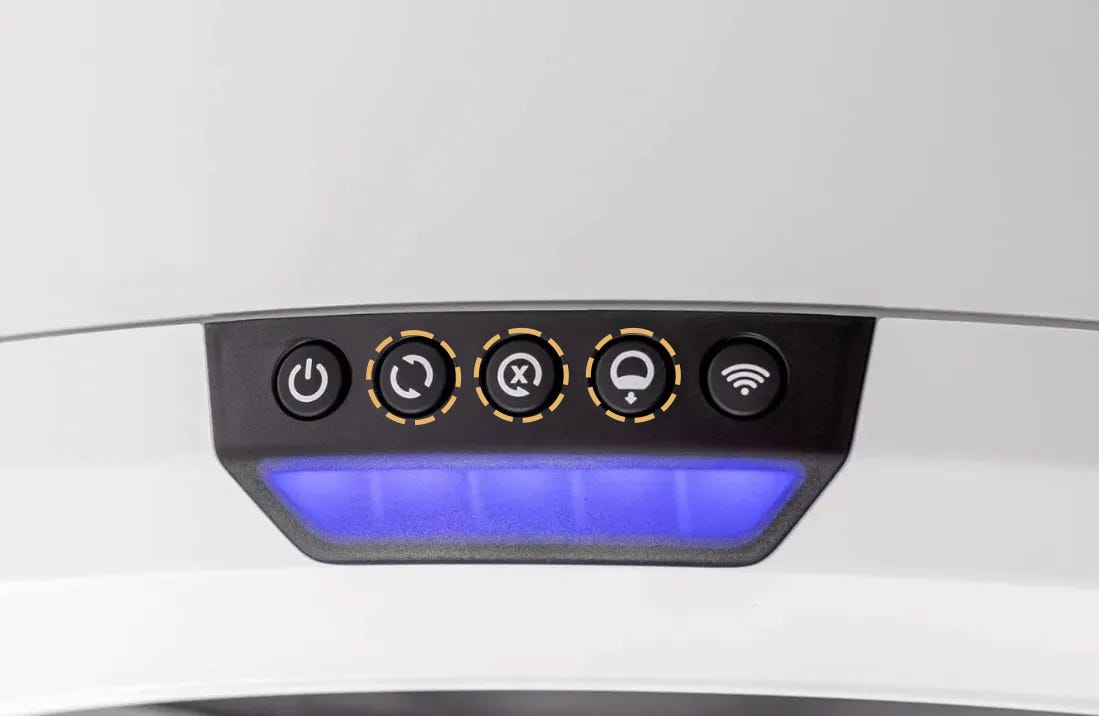
Disable the LitterHopper
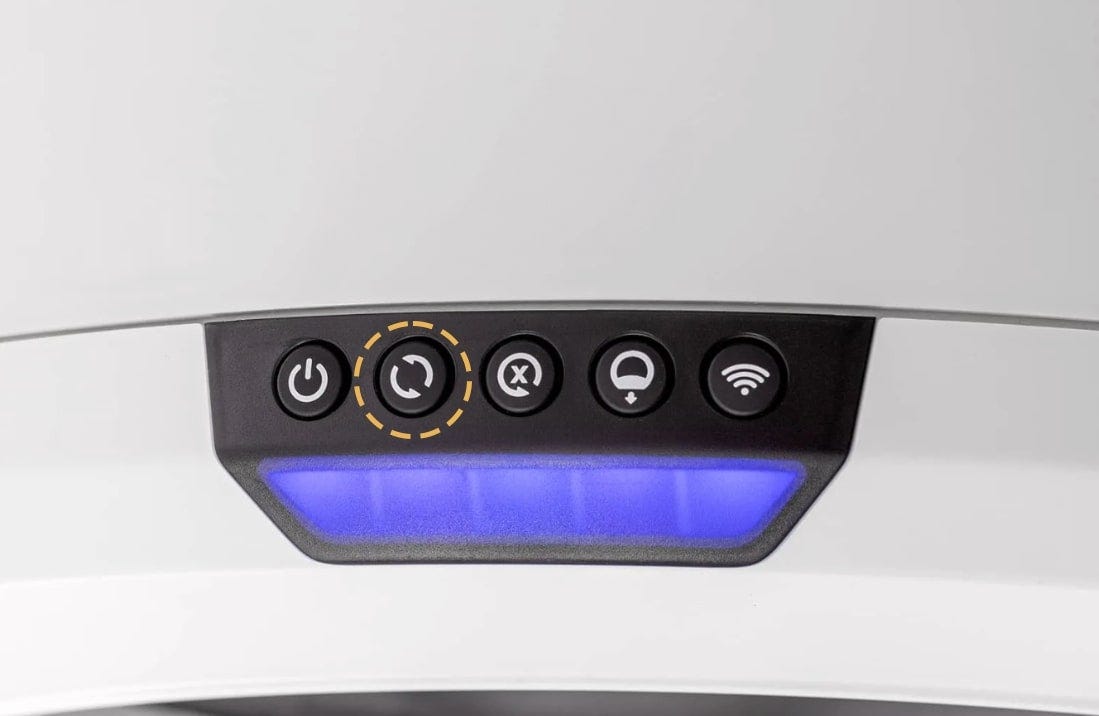
Short press the Reset button on the control panel. The unit should flash white and then display a solid blue light bar.
Disable the LitterHopper by long-pressing the Cycle and Connect buttons for 3 seconds. The unit should flash white and then display a solid blue light bar.
Press and hold the Reset and Connect buttons for 3 seconds, or unplug the unit.
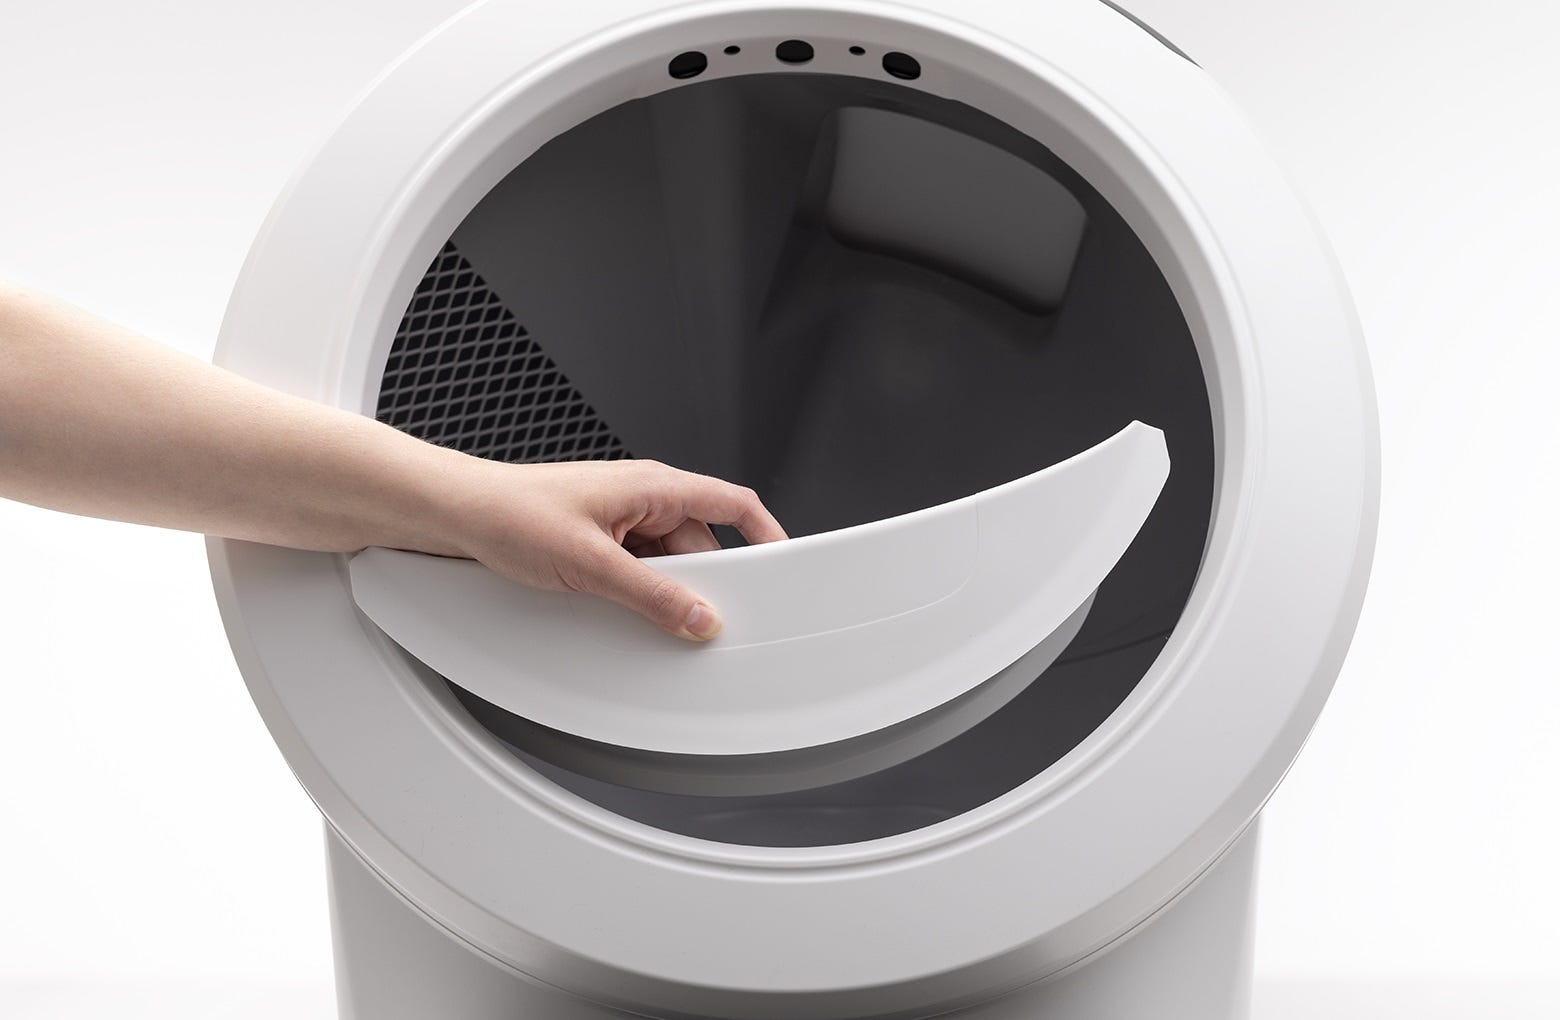
Check the LitterHopper installation
Remove the LitterHopper by lifting it up and away from your Litter-Robot.
Please note: If the LitterHopper has litter, litter may leak from the bottom. We recommend placing a container underneath the LitterHopper when removing it.
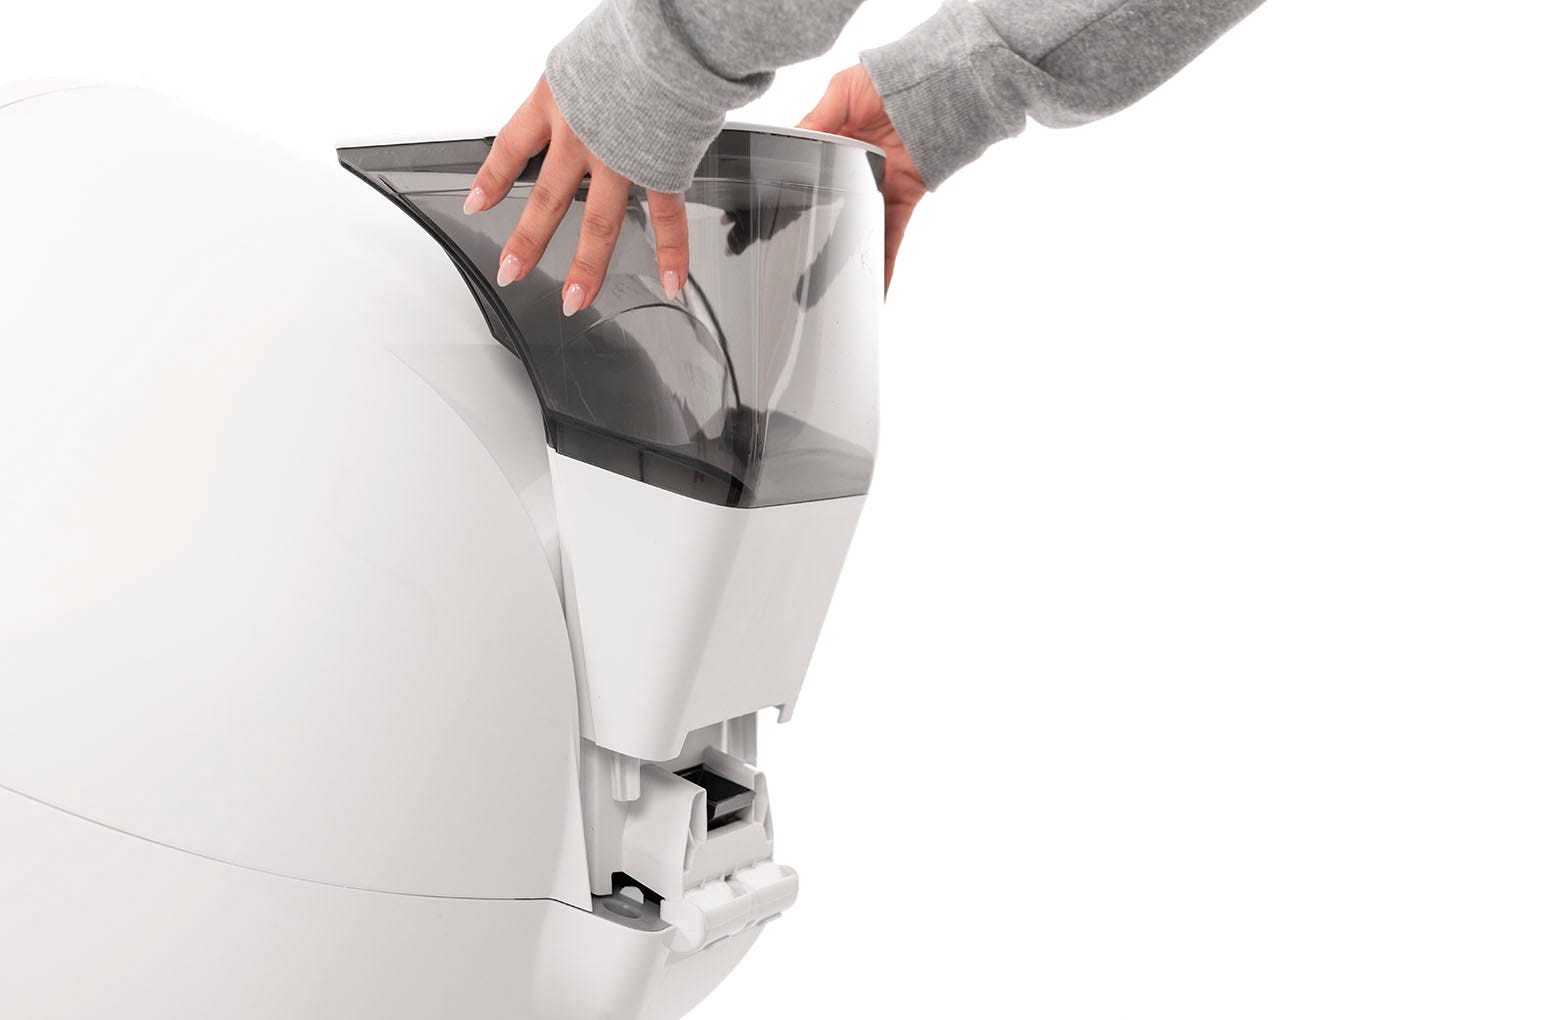
Empty the litter from the LitterHopper into the container.
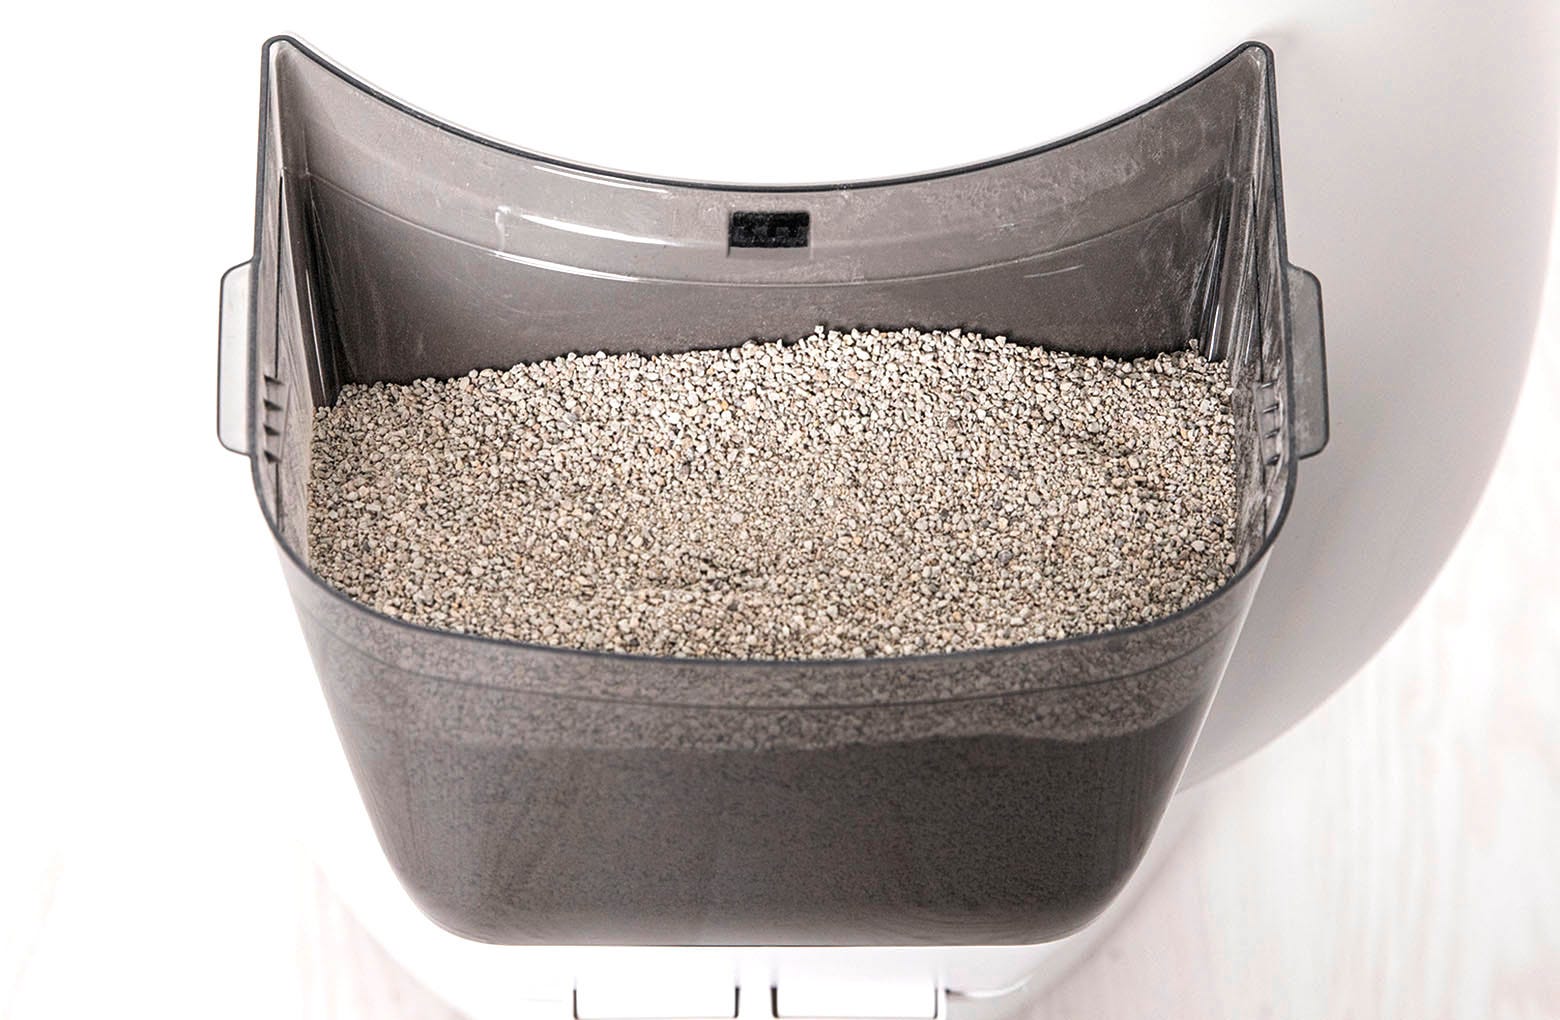
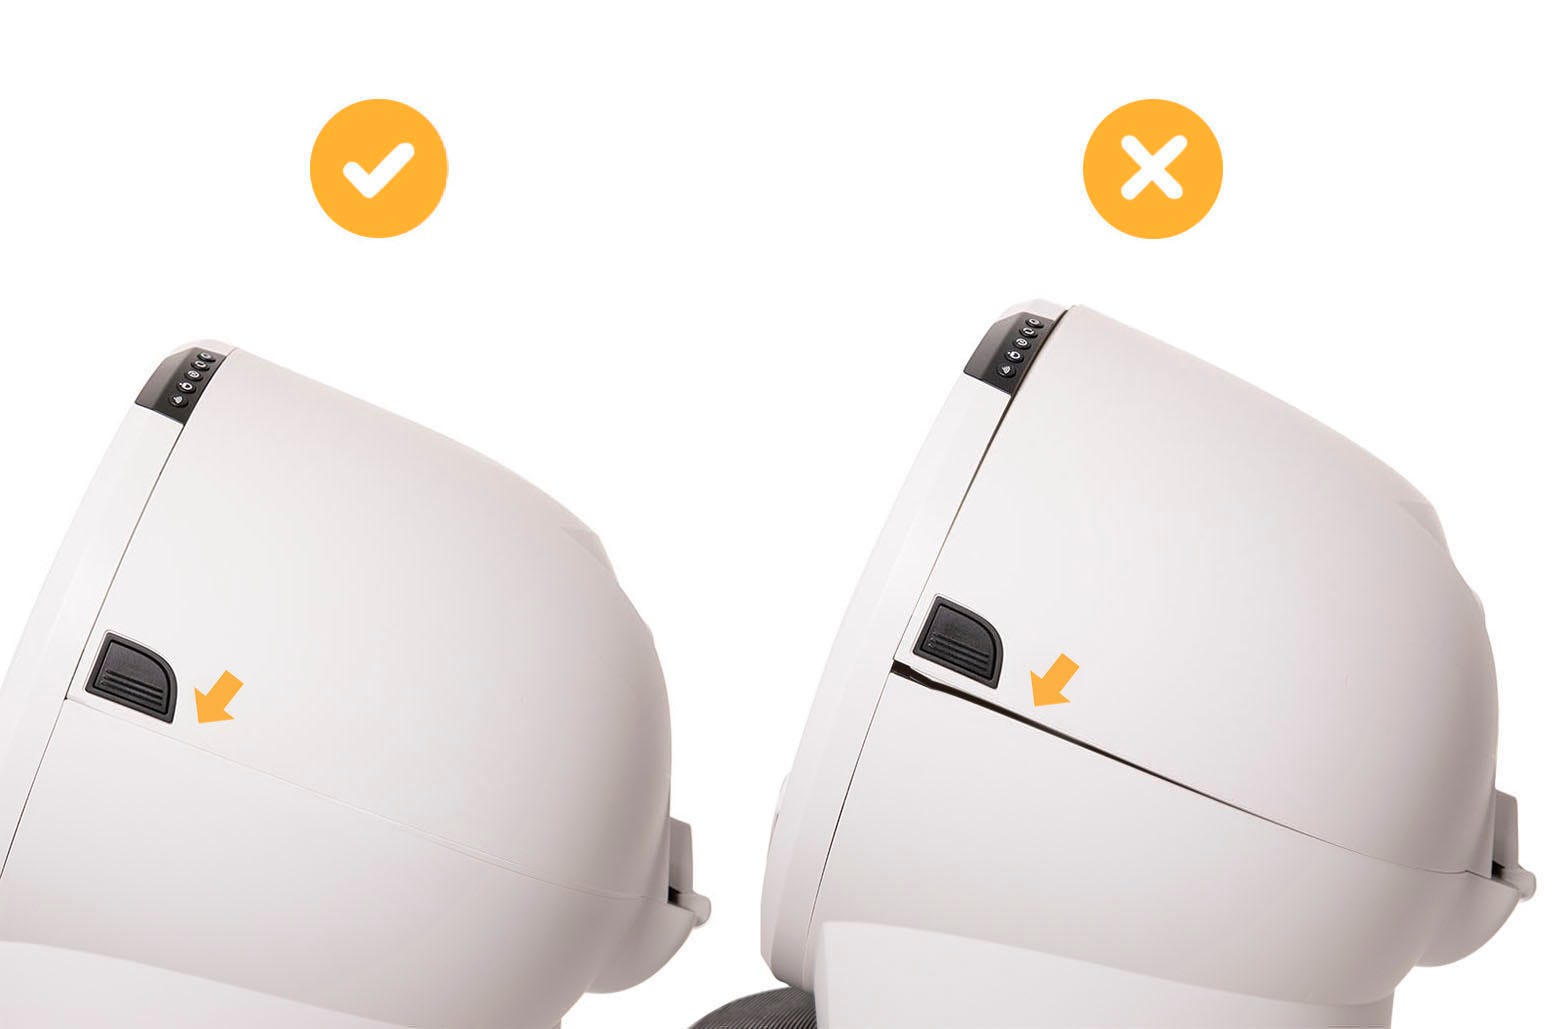
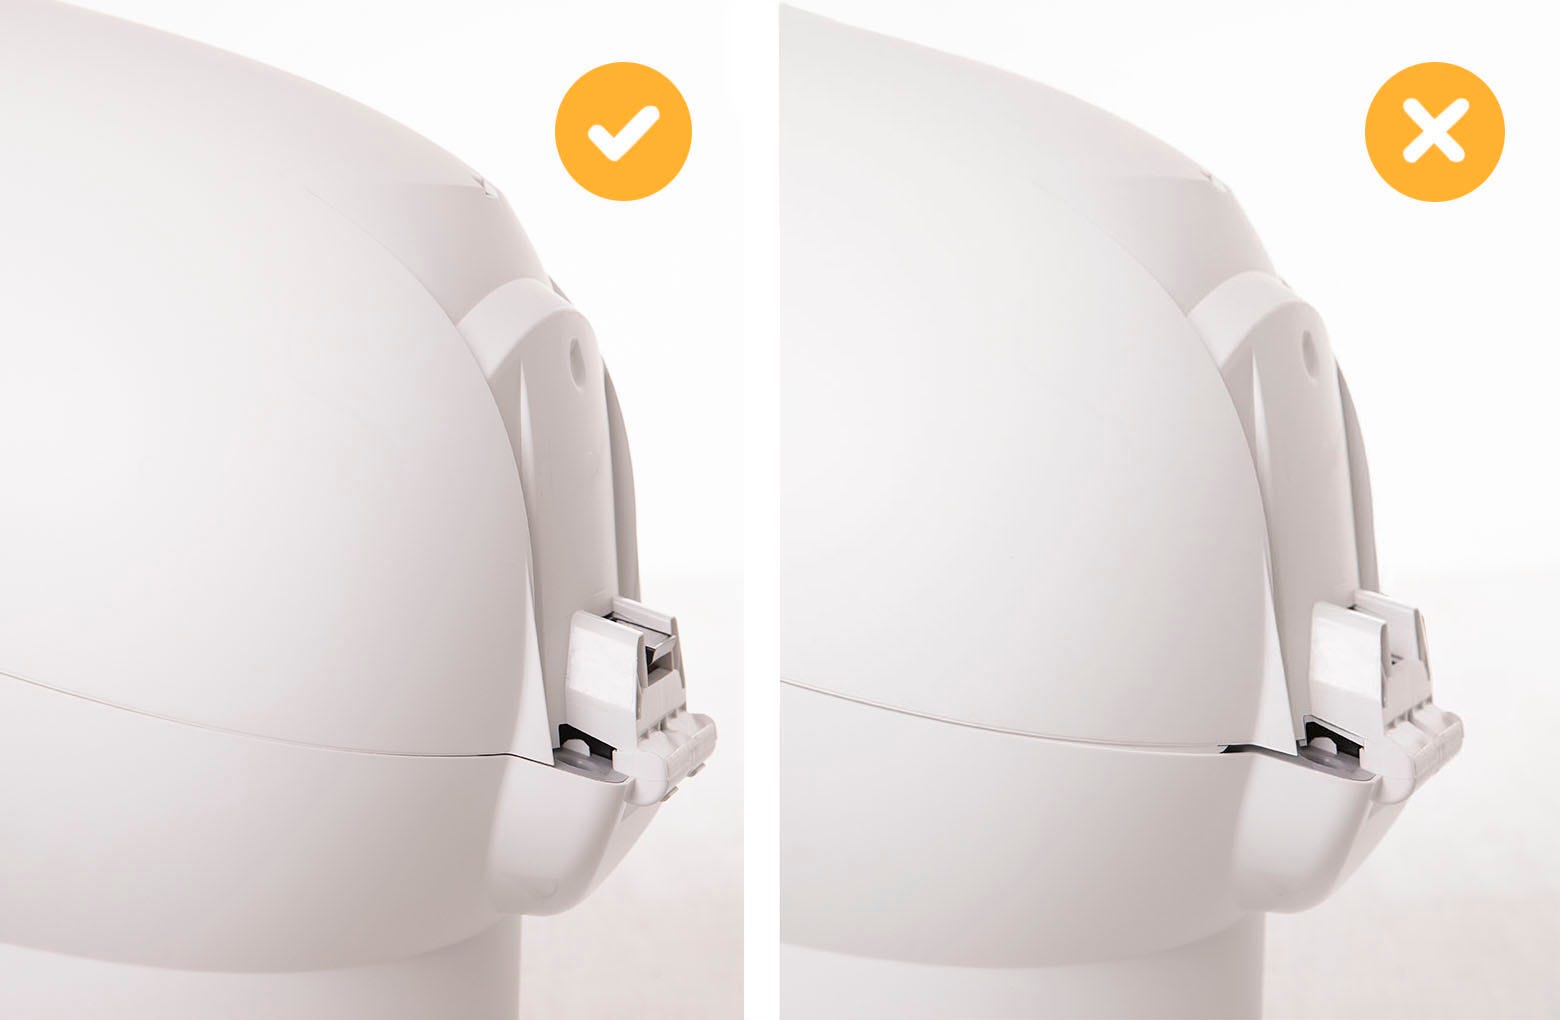
Check all of the following areas on the unit:
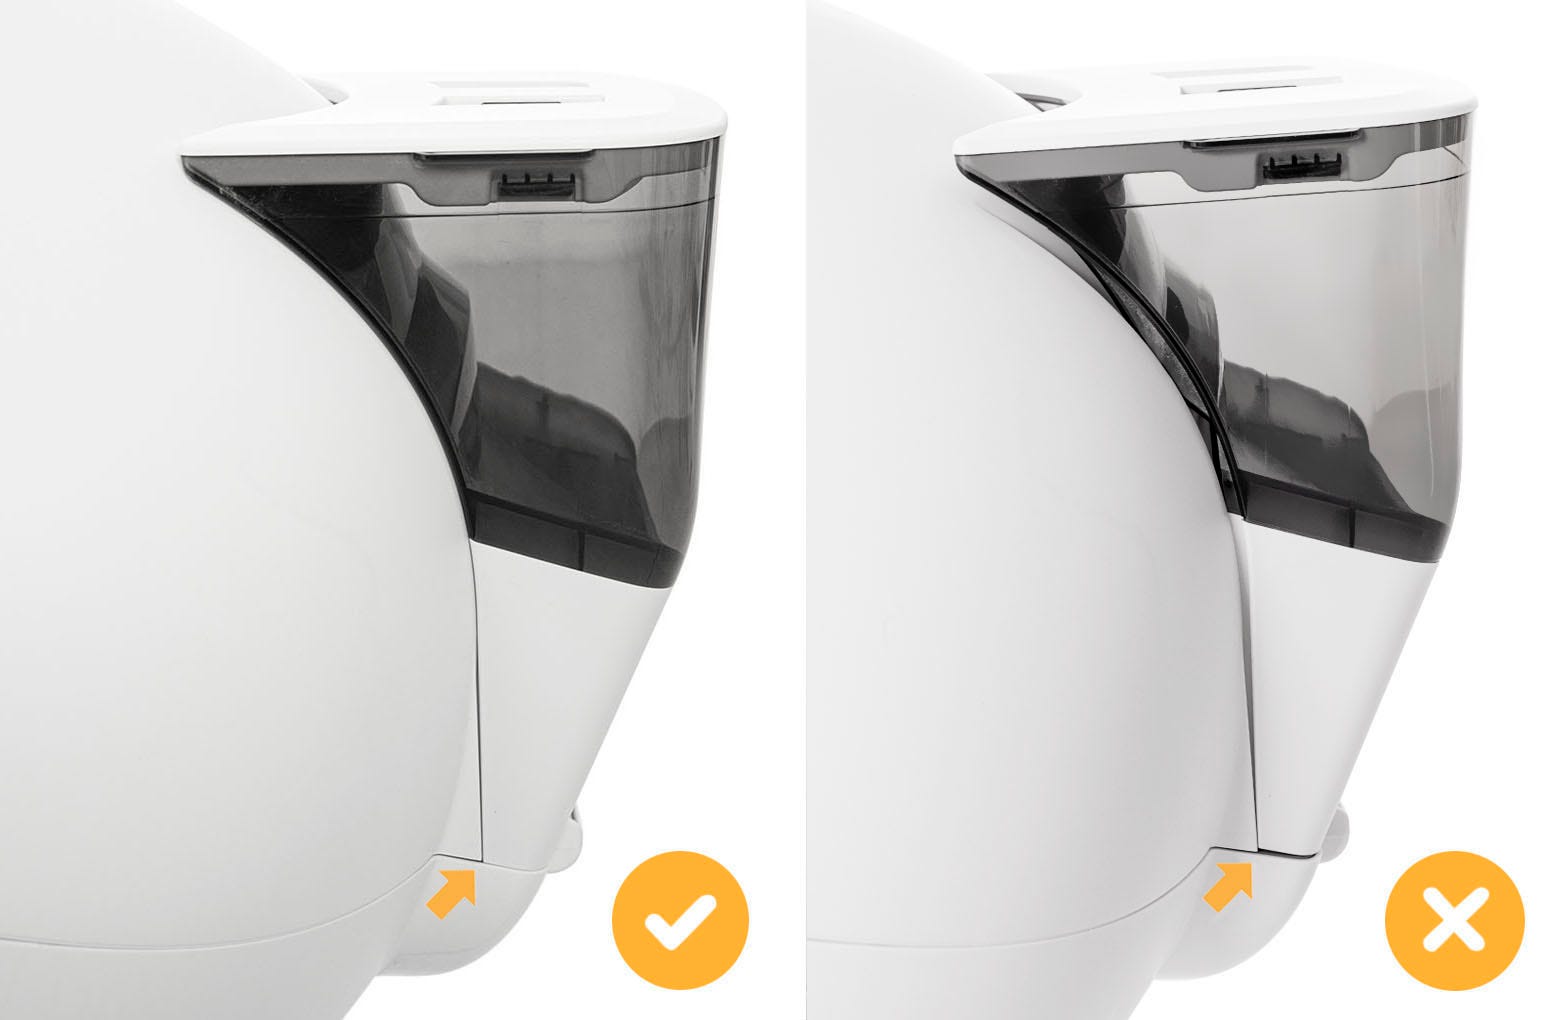
Ensure there is no gap between the bonnet and the base.
Ensure the bonnet hinge sits inside the base hinge pocket completely.
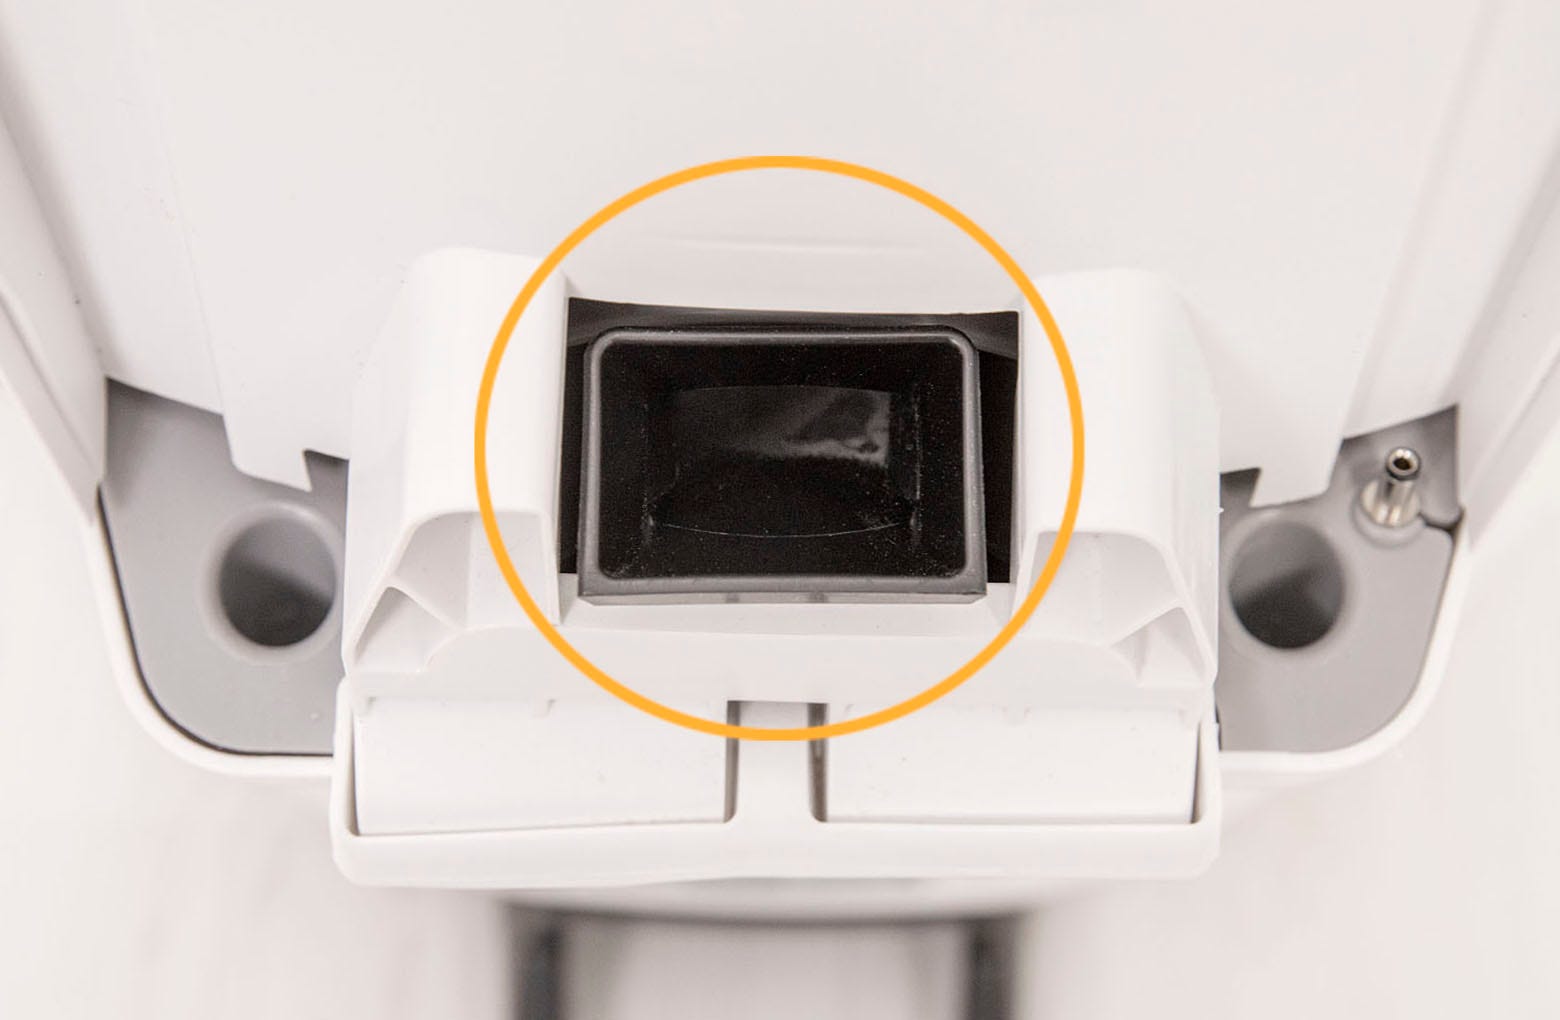
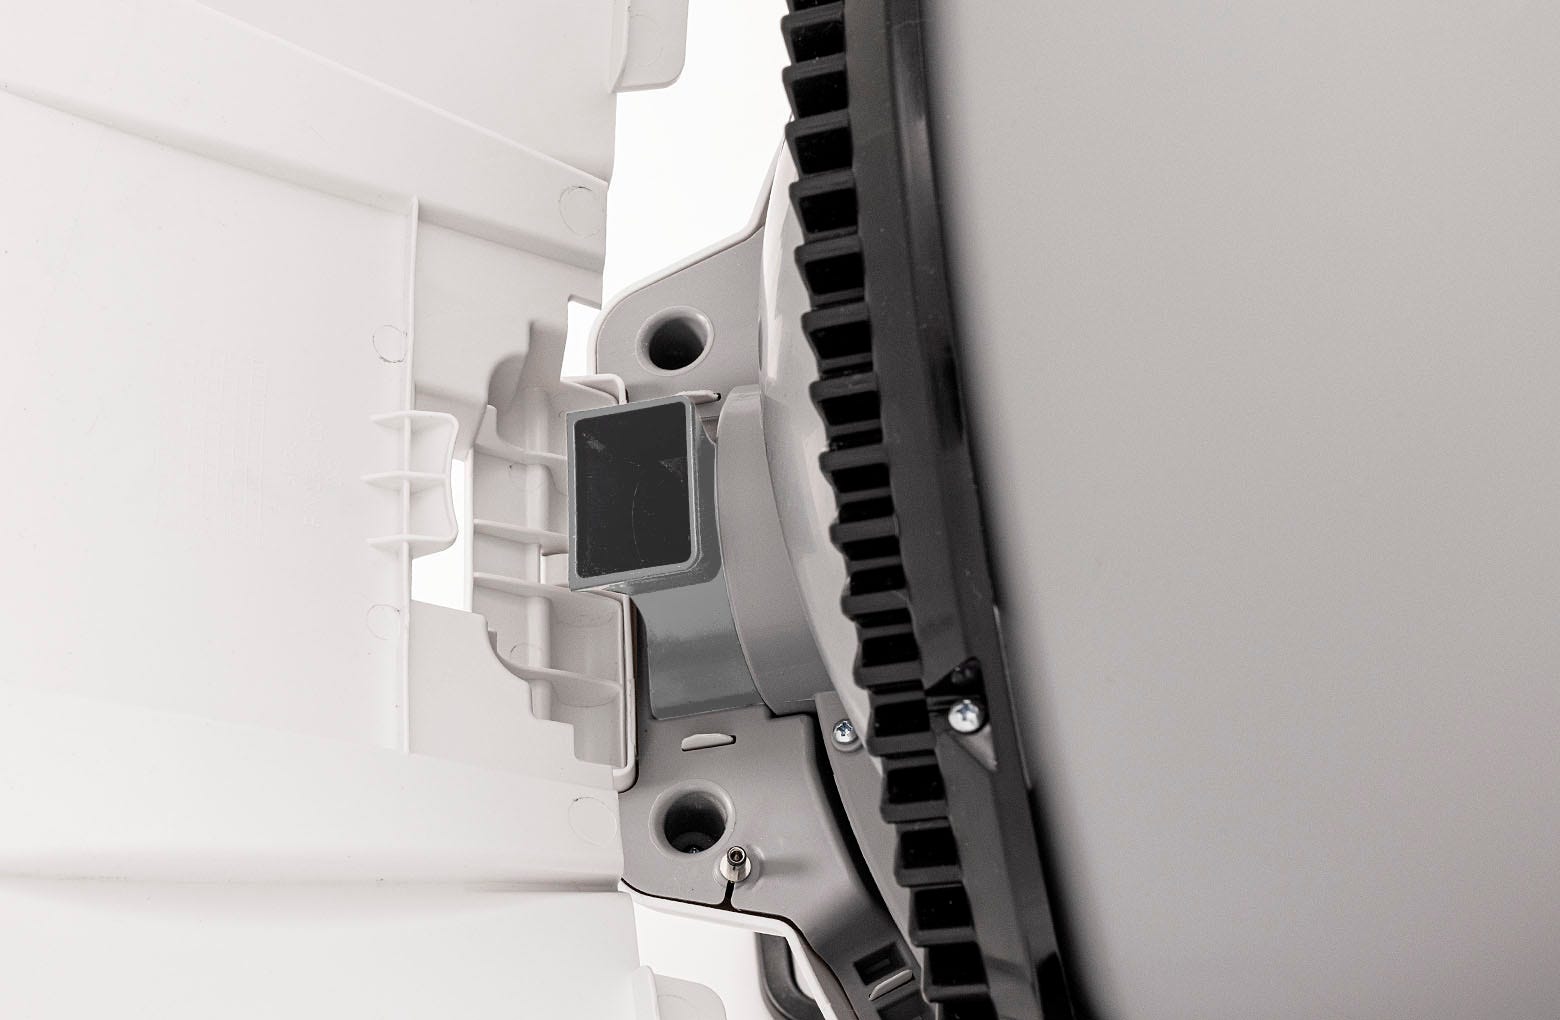
Check the LitterHopper motor for obstructions
Check and remove any obstructions or foreign objects from the following areas to inspect and clear the jam:
The LitterHopper motor area near the flexible flaps
Please note: If a foreign object is stuck in the flap area, use a tweezer or small pliers to remove it. Be careful not to damage or scratch the flaps.

The dispensing area inside the key
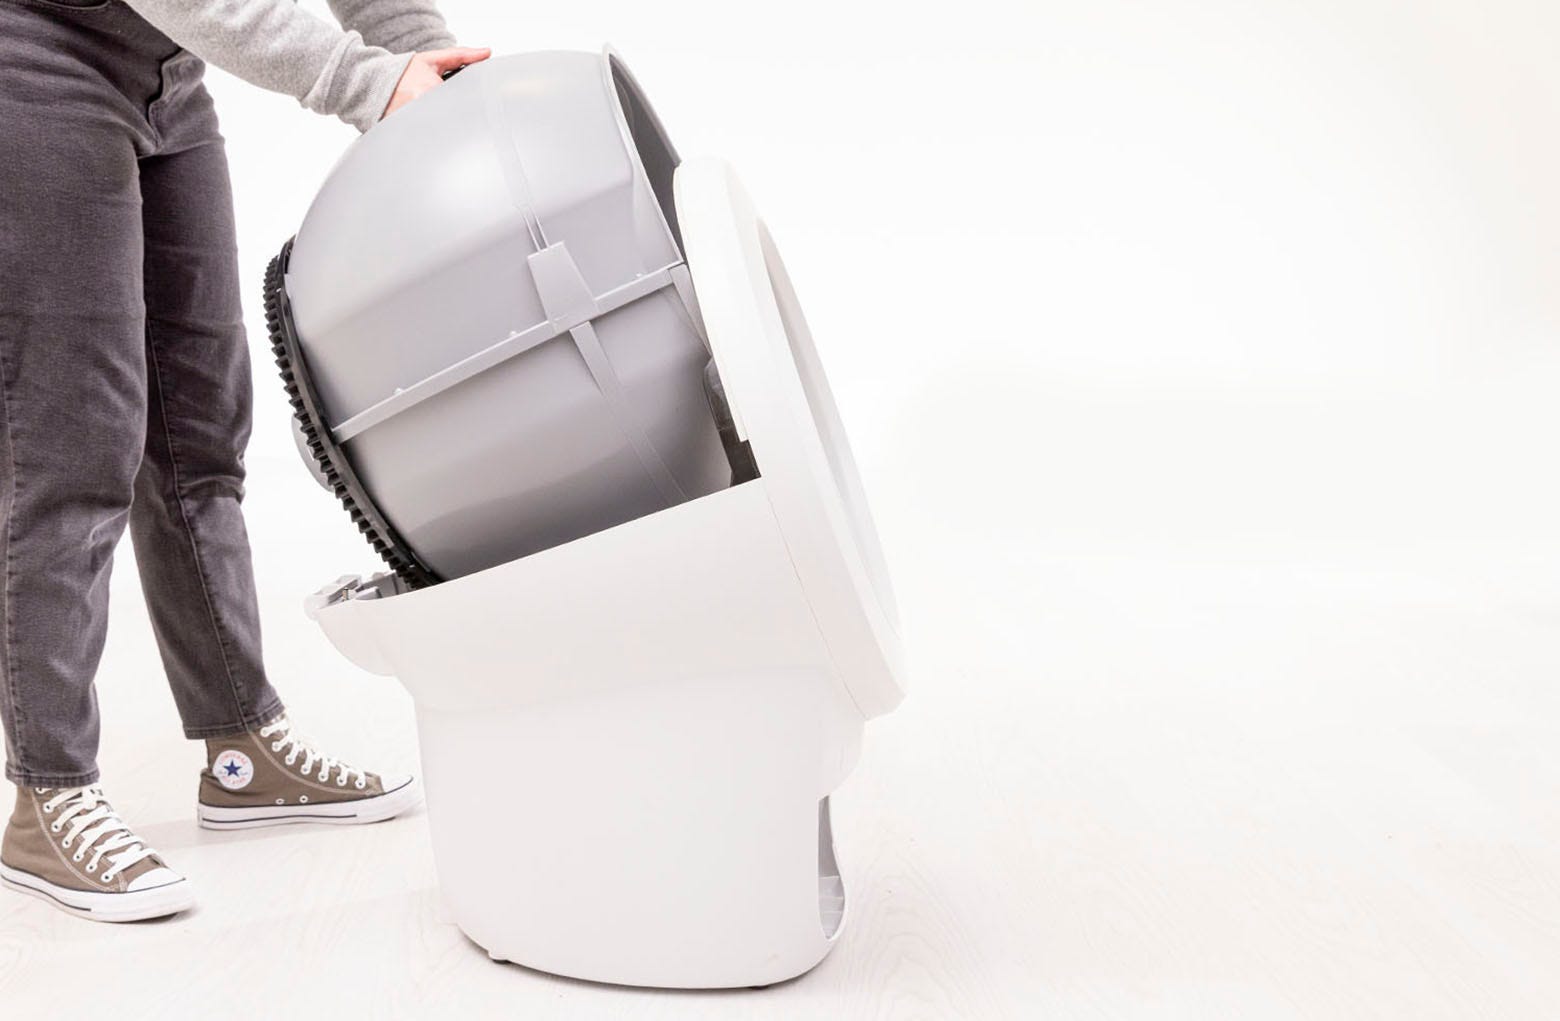
Disassembly
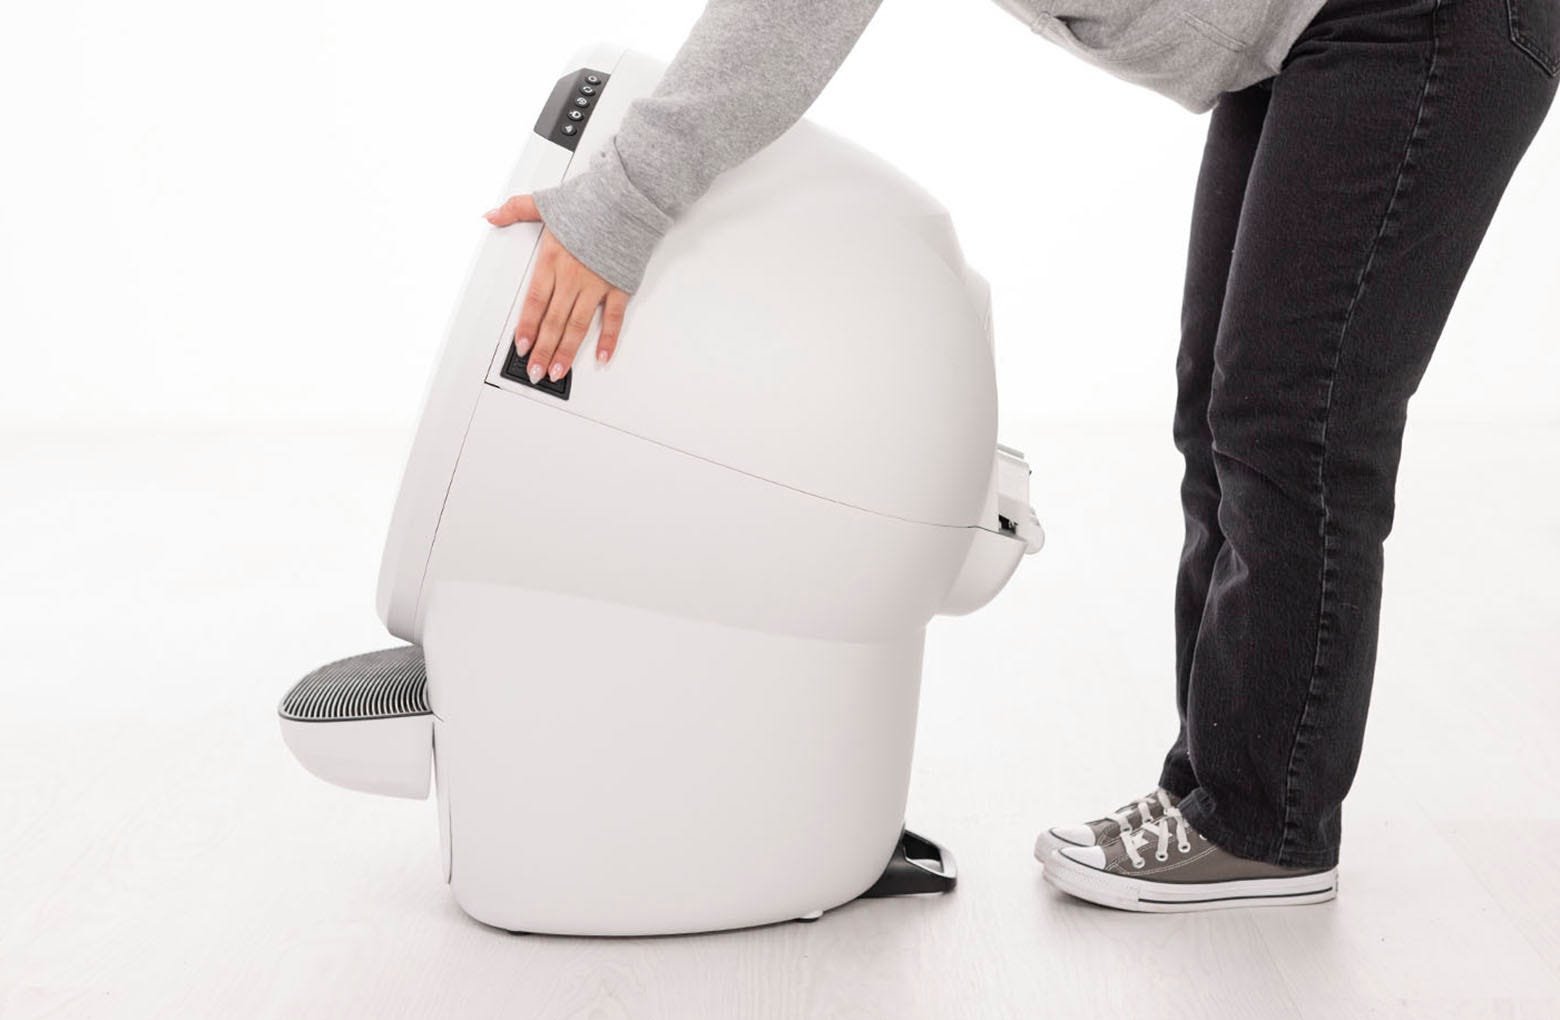
- Press and hold the latches on both sides of the bonnet, then lift and rotate the bonnet to its open position.
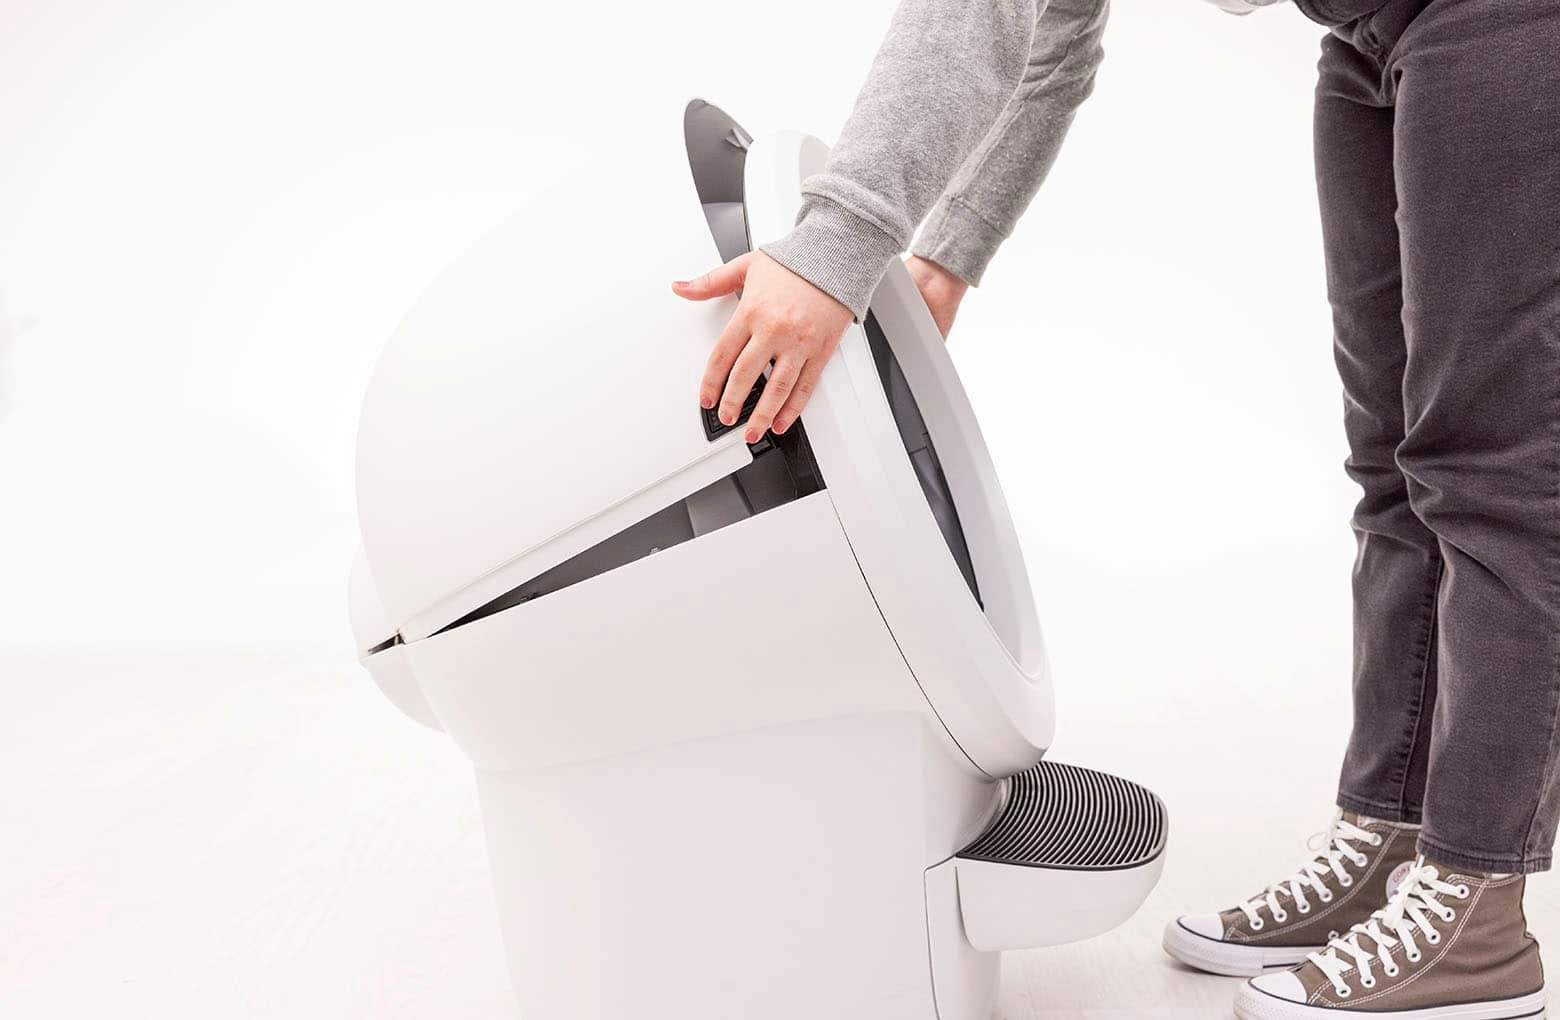
Lift the bonnet up and out of the hinge to remove.
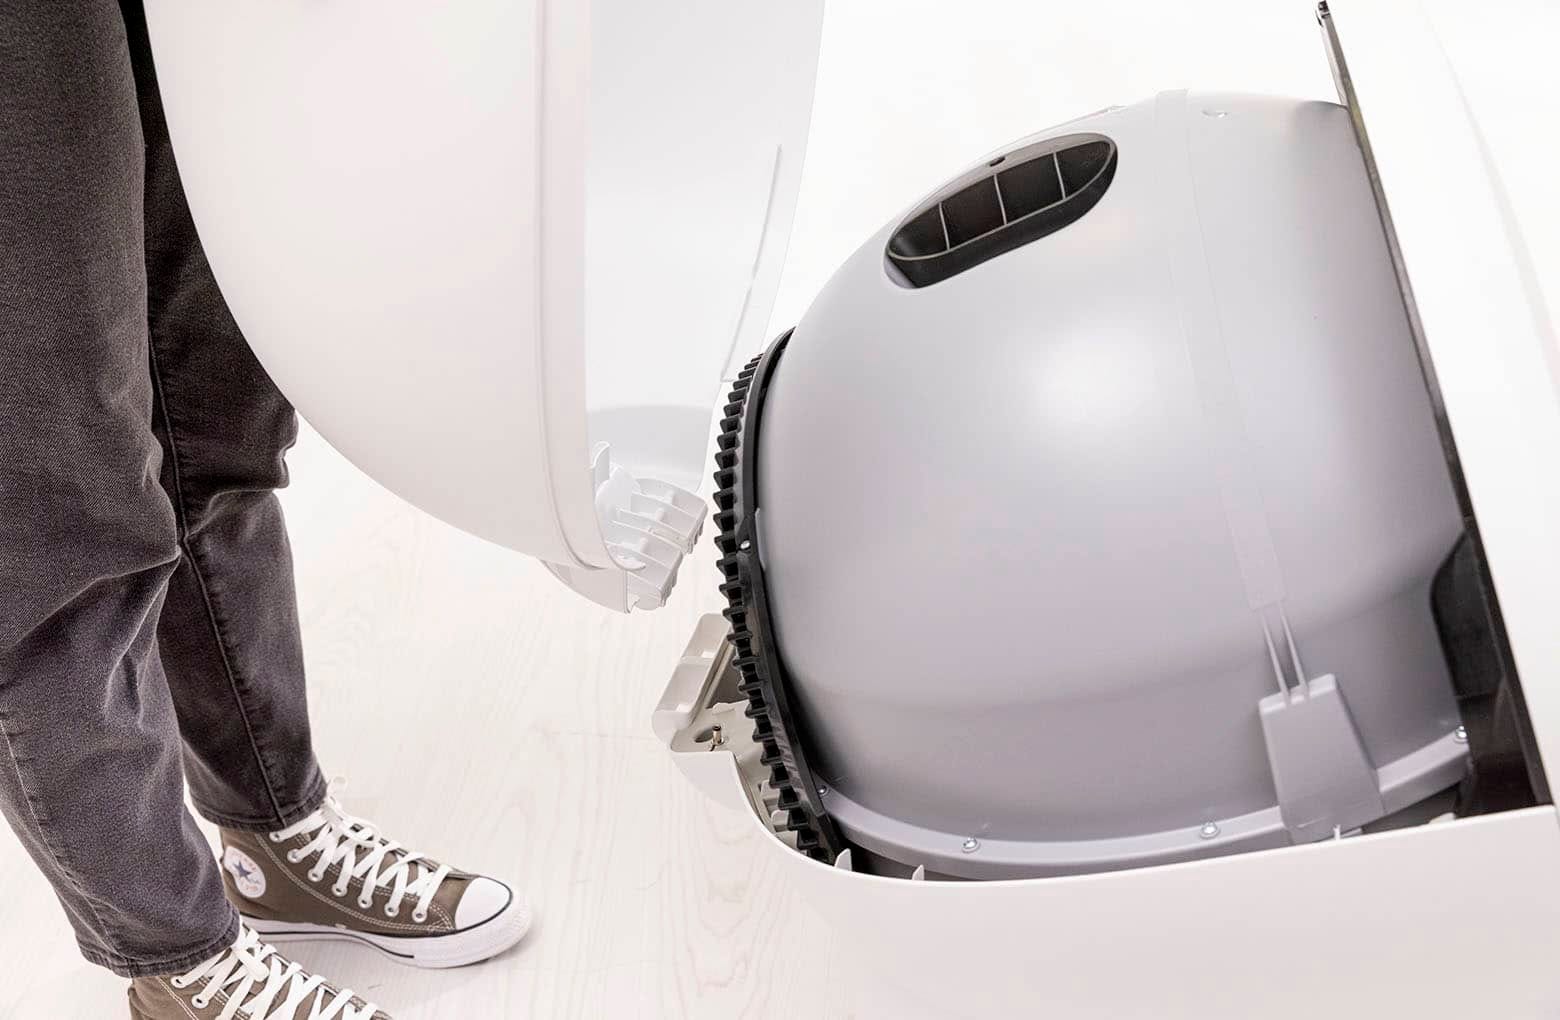
- If you have any accessories installed, remove them from the bezel.
- While holding the key in place, lift the globe up by the black handle and remove it from the base. The key is designed to fit loosely in the globe, thus allowing the globe to rotate freely around it.
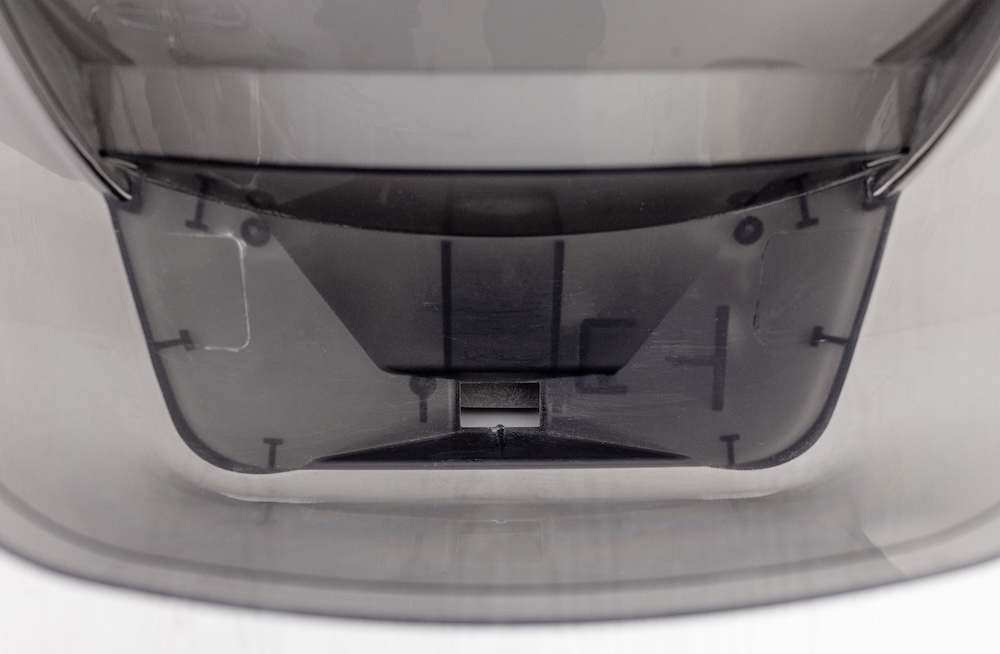
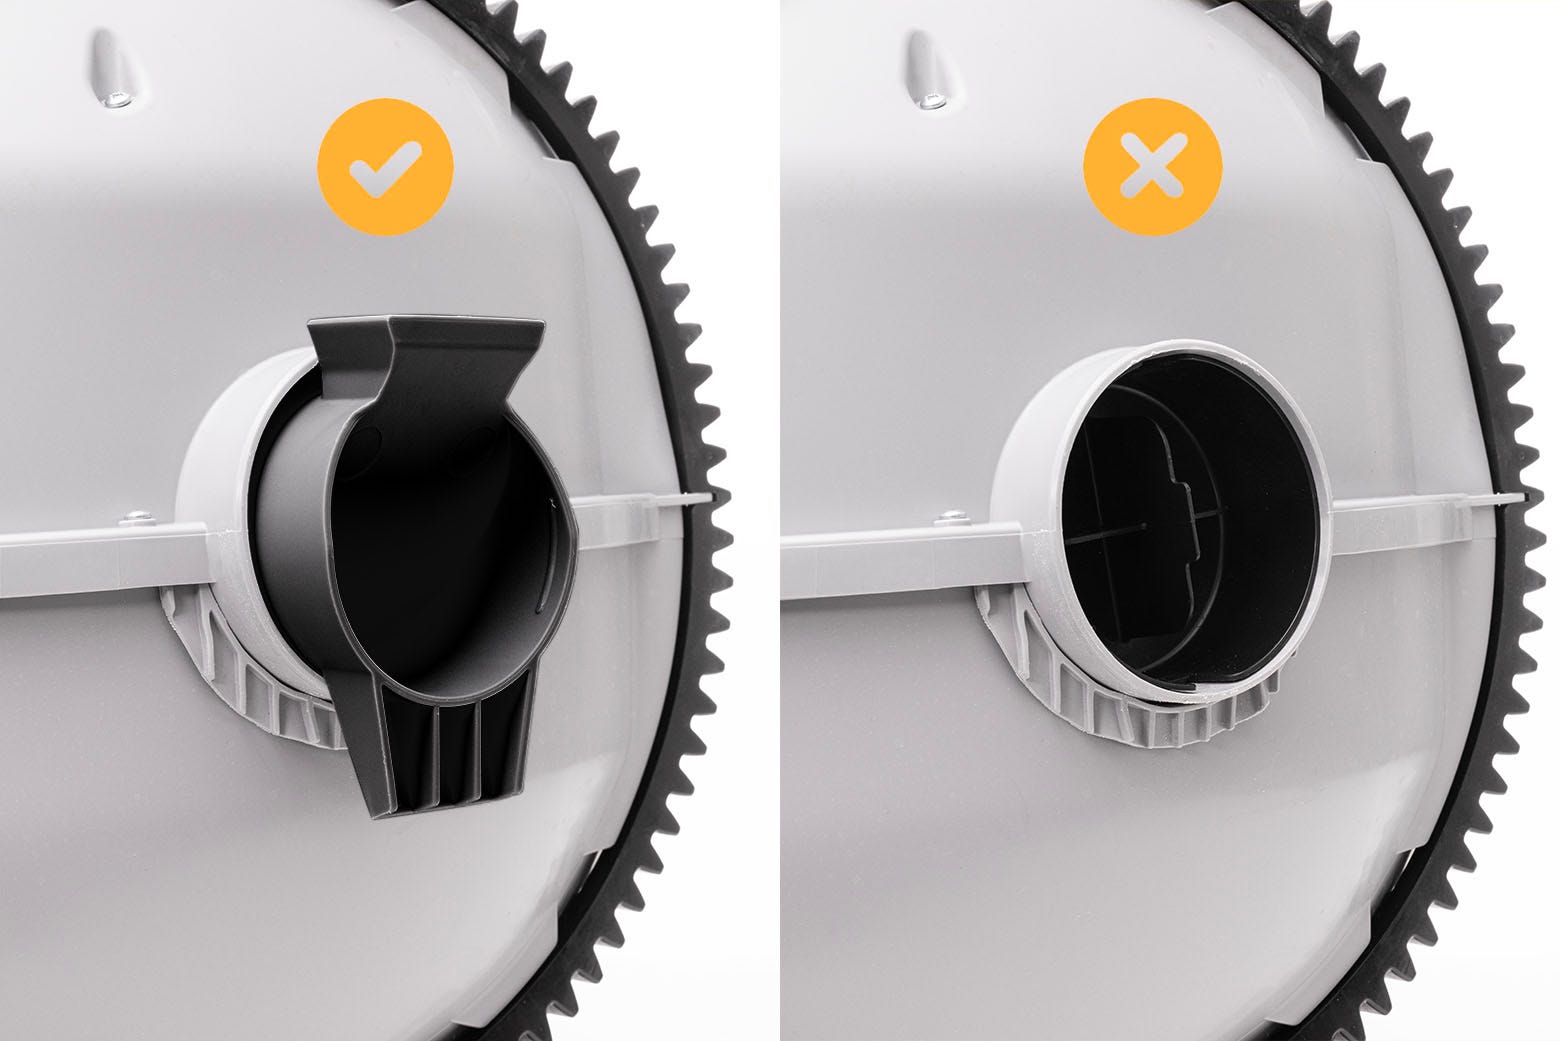
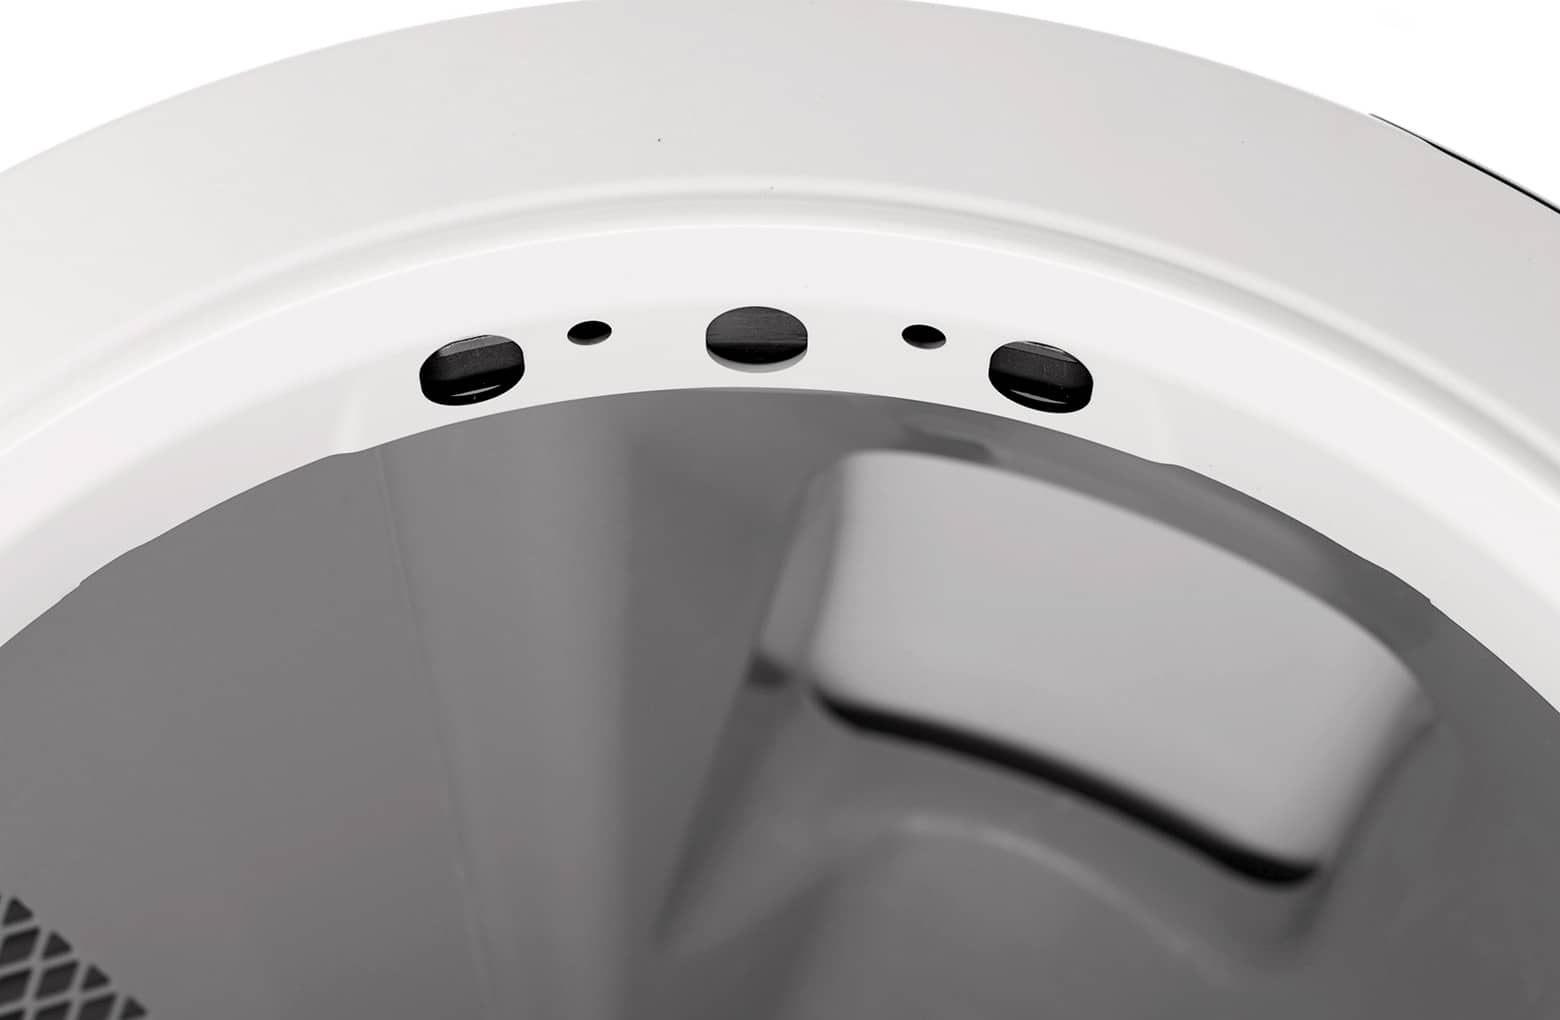
Check the globe key and base pockets
There may be a blockage between your LitterHopper and Litter-Robot, preventing LitterHopper from dispensing litter into the globe.
- Remove the globe key to check if the globe cap was left inside the globe. If it's there, pull the tab to remove it.
- Vacuum any dust, loose litter, or clumps from the power jack, circular pockets, base hinge pocket, and on the base.

Regularly inspect and vacuum the dispensing area to avoid recurrence of errors.
- Place the globe key into the rear of the globe with the rectangular opening facing up.
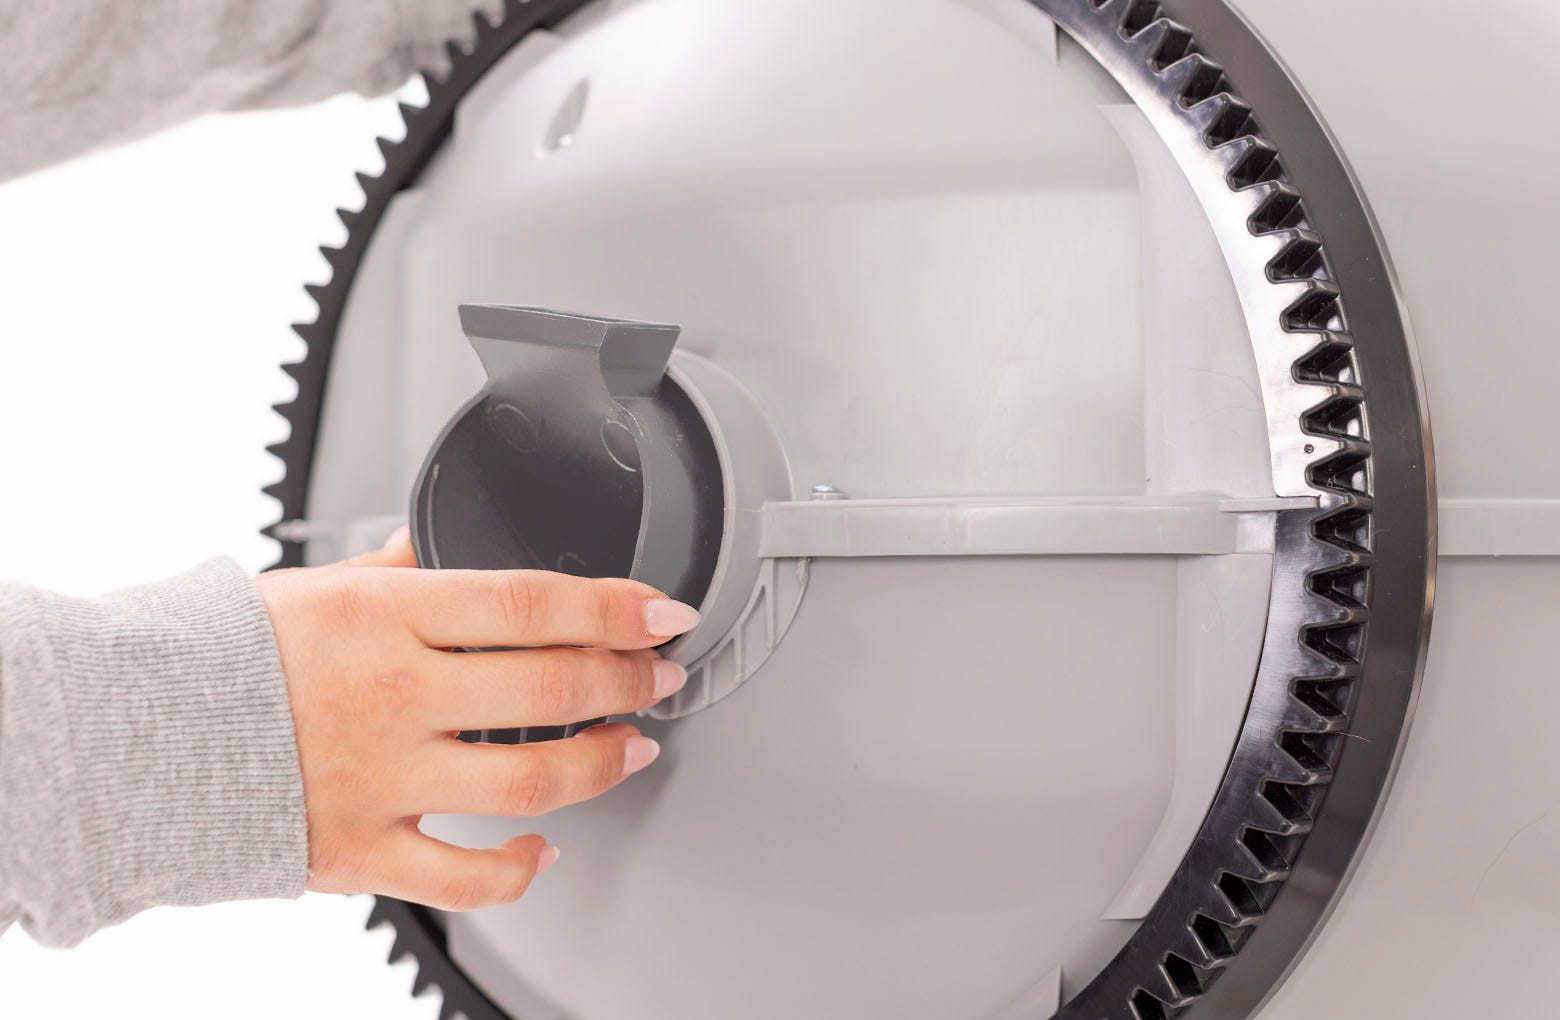
- While holding the key in place, lift the globe and place it back into the base. The key must drop down into the pocket completely.
Reassembly
- Place the bonnet into the hinge on the base. The bonnet should then stay upright on its own.

- Rotate the bonnet downward over the globe and push down on the bonnet from the top to make sure it is latched and secure. The key must protrude through the opening in the back of the bonnet.
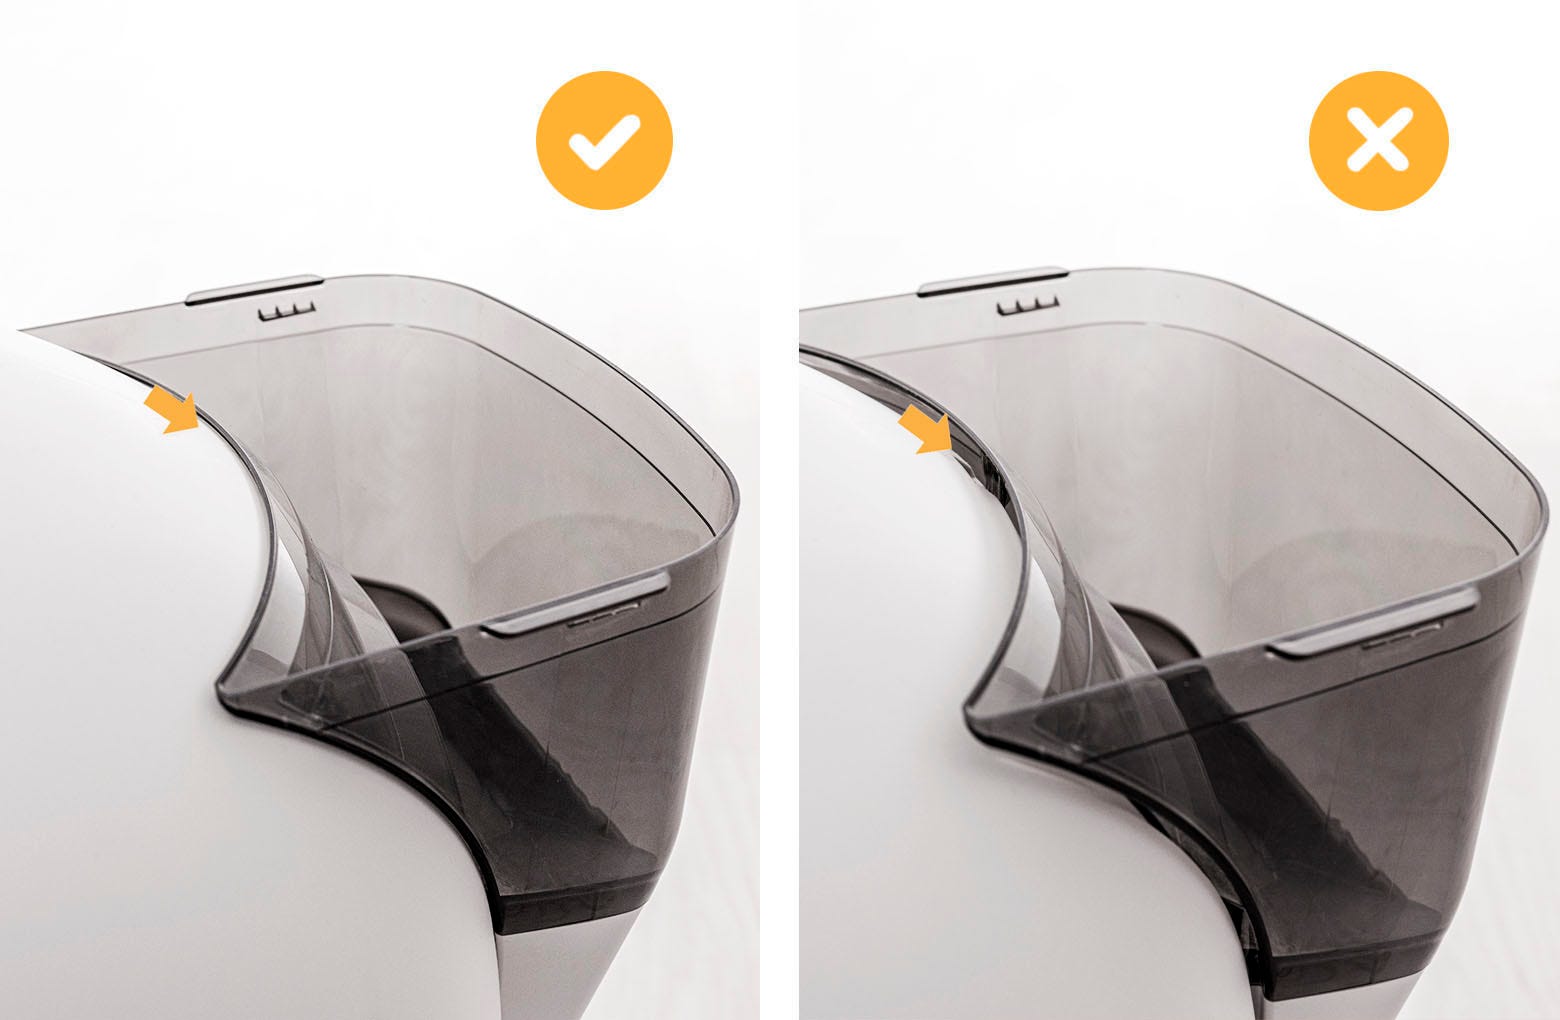
- Verify the bonnet and base are installed correctly.
- The bonnet hooks must be under the base hinge feature.
- The bonnet and base should align with no gap between them.
- The bonnet hooks must be under the base hinge feature.
Reinstall the LitterHopper
- Align the posts on the LitterHopper with the circular pockets and lower it into place to ensure a good electrical connection between the power plug and the power jack.
- Ensure there is no gap between the bottom of the LitterHopper and the Litter-Robot base.
Verify the hook tab engages the slot in the bonnet.
Fill the LitterHopper with litter up to the fill line. Install the lid and make sure it is securely attached to the LitterHopper.
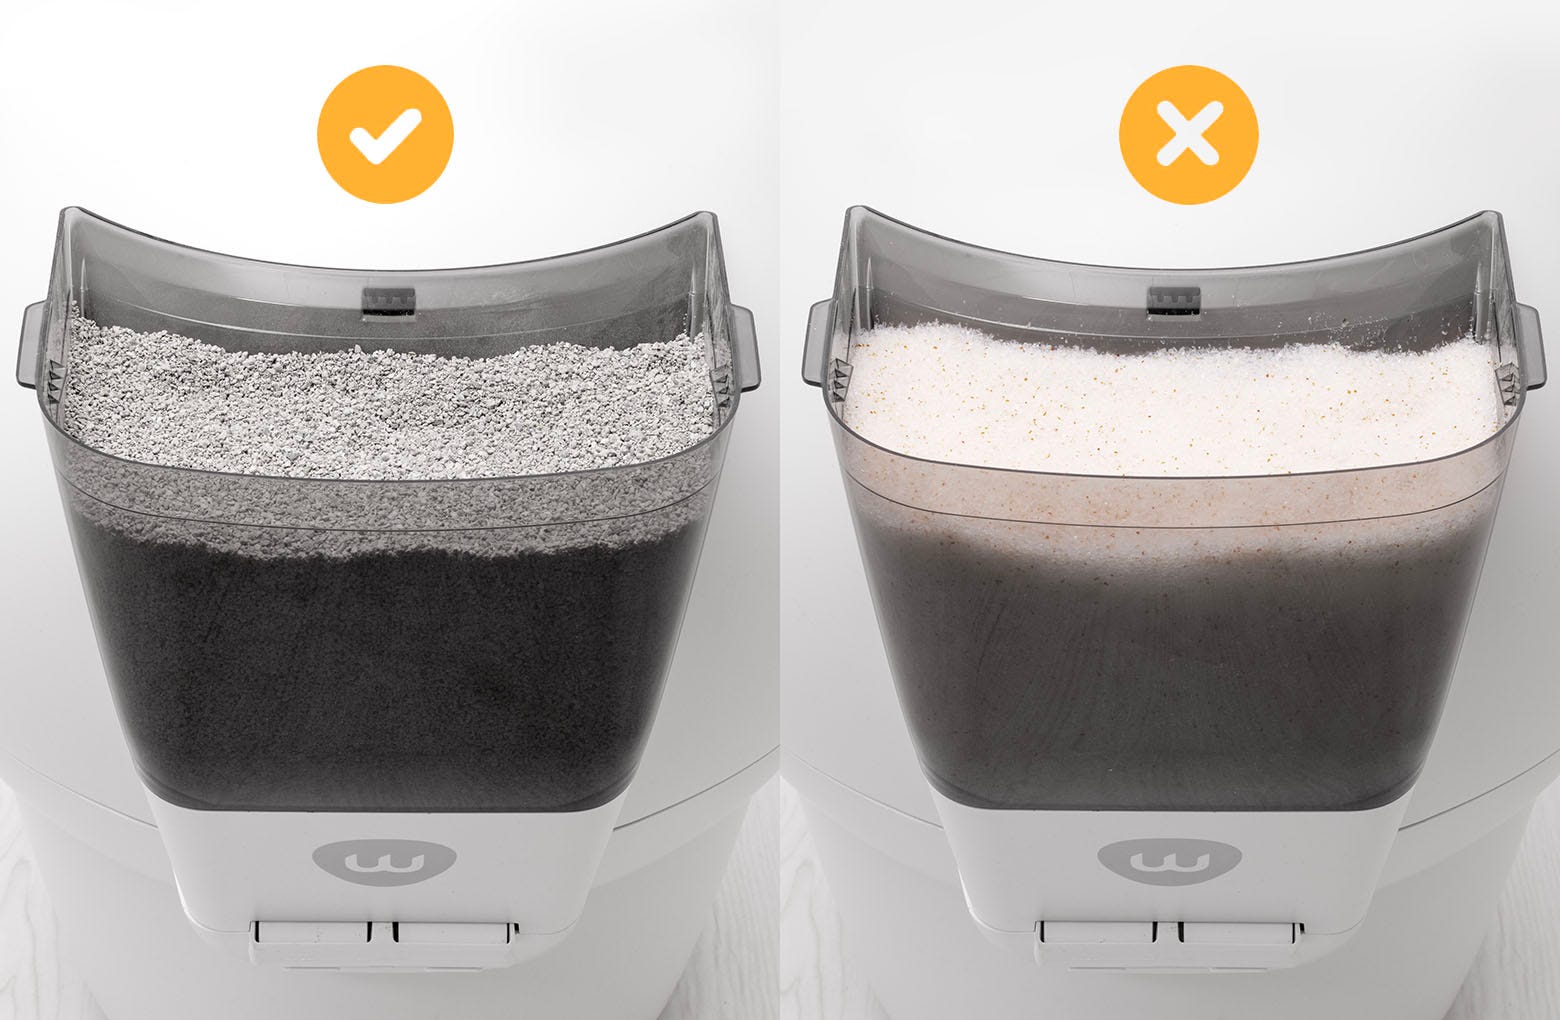
We recommend using clay-clumping litter in Litter-Robot 4. Translucent or white-colored litter (most often seen in crystal litter) may impact the litter level and Drawer Full Indicator (DFI) accuracy.
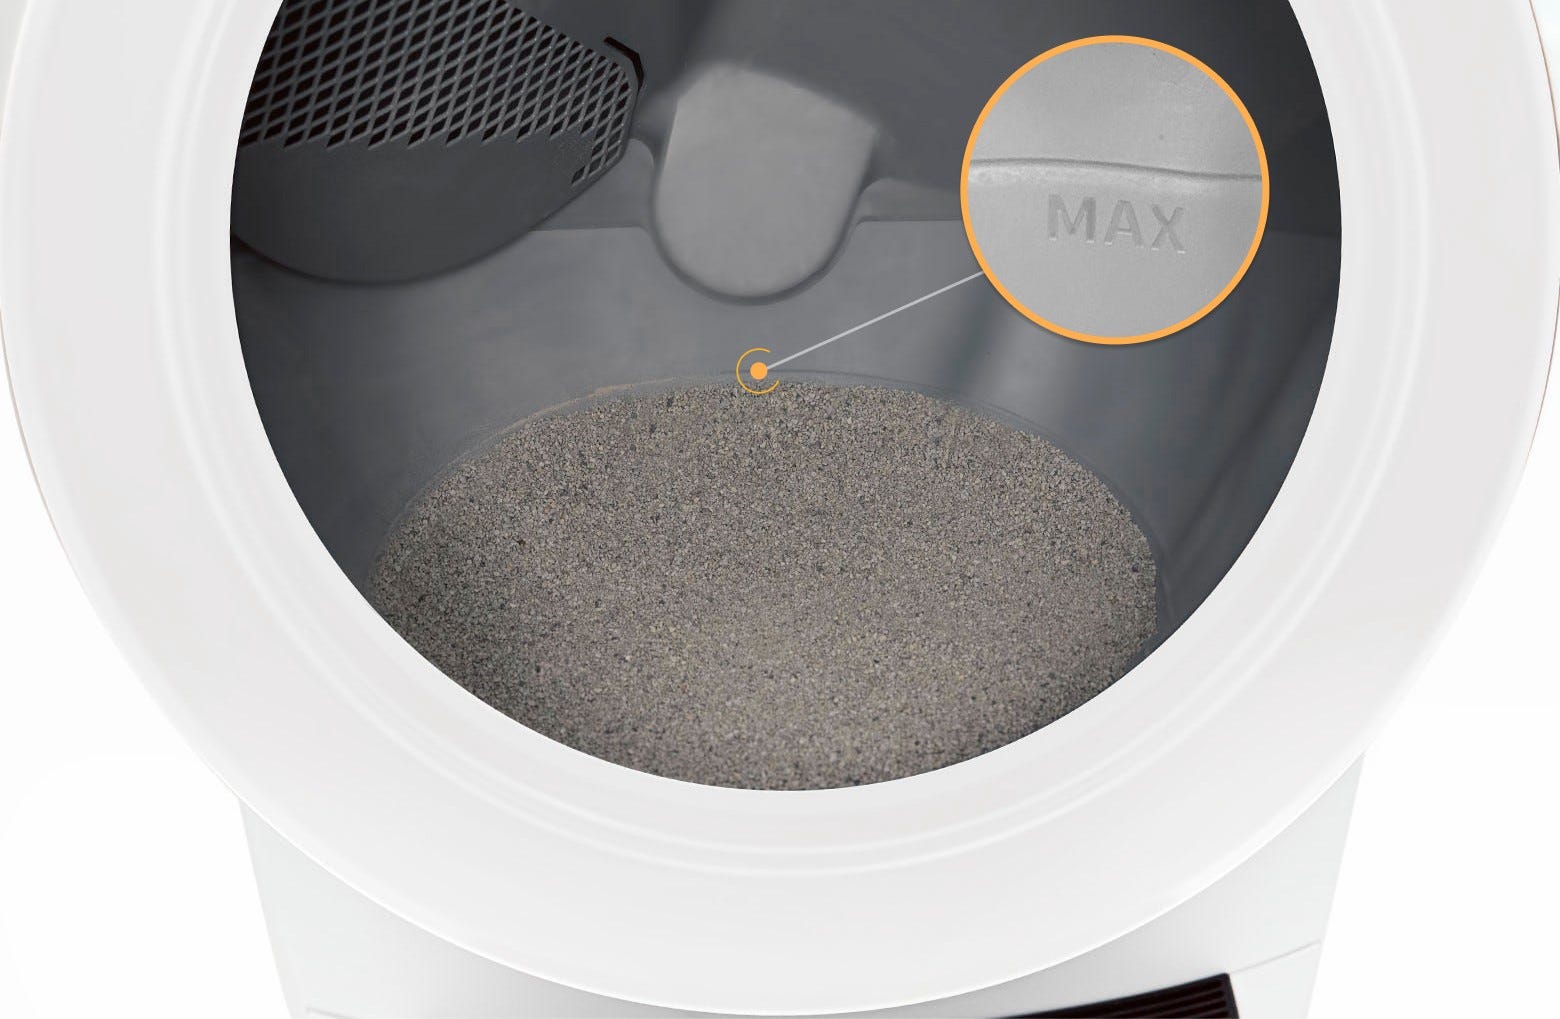
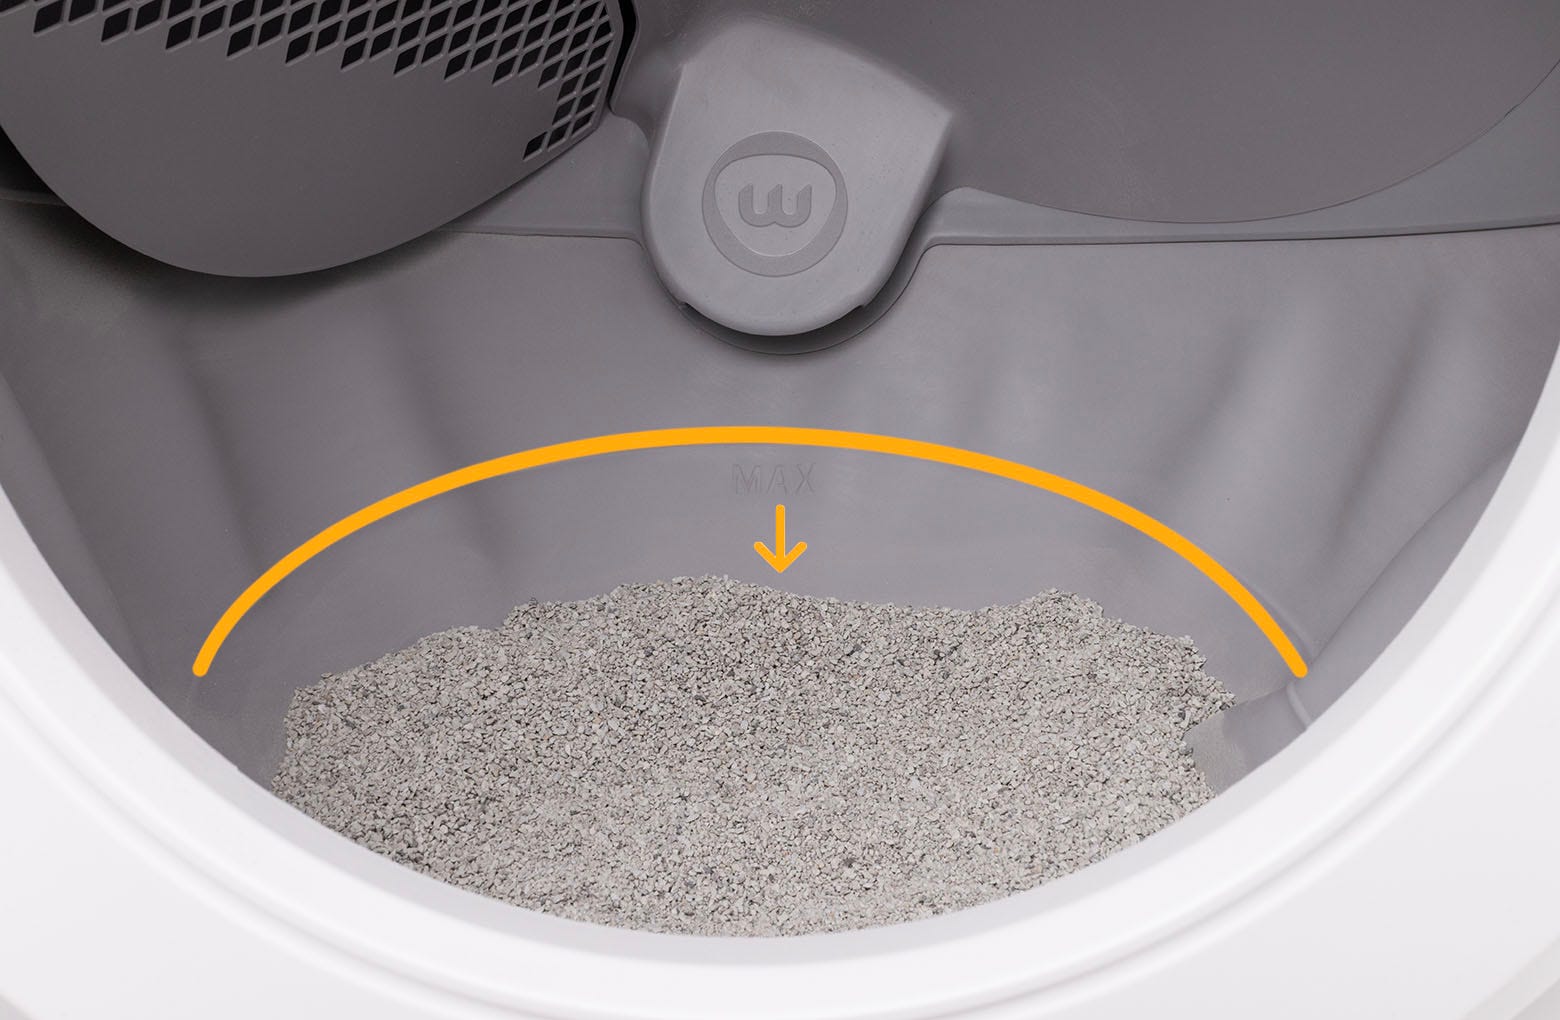
Ensure the optimal litter level
- Add litter to the globe until it is just below the MAX fill line, making sure that the fill line is still visible.
Plug the unit in and power it on.
- Press the Cycle button to run a Clean cycle and sift any excess litter into the waste drawer. Once the globe returns to the home position, this will be your new 'default' litter bed level after the calibration is complete.
Clean the curtain sensors
- Vacuum the bezel area where the sensors are located. Debris, such as dust or cat fur, can interfere with the operation of the curtain sensors. This can cause the unit to inaccurately measure the waste drawer level and litter level, as well as cause false cat detects.
Visit our Laser sensor cleaning instructions to learn how to properly clean your Litter-Robot's curtain sensors.
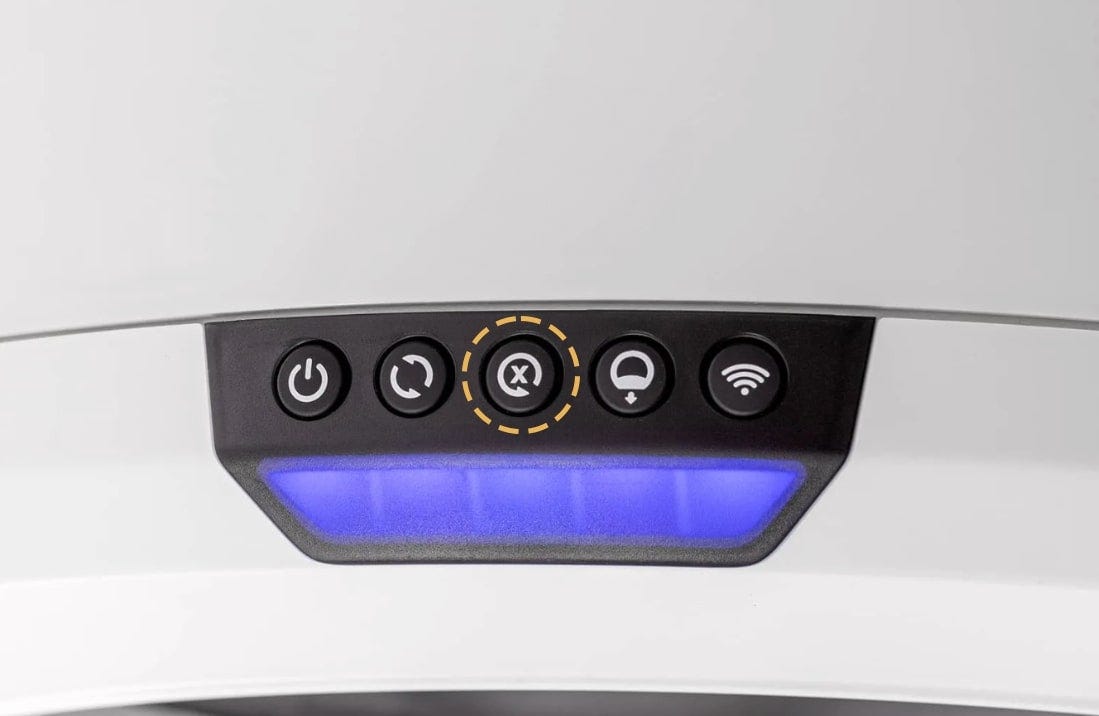
- Short press the Reset button. Litter-Robot will display a solid blue light.
Any time you affect the weight or placement of the unit (including emptying the waste drawer, adding or removing litter, or cleaning or moving the unit), press the Reset button to ensure the weight sensors will detect your cat and cycle properly.
Calibrate the optimal litter level
Confirm in the Whisker App that your Litter-Robot 4 is updated to firmware version 1175.5021.292 or above.
Visit our Firmware update instructions to learn how to update your Litter-Robot's firmware.
Press and hold the Cycle, Reset and Empty buttons simultaneously for 3 seconds to initiate the calibration.
The unit should flash white, perform a Clean cycle, then reset the optimal litter bed level.
Enable the LitterHopper and run a test cycle
Re-enable the LitterHopper by long-pressing the Cycle and Connect buttons on the control panel for 3 seconds. The unit should flash white, then display a solid blue light, indicating the LitterHopper is ready to dispense.
Remove litter from the globe until the litter level is significantly below the MAX fill line. The auto-dispense feature WILL NOT activate unless the litter level in the globe is low.
Test the auto-dispense:
Short press the Reset button. Litter-Robot will display a solid blue light.
Short press the Cycle button to run the first cycle. Your Litter-Robot 4 will detect the litter level inside the globe as low and save it to memory.
Once Litter-Robot is in the home position, press the Cycle button again to run another cycle.
Successful: If your LitterHopper automatically dispenses litter and displays a blue light bar, you’ve been successful.
Unsuccessful: If the LitterHopper does not automatically dispense litter after a cycle, you are still seeing a blue and purple alternating light bar, or the app displays the same error message, there's likely an issue with your LitterHopper or Litter-Robot 4.
What do I do?
The LitterHopper automatically includes a 1-year warranty, regardless of if your Litter-Robot 4 is still under warranty. If you purchased your Litter-Robot 4 and LitterHopper together and bought the WhiskerCare Extended Warranty, the LitterHopper will be covered under your WhiskerCare Extended Warranty. Please contact our Customer Experience Team for further assistance.
Didn't find what you're looking for?
Live support available Mon-Fri: 9AM-9PM EST and Sat-Sun: 9AM-5PM EST, or submit a ticket anytime.