The store will not work correctly in the case when cookies are disabled.
Litter-Robot 5 & Pro: Calibrate the drawer full indicator
If your Litter-Robot 5 displays a Waste Drawer Full message after it has been emptied, or if the waste drawer gauge in the Whisker app or LCD screen seems inaccurate (within 5%), follow this guide to calibrate and reset the Litter-Robot 5 waste drawer and waste level readings.
Quick links
Before you begin
Make sure:
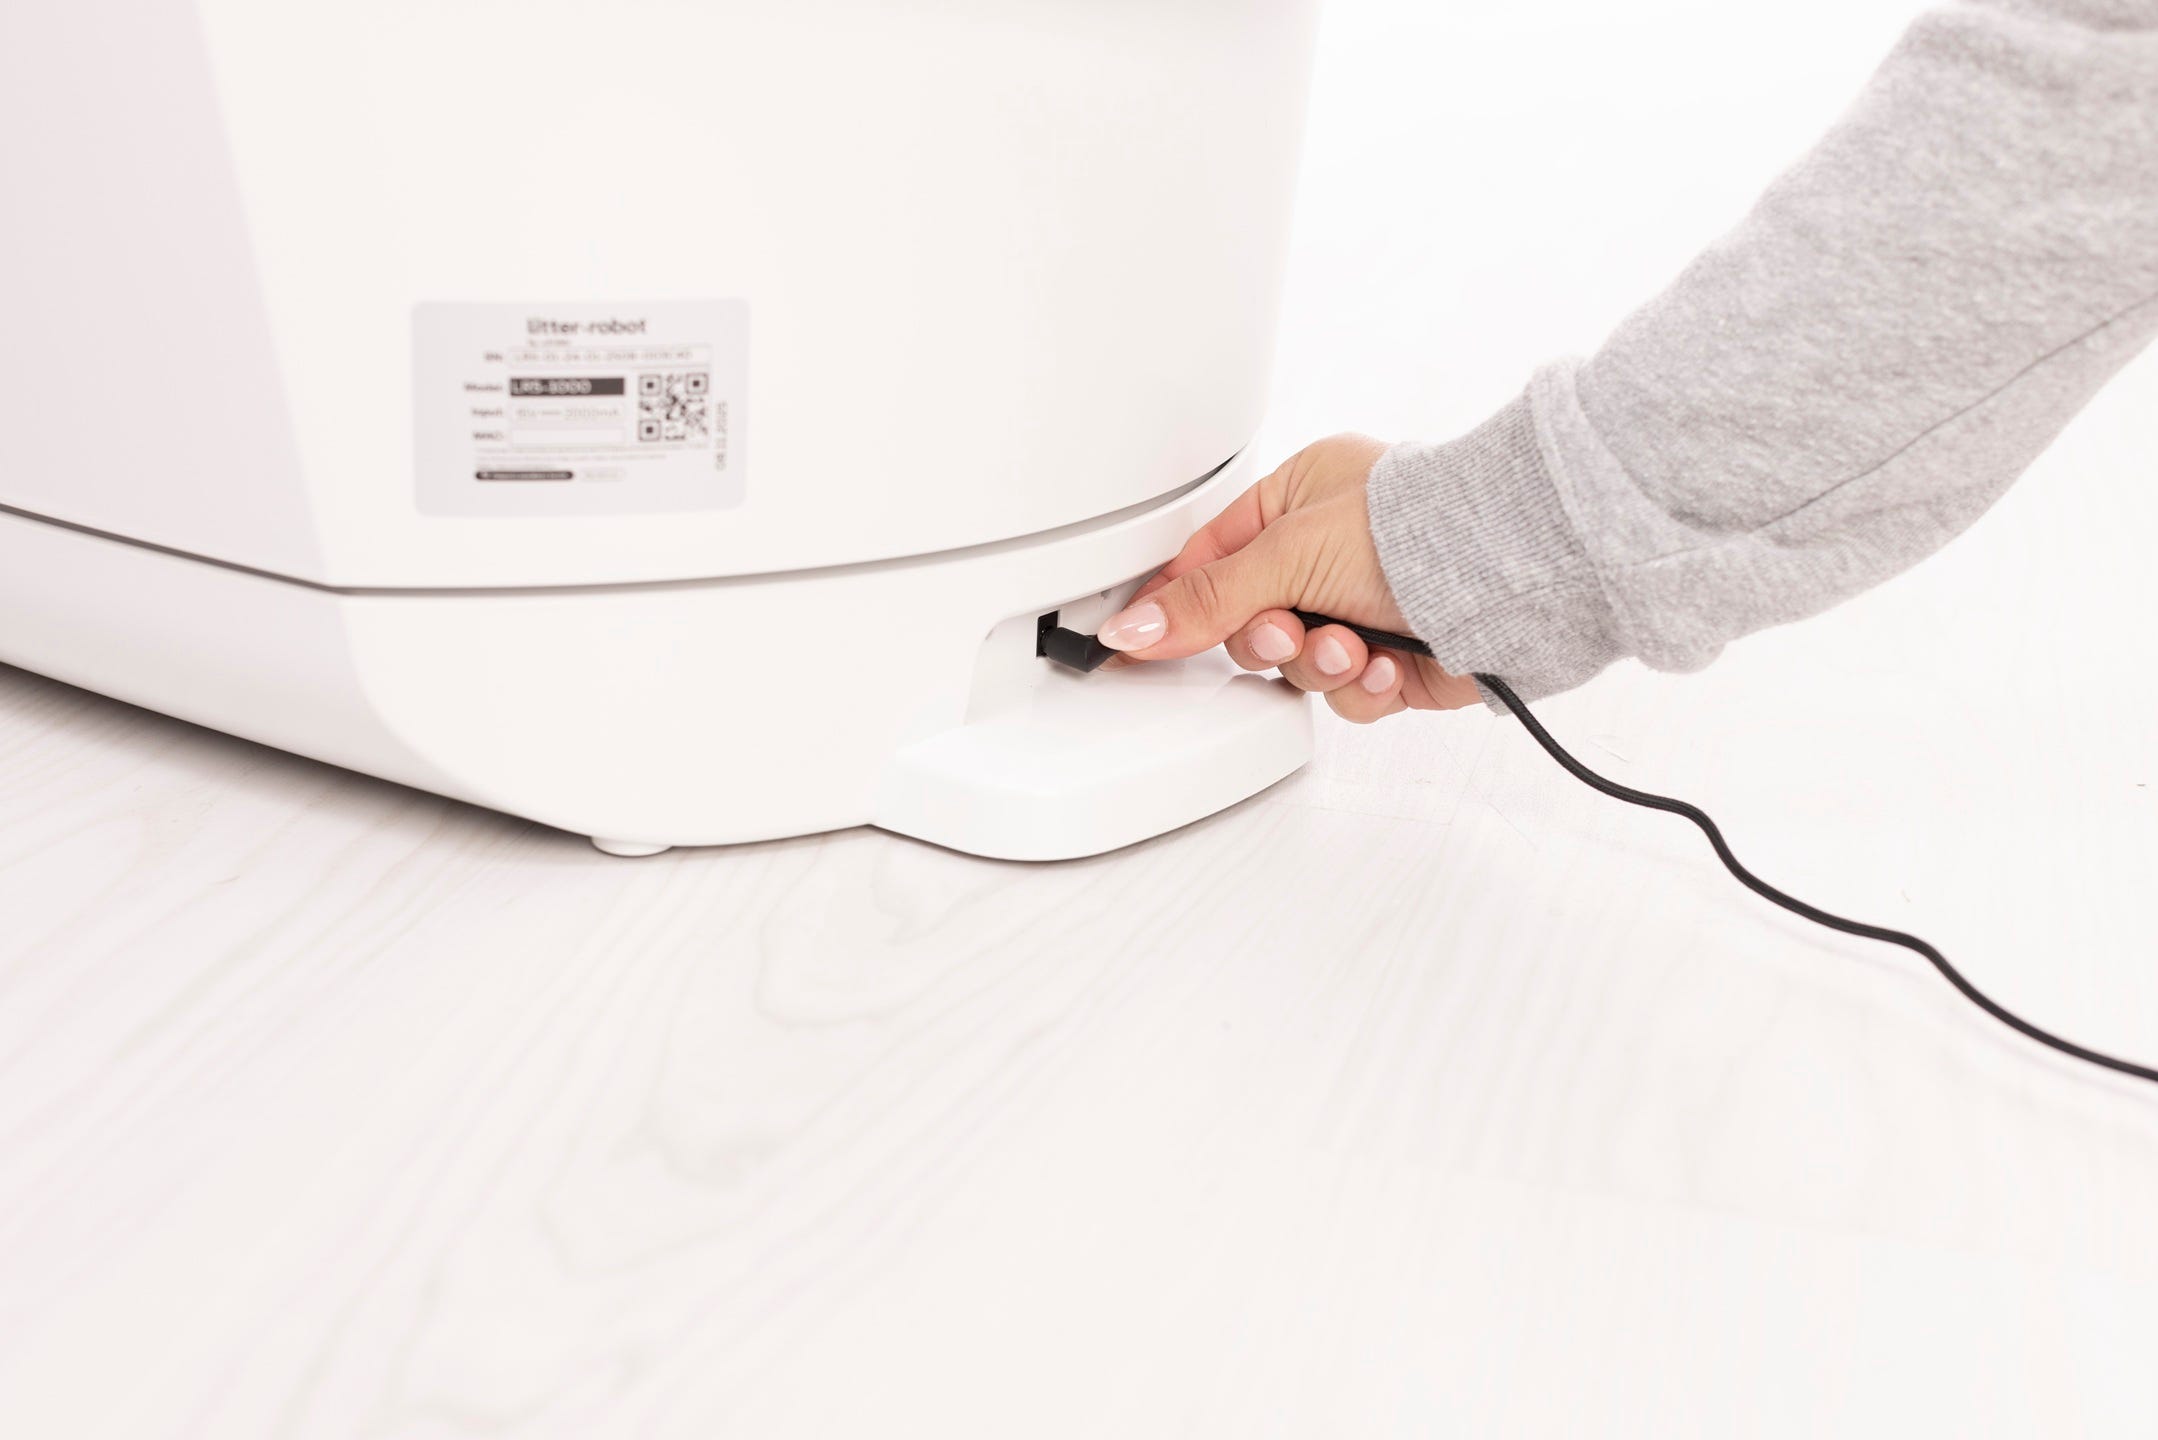
Your unit is plugged in.
Your unit is connected and online.
Your firmware is up-to-date. (If the app does not show an update option, you already have the latest version.)
How the drawer full indicator works
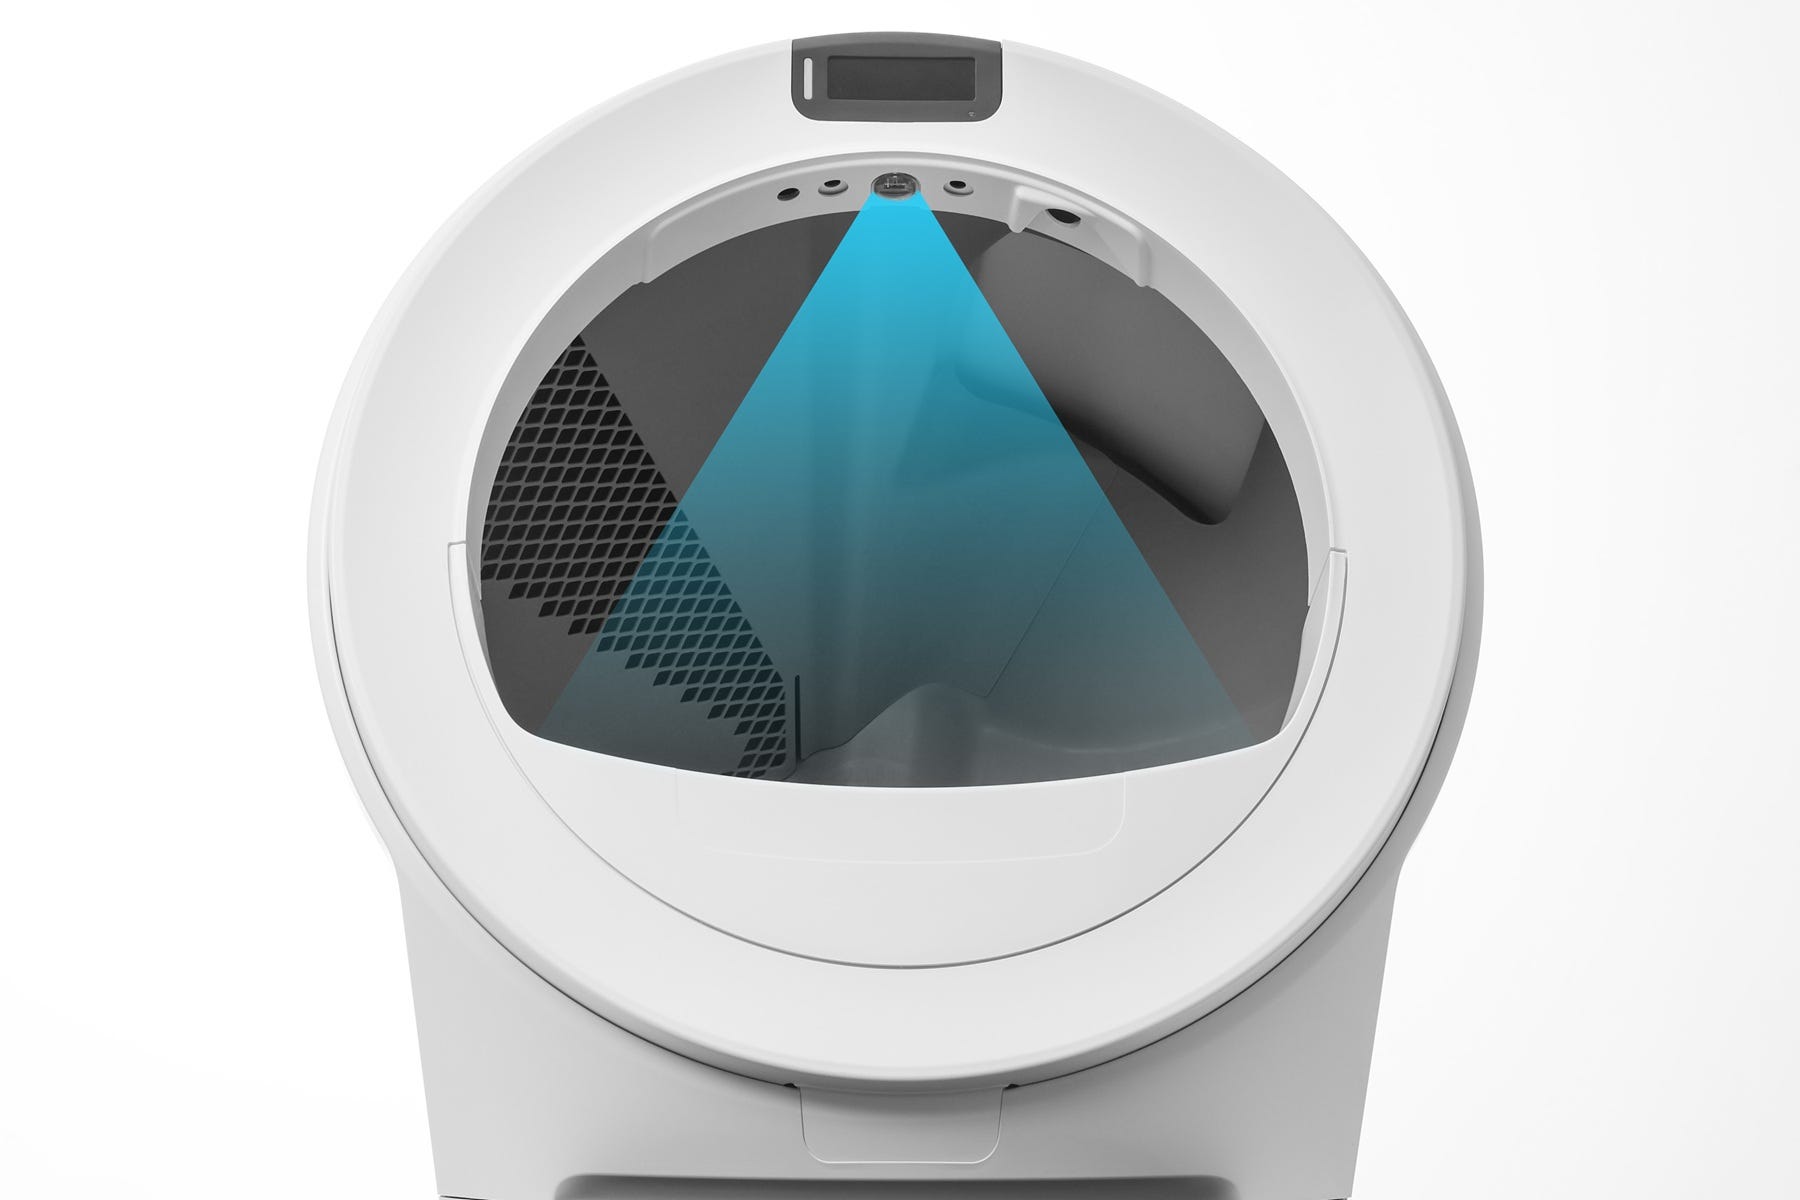
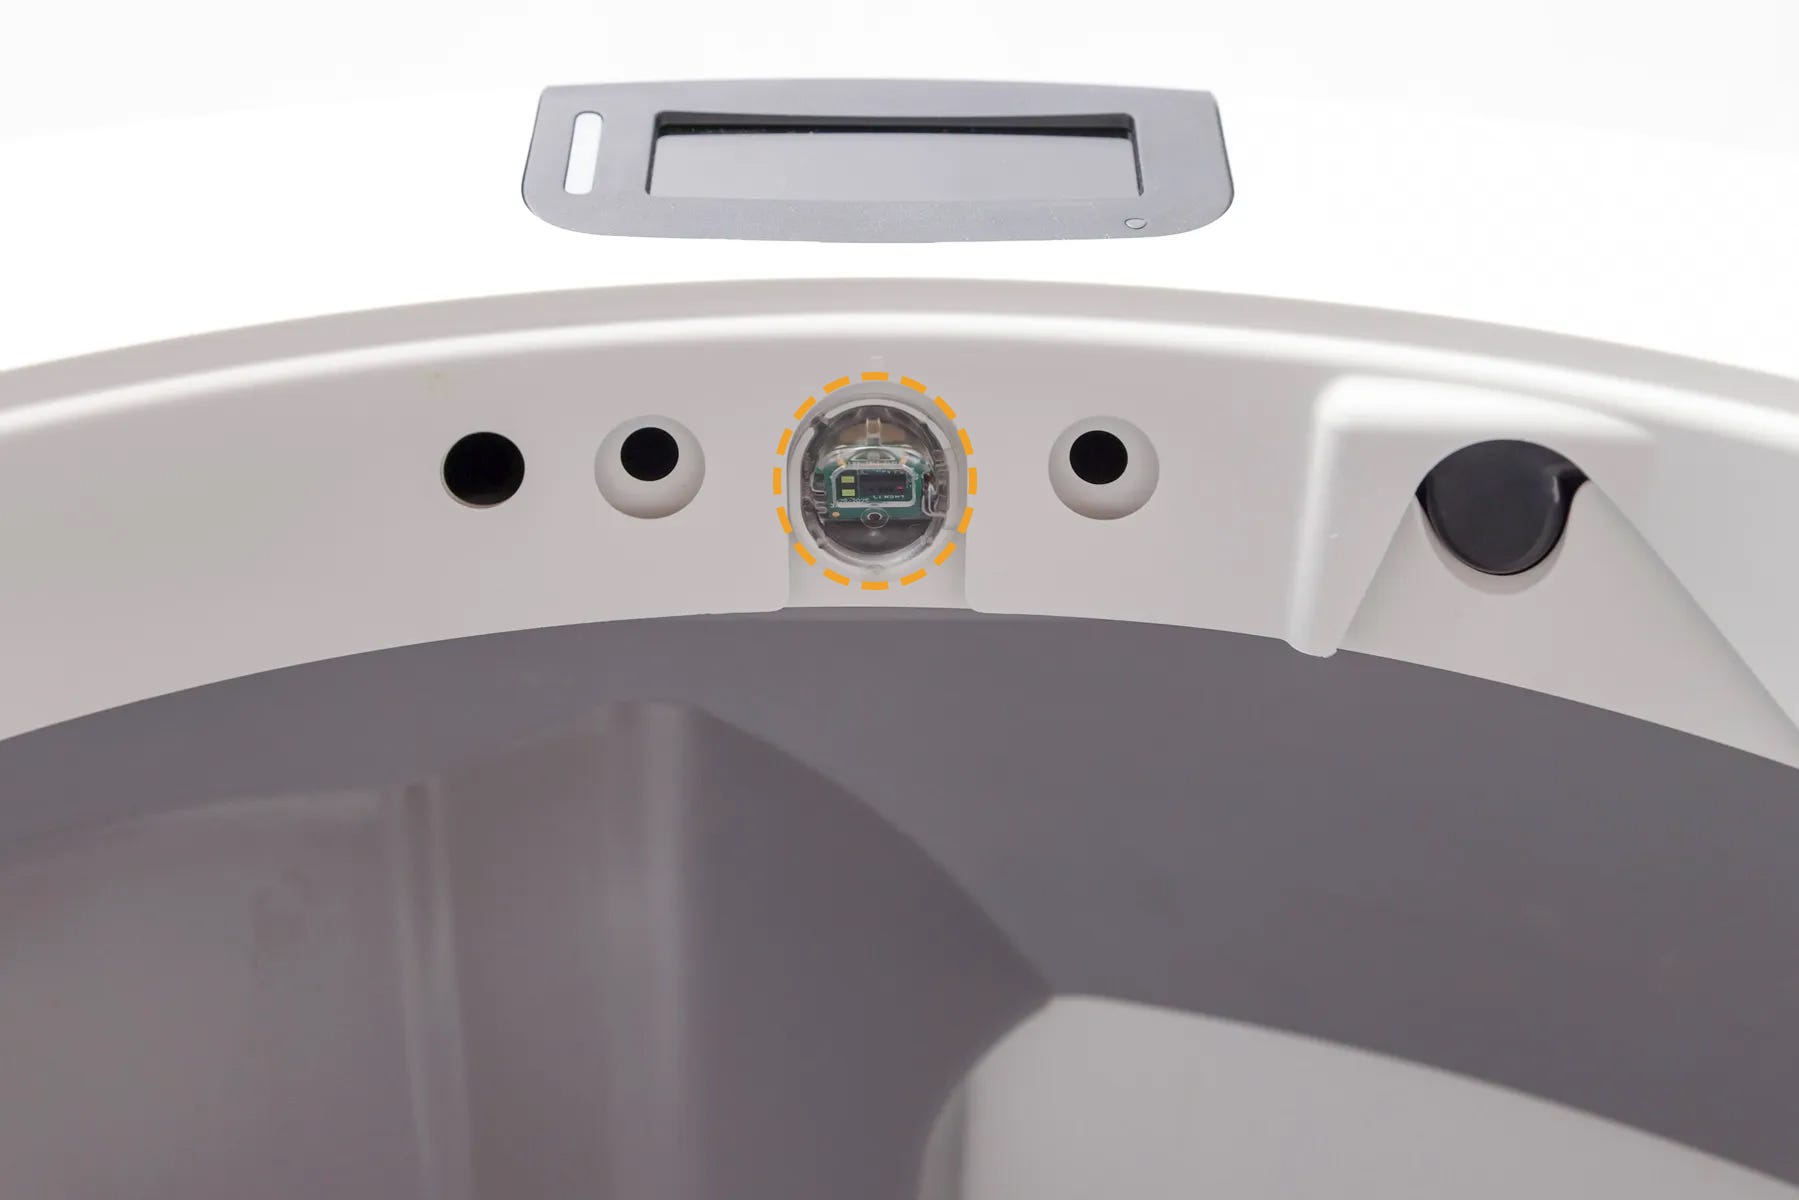
Litter-Robot 5 is equipped with OmniSense® detection, which combines optical and weight sensors to provide real-time litter and waste monitoring.
A curtain sensor, located in the bezel at the top of the globe entrance, looks down into the waste drawer during each Clean Cycle to measure the waste level.
When the drawer is full, the LCD screen will display a Waste Drawer Full message and sends a notification in the Whisker app.
The robot will cycle two additional times before it stops automatic cycling until the drawer is emptied.
Waste drawer liner tips: White bags work best. As clumps accumulate, readings become more accurate. We recommend Litter-Robot Waste Drawer Liners with drawstrings for easy disposal.
If you have emptied the drawer and are still seeing a drawer full indicator or inaccurate waste gauge readings in the Whisker app or LCD screen (within 5%), calibration may be needed.
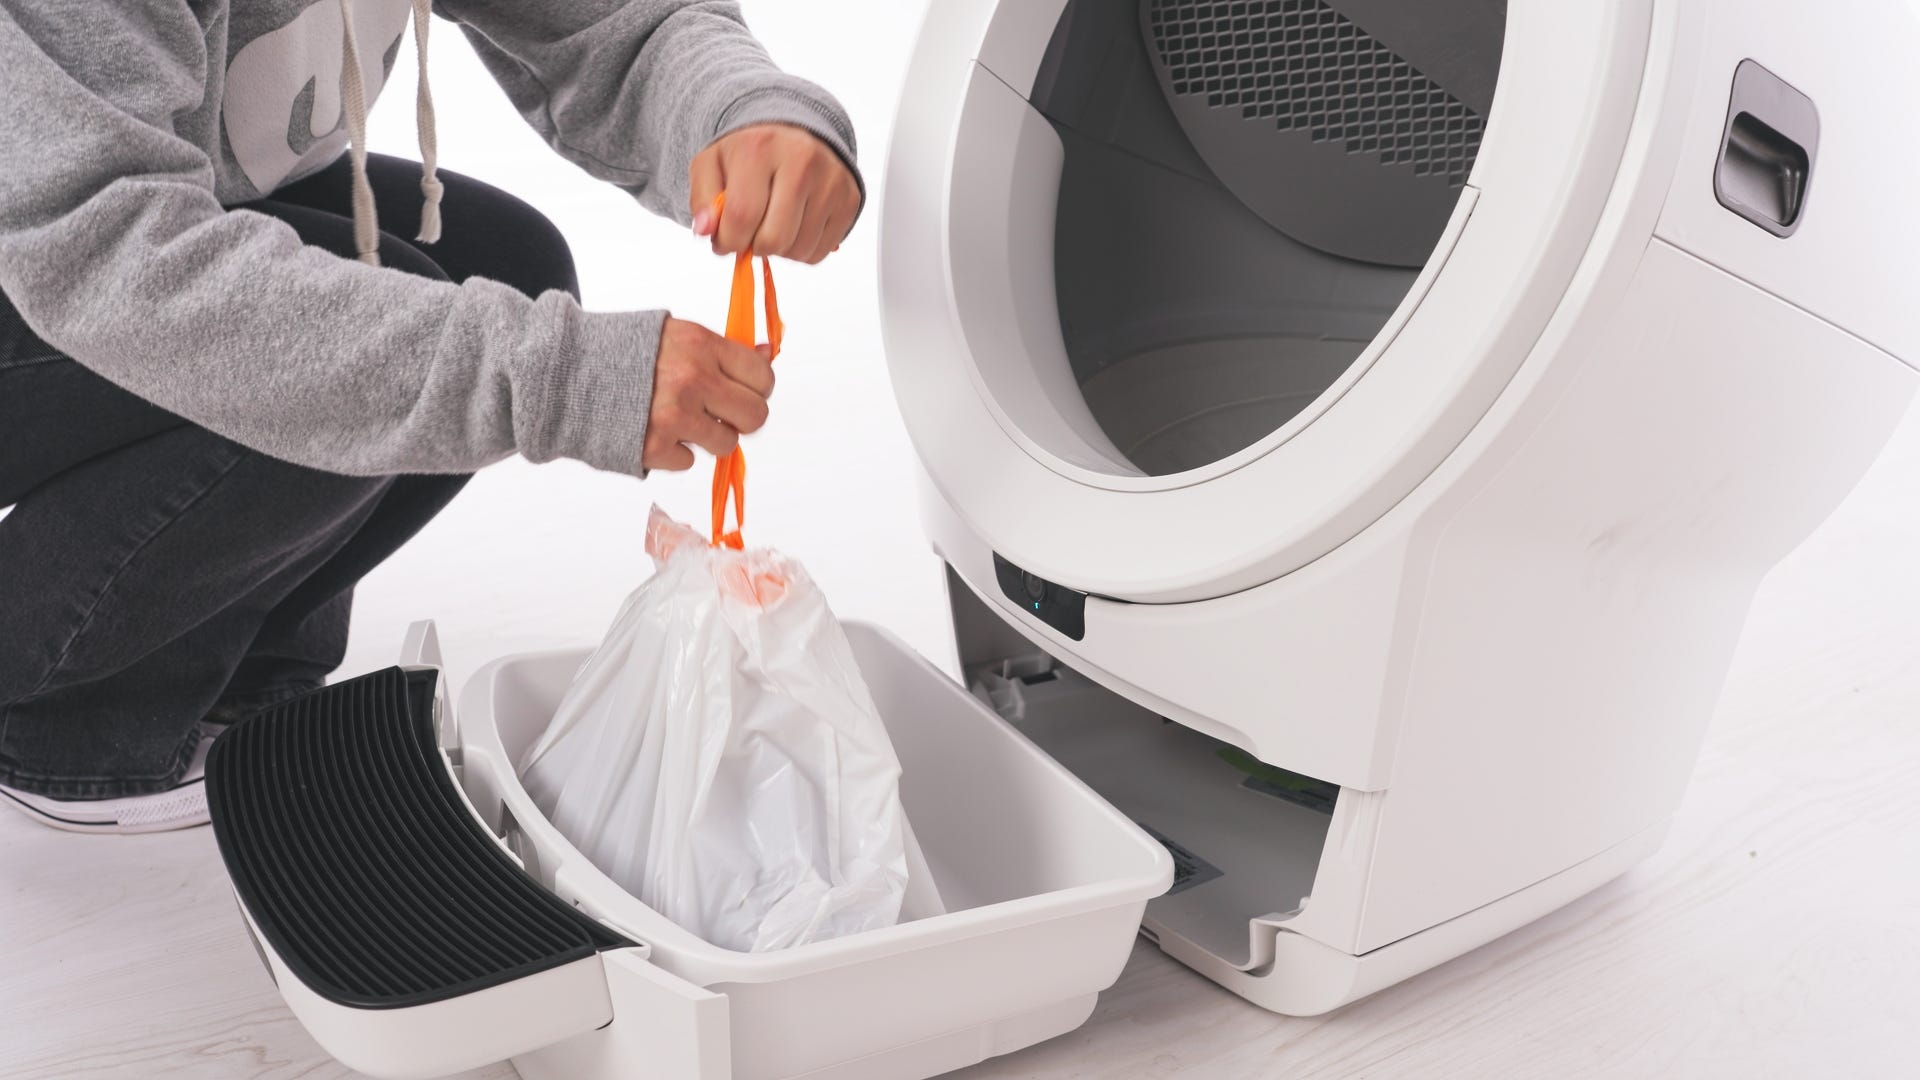
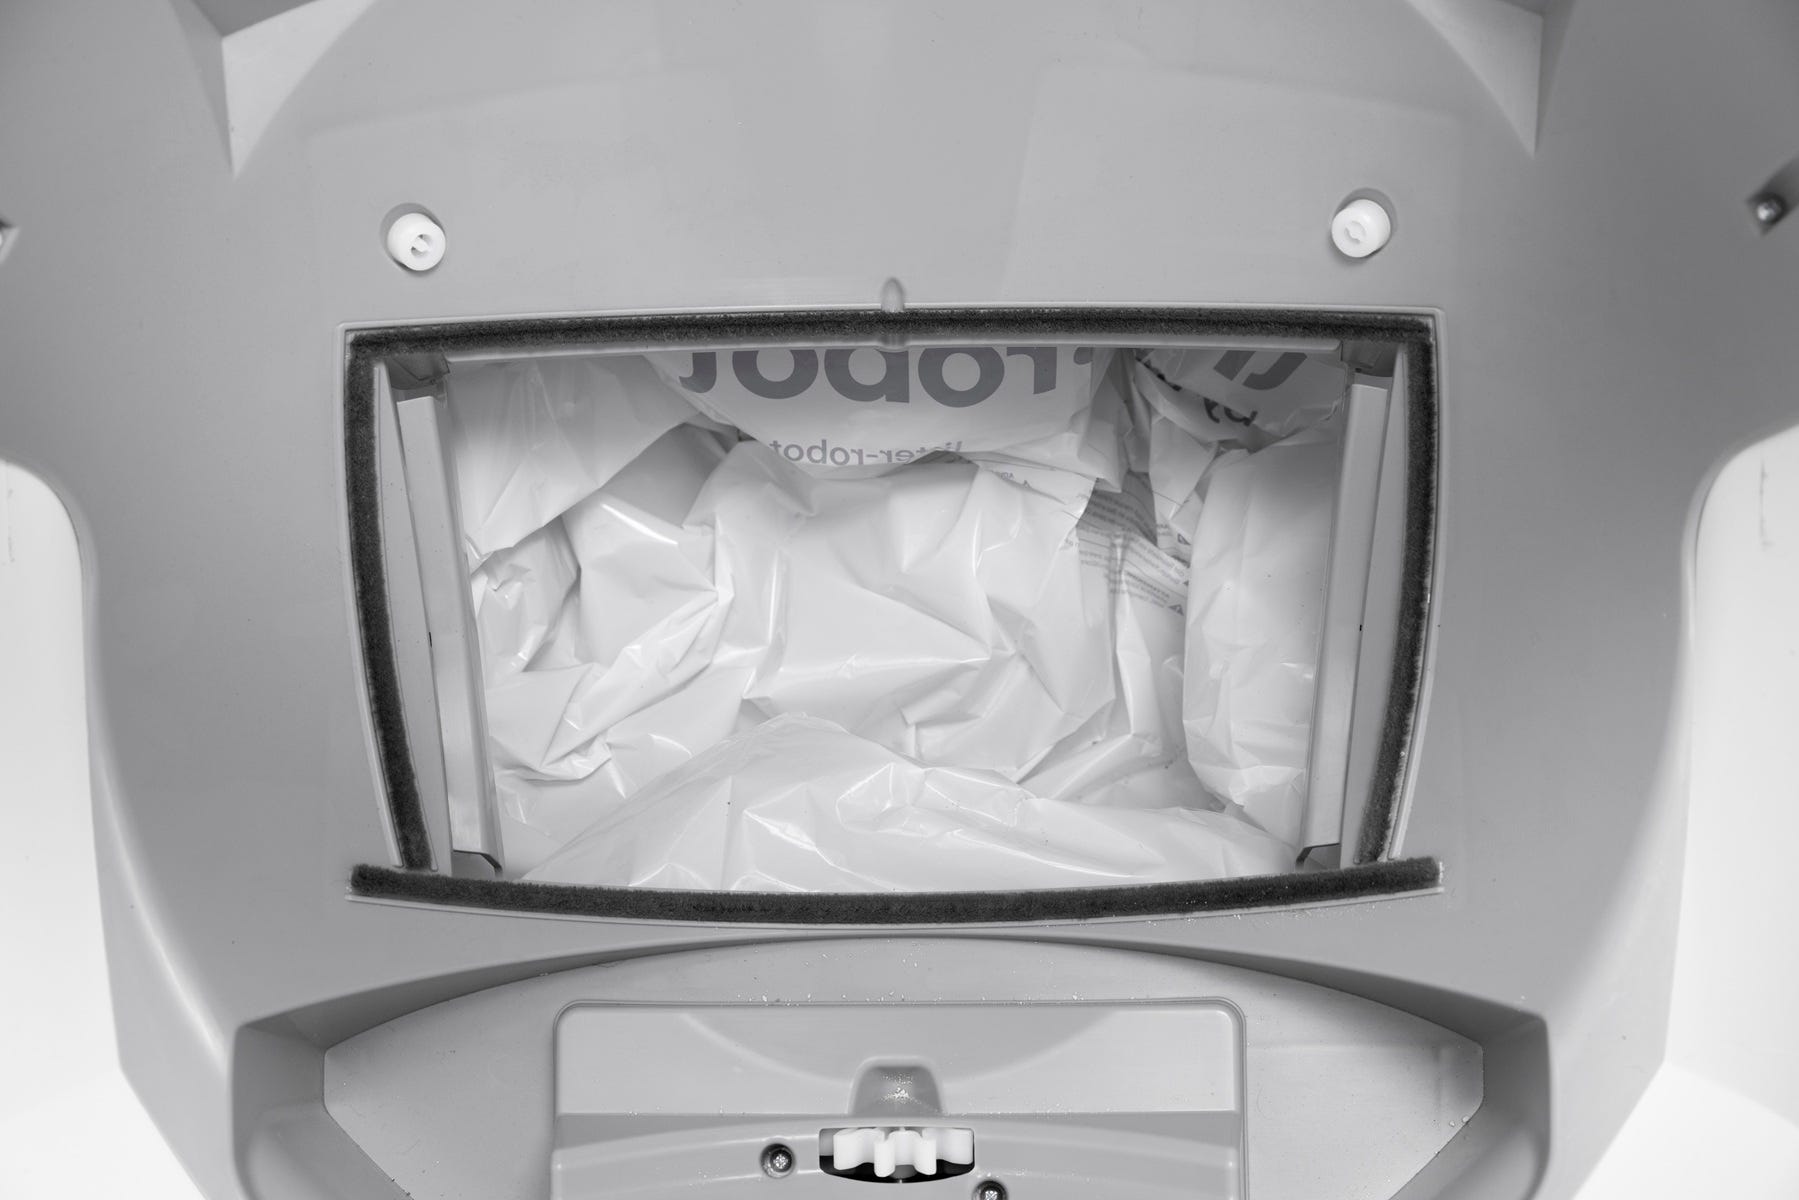
Replace the waste drawer liner
Emptying the drawer when prompted is important for reliable cycling and cleanliness.
Open the drawer and dispose of the used waste drawer liner.
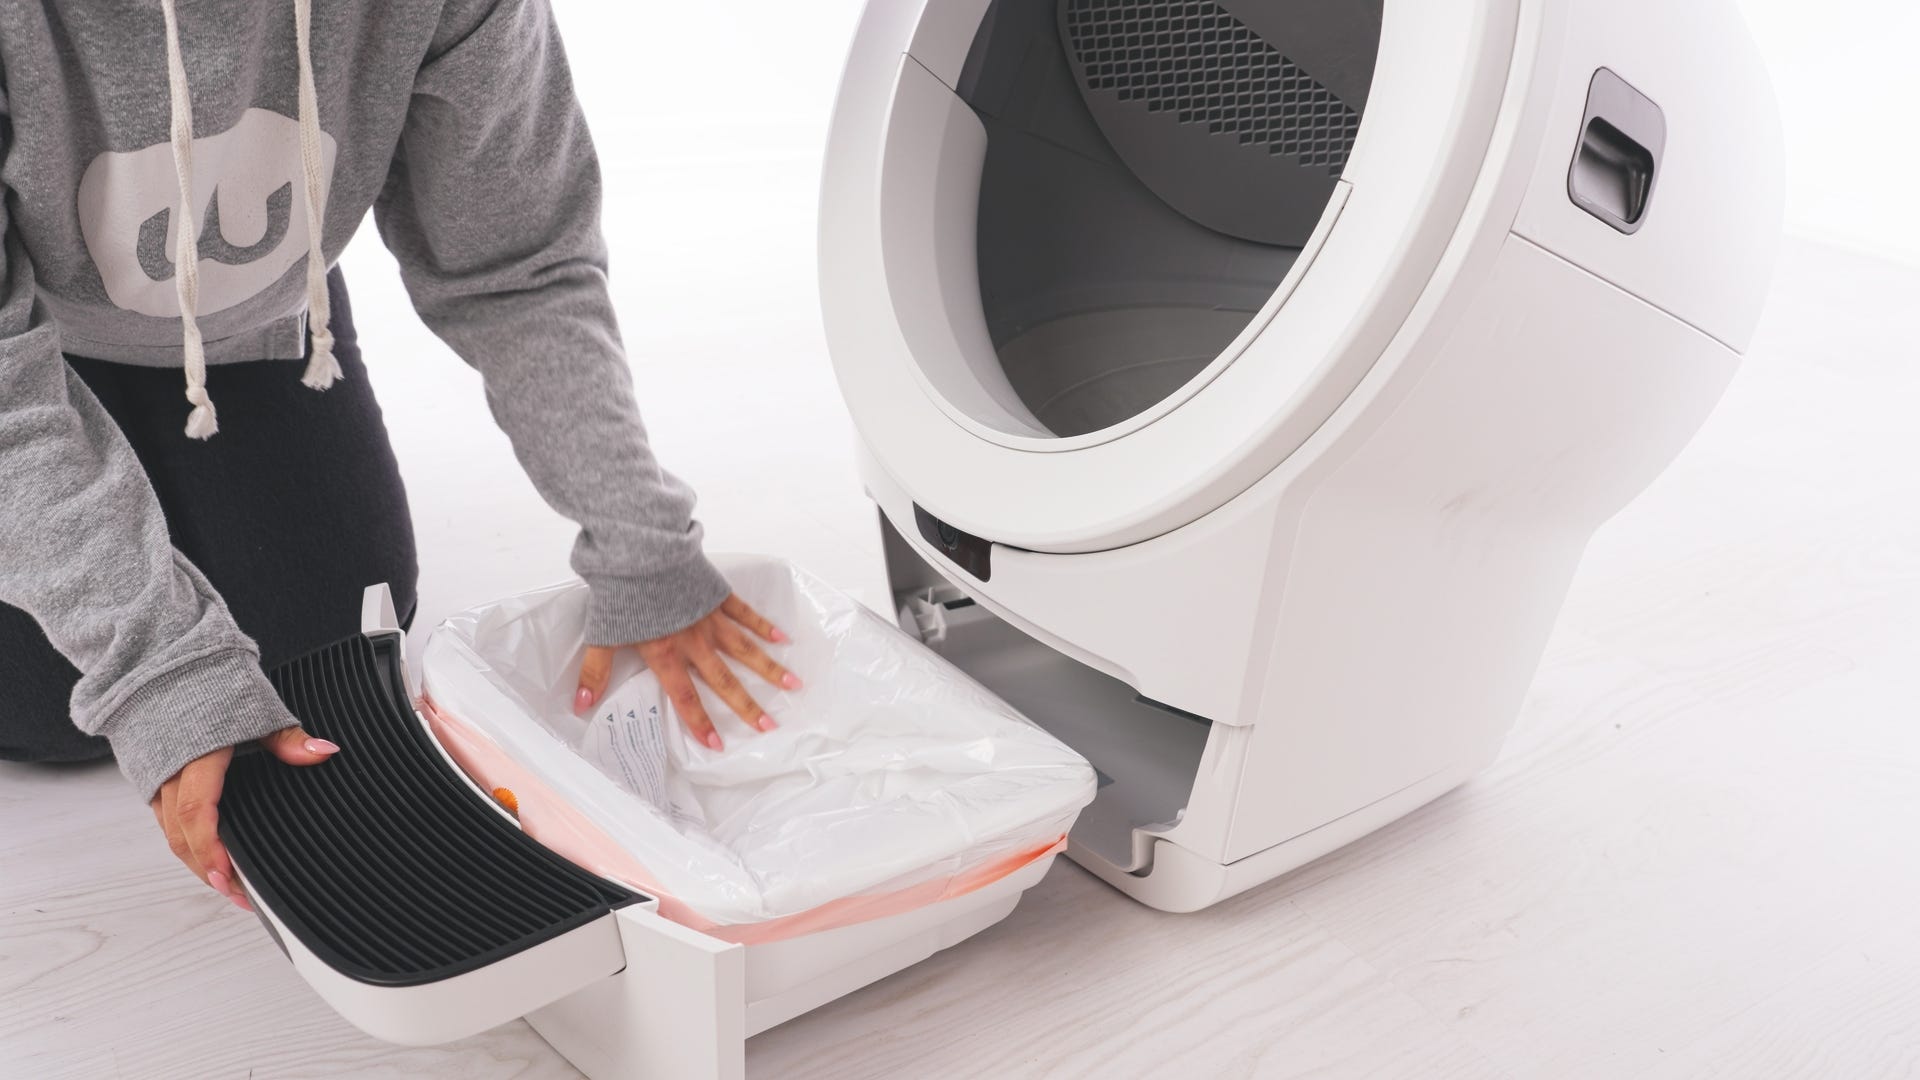
Install a new liner (white 10-13 gallon bags works best), wrapping the edges tightly over the rim of the drawer.
Ensure the bag is pressed flat against the sides and bottom.
Puffy or stretched bags can interfere with the DFI sensor.
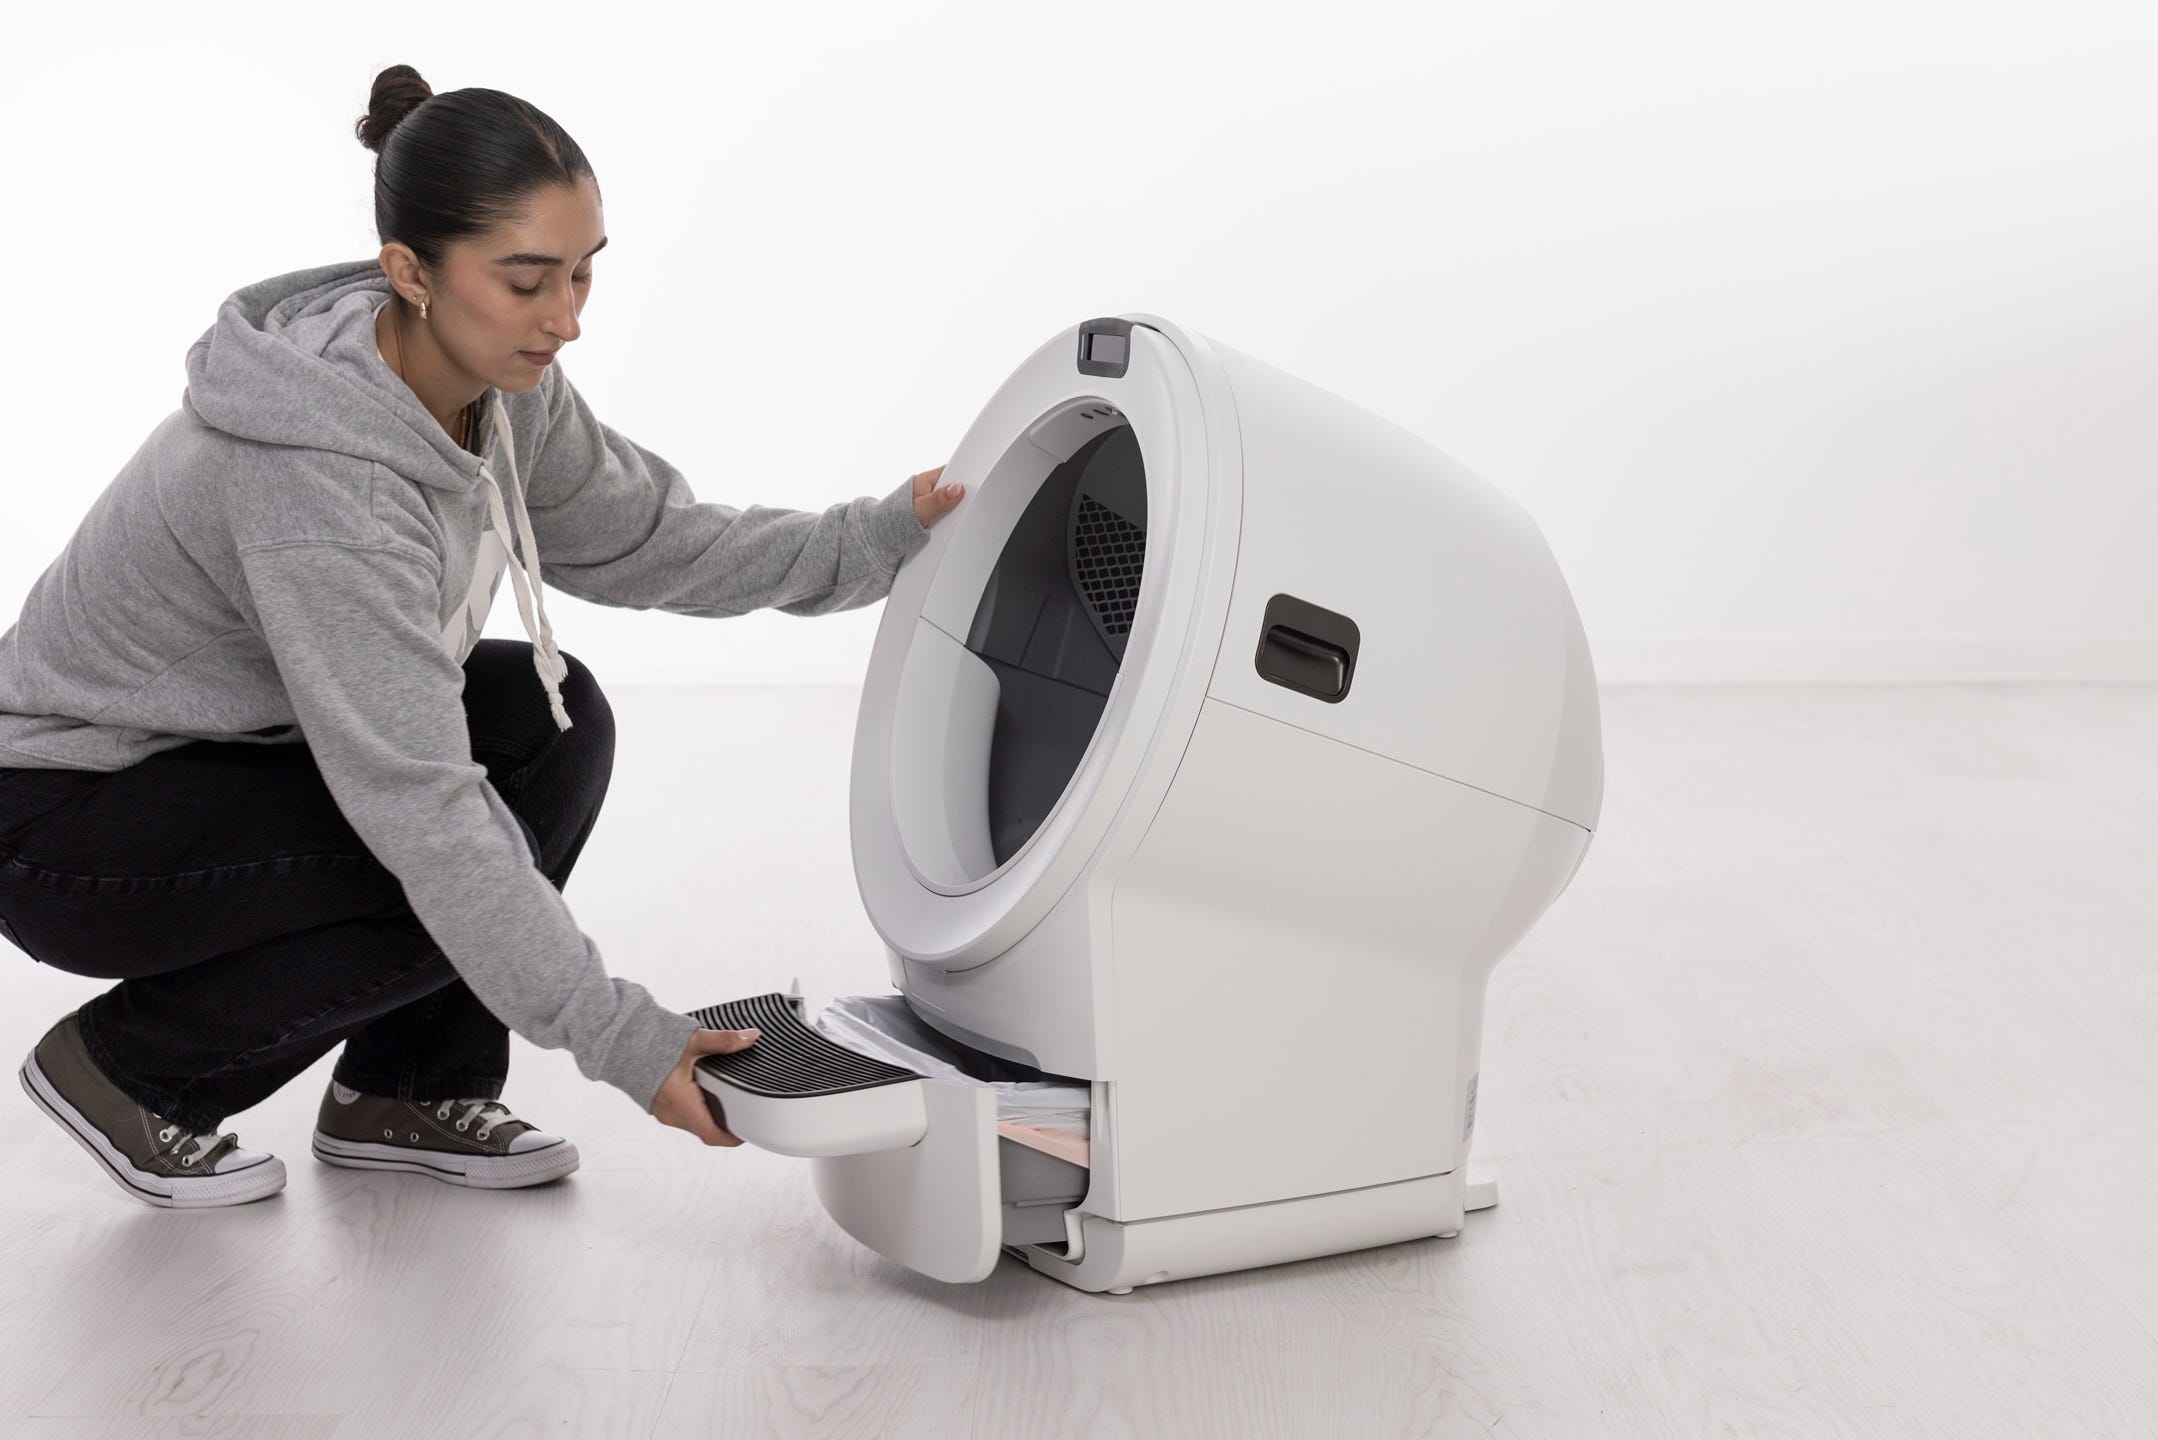
Reinsert the drawer into the base.
Important: Any time you affect the weight or placement of the unit (including emptying the waste drawer, adding or removing litter, or cleaning or moving the unit), press the Cancel button to ensure the weight sensors will detect your cat and cycle properly. Do not rest on the unit while pressing Cancel, or your weight may affect calibration.
- Short press the
 Cycle button to run a Clean Cycle.
Successful: The waste drawer gauge now matches the actual drawer (within 5%).
Unsuccessful: Continue to the next step.
Clean the curtain sensor
Even small amounts of dust, fur, or litter can interfere with the curtain sensor.
This may cause:
Inaccurate waste drawer level readings
Incorrect litter level readings
False cat detects
To clean:
- Gently wipe the curtain sensor with a soft, dry, clean microfiber cloth to prevent scratching or damaging the components.
Important: The bezel contains sensitive electronic components. To prevent damage, do not use water, liquids, disinfectant wipes, or damp cloths when cleaning. Avoid using a vacuum or compressed air as well, since this may interfere with the sensors.
- Short press the
 Cancel button to clear any notifications.
 - Short press the Cycle button to run a Clean Cycle.
Successful: The waste drawer gauge now matches the actual drawer (within 5%).
Unsuccessful: Continue to the next step.
Check for obstructions
Sometimes debris inside the unit can block the curtain sensor’s view. The sensor needs a clear field of view to accurately measure the waste drawer level.
Power off and unplug your unit.
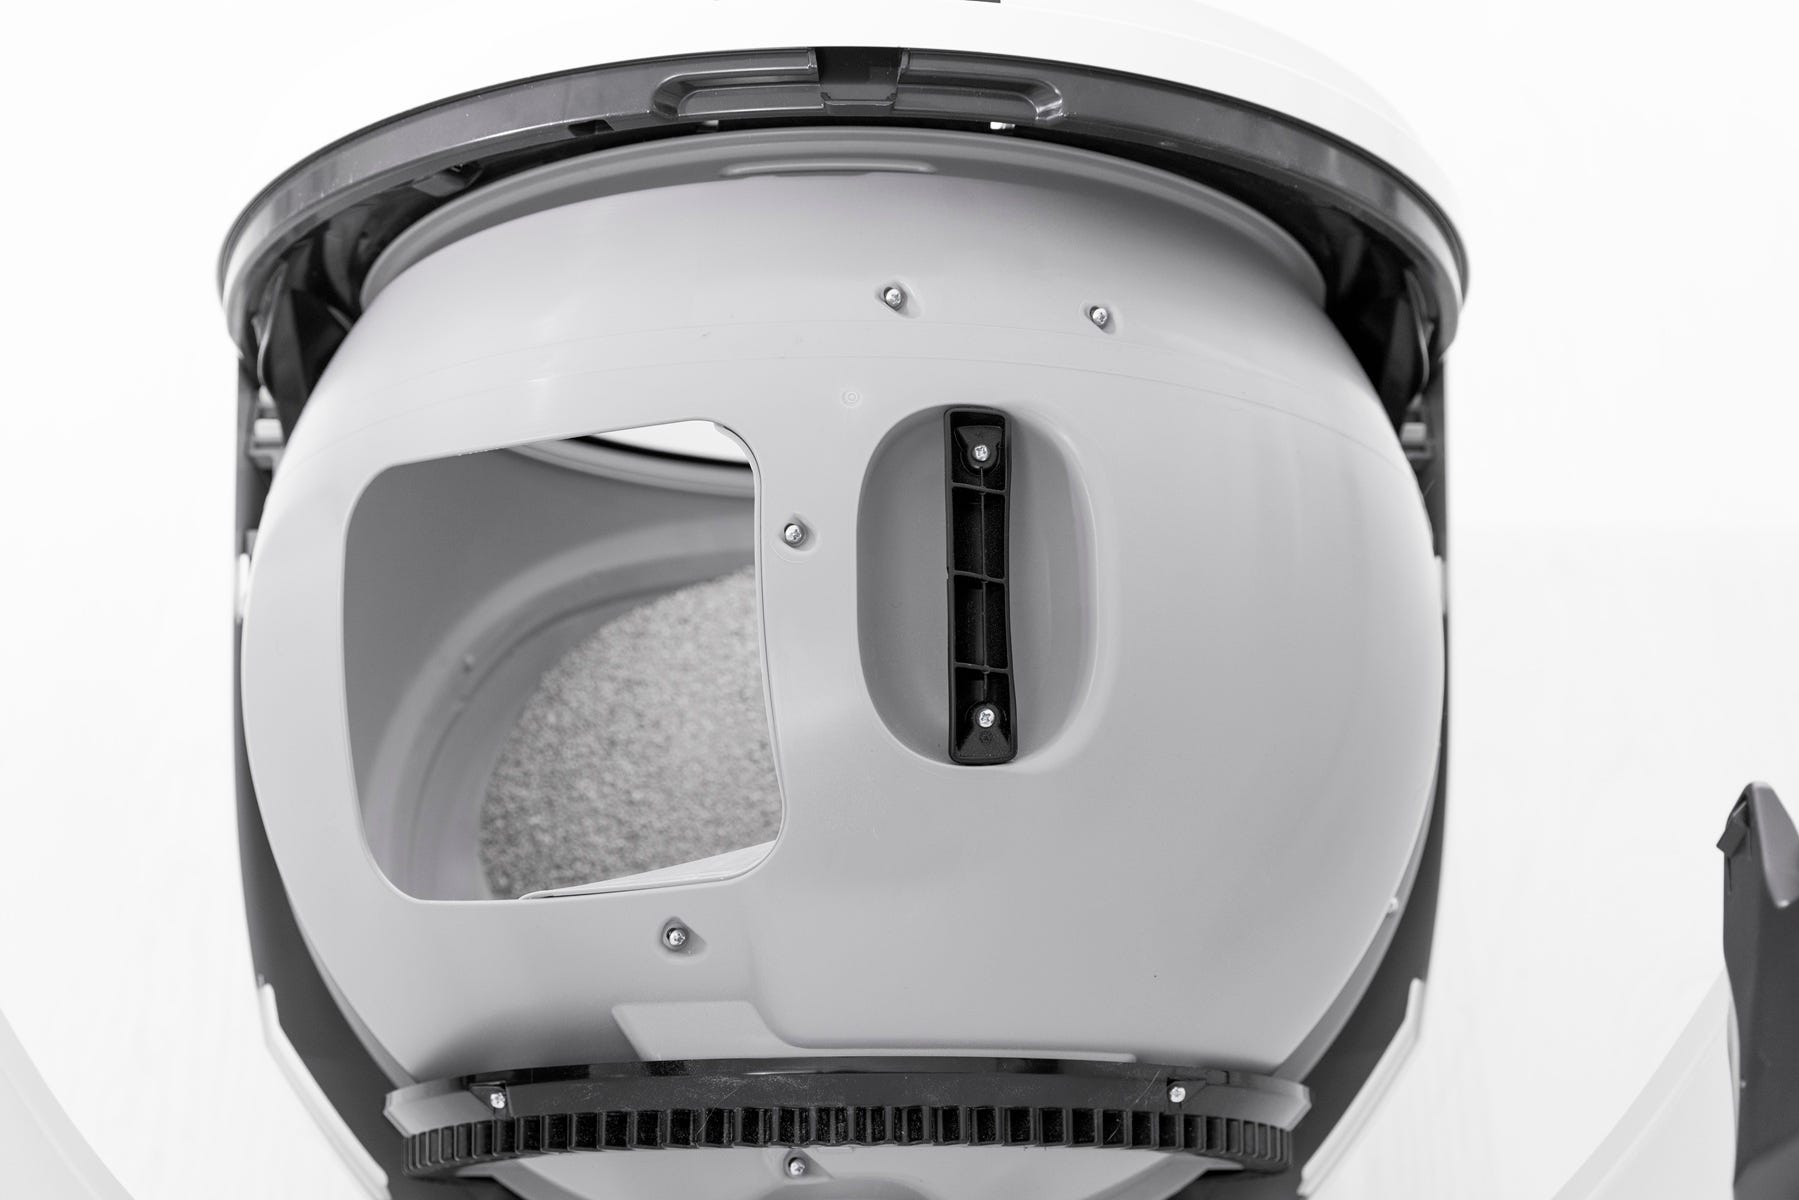
Use the side latches to rotate the bonnet open.
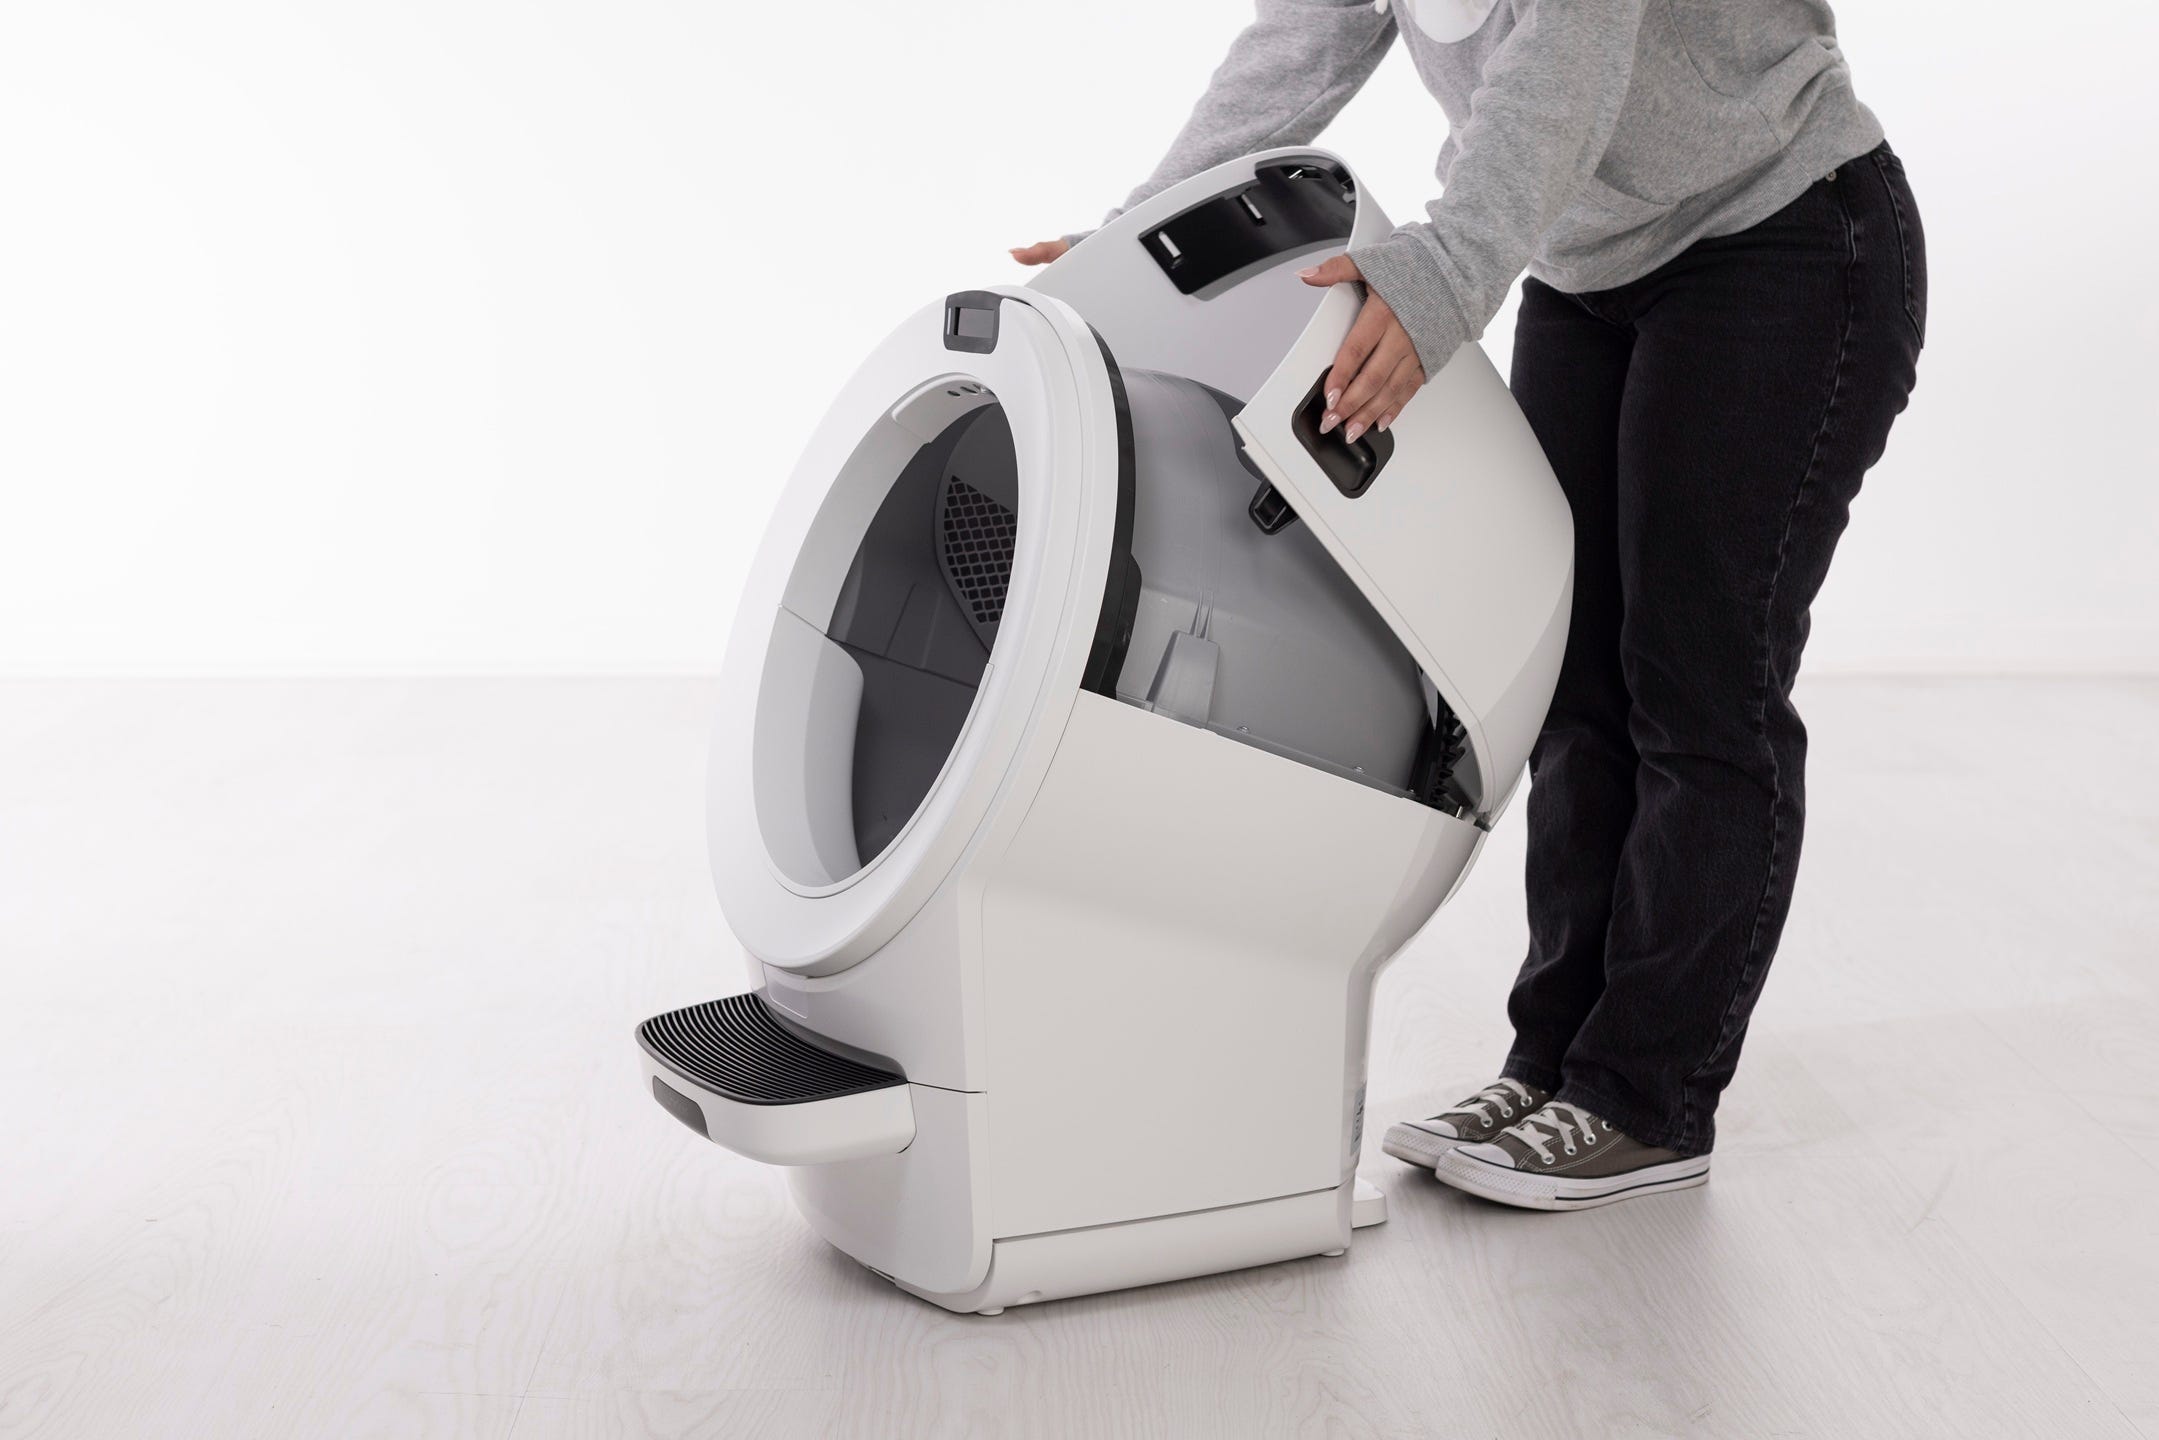
Remove the globe using the handle. Ensure the globe key is not misplaced.

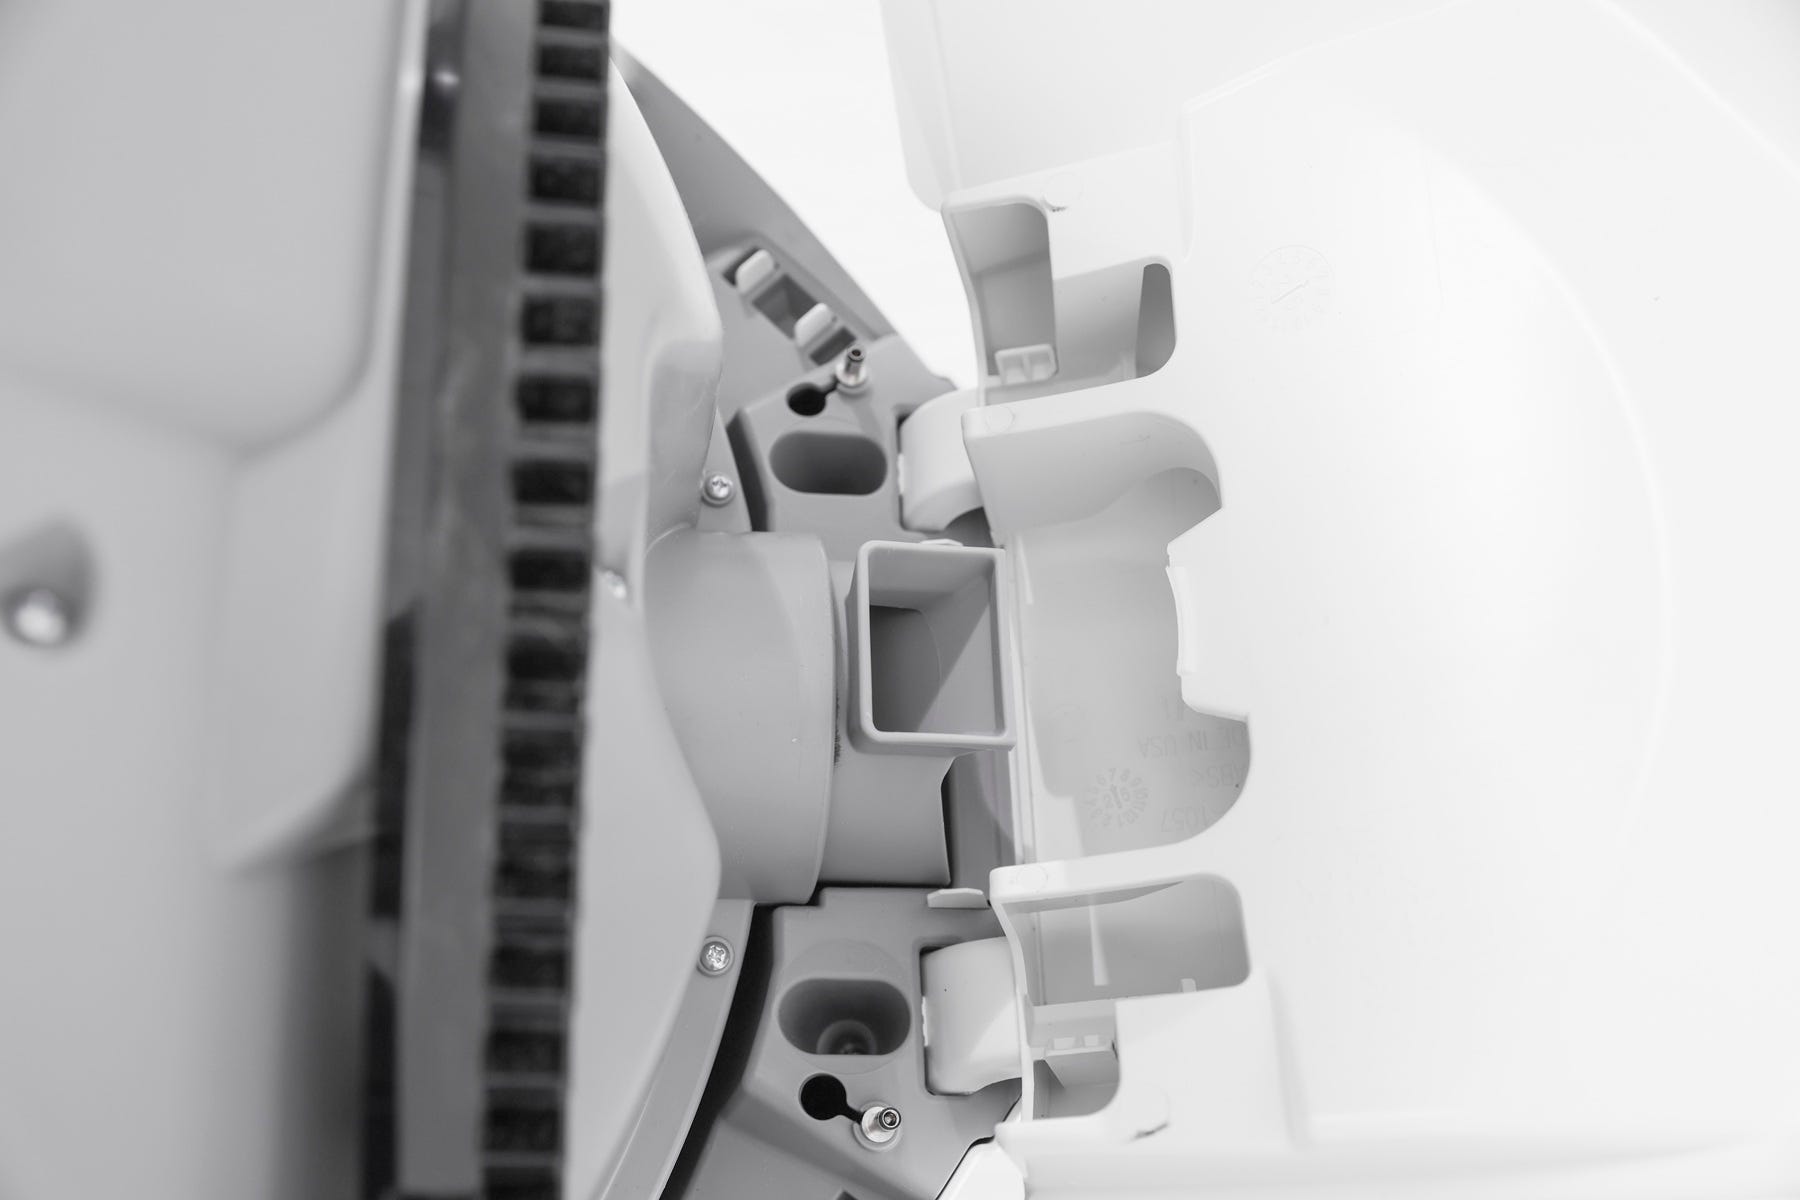
Inspect the waste port opening and the base for clumps or objects including:
Seal strip debris: Cat fur can stick to the seal strip at the globe’s waste port and block the sensor.
Obstructions in the waste port: Check for clumps or litter stuck in the opening.
Reinstall the globe and bonnet
Place the globe back on the base, aligning the handle and waste port near the Home position.
Ensure the globe key is still in place with the rectangular side facing up.
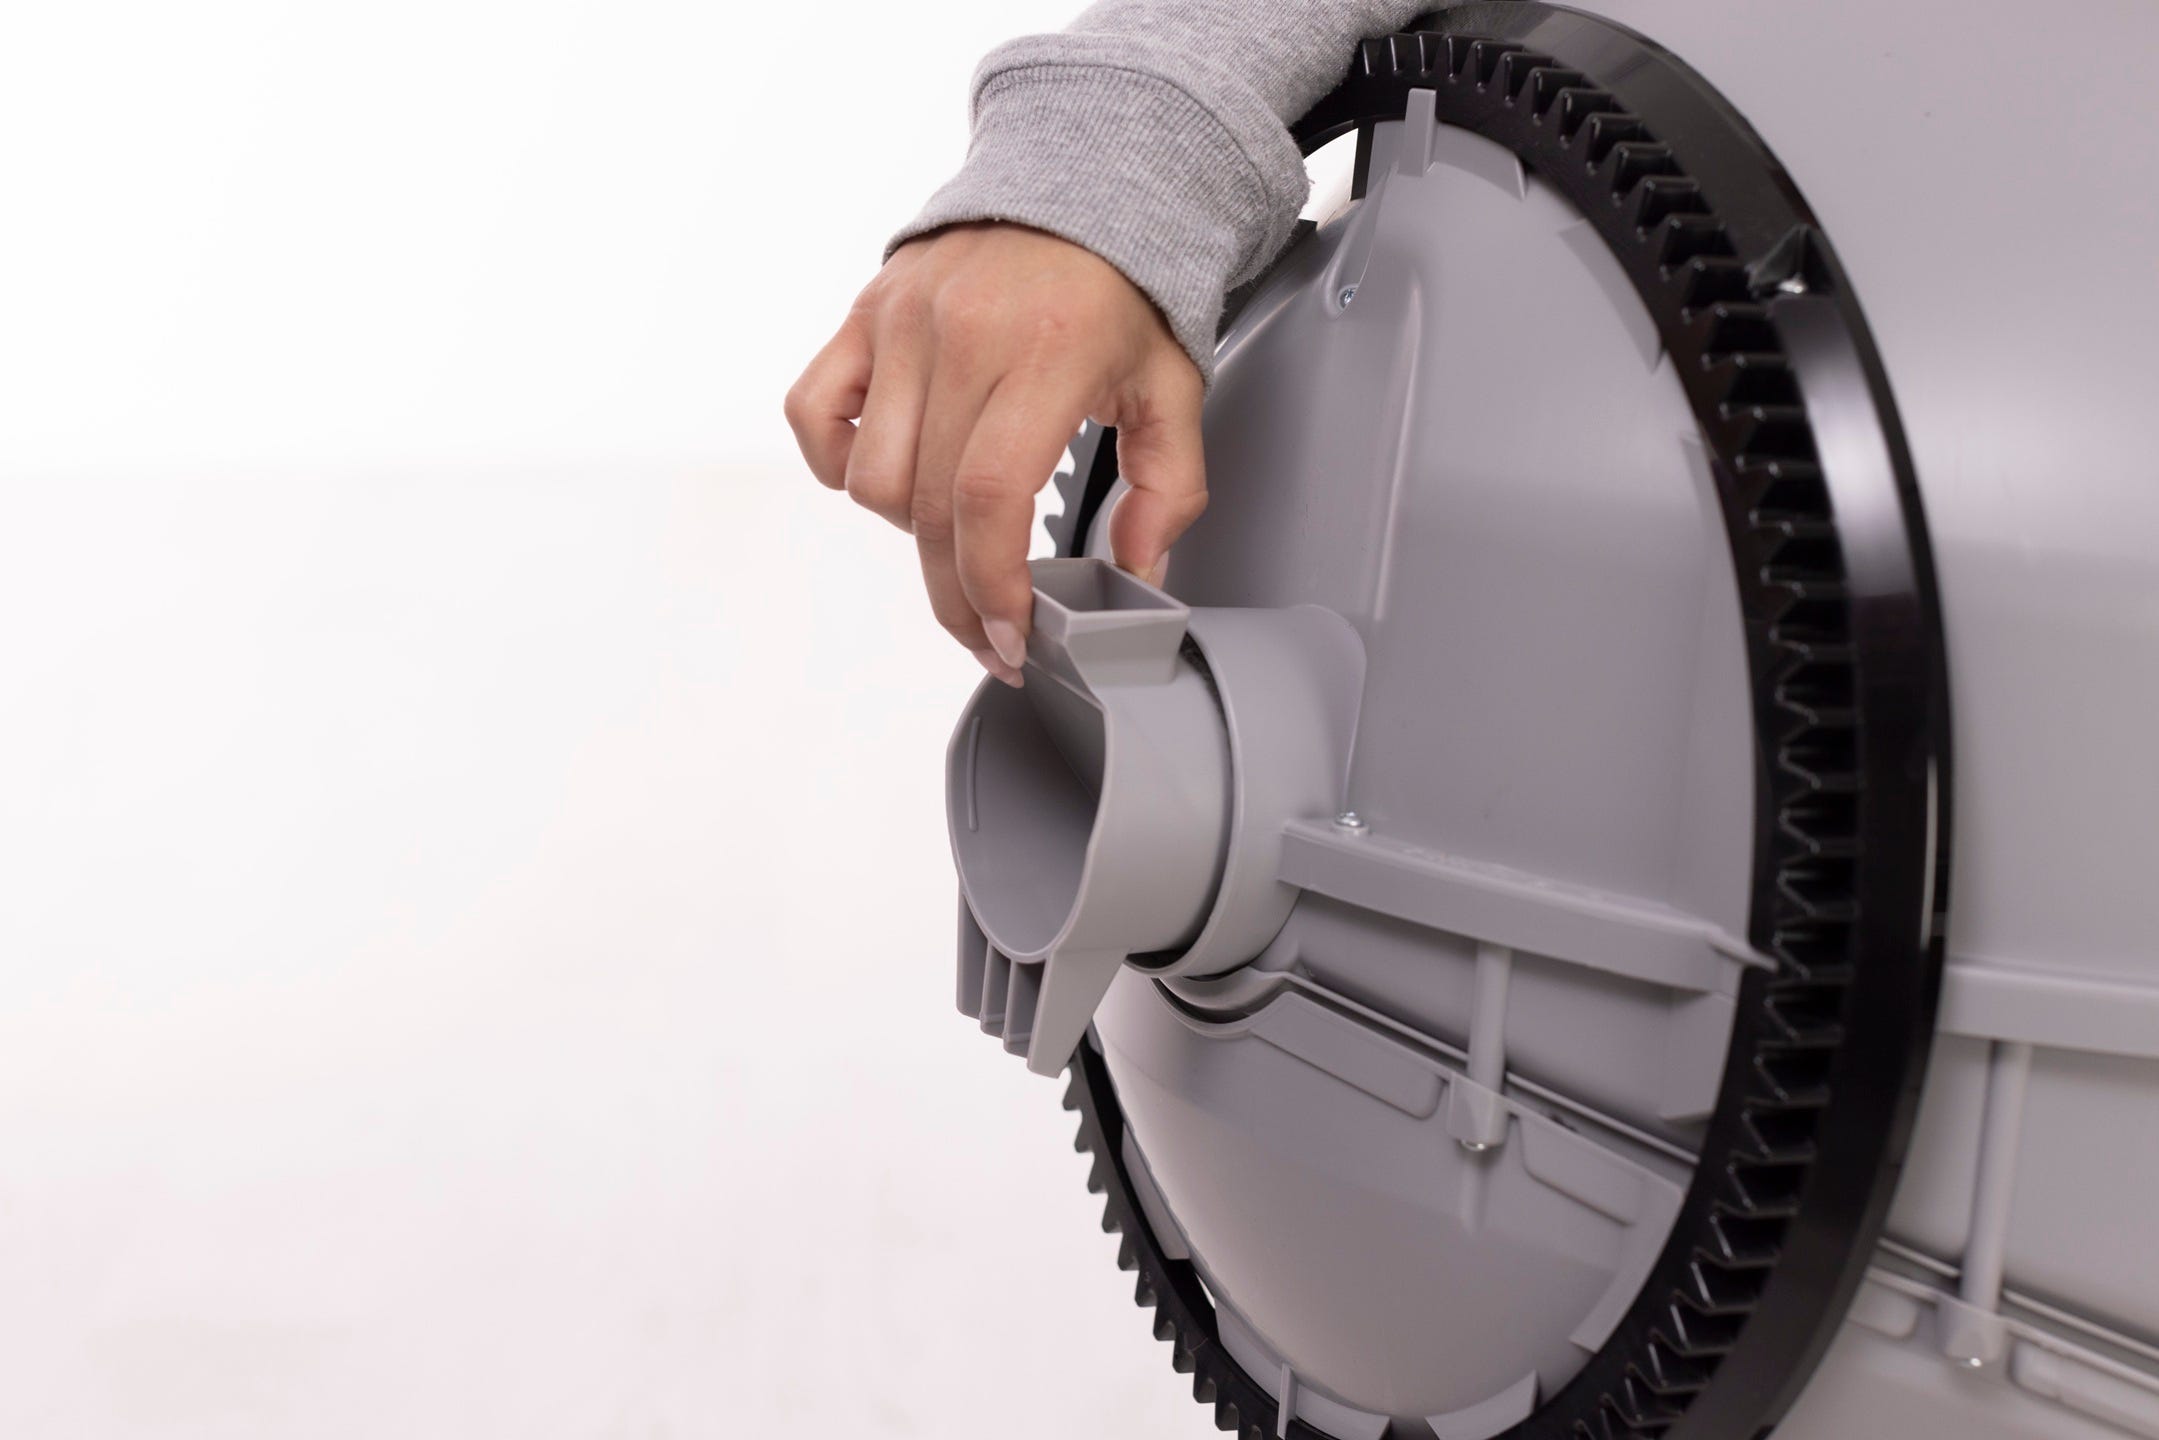
Make sure the large black gear at the rear engages with the smaller drive gear in the base.
Rotate the bonnet downwards to close the bonnet until the latches click into place.
Plug in and power on.
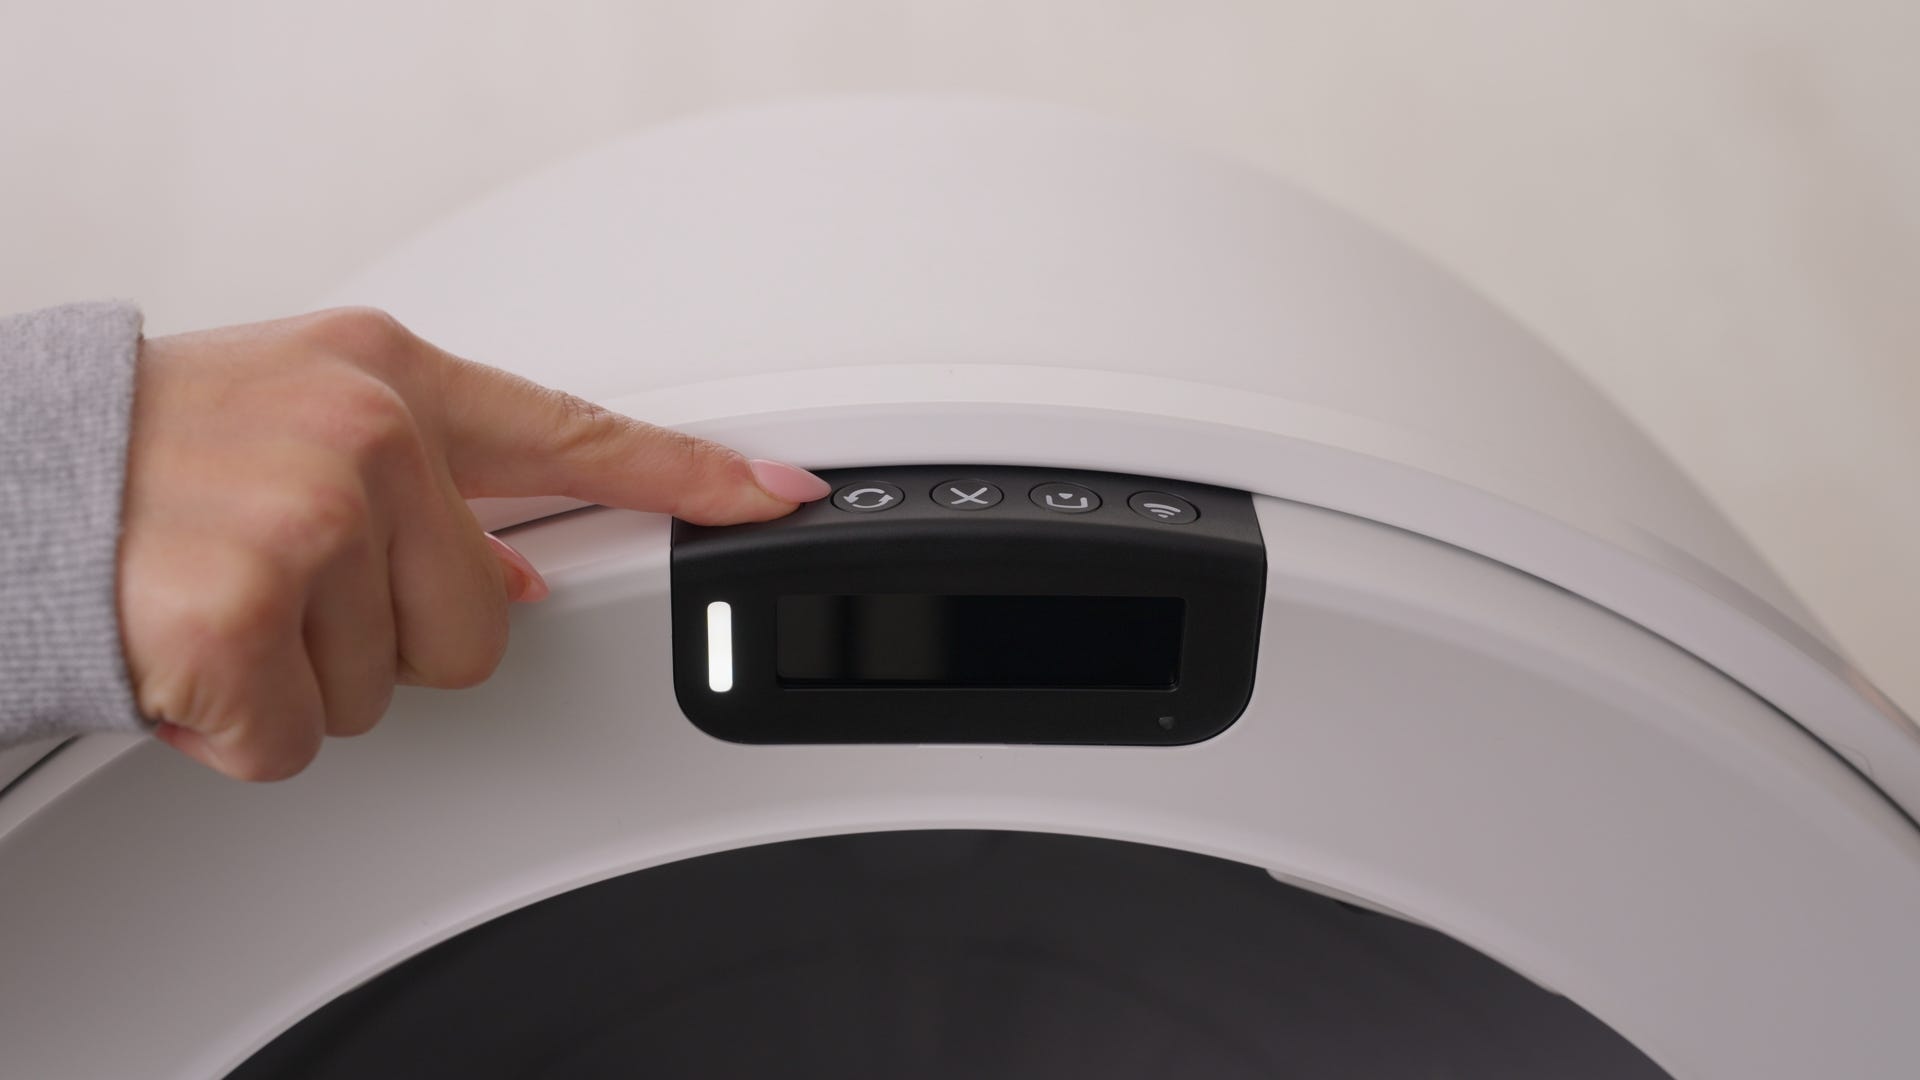
- Short press the Cancel button to clear any notifications.
- Short press the Cycle button to run a Clean Cycle.
Successful: If your unit displays a solid white light, the issue is resolved.
Unsuccessful: Continue to the next step.
Update the firmware
Litter-Robot 5 receives automatic firmware updates when connected to WiFi.
Confirm your firmware is up to date in the Whisker app
If no update option is available, you already have the latest version.
- Short press the Cycle button to run a Clean Cycle.
Successful: Gauge is accurate in the app and LCD screen.
Unsuccessful: If the app or LCD screen still displays inaccurate readings (within 5%) or an error message after updating, continue with calibration.
Calibrate the drawer full indicator
If the waste drawer gauge is still inaccurate and Litter-Robot 5 says the drawer is full when it’s not, calibration may be required to ensure proper measurement accuracy. Here’s how to reset the waste level and calibrate the drawer full sensors.
Preparation
Remove the waste drawer liner and wipe the drawer clean of debris. (A clean, empty drawer provides a plain surface for calibration.)
If a sticker is present in the waste drawer, add a piece of plain white paper to the bottom of the drawer so the images from the sticker don't shine through. For example, a sheet of printer paper folded in half. The purpose of the white paper is to provide a reflective surface for the drawer full indicator sensor.
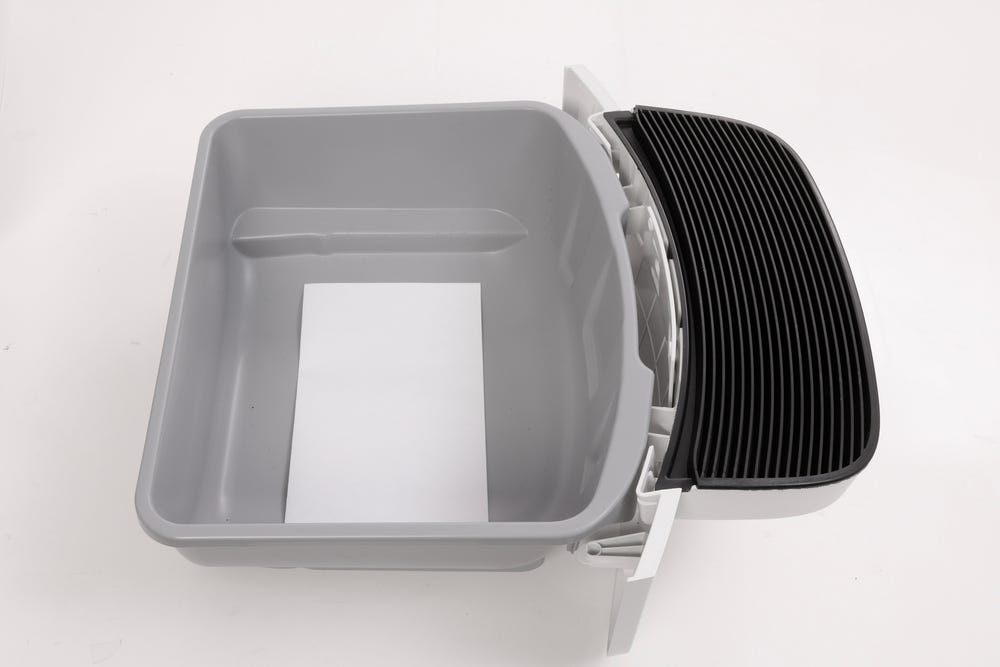
The paper must be plain white with no pattern and must lay flat on the bottom of the drawer.
Reinsert the waste drawer without a liner.
- Short press the Cancel button to zero the weight scale.
Button sequence
Before you begin:
The next steps are time-sensitive and must be completed in the exact order shown. Review the full sequence below, then perform the button presses without pausing between steps.
Press the Power button to turn the unit off. (Do not unplug it.)
Wait at least 5 seconds.
Short press the control panel buttons in this exact order, one at a time (Each button must be pressed within 5 seconds of the previous one.):
 Connect
- Cancel
- Connect
 Empty
Empty- Cycle
What happens next
If pressed correctly, the unit will perform a lamp test (globe light illuminates red, green, and blue).
The globe will rotate to the Dump position, allowing the curtain sensor to view the bottom of the waste drawer.
Successful: The unit cycles Home and the gauge is accurate in the app and LCD screen.
Unsuccessful: The LCD screen displays an error message. Clean the curtain sensor again and repeat the process.
Need more help?
If calibration fails repeatedly or the waste drawer gauge is still inaccurate (within 5%) after troubleshooting, please contact Whisker Customer Experience for further assistance.
Didn't find what you're looking for?
Live support available Mon-Fri: 9AM-9PM EST and Sat-Sun: 9AM-5PM EST, or submit a ticket anytime.