The store will not work correctly in the case when cookies are disabled.

Litter-Robot: Carbon filter installation guide
Litter-Robot is equipped with a flexible carbon filter pad that is installed on the outer bottom area of the globe. This filter sits directly over the waste drawer to absorb odors.

The carbon filter is not required for the unit to function. The OdorTrap® Packs may be used instead of the carbon filter.
Before you start
Parts required
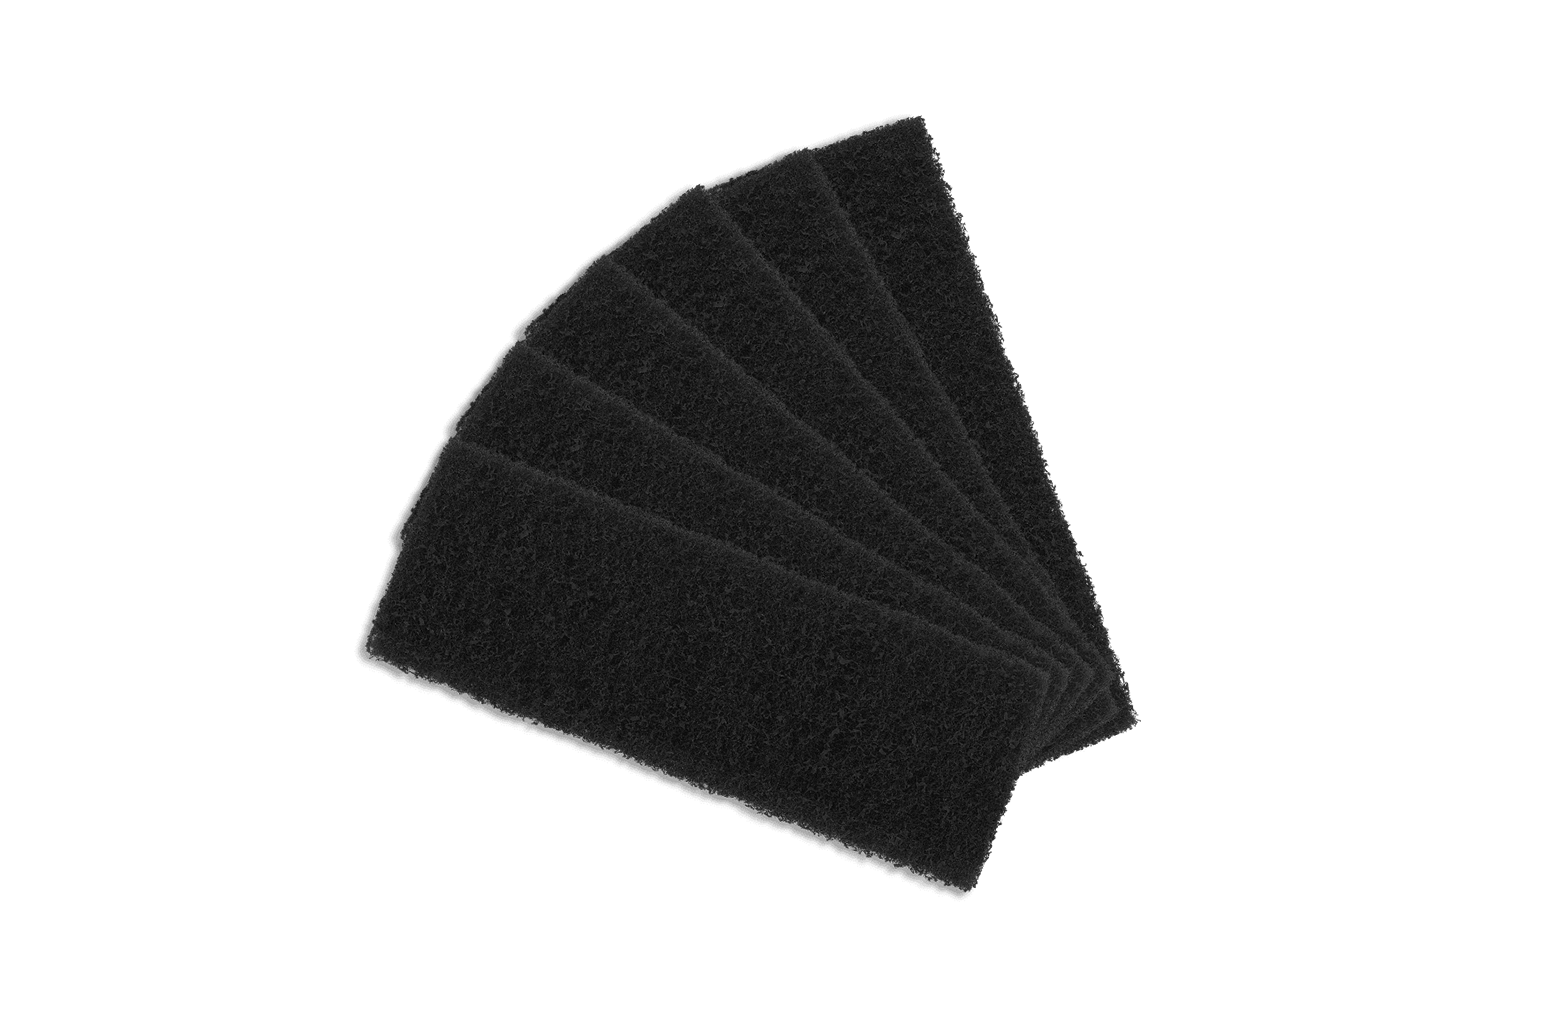
- One (1) carbon filter pad
- (Optional) OdorTrap Packs (used as an alternative to carbon filter)
Note: Under normal use, a single carbon filter should last approximately one month. Replace as needed for optimal odor control.
Quick links
Litter-Robot 5 & Pro: Carbon filter replacement
Preparing the unit
- Make sure Litter-Robot is in the Home position.
- Tap "Replace Filter" under Controls in the Whisker app, or, press and hold the
 Cancel button on the control panel for 3 seconds.
 - A filter change cycle will begin; the cycle will pause when the globe reaches the "replace filter" position.
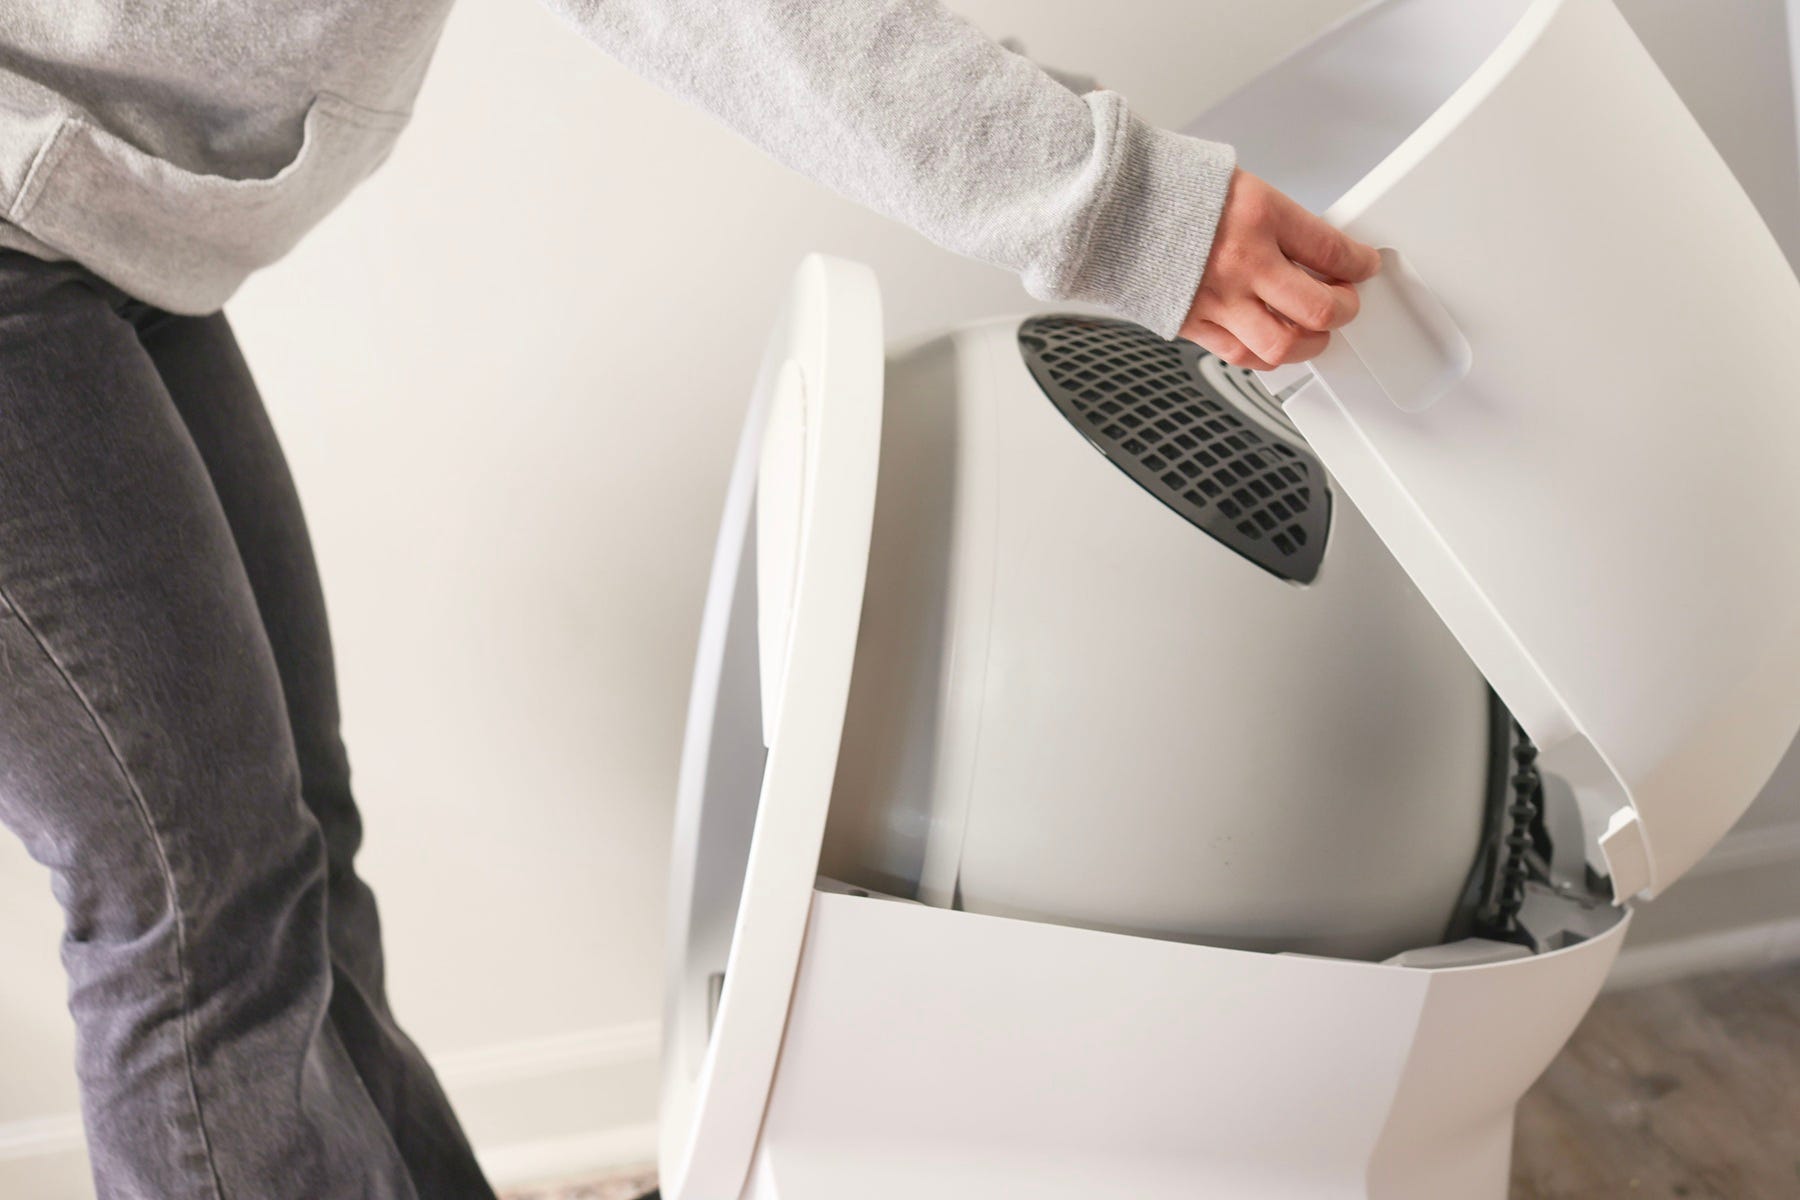
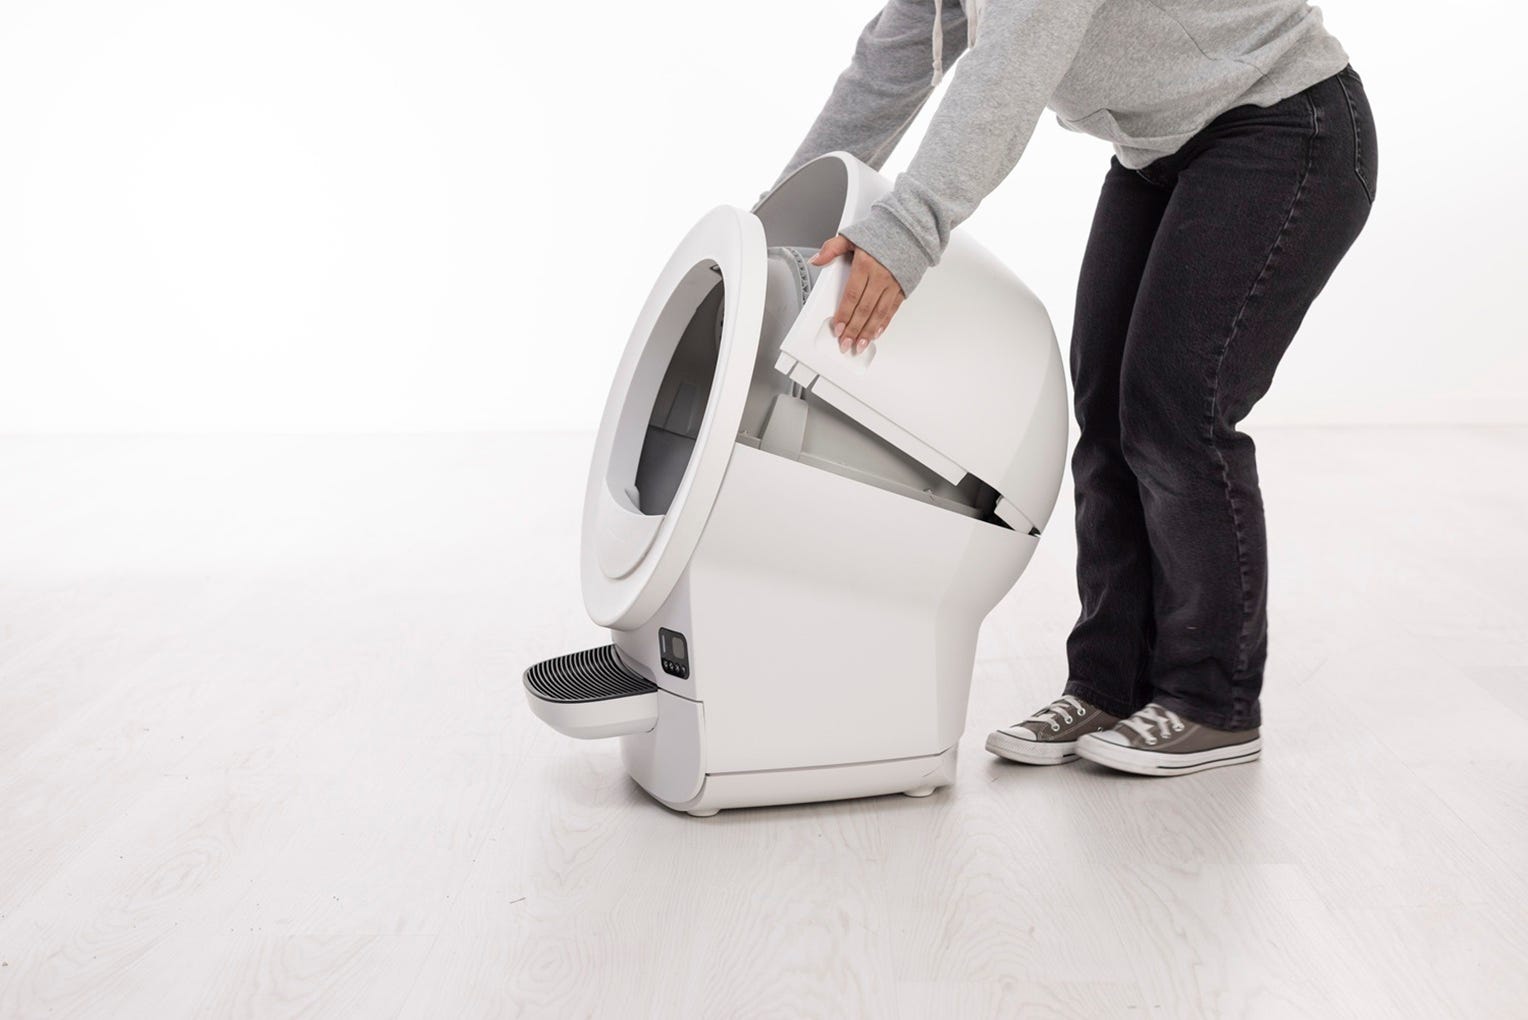
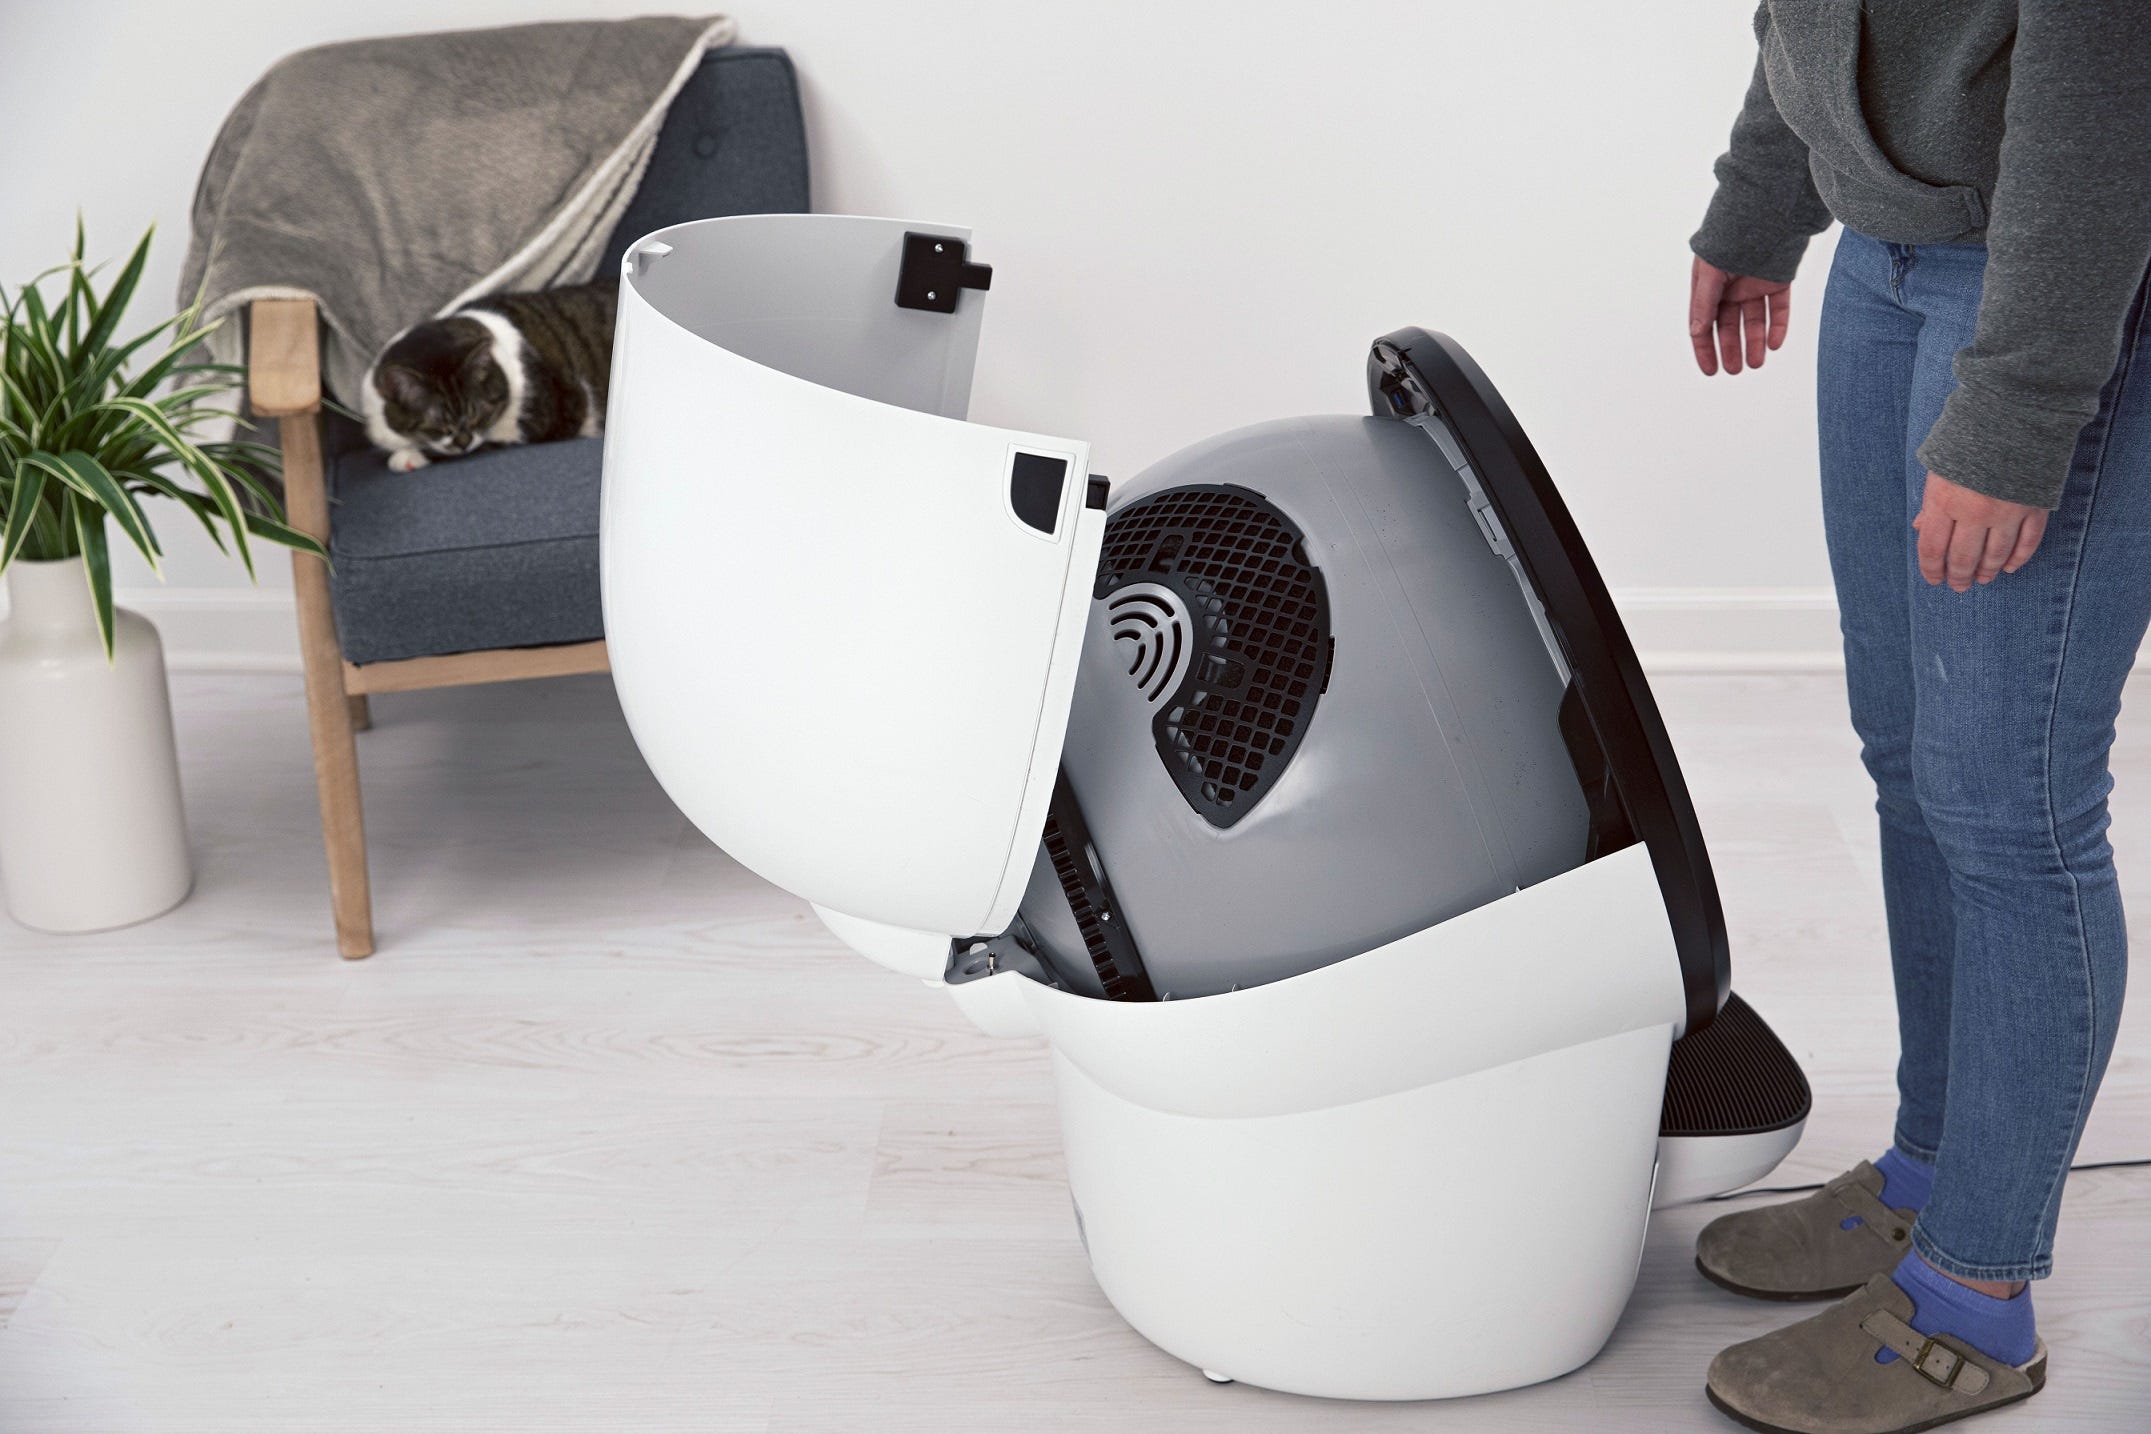
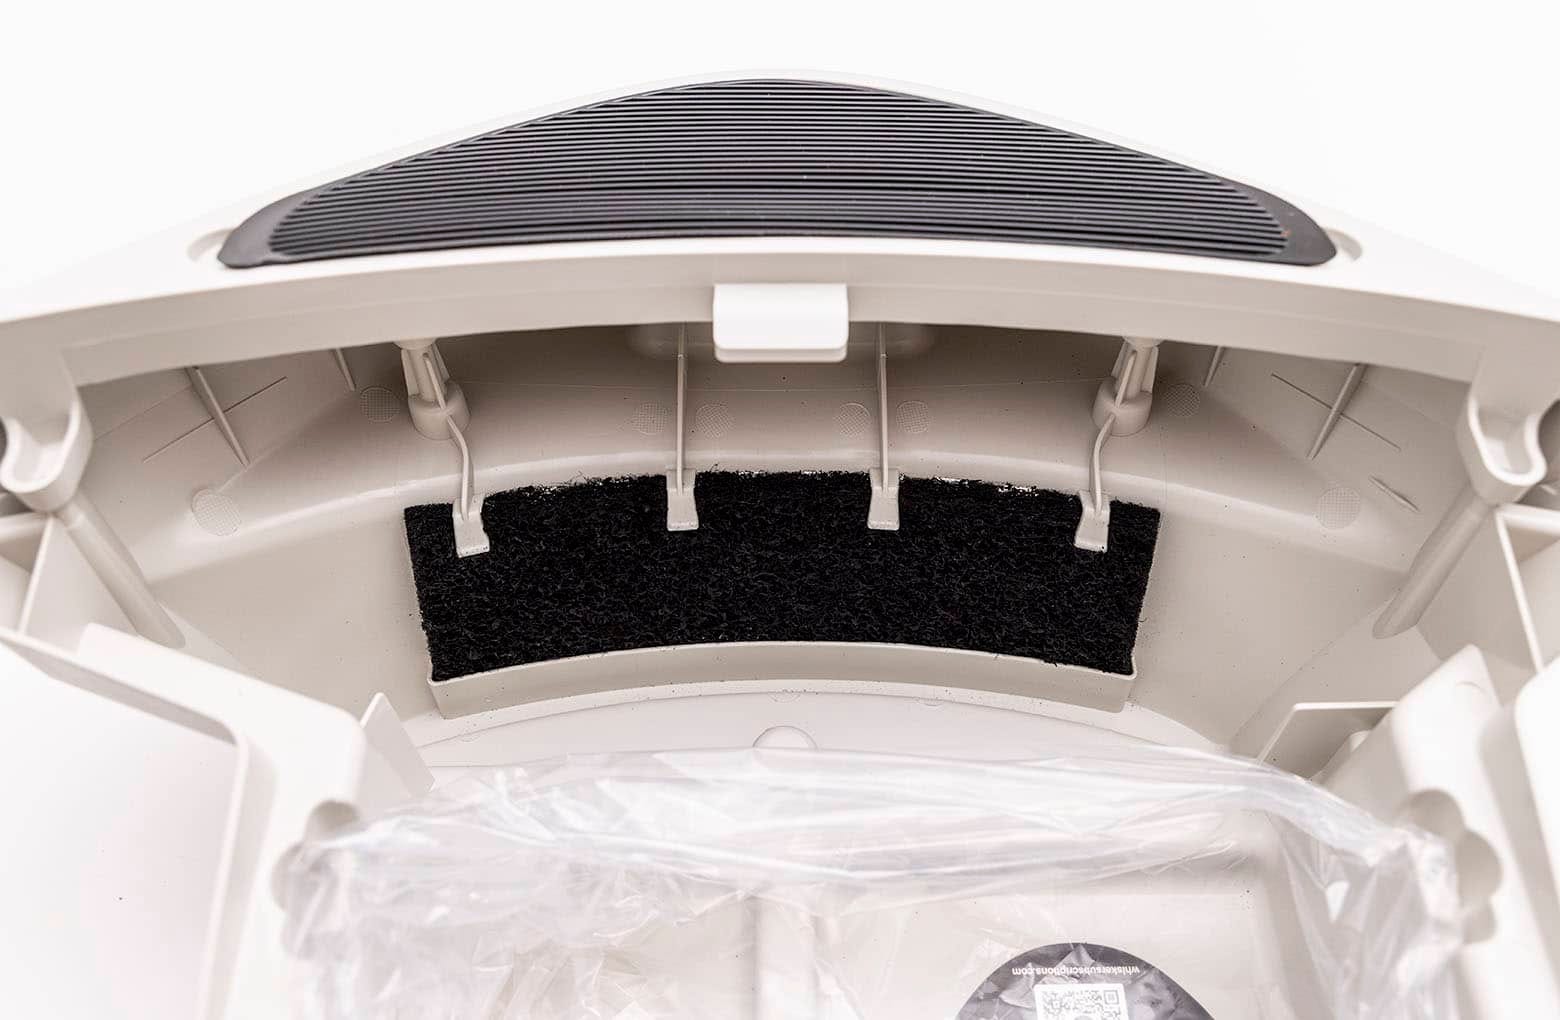
- Lift and rotate the bonnet to its open position to reveal the filter pocket.
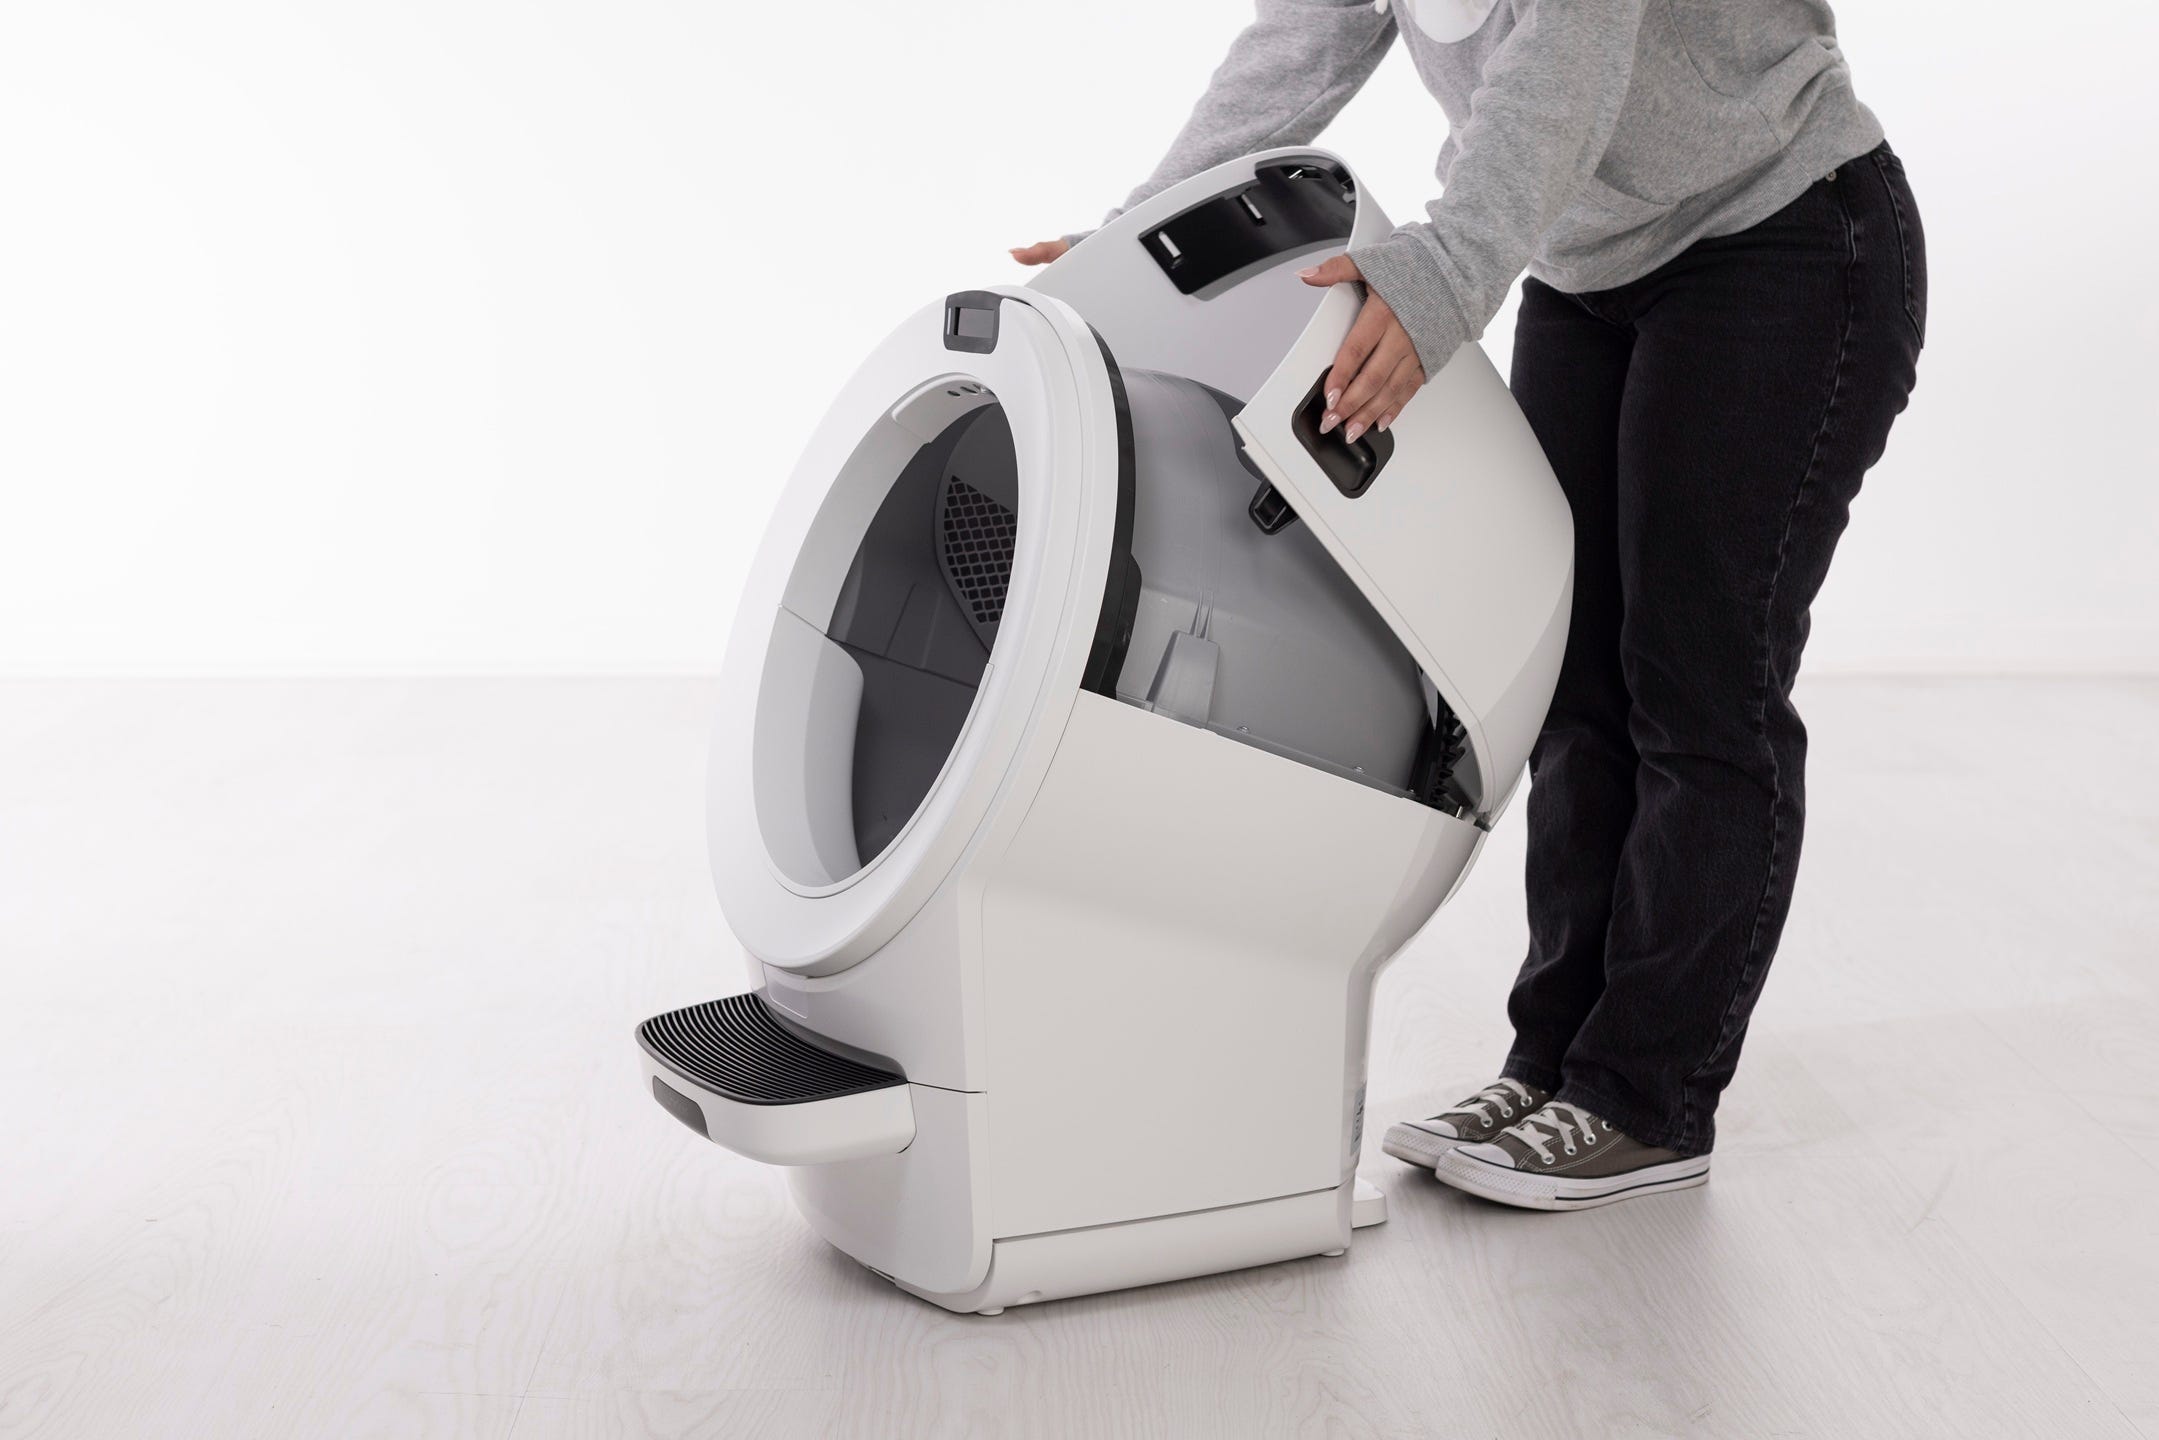
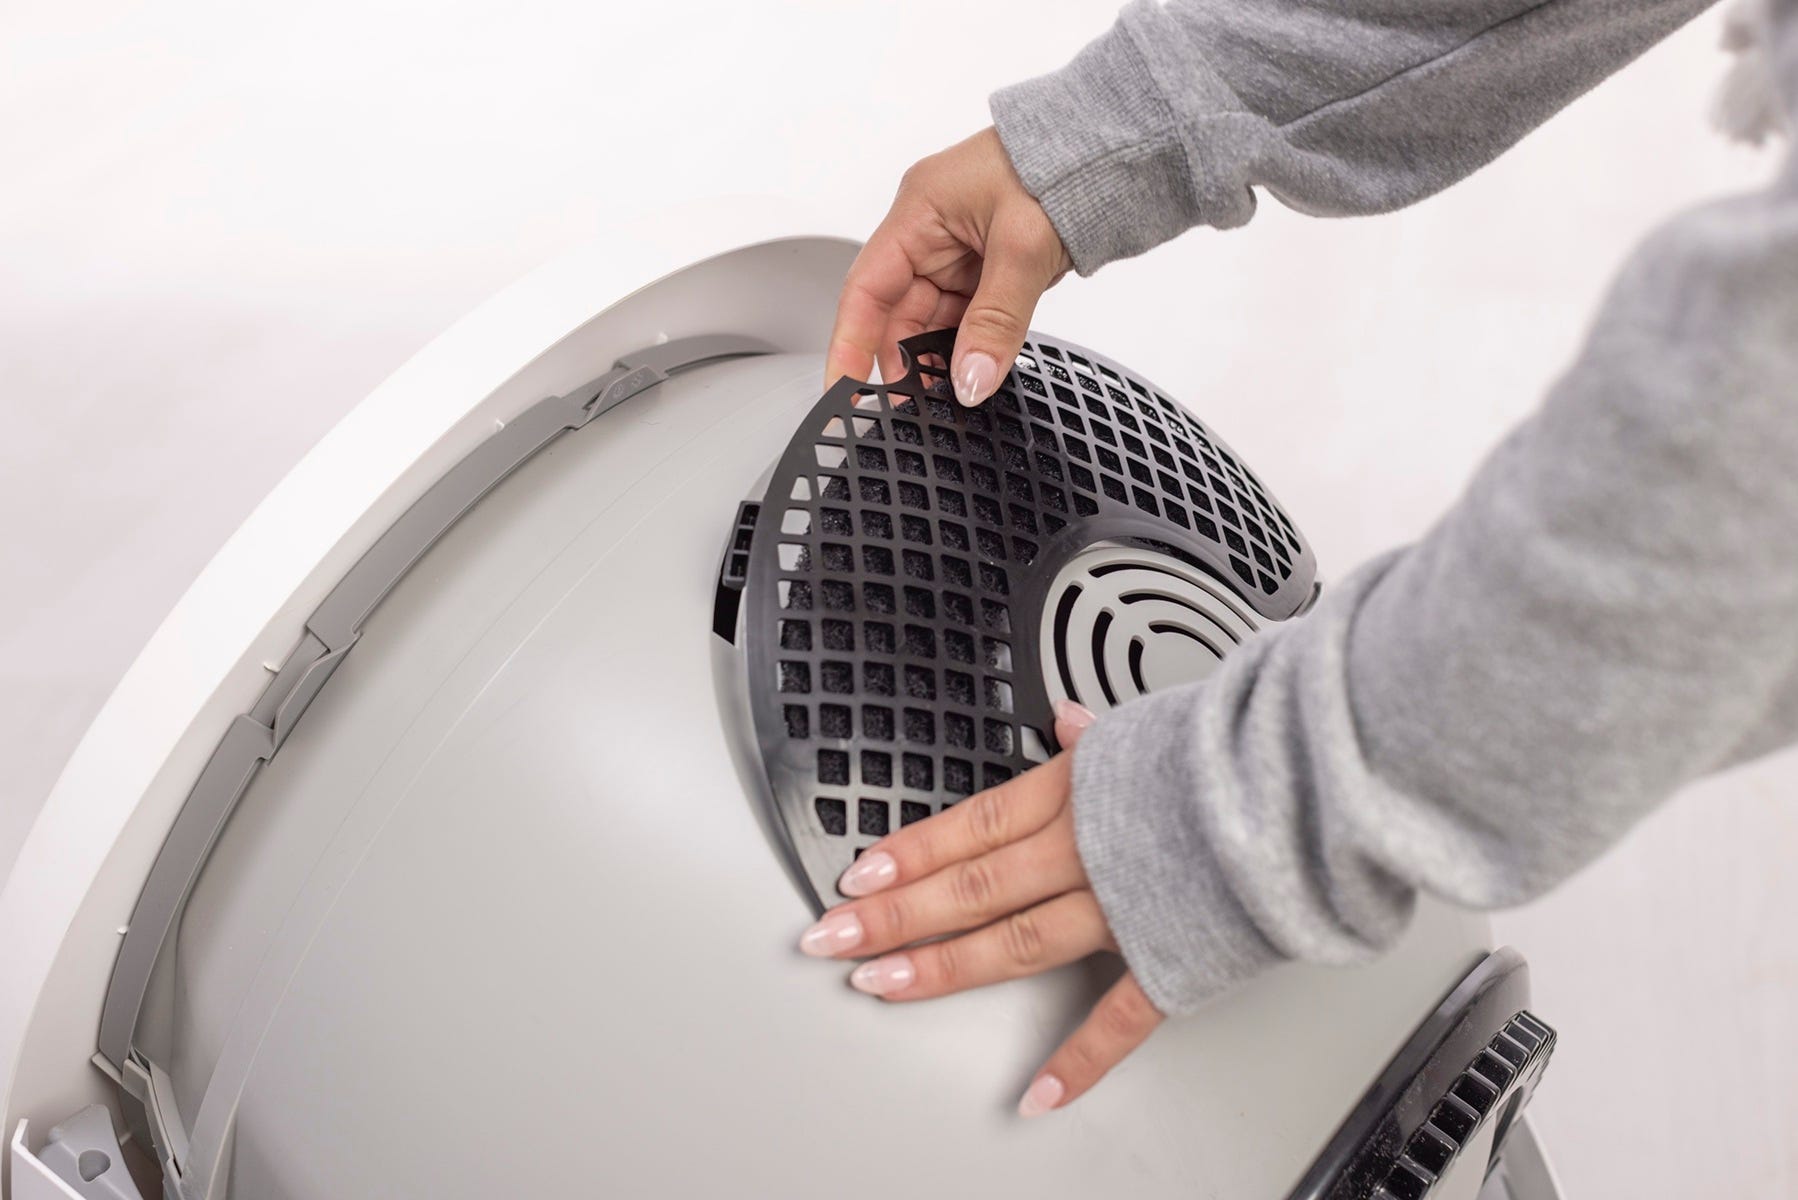
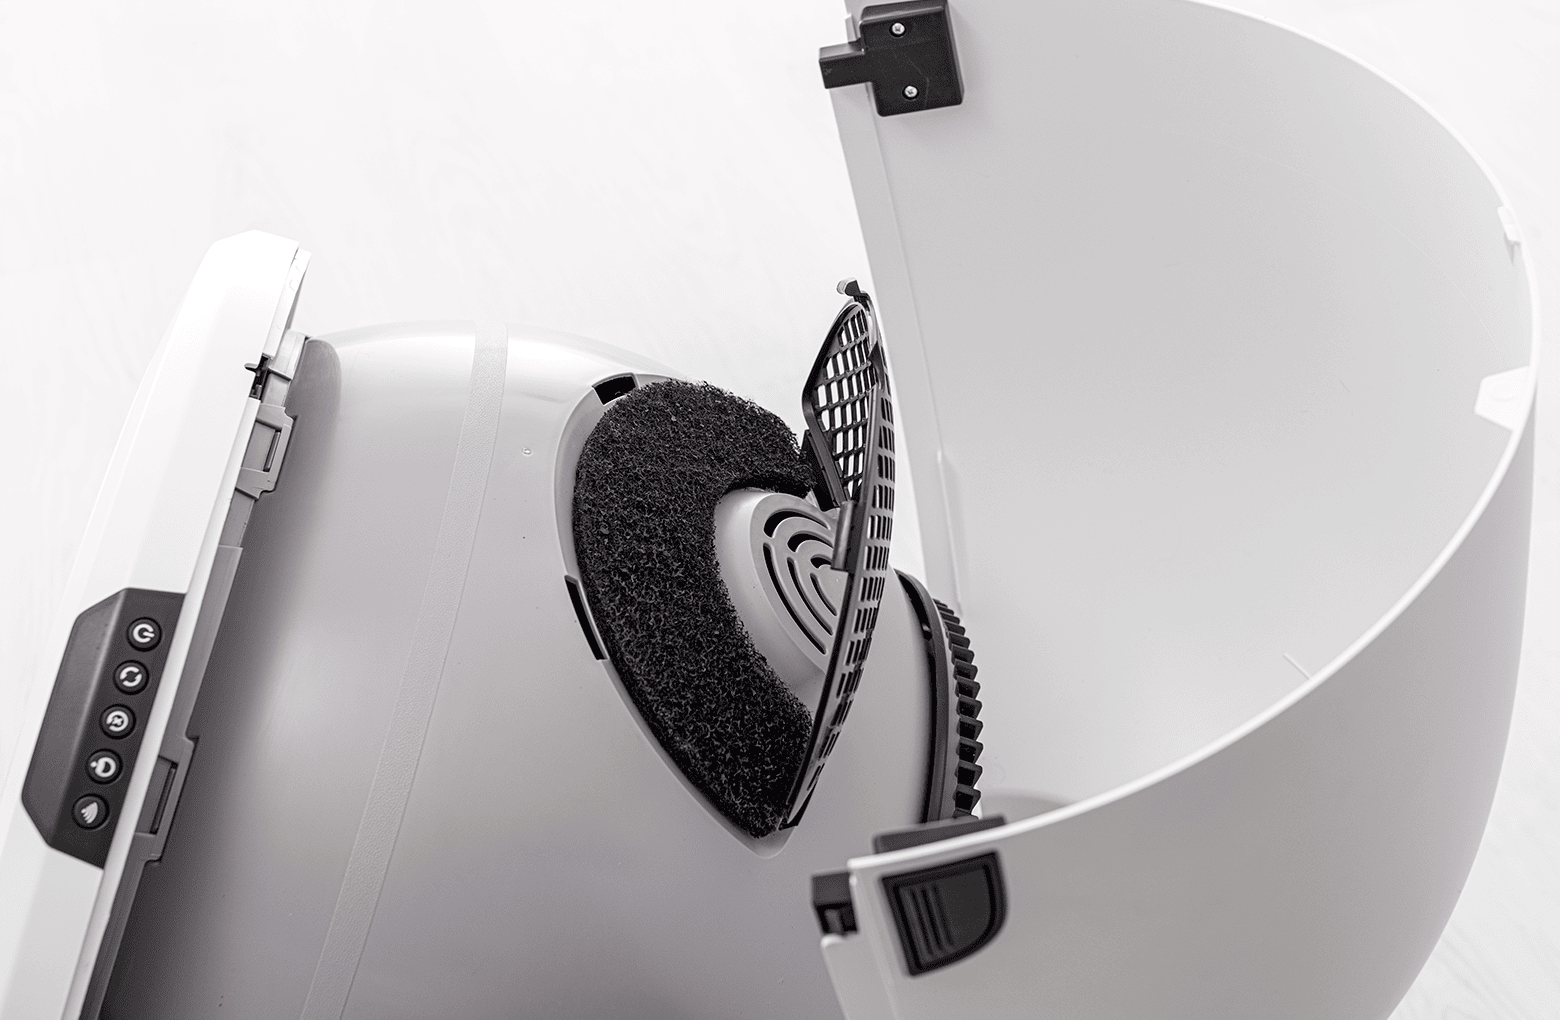
- Lift the small notch to release the filter cover snaps from the globe.
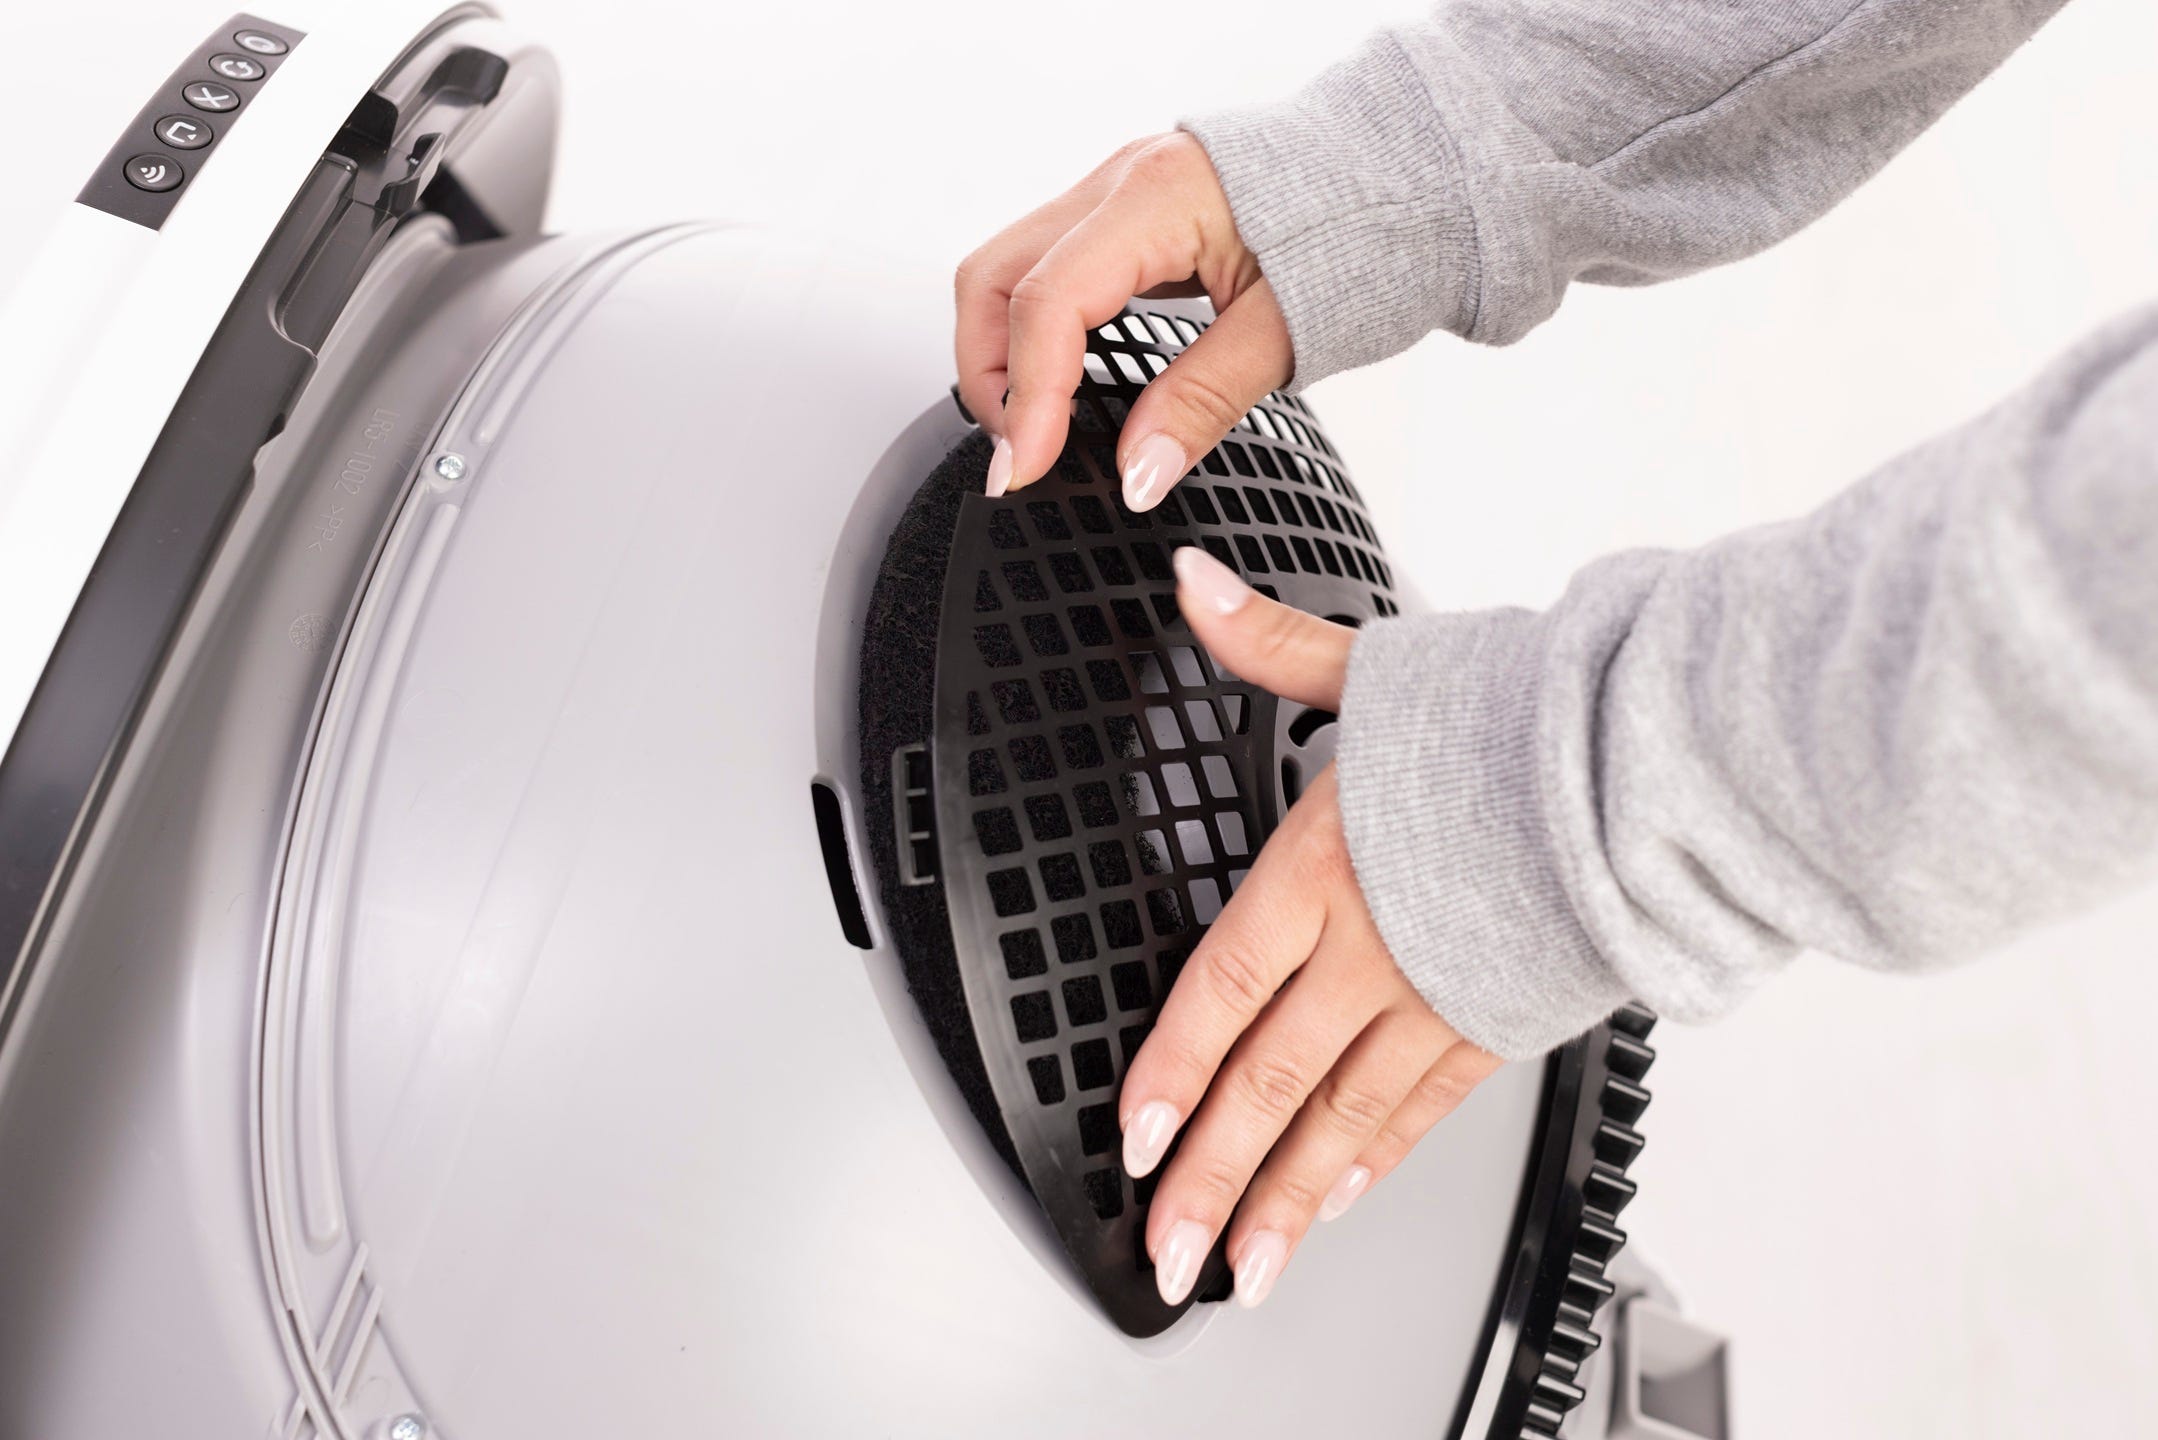
- Replace the carbon filter.
- Slide the bottom two tabs on the filter cover into the corresponding slots on the globe.

- Next, tuck the two tabs at the top of the cover into the corresponding slots on the globe.
Note: If the filter cover is not fully seated it may cause cycle interruptions. Make sure the four tabs on the filter cover are securely seated in the corresponding slots on the globe.
Reassembling the unit
- Rotate the bonnet downward over the globe and push down on the bonnet from the top to make sure it is latched and secure.
- Short press the
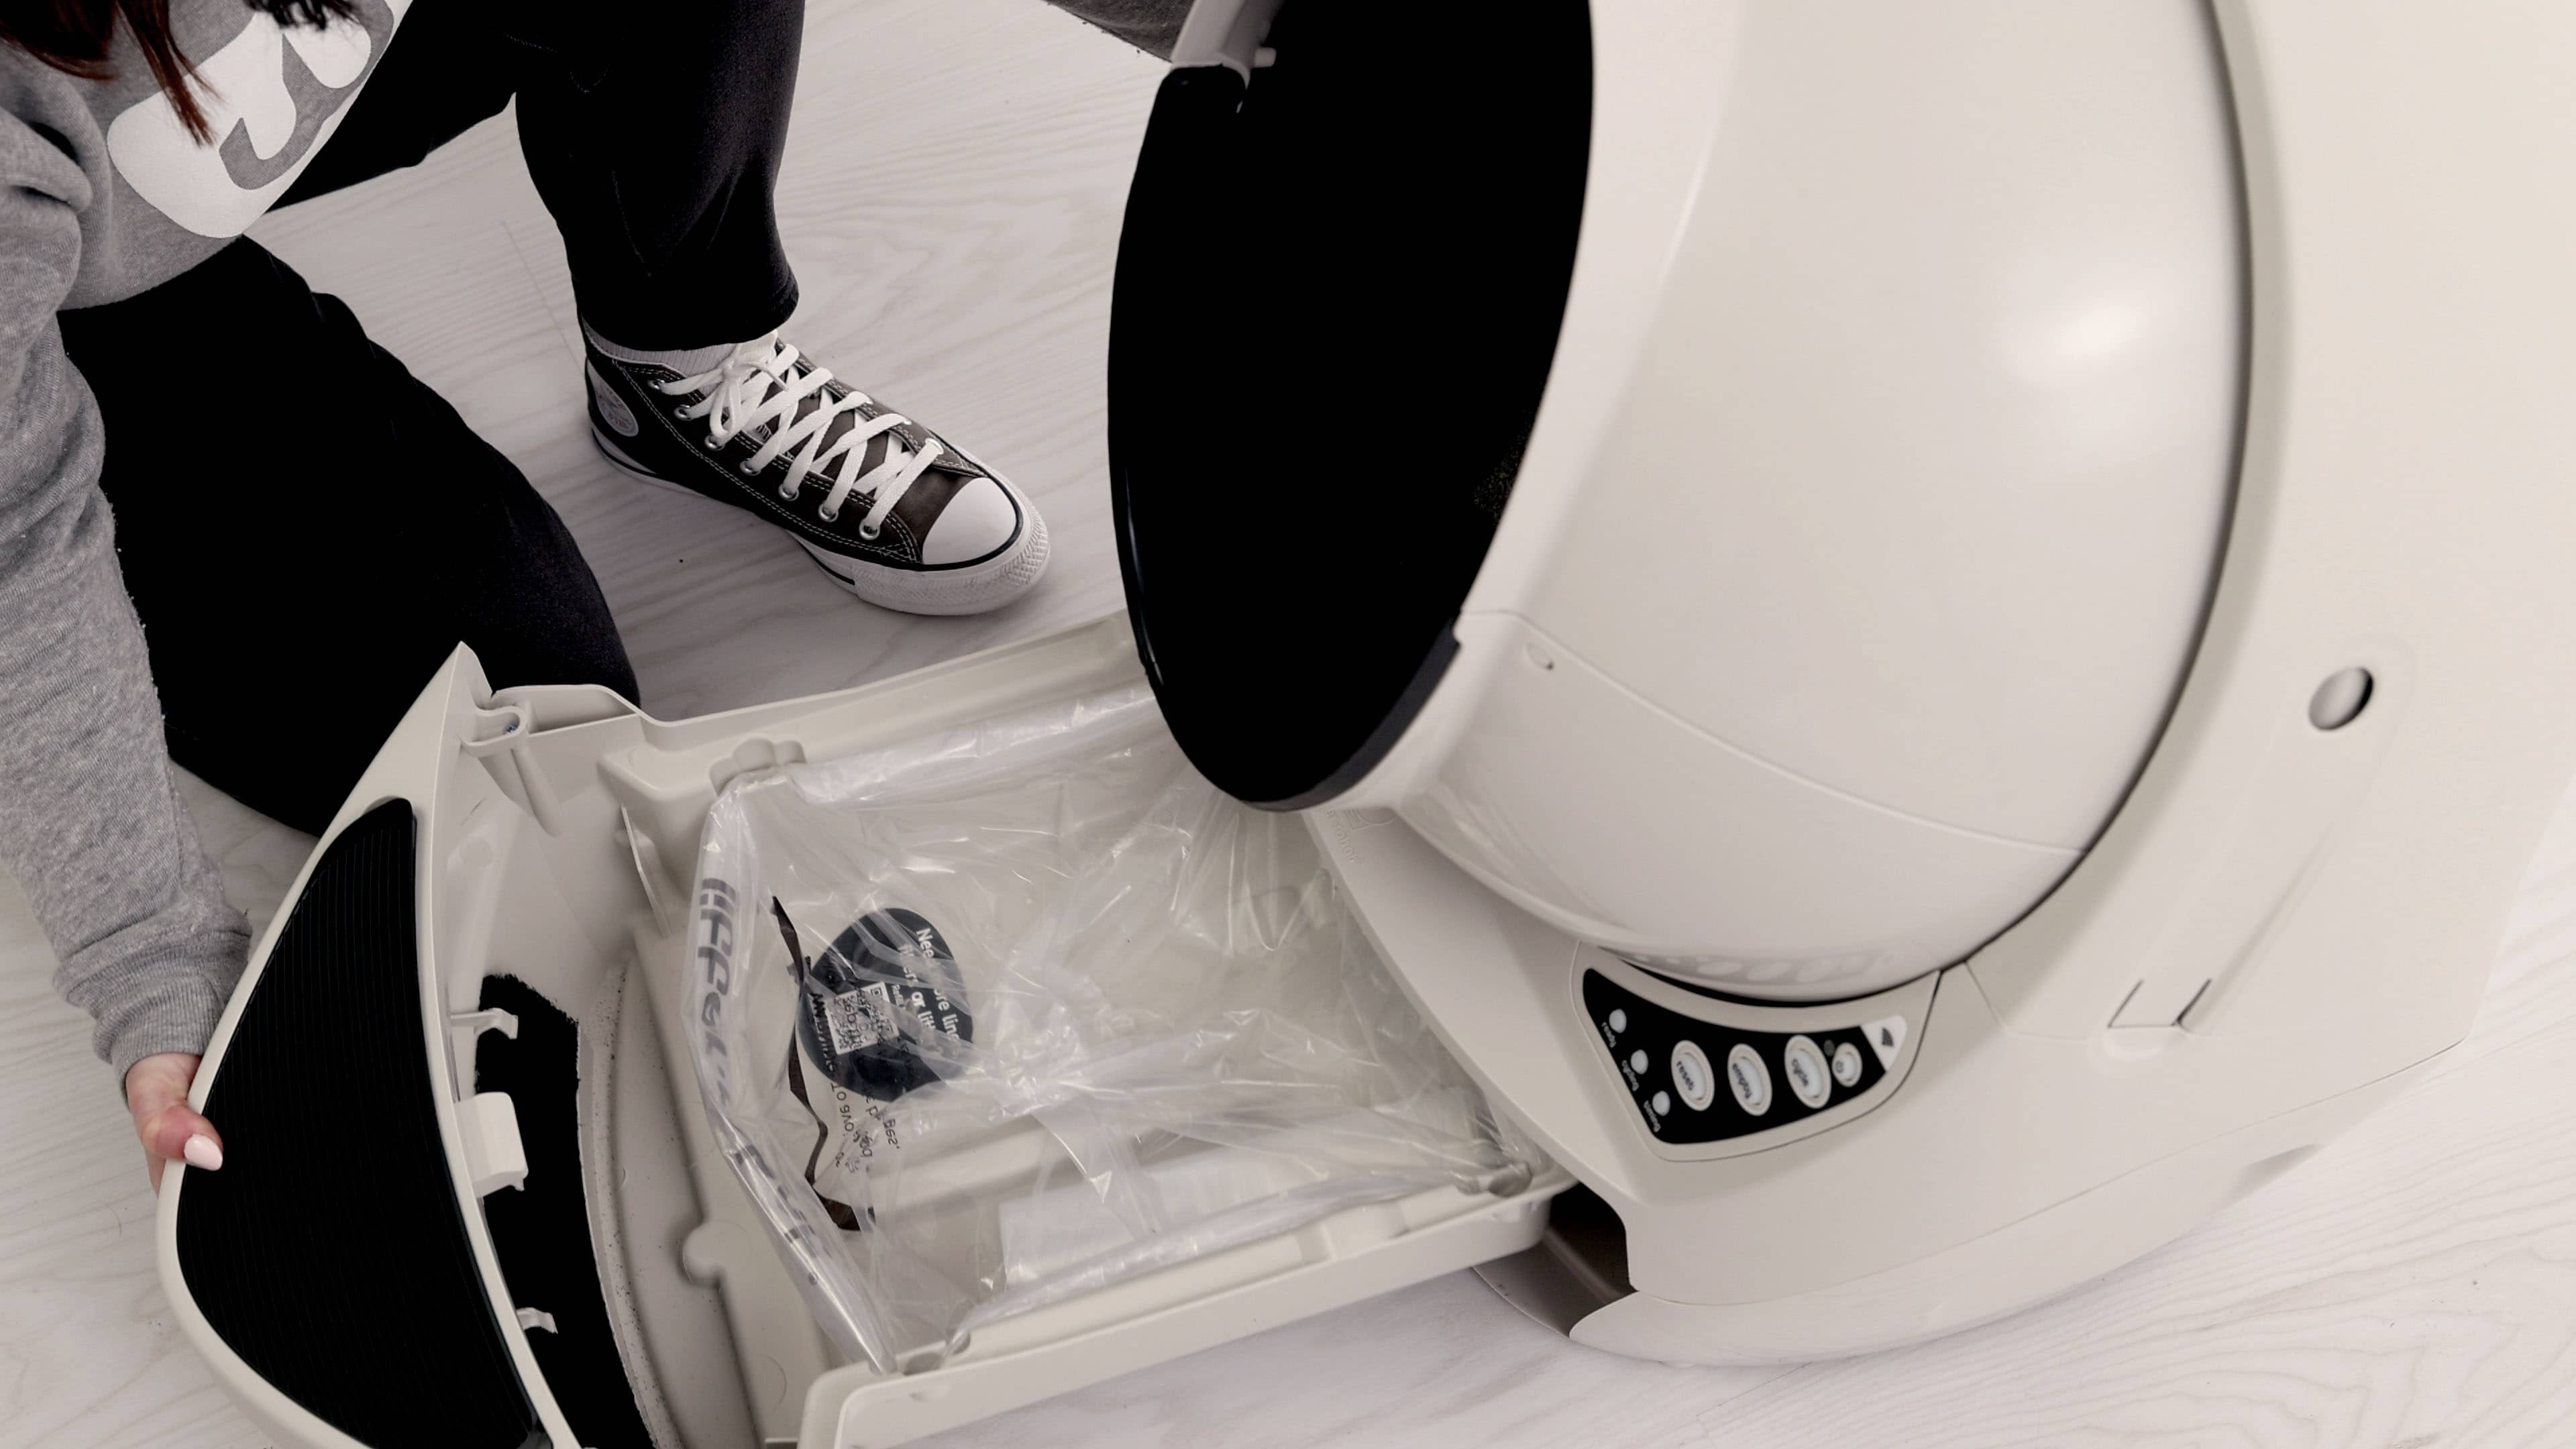
 Empty button to return the unit to the Home position.
 - Once the unit has returned to the Home position, short press the Cancel button to zero the weight scale.
Litter-Robot EVO: Carbon filter replacement
Preparing the unit
Make sure Litter-Robot is in the Home position.
Tap “Replace Filter" under Controls in the Whisker app, or, press and hold the
 Cancel button on the control panel for 3 seconds.
A filter change cycle will begin; the cycle will pause when the globe reaches the "replace filter" position.
Replacing the carbon filter
Lift and rotate the bonnet to its open position to reveal the filter pocket. Remove the bonnet and set aside.
- Lift the small notch to release the filter cover snaps from the globe.
- Replace the carbon filter.
Slide the bottom two tabs on the filter cover into the corresponding slots on the globe.

- Next, tuck the two tabs at the top of the cover into the corresponding slots on the globe.
Note: If the filter cover is not fully seated it may cause cycle interruptions. Make sure the four tabs on the filter cover are securely seated in the corresponding slots on the globe.
Reassembling the unit
Replace the bonnet by aligning the tab at the back of the bonnet with the slot in the bonnet hinge. Rotate the bonnet downward with light pressure on the sides so that it hugs the globe
Short press the
 Connect button to return the unit to the Home position.
 Once the unit has returned to the Home position, short press the
Cancel button to zero the weight sensors.
Litter-Robot 4: Carbon filter replacement
Preparing the unit
Make sure Litter-Robot is in the Home position.
Tap “Replace Filter” under Controls in the Whisker app, or, press and hold the
 Cycle and
  Empty buttons for 3 seconds.
A filter change cycle will begin; the cycle will pause when the globe reaches the "replace filter" position.
Replacing the carbon filter
Lift and rotate the bonnet to its open position to reveal the filter pocket.
Open the filter cover: Lift the small notch to release the filter cover snaps from the globe. Replace the carbon filter as needed. (Under normal use, 1 filter should last approximately 1 month.)
Replace the carbon filter.
Slide the bottom two tabs on the filter cover into the corresponding slots on the globe.

Note: If the filter cover is not fully seated it may cause cycle interruptions. Make sure the four tabs on the filter cover are securely seated in the corresponding slots on the globe.
Reassembling the unit
Close the bonnet: Rotate the bonnet downward over the globe and push down on the bonnet from the top to make sure it is latched and secure.
Short press the
Cycle button to return the unit to the Home position.
Once the unit has returned to the Home position, short press the
 Reset button to zero the weight sensors.

Litter-Robot 3: Carbon filter replacement
Further reduce unpleasant odors with a fresh carbon filter, compatible with any Litter-Robot 3 model.
If you are using a Litter-Robot 3, the carbon filter is located in the waste drawer rather than in the globe.
Recommended: Replace carbon filters every month.
Removing the carbon filter
- Pull out the waste drawer and locate the carbon filter in the front wall.
- Push the top edge of the filter downward to free it from the hooks.
- Pull the filter out of the slot and discard it.
Installing the carbon filter
- In the front wall of the waste drawer, slide the new filter into the slot.
- Bend the top edge of the filter and slide it under each hook.
- Adjust the filter, so it covers the front-facing vent completely.
Note: It is normal for the carbon filter to shed during installation. Simply wipe up or vacuum any debris.
Purchase Litter-Robot 3 Carbon Filters
Didn't find what you're looking for?
Live support available Mon-Fri: 9AM-9PM EST and Sat-Sun: 9AM-5PM EST, or submit a ticket anytime.