The store will not work correctly in the case when cookies are disabled.
Litter-Robot 5 Pro: Onboarding and connectivity
If your LCD screen appears fuzzy or discolored after powering on your unit, don’t worry—this is a temporary effect caused by static buildup during shipping. If it doesn’t clear up within 15–20 minutes, gently wipe the screen with a dry cloth.
Congratulations on your new self-cleaning litter box! Now, let’s walk you through how to connect Litter-Robot 5 Pro to the Whisker app.
Need help with onboarding Litter-Robot 5?
Whisker app onboarding requirements:
Whisker app version: 1.31.0 or newer.
Camera permissions: Required in app to scan the QR code.
Location permissions: “While using the app” must be enabled.
Network: 2.4GHz or 5GHz WiFi signal with IPv4 or IPv6 addressing (varies by internet service providers, router, and modem).
Operating system: Check the Whisker app in your device’s app store for the latest OS version requirements.
Onboarding Litter-Robot 5 Pro
Open the Whisker app. You will need to log in or register an account on the app.
You can do this using the email and password you used when purchasing your robot. If you did not set up an email and password, simply select ‘register’ to create one.
- Once logged in, tap ‘add a device’ to add a new robot.
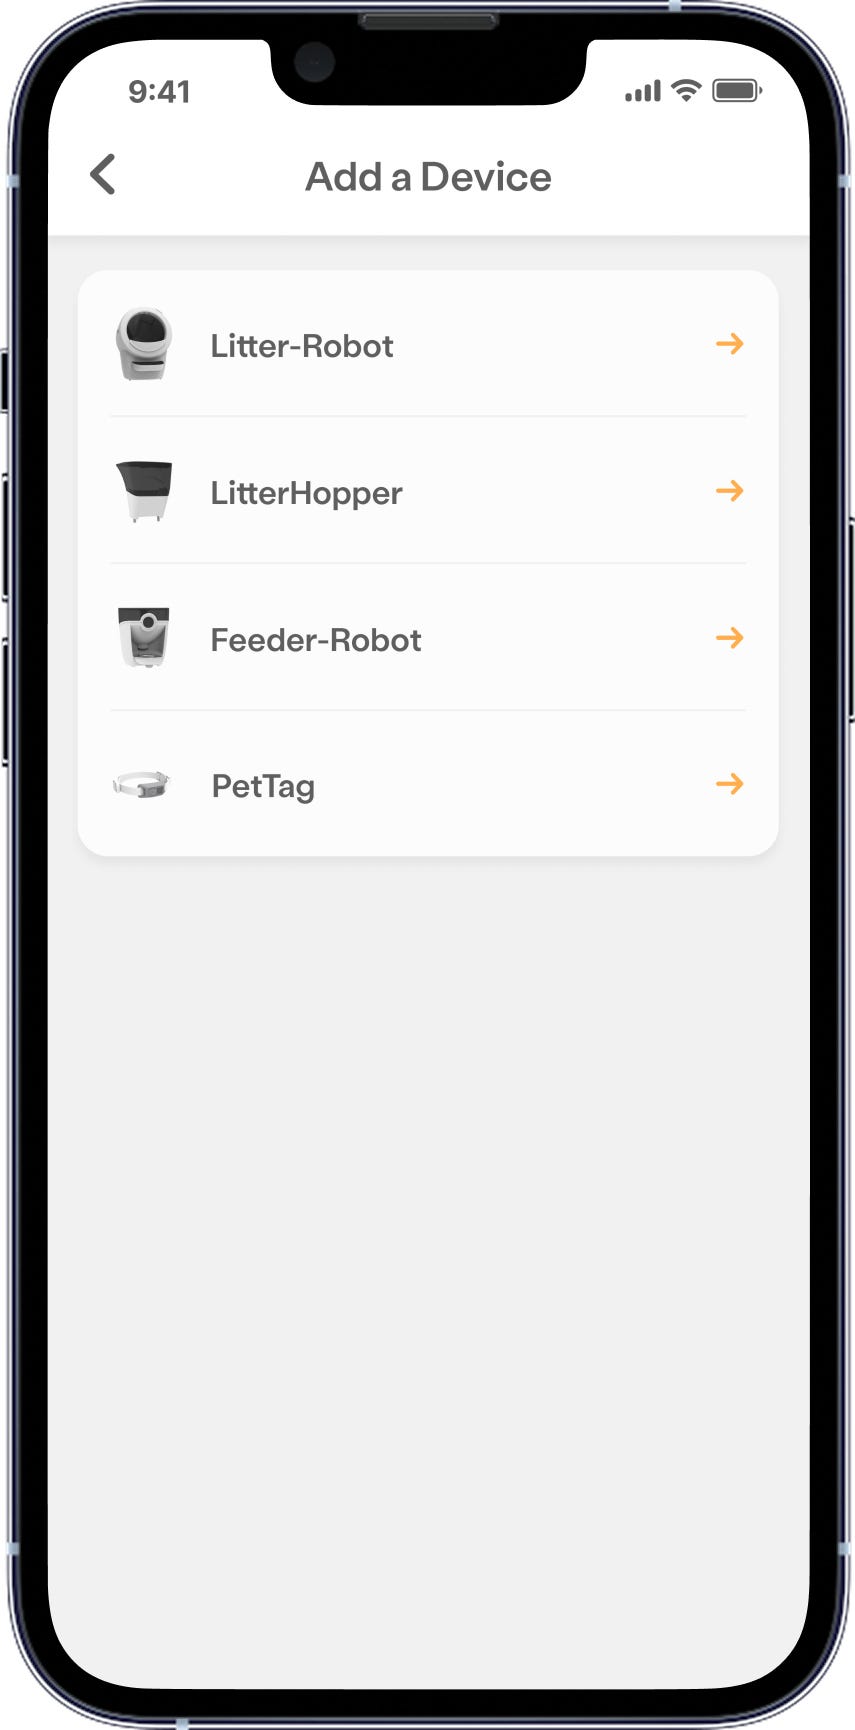
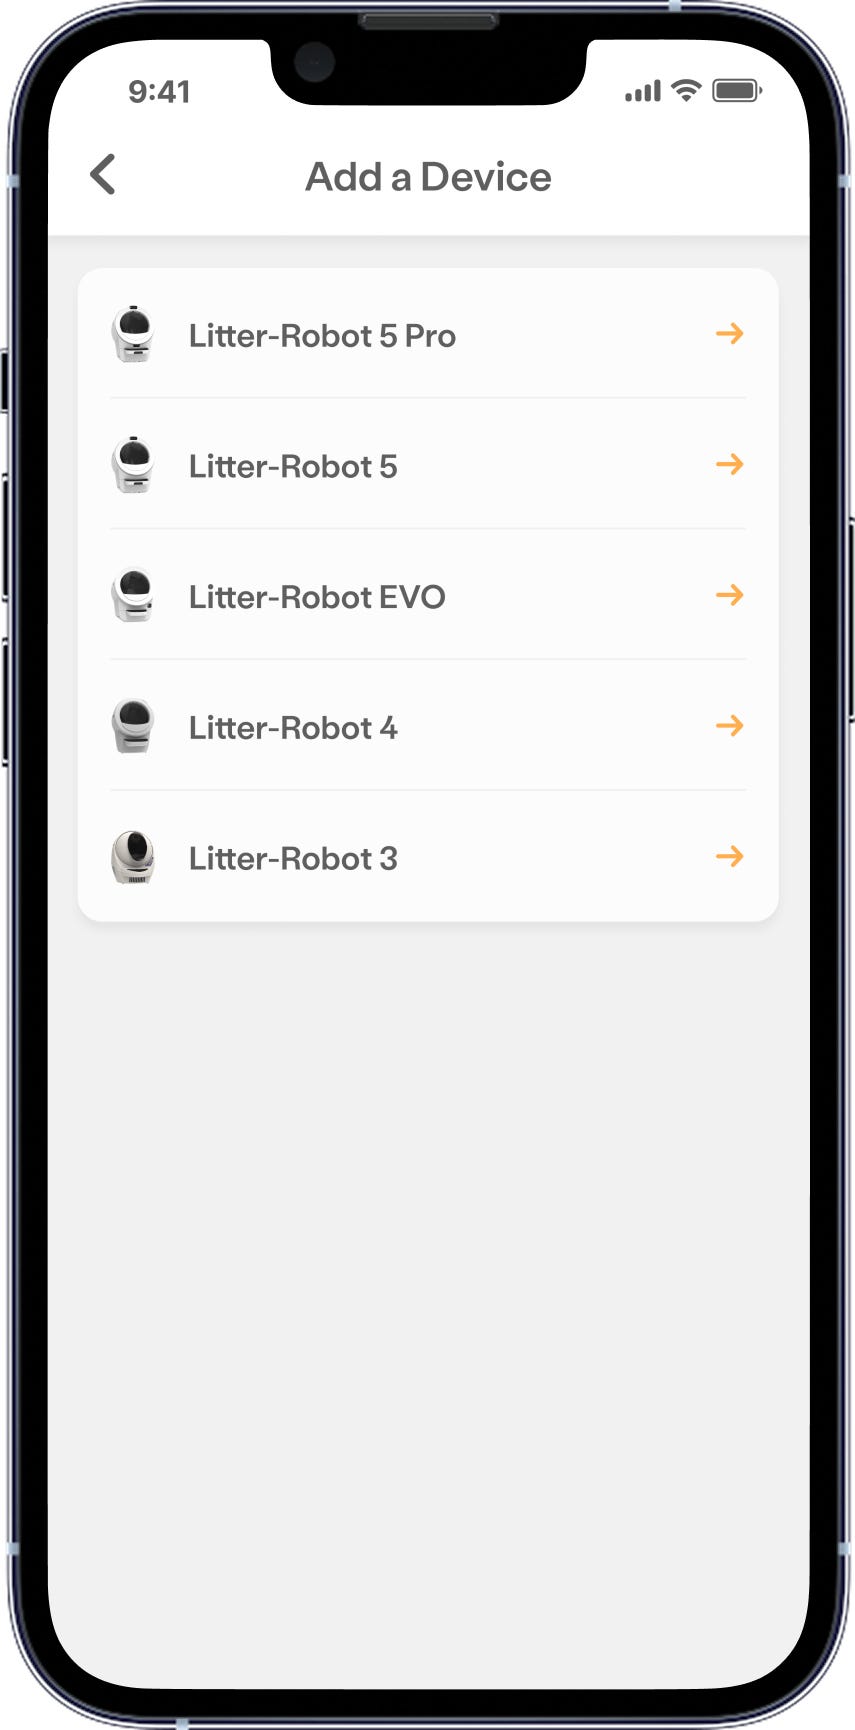
- You’ll need to select the Whisker product you want to add to the app. In this case, select Litter-Robot 5 Pro.
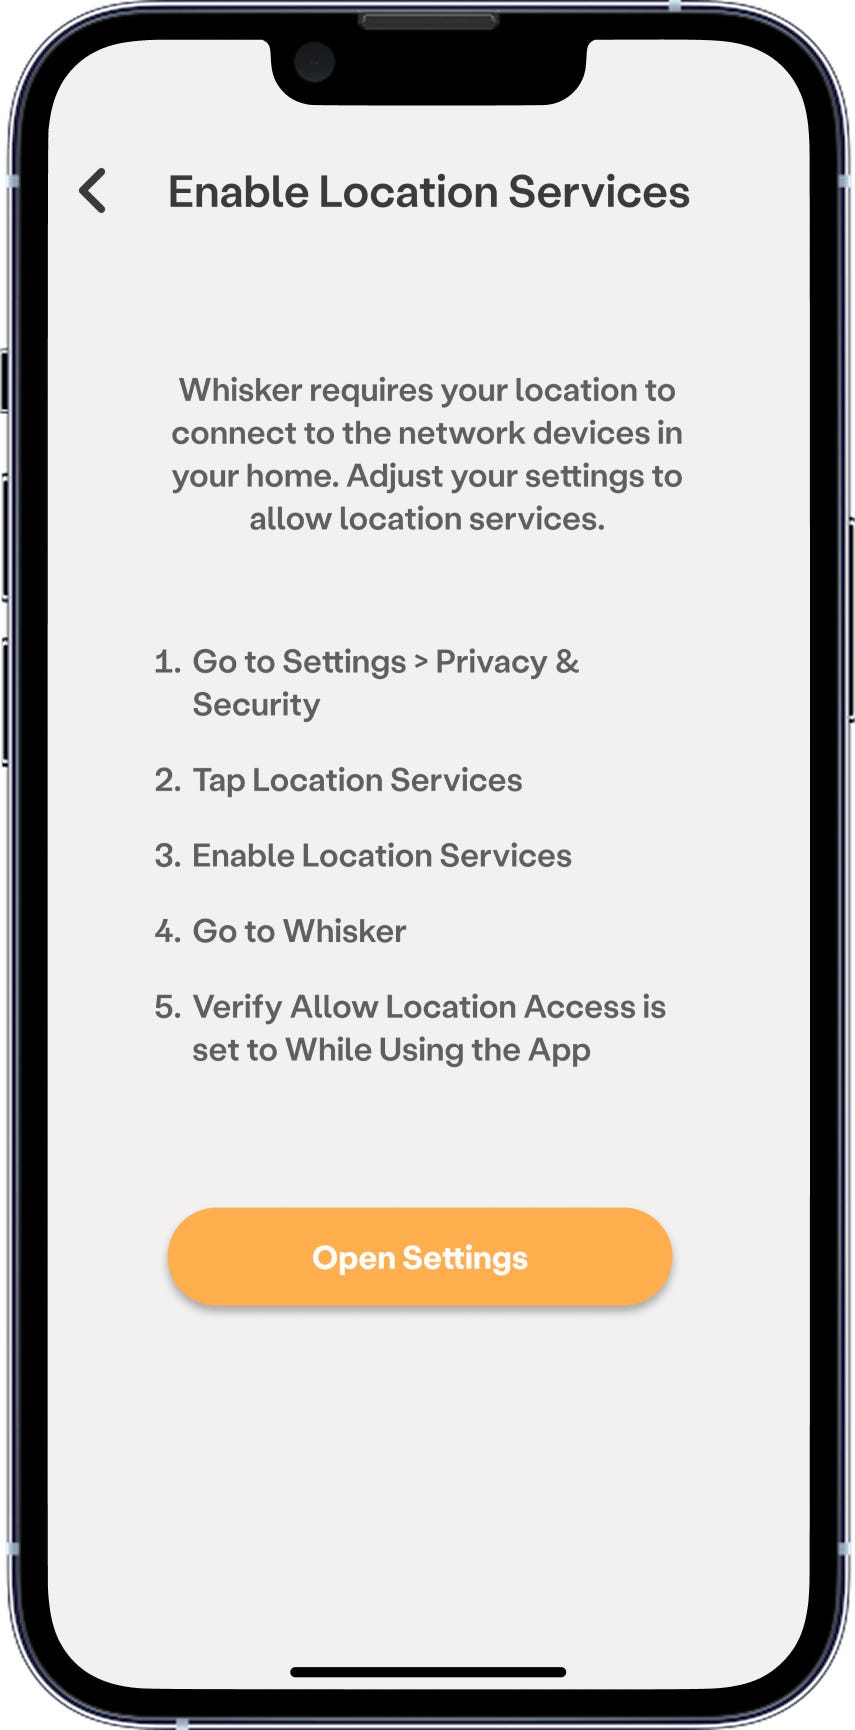
Whisker requires your location to connect to the network devices in your home. You may have to open your settings on your mobile device and ensure that the location services are enabled for ‘Whisker’.
Verify that the access setting is set to ‘While using the app’. If you select ‘Don’t Allow’, you will not be able to onboard your unit.
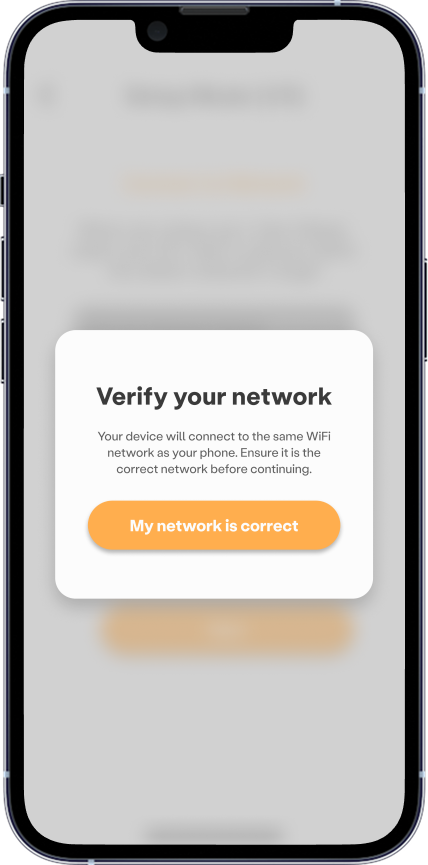
- Select your home WiFi network and enter your password.
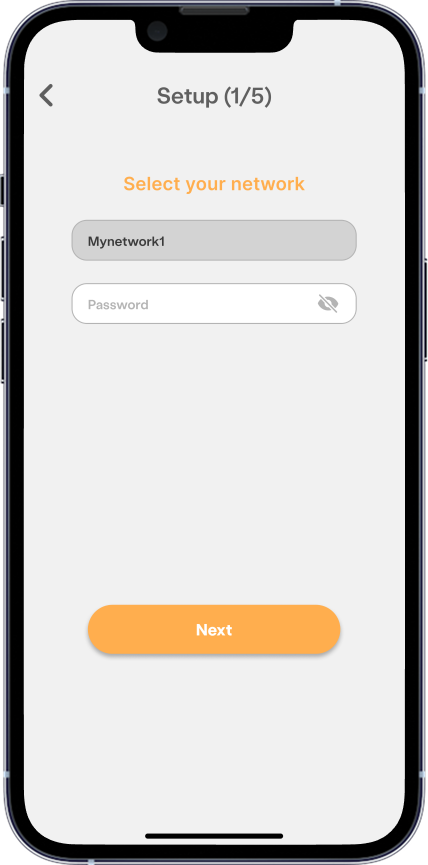
- iOS users can connect to 2.4 GHz or 5 GHz. Verify your network—your device will connect to the same WiFi network as your phone.
Android: Select your 2.4 GHz WiFi network.
Tips:
- Use a 5 GHz network for the best camera performance (lower latency, etc).
- If your robot is far from the router or 5 GHz is unreliable, switch to 2.4 GHz for better range.
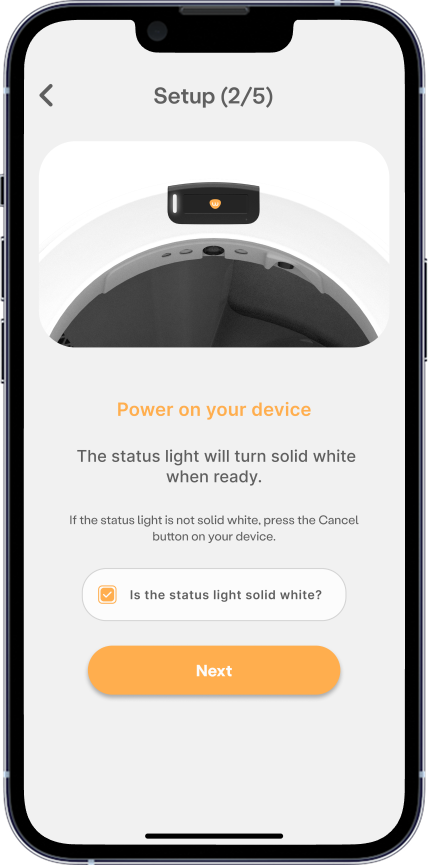
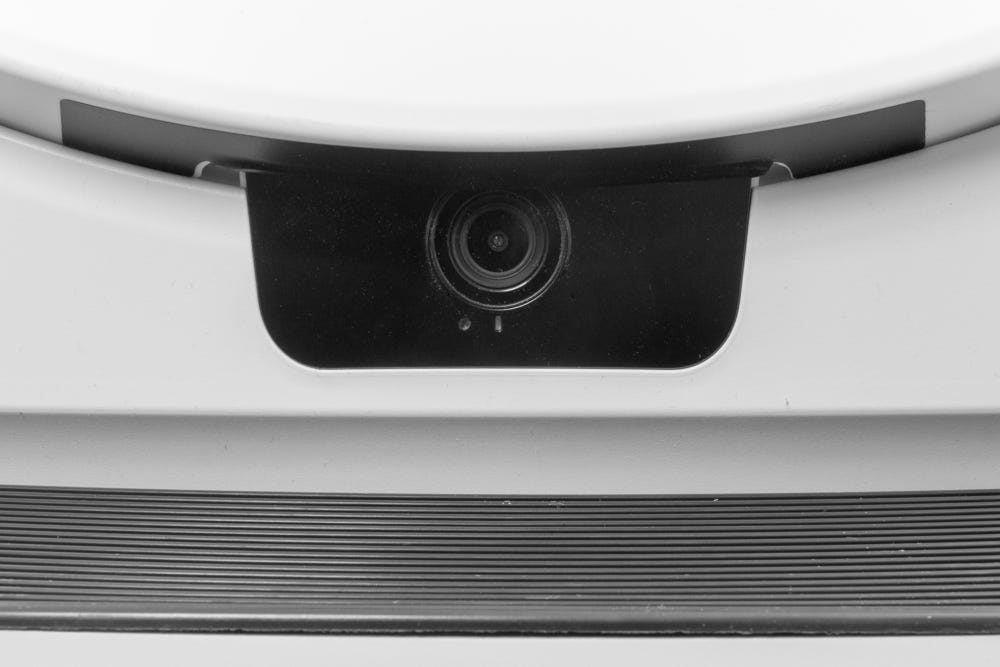
Make sure your Litter-Robot is plugged in. The LED status light on the Control Panel will turn solid white and the camera LED light will be blinking blue when powered on.
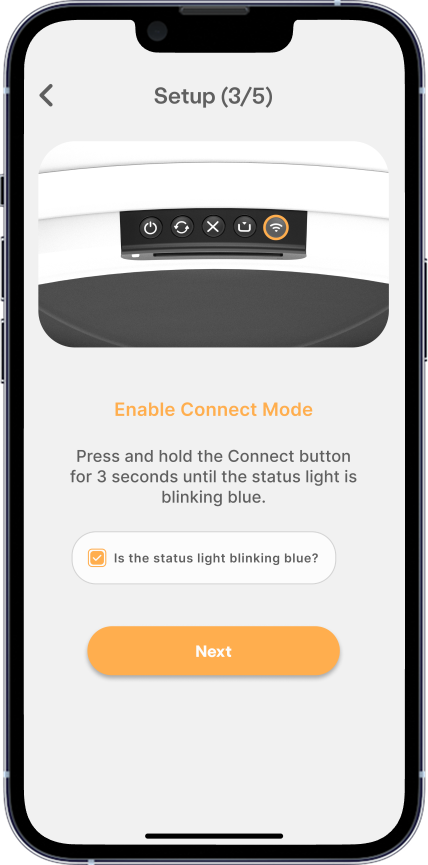
To start the onboarding process, put Litter-Robot into Onboarding Mode by pressing the Connect button for 3-5 seconds. The status light will begin blinking blue and the camera LED will continue to display a blinking blue light.
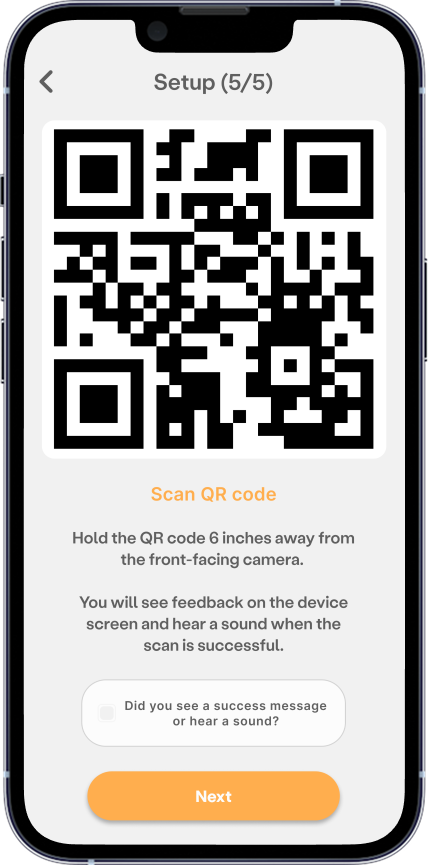
Next, you’ll see a QR code appear on your screen.
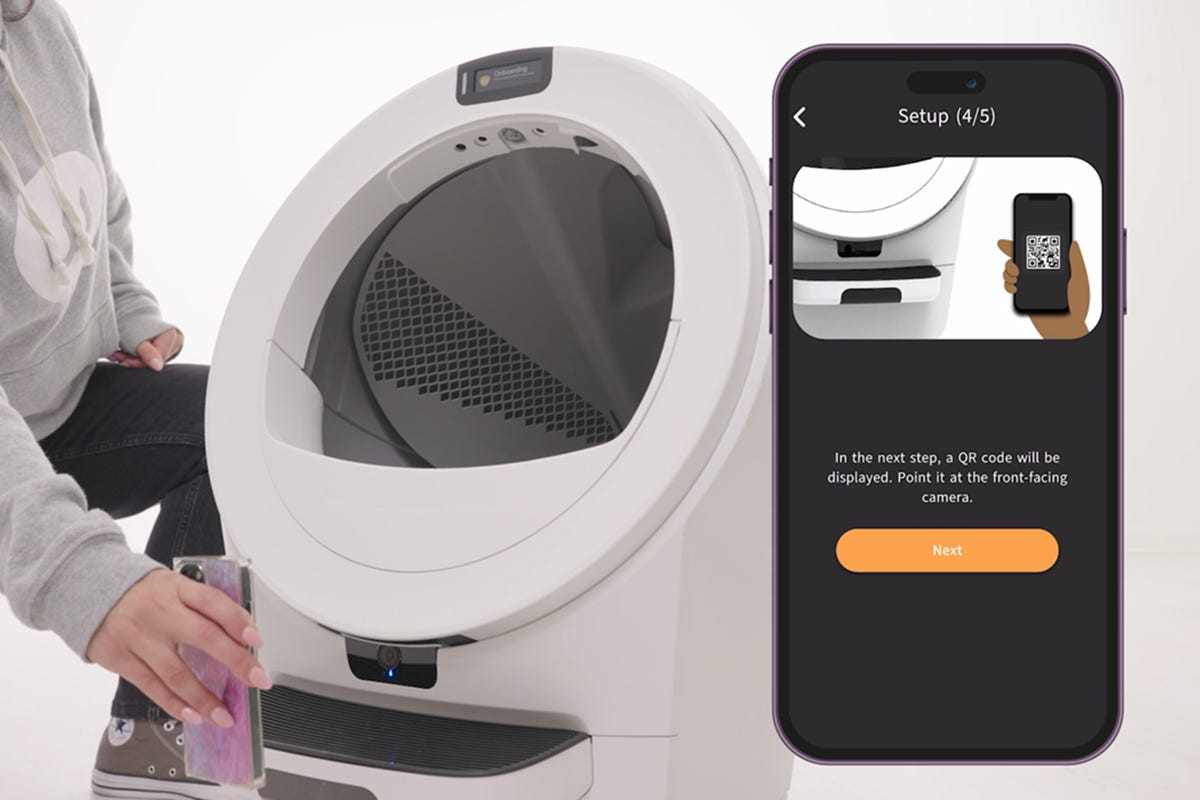
- Ensure your screen brightness is set to 40% or higher. If the QR cannot be read, increase the brightness of the screen.
- Hold the QR code in front of Litter-Robot’s camera (about 6 inches / 15 cm away). When you see a success message the QR code has been successfully scanned.
- If the camera is not reading the QR code, power off and unplug your unit from the base for 15 seconds, then plug it back in. Wait up to 60 seconds for the camera to reboot and restart the onboarding process.
What if my camera LED Indicator light is not blinking blue?
In order to scan the QR code, the camera LED indicator light must be blinking blue.
- If you see a blinking yellow light after scanning the QR code, your WiFi credentials may have been entered incorrectly. Please verify your WiFi network’s name and password and try again.
- If no camera LED light is illuminated, or the camera LED continues blinking yellow after you’ve confirmed correct WiFi credentials, perform a Factory Reset:
Simultaneously, press and hold the
Cycle and
Cancel buttons for three seconds. The LED indicator light will blink red.
After the reset, please wait up to 60 seconds to reboot. The camera LED should turn solid white. You may then reattempt onboarding.
Keep the app open while your Litter-Robot connects. This may take a few minutes.
- The LED lights on the Control Panel and camera will continue to blink blue while initiating the connection.

When successfully connected, the Control Panel LED status light and camera LED will both show solid white and your Litter-Robot is ready to use.
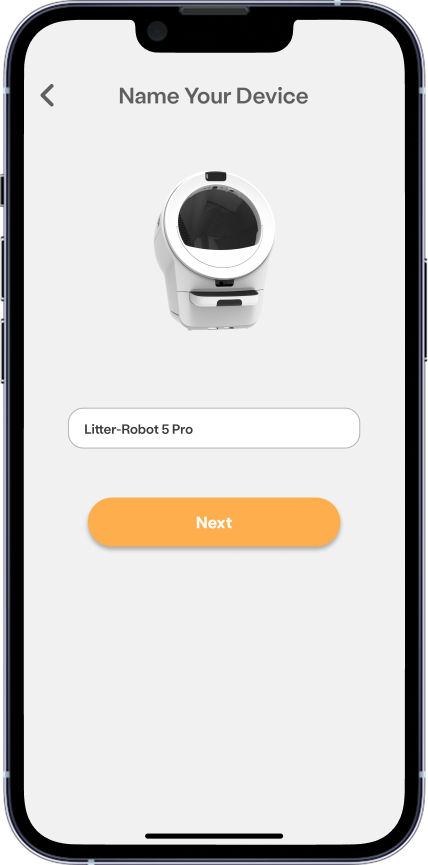
Next, it’s time to name your Litter-Robot. If you have more than one robot, this will make it easy to identify.
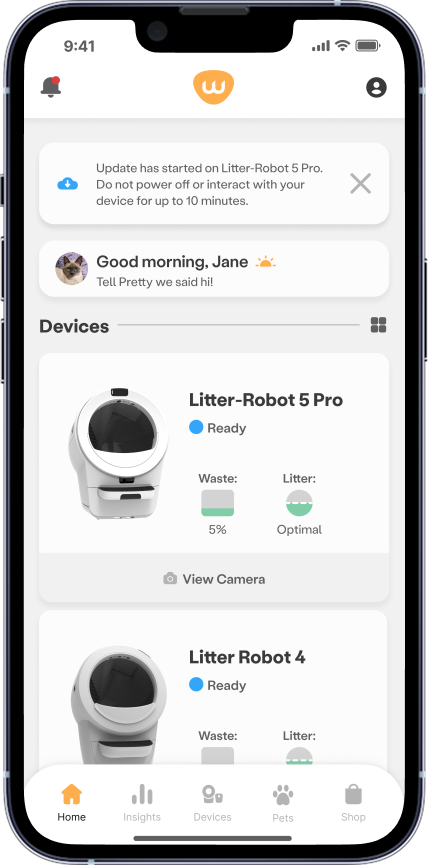
Next, your firmware will automatically update. Please do not power off or interact with your Litter-Robot until this is finished.
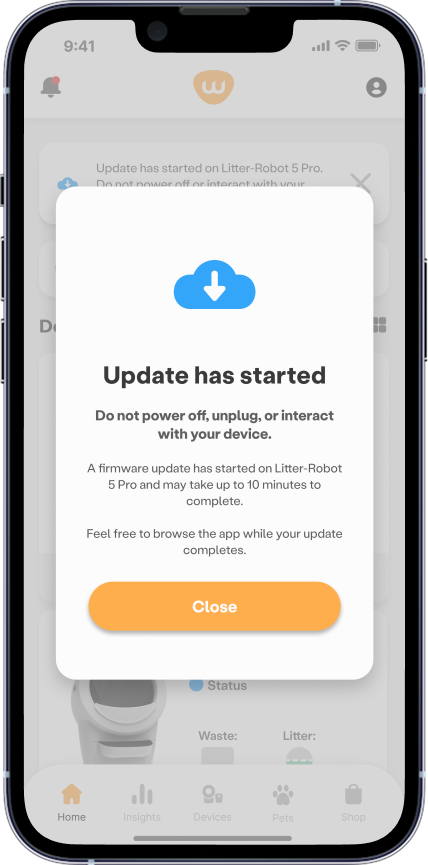
The firmware update may take up to 10 minutes.
Now you can finish setting up your new Litter-Robot and enabling SmartScale by creating profiles for your pets.
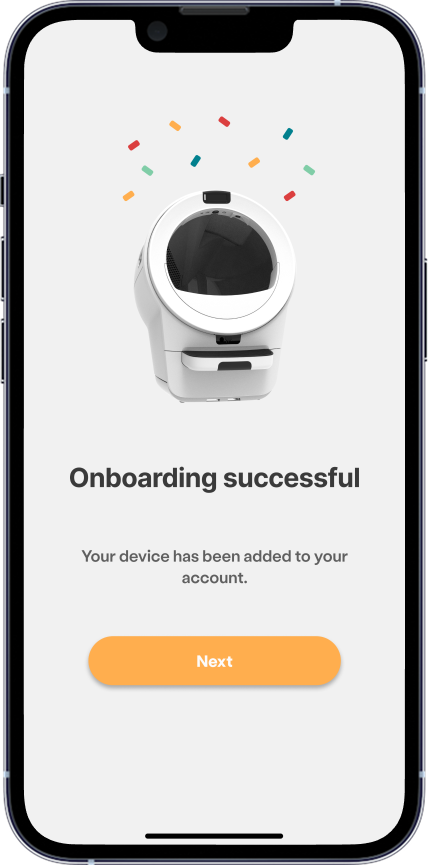
Congratulations! Your Litter-Robot is connected and ready to use.
Need more help?
Contact Whisker Customer Experience for assistance.
Didn't find what you're looking for?
Live support available Mon-Fri: 9AM-9PM EST and Sat-Sun: 9AM-5PM EST, or submit a ticket anytime.