The store will not work correctly in the case when cookies are disabled.
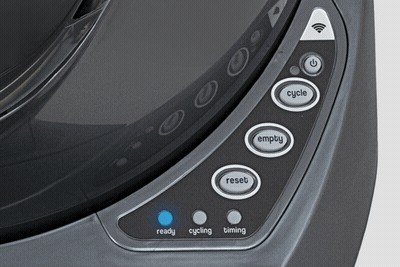
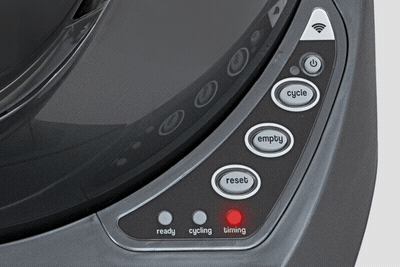
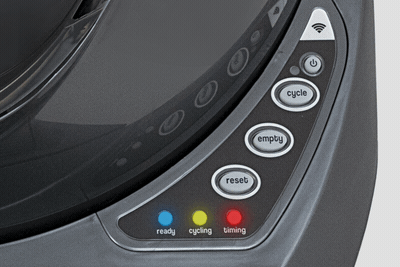
Litter-Robot 3: All three lights flashing (Globe position fault)
The Litter-Robot 3 is equipped three LED lights to indicate certain statuses and faults with your unit.
If all three of these lights are flashing in one of three combinations, it is an indication of a globe position fault.
You will also receive a notification on your phone if you use the Whisker App.
There are three different light combinations that are related to the position of the globe.
- Blue, then yellow, then red (Flashing sequentially, one light at a time): This means the unit cannot find the dump position. It will continue to function in automatic mode but needs repair.
- Red, then yellow, then blue (Flashing sequentially, one light at a time): This means the unit cannot find the Home position. It will continue to function in automatic mode but needs repair.
- Blue and yellow and red (All three lights flashing simultaneously): This means the unit cannot find the Dump or Home position. The unit will not cycle automatically and needs repair.
Inspect the power supply
Ensure Litter-Robot is plugged directly into a wall outlet. We do not recommend using an extension cord or power strip.
- Unplug the power supply from the wall.
- Confirm that your outlet works by testing it with a known working device, such as a lamp or cell phone charger.
- Check that the power supply label reads 15V DC 1000mA or 1A.
- Visually inspect the power supply cord for any deformities, punctures, or other anomalies.
- Unplug the power supply from the rear of the base to check the pin in the power jack.

- The pin in the jack should be split slightly. If this pin is collapsed, find something small and gently open the pin.
- Plug the power supply back into the base and the wall
- Press the Power button to turn the unit on.
- When powered back on, your unit will perform a clean cycle.
- Once the clean cycle is complete, the unit should go back to blue ready status.
- If the base has been damaged by liquid or you've had any power fluctuations or power outages in your home due to outages or brownouts, you may need to replace your power supply or base.
If your unit returned home and displays a solid blue light, you've been successful.
If your unit is not displaying a solid blue light after returning to home position, or cannot complete the cycle, please continue with troubleshooting.
Inspect the globe
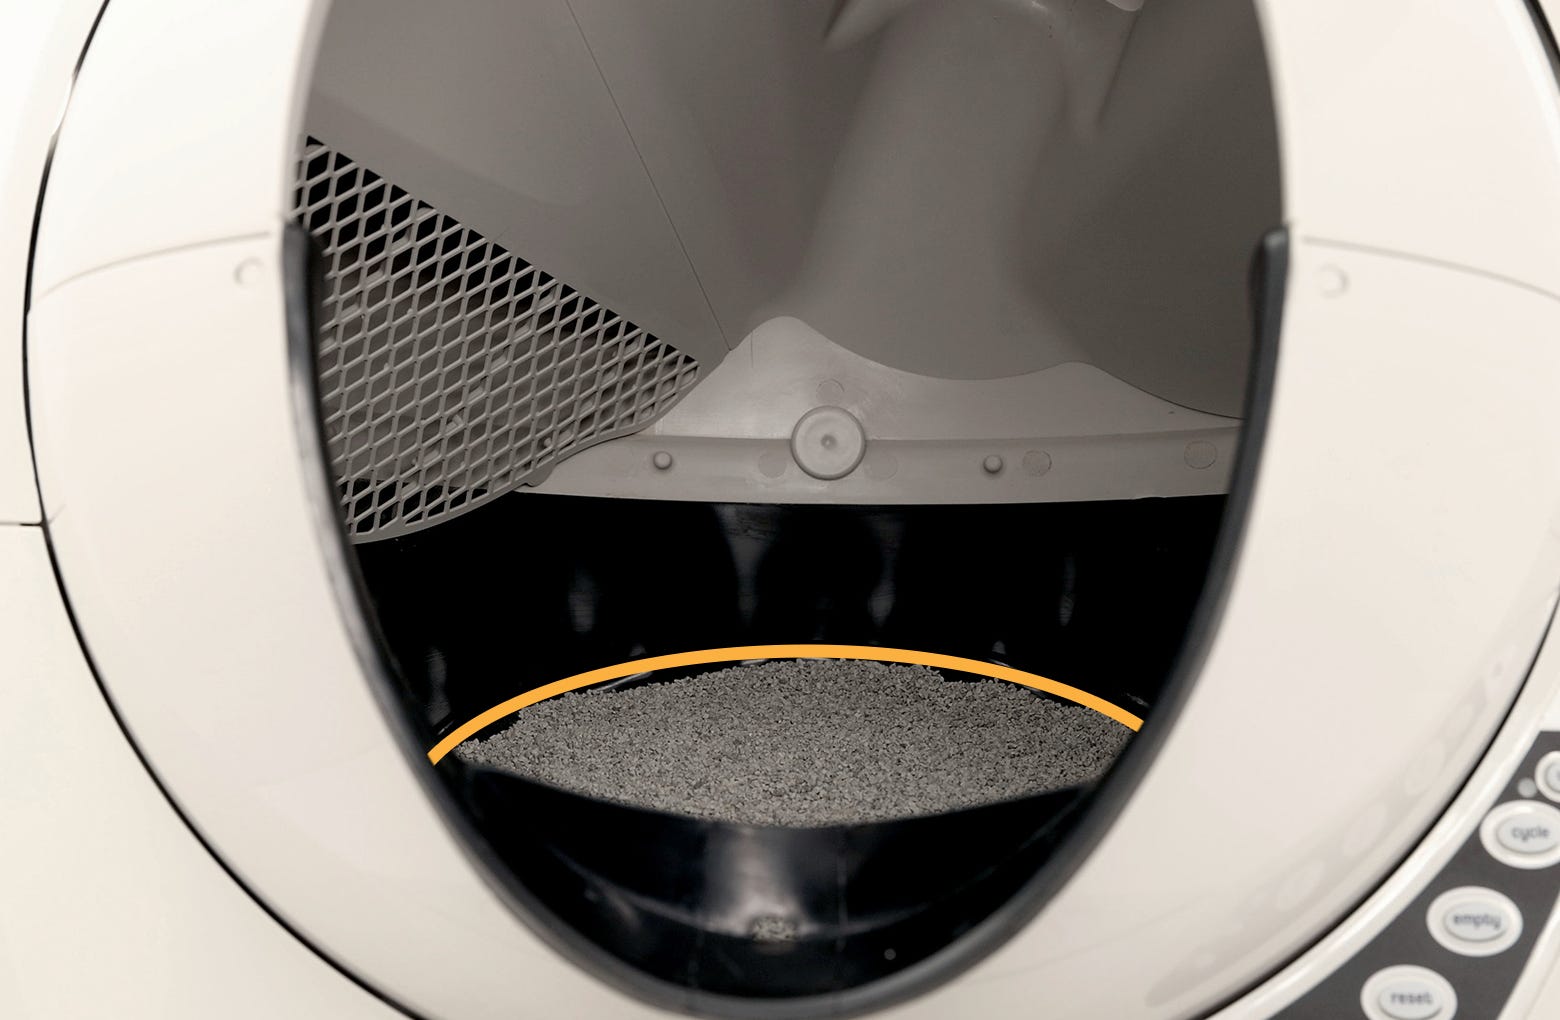
Check for excess litter inside the globe. Using more than 10 lbs (4.5 kg) of litter can strain the motor, causing a globe position or over-torque fault.
Make sure the litter is at or below the raised fill line. Some brands of litter are heavier than others. For these litters, we recommend keeping the litter at least a half inch (1.2 cm) below the fill line to avoid weight-related errors.
- Check and clear any obstructions in the waste port. Waste clumps or toys could obstruct the globe rotation and cause a globe position or over-torque fault.
- Press the Power button to turn the unit off then unplug the unit from the wall.
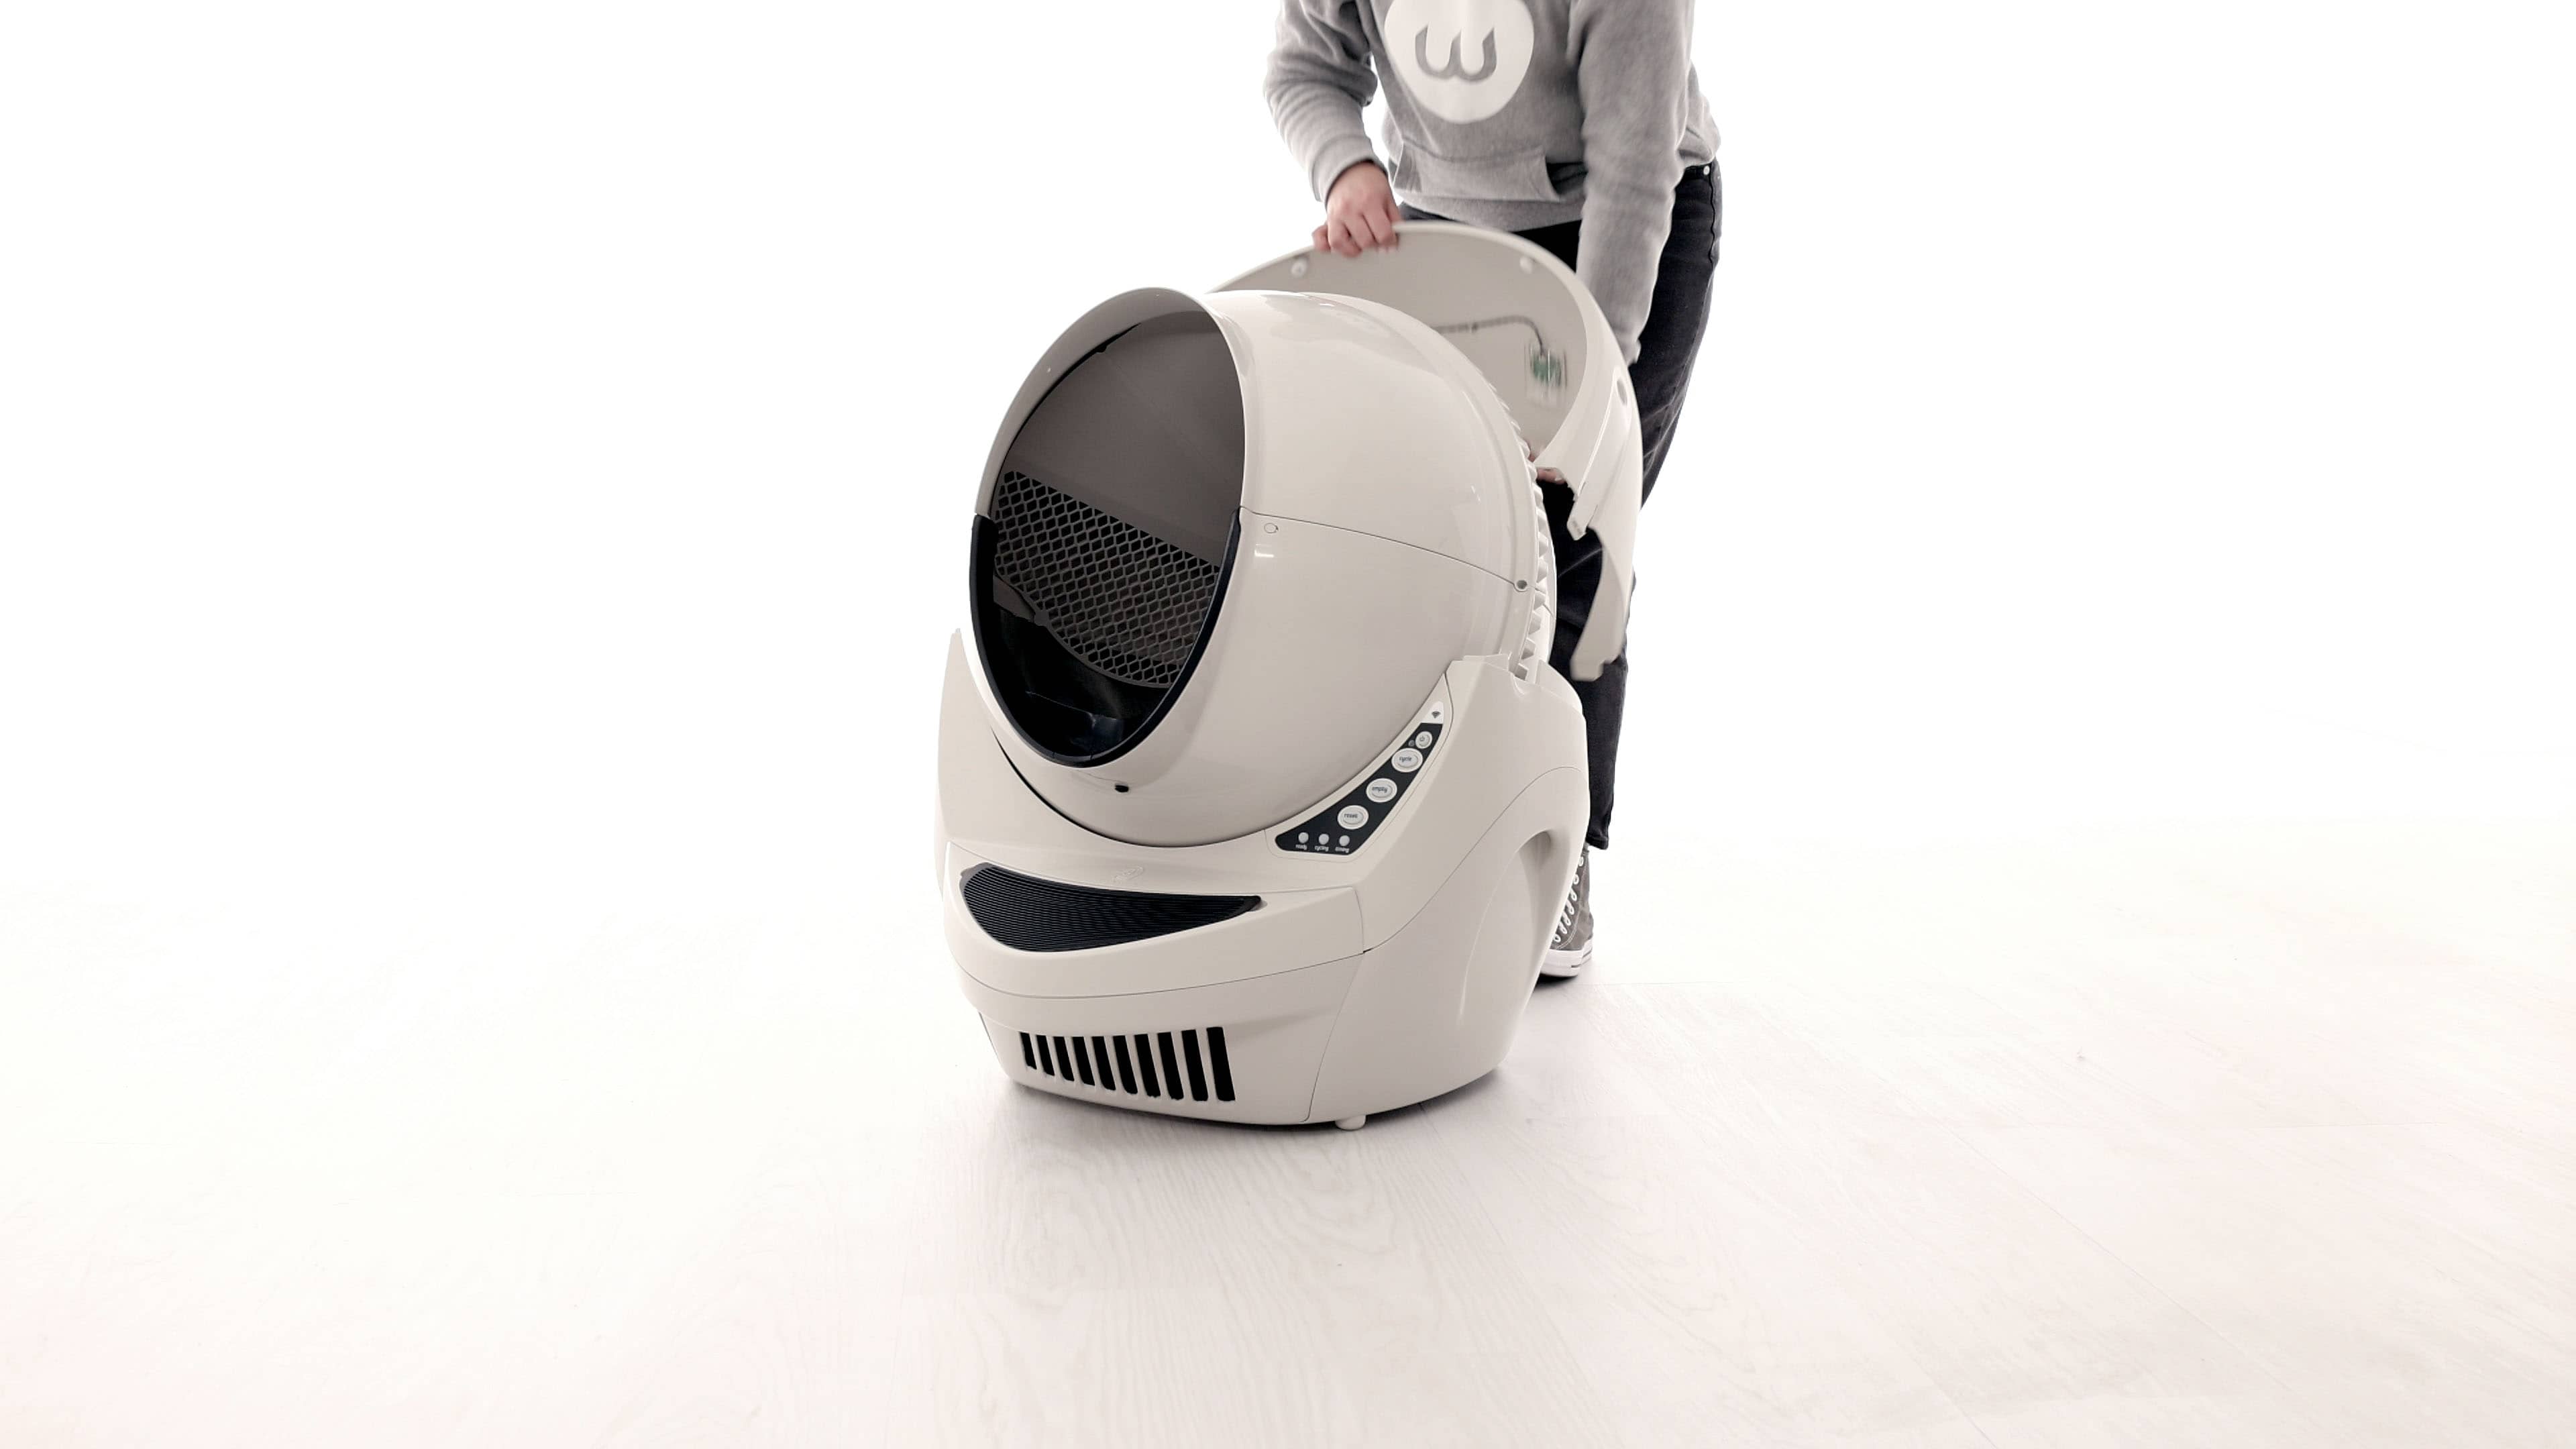
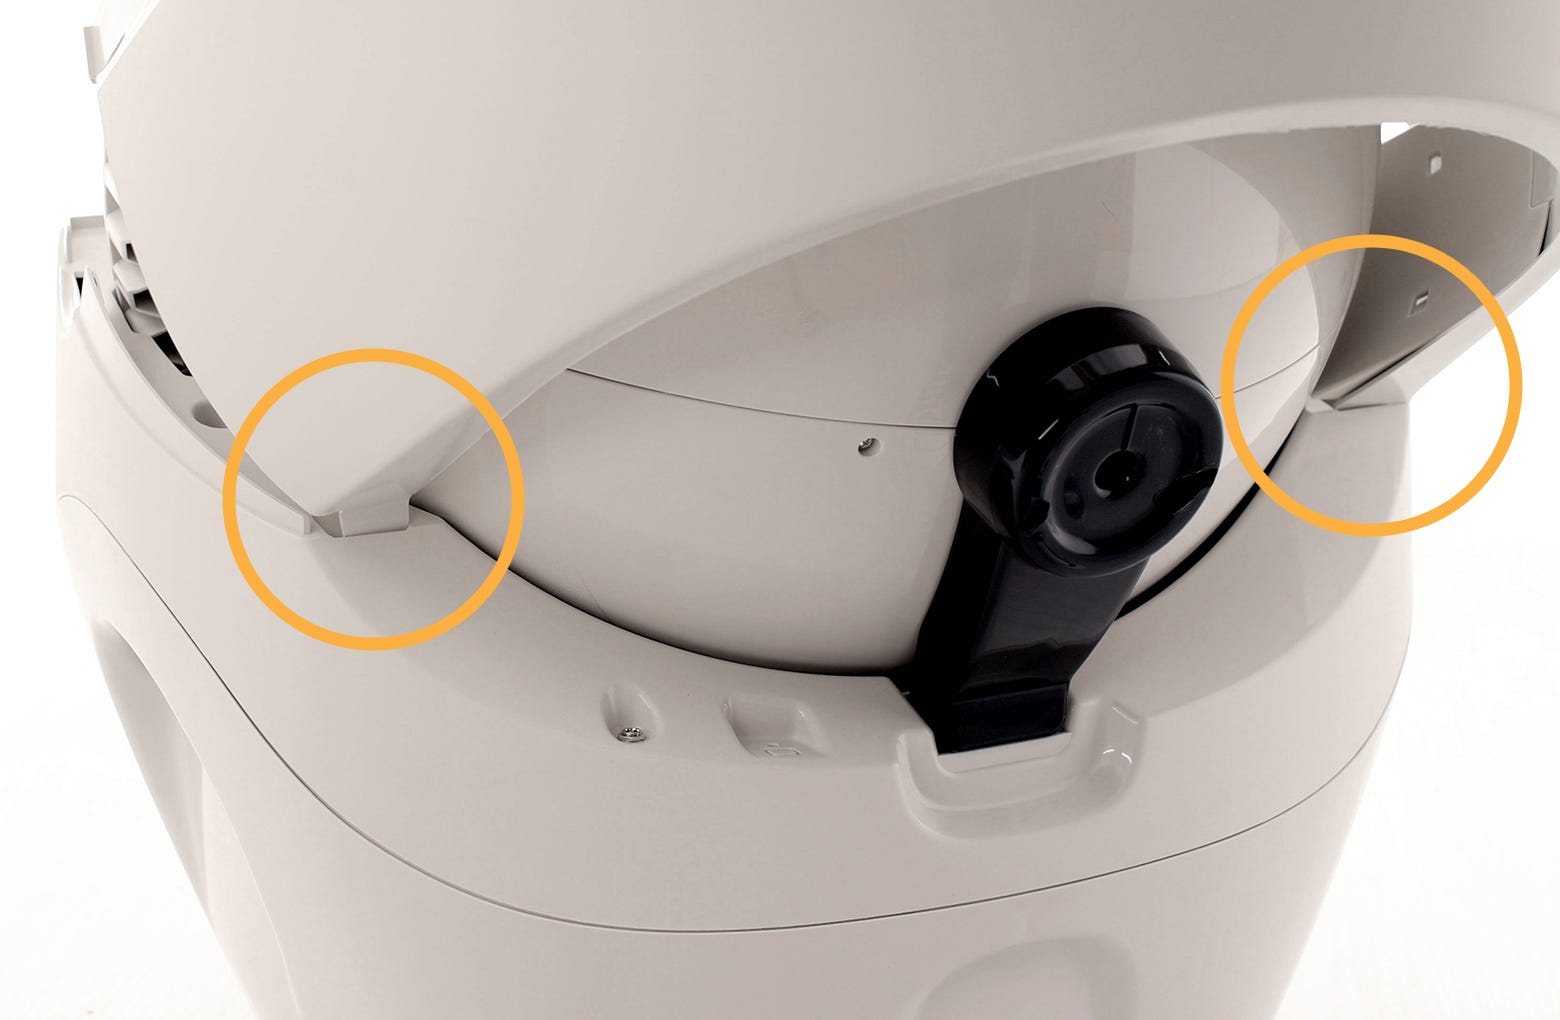
- Remove the bonnet by pressing the latches on both sides of the bonnet, then lift while rotating it backward. There are two plastic tabs on the back of the bonnet that should slide up and out of the base.
- Set the bonnet aside.
- Remove the globe and set aside.
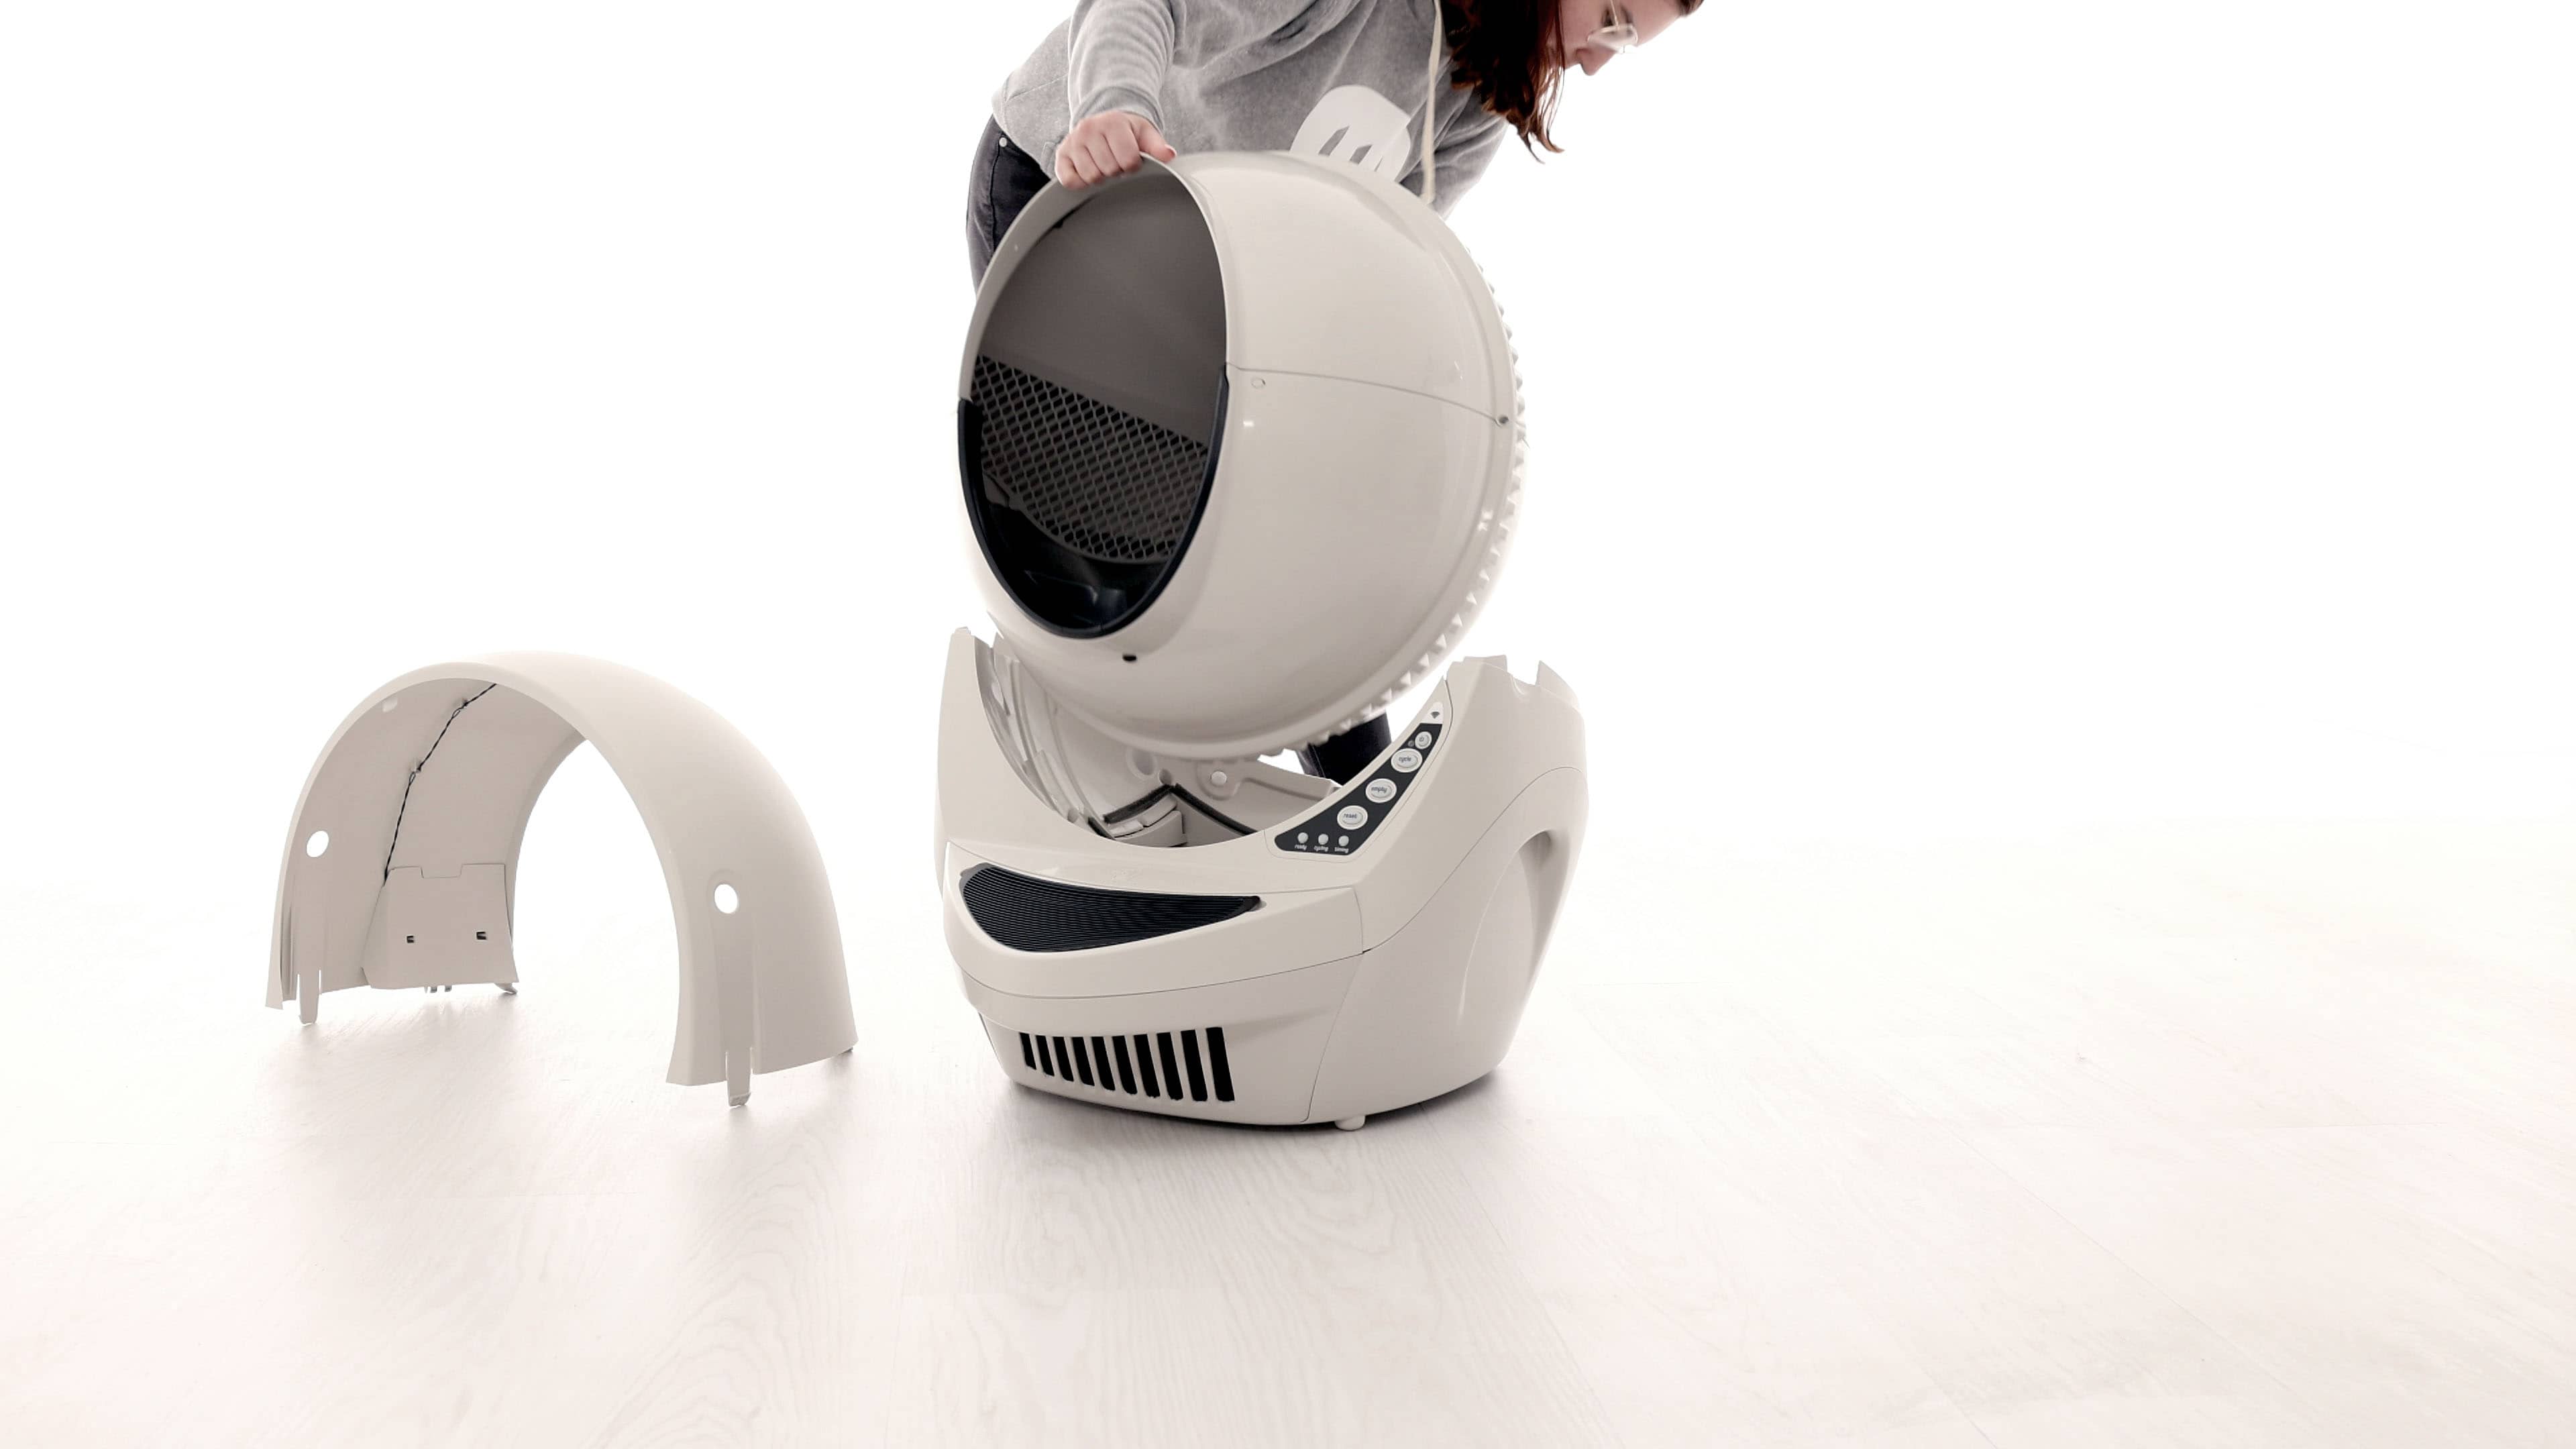
- Inspect the outside of the globe. Remove any debris that might be stuck on the outside of the globe.
- Remove the waste drawer and set aside.
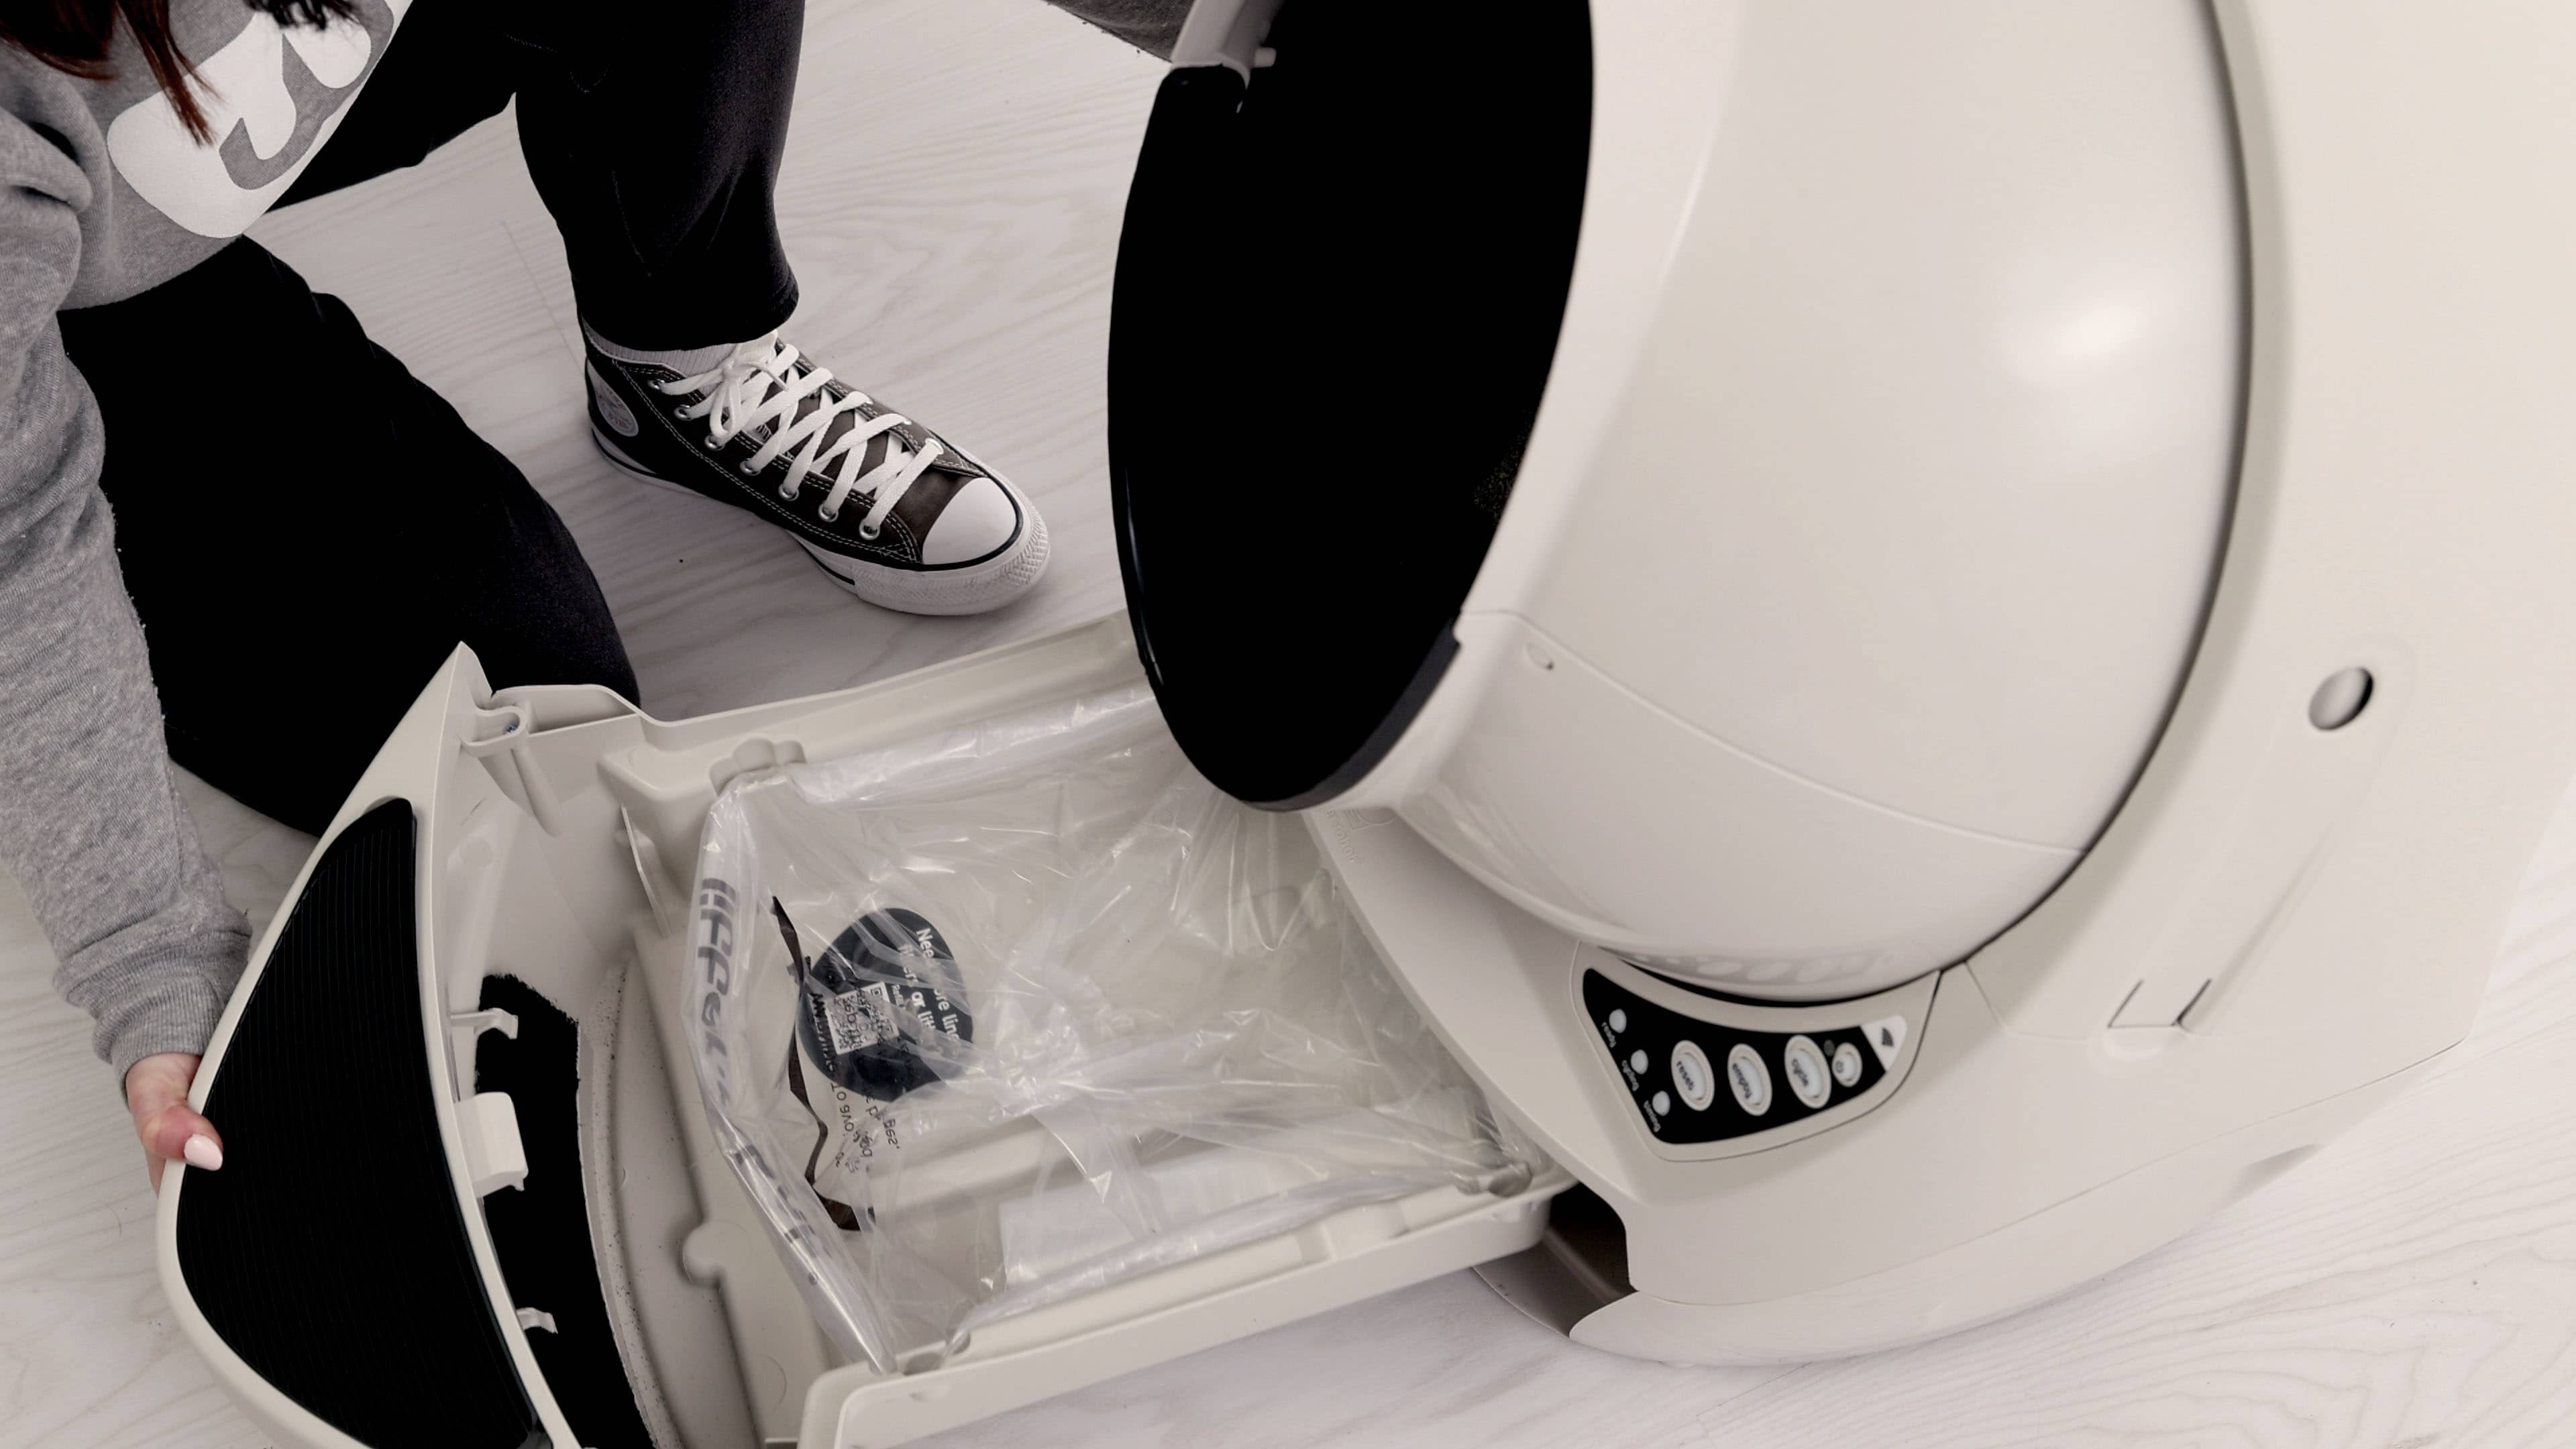
Inspect the base
- Ensure all four white glider buttons are installed and free of debris. If they are missing or damaged, replacement parts can be purchased at Litter-Robot.com.

- Check the top portion of the base where the globe usually rests. Using a damp cloth, clean this area of any residue or liquid build-up. Clean any litter or debris from this area as well.

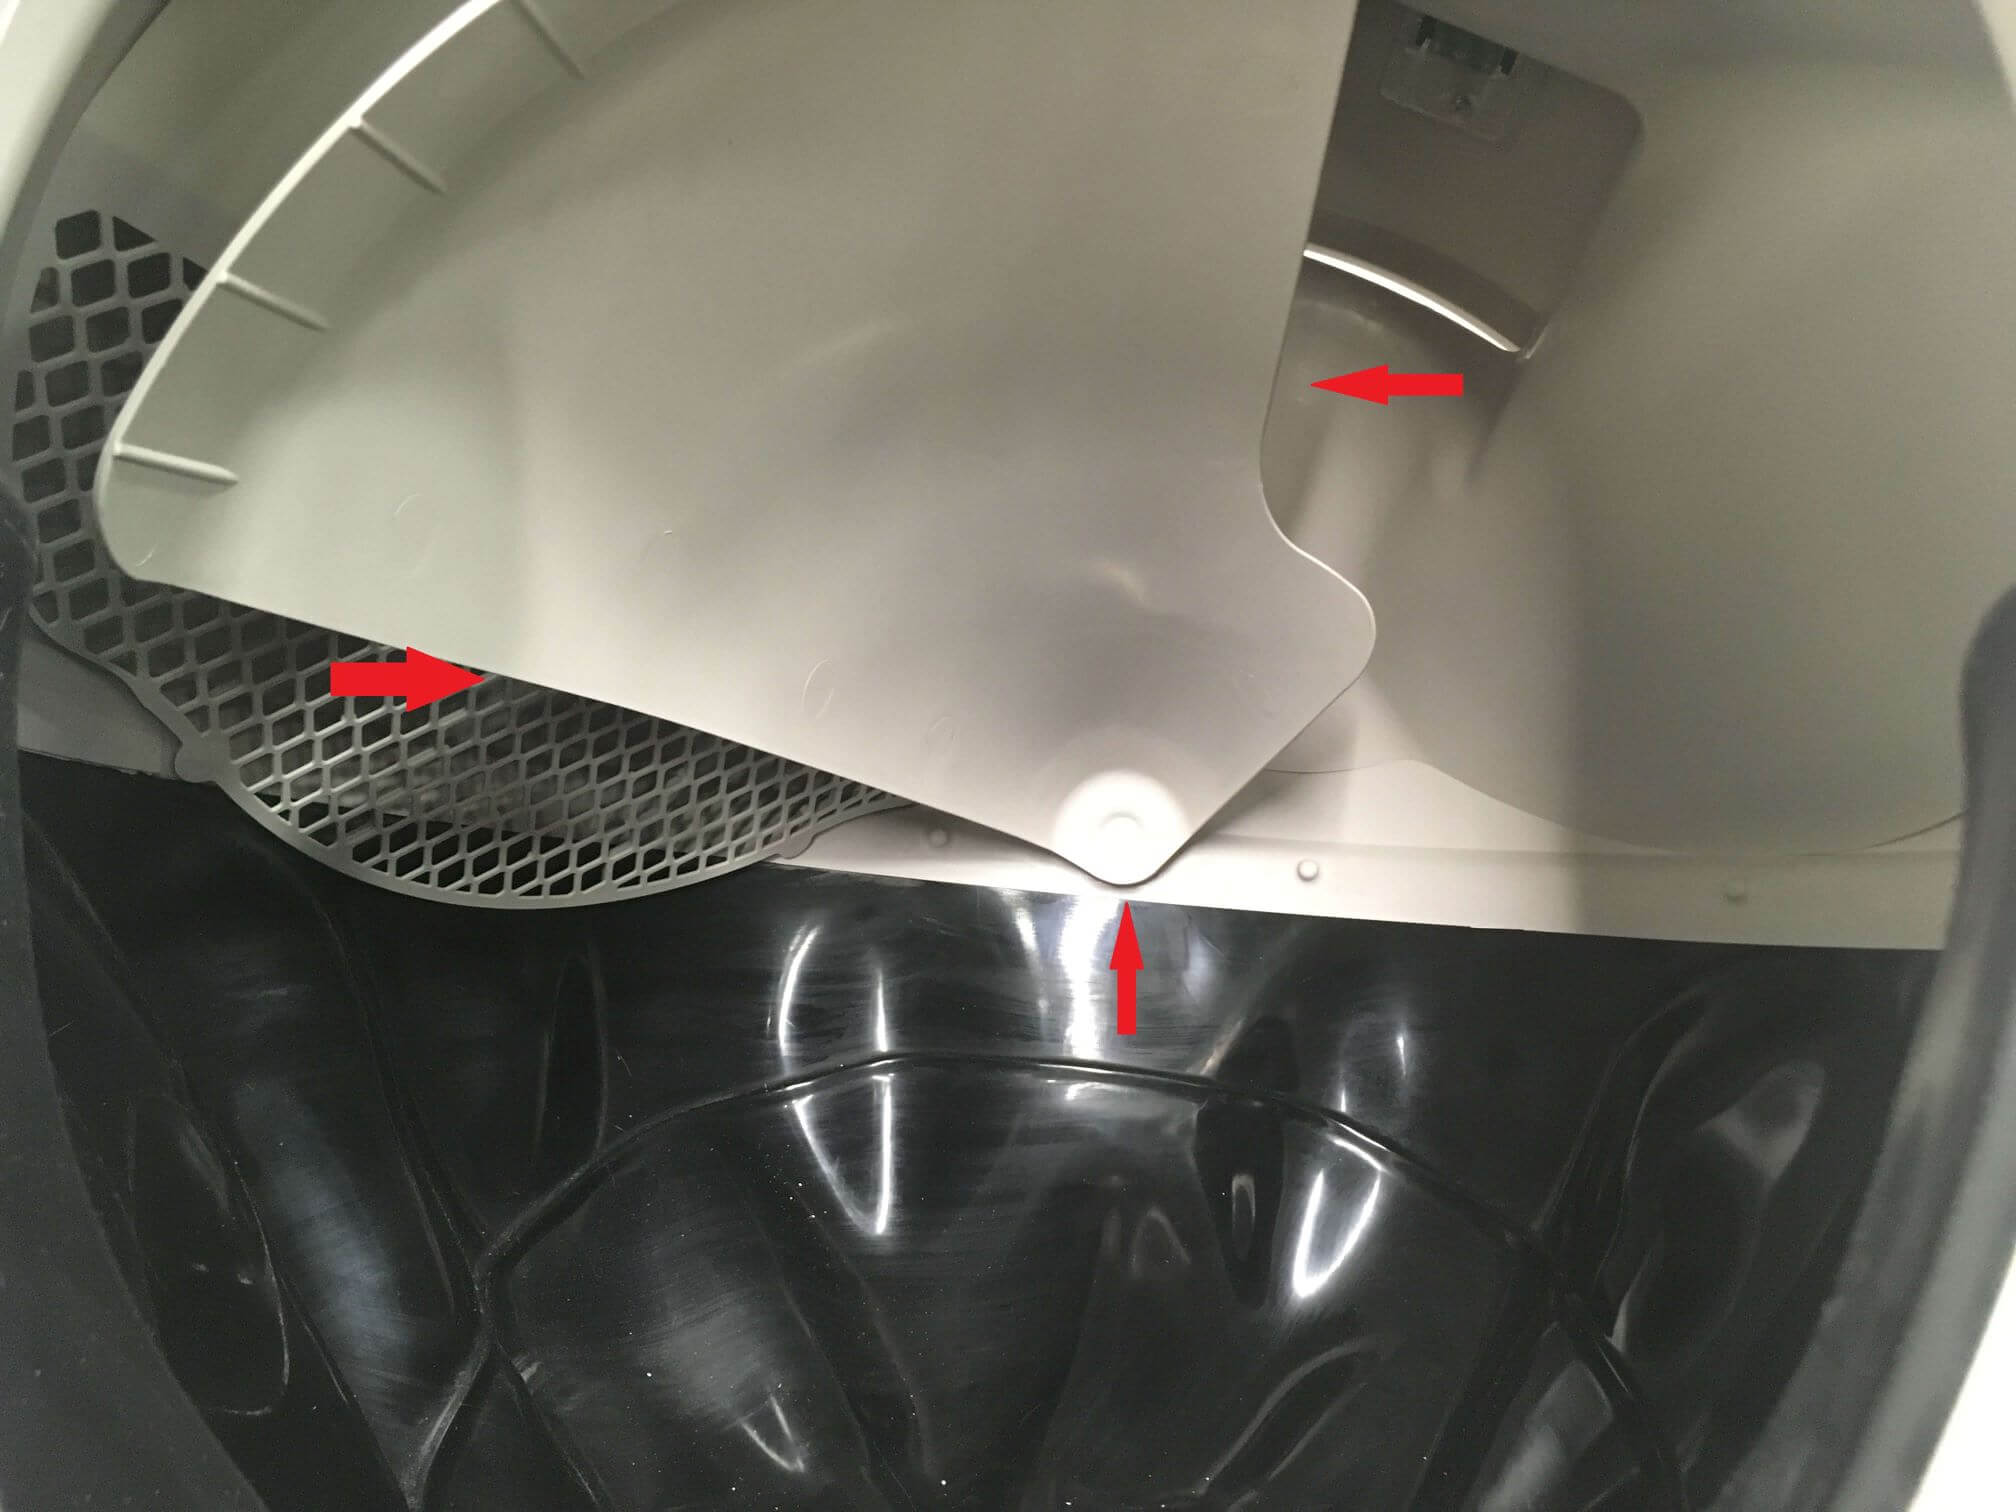
- Check that the four seal strips around the waste port are firmly stuck in place and free of debris. seal strips that are peeling could cause excess drag on the globe.
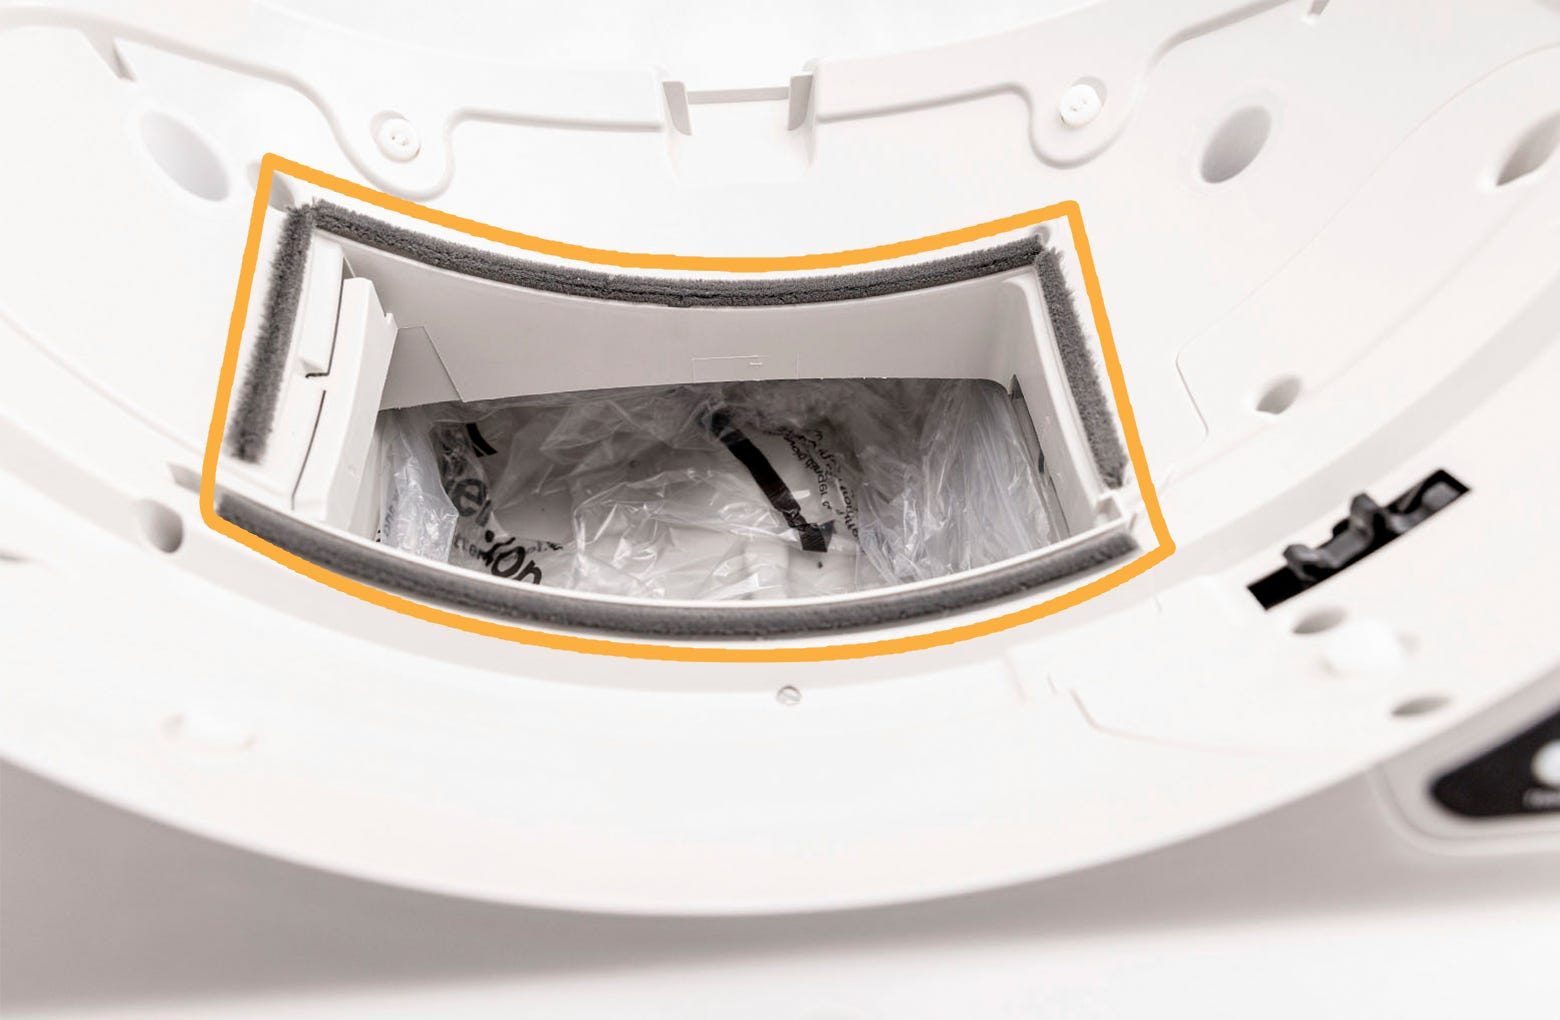
- If the seal strips will not adhere to the base, a replacement set of seal strips can be purchased at Litter-Robot.com.
Inspect the position sensor
If you've just installed and/or replaced the Connect Upgrade Kit, the Drawer Full Indicator, motor, control panel, or any other components within the motor cavity in your unit, and now you're getting three flashing lights, it is most likely due to the position sensor being out of place.
- Look at the top of the base, and locate the control panel cover on the right side of the robot. The control panel cover is held in place by five screws. Use a #2 Phillips head screwdriver to remove the screws. Reference the beginning of this video for the removal of the control panel cover.

- Gently pull up on the plastic cover, noting that the main circuit board and rubber buttons are attached to the control panel cover. Gently push the rubber buttons so they push out the backside of the control panel cover.
- You can now remove the control panel cover, leaving the circuit board and rubber buttons connected to the robot wiring harness.
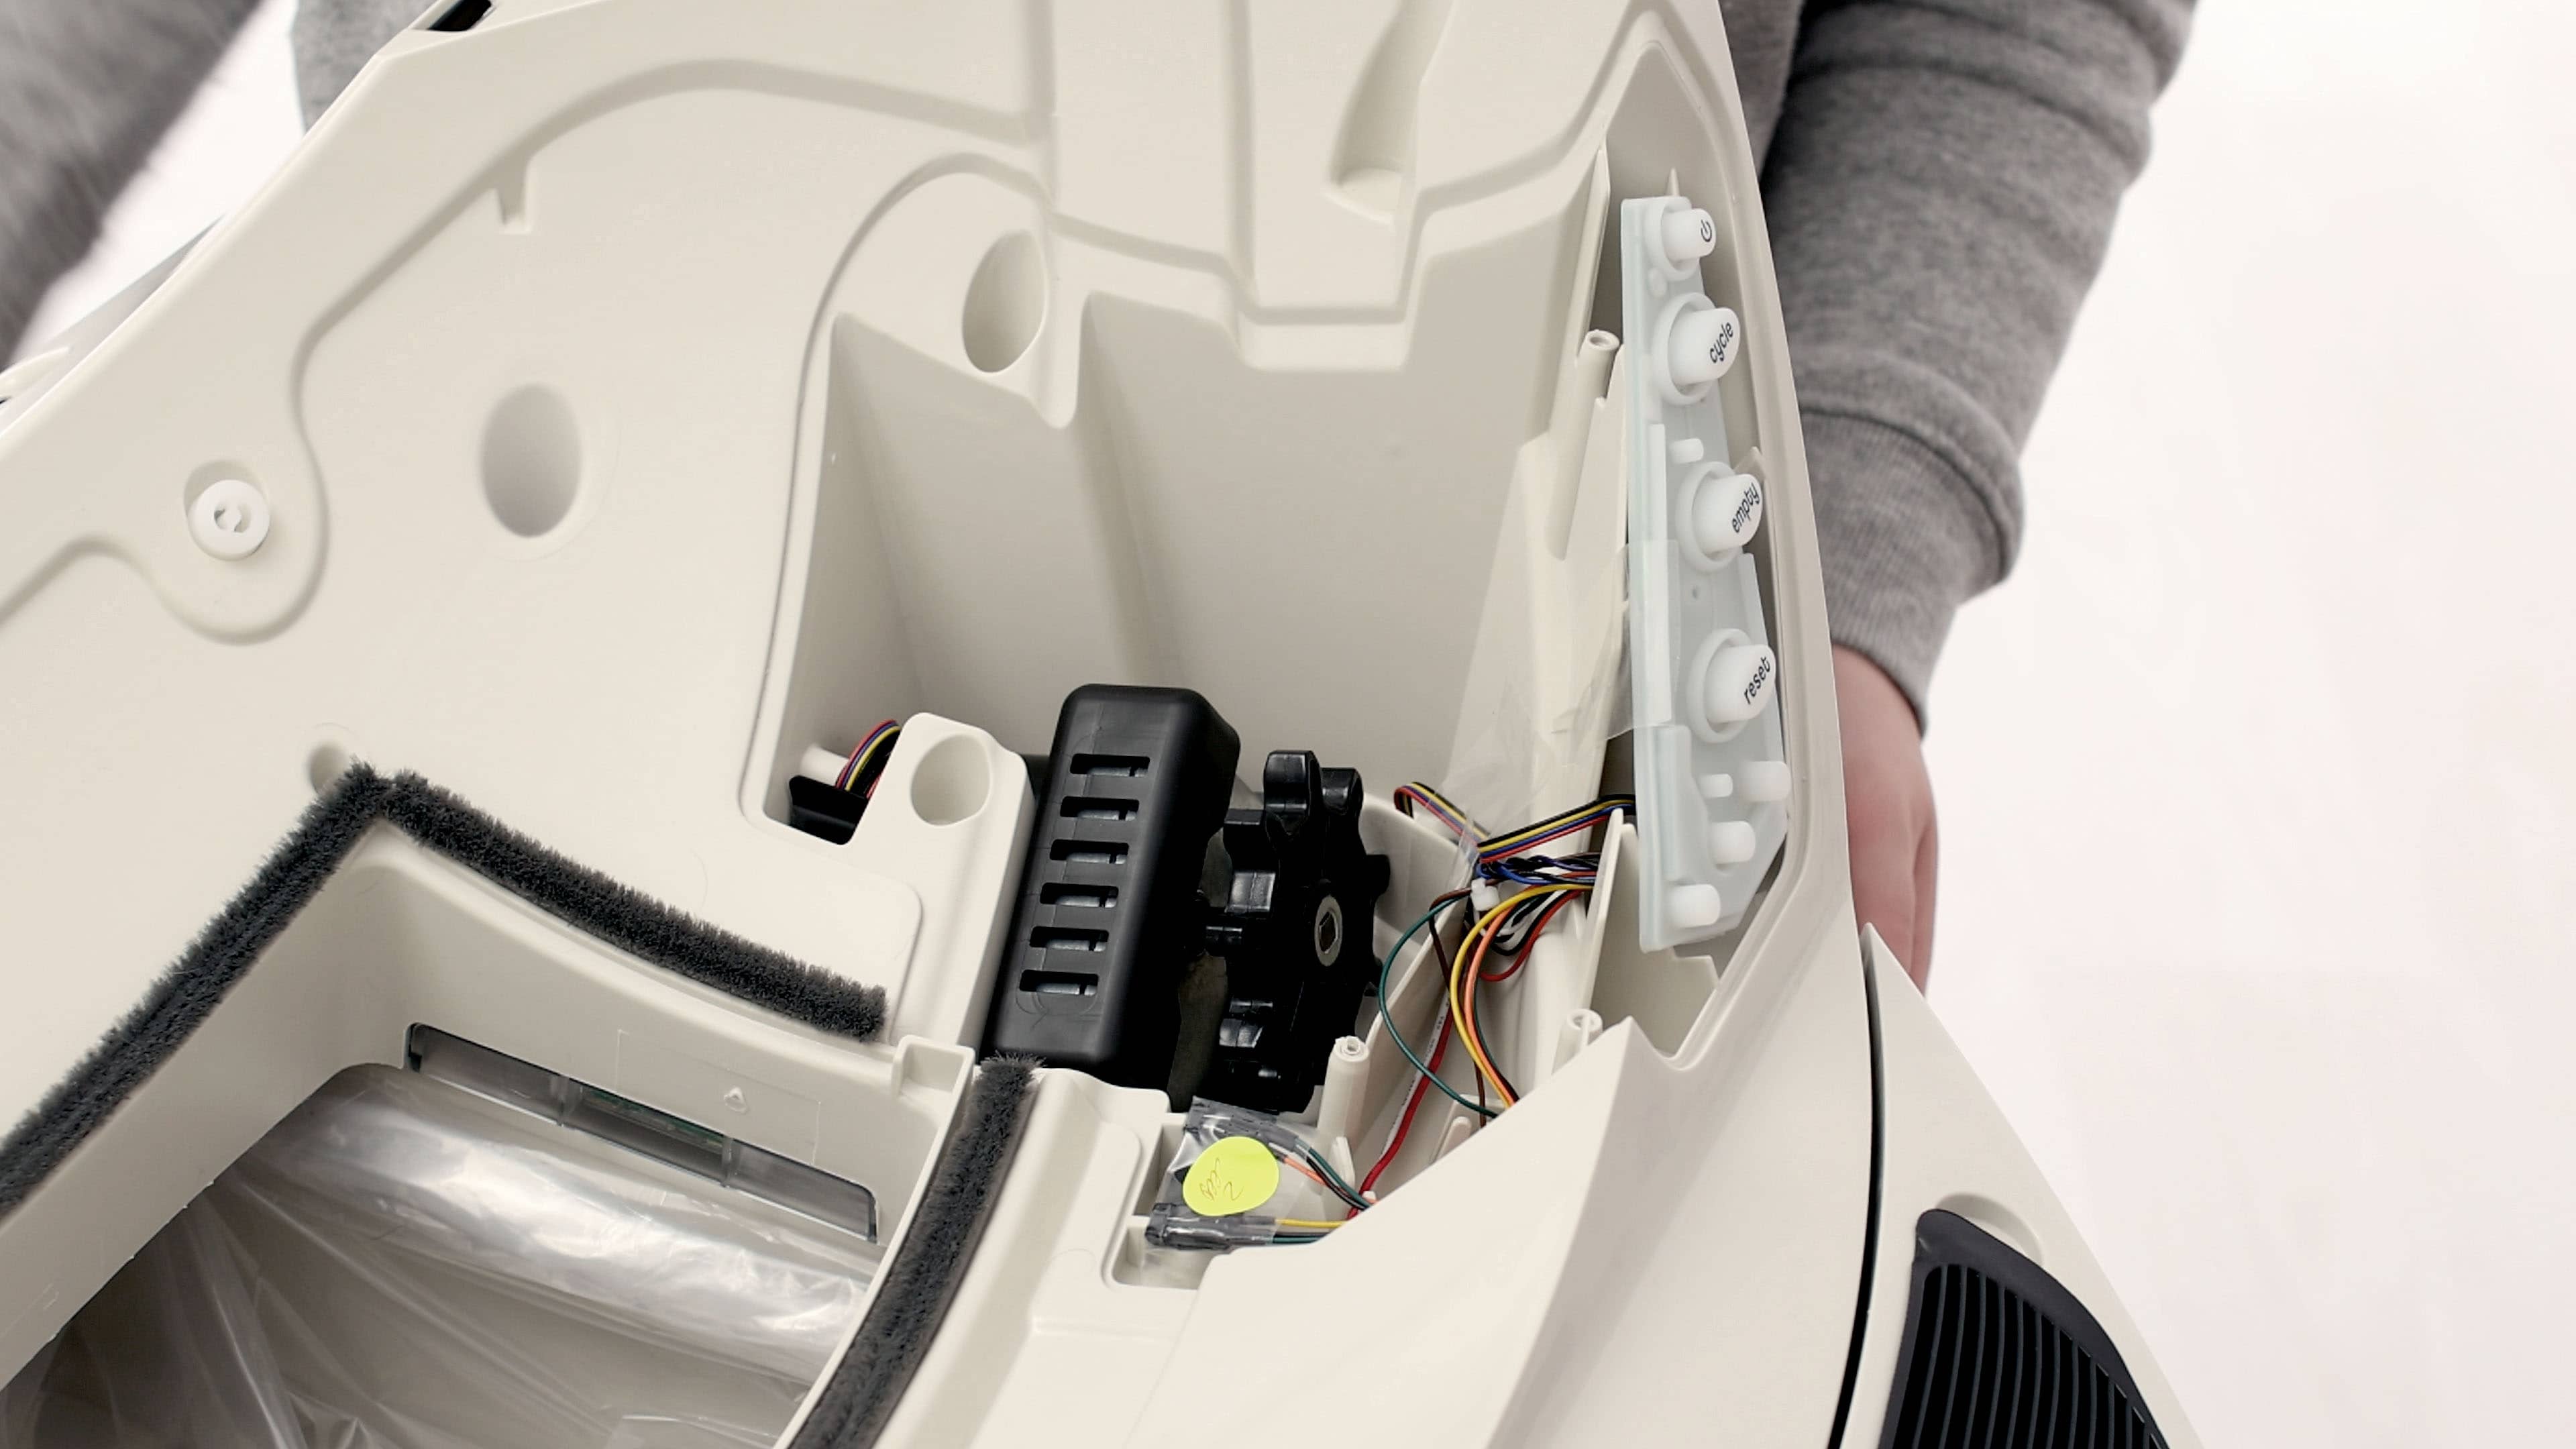
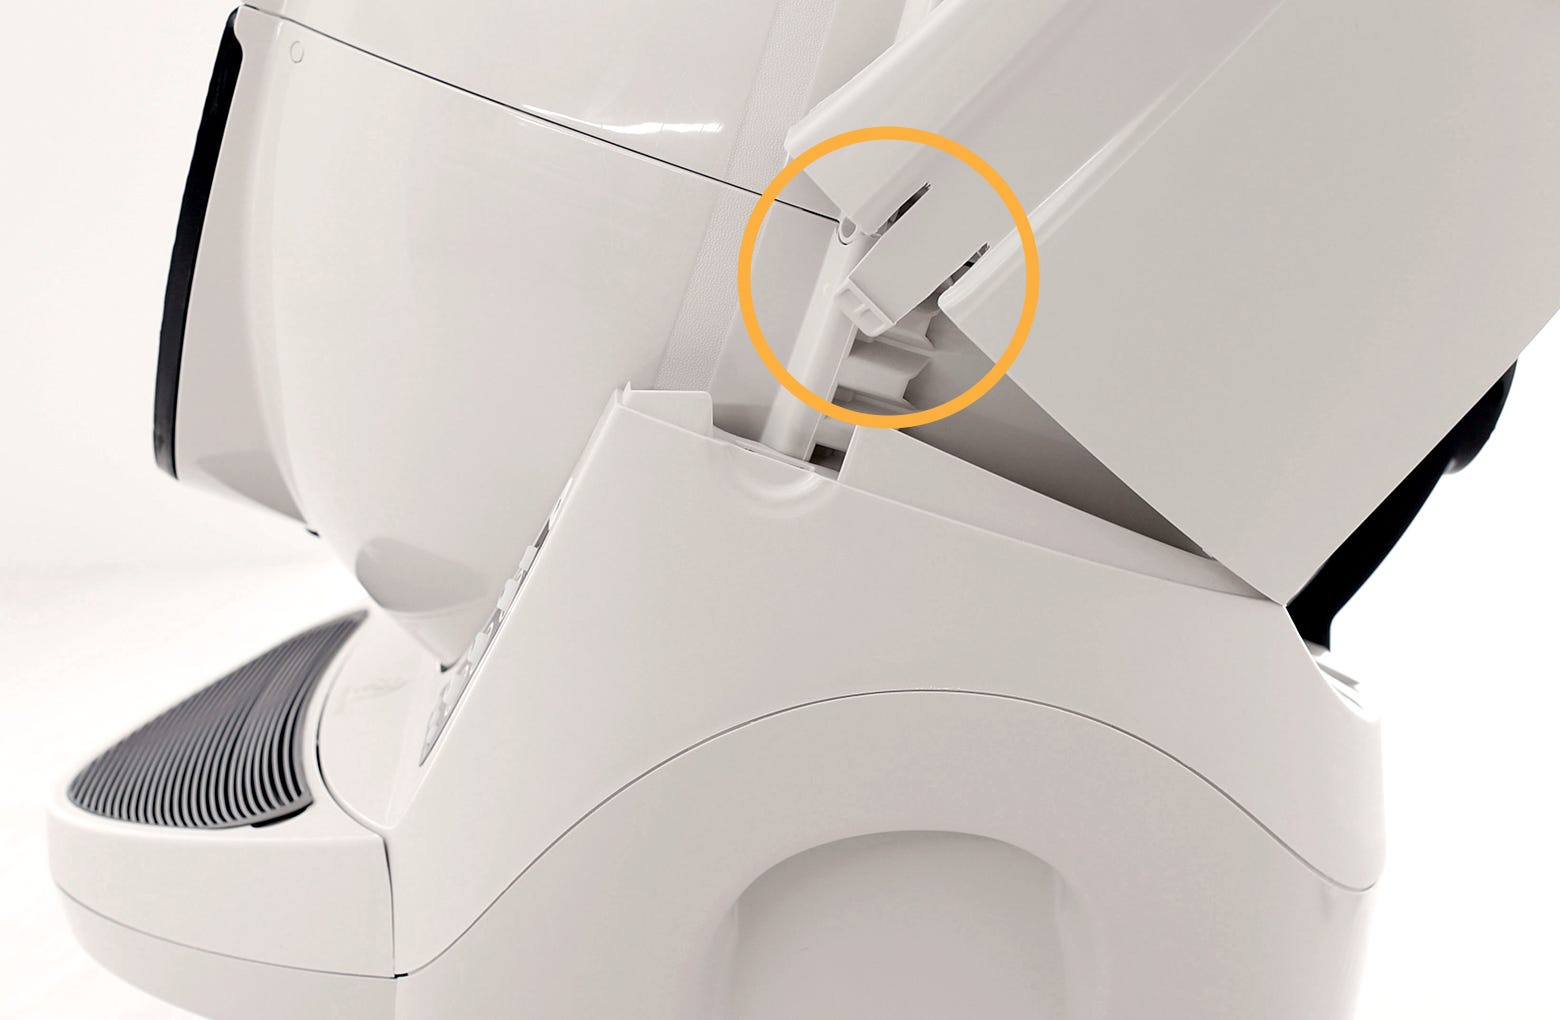
- Locate the position sensor. The position sensor should be located on the front left side in the control panel opening. There are six wires going to the position sensor.
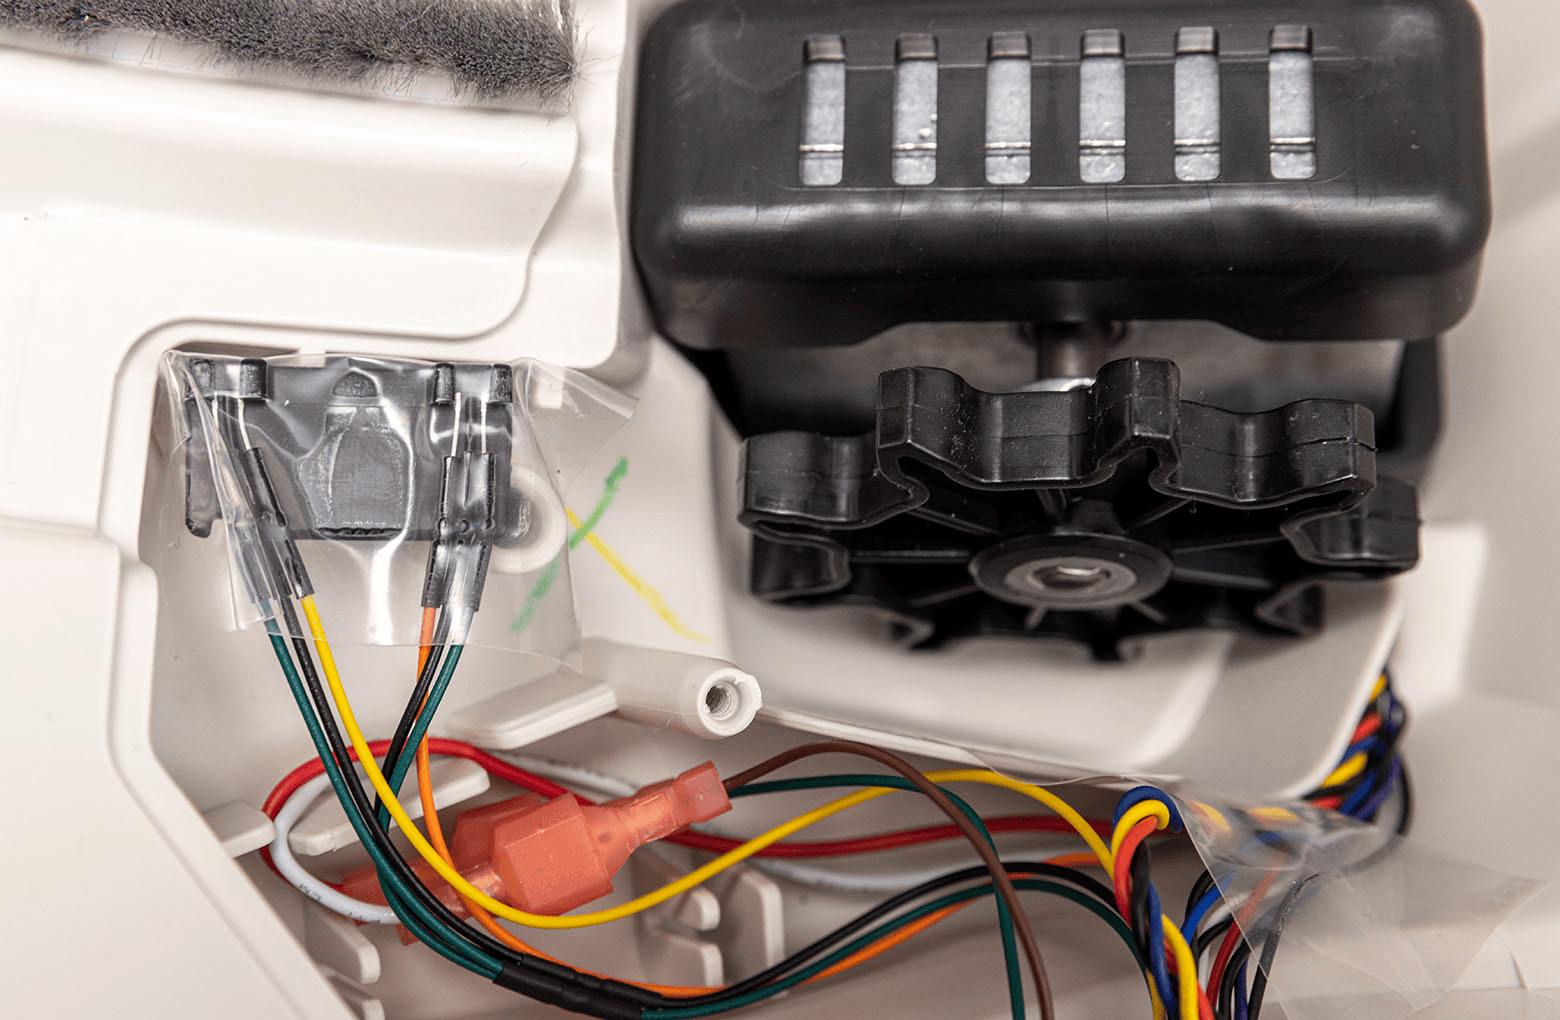
- Check the position sensor for any signs of damage, such as exposure to liquids.
- Double-check that the position sensor is firmly seated into the base. There are two plastic posts that should press into the base.
- Double-check that the position sensor is oriented correctly. When standing in front of the robot, the bundle of wires that includes a YELLOW wire should be on the left. The bundle of wires that includes an ORANGE wire should be on the right.
- Once you’ve checked the condition, location, and orientation of the position sensor, reassemble the robot and initiate a clean cycle to determine if the problem was resolved.
Reassemble the globe and bonnet
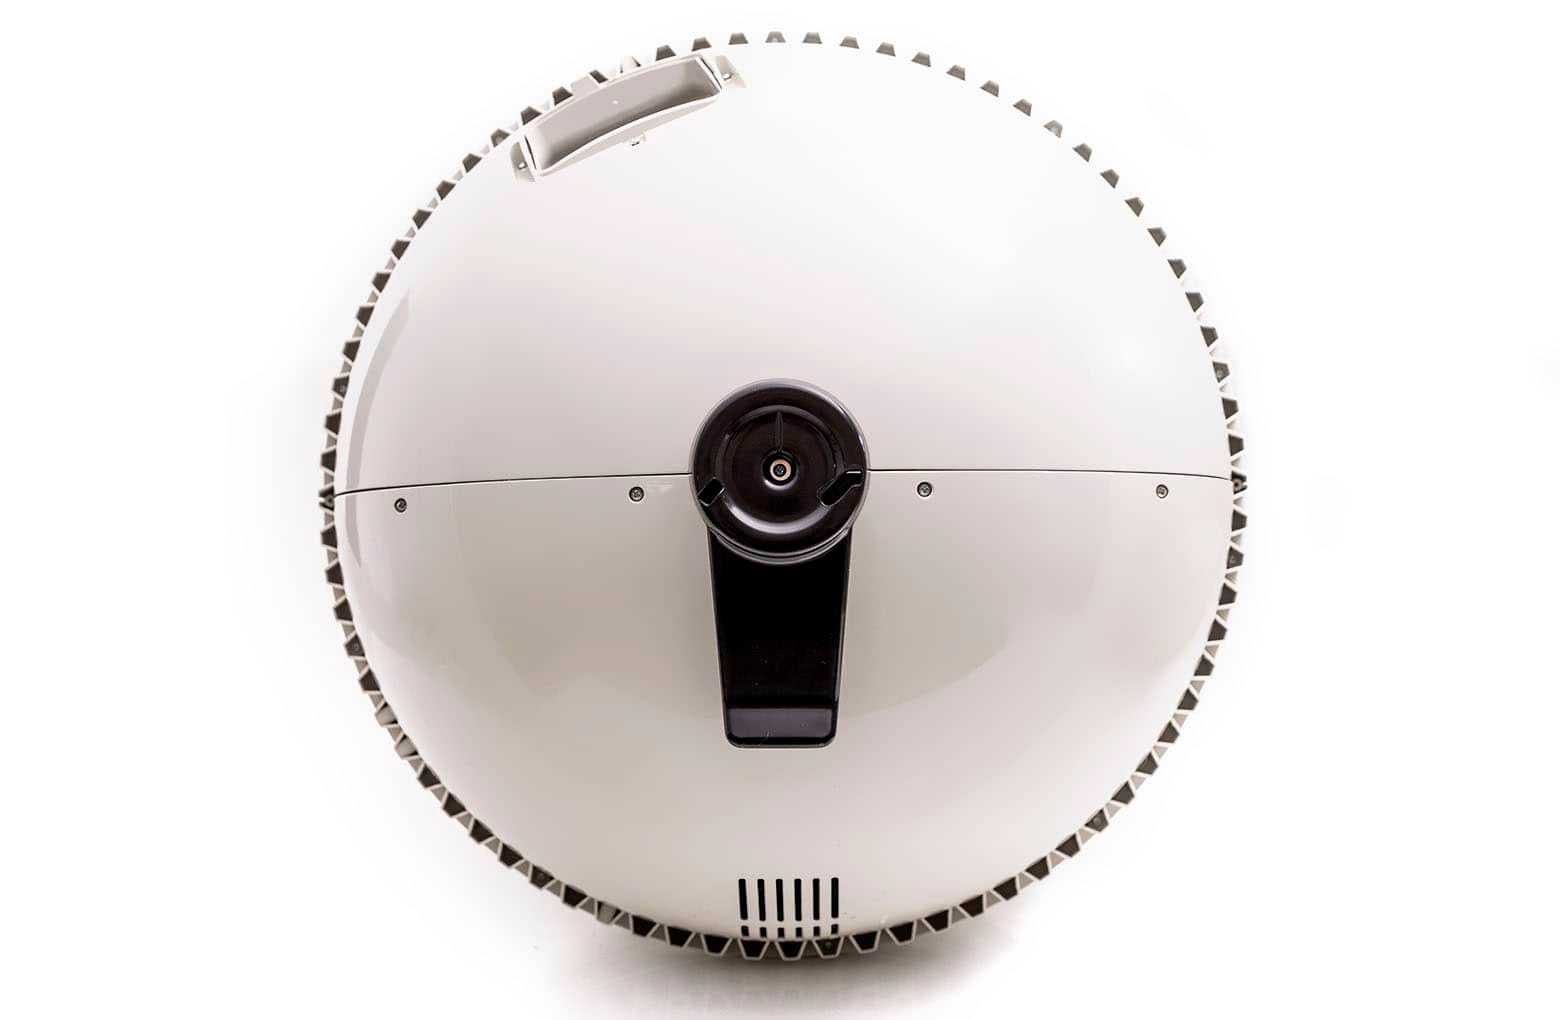
- Replace the globe, making sure it is on straight and in its tracks.
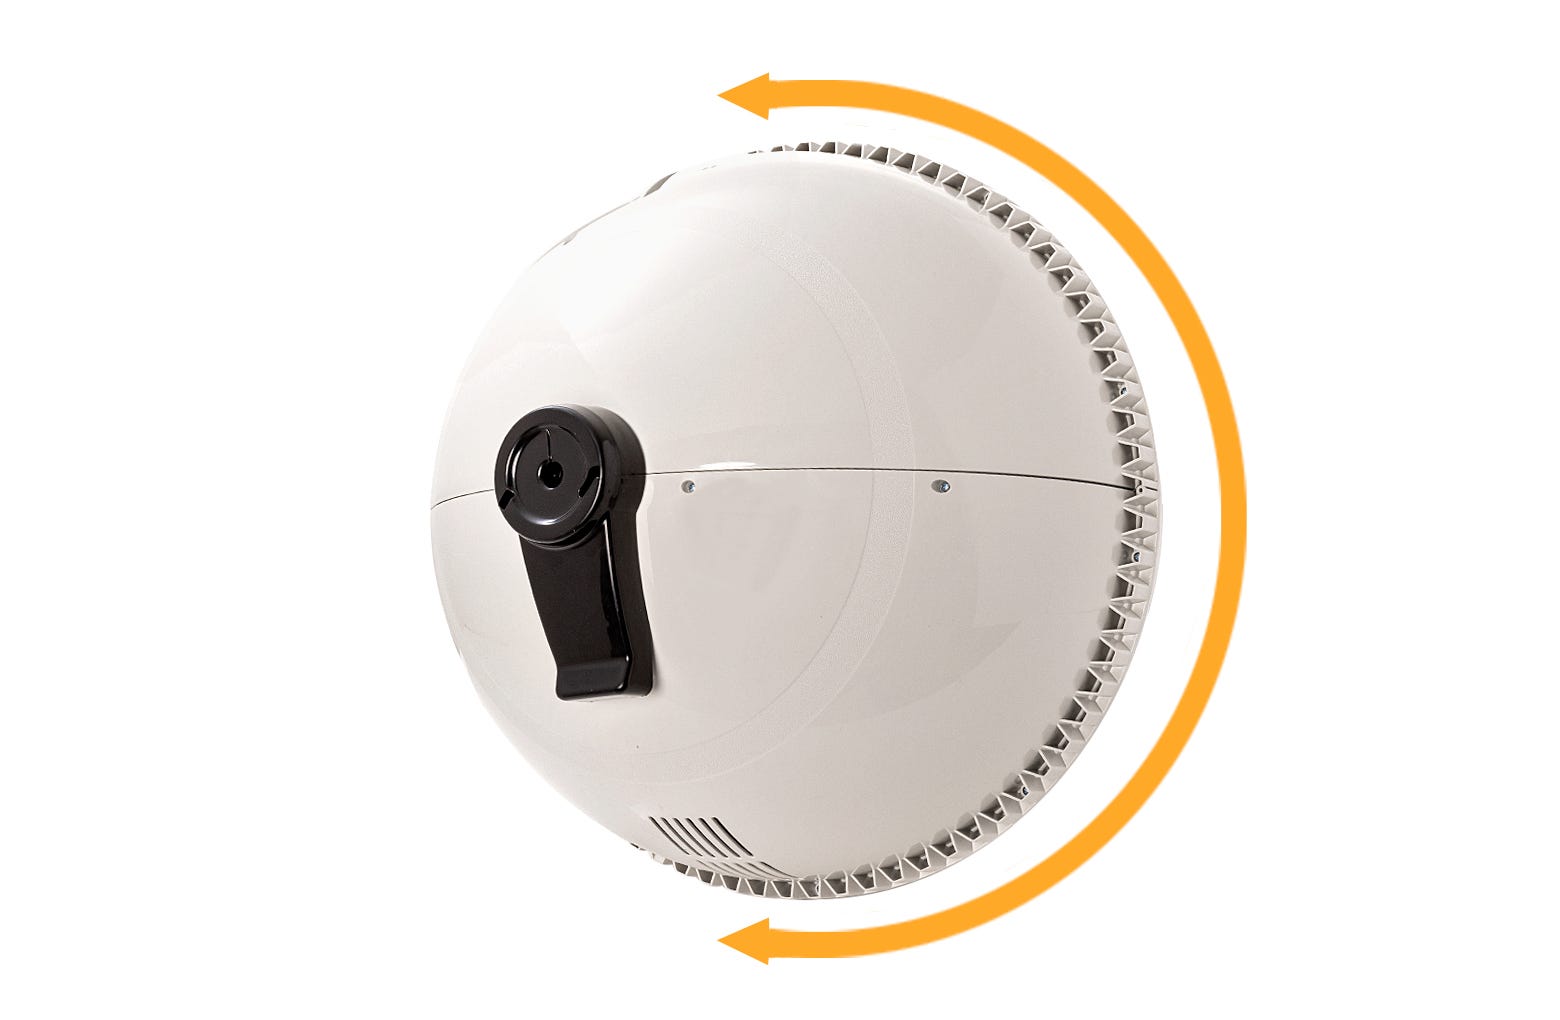
- At the back of the globe, turn the black key into the key pocket.
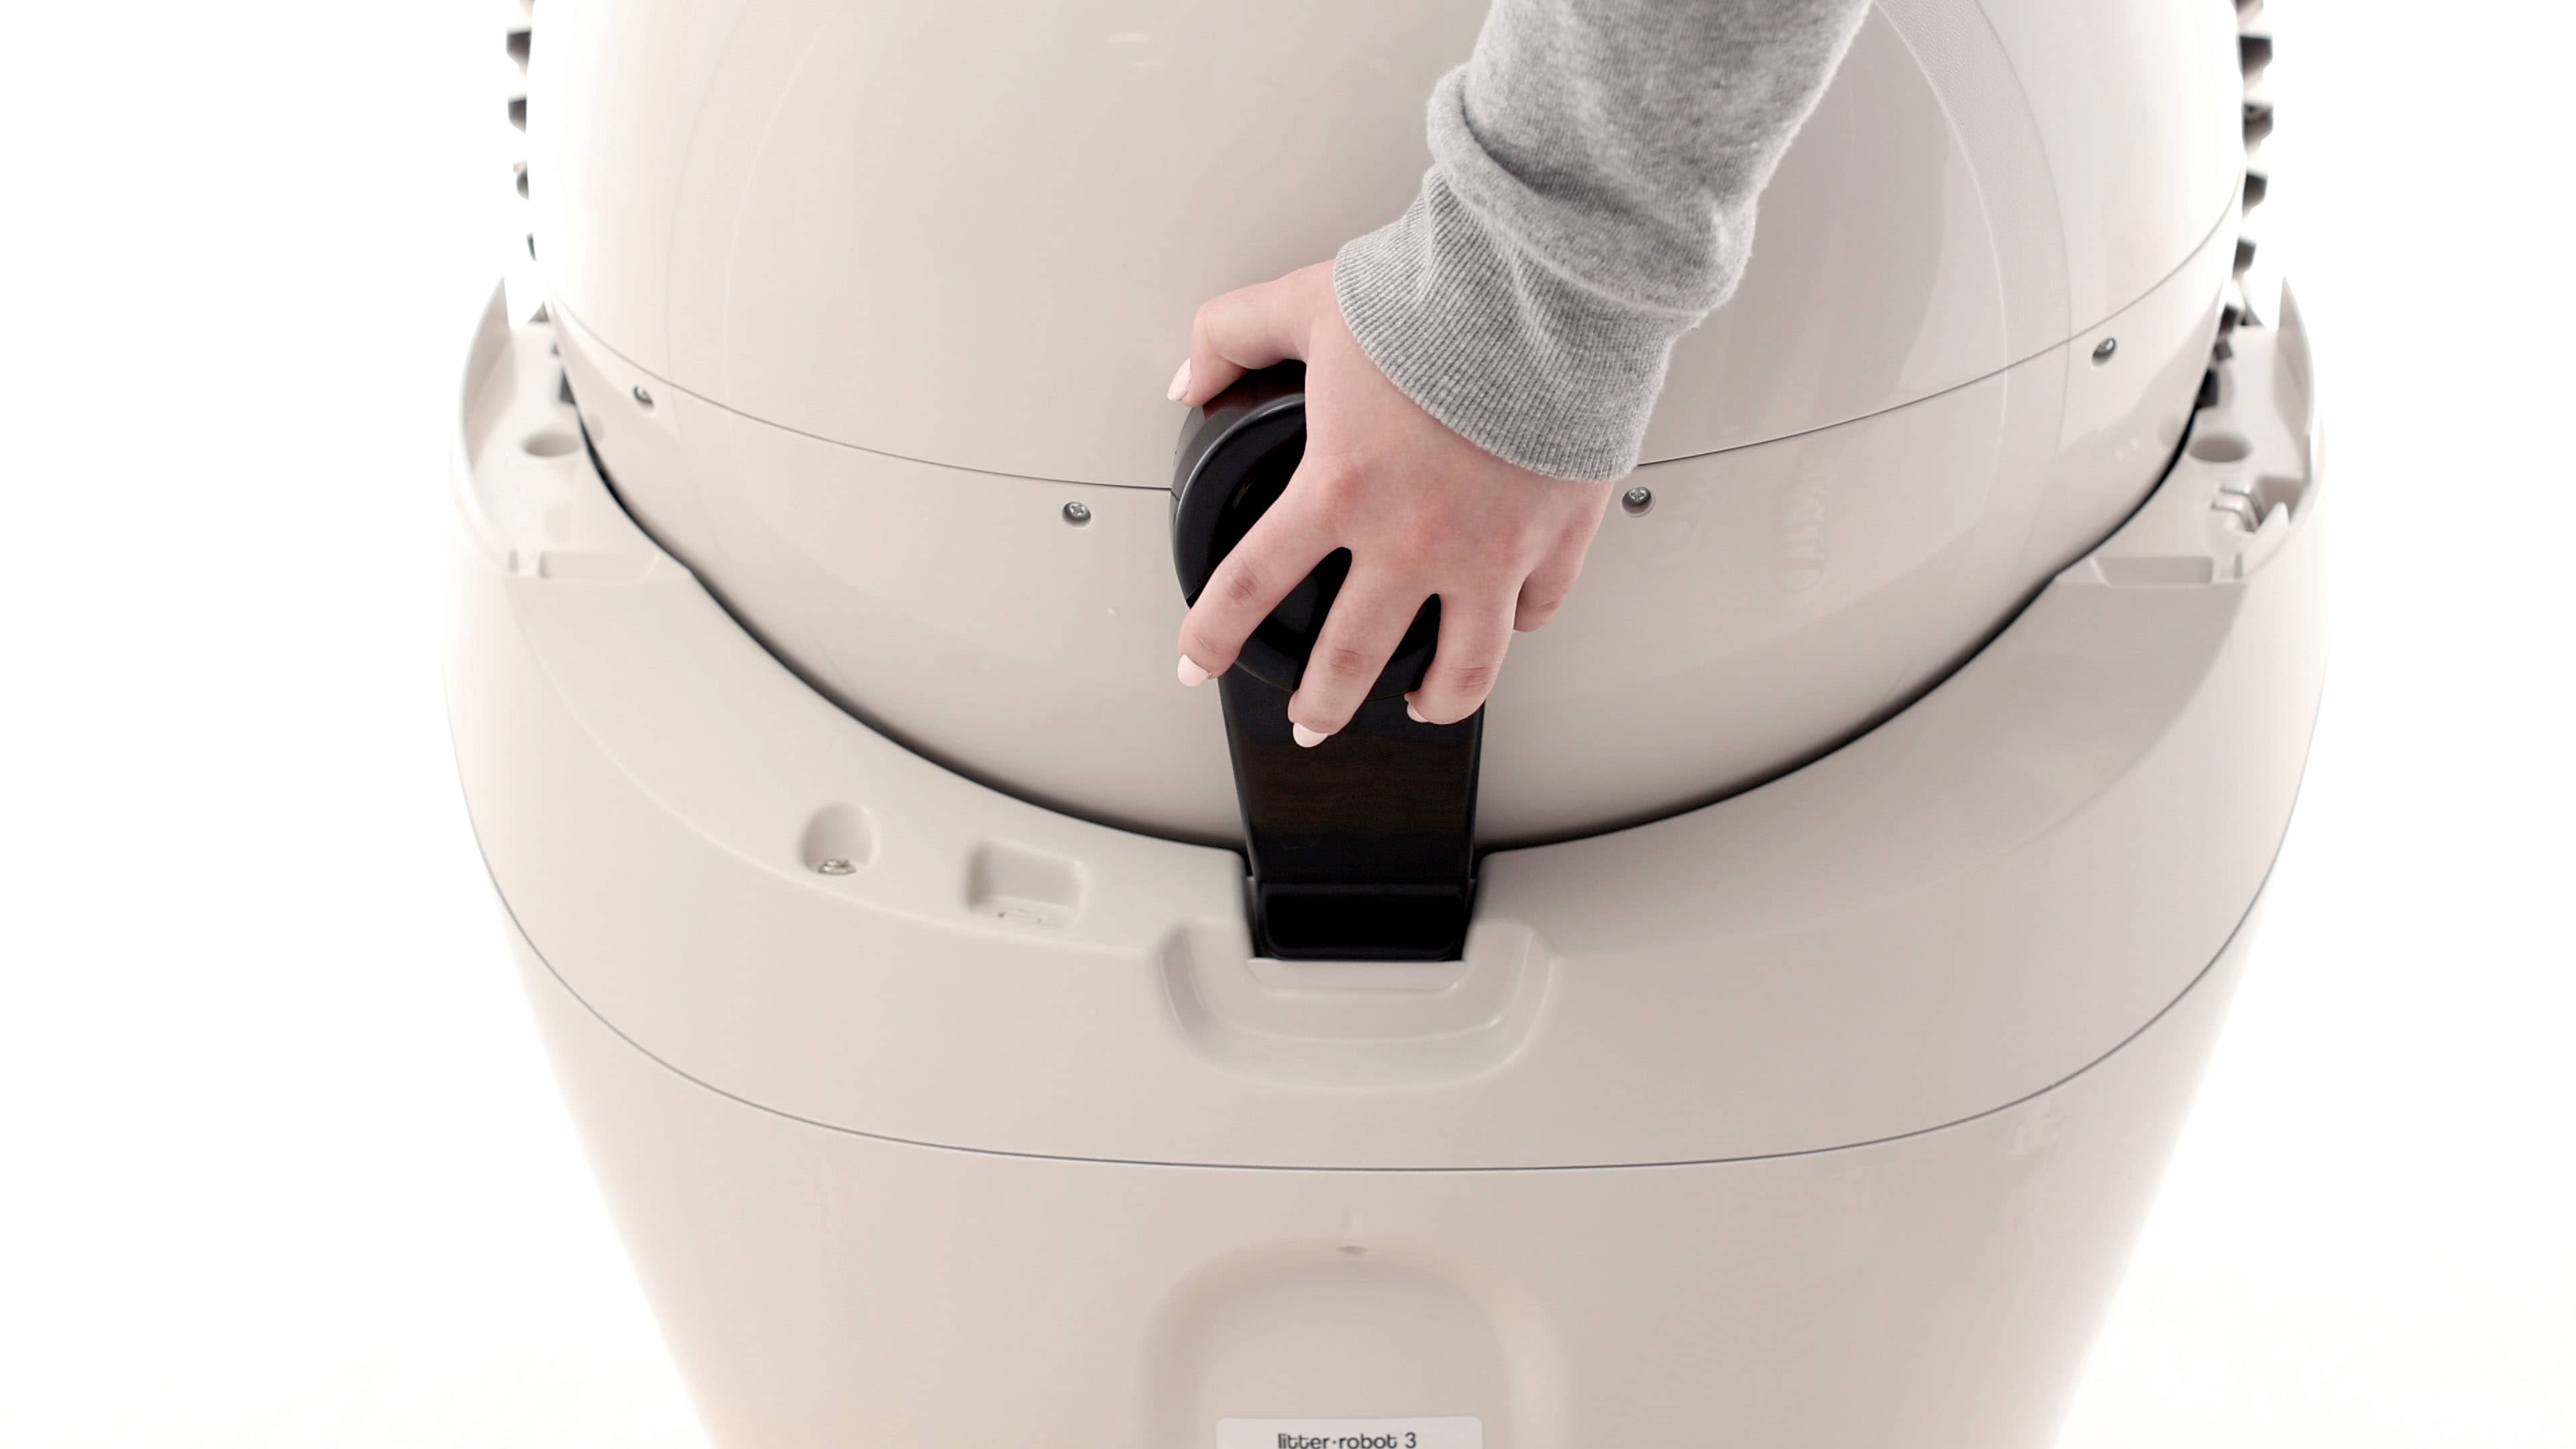
- Replace the bonnet by inserting the bonnet tabs into the rear bonnet slots, then press the latches while rotating it forward, until the latches click into place.
- Plug Litter-Robot into the wall.
- Press the Power button to turn the unit on.
- Once the initial clean cycle is complete, the unit should return home displaying a blue 'ready light' status.
If your unit returned home and displays a solid blue light, you've been successful.
If your unit is not displaying a solid blue light after returning to home position, or cannot complete the cycle, please continue with troubleshooting.
Inspect the globe magnets
If you've previously disassembled your globe at it's y-axis to inspect the magnets, it's possible that it was reassembled incorrectly.
Litter-Robot uses two magnets located in the globe gear track to monitor the position of the globe. The magnets could be missing or put in backward, reversing the required polarity. If you have recently disassembled your globe, follow the troubleshooting steps in our Litter-Robot 3: Fixing the globe magnets article.
If your unit returned home and displays a solid blue light, you've been successful.
If your unit is not displaying a solid blue light after returning to home position, or cannot complete the cycle, please continue with troubleshooting.
Remove the internal shield
The shield is a possible cause for the three lights flashing fault. We strongly recommend removing the internal shield.
If your Litter-Robot was built before February of 2018, you may have an internal shield. The internal shield is not necessary for the unit to function and was removed from the design in March 2018.
If your unit does not have an internal shield, you can skip to the next section.
To remove the shield, you will need a Phillips head screwdriver.
- Follow the instructions in our Litter-Robot 3: Key and plug installation guide to remove the internal shield.
- Once you remove the internal shield, the globe will have a hole where the shield once was. We can send you a part to cover that hole, free of charge.
- Follow this link to add the Litter-Robot 3 Key and Plug Kit to your cart, then log into your Whisker account to ensure the discount code is applied to your order. If the discount isn't applied, ensure you are logged into your Whisker account and apply the code KEYANDPLUGKIT at checkout.
- Until the part arrives, you can cover the hole with a small piece of tape to prevent debris from entering.
- Press the Cycle button to run a Clean Cycle.
If your unit returned home and displays a solid blue light, you've been successful.
Unsuccessful: If your unit is not displaying a solid blue light after returning to home position, or cannot complete the cycle, your unit needs to be repaired.
Issue not resolved?
To repair your Litter-Robot, you will need a power supply, motor assembly or a base.
What do I do?
My unit is covered by WhiskerCare™
If your Litter-Robot is covered by our WhiskerCare™ warranty, you have access to replacement parts, at no cost, to get your Litter-Robot up-and-running quickly.
- Simply log in to your account at litter-robot.com
- Click on ‘My Robots’ to access the parts available for your robot.
- Select the part you need
- We’ll ship you the part at no cost, along with detailed instructions.
The warranty on my unit has expired
If your unit is no longer under warranty, we can help you with the necessary parts and instructions to properly fix your unit at home.Parts Needed (choose one):
Need technical support?
Our easy-to-use Troubleshooting Wizard will solve most issues and is the fastest way to get help.
Didn't find what you're looking for?
Live support available Mon-Fri: 9AM-9PM EST and Sat-Sun: 9AM-5PM EST, or submit a ticket anytime.