The store will not work correctly in the case when cookies are disabled.
Installing the LitterHopper™: How to check if the key is installed on your Litter-Robot 4®
Step 1: Disassembly
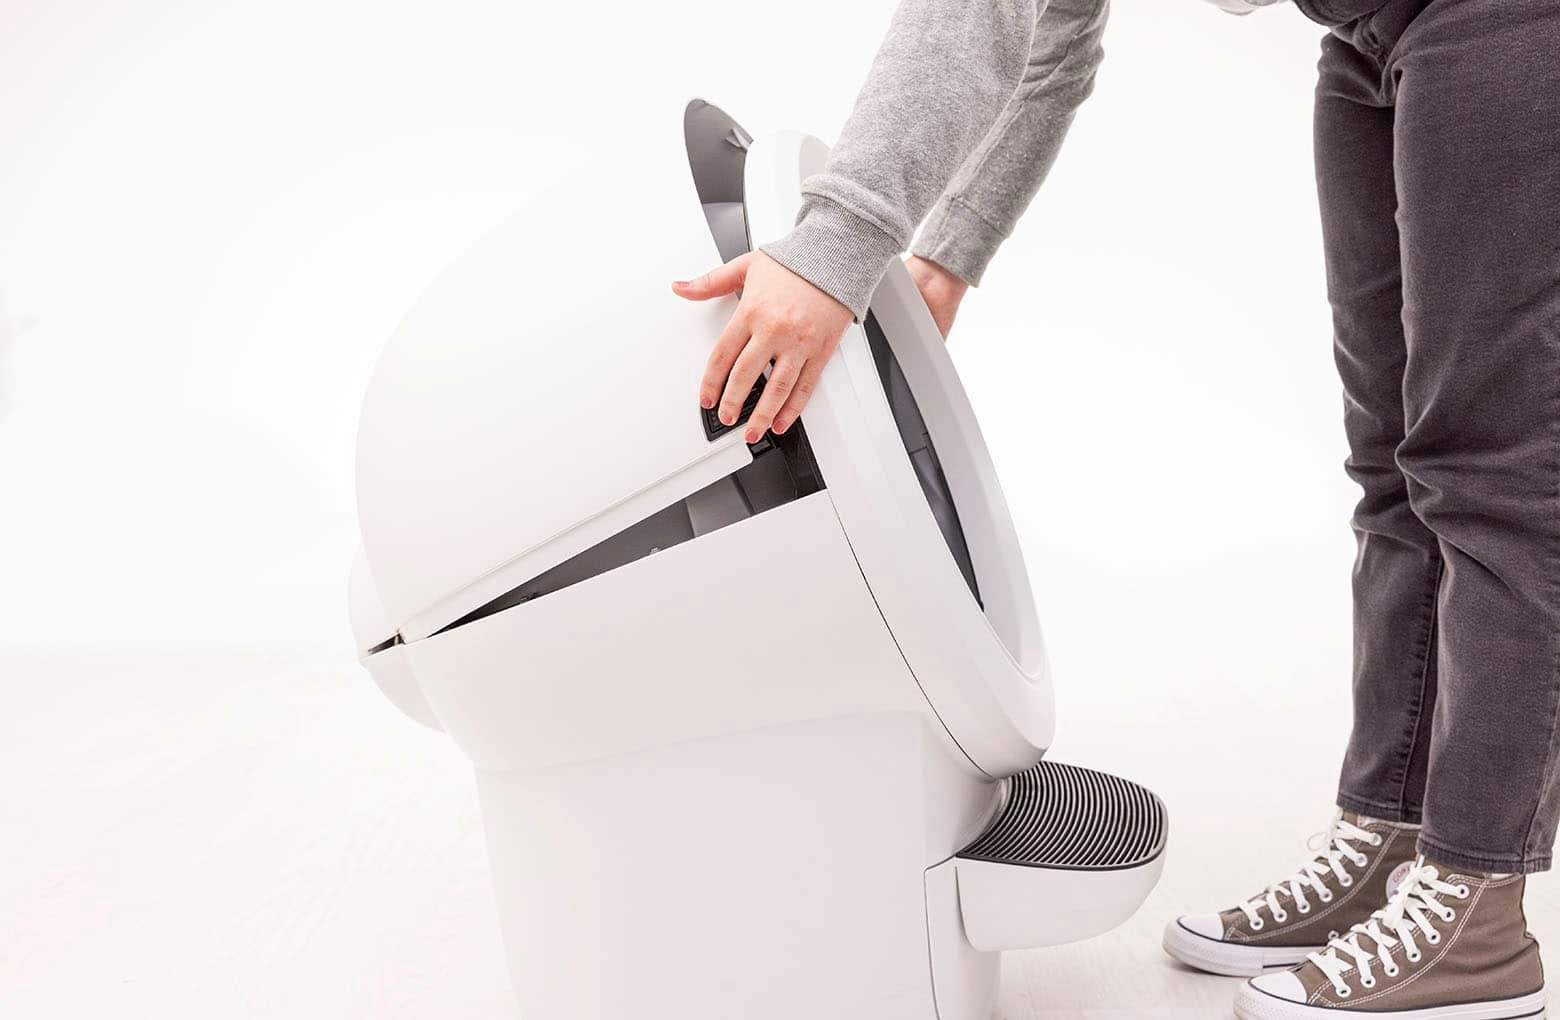
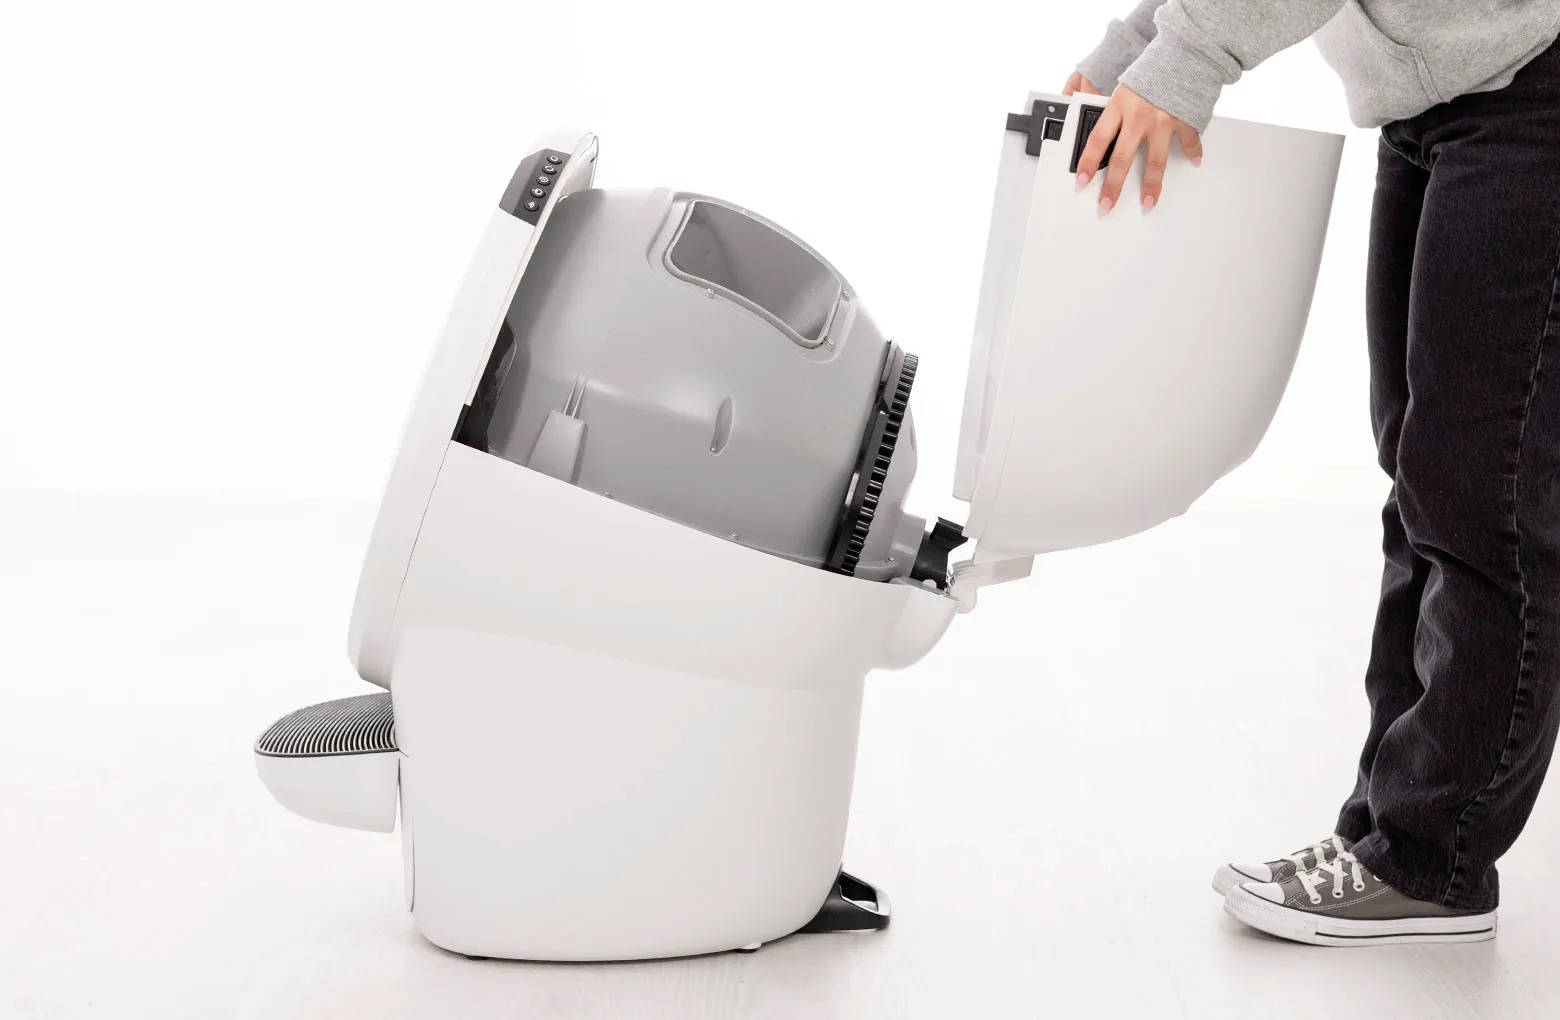
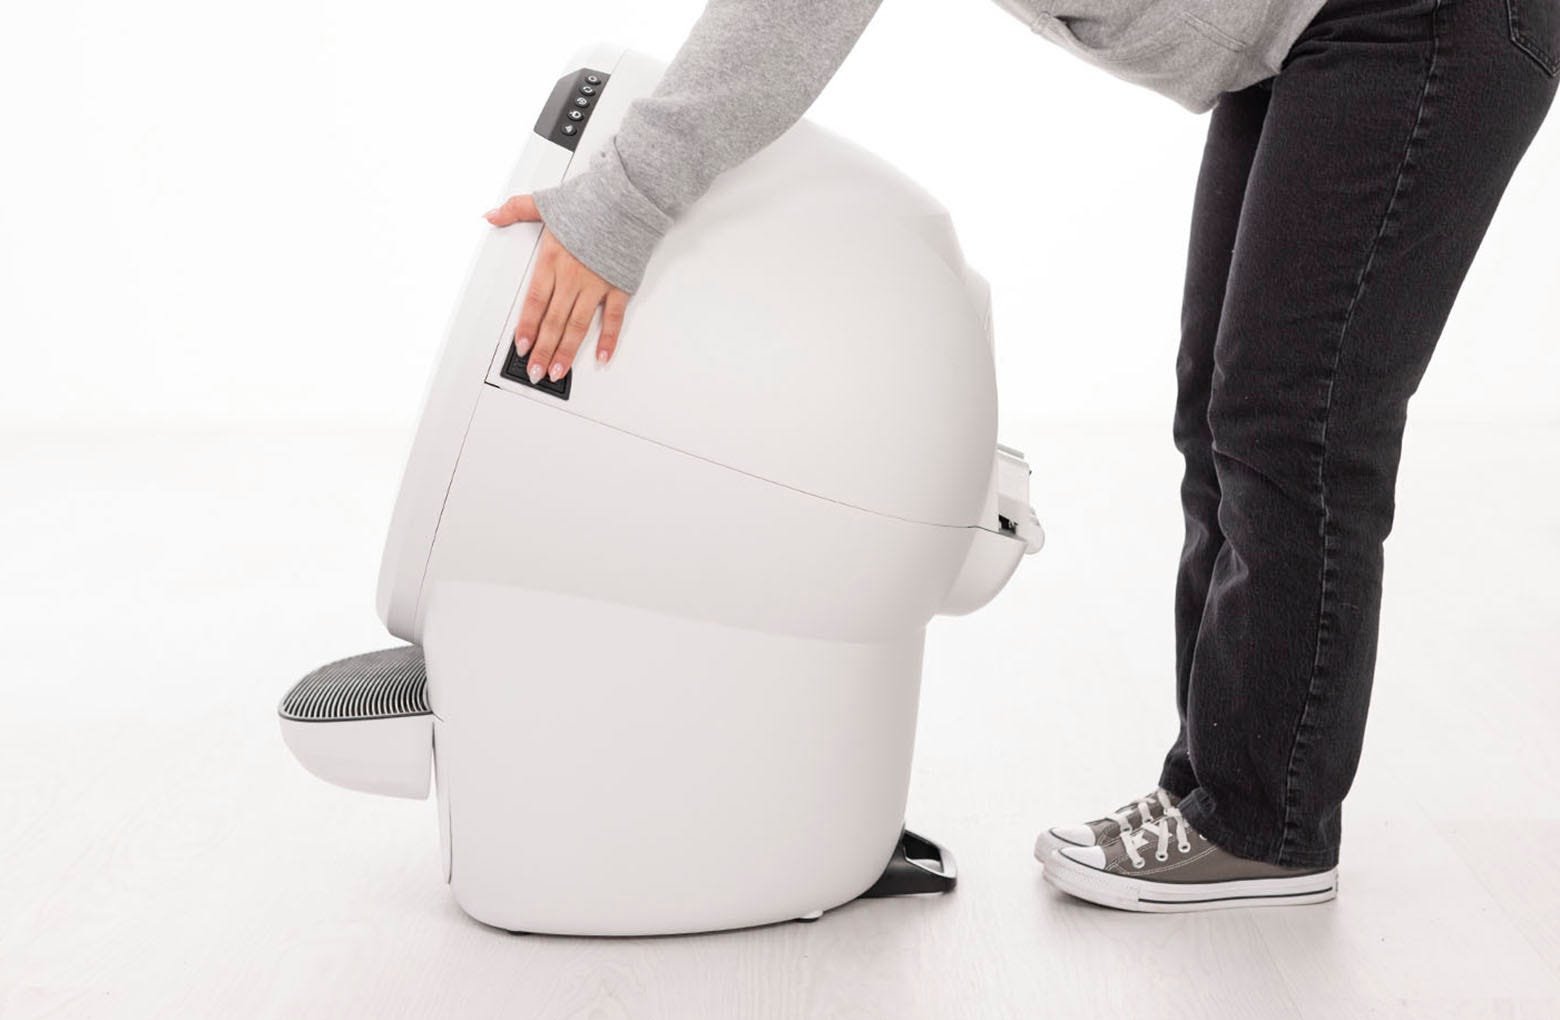
- Press and hold the latches on both sides of the bonnet, then lift and rotate the bonnet to its open position.

Lift the bonnet up and out of the hinge to remove.
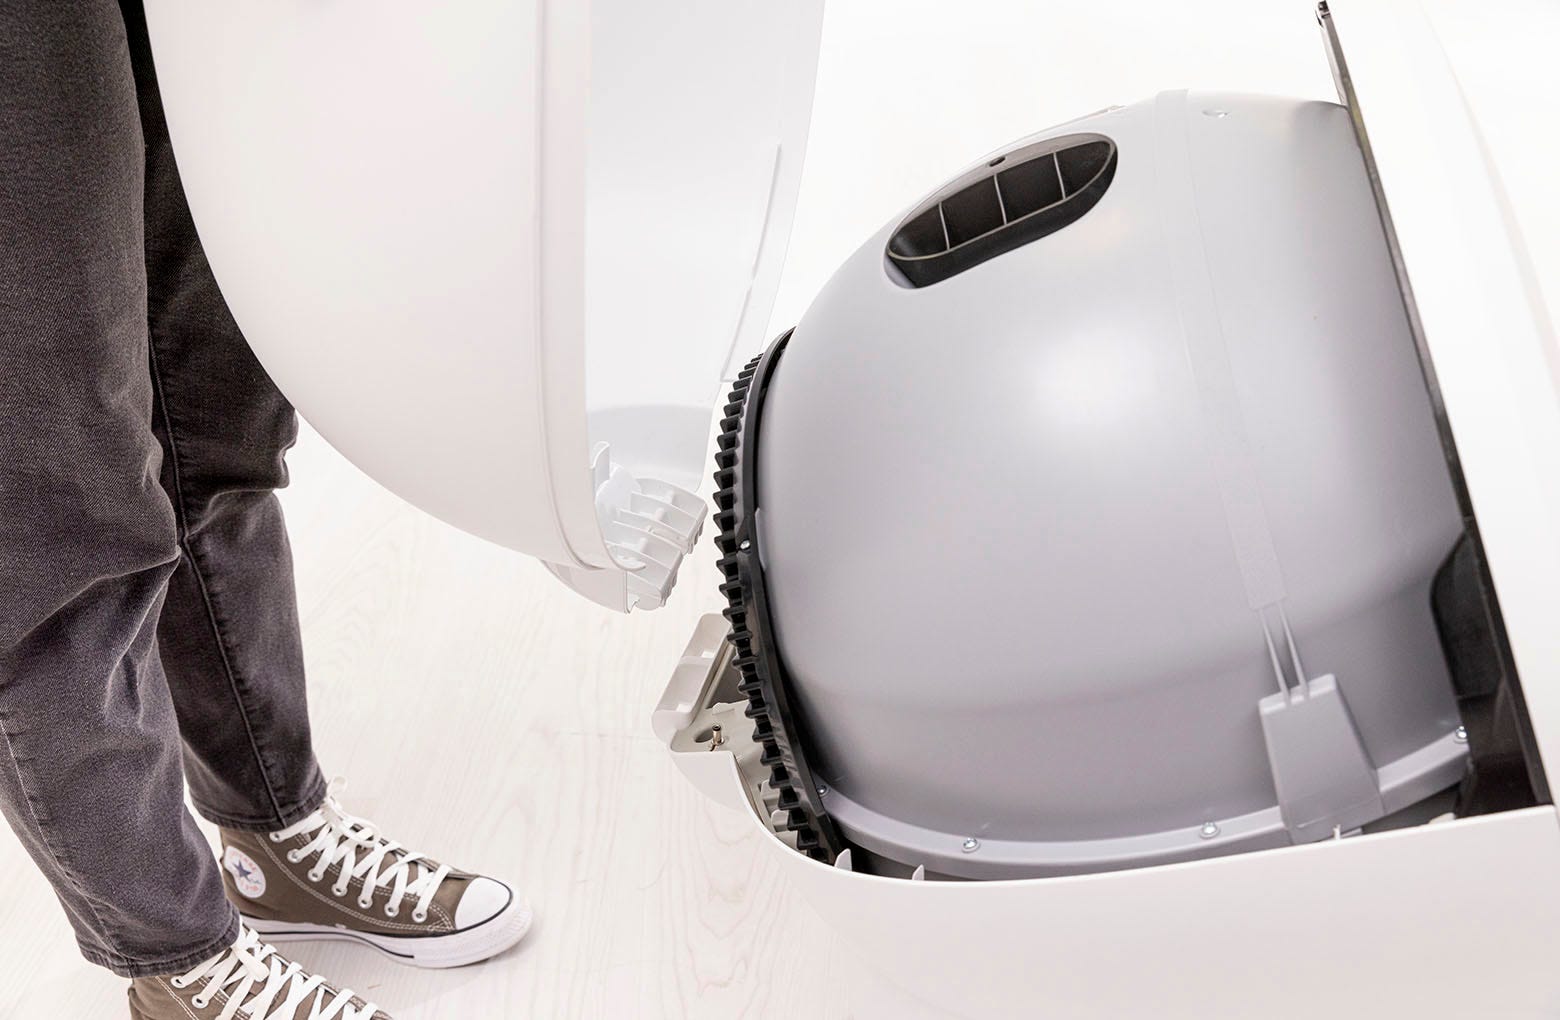
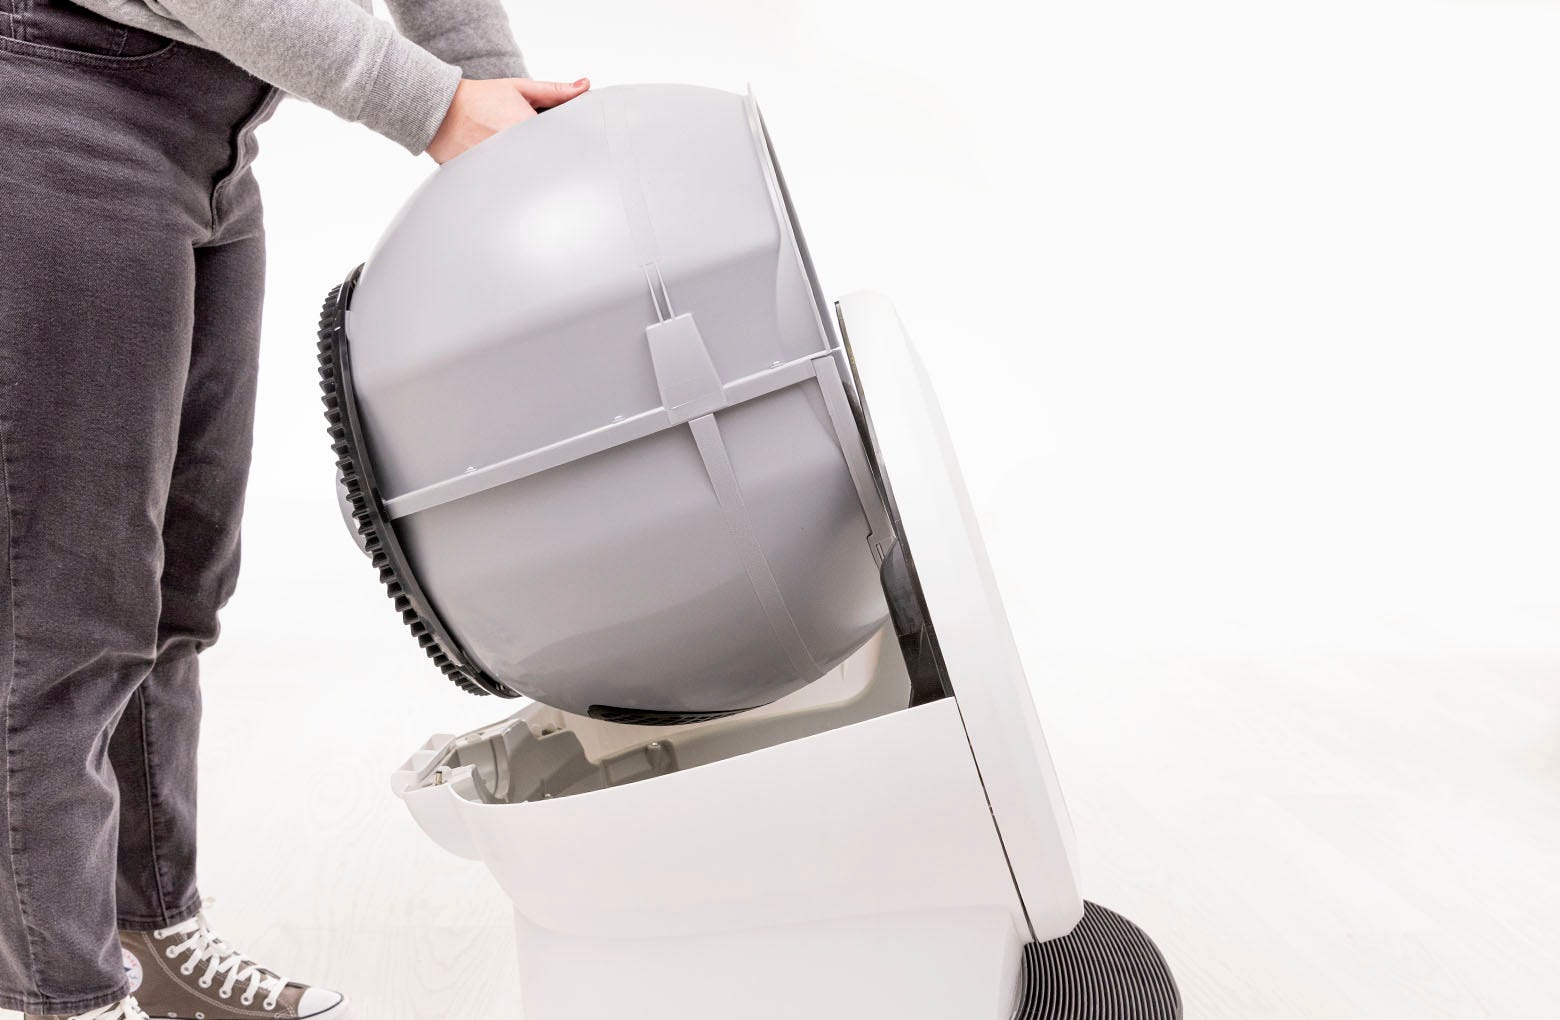
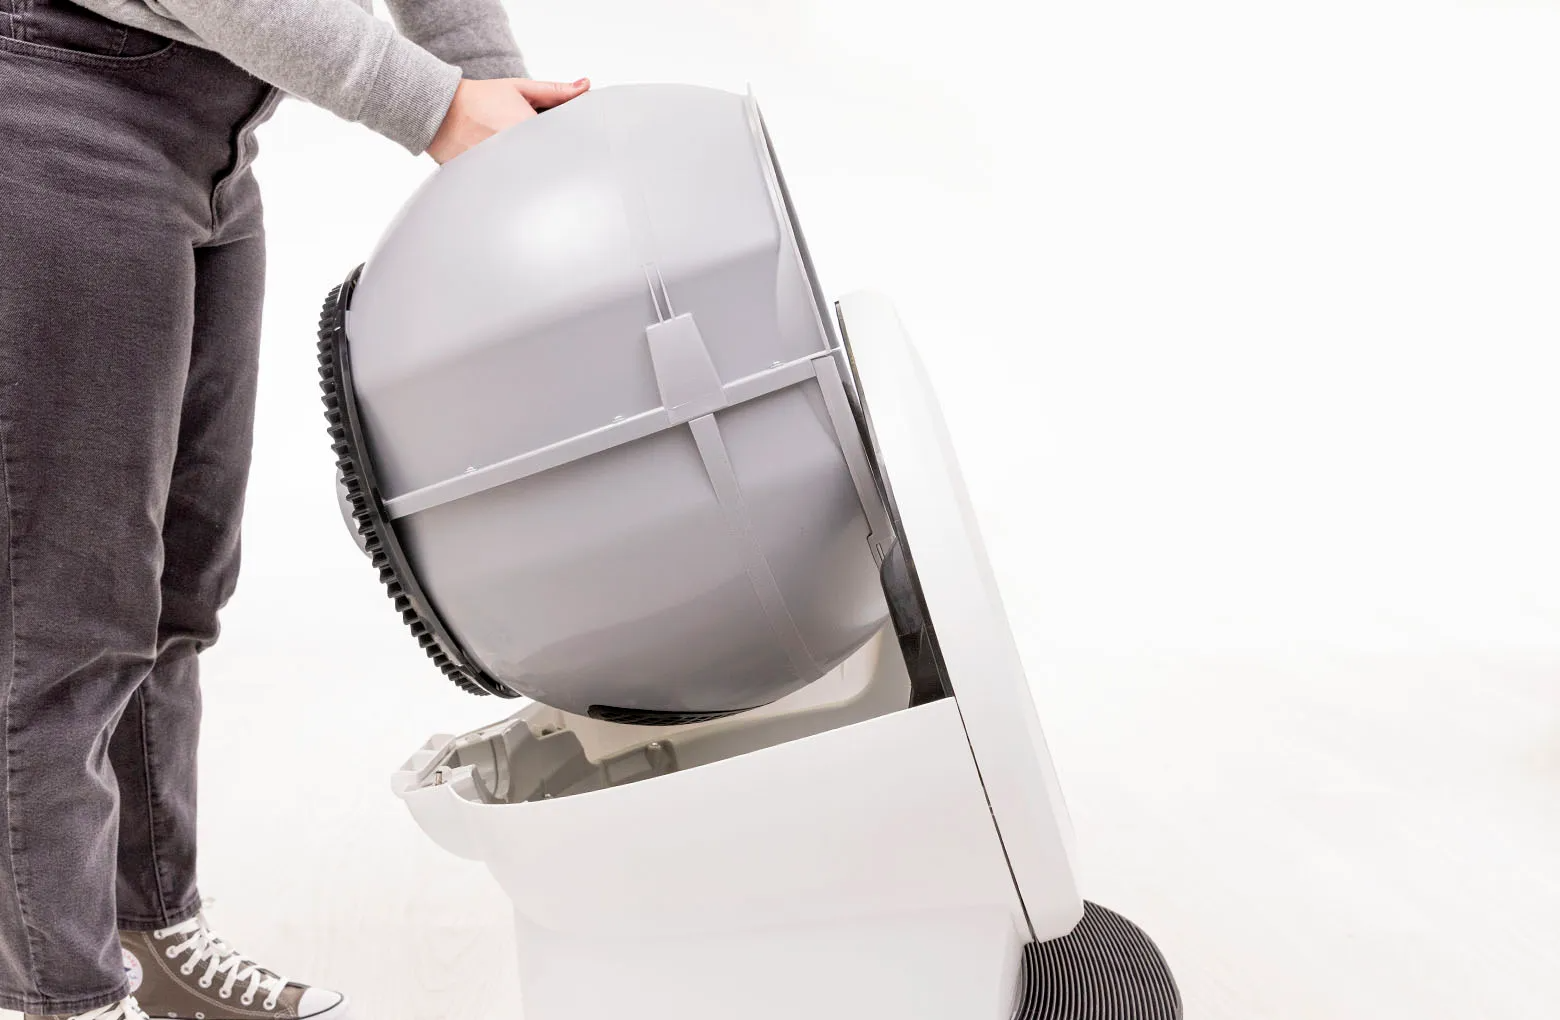
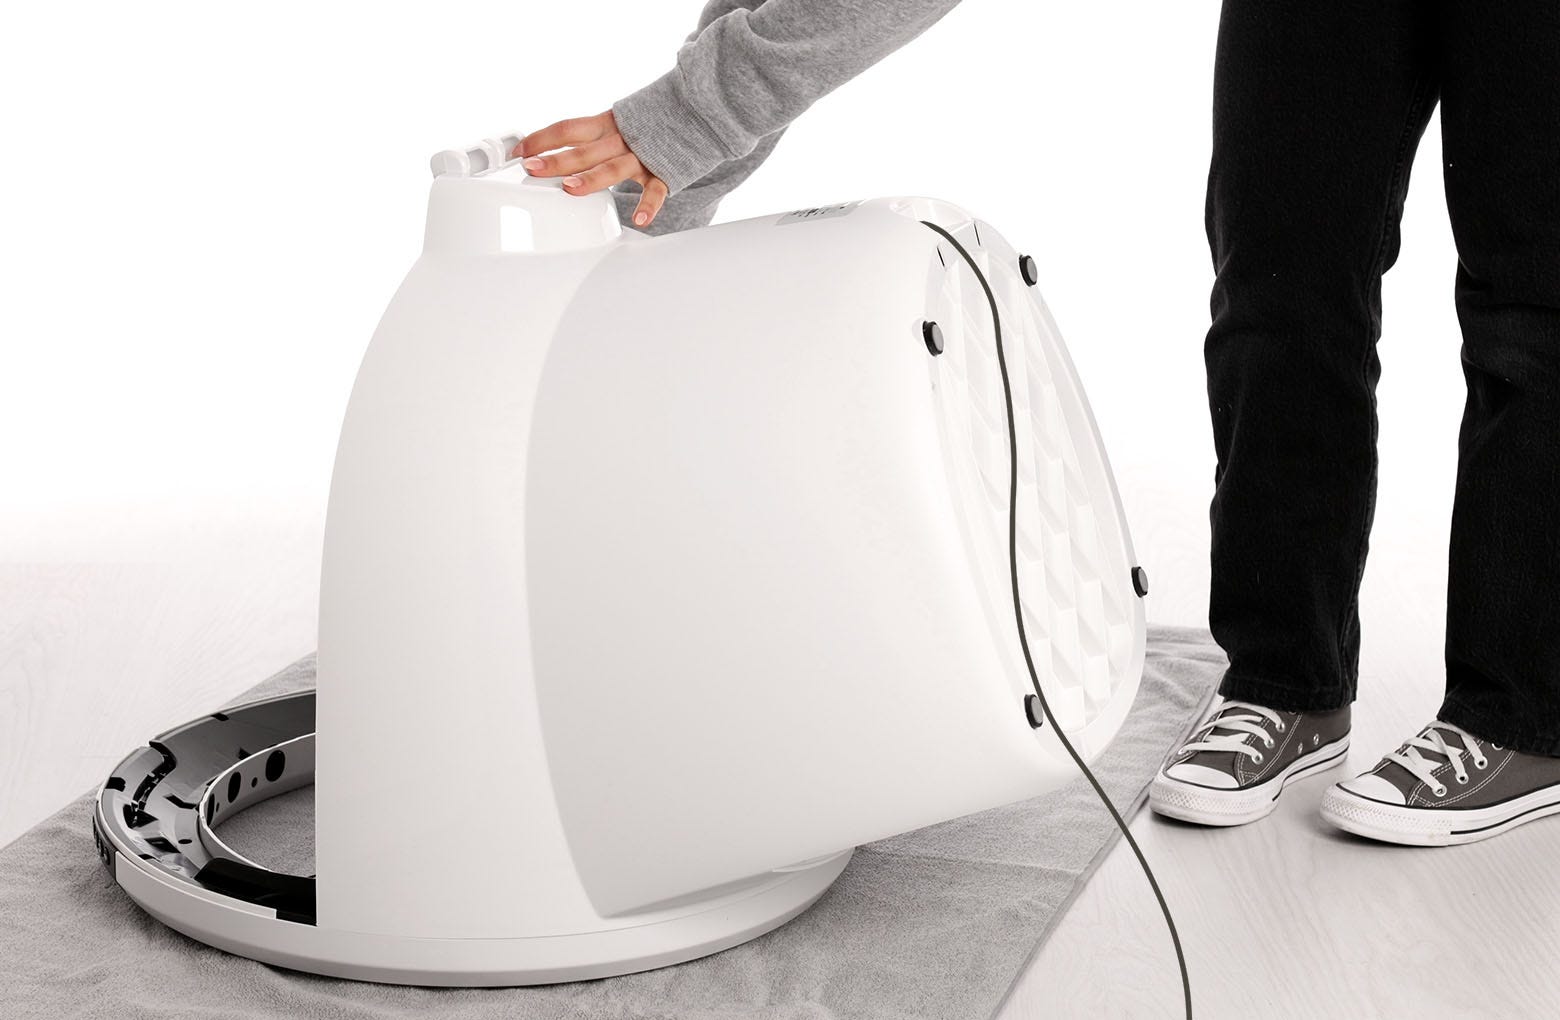
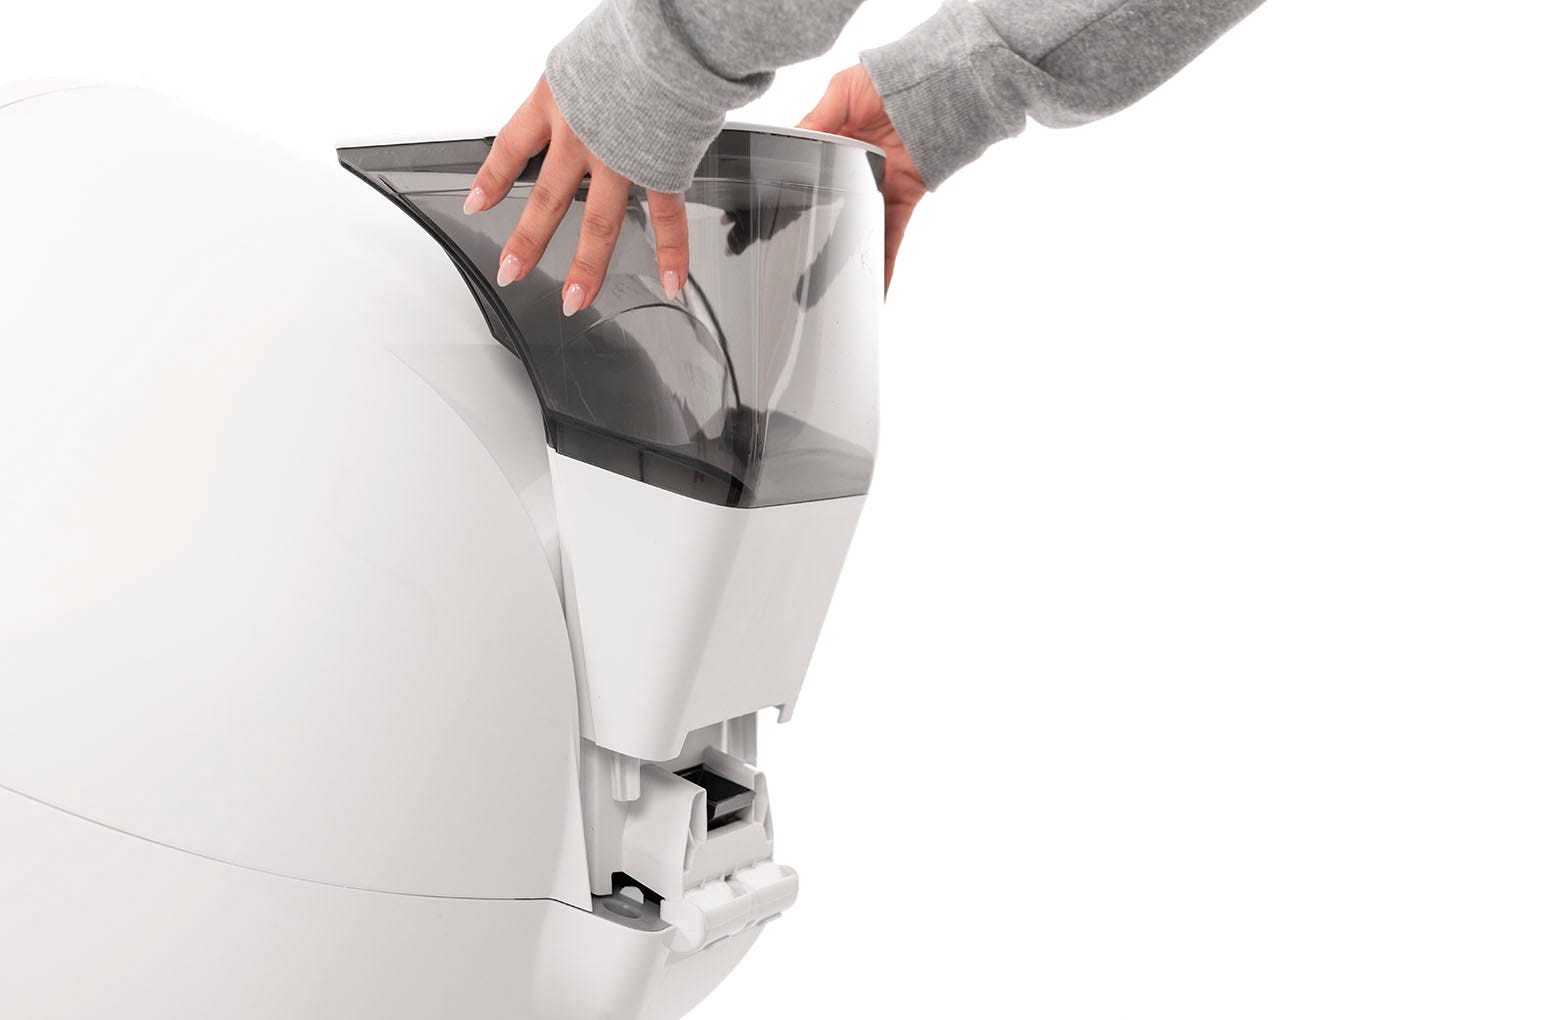
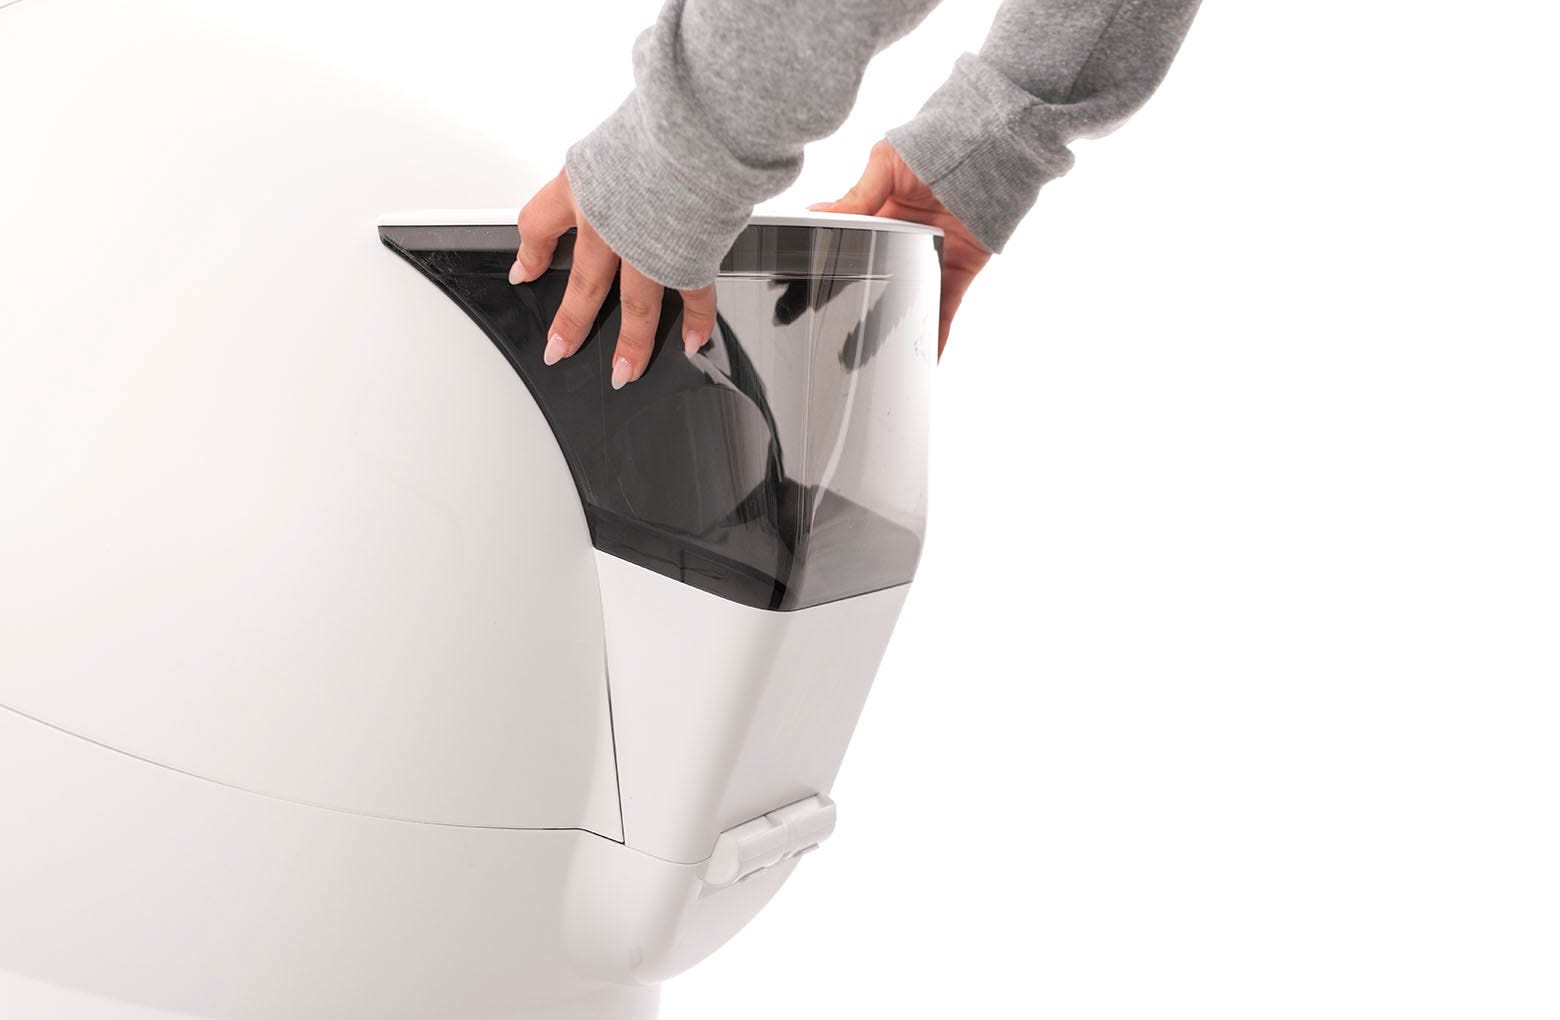
- Remove the globe: Grab the black handle located on top of the globe, lift the globe up and out of the base, and set it aside.

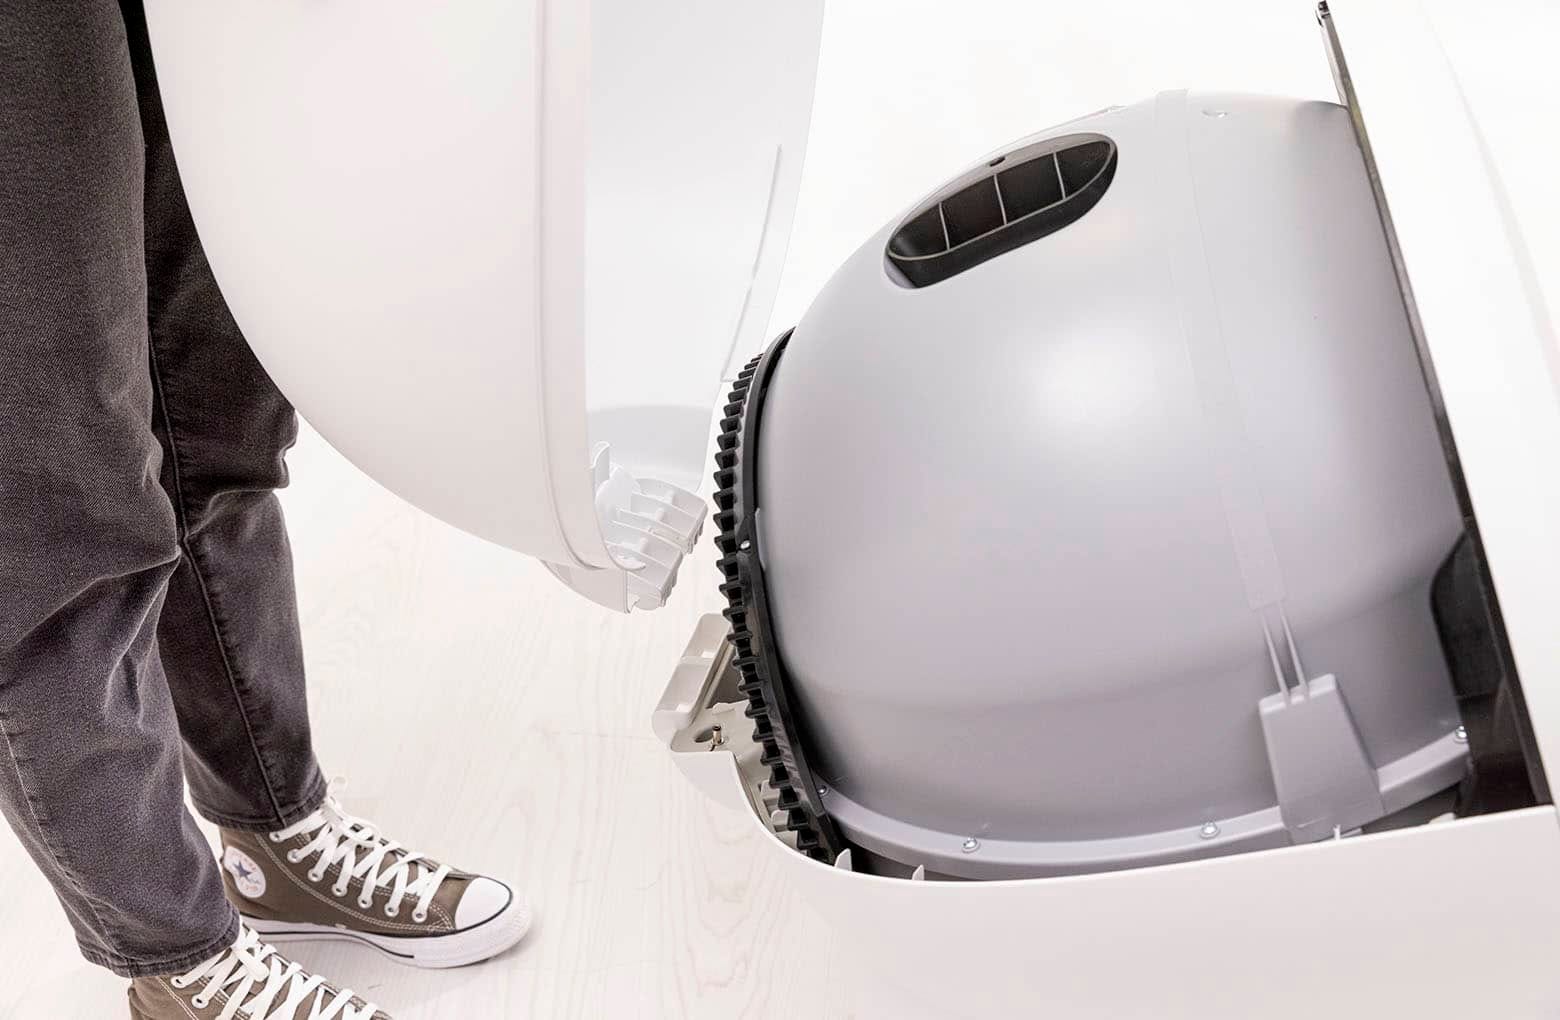
Step 2: Check for the LitterHopper™ key on Litter-Robot 4®
Check the hole in the back of the globe. If there is a black cap in the hole (as shown in Step 3) please proceed to Step 3 to remove the cap.
If the hole is empty and you are ready to install your LitterHopper please proceed to Step 4.
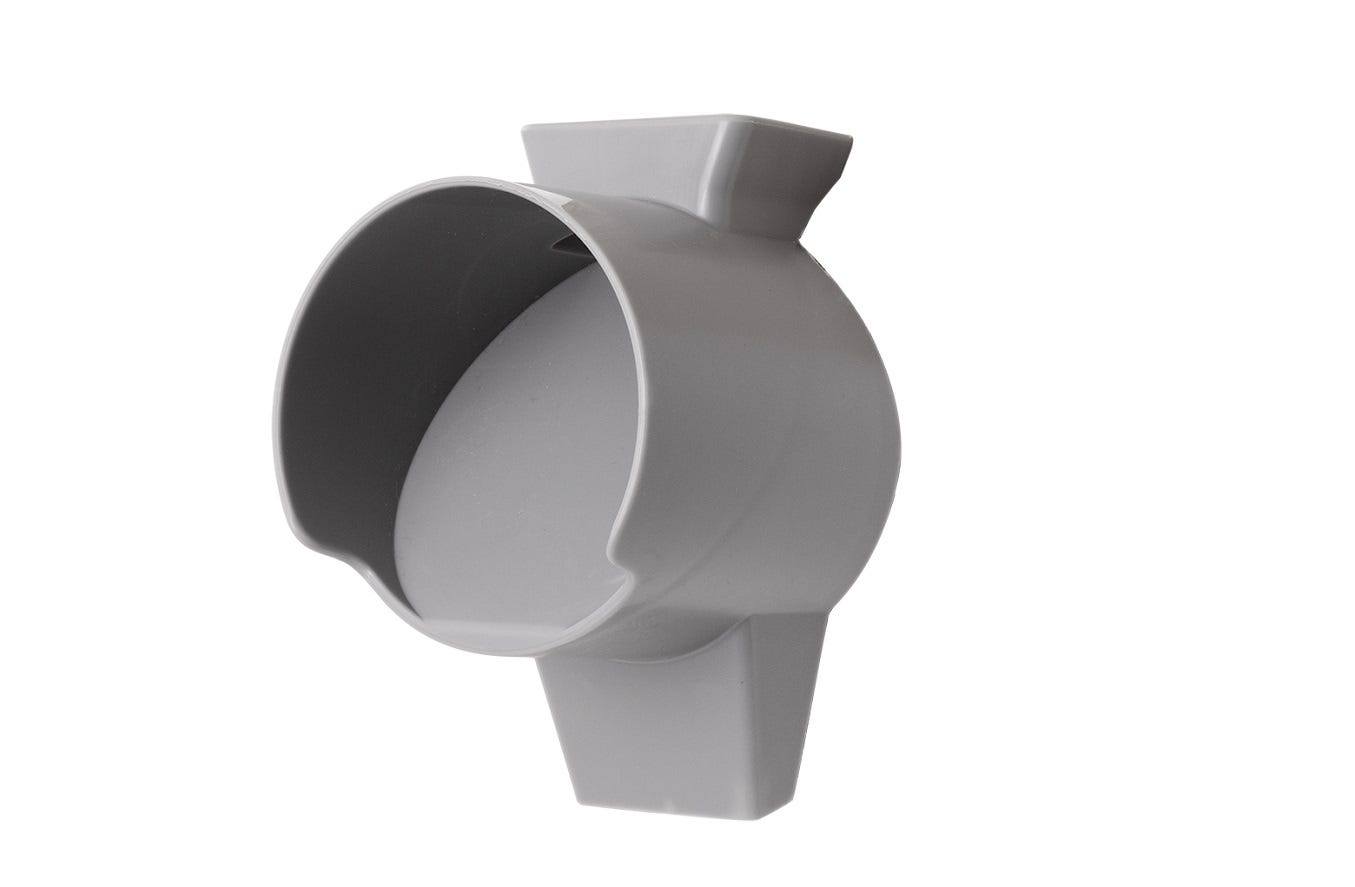
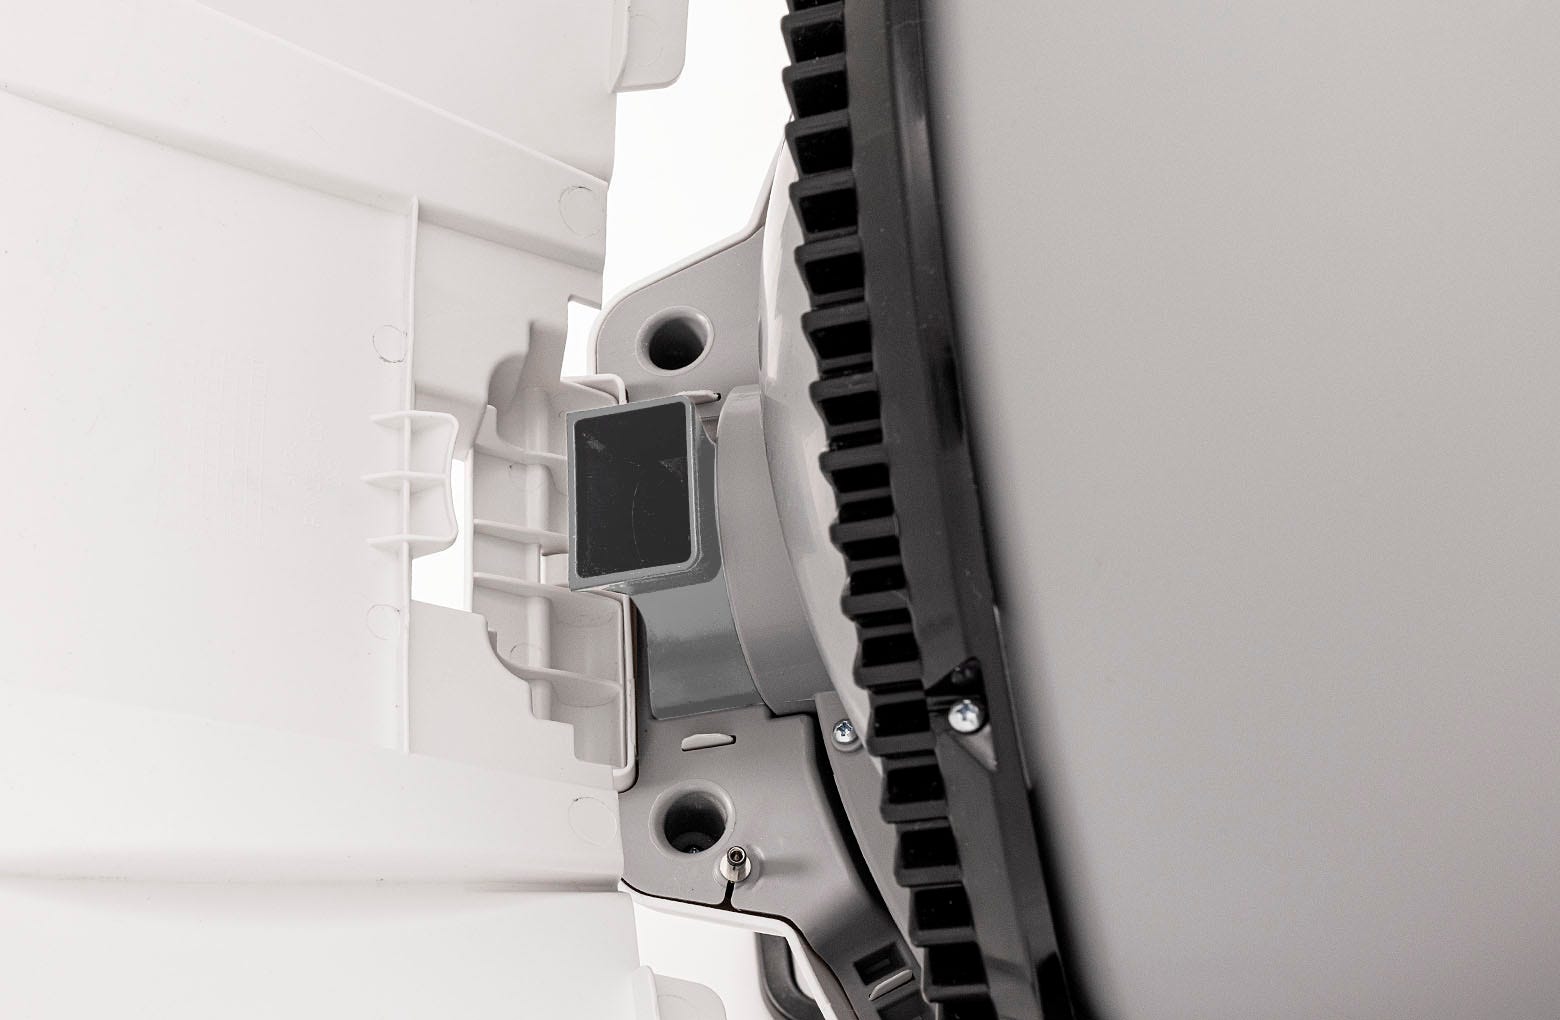
If there is a grey key in the hole (shown below), then the key was already installed on Litter-Robot 4. Please proceed to Step 4.
Step 3: Remove the cap from Litter-Robot 4®
Remove the cap from the rear of the globe by grabbing the tab and pulling.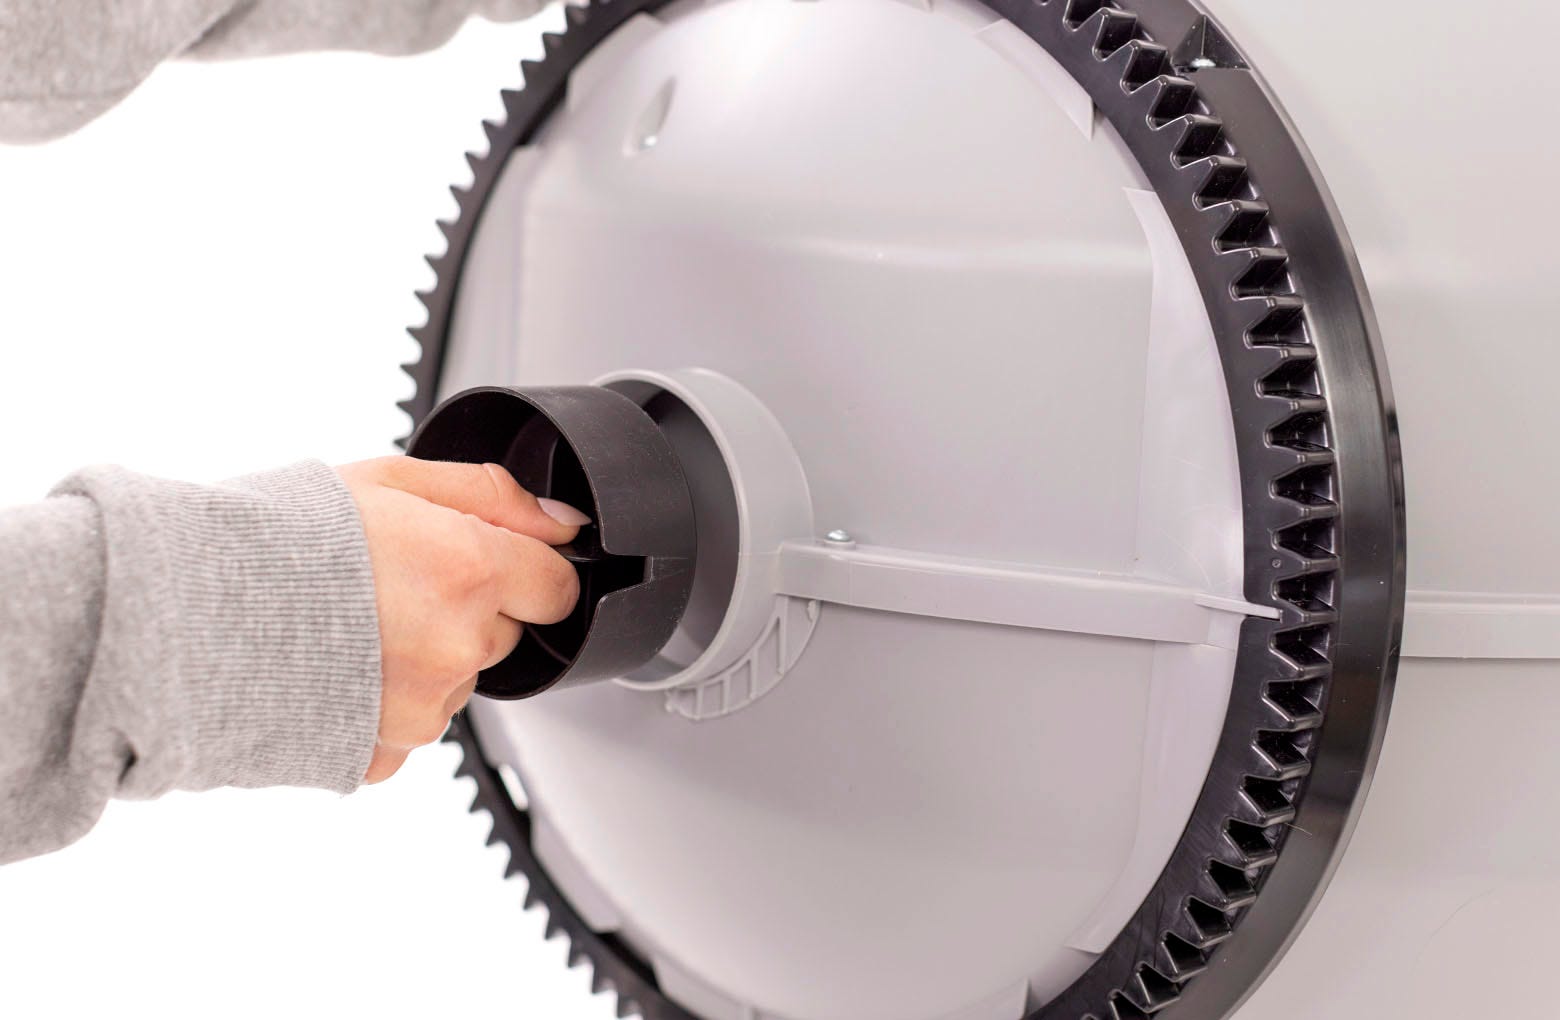
If you have not received your LitterHopper please reassemble your Litter-Robot 4 and follow the instructions below. If you have received your LitterHopper proceed to step 4.
- Place the globe back into the Litter-Robot 4 base.
- Place the LitterHopper bonnet into the hinge on the base. The bonnet should then stay upright on its own.
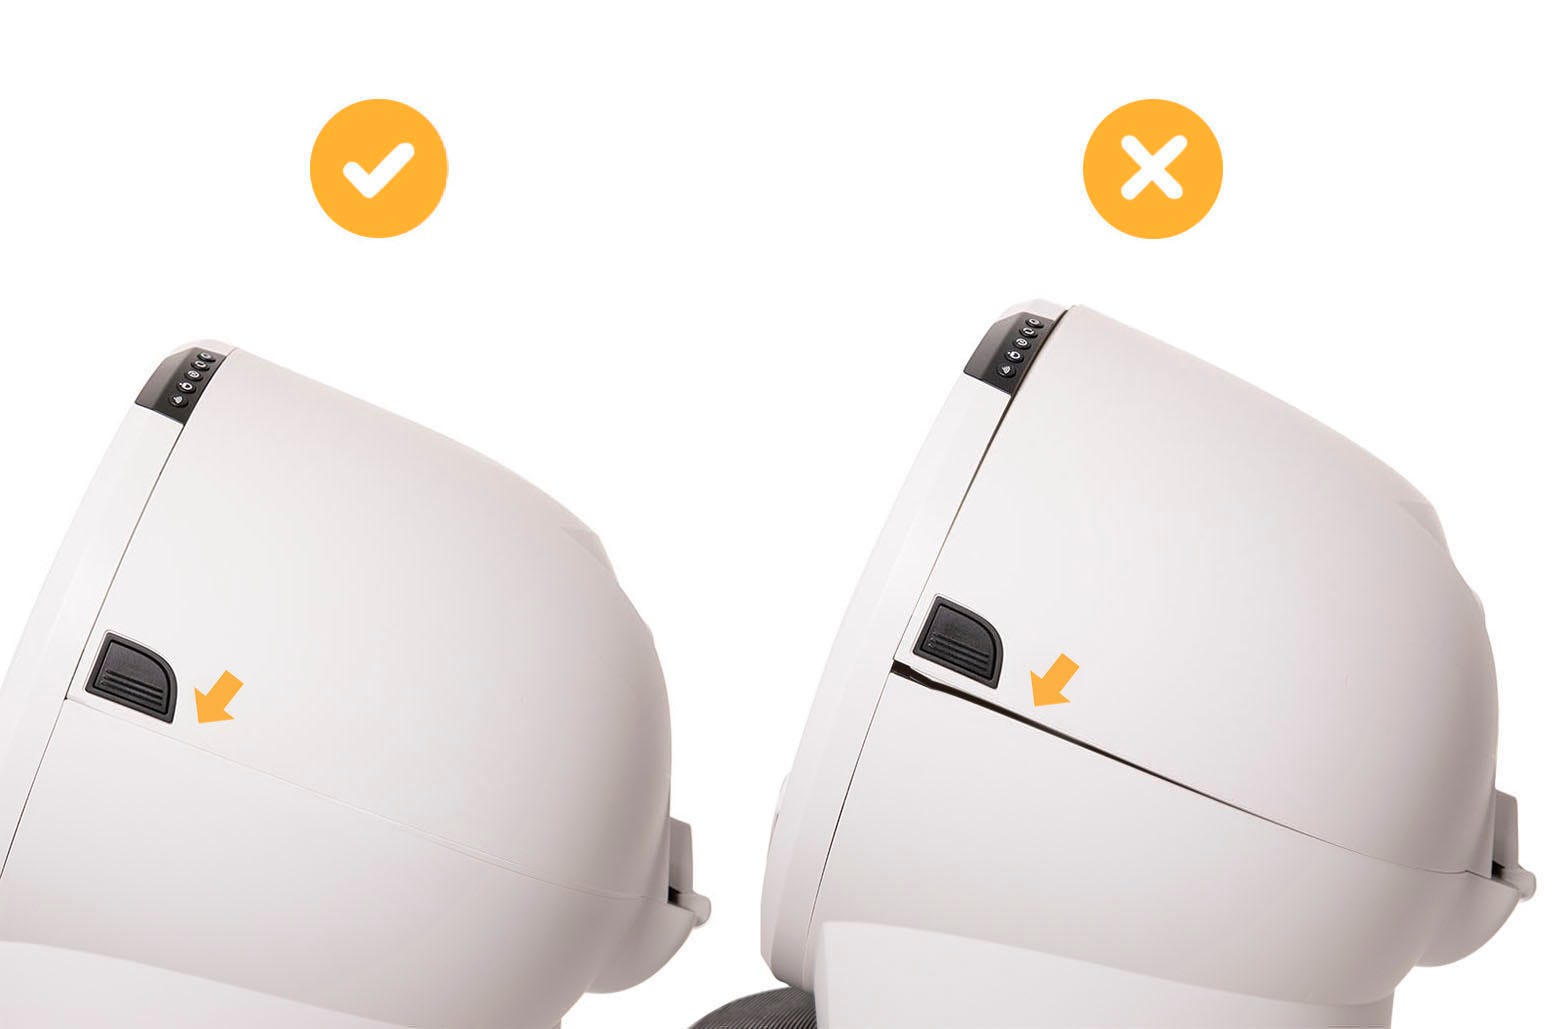
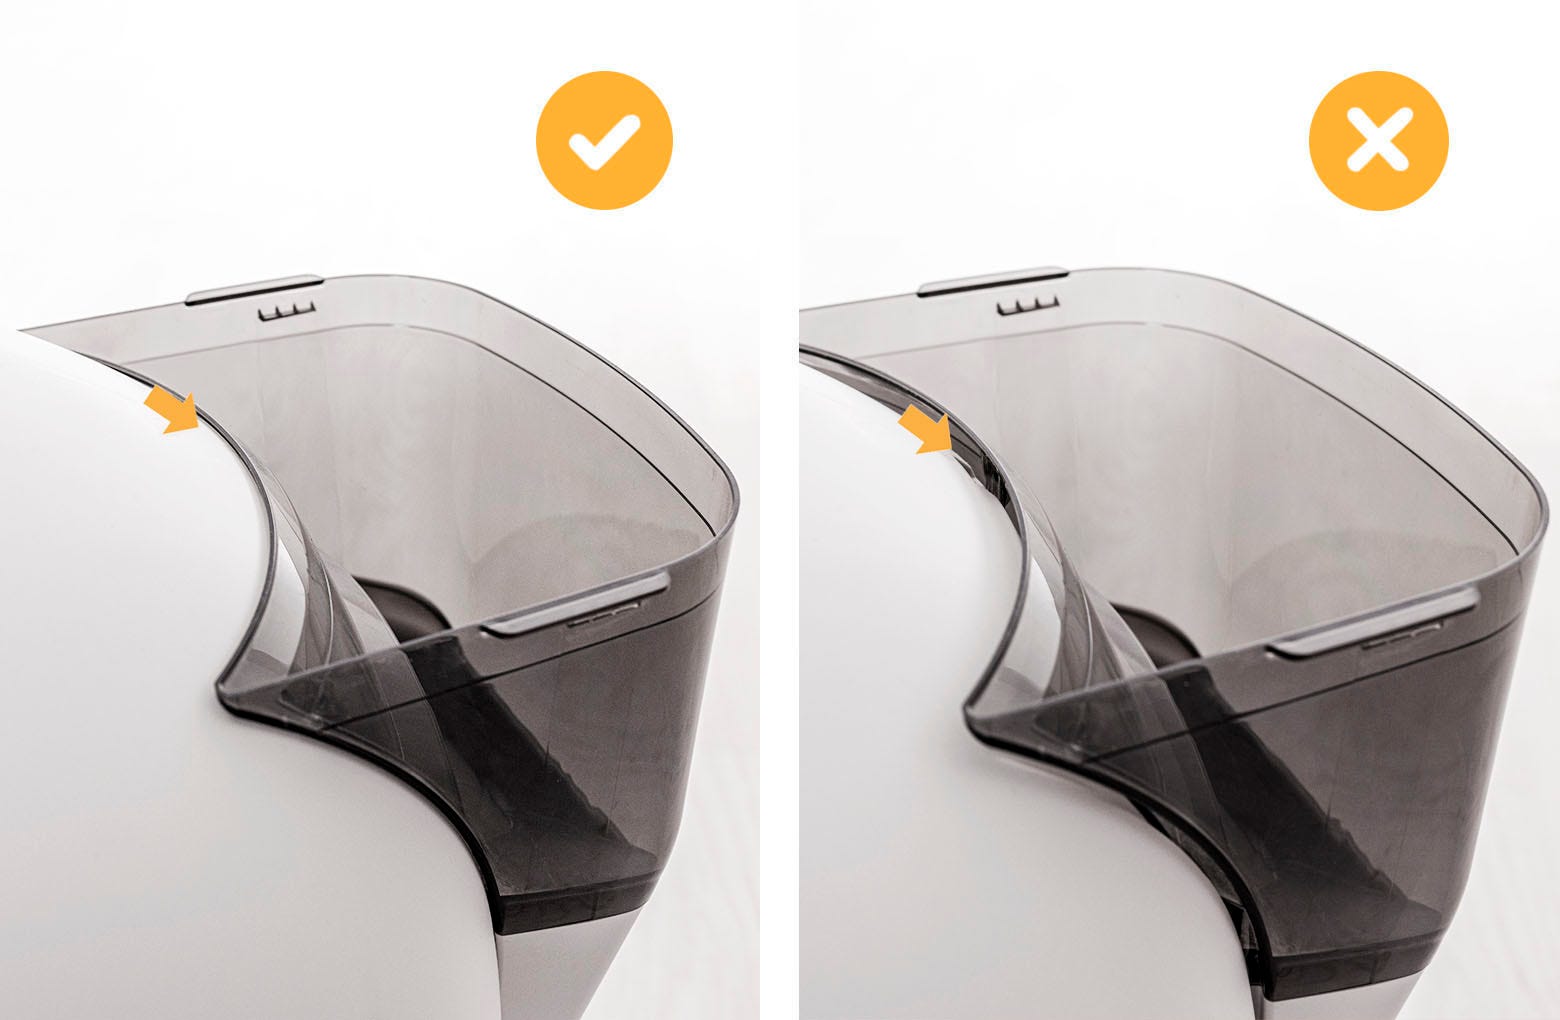
- Rotate the bonnet downward over the globe and push down on the bonnet from the top to make sure it is latched and secure. The key must protrude through the opening in the back of the bonnet.
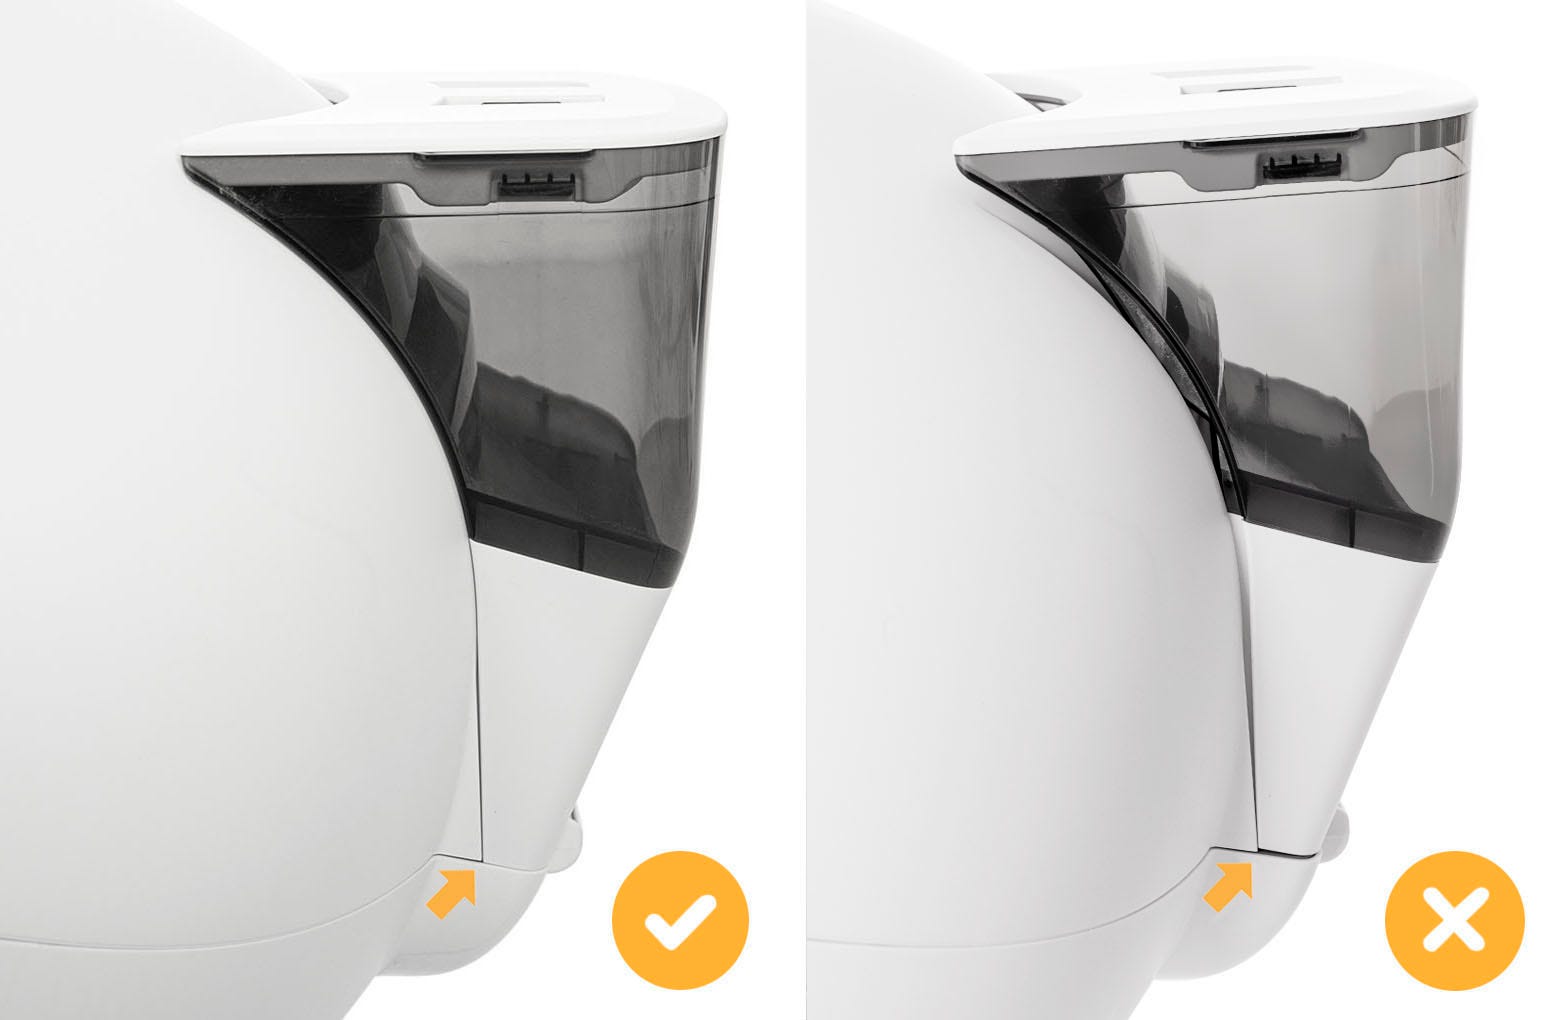
 Verify the bonnet and base are installed correctly.
 - The bonnet hooks must be under the base hinge feature.
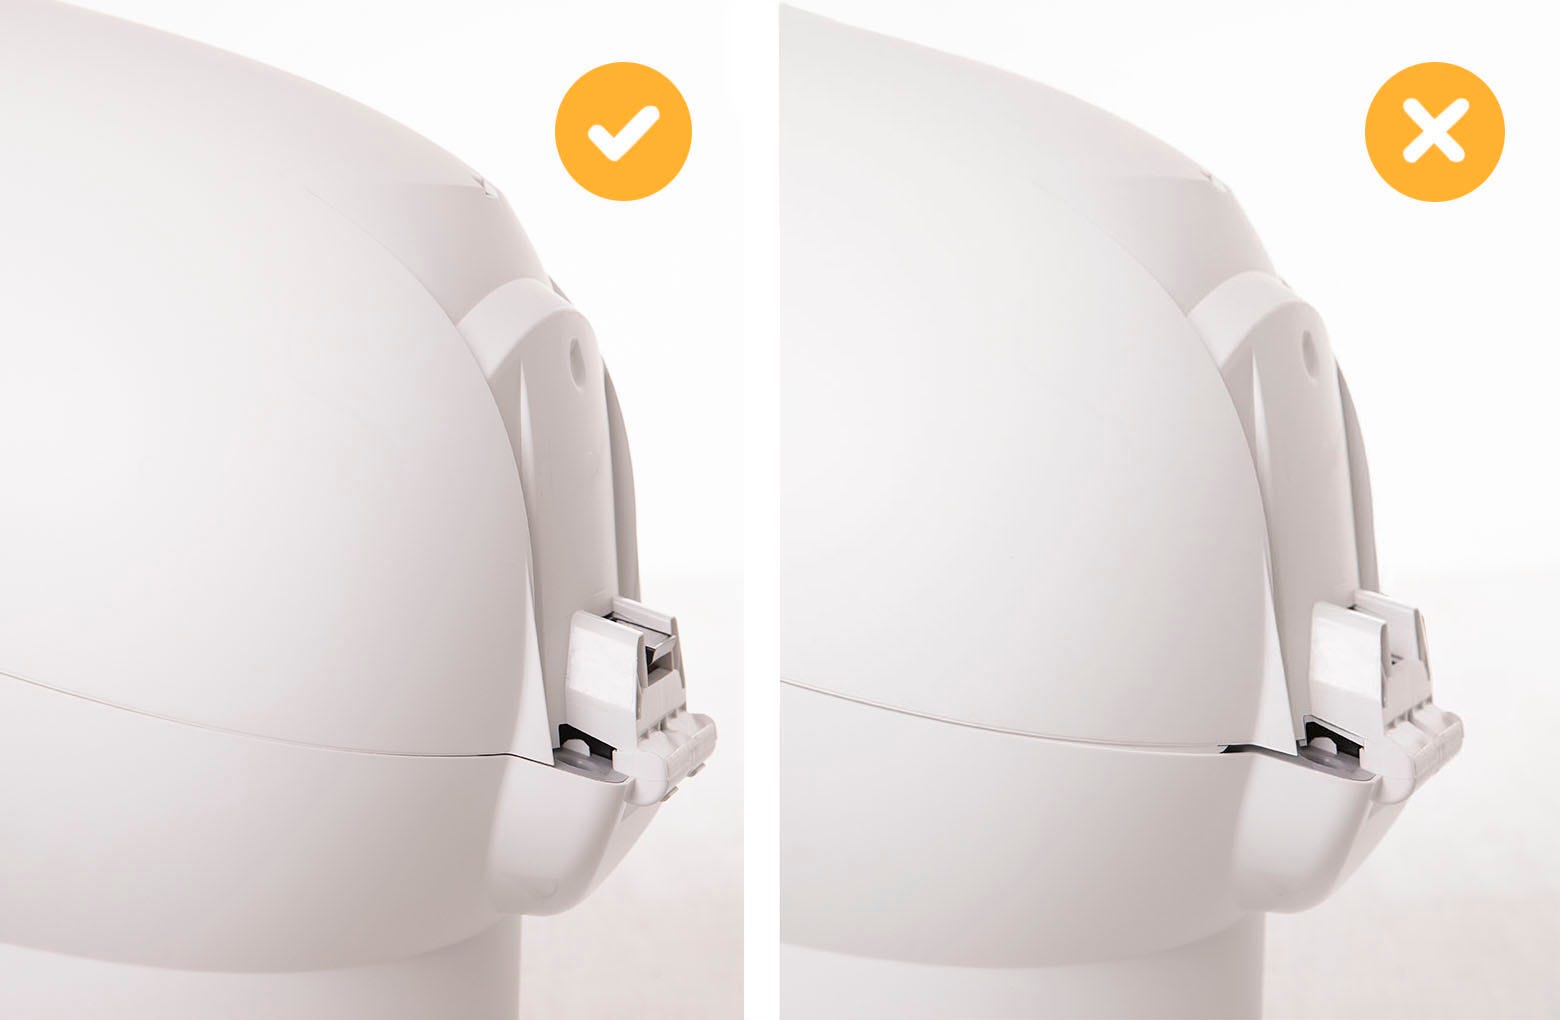 The bonnet and base should align with no gap between them.
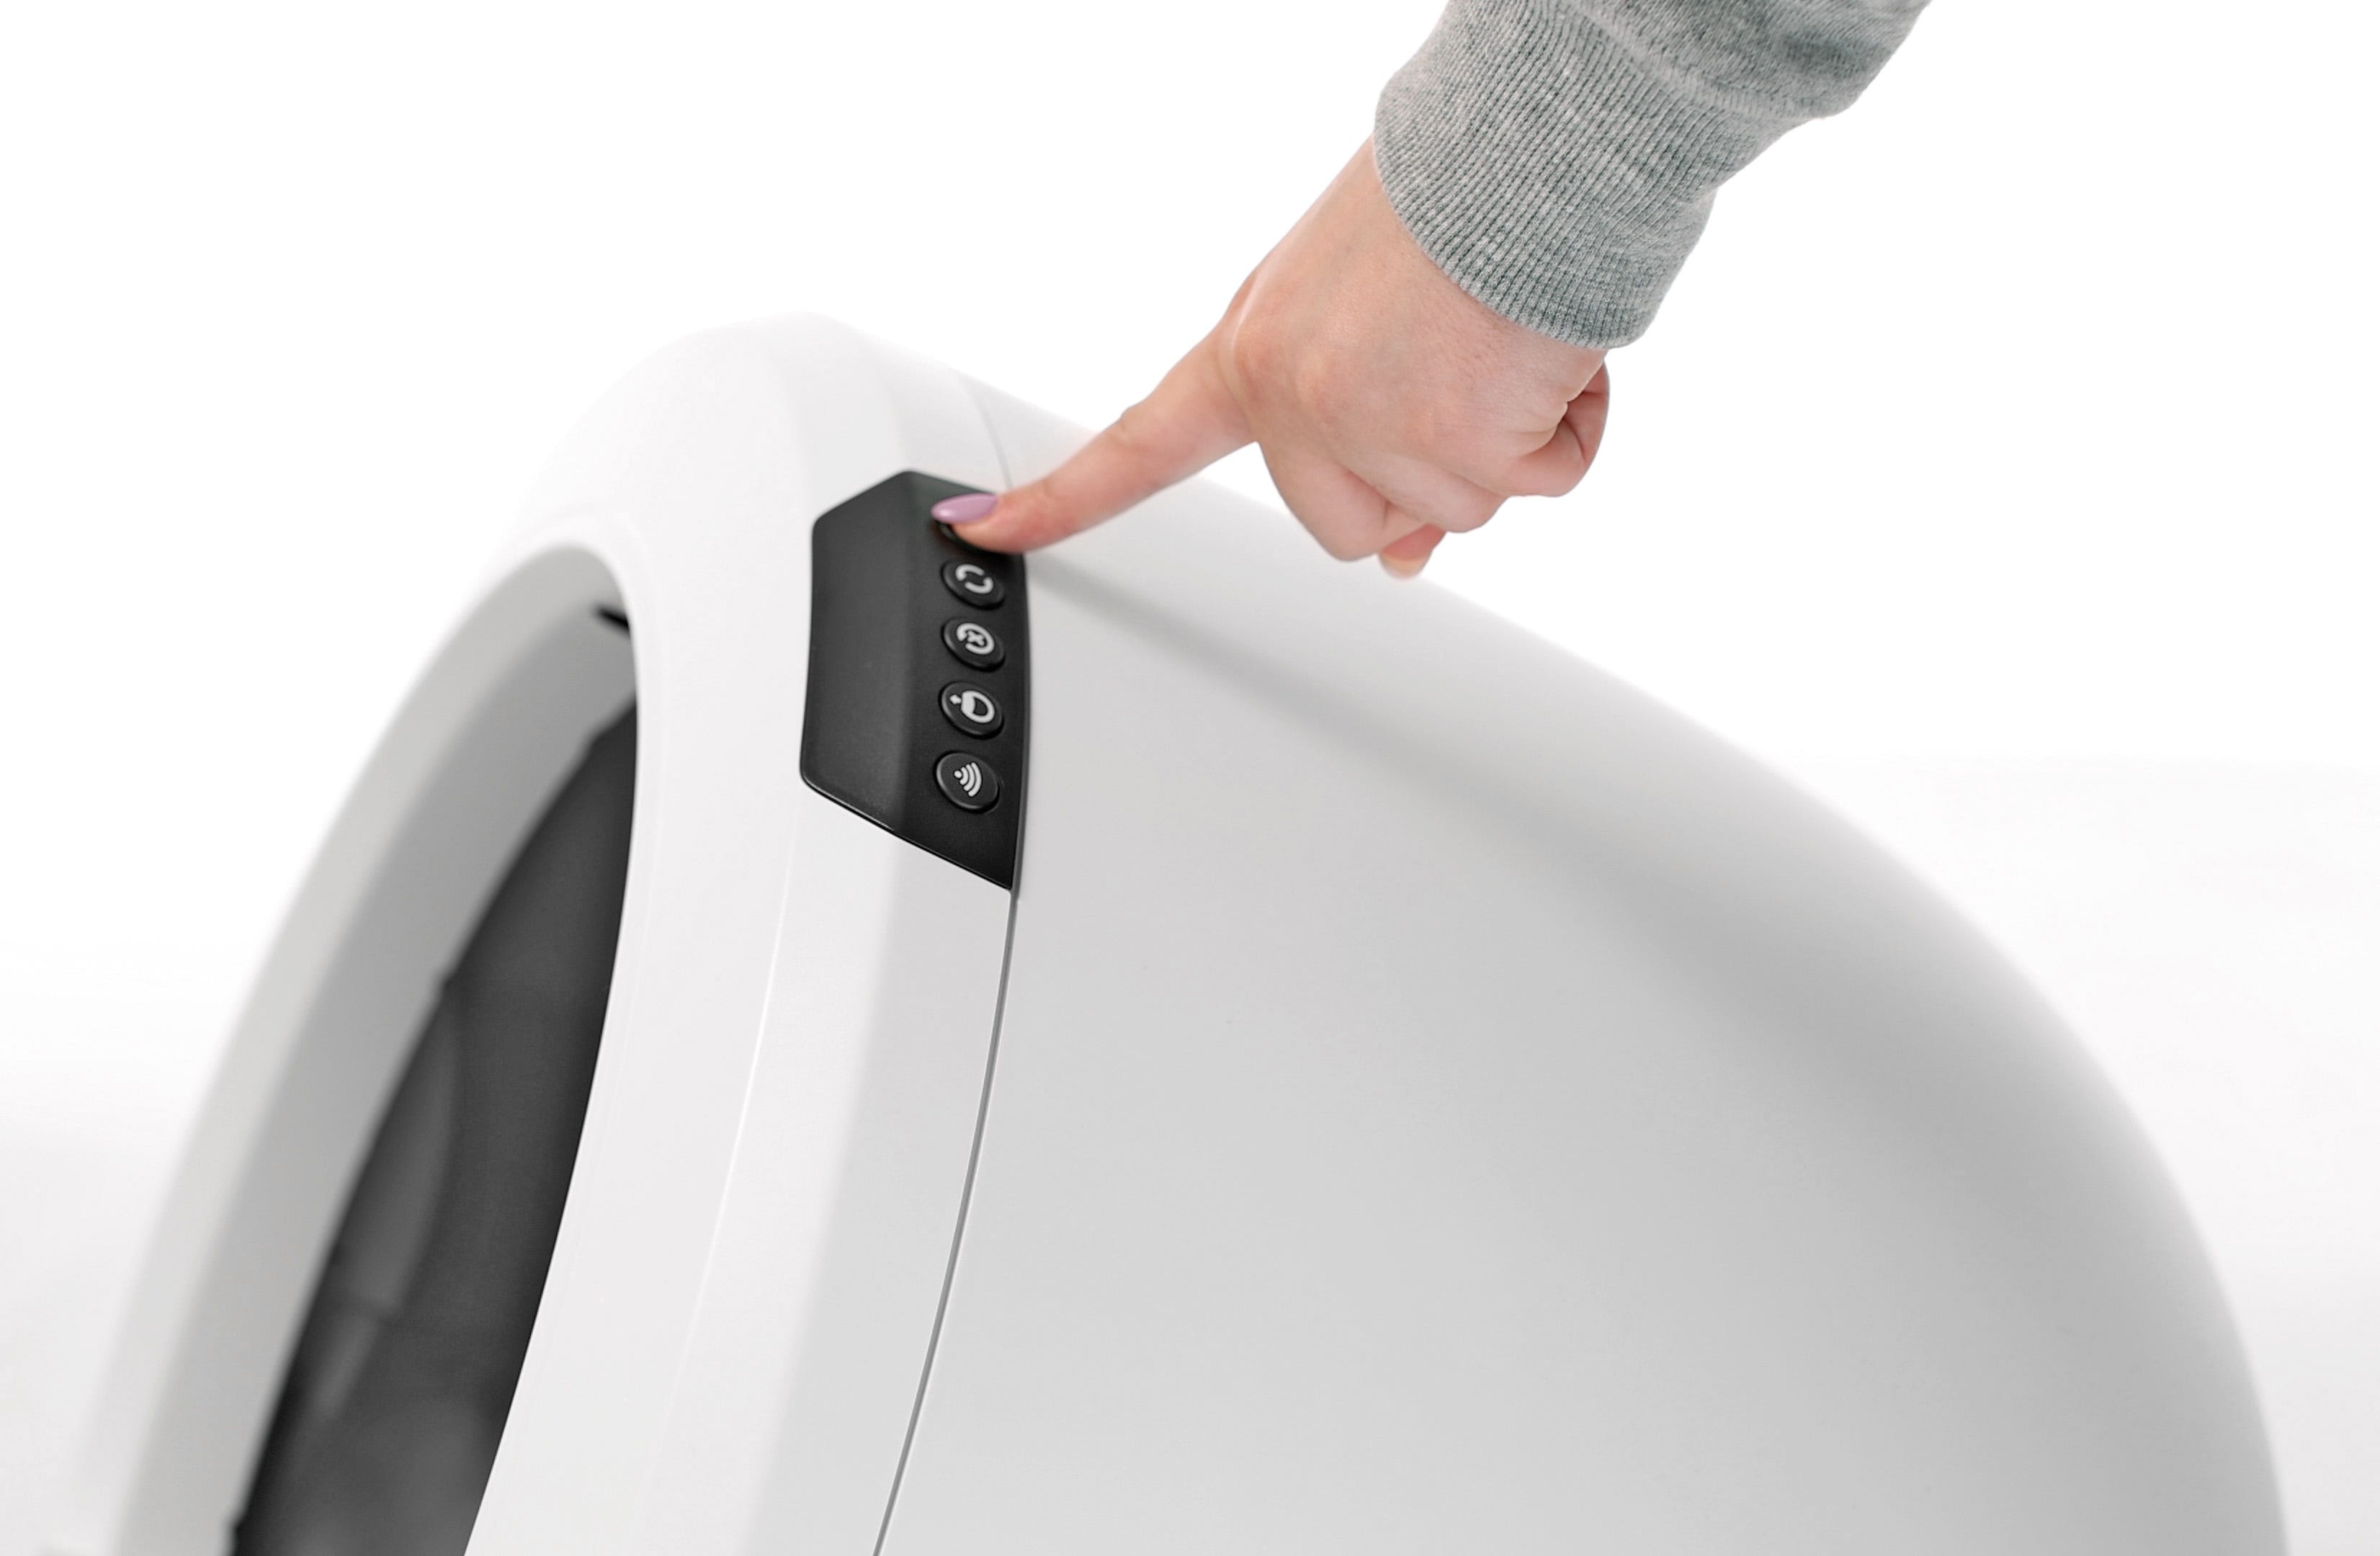
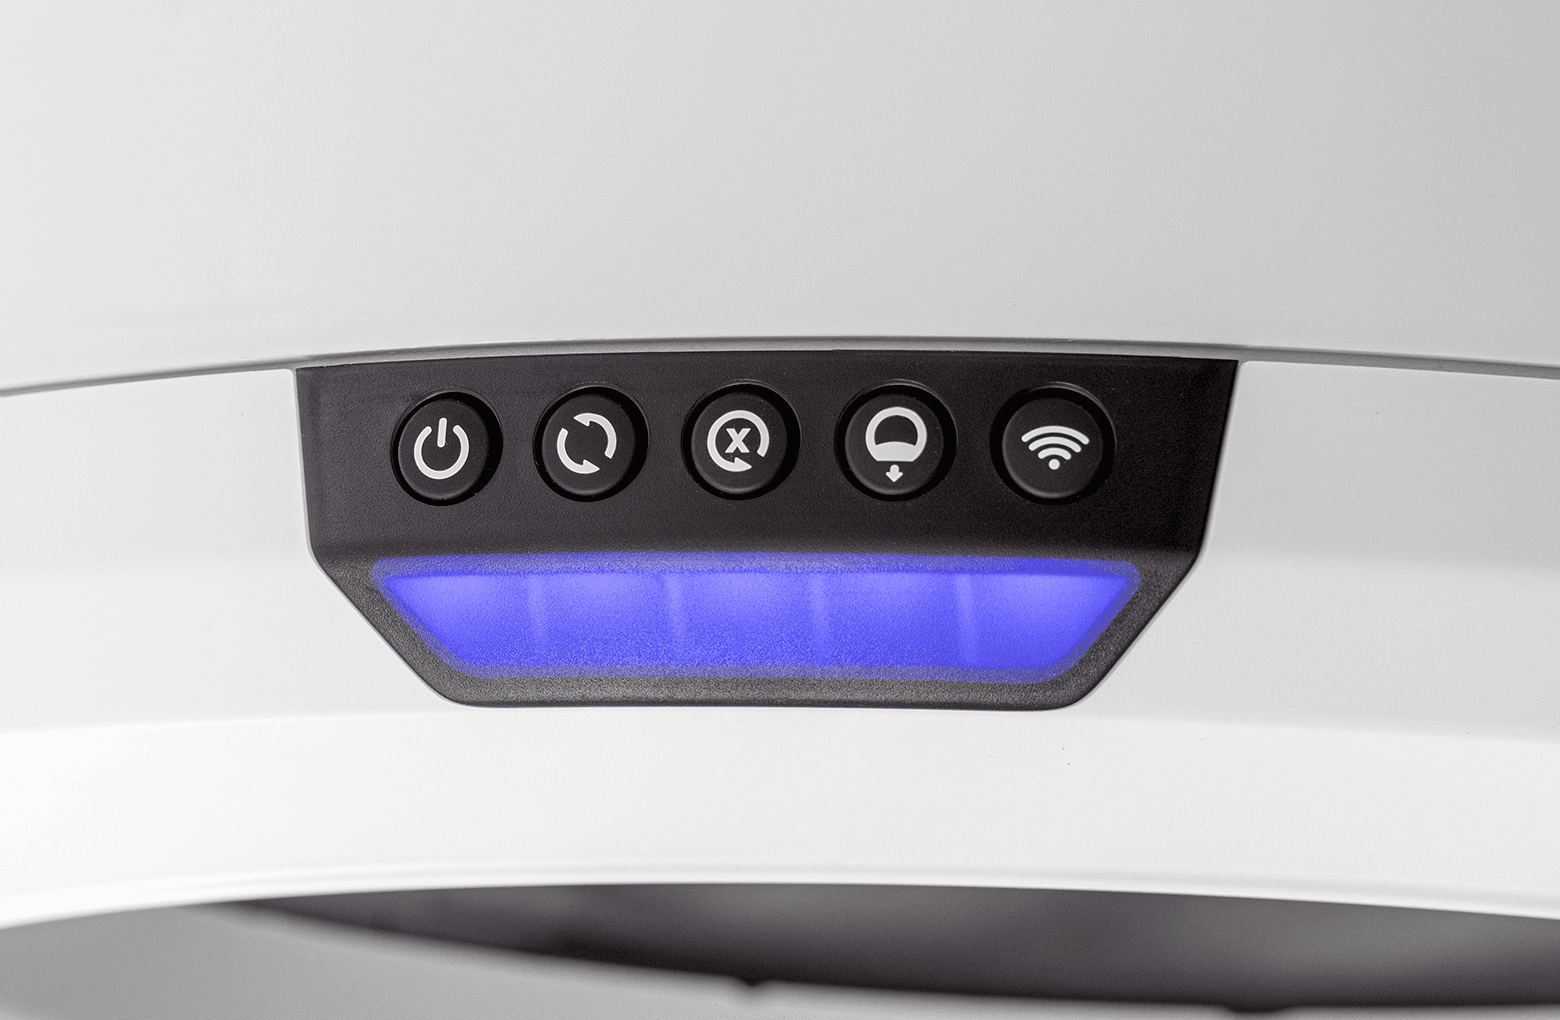
 - Please note: After setting up your Litter-Robot 4 without the LitterHopper installed, the control panel lights will flash blue and purple. If you don't have your LitterHopper yet, you'll need to disable the LitterHopper mode. To do this, press and hold the Cycle and Connect buttons on the control panel for 3 seconds.
When you are ready to install your LitterHopper, please refer back to these instructions and start at Step 4.
Step 4: Install the LitterHopper™ anti-tip guard
- If you have not done so already please remove the waste drawer and follow the disassembly steps in Step 1.
- Place the unit facedown (bezel down) on a solid, flat surface. Use a towel or blanket to protect the bezel from scratching, if on a hard surface.
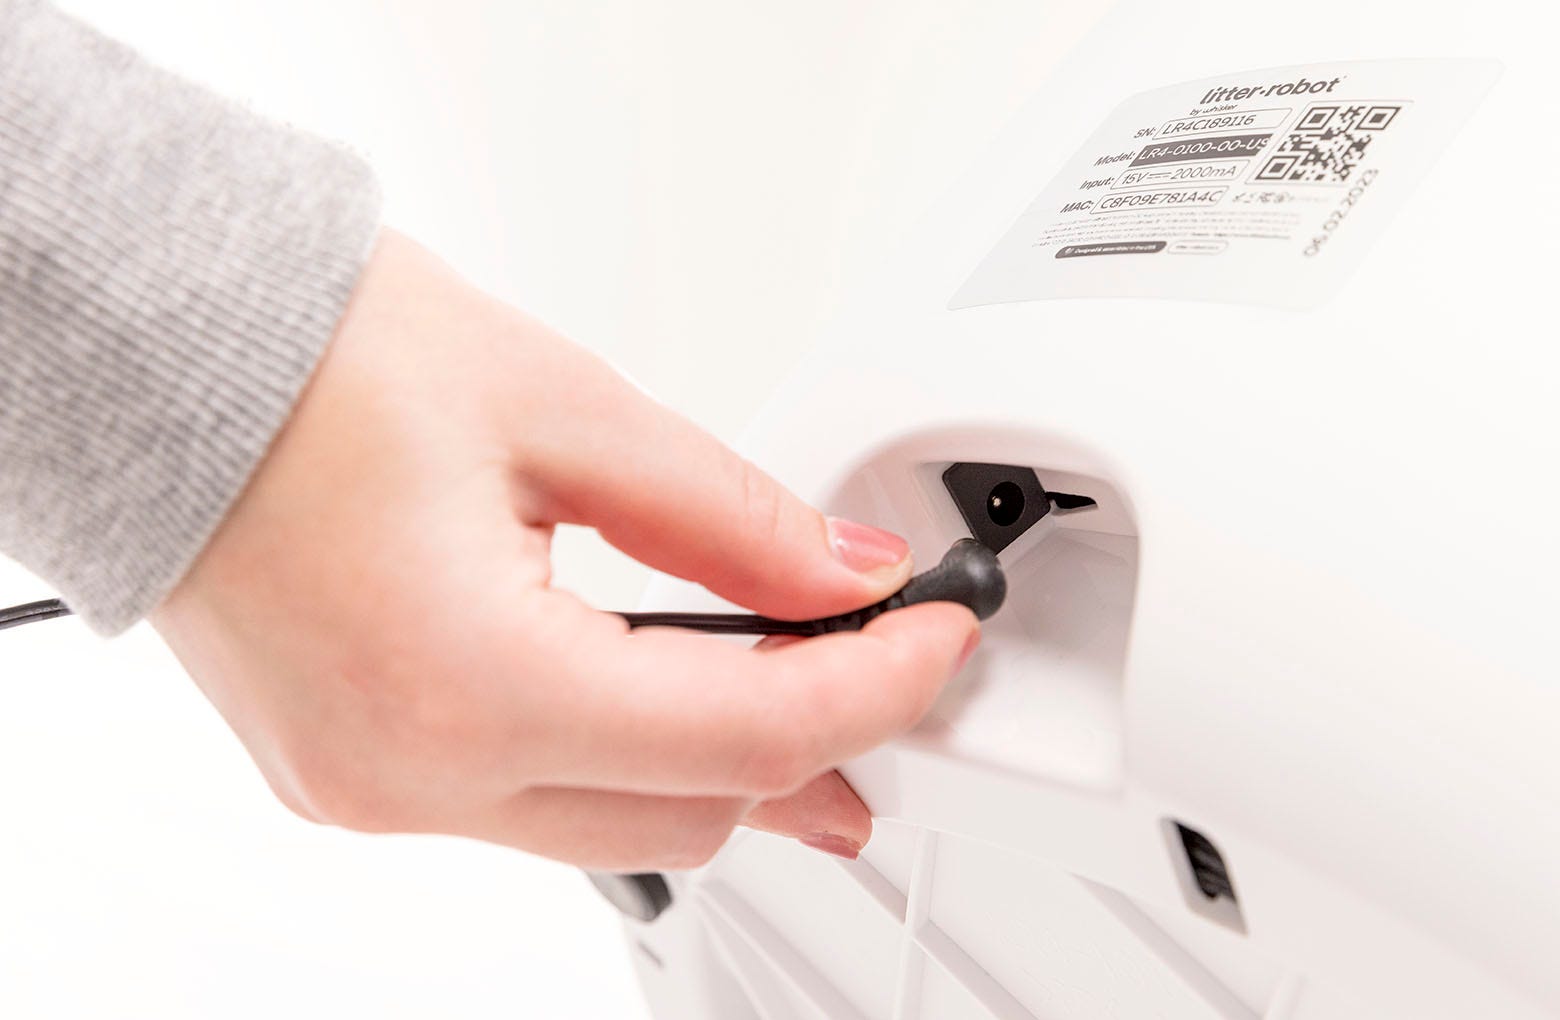
- Unplug the power plug from the unit.
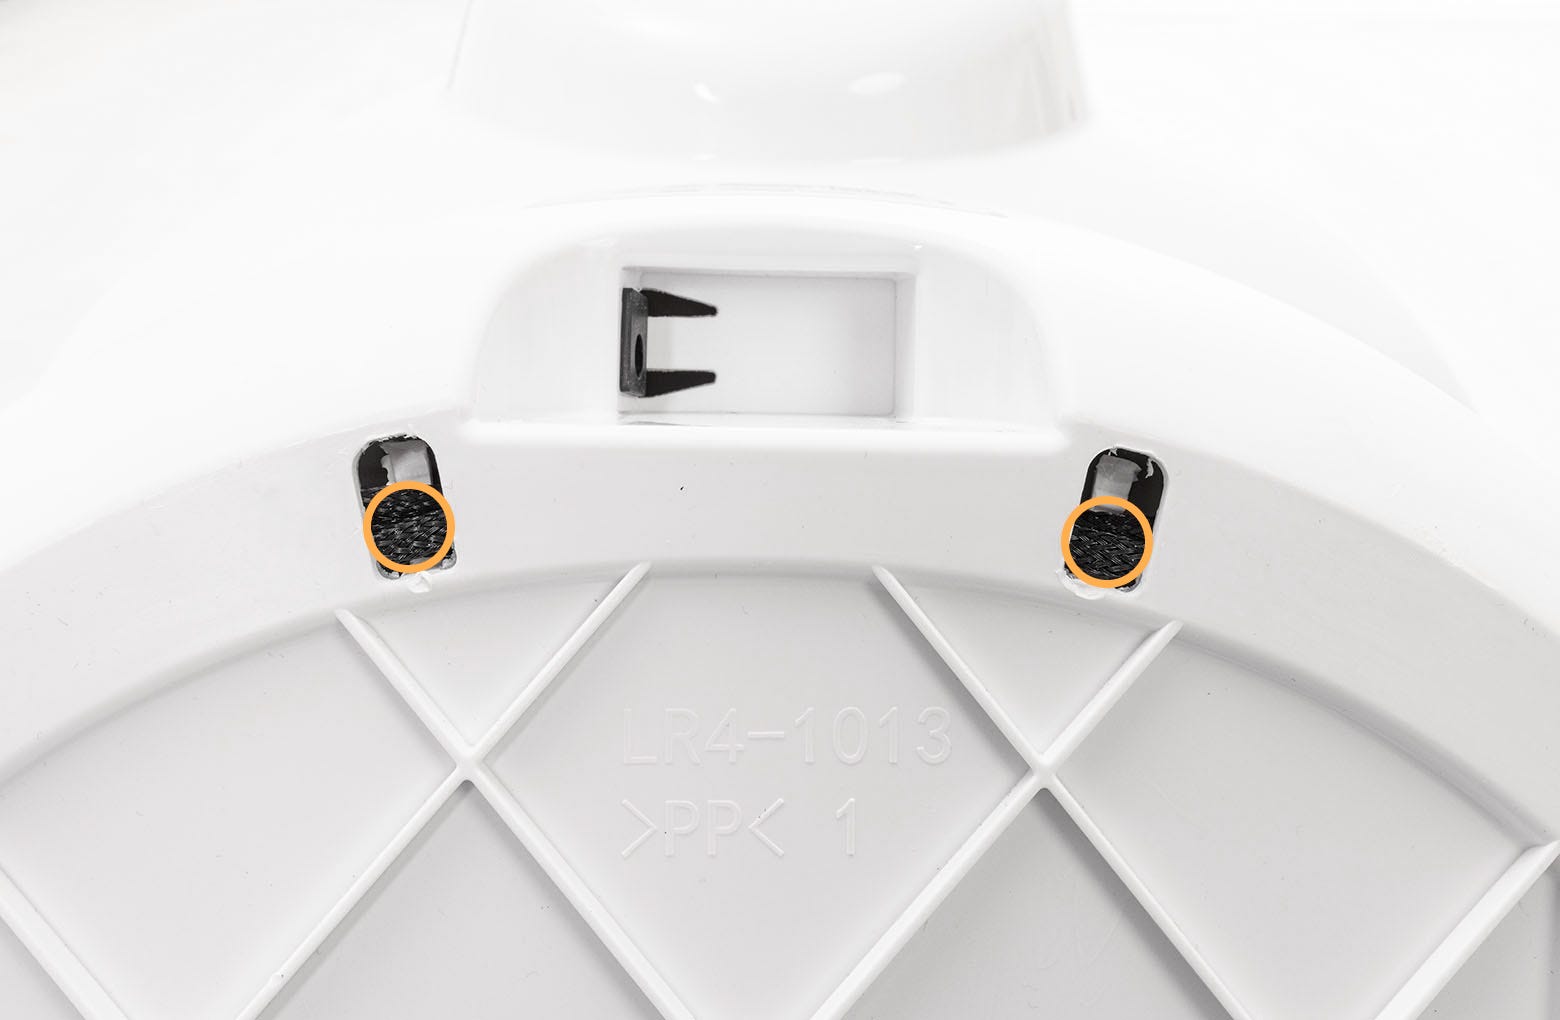
- The two hooks on the anti-tip guard were designed to snap into the two holes on the bottom rear of the Litter-Robot 4 Base. Note that a wire runs through the two holes. Gently pull down the wiring to the lower end of the holes and leave enough room at the top for the anti-tip guard hooks to insert completely.
- While the unit is still facedown, lay the anti-tip guard into the power jack pocket on the base.
- With one hand, grab the bonnet hinge on the base.
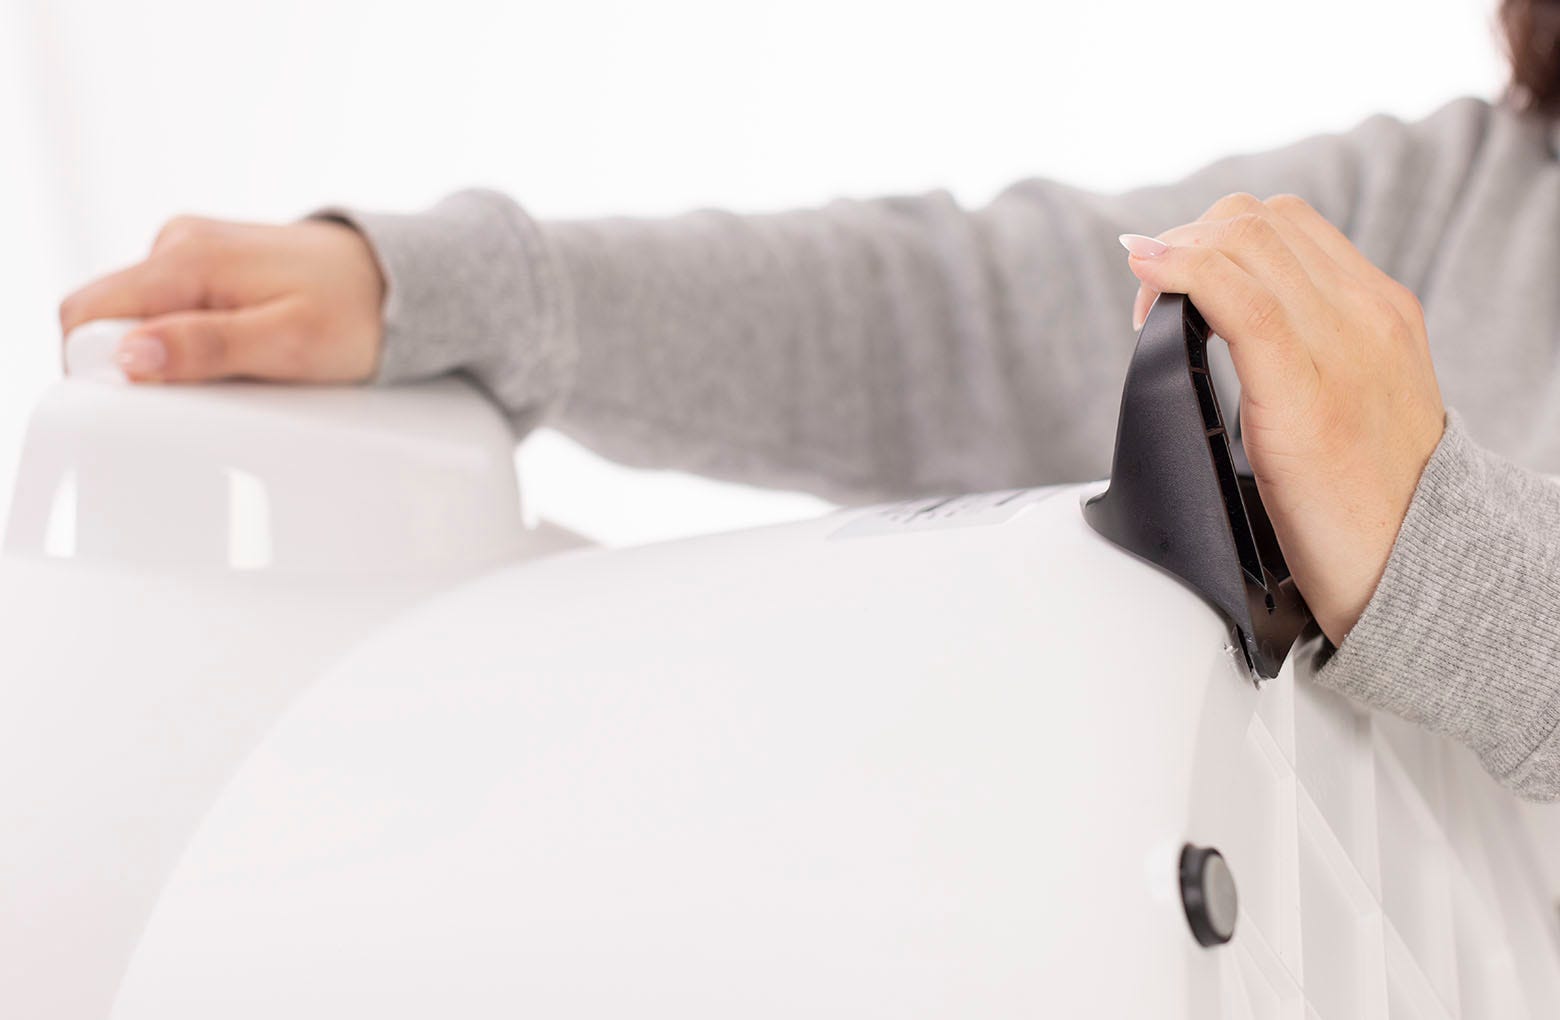
- With the other hand, press on the anti-tip guard near the small holes until each side snaps into place. This may require some amount of force.
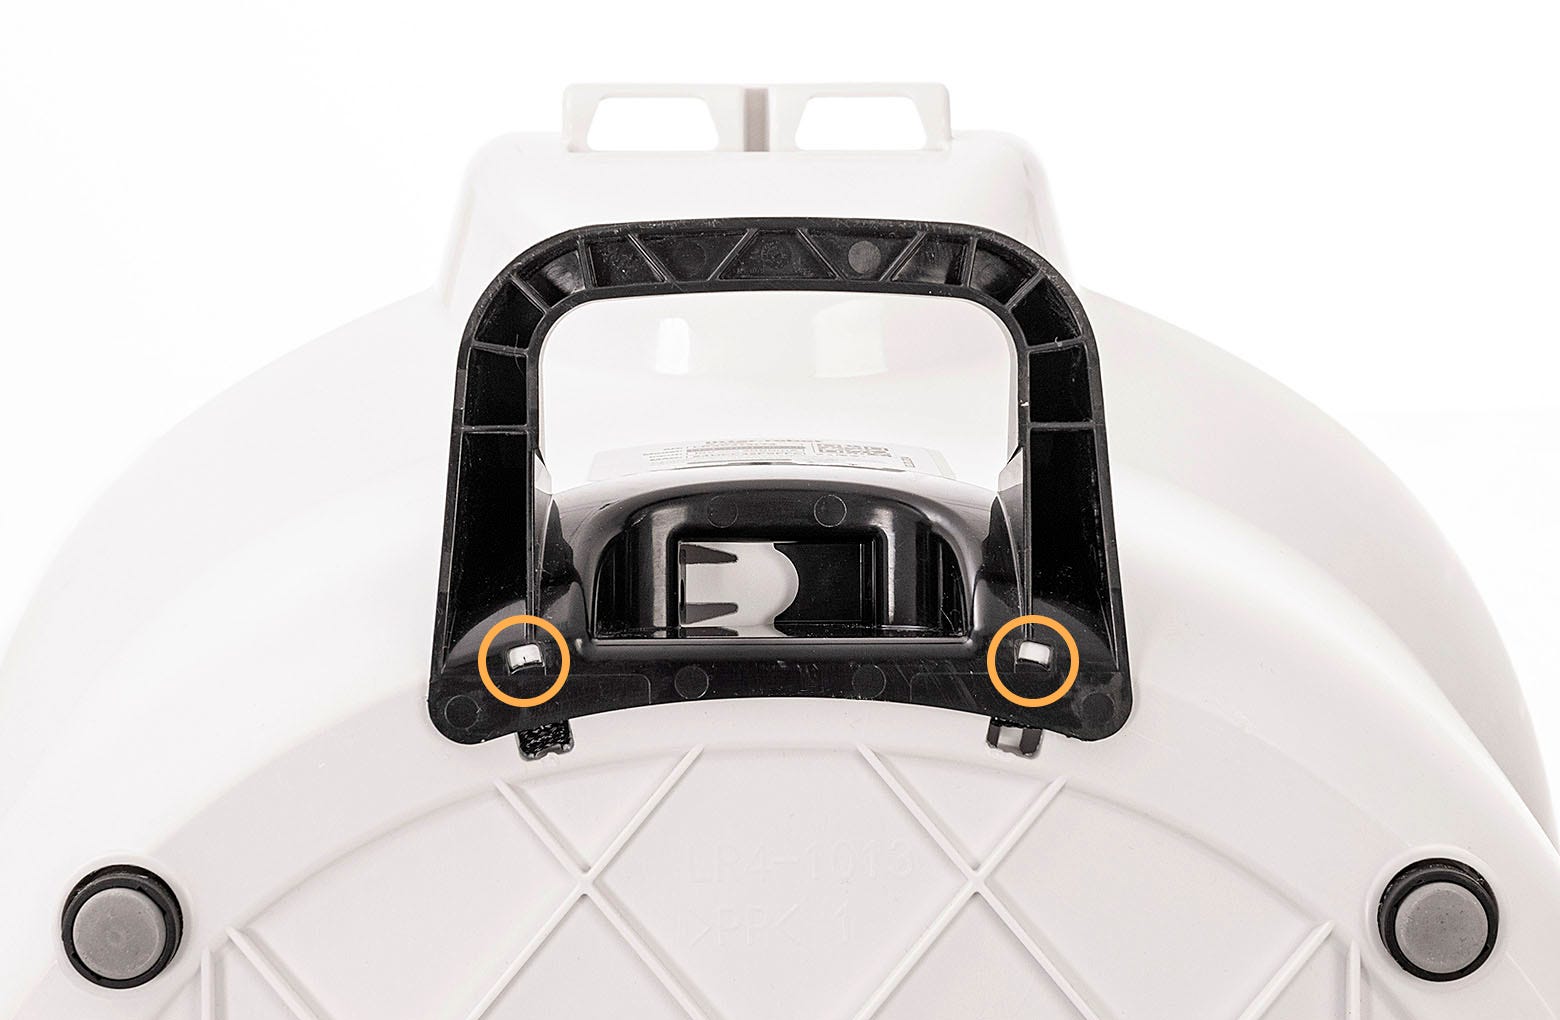
- Once installed, the anti-tip guard should feel rigid with no movement and be flush with the base.
- Once installed, the anti-tip guard should feel rigid with no movement and be flush with the base.
Step 5: Plug the power plug back into Litter-Robot 4®
- Route the power cord over the anti-tip guard – NOT under – then connect the power plug back into the unit.
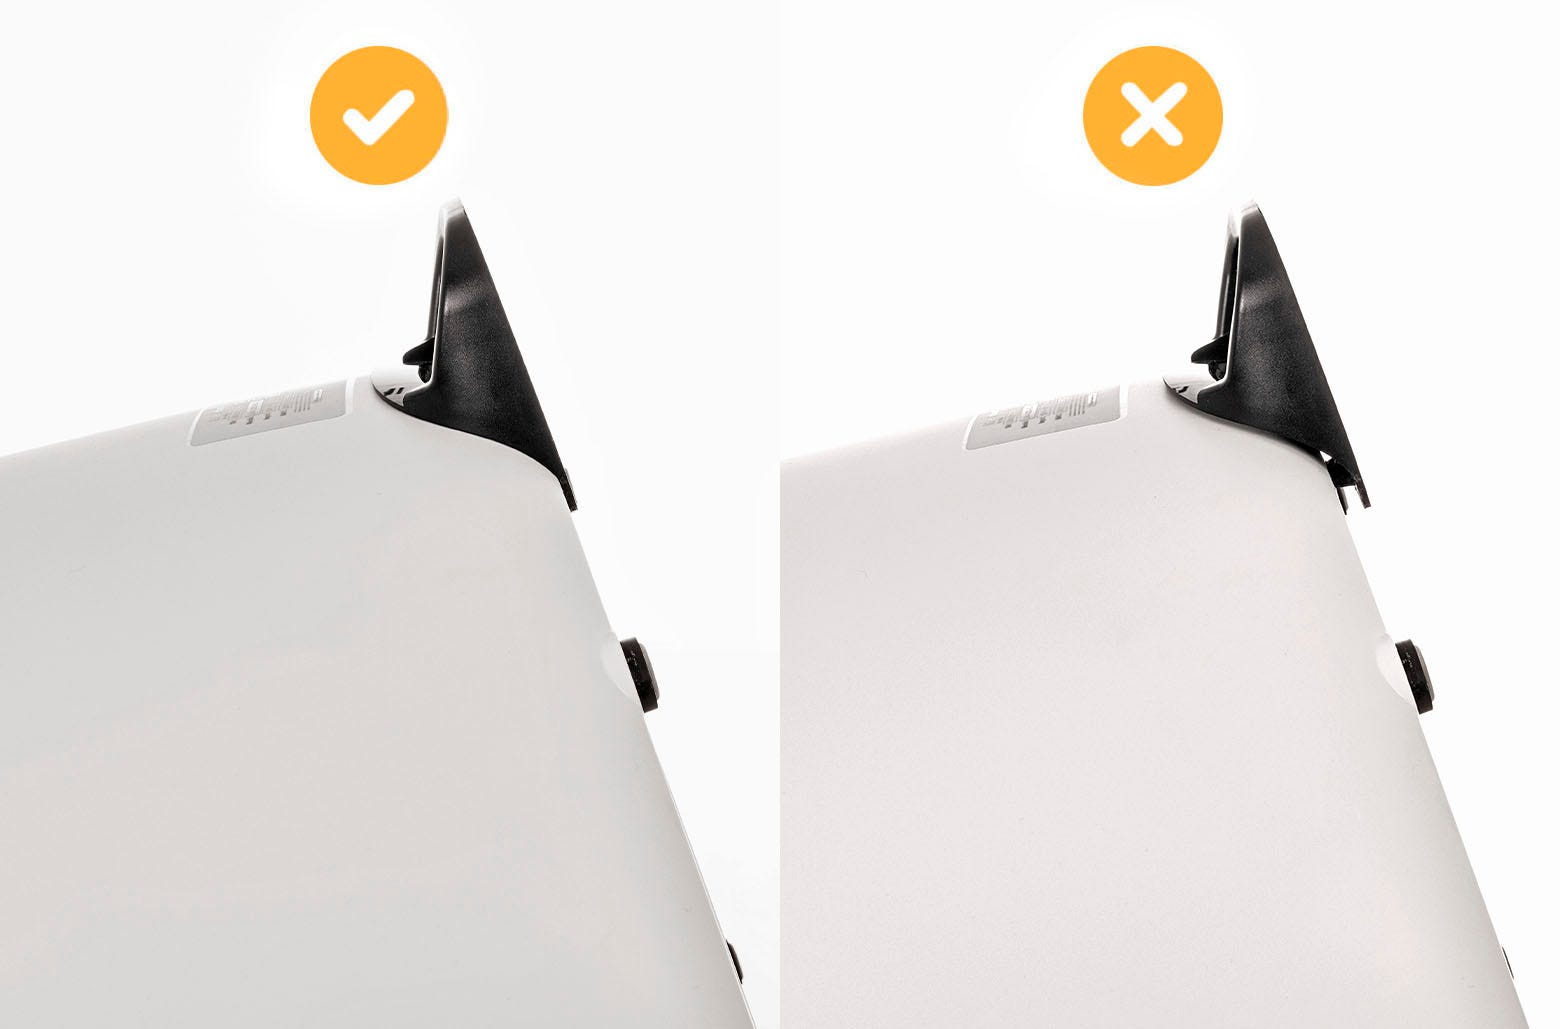
- Tip the unit upright onto its feet. Verify the power cord is NOT trapped under the anti-tip guard. Verify that the anti-tip guard is NOT contacting the floor. There must always be a small gap between the bottom of the anti-tip guard and the floor. If there is no gap, you may need to place your Litter-Robot 4 on a different floor surface or purchase the carpet tray accessory.
Step 6: Install the LitterHopper™ key
Note: If your key was already installed please skip this step and proceed to step 7.
- Place the new key into the rear of the globe with the rectangular opening facing up. Unlike the cap, the key was designed to fit loosely in the globe, thus allowing the globe to rotate freely around it.
- While holding the key in place, lift the globe and place it back into the base. The key must drop down into the pocket completely.
Step 7: Install the LitterHopper™ bonnet
- Place the new LitterHopper bonnet into the hinge on the base. The bonnet should then stay upright on its own.

- Rotate the bonnet downward over the globe and push down on the bonnet from the top to make sure it is latched and secure. The key must protrude through the opening in the back of the bonnet.
- Verify the bonnet and base are installed correctly.
- The bonnet hooks must be under the base hinge feature.
- The bonnet and base should align with no gap between them.
- The bonnet hooks must be under the base hinge feature.
Step 8: Attach the LitterHopper™ to Litter-Robot 4®
- The LitterHopper attaches to the back of Litter-Robot 4 using two posts at the bottom of the LitterHopper and a hook tab at the top.
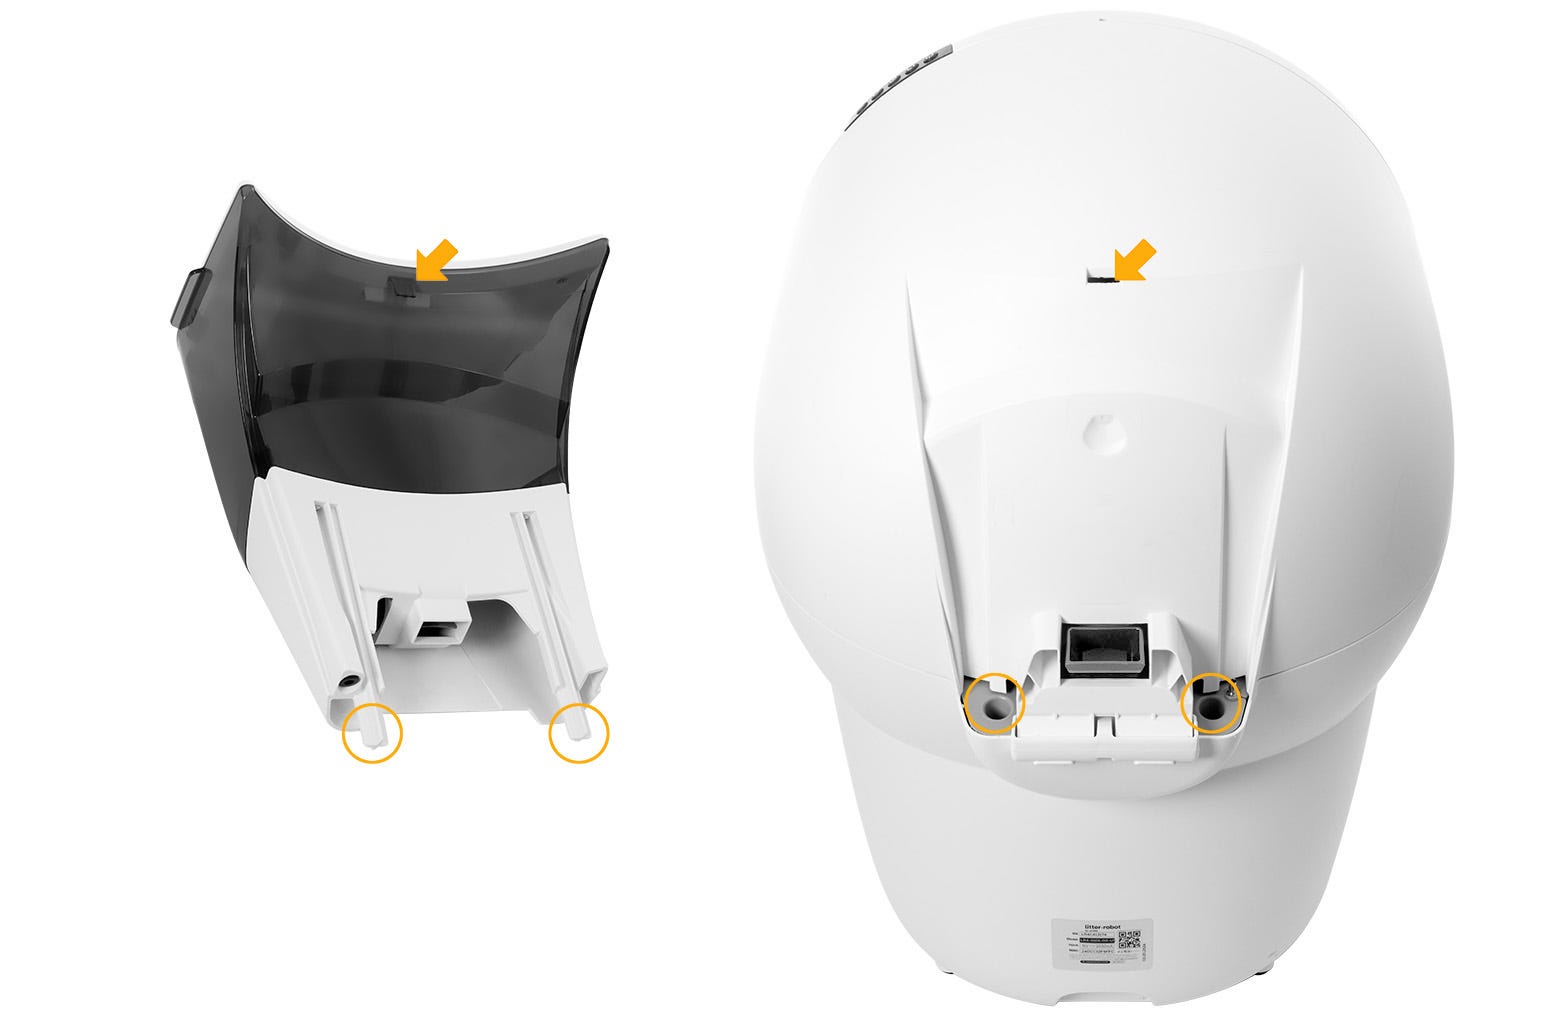
- Litter-Robot 4 has two circular pockets on each side of the hinge at the back of the base and a slot at the back of in the bonnet for the LitterHopper hook tab.
- Align the posts on the LitterHopper with the circular pockets and lower it into place. Make sure the hook tab engages with the slot in the bonnet. To ensure a good electrical connection between the power plug and the power jack, verify your installation with the photos below.
Step 9: Final assembly
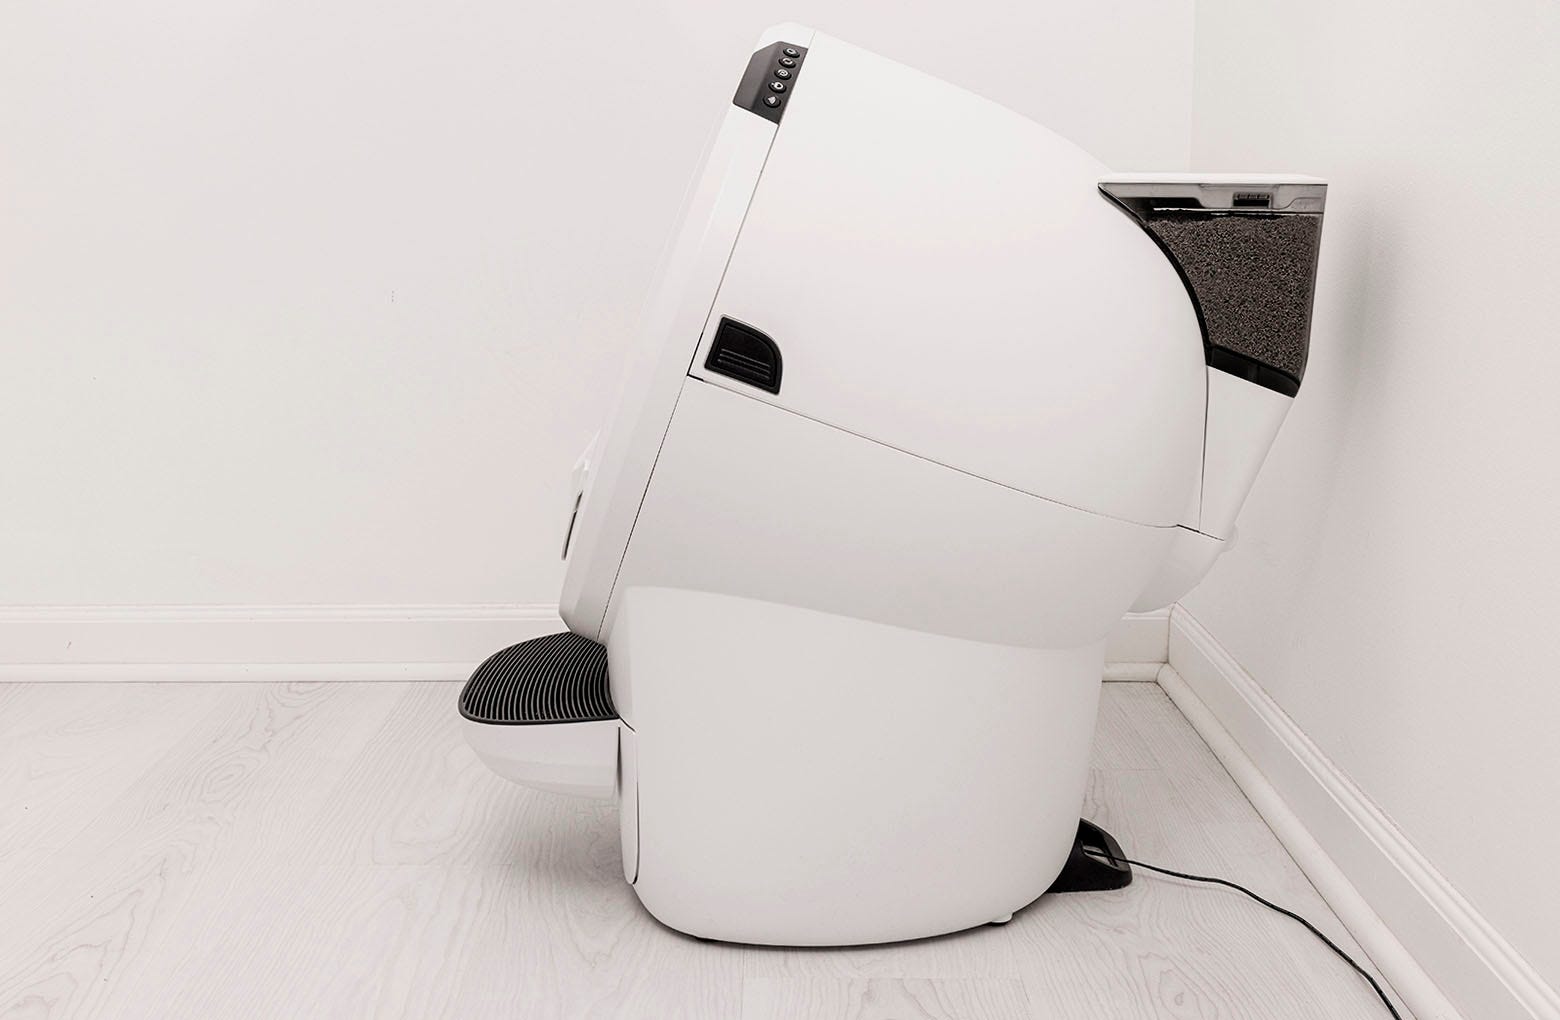
- Slide the waste drawer back into the base. Move Litter-Robot 4 to its original location, making sure the LitterHopper does not touch the wall.
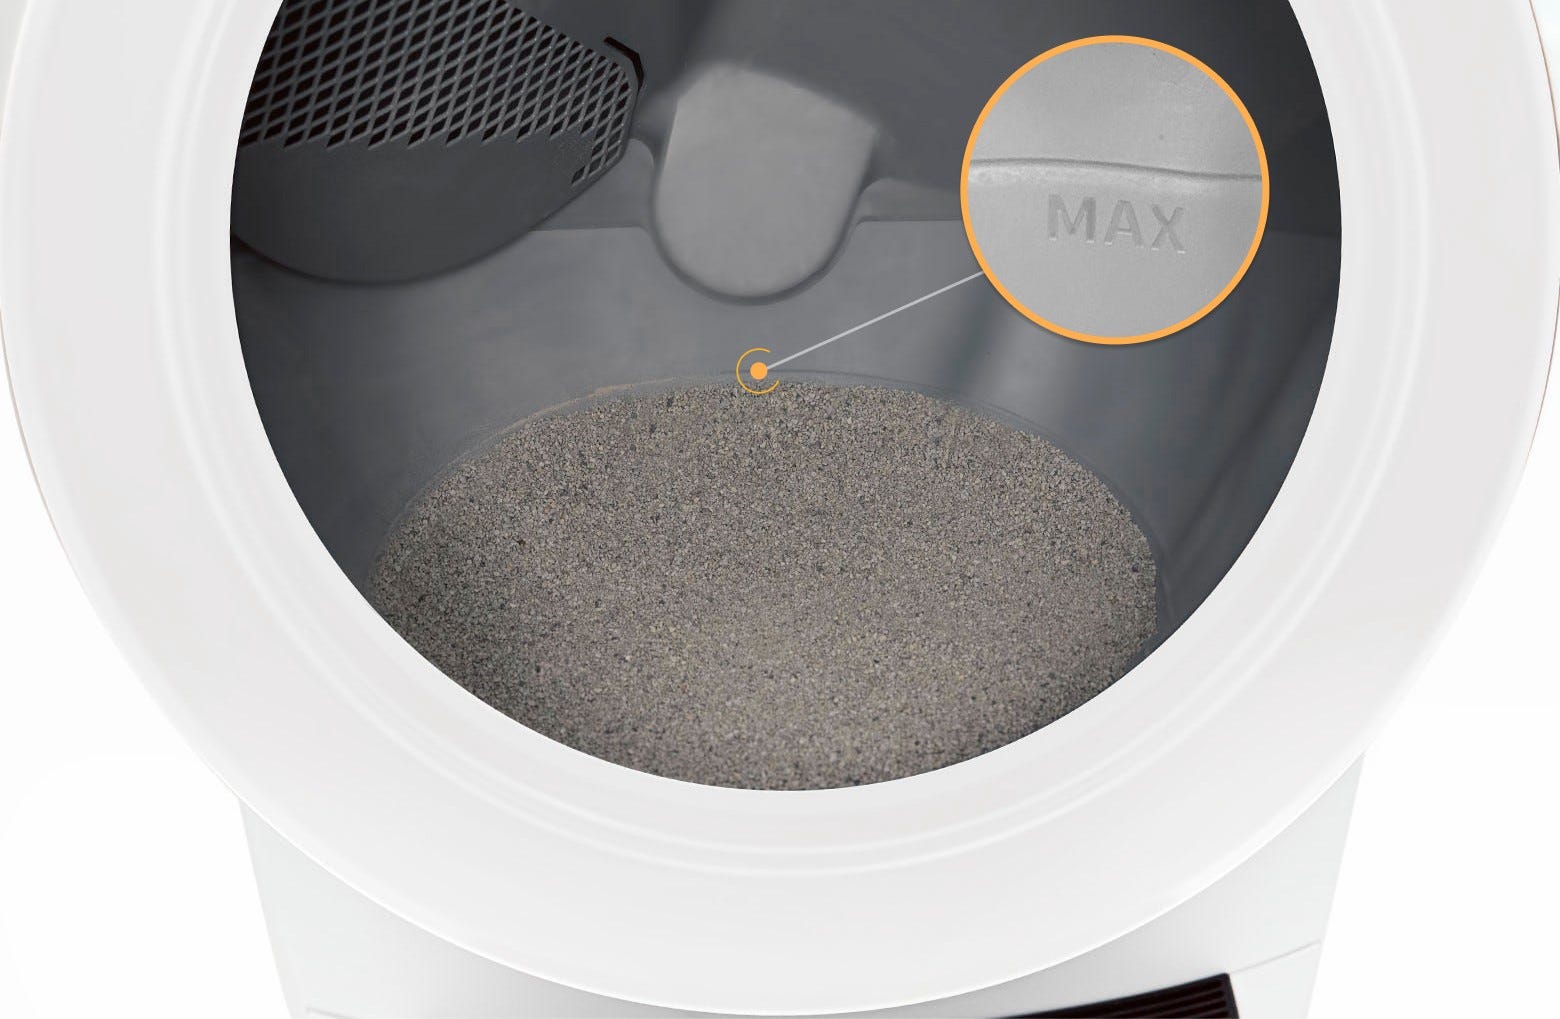
- Ensure the litter level inside the globe is just below the MAX fill line. Add some litter if needed. The LitterHopper is designed to maintain the litter at the optimum level.
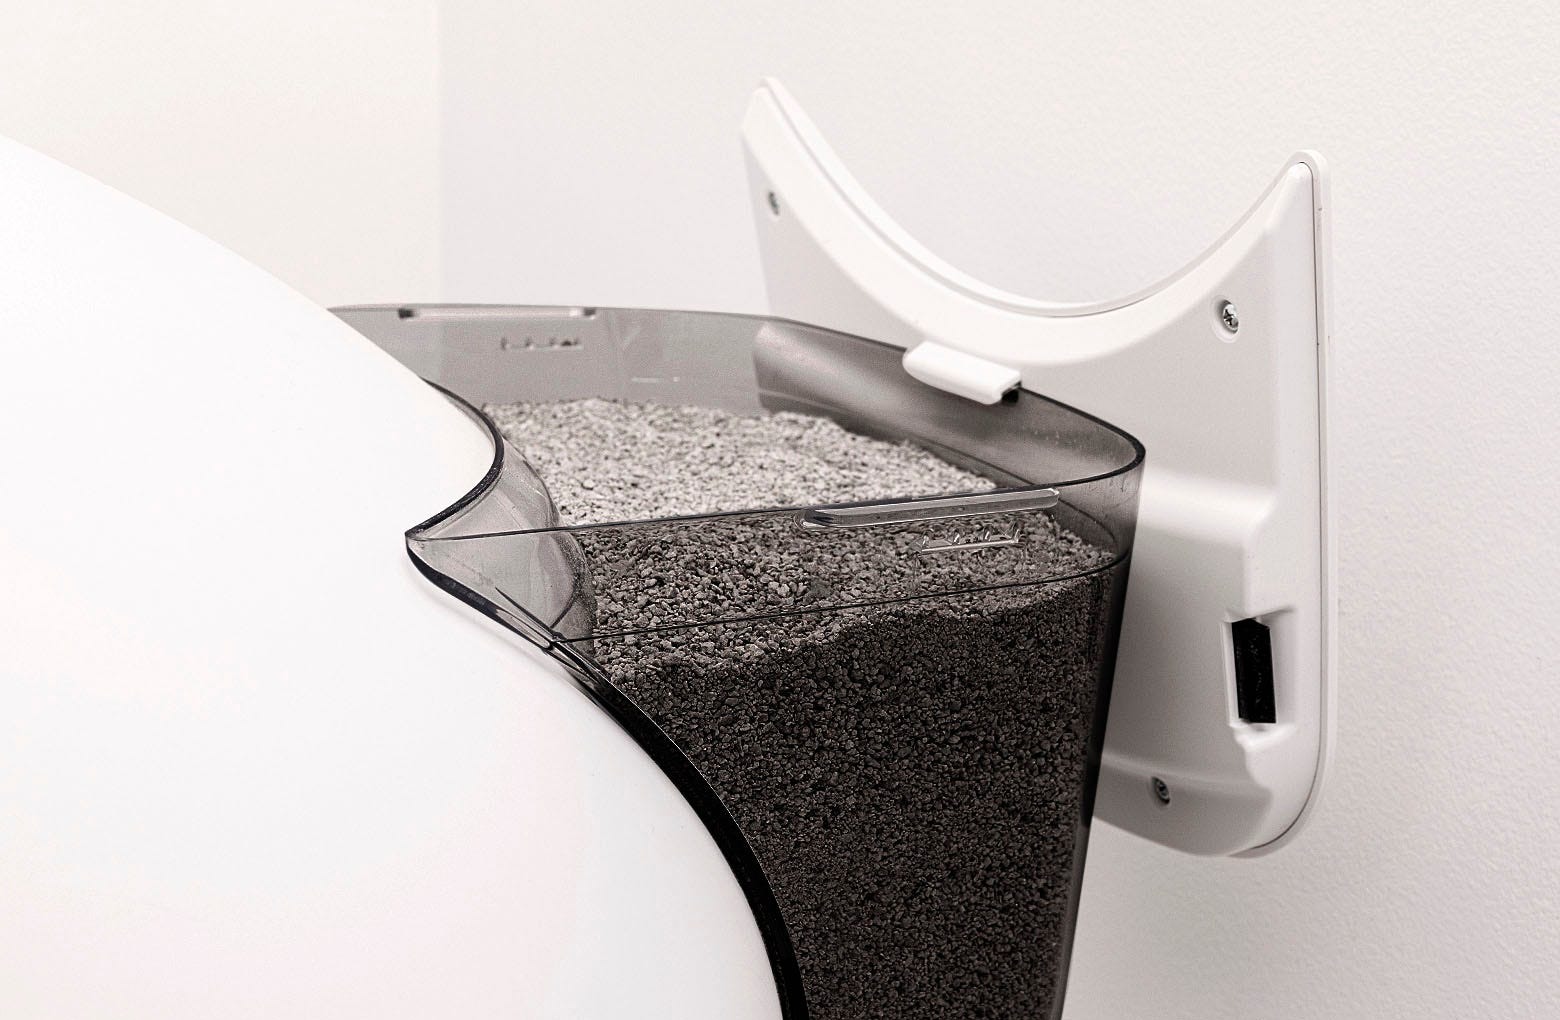
- Remove the lid from the LitterHopper and fill the LitterHopper with litter up to the fill line. Install the lid and make sure it is securely attached to the LitterHopper.
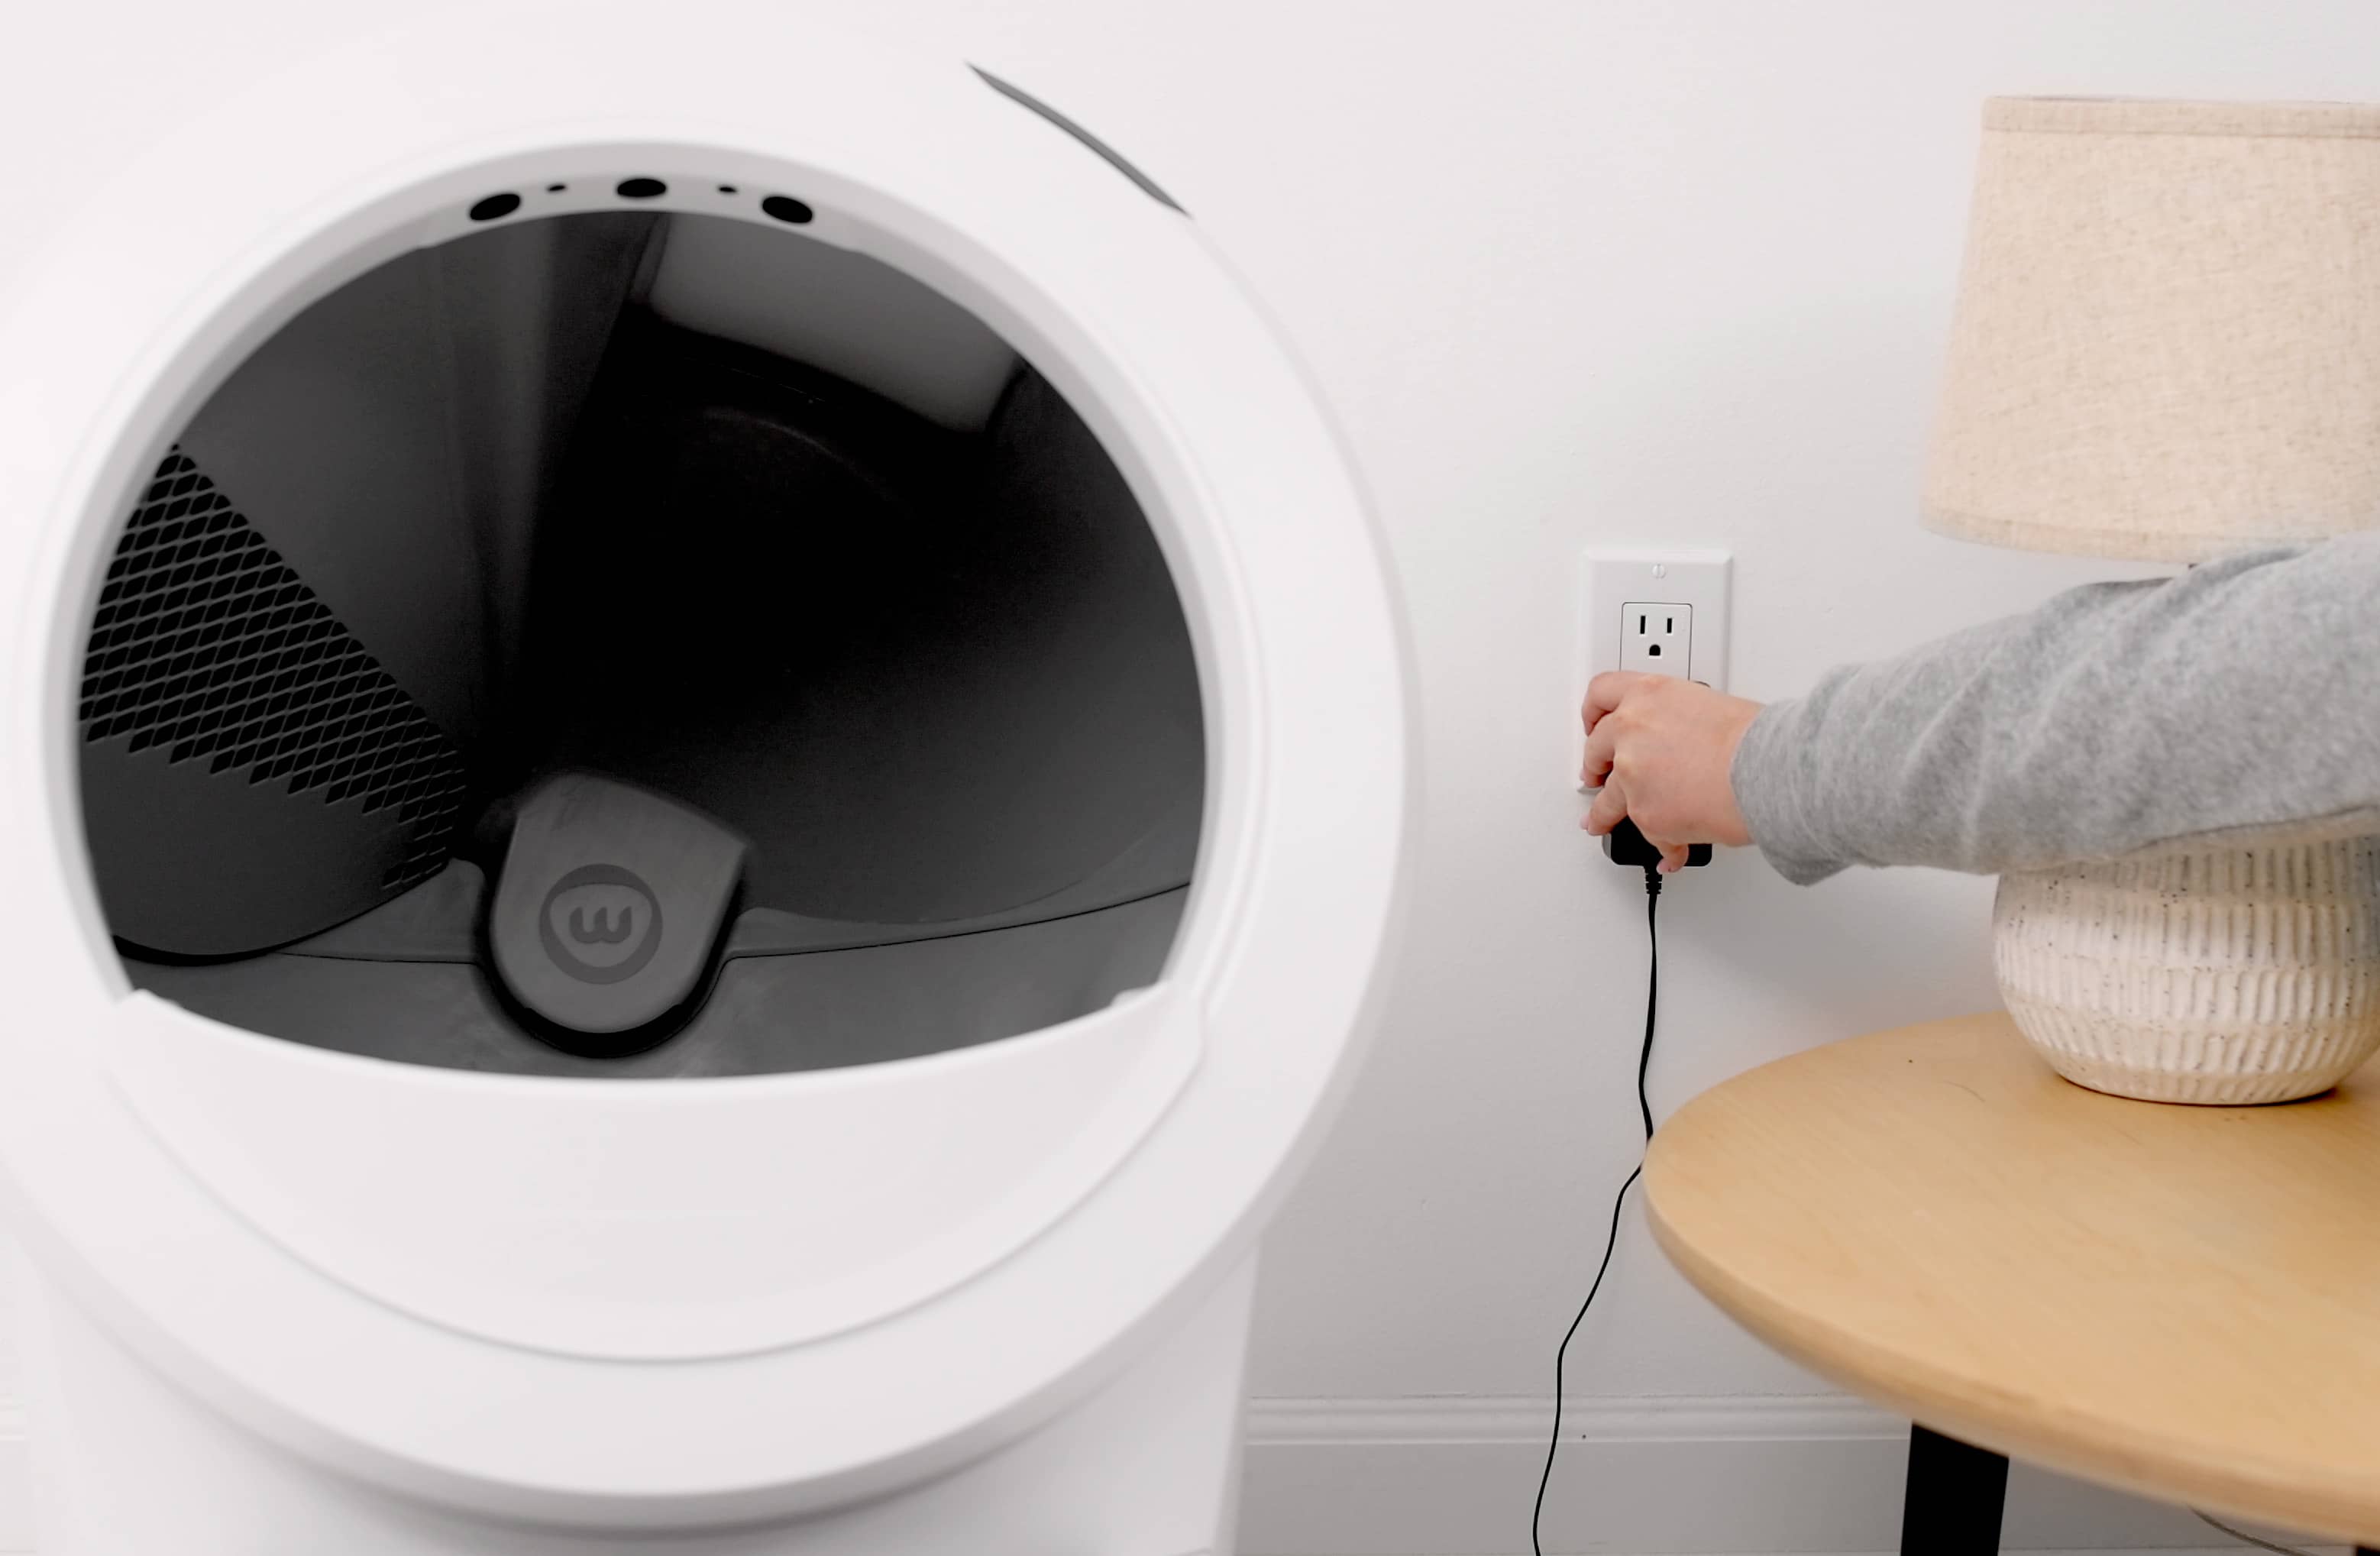
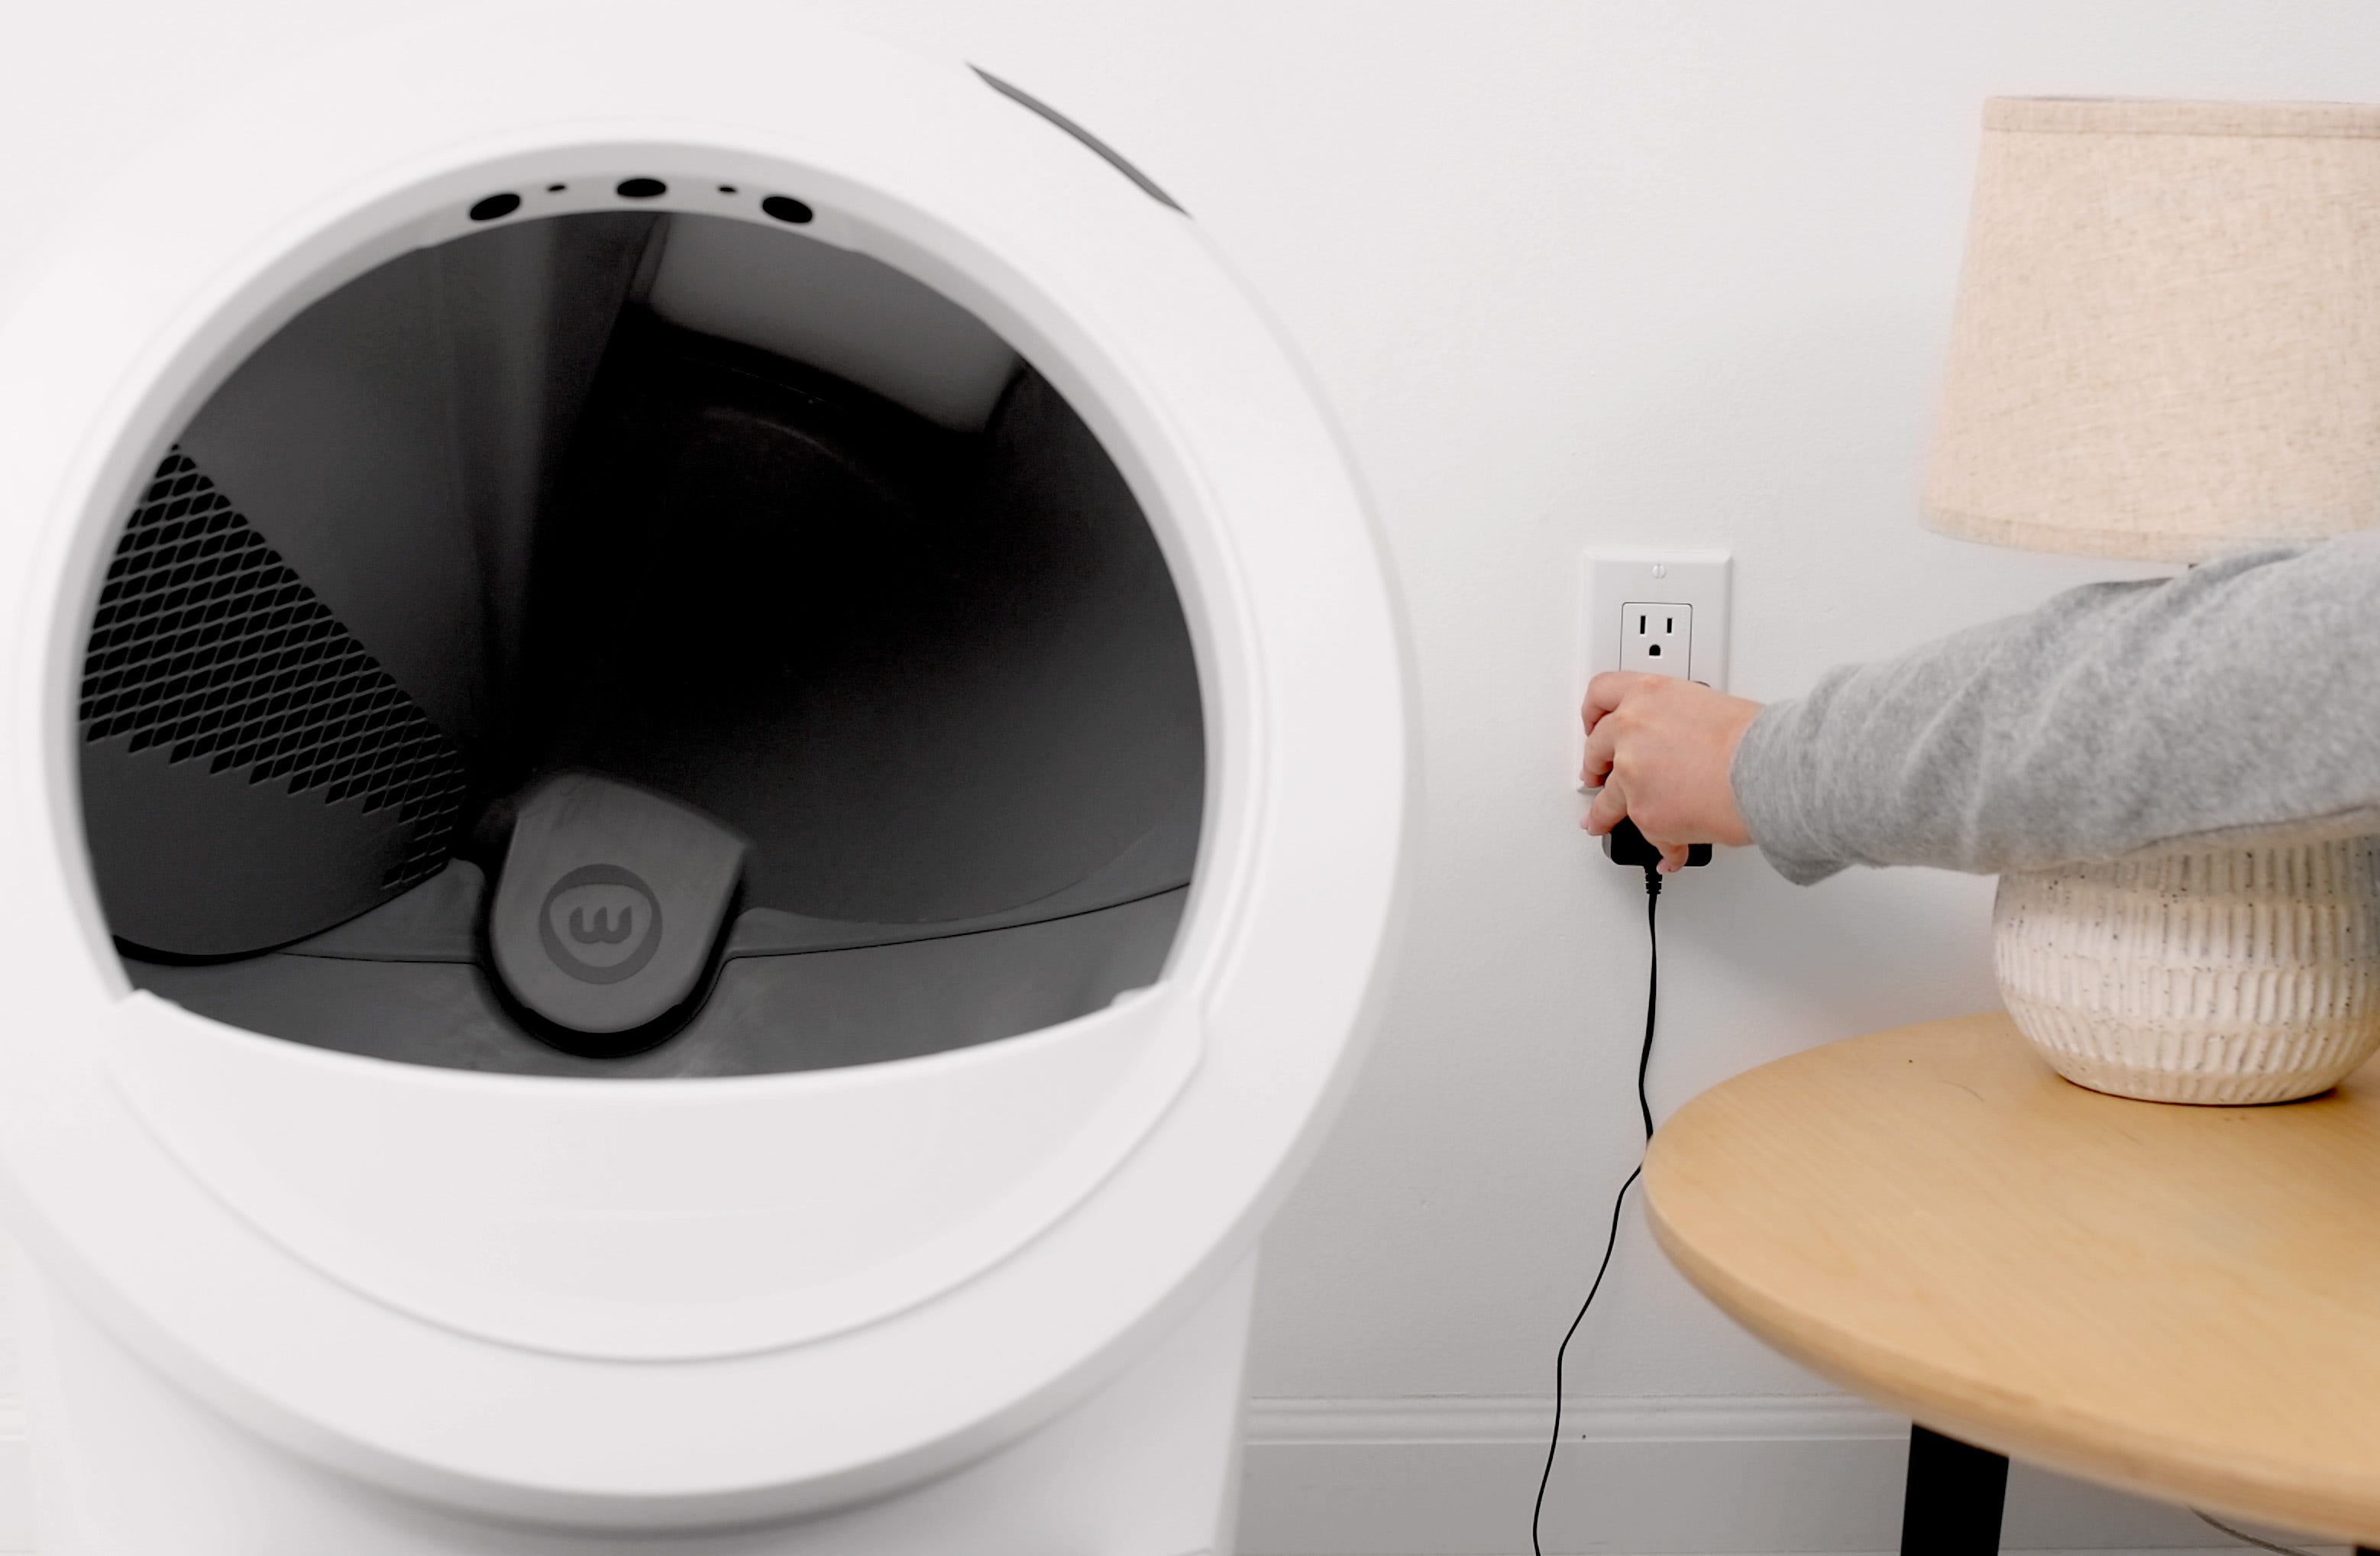
- Plug the power supply back into the wall if removed and press the Power button.

- Any time you add litter to the globe or the LitterHopper, you will need to press the Reset button to ensure the weight sensors will detect your cat and cycle properly

Step 10: Download the app
Download the Whisker app and follow the onboarding instructions.
Additional resources:
Visit whiskersupport.com for troubleshooting resources.
Didn't find what you're looking for?
Live support available Mon-Fri: 9AM-9PM EST and Sat-Sun: 9AM-5PM EST, or submit a ticket anytime.