Any cat lover can tell you that while they make wonderful companions, cats can make some of the messiest roommates. From the litter box to the feeding area to the shedding on your couch (and your bed, bathmats, computer chair), it can feel like there’s always something to clean—and it never stays that way.
It's time to tackle the dust, dirt, and grime head on. Spring is in full swing, which means it's time for a deep clean. Read on for our spring cleaning checklist and guide to spring cleaning when you live with cats.
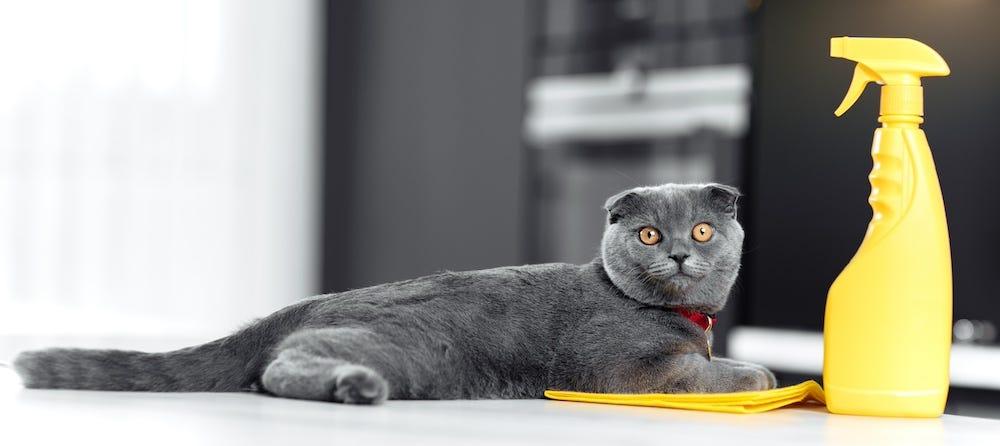
Use pet-safe cleaning products
Choose a soap or cleaning product that’s safe for pets. Avoid products that use any of the following ingredients:
- Ammonia
- Bleach
- Chlorine
- Essentials oils, particularly tea tree
- Formaldehyde
- Phenols
- Phthalates
- Rubbing alcohol
You can also make a DIY pet-safe cleaner like vinegar, baking soda, and water (or any combination thereof). All of these ingredients are safe for pets. Follow instructions on the product packaging for proper dilution.
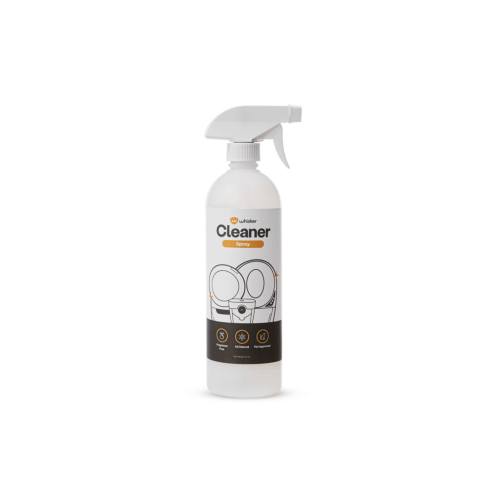
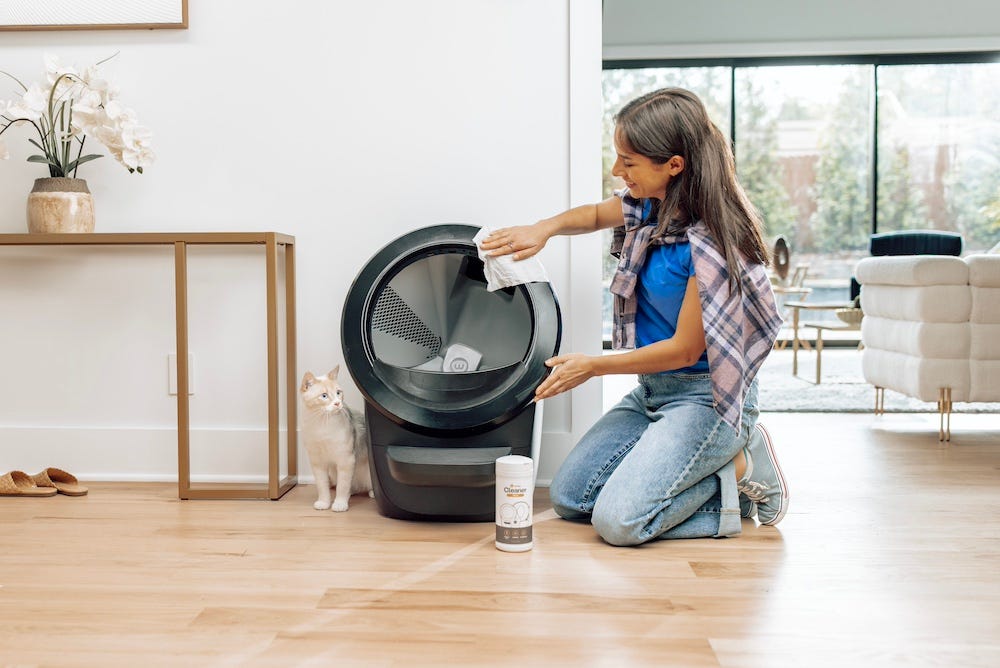
Enzymatic cleaners like Cleaner Spray or Cleaner Wipes by Whisker are pet-safe cleaning products and available for subscription.
Spring cleaning checklist for cat parents
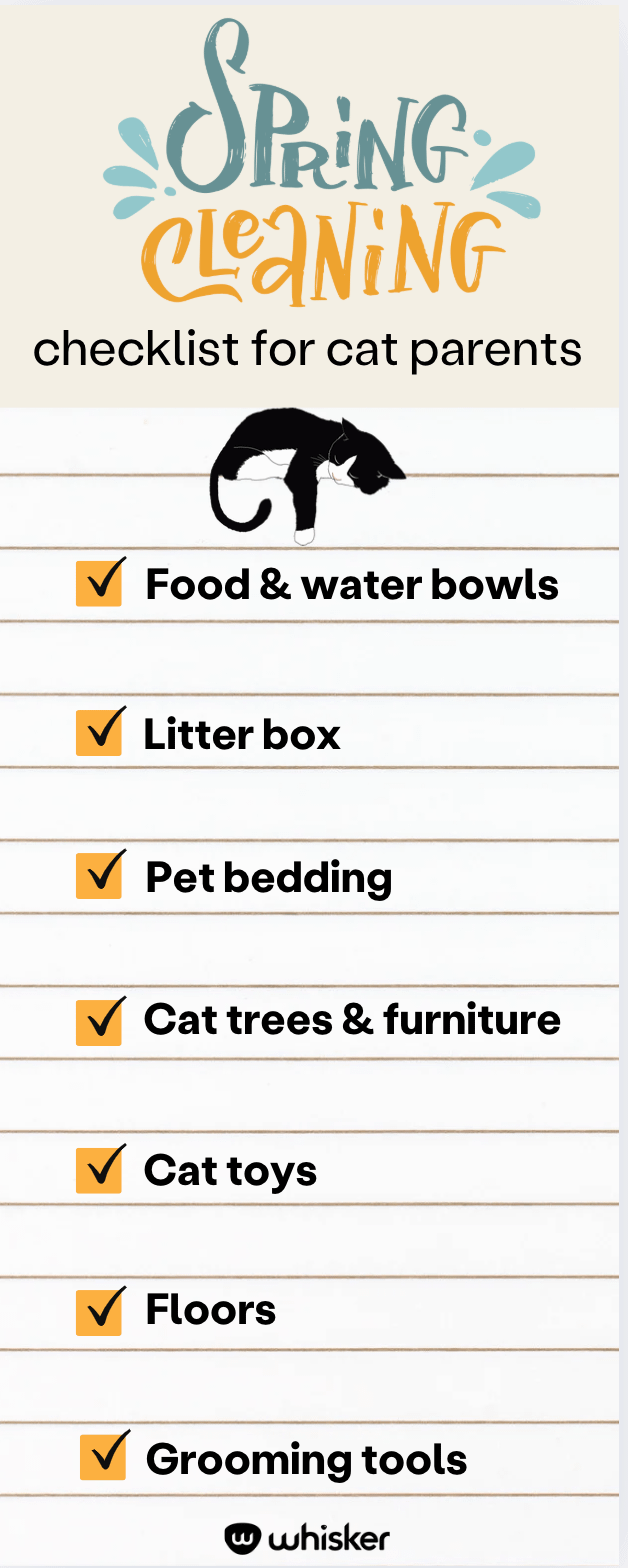
Spring cleaning is the perfect time to refresh your home, but if you have a cat, there are a few extra tasks to include. From how to wash a cat toy to grooming tools, here's the spring cleaning checklist every pet parent needs to ensure your feline’s environment stays clean and healthy:
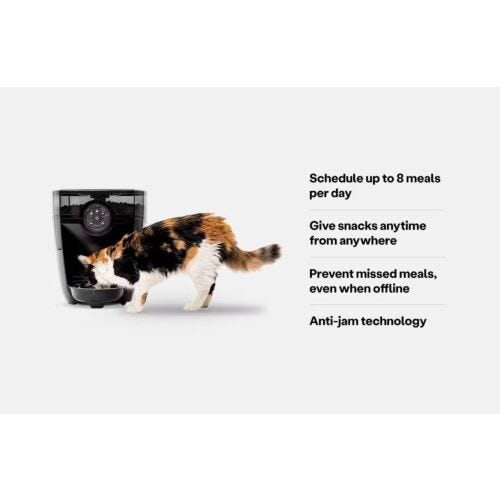
- Food & water bowls – Soak in hot, soapy water to loosen food and slime. Scrub with a separate sponge or brush. Clean the splatter zone, including mats, walls, and floors. Wash automatic feeders and fountains per manufacturer instructions, replacing filters as needed. Clean dry food bins before refilling.
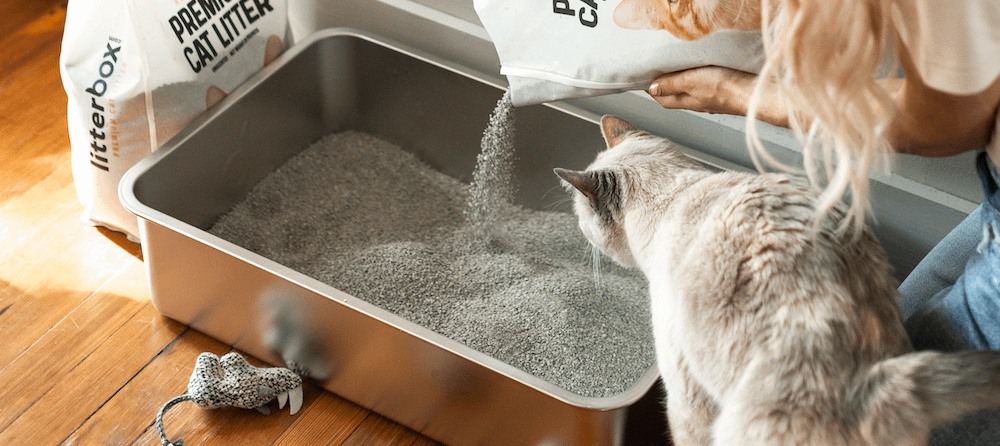
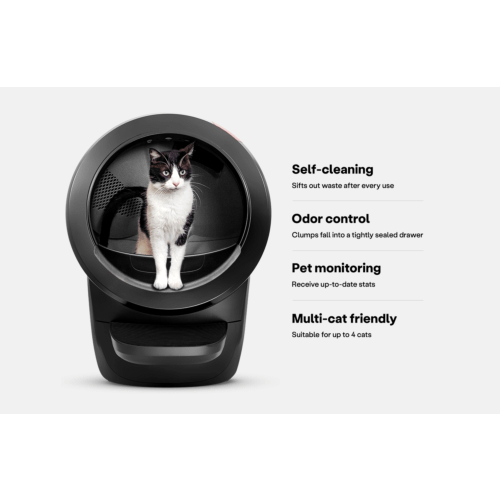
- Litter box & accessories – Empty and scrub the litter box with a pet-safe cleaner. Rinse thoroughly, dry, and refill with fresh litter. Clean litter mats and scoops. Follow manufacturer guidelines for cleaning your self-cleaning litter box.
- Pet bedding – Gather all bedding, blankets, and slipcovers. Shake out or vacuum before washing. Air-dry stuffed bedding to prevent damage. Replace worn-out items.
- Cat trees & furniture – Vacuum to remove fur and dander. Use pet-safe cleaners to spot-treat stains and odors. Inspect for wear—replace or repair if necessary.
- Cat toys – Discard broken or hazardous toys. Wash fabric toys by hand or in the machine. Wipe plastic and rubber toys with a pet-safe cleaner. Refresh catnip toys by replacing old catnip.
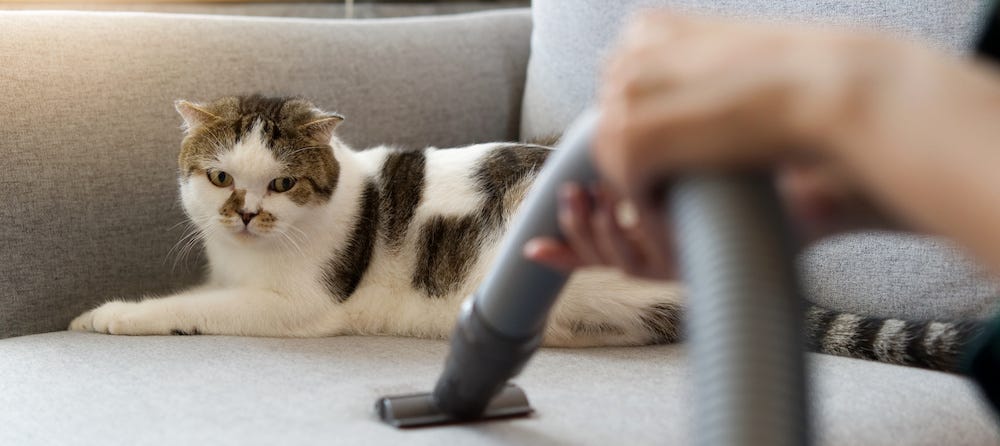
- Floors & carpets – Sweep, vacuum, and mop regularly. Spot-clean stains with an enzyme cleaner. Steam clean carpets to remove deep dirt and allergens. Regular cat vacuuming and cat sweeping help remove fur, dander, and litter debris from your floors.
- Grooming tools – Remove fur from brushes and combs, then wash with warm, soapy water. Soak combs if needed. Replace worn-out toothbrushes and nail clippers.
By keeping up with these tasks, you’ll create a cleaner and healthier space for both you and your cat. Happy spring cleaning!
How to clean pet food and water bowls
Your pet’s food and water dishes can be one of the dirtiest places in your home—attracting bacteria, bugs, and mold—not to mention the mat under the dishes, which probably resembles a culture in a petri dish.
Here’s how to clean pet food bowls and water bowls:
- Soak pet food and water bowls in hot soapy water to loosen dried-on food and slime rings while you tackle another item on this list.
- Use a sponge or brush (perhaps one that you do not use on your own dishes) to scrub them clean.
- Don't forget the splatter zone! Clean the area surrounding pet dishes, including the counter, floor, walls, and place mat.
If you have a cat water fountain or automatic cat feeder, consult the product manual to learn how to clean them. You’ll want to pay attention to which parts of the device are submersible and which should only be wiped down because they house the electronics. For example, with Feeder-Robot you’ll want to avoid submersing the base or the control panel. View our Feeder-Robot cleaning guide for more tips.
After cleaning your automatic feeder, make sure it is rinsed thoroughly and dried completely before you reassemble. Refresh any disposable parts like filters and replace any broken parts.
If you store dry food in a bin, clean it too:
- Pour the kibble into a bag temporarily.
- Depending on how big the bin is, it may be easier to take it outside and use the hose or wash it in the bathtub.
- Rinse it with soapy water and use a brush to get food out of grooves and crevices.
- Let it dry completely before you put the lid back on and refill it with kibble.
How to deep clean the litter box
Someone has to do it and if it has to be you, don’t worry, we’ve got you covered. Let’s tackle this head on, keep it simple, and do the least work for the greatest benefit. With such a sensitive sense of smell, your cat is going to love their litter box after it gets a deep clean! Check out our complete guide for how to clean the litter box or read on for tips.
- Gather your cleaning supplies: gloves, litter scoop, trash bags, cleaning cloths or wipes, pet-safe cleaner.
- Empty the litter: Put on your gloves and scoop out any solid waste and litter clumps. Place the waste into a cat litter trash. For a deep cleaning of the litter box, fully empty out the litter into a separate trash bag.
- Spray the litter box with the cleaner: Using an enzyme cleaner or a pet-friendly cleaning spray, start scrubbing the litter box. Enzyme cleaners are much more effective at getting rid of cat urine smell specifically.
- Rinse: Rinse thoroughly to remove any soap residue and keep the litter box safe for your cat. The bathtub, utility sink, or simply outside are ideal places to do so as you will have more space to do so.
- Dry the box: Use paper towels or a cleaning cloth to thoroughly dry the litter box. If your litter box is still humid, the new litter will stick to it.
- Refill with fresh cat litter: Add a fresh layer of cat litter to the clean, dry litter box. If you're not sure how much cat litter to use, fill it about 2-3 inches deep.
How to deep clean Litter-Robot
We recommend deep cleaning your Litter-Robot 4 or Litter-Robot 3 approximately three times per year, depending on your personal preference and your cat’s behavior. Check out our helpful video to learn how to deep clean your Litter-Robot.
How to clean pet bedding
Where does one cat bed end and another begin? We don’t know, either. But as best as you can tell, collect all sheets, bedding, slipcovers, pillows, and anything else that gets slept on by your cat regularly. Fur, dirt, shed skin, tracked litter, and the slew of allergens that live therein all have to go. It’s also essential to check for signs of fleas, like black specks or eggs. Here’s how to get rid of cat fleas if you find any.
Before you wash them, review each item. What condition is it in? Is it worth washing or is it time to buy a new one?
Read the tags to learn how to best wash each item. Here are general tips:
- Most things can be laundered in a machine or hand-washed.
- Give them a vacuum or a shake outdoors before wetting them.
- It’s usually best to let bedding with any stuffing air dry—sorry, kitty, you’re going to miss your favorite bed for a day or two.
How to clean cat trees and furniture
Don’t overlook other kitty entertainment spots like cat trees, cat shelves, or whatever else your cat has commandeered. (Including that chair in the living room that looks like you got it reupholstered in cat fur shag.)
First, review the piece and decide if it is in good shape. Your cat might love perching on it, but is it something you’re embarrassed about when guests come over? Make your decision and follow through by donating it, listing it, or throwing it out, then planning for a replacement.
If your cat tree is in good shape, start by vacuuming it. Then, apply a carpet cleaning product to clean spots or stains and remove smells.
Treat any other furniture your cat has hijacked much the same way: vacuum or use a lint roller on trickier areas. Then spot-clean with a pet-safe product.
How to clean cat toys
Does it seem like there are enough broken cat toy ears, feet, feathers, and bells laying around to build a Seussian masterpiece? Then it’s definitely time to clean your cat toys.
- First, collect your cat’s toys and discard those that are torn open, pose choking or other hazards, and are very dirty.
- If the toy is made of a material that can be washed, either hand wash it and let it air dry or toss it in the washer with some towels on a hot setting.
- For toys with feathers, trim or replace broken feathers, so they’re not sharp.
- If you have catnip toys, check if they have an opening intended for re-stuffing. Take out the old catnip, wash the toy, then re-stuff it with new catnip.
If nothing seems worth washing, it might be time to go kitty toy shopping.
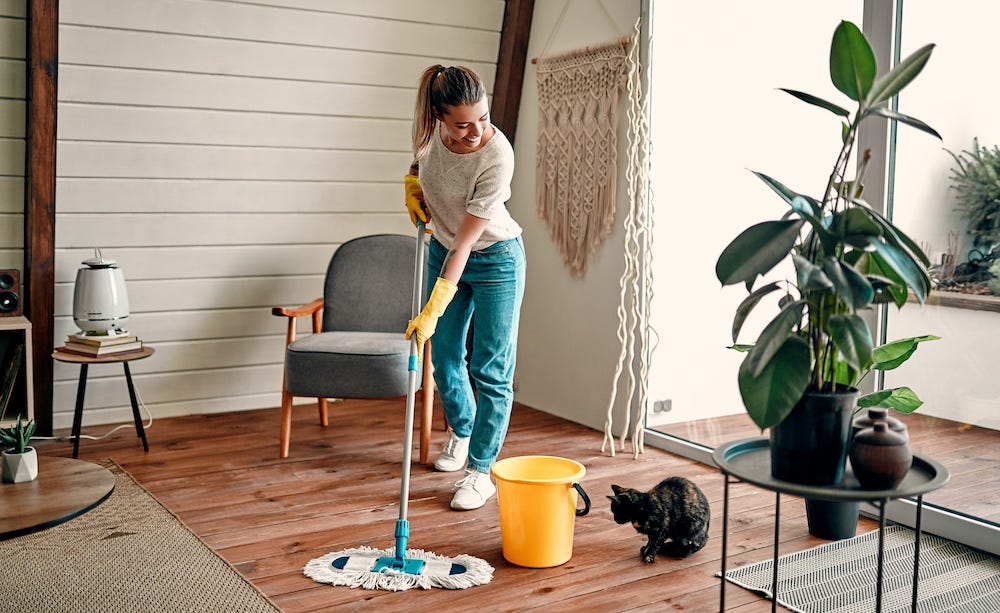
How to clean floors when you have pets
If you have hardwood floors, you have it easy on this one. Use a microfiber mop to collect debris from the floor, then use your preferred wet mop to clean the floor.
If you have carpet, you’ll have to do a bit more work:
- Vacuum your carpet and note any discolored patches or stains that may have accumulated since your last deep clean.
- Apply a stain remover to those spots according to the product’s instructions.
- Steam clean your carpet to remove deep down dirt and allergens. (If you don’t have a steam cleaner, reach out to friends, family, and neighbors to see if someone has one you can borrow—trust us, it’s worth it.)
How to clean grooming tools
Hopefully you have some well-used grooming tools, since they are key to keeping your home pet fur-free. Make sure they are in good shape and discard those that aren't. If you don't own any grooming tools, it's a good idea to purchase a brush appropriate for your cat's fur type—consider it proactive cleaning!
- Brushes: Remove all hair from brushes, then wash them with warm soapy water. You may want to scrub the bristle bed if debris remains.
- Combs: Soak combs in a mixture of soap and warm water for about 10 minutes.
If you brush your cat’s teeth or trim their nails, take inventory and replace well-worn toothbrushes and trimmers.
Now that you’ve got your spring cleaning checklist ready to go, get up, get started, and get it done! You'll be so glad you did. Be sure to check out our general cat parent cleaning guide for more tips and tricks.